
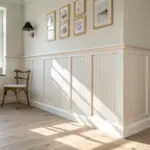
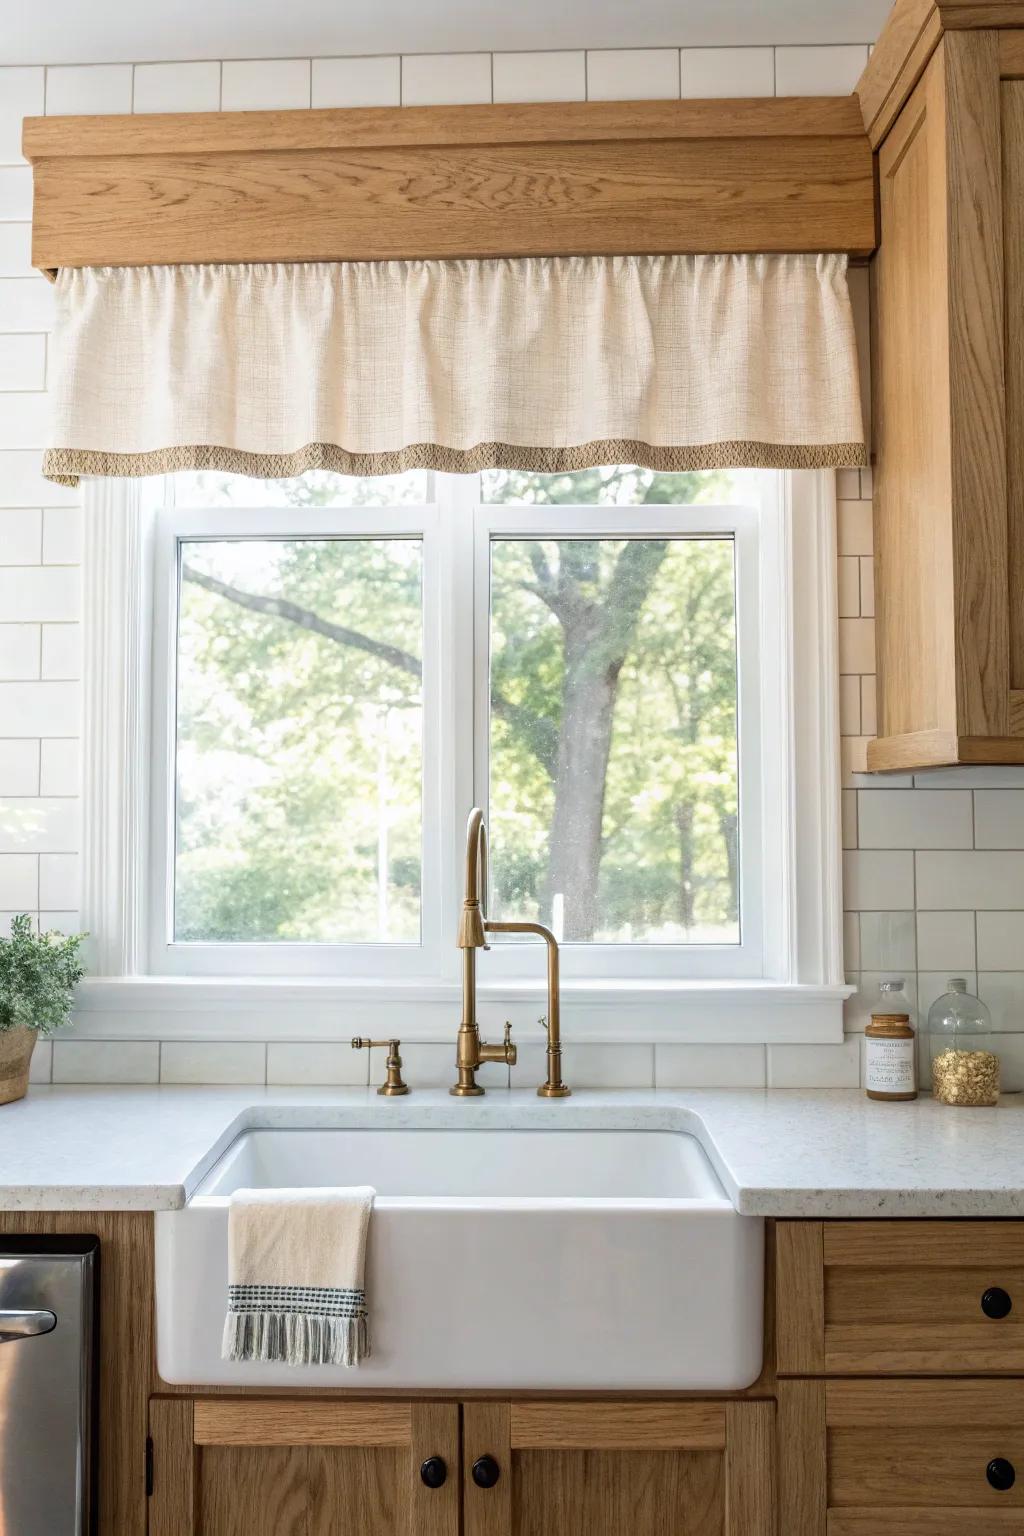
That little strip of wood above your kitchen sink can either date the whole room or become the cutest focal point you’ve got. I’ve rebuilt, covered, trimmed, and totally reimagined more kitchen sink wood valances than I can count, and these are the ideas that always get people excited.
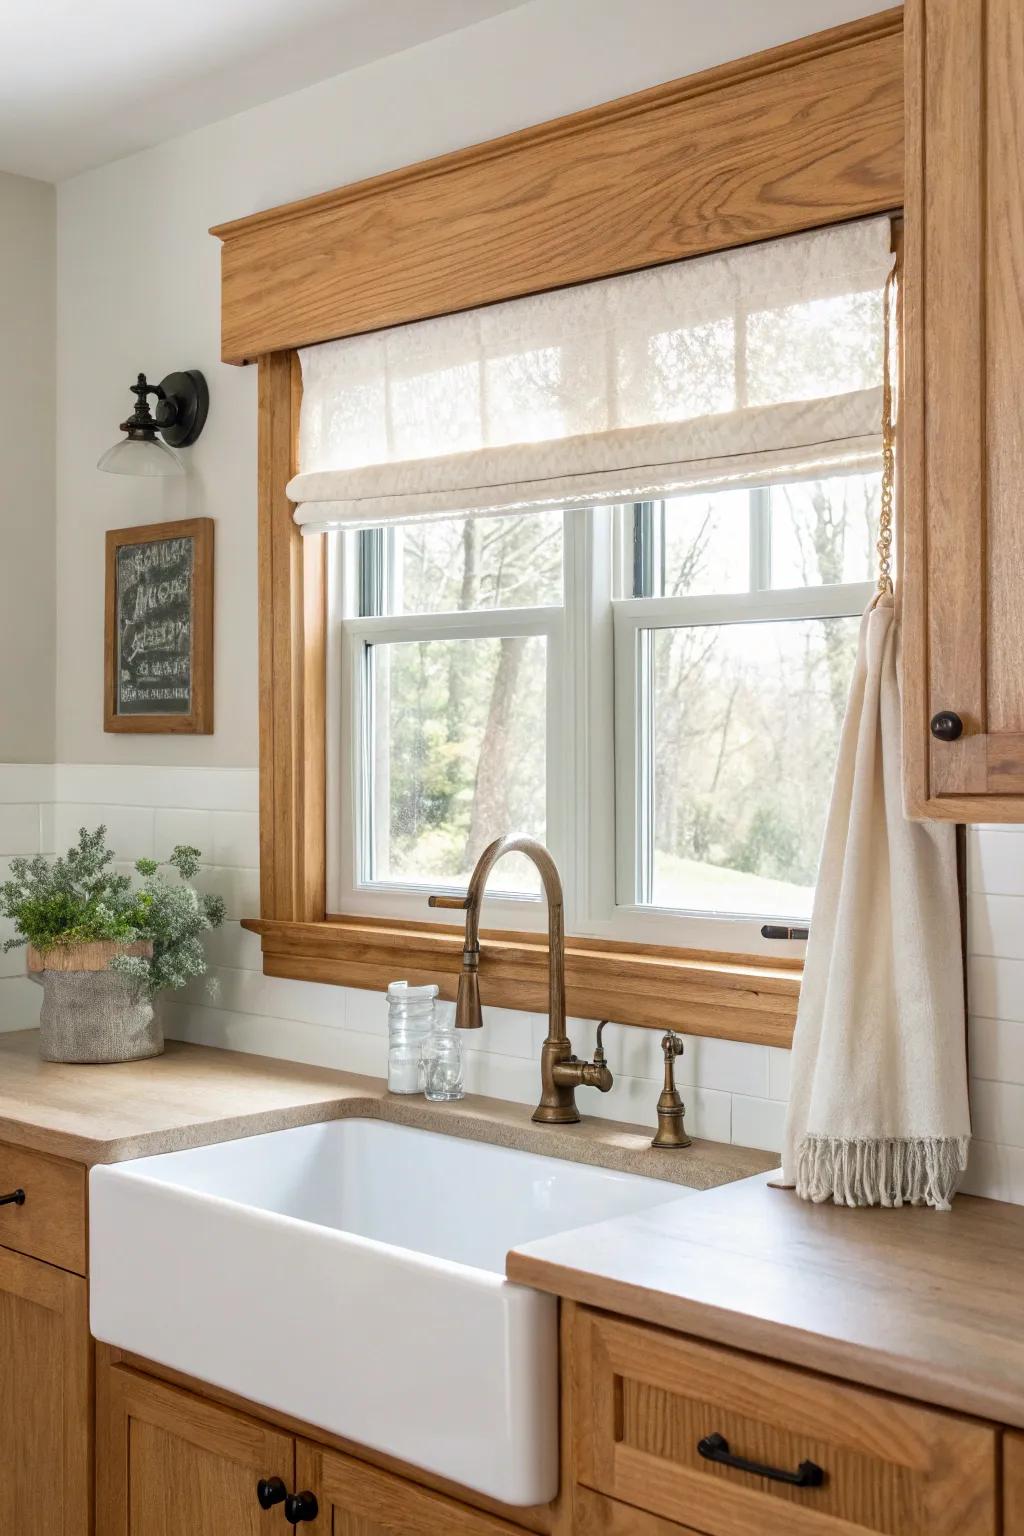
Trimmed-Out Farmhouse Header
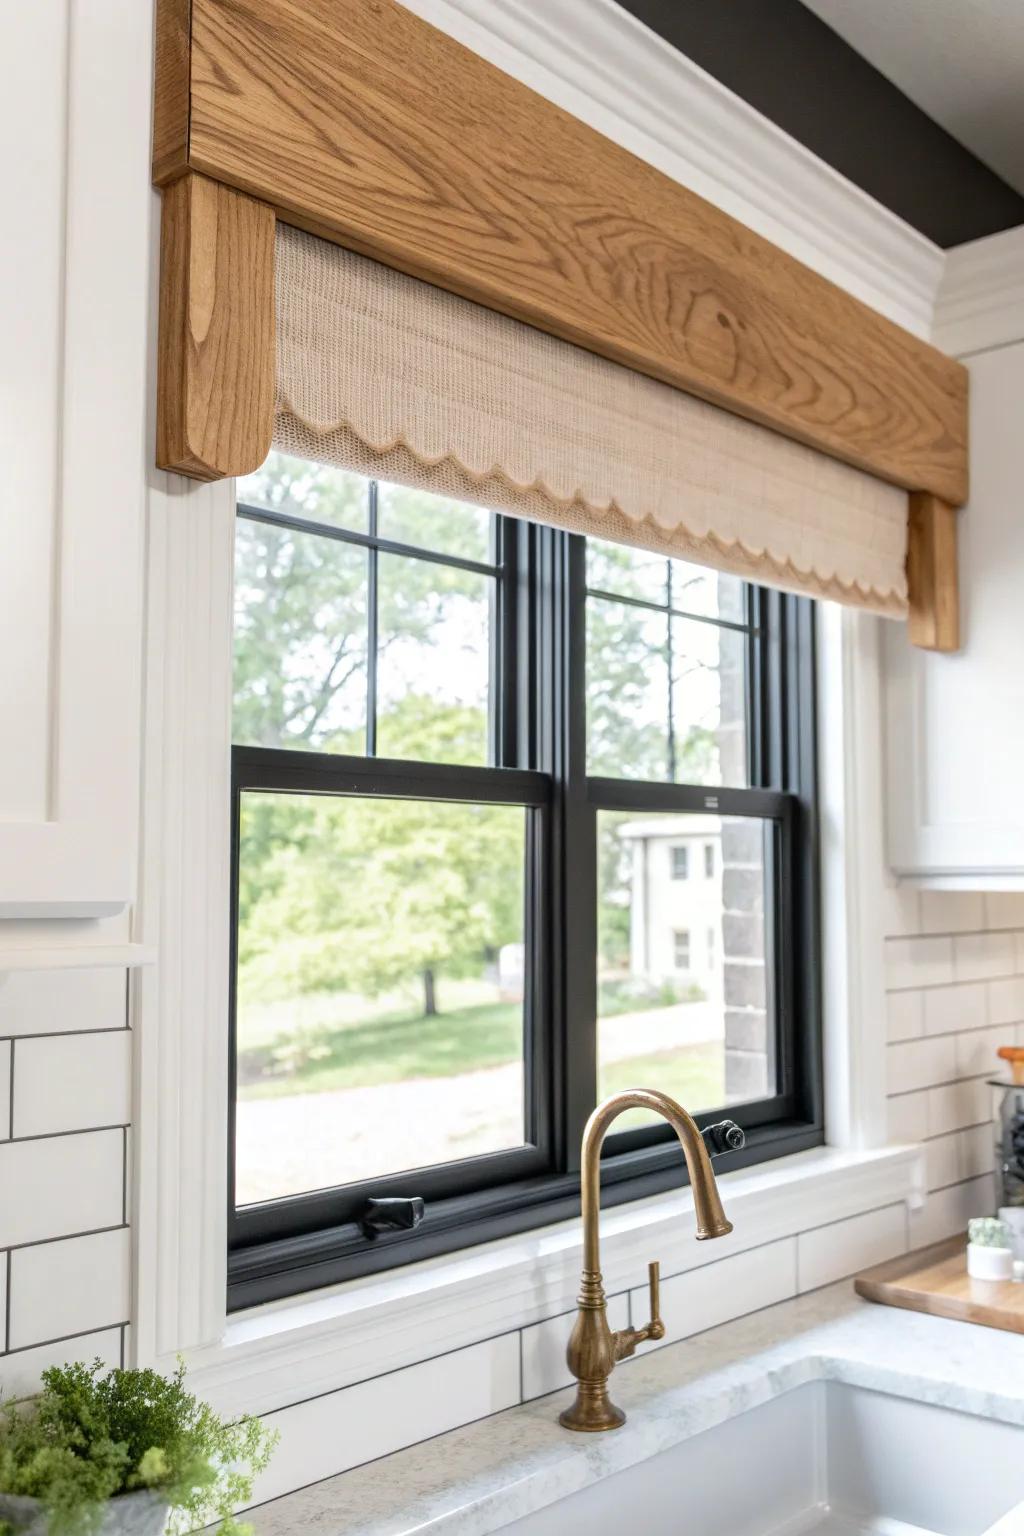
Add chunky casing trim around a basic wood valance and it suddenly looks built-in, like it came with the house (in a good way). I’ve used simple 1x stock with mitered corners, and it always makes the sink wall feel more finished.
Give these a look:
- Red Oak Lumber Boards: Select sturdy hardwood boards to construct the main face and return pieces of your custom valance build.
- Miter Saw: Create precise corners and clean crosscuts on your trim pieces for that seamless, professional built-in appearance.
- Textured Roman Shade: Layer a natural fabric shade underneath your new wood valance to add softness and complete the farmhouse look.


Simple Straight Board Valance
When I want an instant refresh, I swap the fussy shape for a clean straight wood valance—it makes the sink window feel calmer right away. I’ve done this with a single pine board and a quick sand, and the difference is night-and-day.
May just do the trick:
- Reclaimed Wood Floating Shelf or Beam: Add instant rustic character by installing a solid, reclaimed wood piece above your window frame.
- Clear Matte Wood Sealer: Protect your new wooden valance from kitchen steam while keeping the natural look completely authentic.
- Heavy Duty Floating Shelf Brackets: Securely mount your wooden valance board invisibly for that clean, seamless floating appearance.

Painted Valance to Match Cabinets
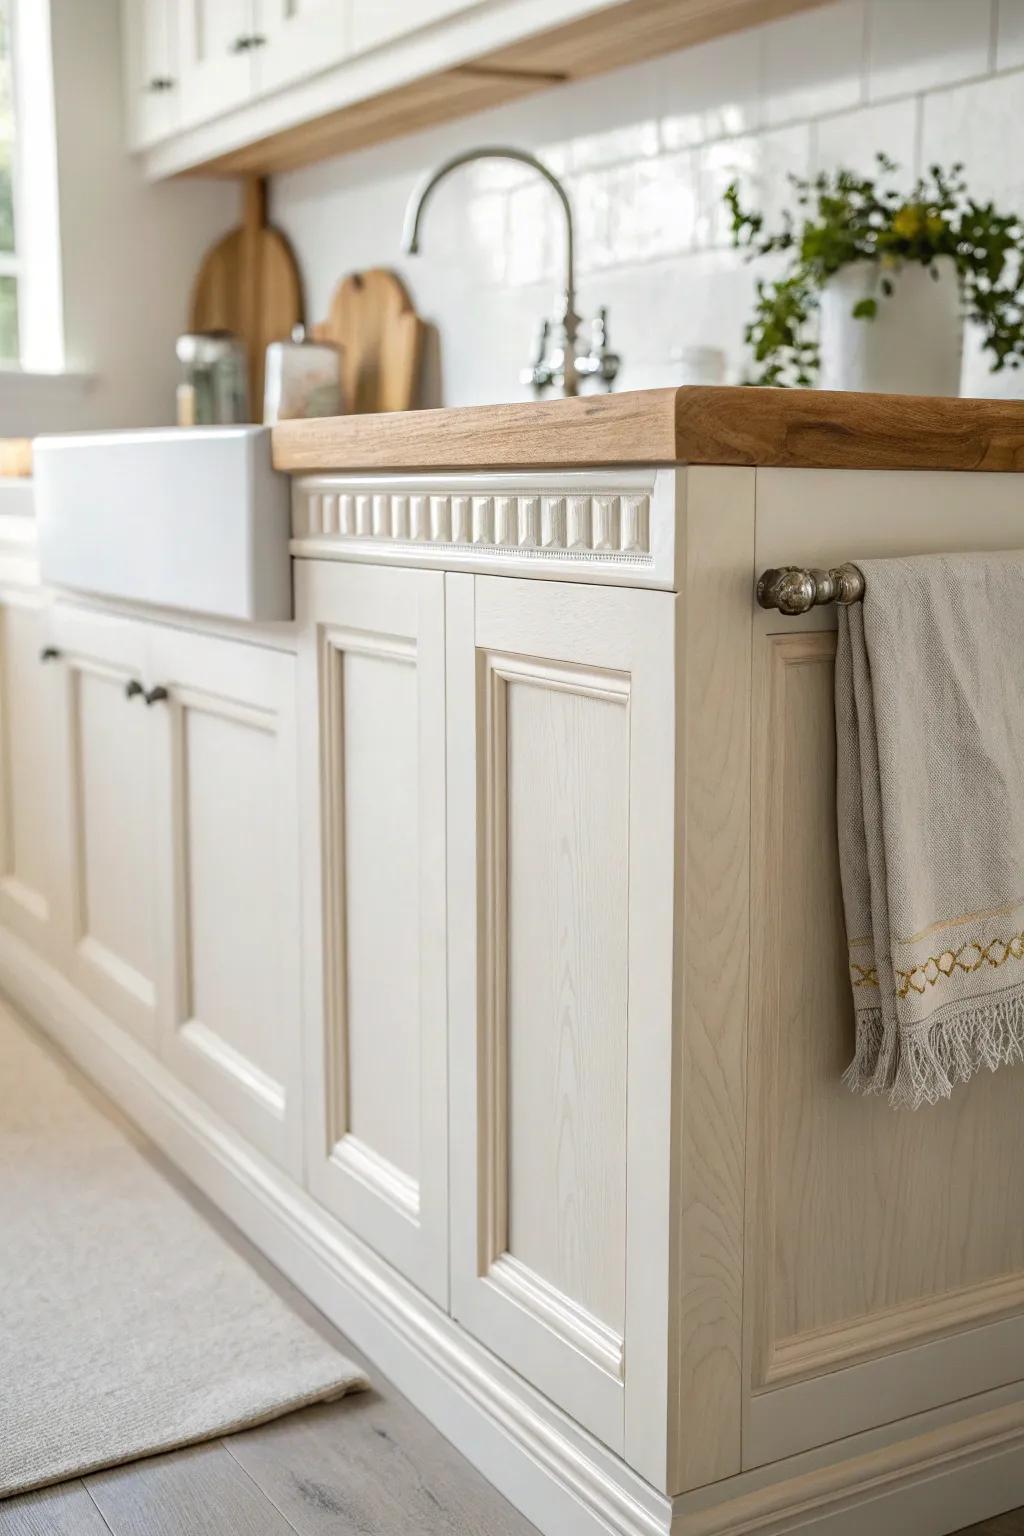
If your goal is seamless, paint the wood valance the exact cabinet color so the whole run reads as one clean line. I’ve done this in a weekend with a bonding primer and a small foam roller, and it hides a lot of “old kitchen” vibes fast.
Items that may come in handy:
- Decorative Wood Appliques / Onlays: Add architectural interest to your plain valance before painting to mimic the detailed trim shown in the photo.
- Bonding Primer: Ensure your paint adheres perfectly to existing wood surfaces for a durable, professional finish on your project.
- Cabinet Paint Roller Kit: Achieve that smooth, sprayed-on look using high-density foam rollers designed specifically for cabinet and furniture refinishing.

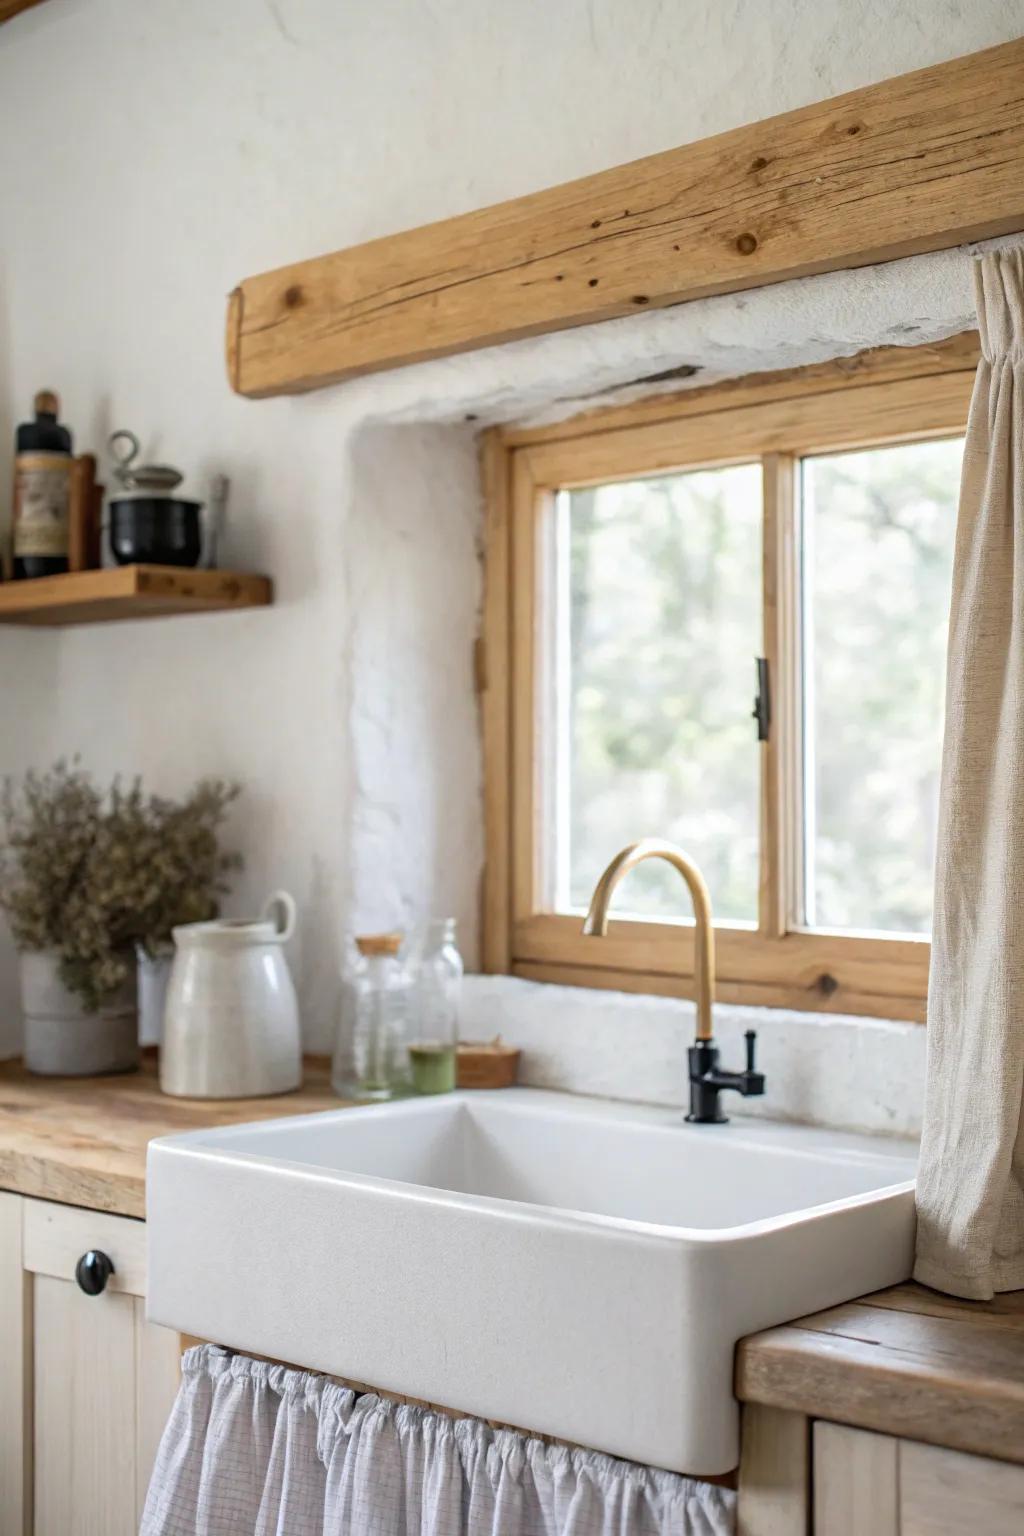
Soft Linen Under-Valance Layer
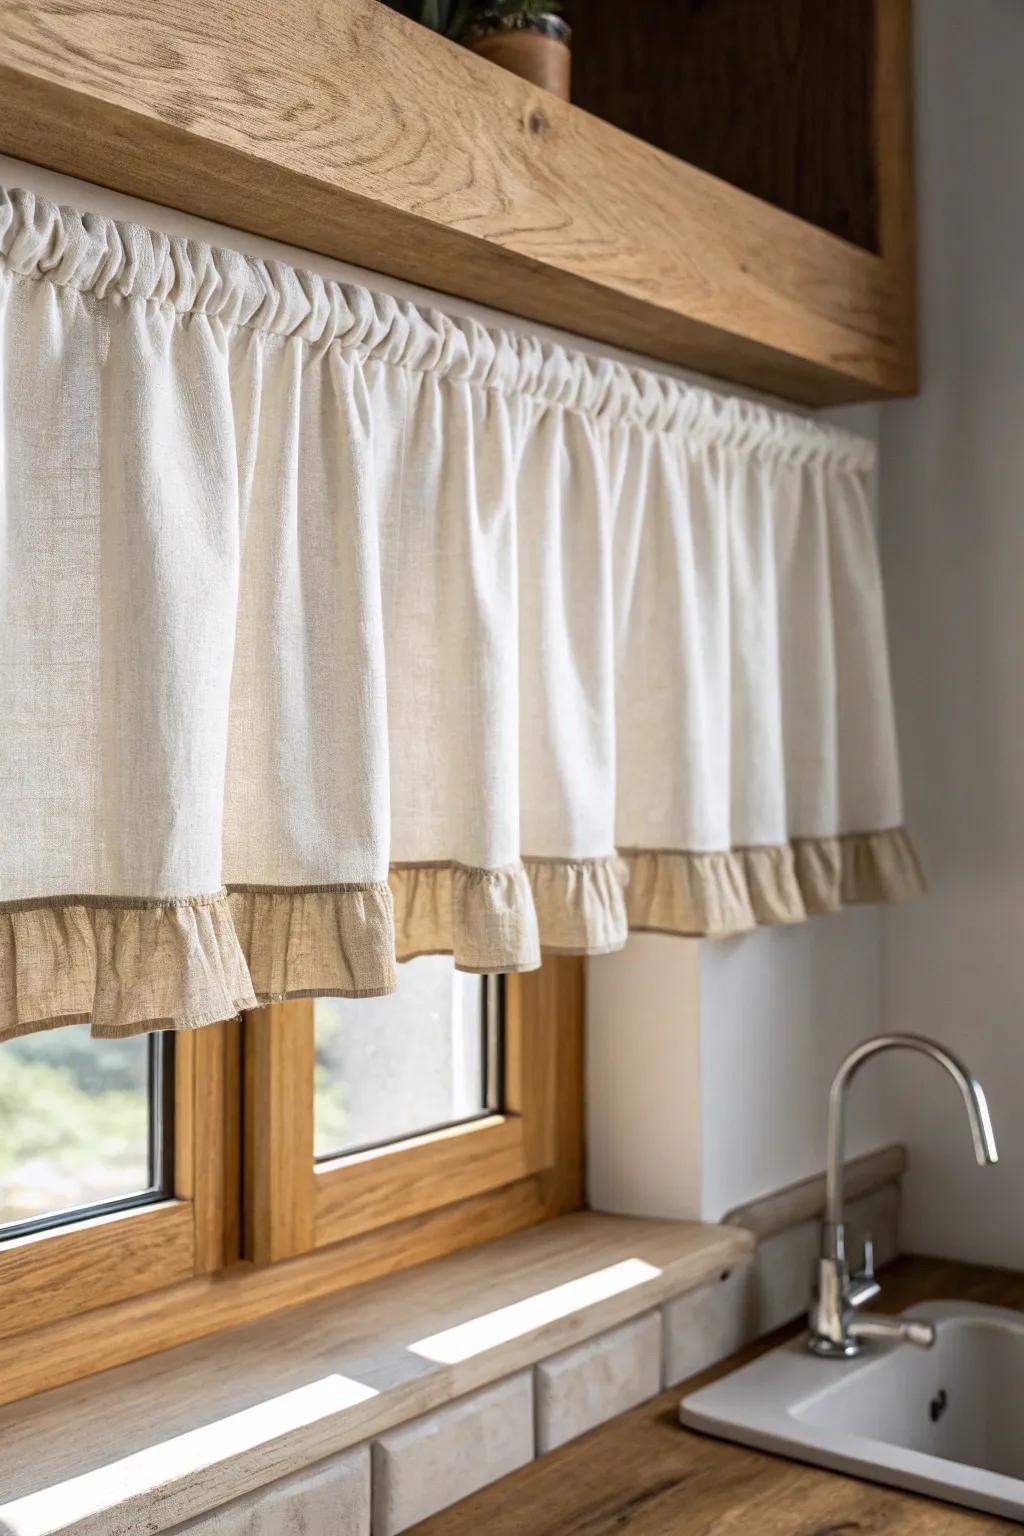
One of my favorite classics is pairing a wood valance with a simple gathered fabric piece underneath for that wood-and-linen mix. I’ve stapled a hemmed panel to a thin board before, and it instantly made the sink window feel homey.
A few relevant products:
- Linen Cafe Curtain Panel: Add instant texture to your window with a natural linen panel that offers both privacy and filtered light.
- Adjustable Tension Rod: Install your under-valance layer effortlessly inside the window frame without drilling any holes into your woodwork.
- Heavy Duty Fabric Stapler: Secure your gathered fabric directly to a wooden mounting board for that classic, seamless upholstered look.
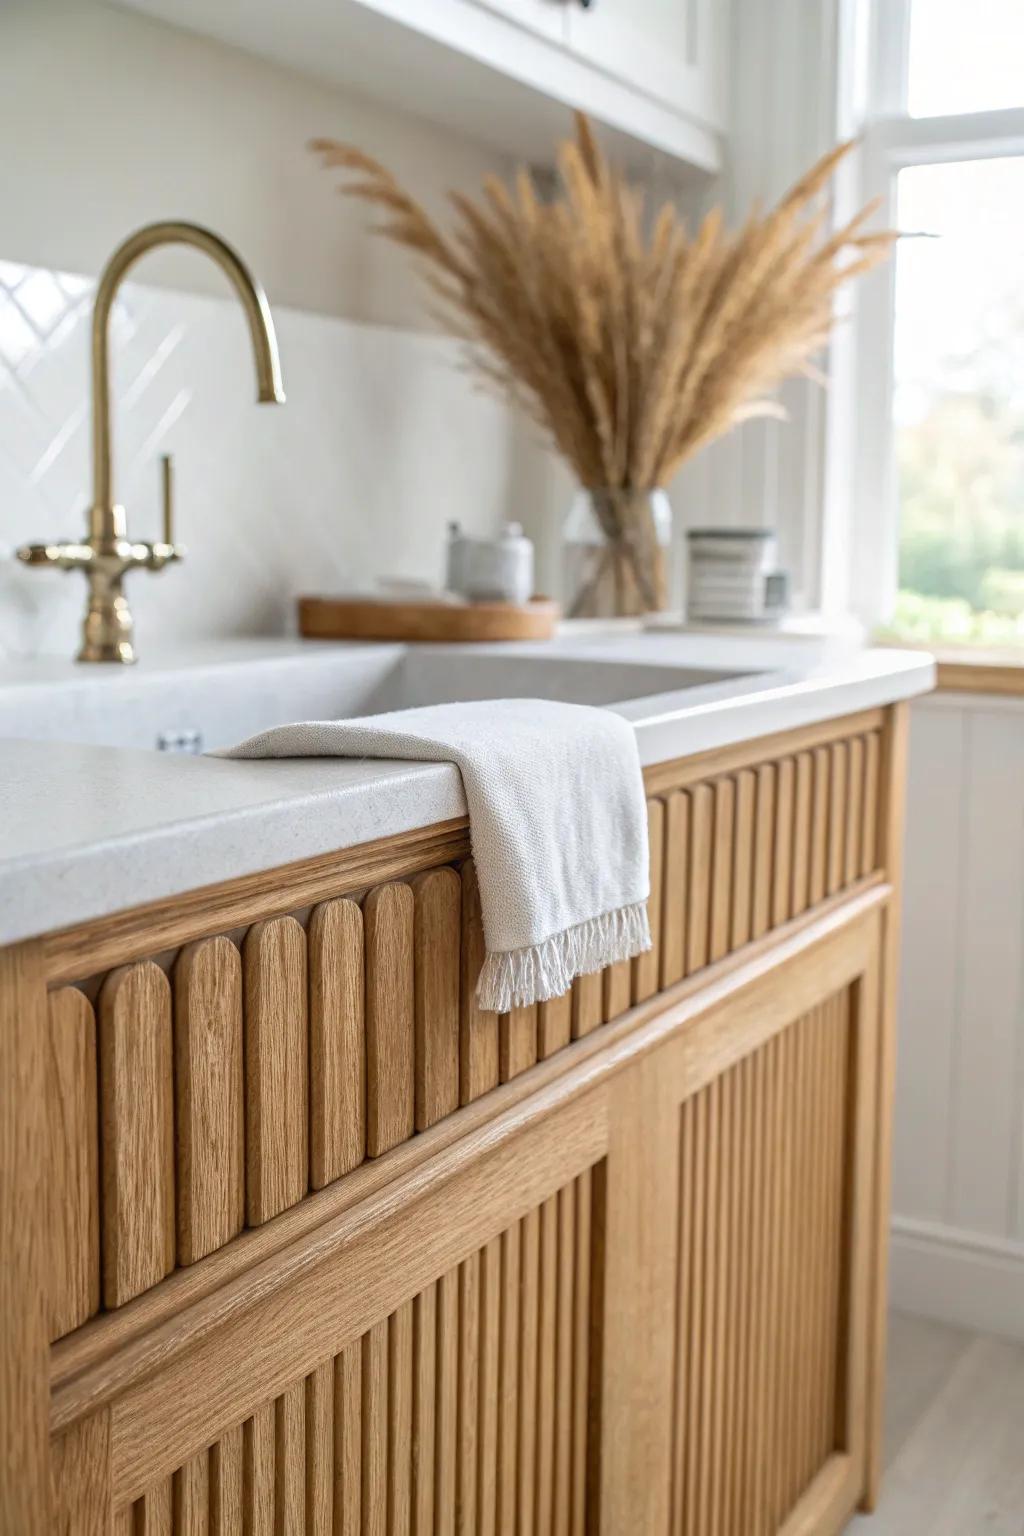
Shaker-Style Flat Panel Valance
A flat panel with a little inset trim gives you that Shaker-style look without getting complicated. I built one from scrap plywood and thin lattice strips, and it made my sink window look way more custom.
You might give these a try:
- Cabinet Grade Plywood Sheets: Build the sturdy base of your valance with high-quality plywood panels that are ready for finishing.
- Wood Lattice Molding Strips: Create that classic Shaker inset look by attaching these thin, flat trim pieces to your panel.
- Wood Stain and Sealer: Protect your new custom valance and match your existing cabinetry with a water-resistant wood stain.
Arched Bridge Between Cabinets

When cabinets flank the sink, a gentle arched wood valance connecting them makes the window feel intentional. I’ve cut arches with a jigsaw and sanded forever, and it was still totally worth it.
You might like:
- Jigsaw for DIY Wood Cuts: Create your own custom arched valance designs effortlessly with a reliable jigsaw suitable for precise curved wood cuts.
- Wood Stain and Finish: Match your new valance to existing cabinetry perfectly by applying a high-quality wood stain for a seamless, warm look.
- Orbital Sander: Achieve professional, smooth edges on your custom arch by finishing your DIY project with an easy-to-use power sander.


Open Shelf Ends With Mini Valance
If you’re removing upper cabinets by the sink, add a short wood valance just at the top to visually “cap” the open shelves. I’ve used a single stained board as that top header, and it kept the sink wall from feeling unfinished.
Possibly handy products:
- Stained Lumber Board: Create your custom window header by selecting a sturdy board that matches your shelving finish perfectly.
- Matte Black L-Brackets: Secure your new wood valance or additional open shelves firmly with discreet, stylish metal hardware.
- Wood Stain and Sealer: Protect your wood valance from kitchen humidity while achieving that rich, warm tone you desire.
Slatted Valance for Airy Texture
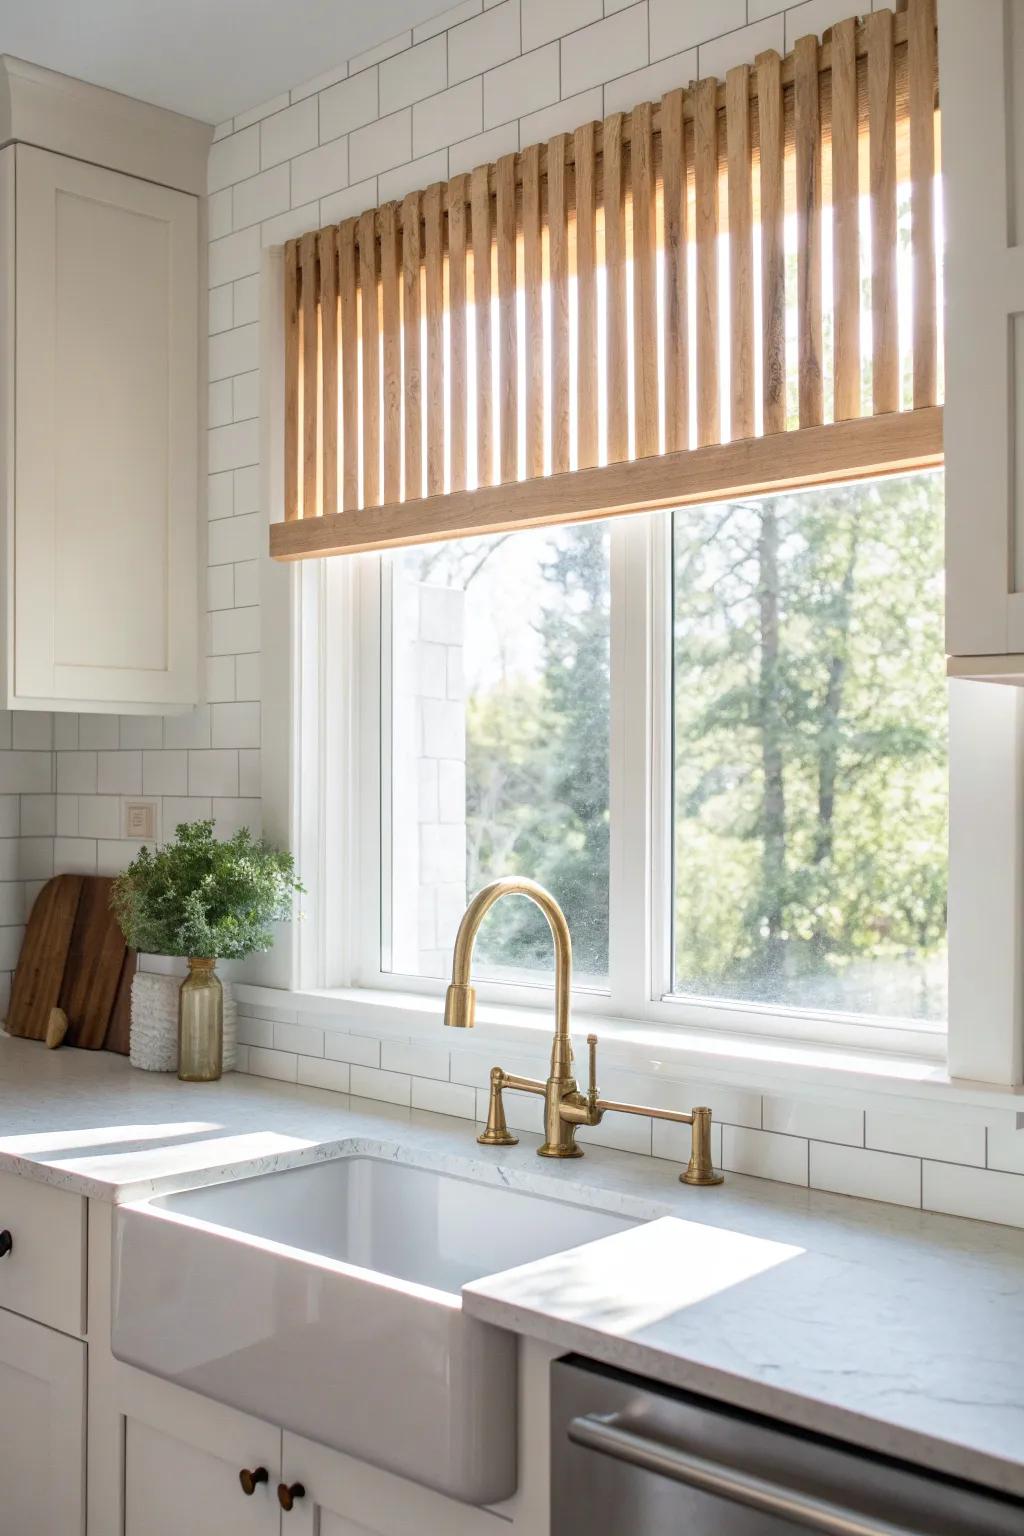
A row of thin vertical or horizontal slats creates a breezy wood slat valance that feels light, not heavy. I built one from ripped strips and spacers, and it gave my sink window a fresh modern-farmhouse vibe.
Possibly helpful picks:
- Unfinished Wood Slat Trim: Use these wood pieces to create the vertical slats for your custom valance; easily paint or stain them.
- Matte Polyurethane Finish: Protect your new wooden valance from kitchen humidity while maintaining that natural, modern low-sheen appearance.
- Wood Glue and Clamp Set: Secure your slats and spacers firmly together during assembly with this essential kit for durable woodworking projects.
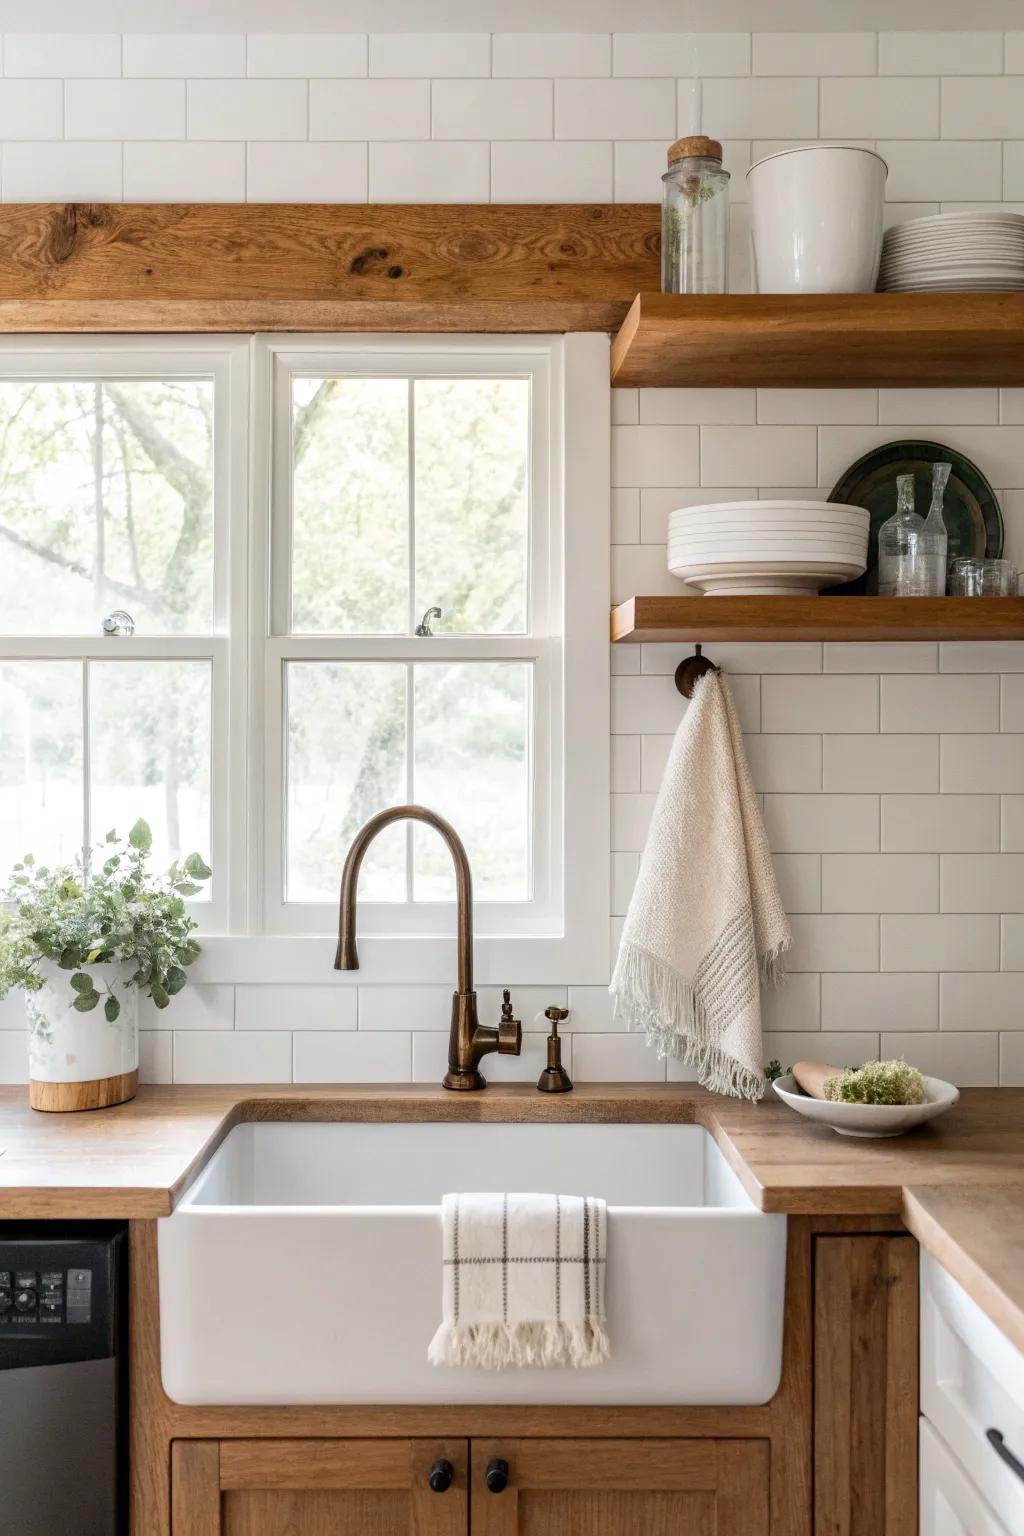
Fluted Trim Detail Valance
Adding fluted or reeded trim to the face of a kitchen sink wood valance gives it that high-end, furniture-like feel. I’ve faked this with evenly spaced half-round strips, and it photographs like a designer upgrade.
These products might be useful:
- Half-Round Wood Moulding: Recreate the fluted look easily by gluing these half-round strips side-by-side for instant texture and custom style.
- Construction Adhesive: Ensure your custom trim stays perfectly in place on your cabinet face with this strong, reliable bonding agent.
- Matte Oak Wood Stain: Finish your new wood detail with a natural, matte stain to match the warm, organic look shown here.
Two-Tone Valance With Edge Band
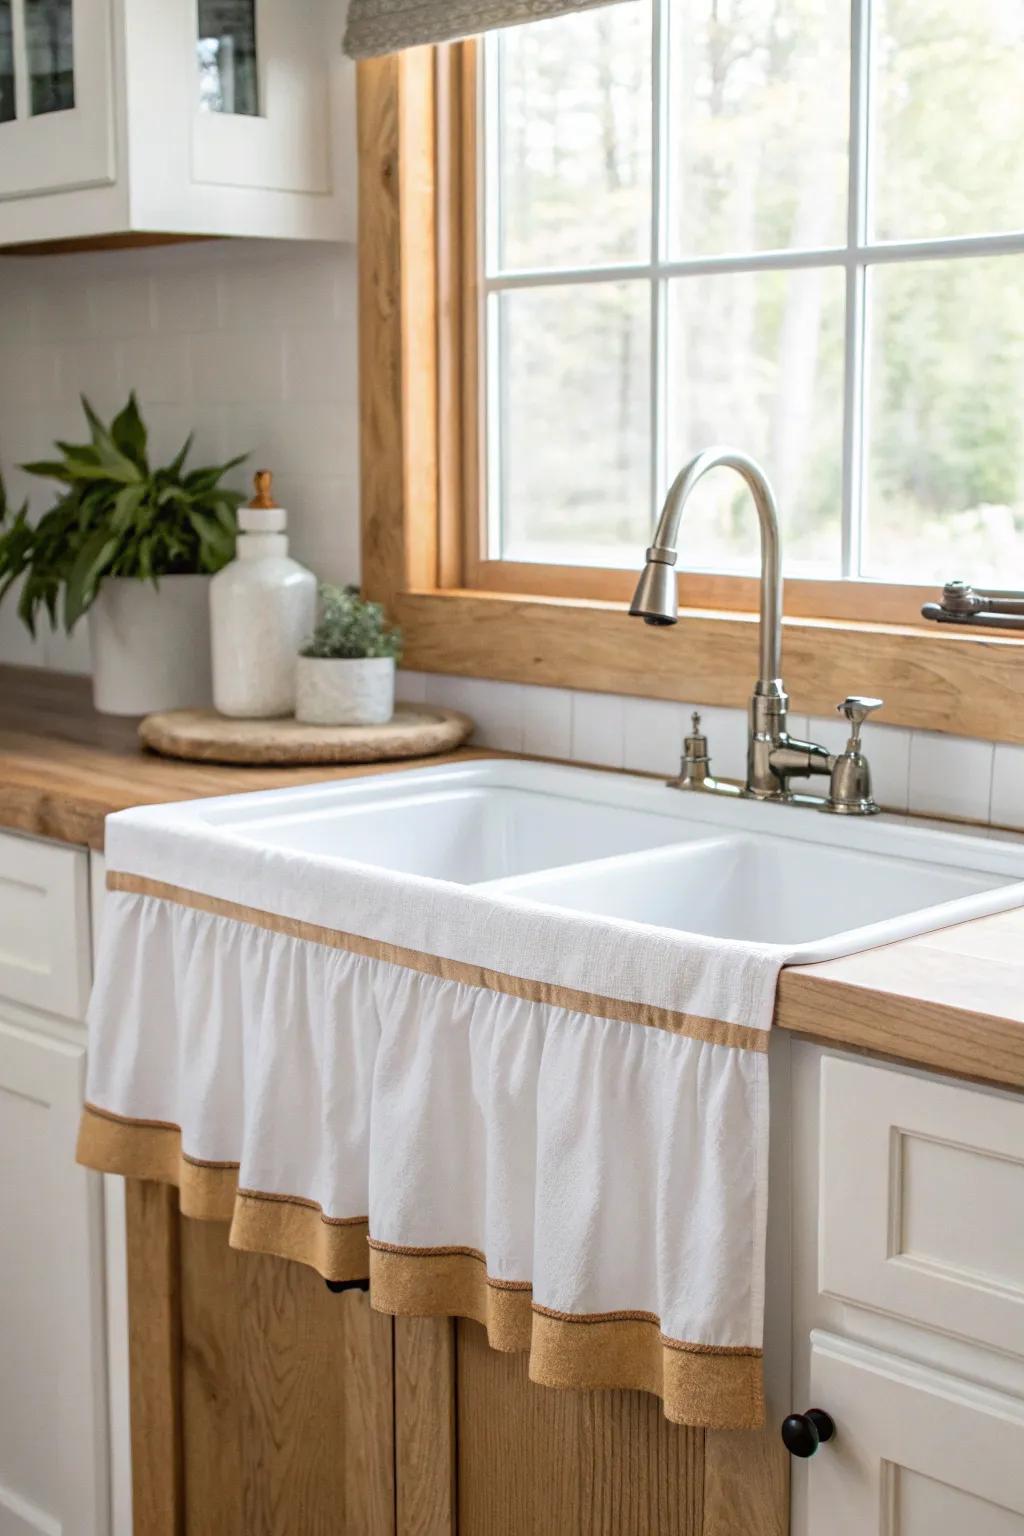
Paint the main valance one color and add a contrasting stained edge strip for a crisp two-tone wood valance moment. I tried this when my kitchen felt bland, and that tiny contrast line made the sink window pop.
A few helpful options:
- Burlap or Linen Ribbon Trim: Add a contrasting border to your sink covering with this textured ribbon for that warm, two-tone effect.
- Iron-On Hemming Tape: Easily attach your contrasting edge band without sewing to quickly create a crisp, finished two-tone look.
- White Cotton/Linen Fabric Yardage: Use this neutral base material to construct the main body of your custom sink covering before adding trim.
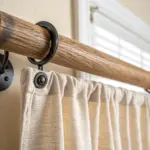
Hidden Curtain Rod Valance Channel
Build a hollow wood valance box that hides a small rod so you can slide in café curtains without showing hardware. I’ve built this above a sink for privacy, and it keeps everything looking tidy and intentional.
Some ideas to consider:
- Tension Curtain Rod: Easily install this rod inside your valance box without drilling, keeping your window treatment seamless and secure.
- Linen Texture Café Curtains: Add privacy and softness to your kitchen with these short curtains that perfectly fit standard window sizes.
- Unfinished Oak Lumber Board: Create your custom valance box using sturdy wood that can be stained to match your existing cabinetry.


