When one room has a standard ceiling and the next one suddenly shoots up, that jump can feel a little awkward if it’s not handled on purpose.
Soffit Drop to Create a “Frame”
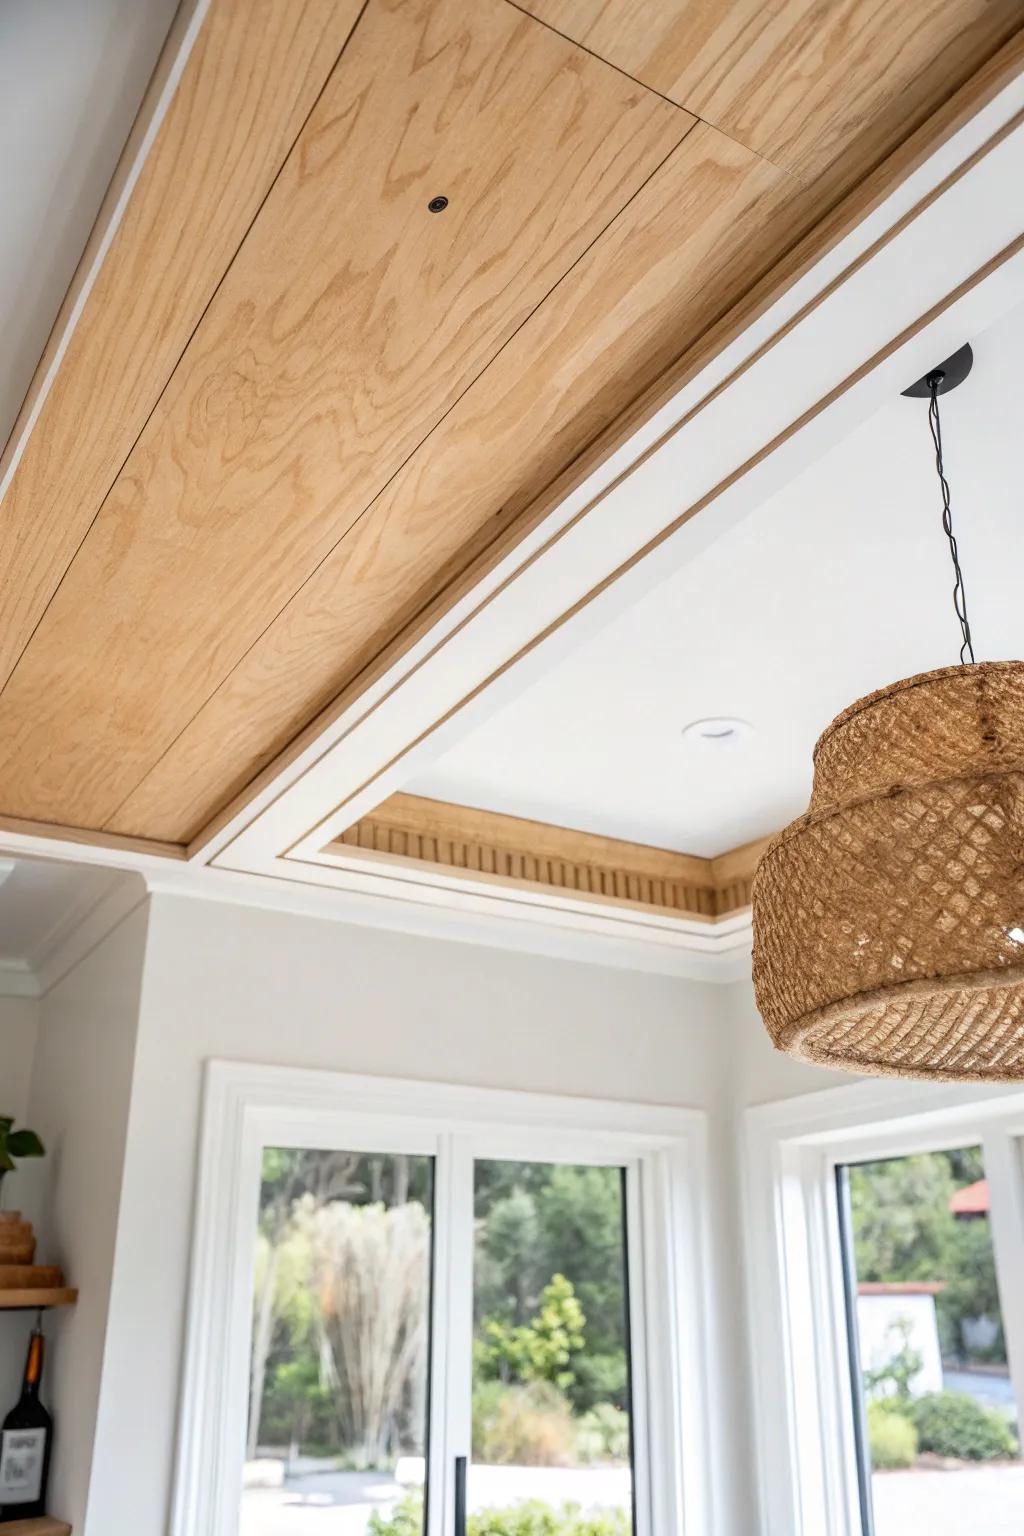
Adding a simple soffit at the lower ceiling edge can make the transition look planned, like the tall room starts after a threshold. I’ve boxed one in with plywood and trim, and it hid ductwork while making the height change feel crisp.
May just do the trick:
- Crown Molding & Trim: Finish your soffit edges cleanly by adding elegant molding for a professional, seamless transition between varying heights.
- Birch Plywood Sheets: Create the rich, warm wooden inlay for your soffit box by using high-quality plywood suited for staining.
- Recessed Lighting Kits: Illuminate your new dropped frame and add depth by installing sleek recessed lights into the soffit structure.


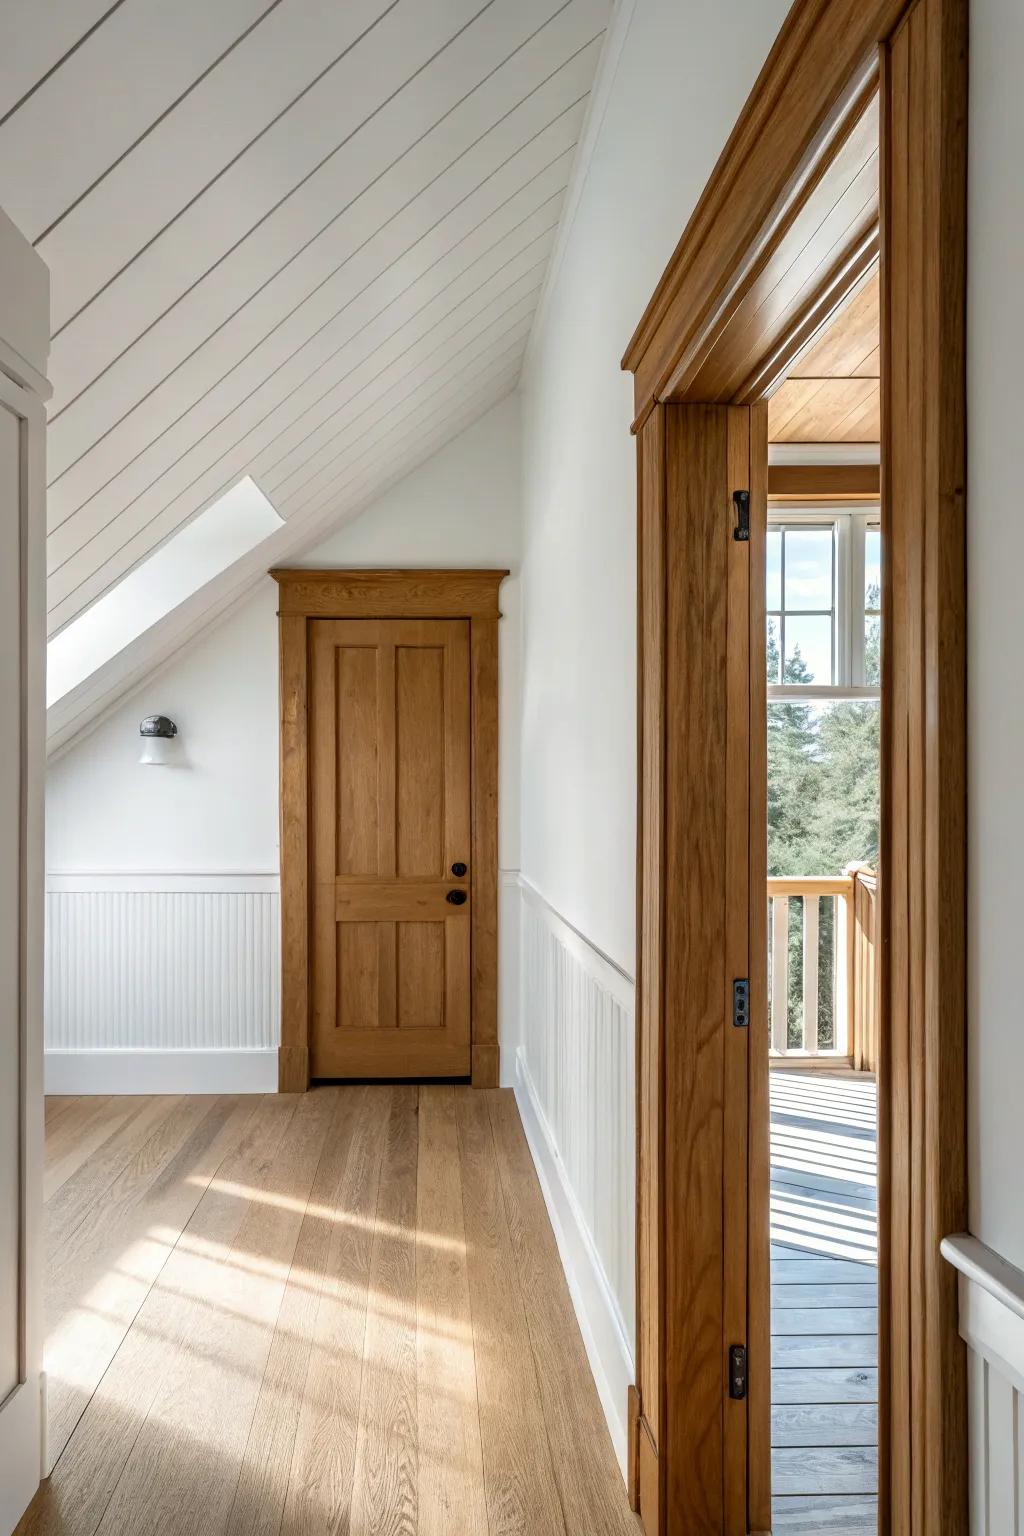
Cased Opening With Thick Wood Trim
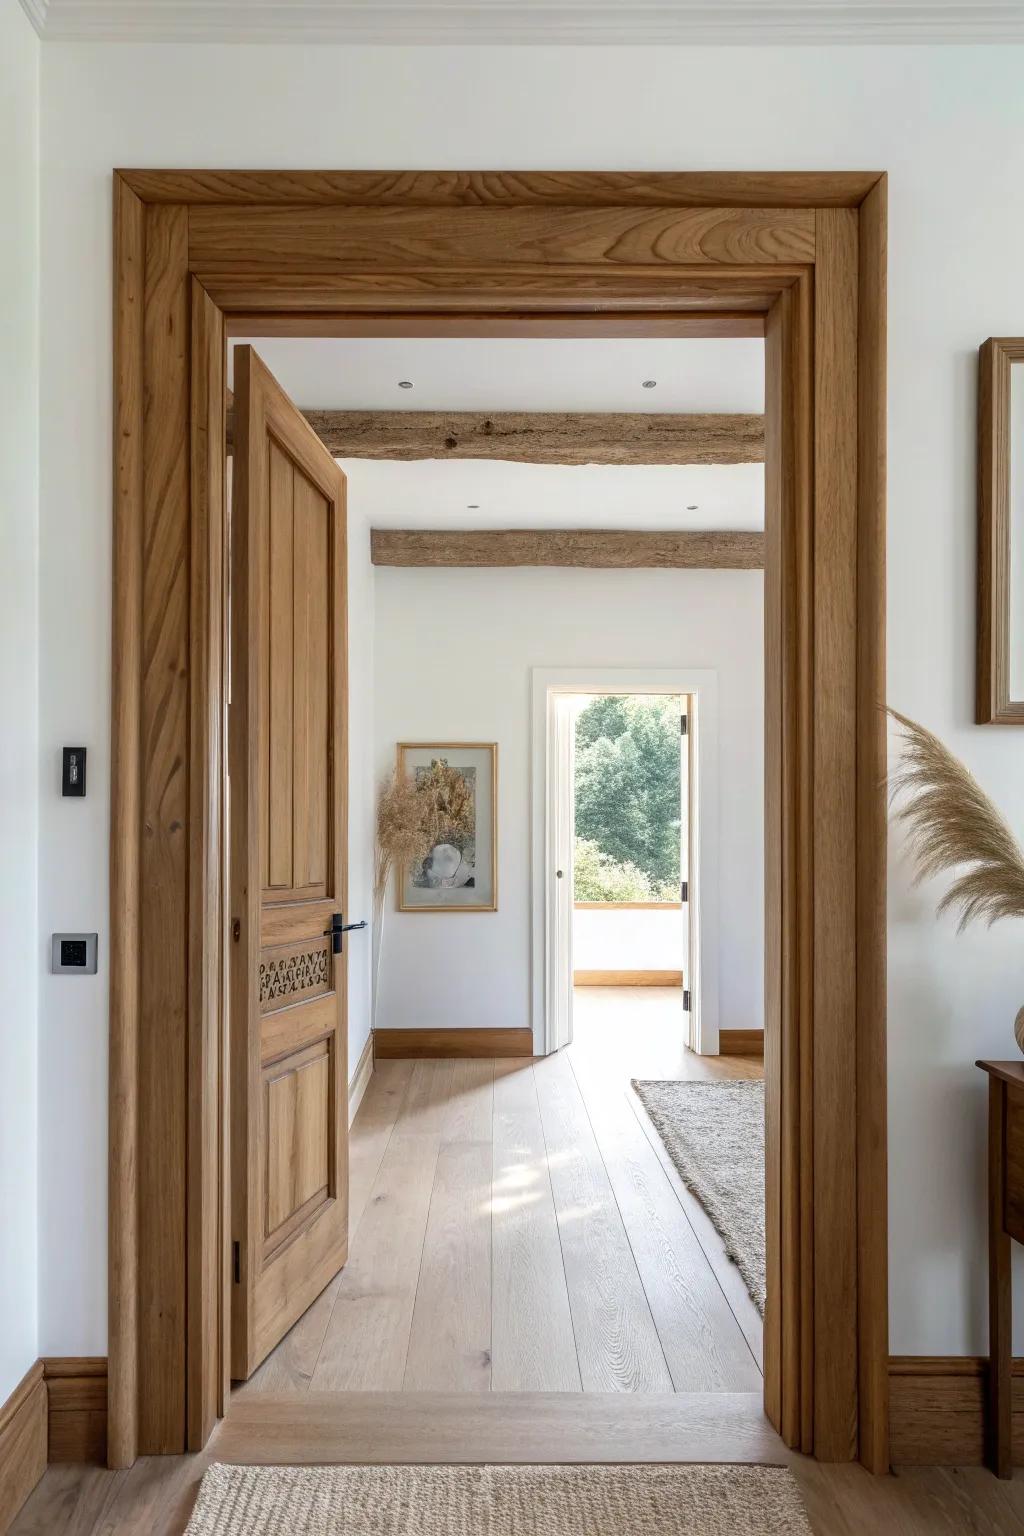
I like to frame the transition with a wide, squared-up cased opening so the ceiling change reads like a feature, not a mistake. I’ve built these with simple 1x stock and a beefy header look, and it instantly made the taller room feel like a “destination.”
You might like:
- Oak Lumber Boards: Build your substantial custom door casing using solid oak boards to create that warm, authentic structural look.
- Matte Black Door Levers: Complement the natural wood tones with modern matte black hardware for a sleek, contrasting finish on doors.
- Wood Conditioner and Stain: Enhance the natural grain of your new wood trim and protect the finish with premium oil-based stains.


Box Beam Header at the Step
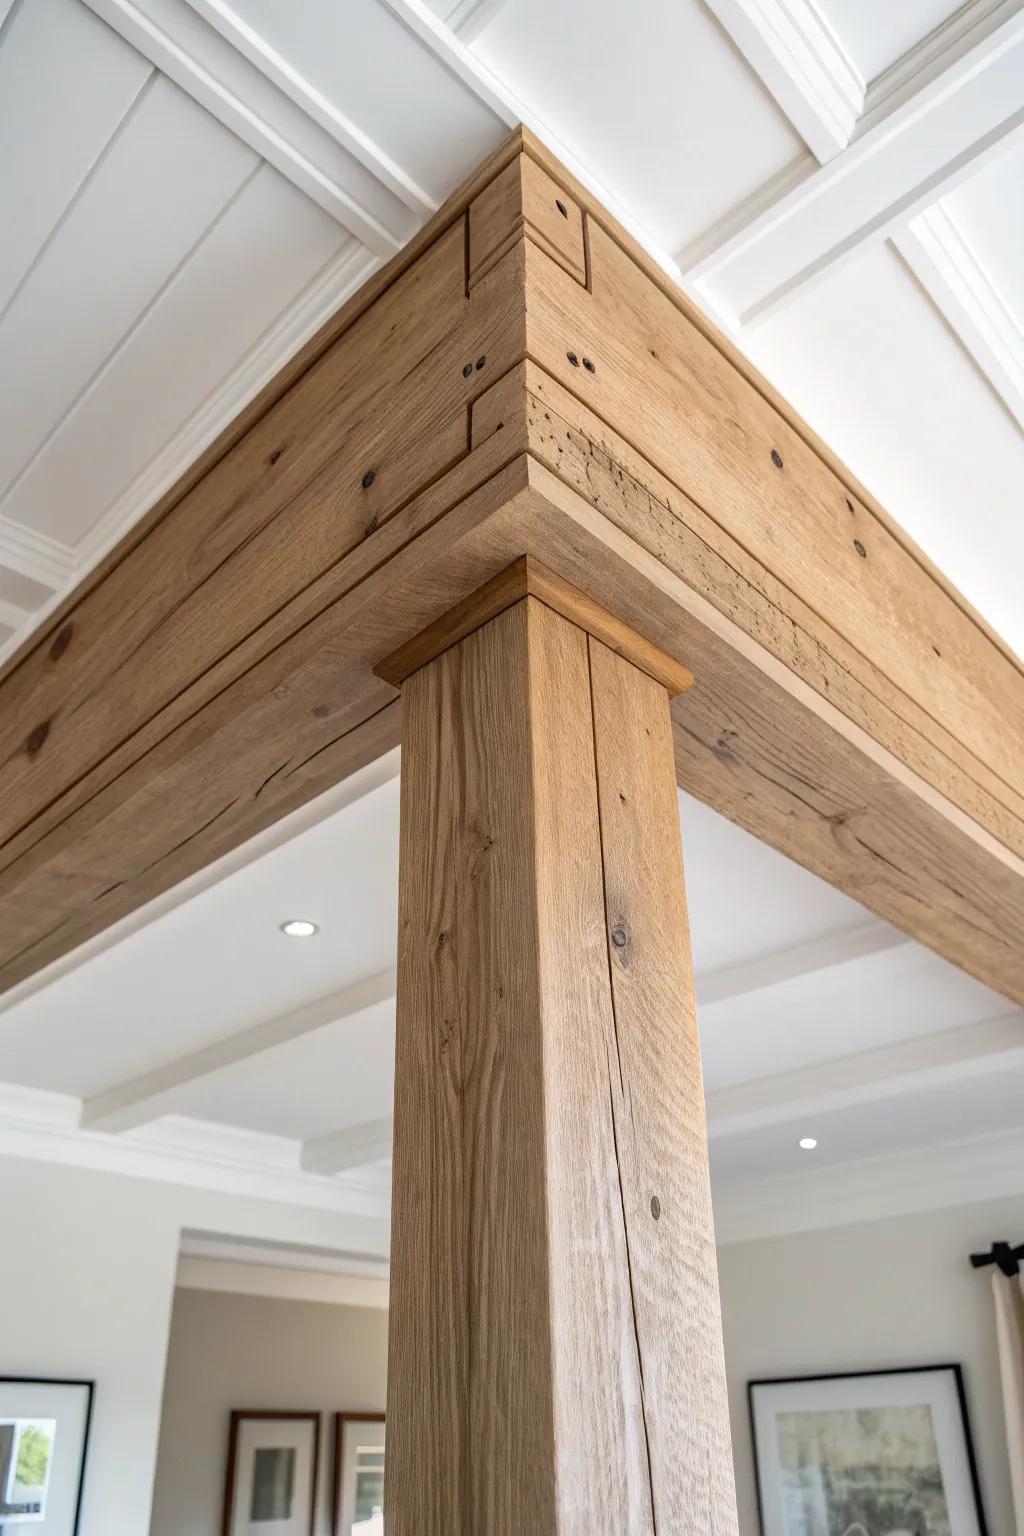
A faux box beam right where the ceiling height changes is my go-to for giving the eye a clean “pause” before it moves up. I’ve wrapped basic framing with reclaimed boards, and the transition suddenly felt architectural and expensive.
Explore these options:
- Faux Wood Beam Wraps (Three-Sided): Transform framing into rustic features quickly; three-sided designs slip easily over existing lumber for instant architectural flair.
- Reclaimed Wood Planks: Create your own custom box beam by cladding standard lumber with these authentic weathered boards for genuine character.
- Wood Stain (Oak/Driftwood Tones): Match new wood to existing decor or achieve a specific aged look with high-quality interior wood stains.


Exposed Beam Carry-Through
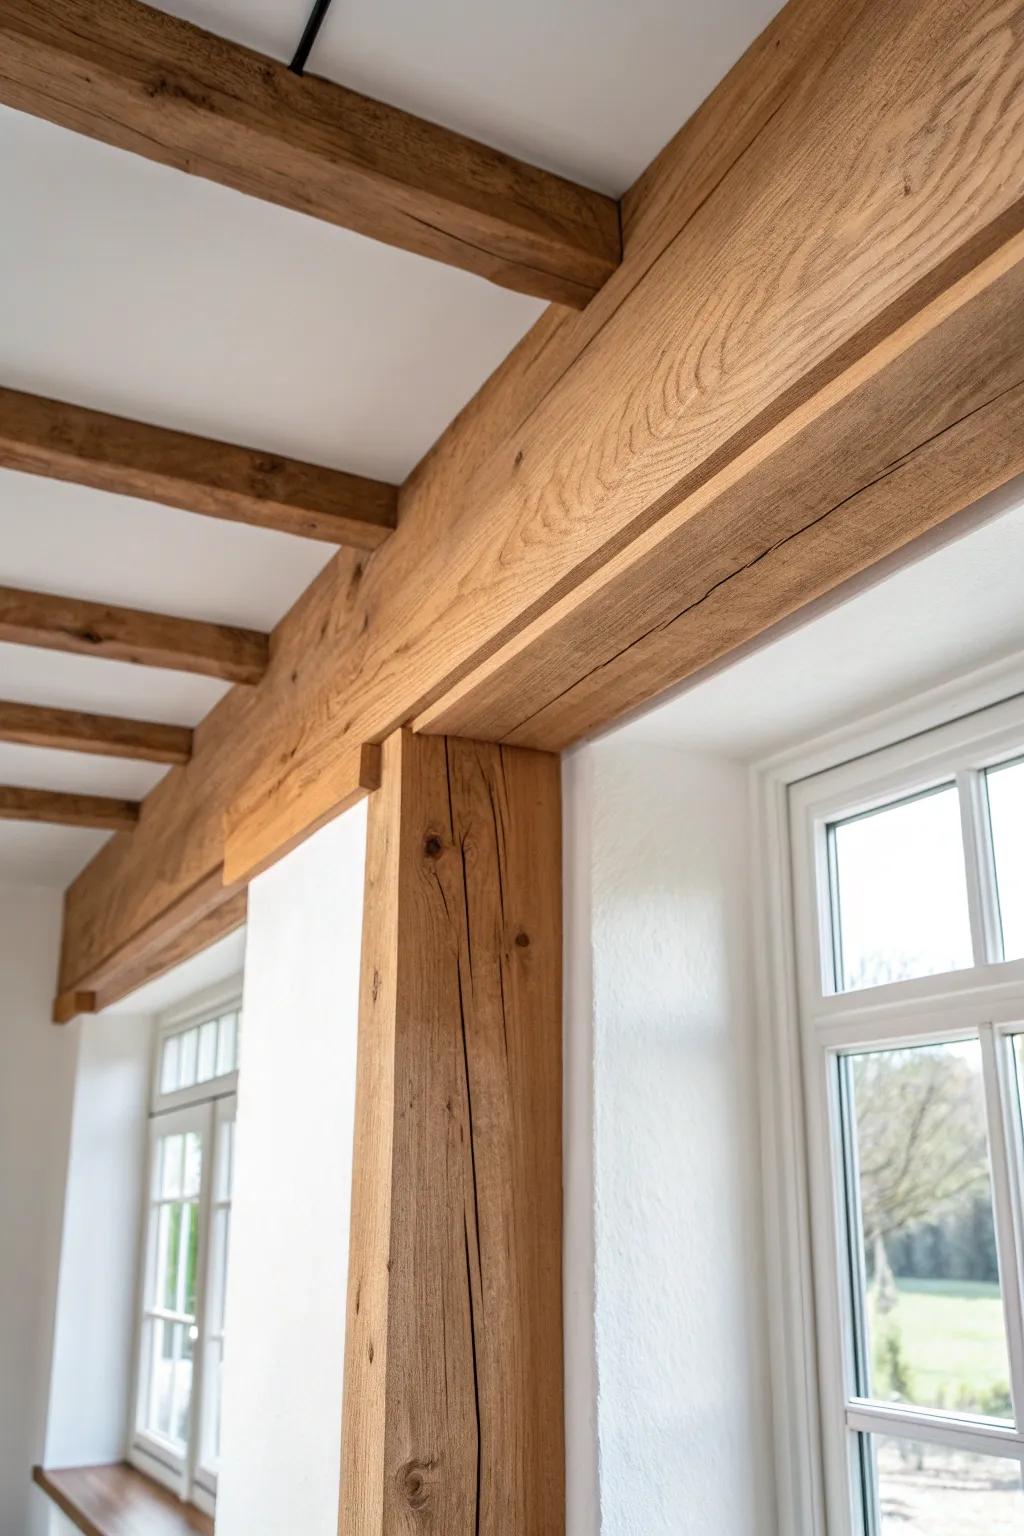
If you can repeat a similar exposed beam detail in both the lower and higher zones, the height shift feels connected instead of chopped. I’ve matched stain tones across rooms, and that little bit of continuity seriously calms the whole sightline.
These products might be useful:
- Faux Wood Beam: Instantly add rustic architectural character to your ceiling transition without the need for heavy structural timber.
- Wood Beam Strap: Use these decorative iron straps to conceal seams where new beams meet walls or other transitions.
- Oil-Based Wood Stain: Ensure your new beams perfectly match existing woodwork for a cohesive and connected look across rooms.
Half-Wall With Chunky Posts
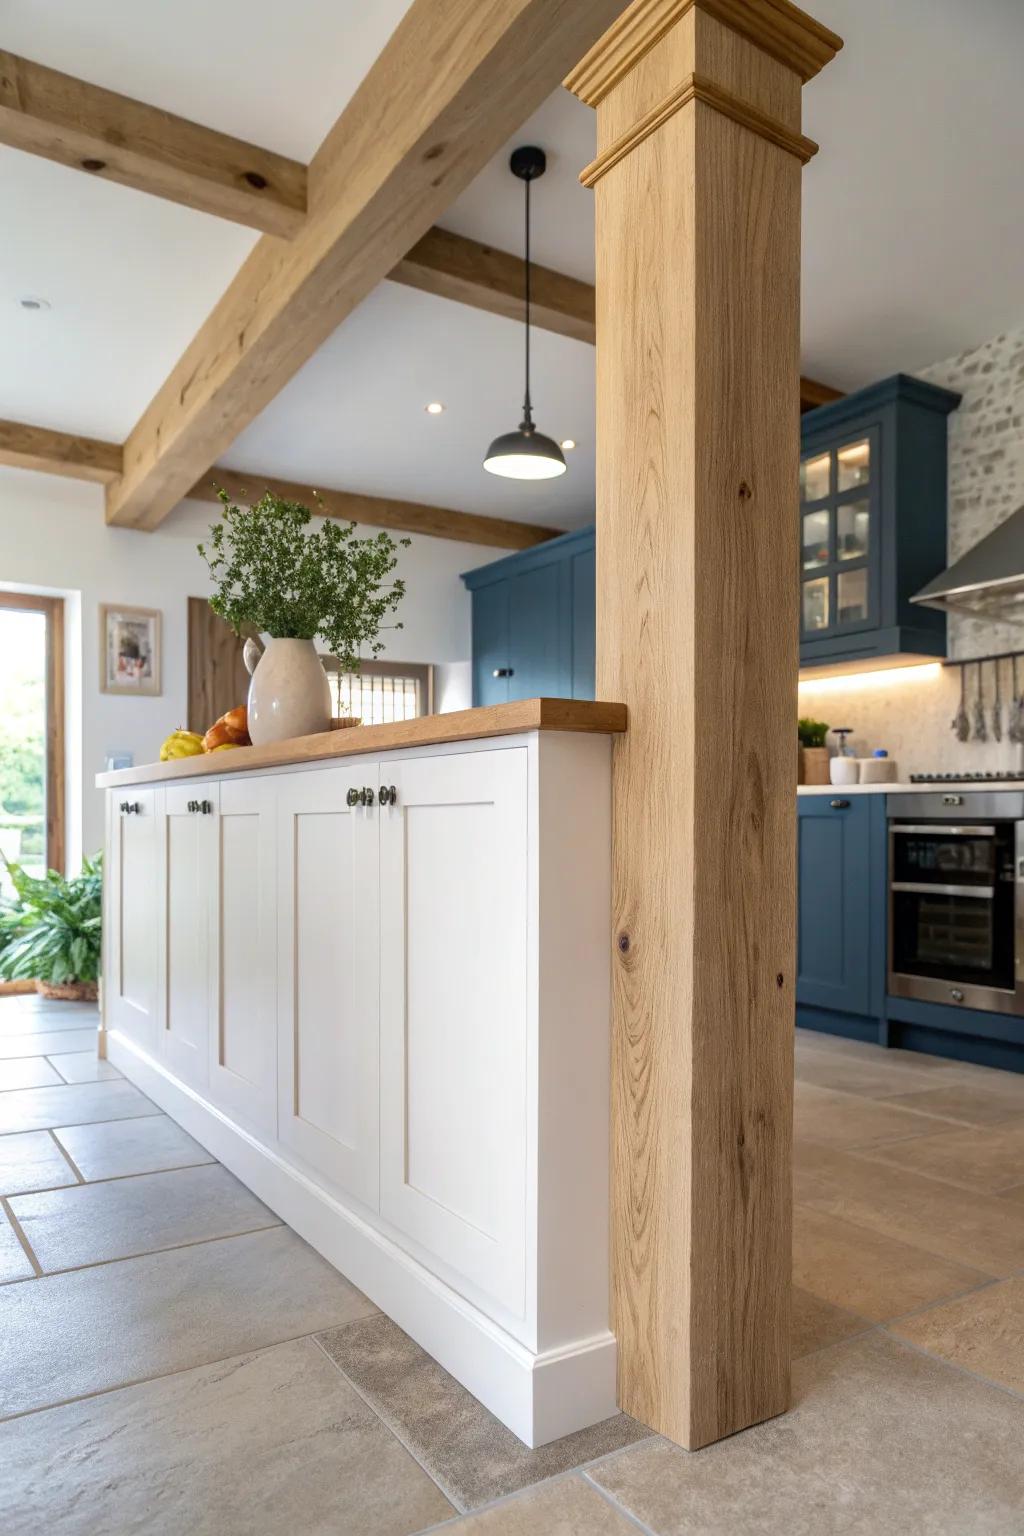
A low knee wall topped with square wood posts is a classic way to “support” the transition without closing off the plan. I built one to separate a kitchen from a vaulted living area, and it gave the height change a grounded, sturdy feeling.
Products that could assist:
- Unfinished Hardwood Square Column Wrap: Create that solid structural look easily by wrapping existing support poles with these unfinished wood column covers.
- Decorative Wood Corbel or Capital: Add architectural detail to the top of your post with simple wooden trim or classic molding accents.
- Butcher Block Countertop Slab: Top your knee wall with durable wood to provide a finished surface that matches the vertical post.
Soft Wood Arch Opening
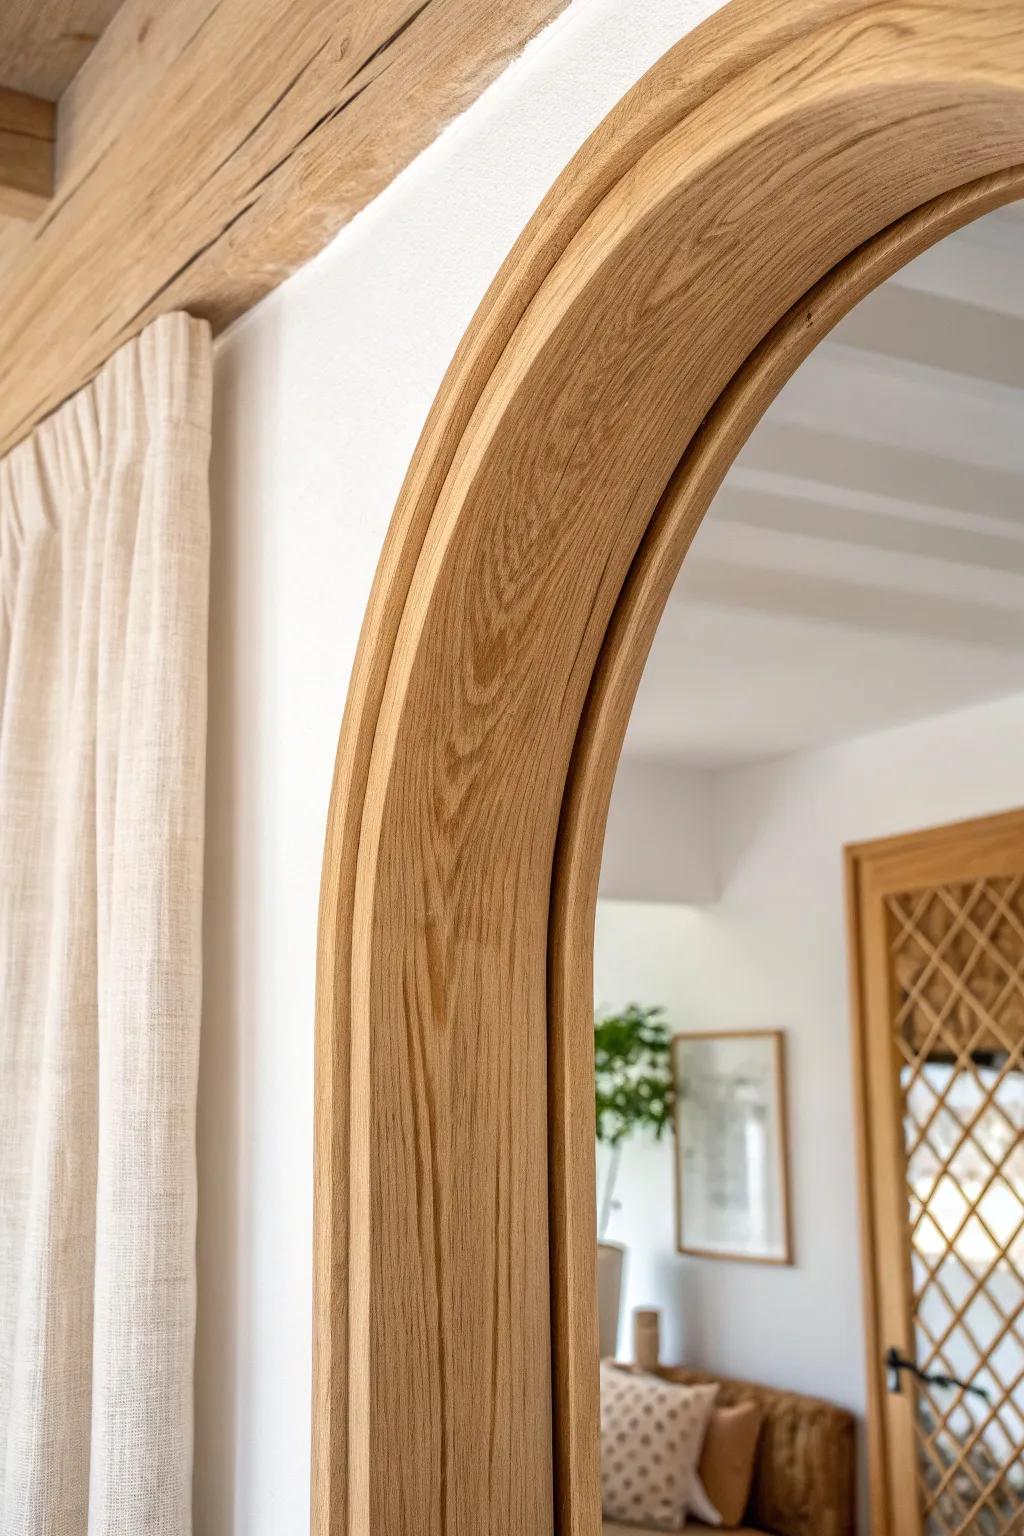
A gentle arched opening makes the ceiling height change feel way more natural, especially between dining and living areas. I’ve bent thin wood strips for the curve and skinned it smooth, and it instantly turned a sharp step into a pretty moment.
Try these:
- Flexible Plywood Sheets: Create smooth curves easily by using bendable plywood sheets, forming the perfect architectural base for your archway.
- Real Wood Veneer Edge Banding: Finish curved edges professionally with real wood veneer, giving your arch a cohesive, high-end solid wood appearance.
- Contour Profile Gauge Tool: Replicate complex shapes and curves accurately to ensure your wooden trim fits the archway’s unique dimensions perfectly.


Crown Molding That Steps and Turns
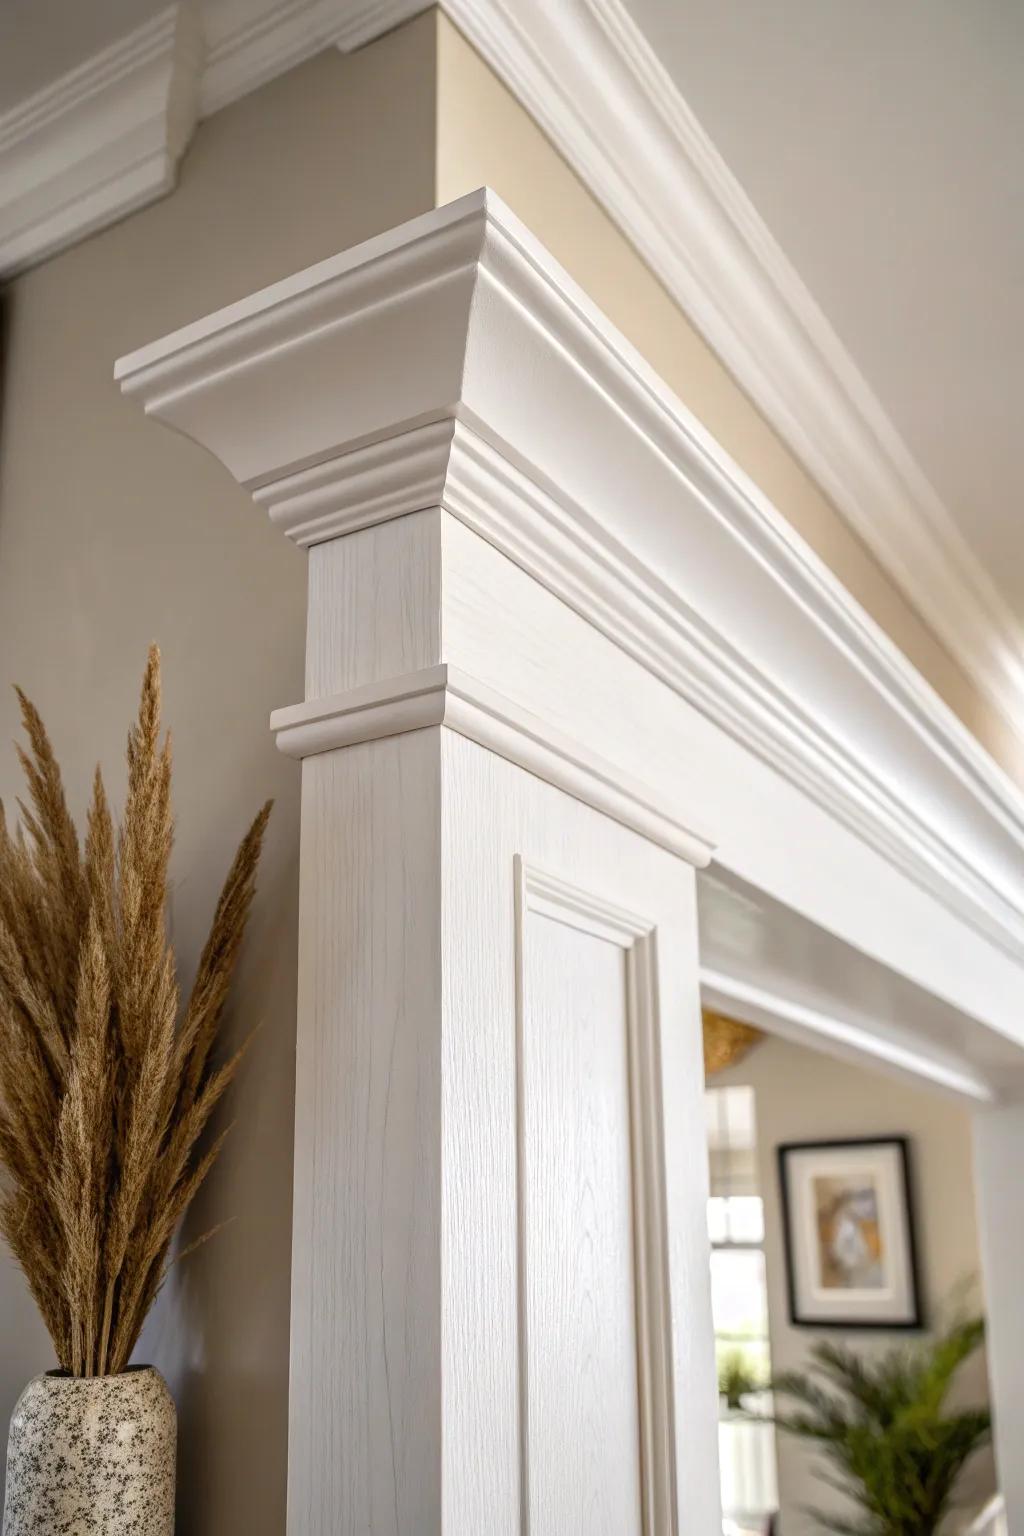
I love using crown molding to “walk” the eye from the low ceiling line into the taller one by stepping and wrapping it cleanly around the opening. I’ve done this with paint-matched trim, and it made the transition feel tailored instead of abrupt.
A few helpful options:
- Primed Polyurethane Crown Molding: Instantly elevate your ceiling transitions with lightweight, durable molding that mimics real wood without warping.
- Architectural Trim Nail Gun Kit: Secure your intricate molding pieces seamlessly with a reliable brad nailer designed for delicate finish work.
- Professional Grade Wood Filler: Achieve that seamless, custom-built look by filling nail holes and corner gaps for a smooth finish.
Shiplap Only in the Tall Zone
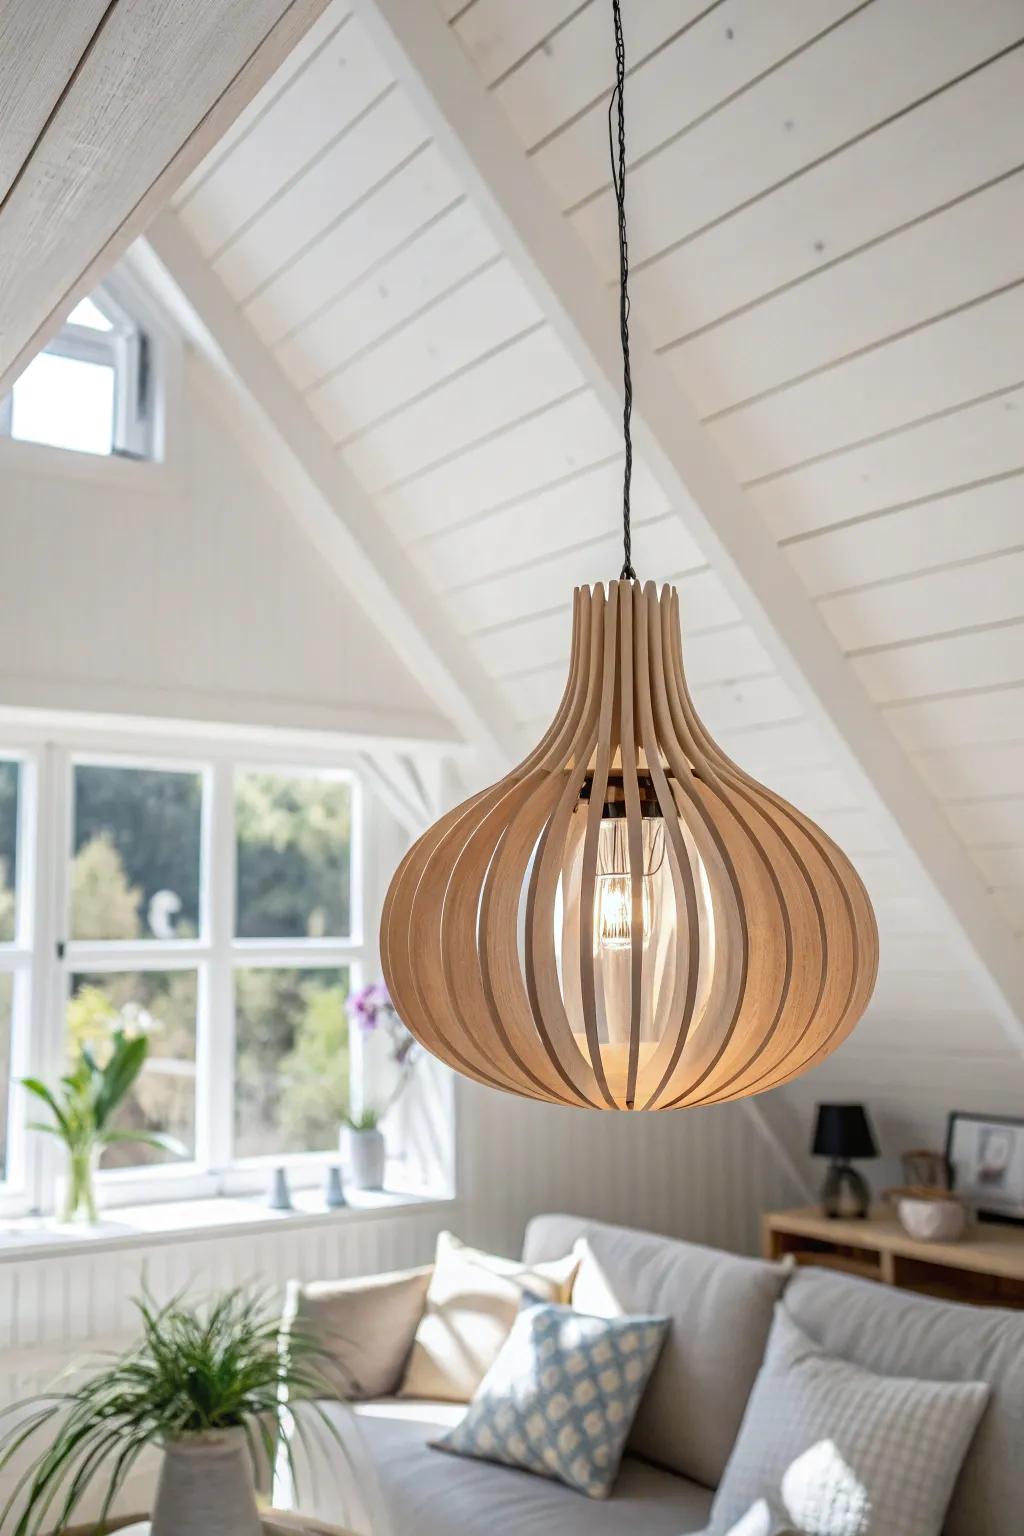
Cladding just the vaulted portion with wood paneling (like shiplap) makes the height change feel like an intentional zone shift. I’ve installed it running along the slope, and the tall ceiling finally felt cozy instead of echo-y.
Some handy options:
- White Shiplap or Tongue & Groove Paneling: Transform your vaulted ceiling with these planks to create a cozy, defined zone that adds instant architectural character.
- Wooden Slat Pendant Light: Enhance the wood-paneled look with a natural texture lighting fixture that draws the eye upward into the vault.
- Brad Nailer Kit: Secure your ceiling planks efficiently with this essential tool, making overhead installation faster and much easier for DIYers.
Matching Baseboards and Door Casings
When the trim profile stays consistent across both ceiling heights, the transition reads unified even if the ceilings don’t match. I’ve swapped mismatched casings for one consistent style, and it cleaned up the “two houses stitched together” vibe.
Items that may come in handy:
- Oak Wood Door Casing Molding: Create a unified look between rooms with consistent, high-quality wood trim that frames your entryways beautifully.
- Wood Conditioner and Stain: Ensure your new moldings match existing woodwork perfectly by prepping and staining them for a seamless finish.
- Finish Nailer Kit: Install your new casings and baseboards professionally and securely with the right tools for a clean installation.
Two-Tier Lighting Plan at the Transition
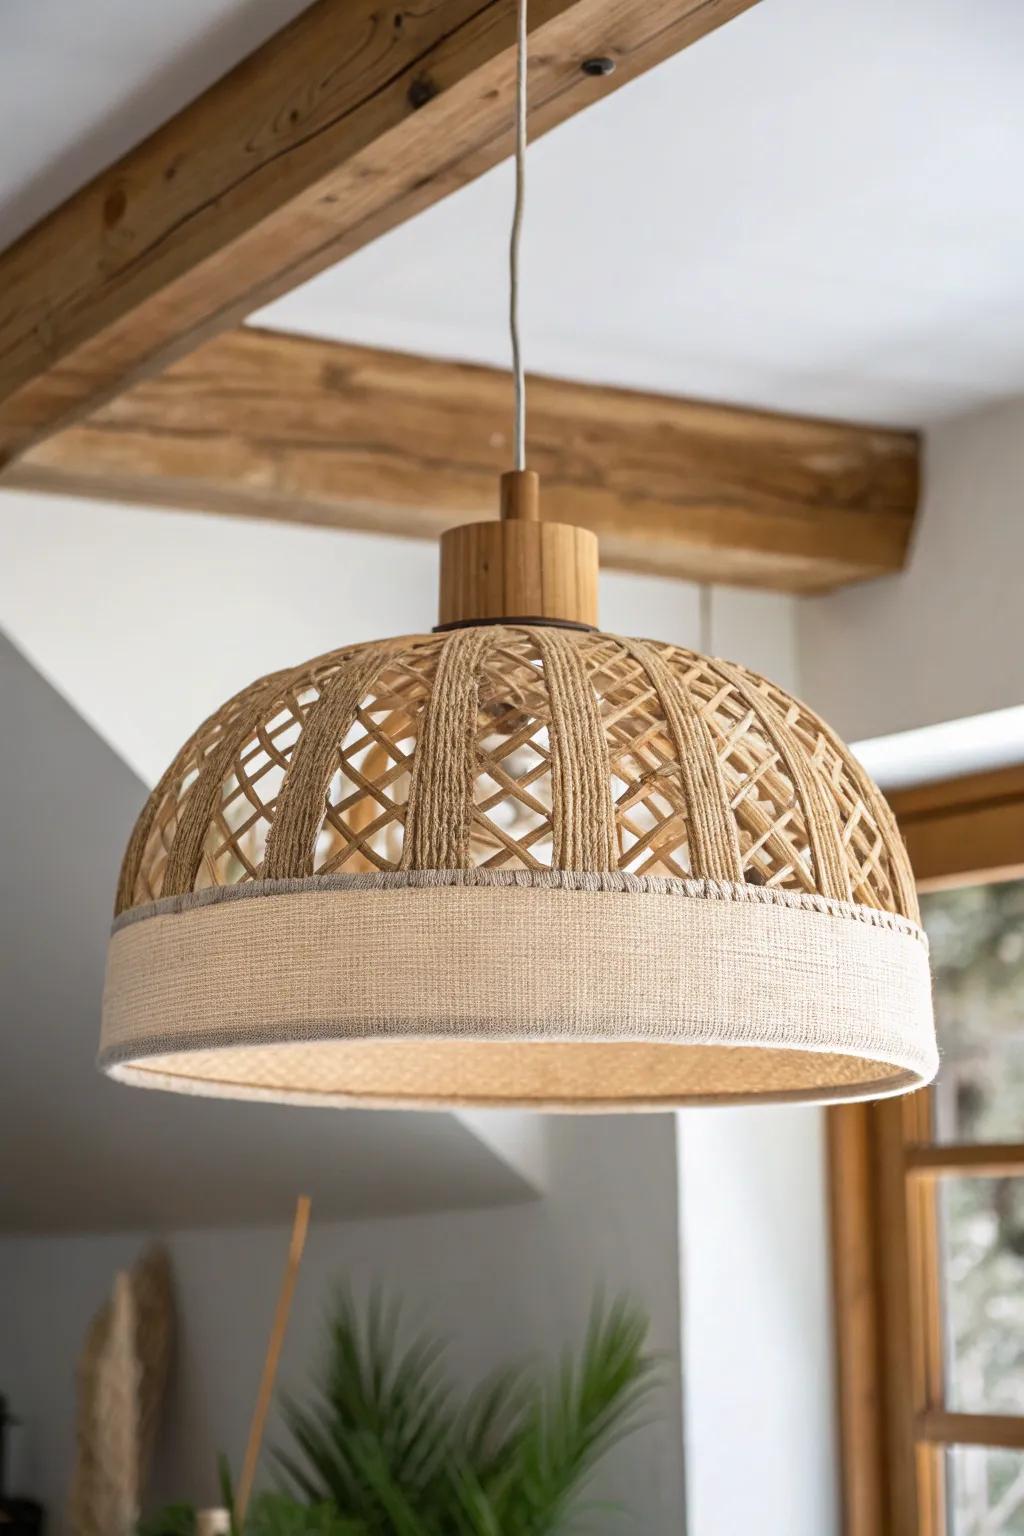
I like to “announce” the change with lighting: lower-profile fixtures in the standard zone and a statement fixture scaled for the taller volume. I’ve used this trick between kitchen and living areas, and it made the height transition feel balanced instead of top-heavy.
Give these a look:
- Woven Rattan Pendant Light: Instantly add texture and height to your taller ceiling zones with a natural, eye-catching statement fixture.
- Semi-Flush Mount Drum Light: Illuminate your lower ceiling areas seamlessly using a low-profile fixture that complements organic textures.
- Jute Rope Electrical Cord Kit: Customize your pendant height perfectly for dramatic transitions using this rustic, adjustable suspension cable kit.
Paint Band That Blurs the Break
A subtle paint trick is to carry the ceiling color down the wall a few inches right at the transition, so the edge doesn’t scream for attention. I’ve used this on awkward ceiling drops, and the height transition suddenly felt softer and calmer.
A few relevant products:
- Painter’s tape multi-pack: Achieve crisp, clean paint lines effortlessly when extending your ceiling color down a few inches for effect.
- Angled sash paintbrush: Use an angled brush to carefully cut in the new transition line for a professional, seamless finish.
- Laser level tool: Ensure your painted band is perfectly straight across the entire room with this handy self-leveling tool.
Vertical Slat Wall That Climbs Into the Vault
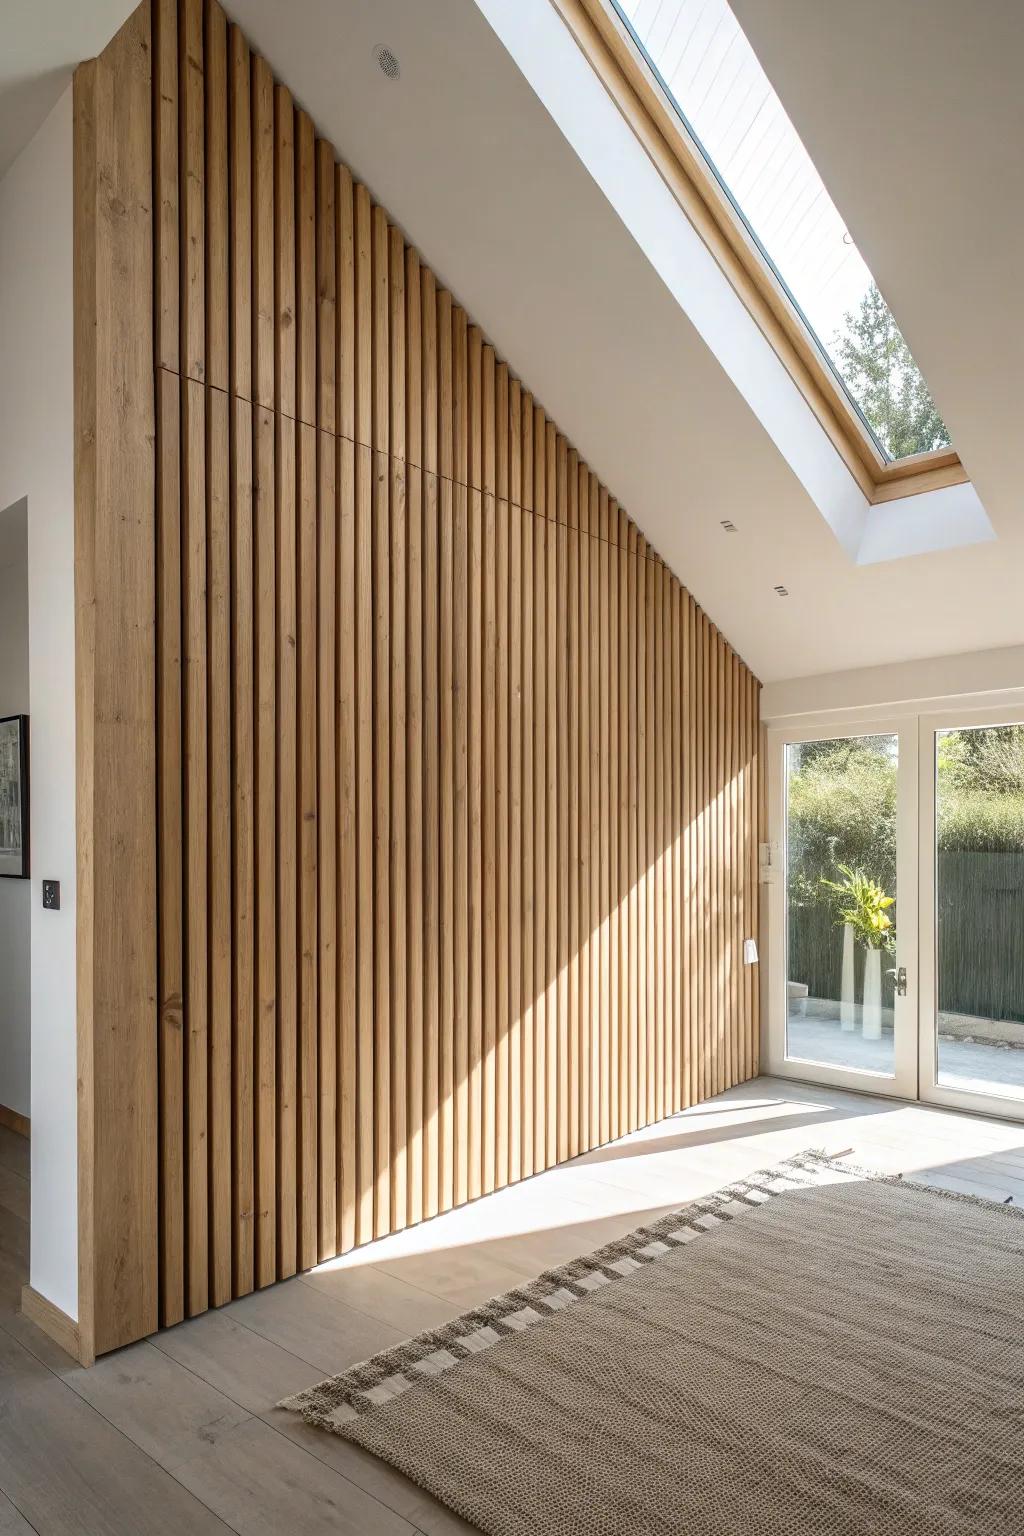
A vertical slat wall placed at the transition line pulls your eye upward and makes the jump in ceiling height feel like a feature wall. I’ve ripped slats from scrap boards, and the movement of the lines made the tall ceiling feel connected instead of separate.
A few choices to try:
- Acoustic Wood Slat Wall Panels: Transform your transition wall instantly with these pre-made panels that add texture and absorb excess sound.
- Laser Level Tool: Ensure your vertical lines are perfectly straight and plumb to achieve that professional, seamless architectural look.
- Construction Adhesive: Secure your slats or panels firmly to the wall for a durable, clean installation without visible nails.
Sliding Screen to Soften the Height Shift
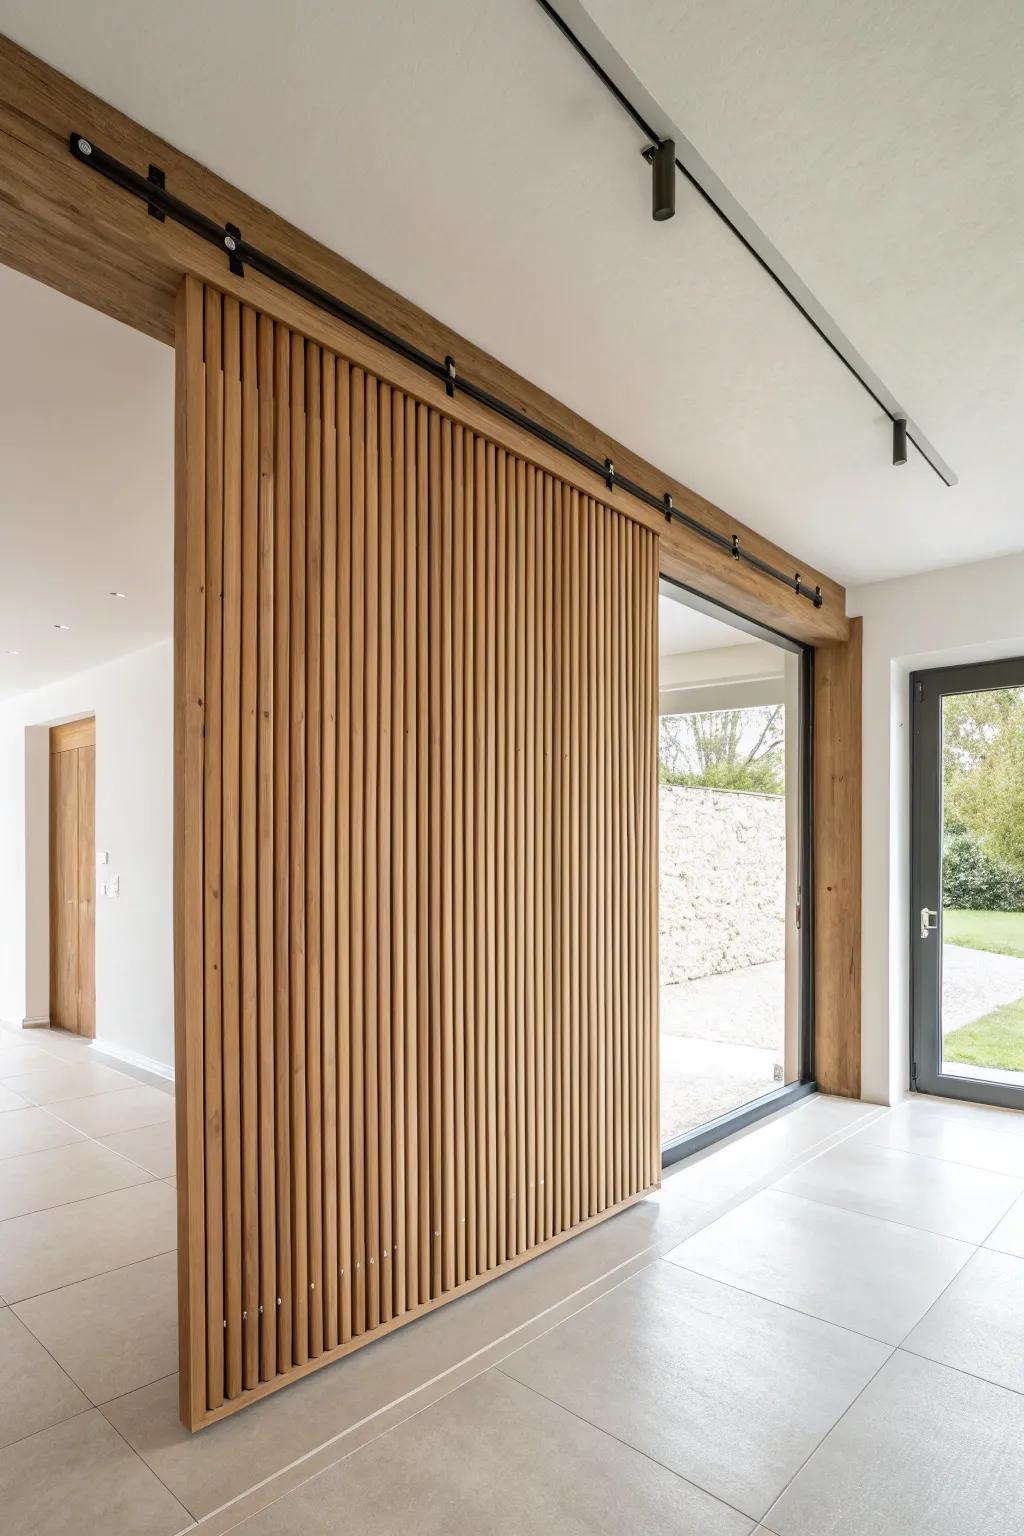
A lightweight sliding wood screen (think slats or lattice) near the transition can visually bridge the two ceiling heights without closing anything off. I built one for a client who wanted separation sometimes, and it made the height change feel intentional in both open and semi-closed mode.
These products might help:
- Top-Mounted Sliding Door Hardware Track Kit: Securely hang your custom wood screen with this robust hardware kit, ensuring smooth and reliable gliding motion.
- Prefinished Wood Slats or Wall Paneling: Create the slatted screen look easily using these pre-cut wood strips, adding warmth and texture instantly.
- Modern LED Track Lighting System: Highlight your new architectural feature and illuminate the space effectively with adjustable, minimalist overhead track lighting.
Ceiling “Ribs” That Lead You Up
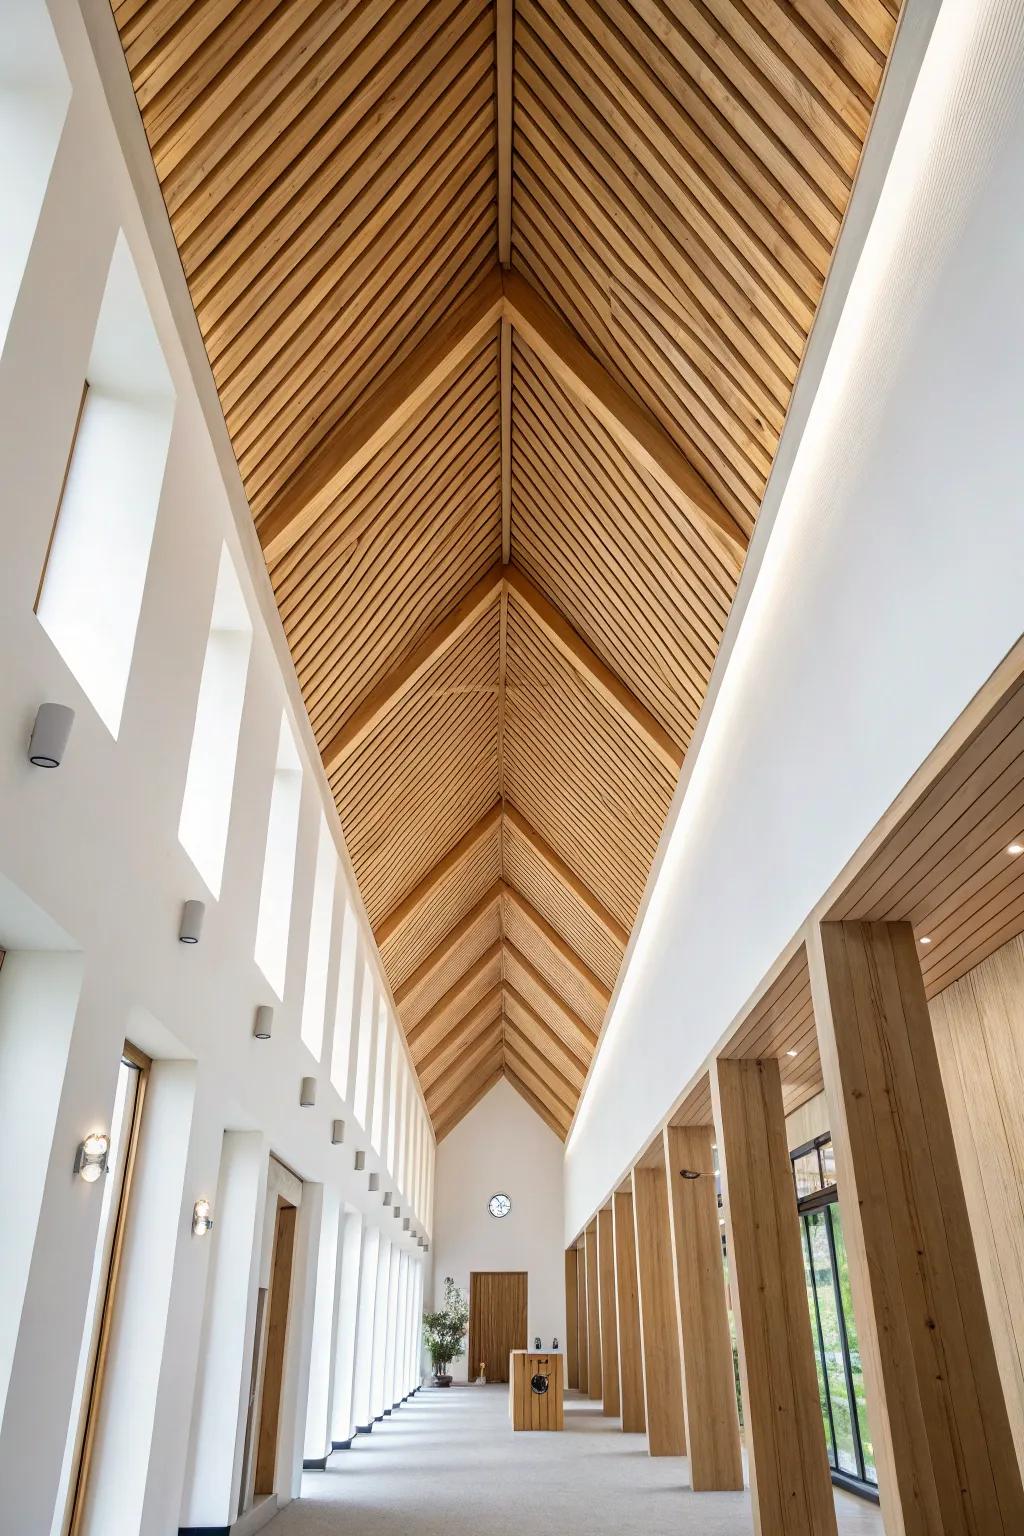
For a real wow moment, I’ve installed thin wood ceiling ribs starting in the lower zone and spacing them wider as they run into the taller ceiling. That gradual rhythm made the height transition feel like a designed pathway, and it stopped the tall space from feeling like a sudden cavern.
Useful items to consider:
- Wood Slat Wall Paneling Kits: Transform your transition zones easily with pre-assembled slats that add instant architectural rhythm and warmth.
- Architectural Faux Wood Beams: Create the structural look of ceiling ribs without the heavy weight, perfect for defining height changes.
- Linear Wood Strip Lights: Integrate lighting directly between your ceiling ribs to emphasize the upward movement and modern aesthetic.


