
Plywood isn’t just a “hidden” building material anymore—when you let it show, it can look seriously high-end without the high-end price tag. I’ve built and refinished a lot of kitchens in my workshop, and plywood is still my favorite way to get that warm, modern, lived-in vibe fast.
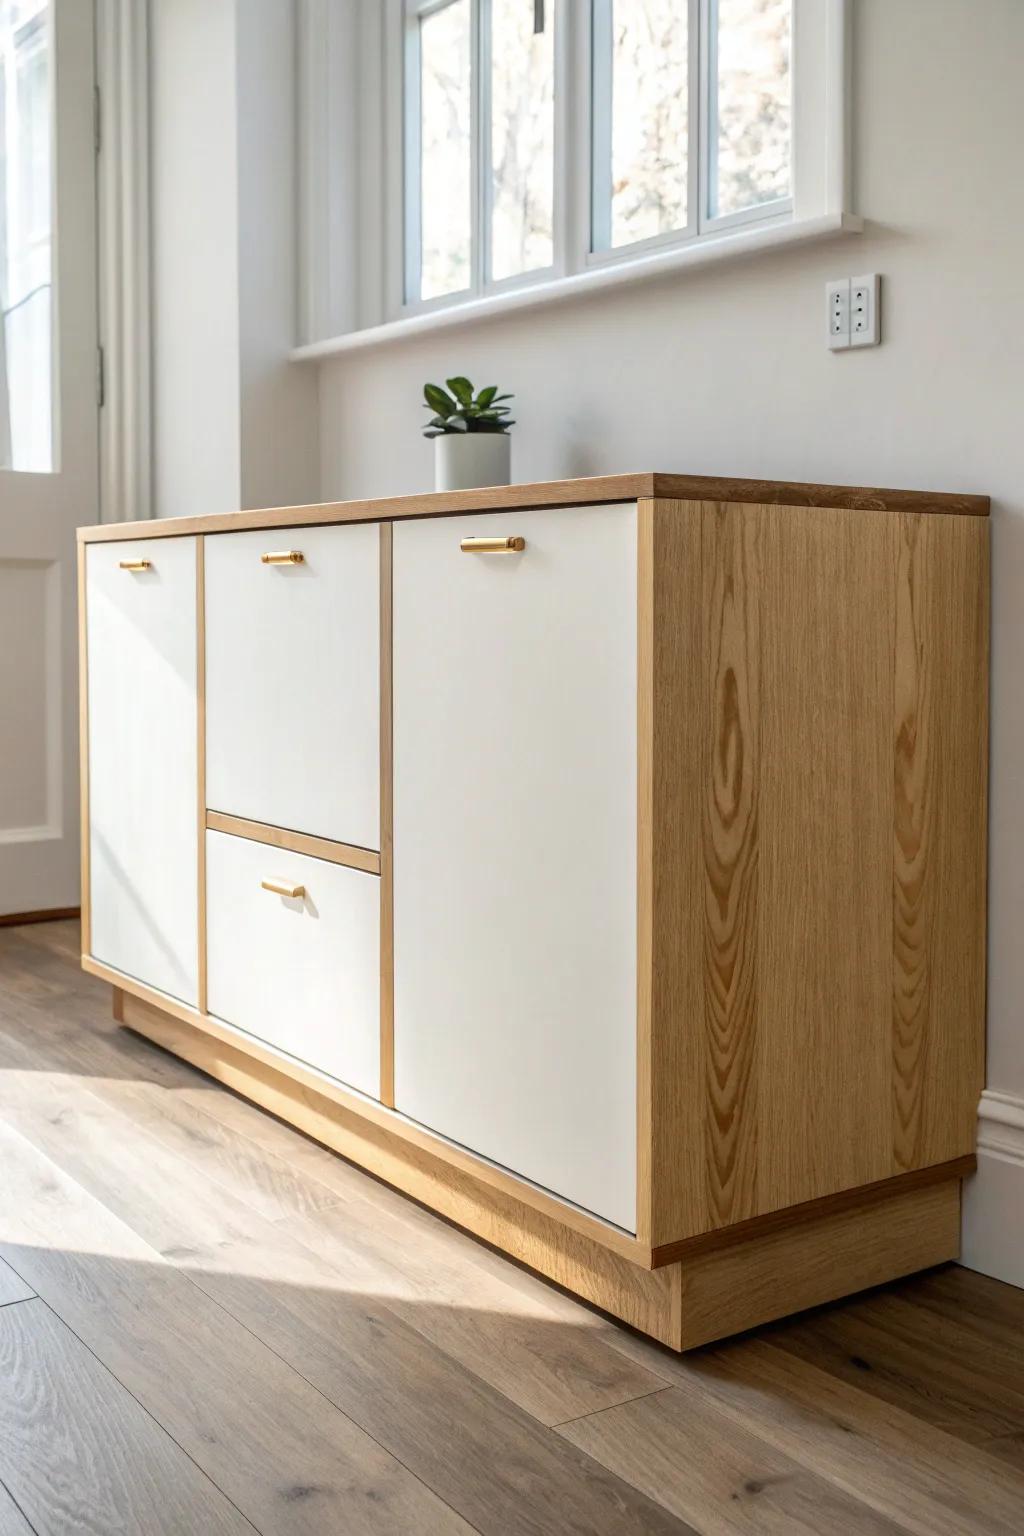
Plywood Grid With Dark Reveals
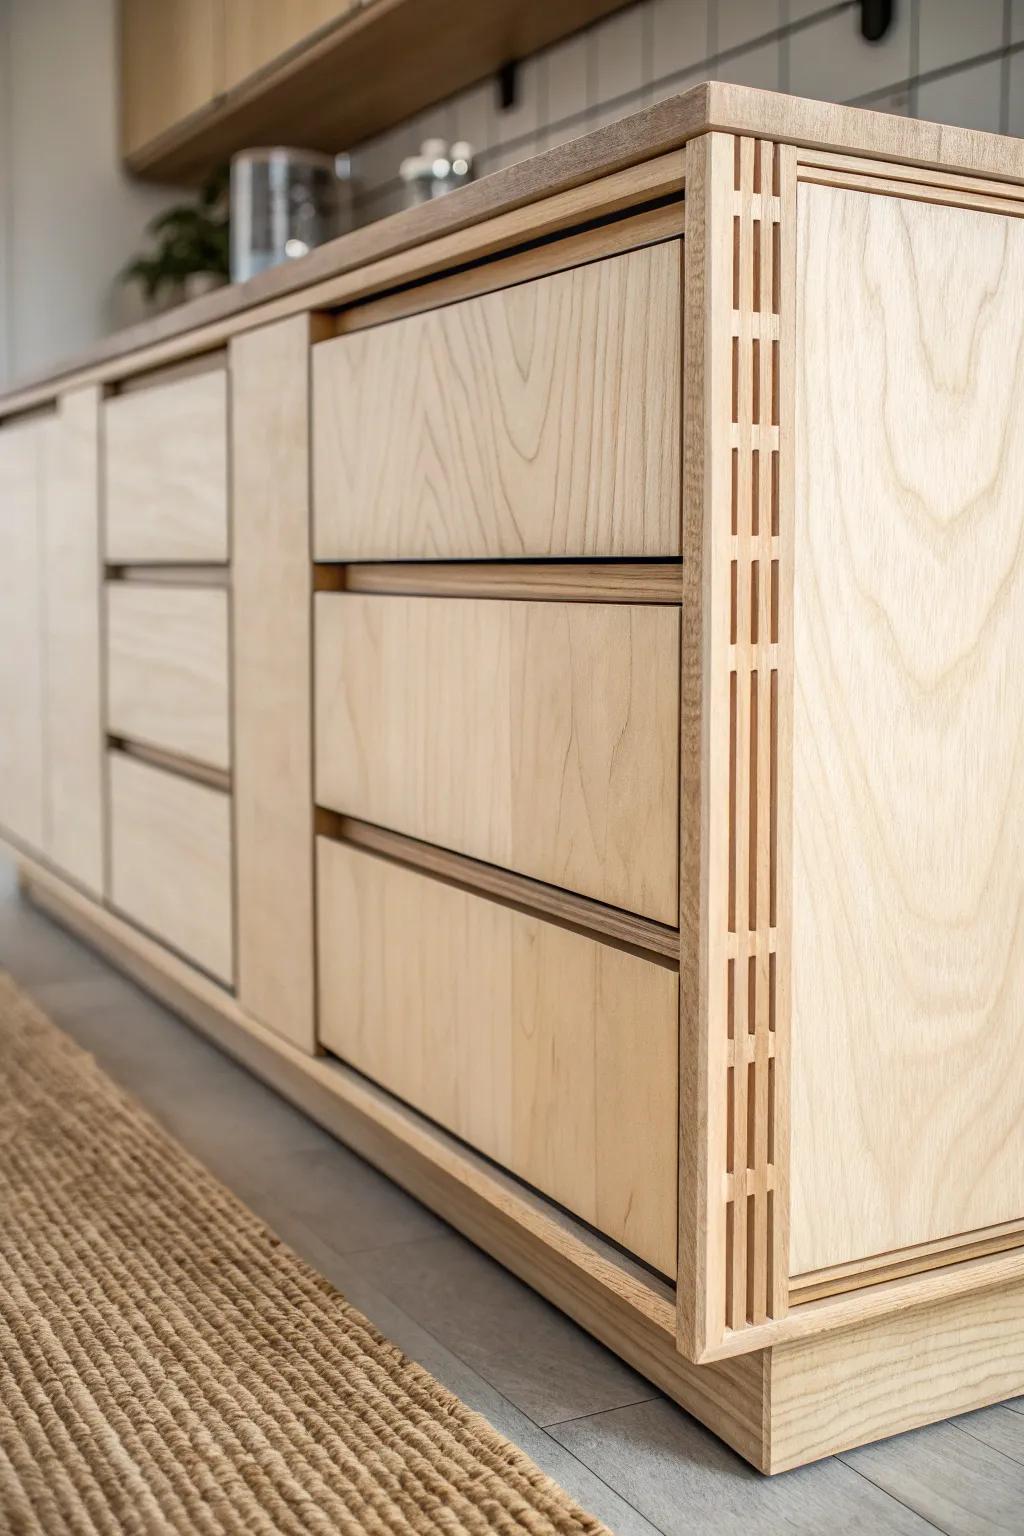
For a crisp, graphic look, I’ve built plywood kitchen cabinets with darker interior edges so the fronts form a subtle grid effect. It’s one of those small construction choices that makes the whole kitchen feel architectural.
You might like:
- Edge Banding Trimmer Tool: Achieve clean, professional edges on your plywood panels quickly with this essential woodworking trimming tool.
- Matte Black Wood Stain: Create the striking dark reveal effect by applying this deep matte stain to your cabinet interior edges.
- Clear Satin Polyurethane Finish: Protect your beautiful plywood grain and ensure long-lasting durability with a smooth, clear satin finish.

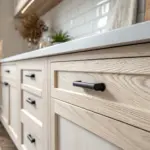
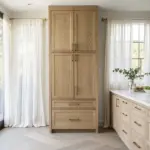
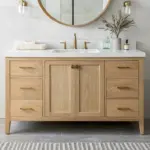
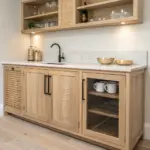
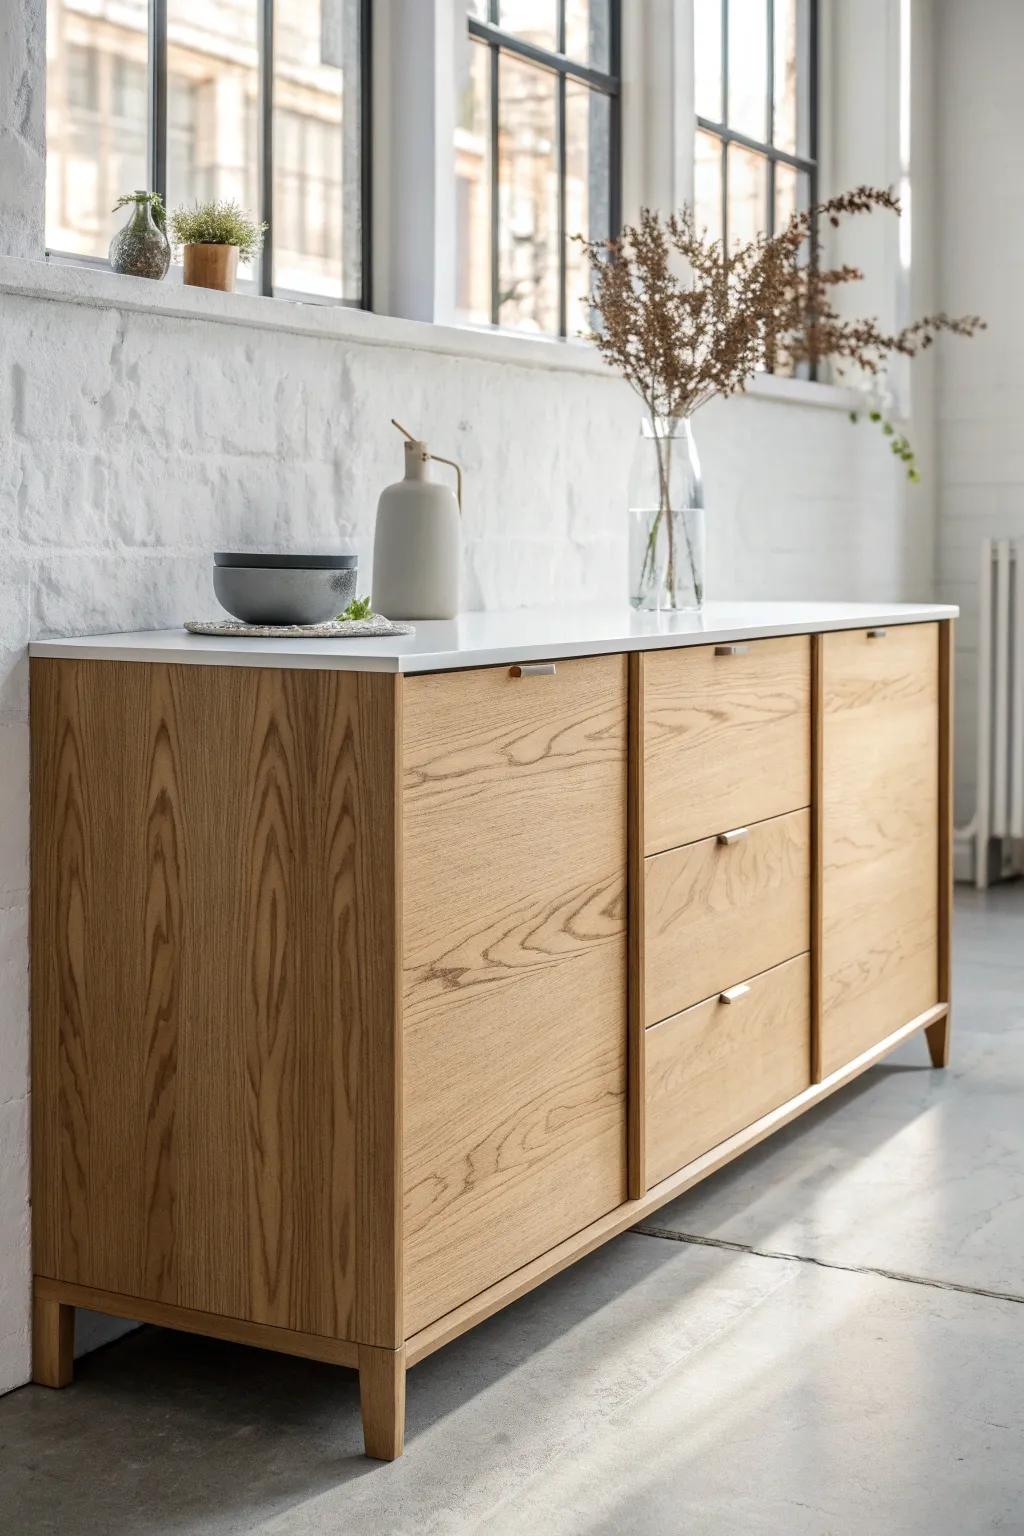
Flat-Front Plywood Cabinets
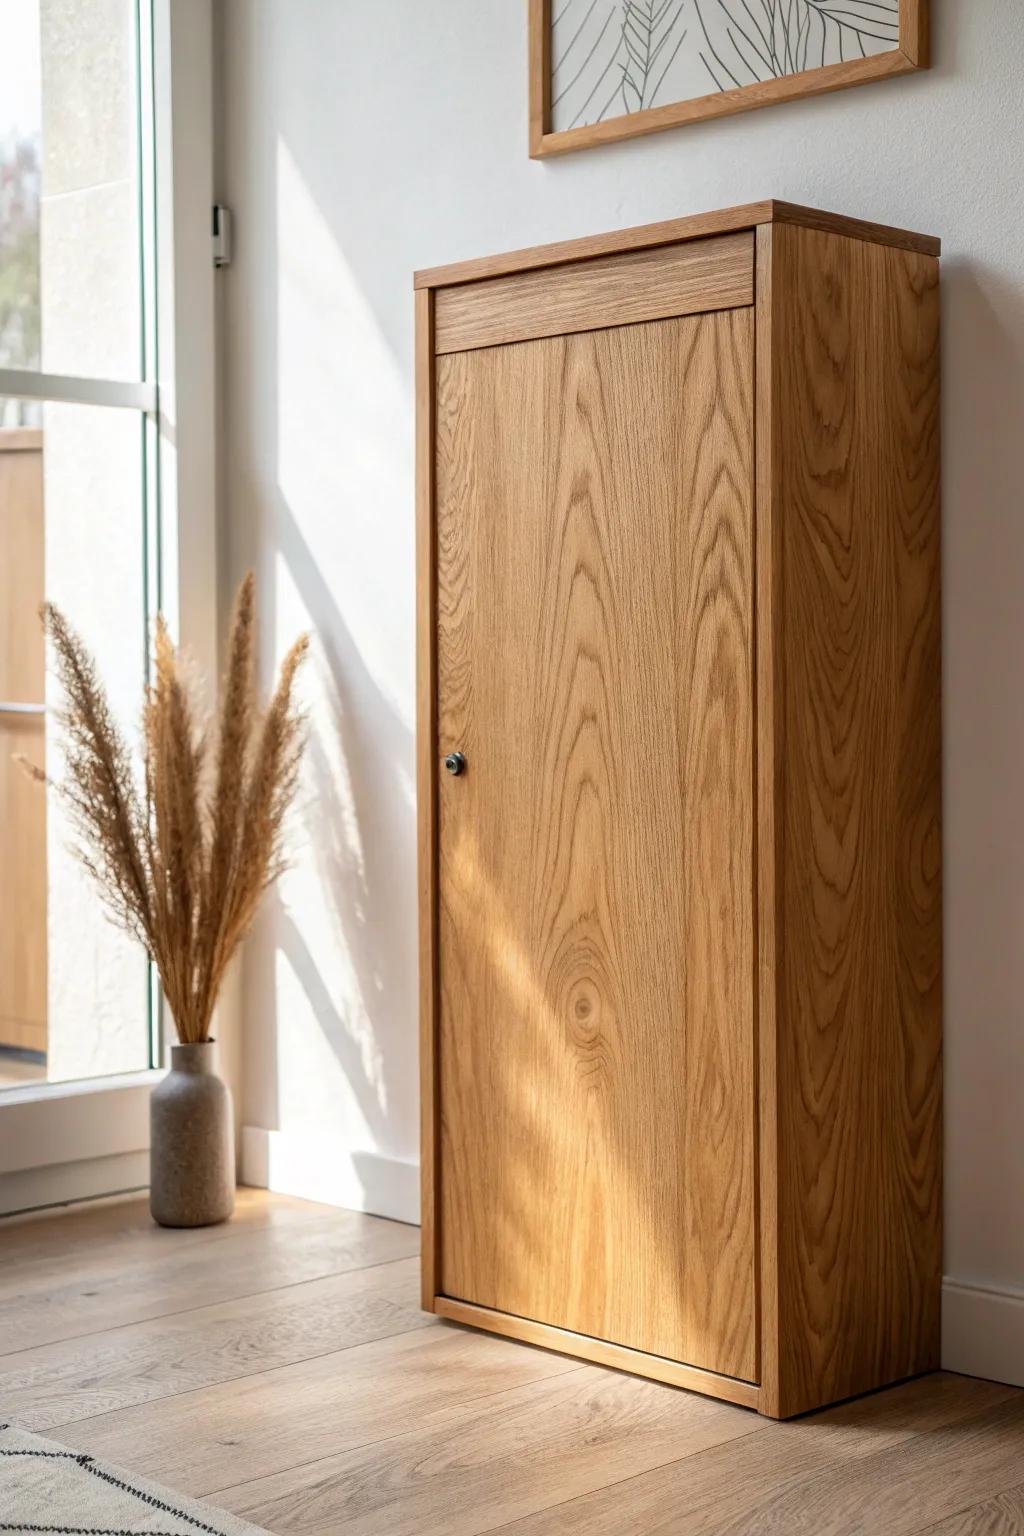
My go-to look is flat-front plywood cabinets because the clean lines make the grain the star of the kitchen. The first time I installed slab-style doors, I couldn’t believe how much calmer and more “custom” the whole room felt.
Try these:
- Clear Matte Wood Finish: Protect your plywood cabinets while keeping the natural look with a durable, non-yellowing matte finish.
- Minimalist Cabinet Knobs: Maintain clean lines by adding sleek, unobtrusive hardware that complements rather than overpowers the wood grain.
- Concealed Cabinet Hinges: Achieve that seamless custom look by installing hidden hinges for smooth operation and a clutter-free exterior.
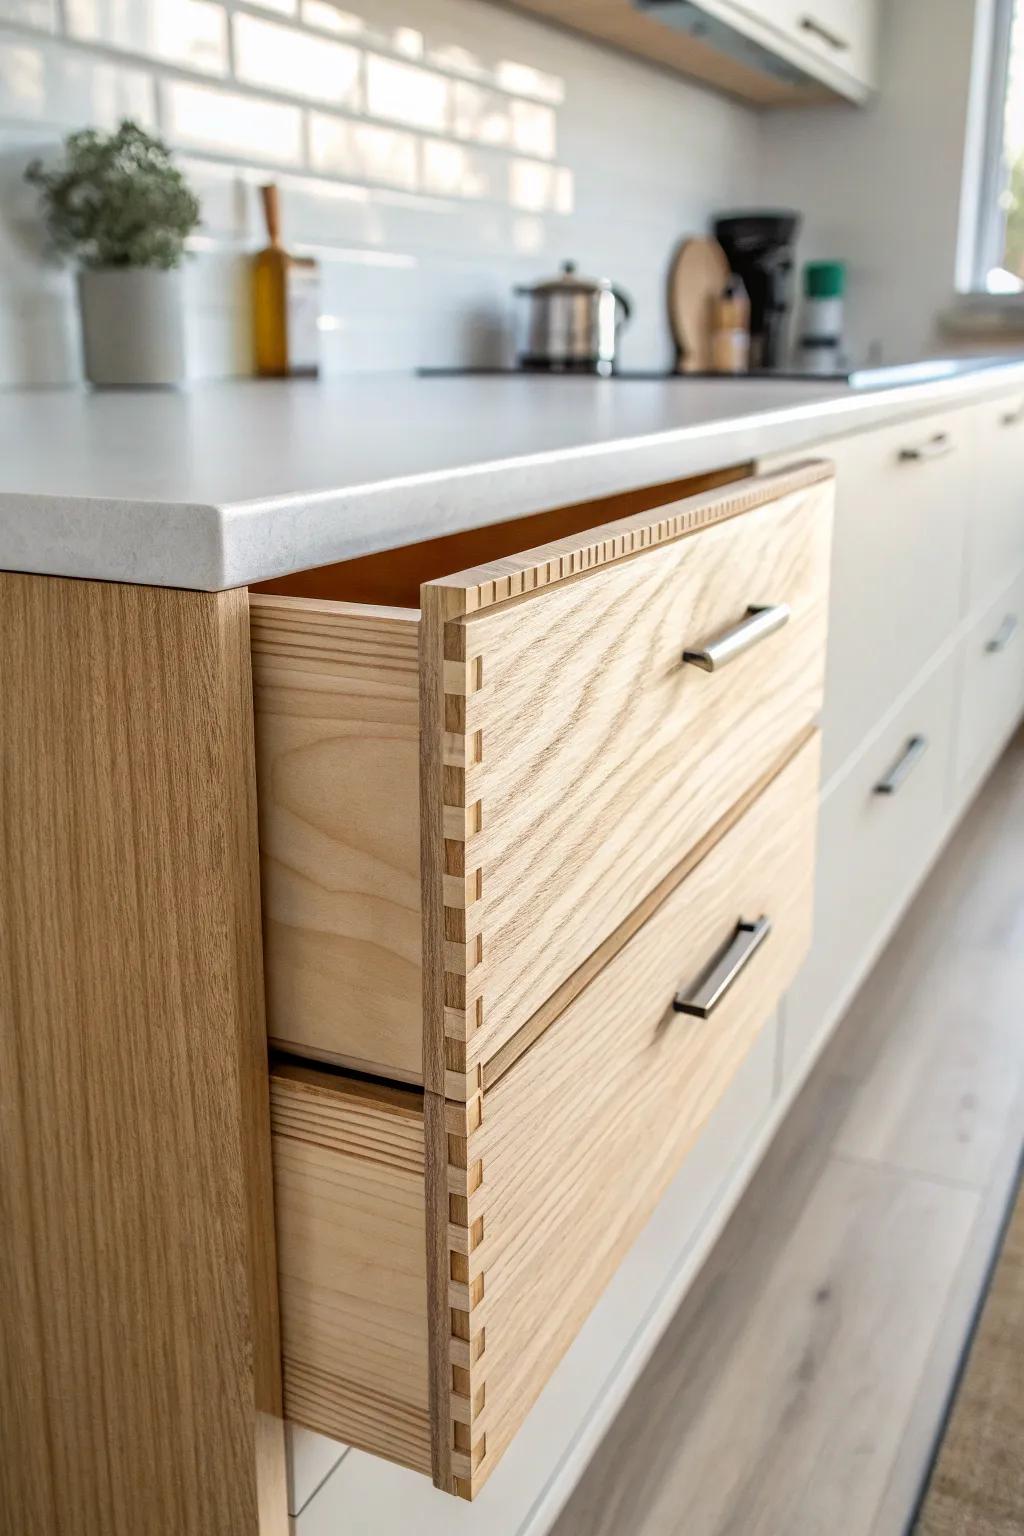
Exposed Plywood Edges
If you want instant character, leave the exposed plywood edges visible on doors and drawer fronts—I’ve done this on birch ply and it always gets compliments. I usually just ease the edges and seal them well, and that striped layered look does all the decorating for me.
Some handy options:
- Clear Water-Based Wood Sealer: Protect exposed plywood edges from moisture and stains while enhancing the grain’s natural contrast for lasting durability.
- Sanding Sponge Block: Smooth down sharp plywood corners easily before sealing to ensure a professional, splinter-free finish on your drawers.
- Modern Gold Finger Pulls: Accessorize your plywood fronts with sleek hardware that complements the warm wood tones without overpowering the design.
Cut-In Finger Pull Handles
I love skipping hardware and routing finger pulls right into the plywood drawer fronts for a super sleek vibe. On my last build, that little detail made the whole kitchen feel more intentional (and way easier to wipe down).
Might be a good match:
- Finger Pull Router Bit: Carve smooth, ergonomic finger grips directly into your plywood drawer fronts with this specialized router bit.
- Edge Guide for Router: Ensure your cut-in handles remain perfectly straight and consistent across every drawer with a reliable edge guide.
- Sanding Sponge Block Set: Smooth out the routed finger pulls easily by hand to prevent splinters and ensure a soft touch.
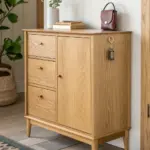
Grain-Matched Drawer Fronts
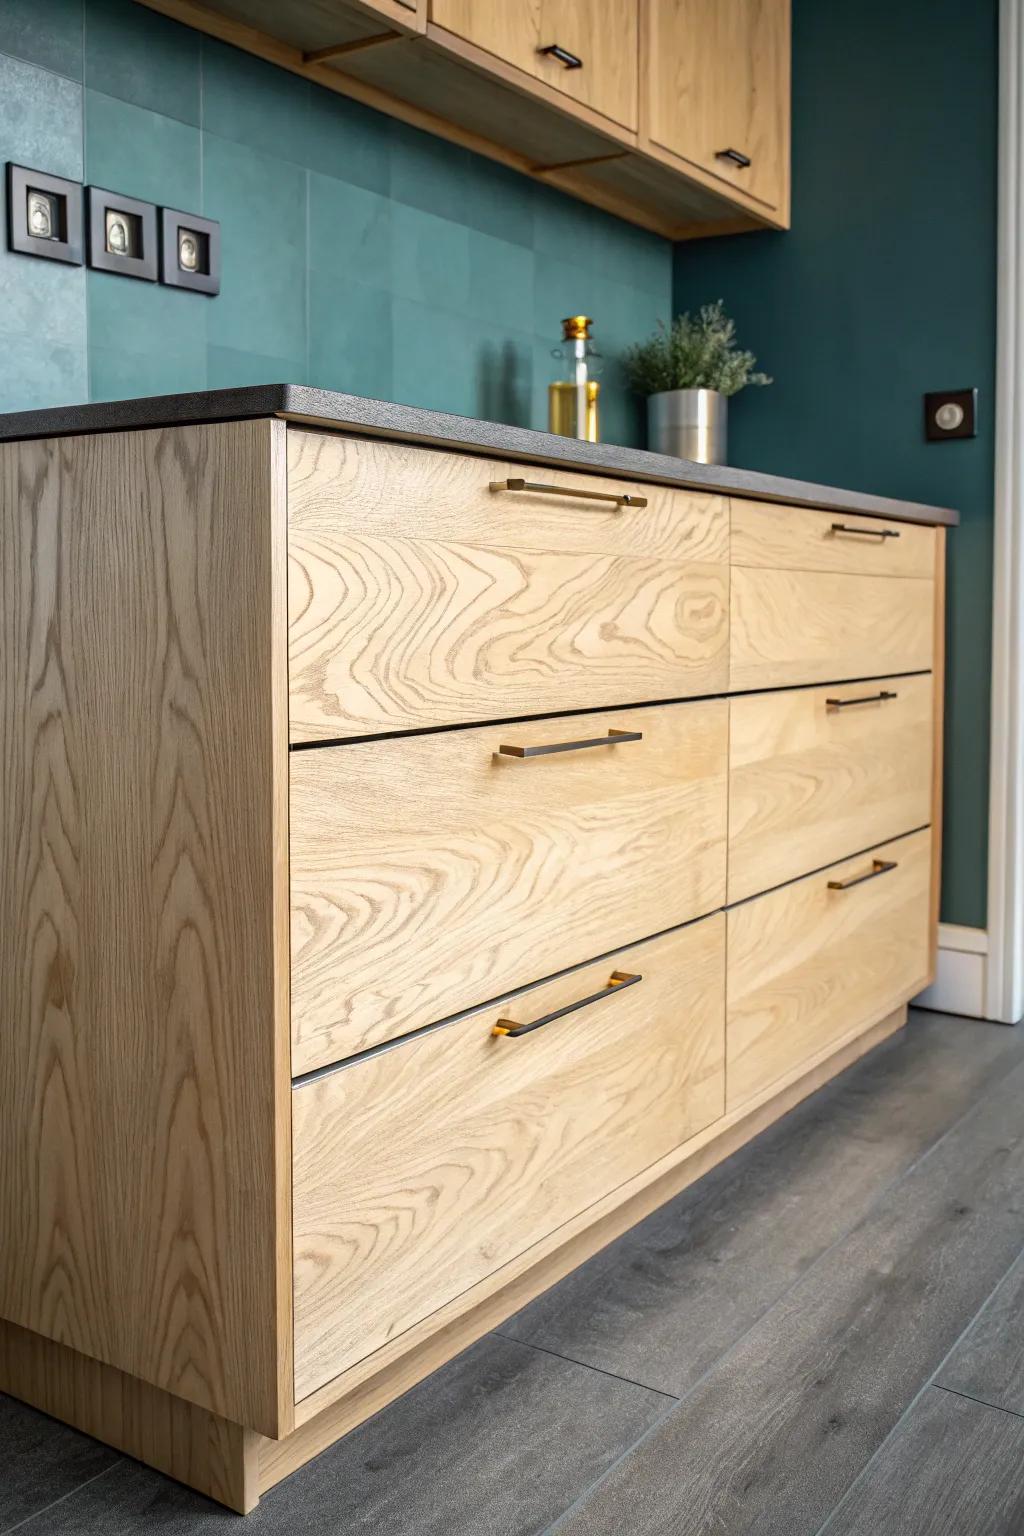
One of my favorite “fancy but doable” tricks is grain matching across multiple plywood cabinet doors so the pattern flows like one big panel. The first time I laid everything out on the shop floor and lined it up, it felt like solving the most satisfying puzzle.
Items that may come in handy:
- Circular Saw Guide Track System: Achieve perfectly straight cuts across large plywood sheets to maintain continuous grain patterns for your drawer fronts.
- Minimalist Black Cabinet Pulls: Complete the modern look with sleek hardware that complements the natural wood grain rather than distracting from it.
- Clear Matte Wood Finish: Protect your beautiful plywood grain with a durable, non-yellowing matte finish that keeps the natural aesthetic intact.
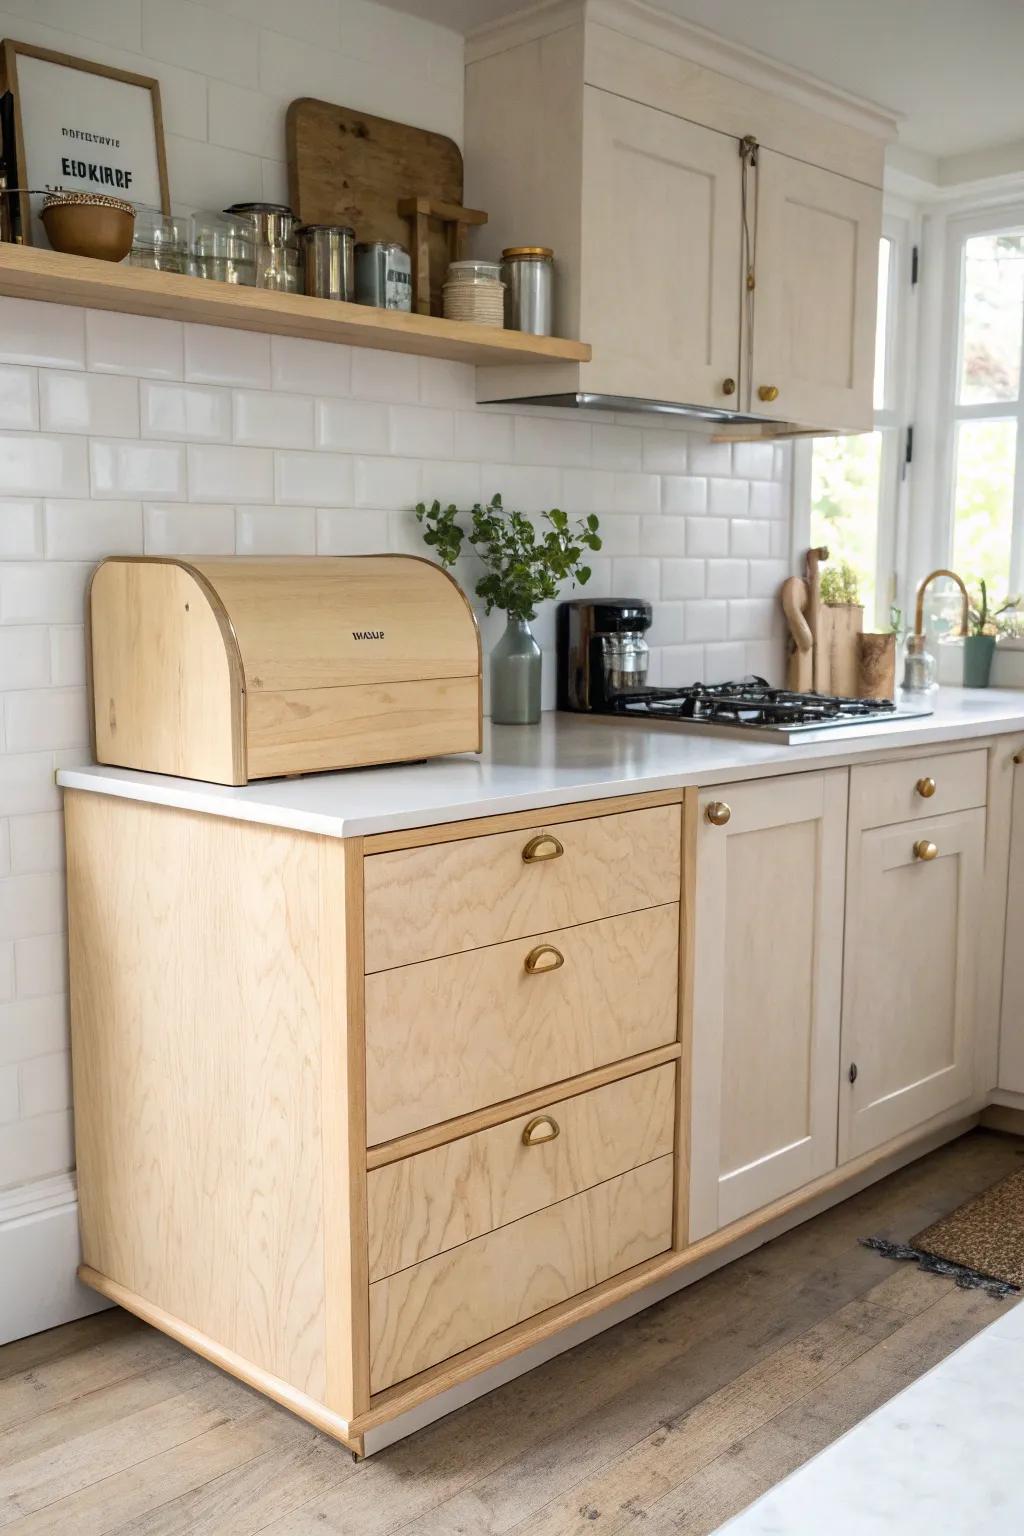
Plywood Open Shelving
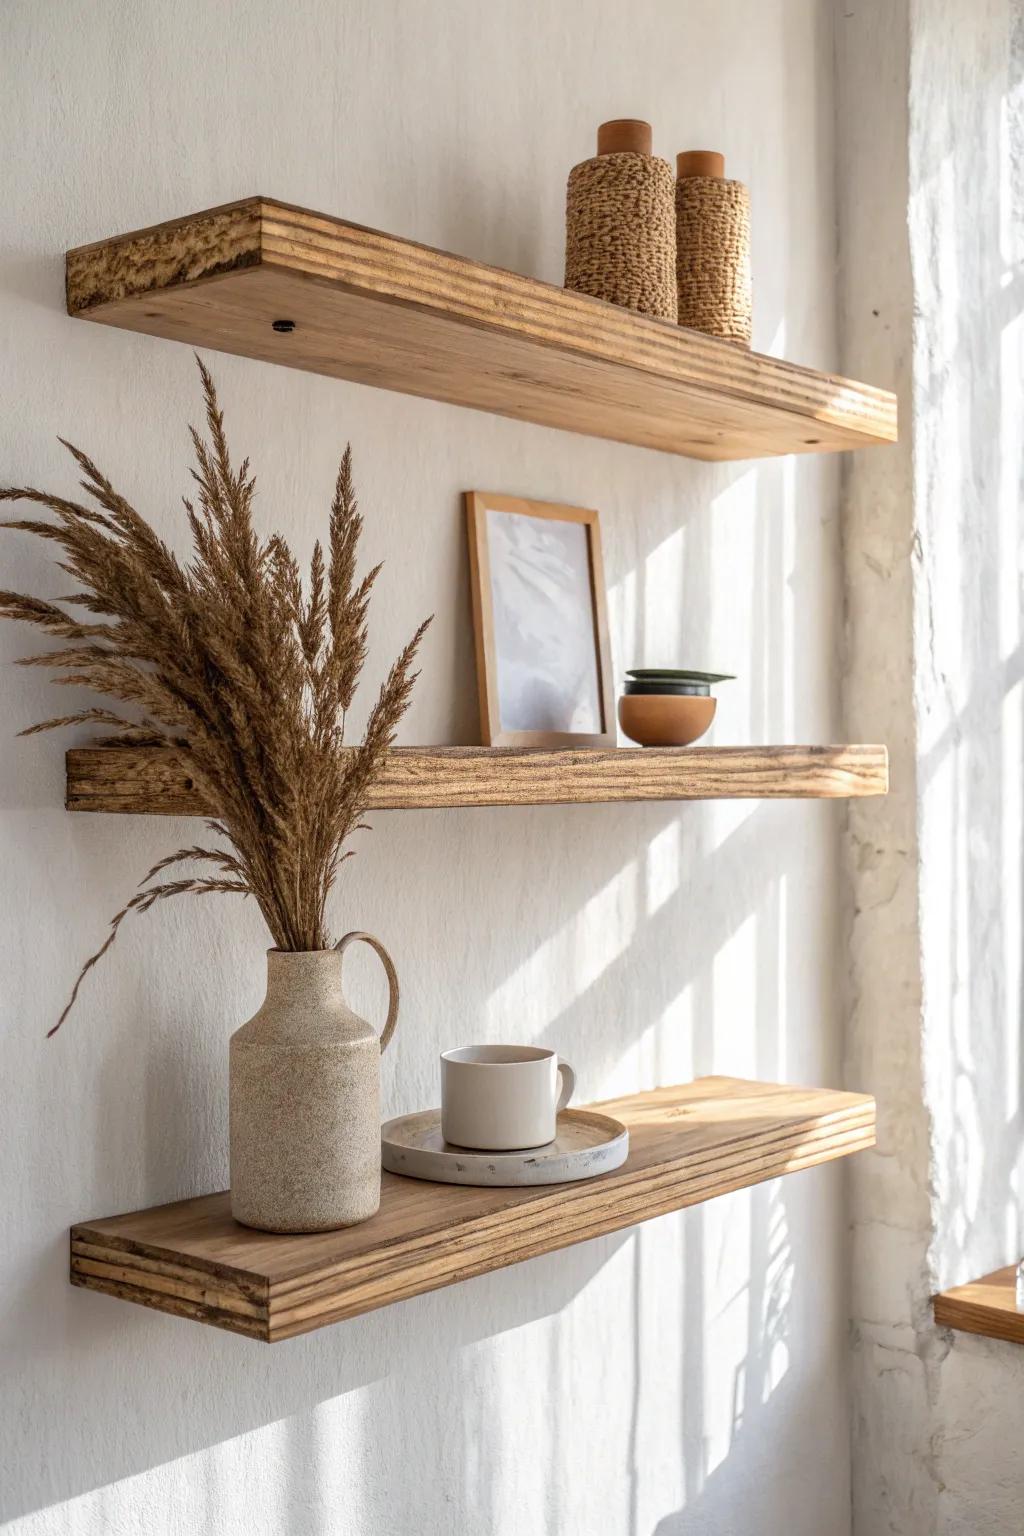
Floating plywood shelves are my quick win when a kitchen needs warmth without more upper cabinets. I’ve built them from the same ply as the lowers so the whole kitchen looks tied together, even if the rest of the space is simple.
Consider these options:
- Floating Shelf Hardware Brackets: Secure your DIY plywood shelves with invisible mounting brackets to achieve that seamless, modern floating look effortlessly.
- Matte Clear Wood Finish: Protect your raw plywood from kitchen moisture while keeping a natural, low-sheen appearance with a quality sealant.
- Textured Ceramic Vases: Style your new open shelving with neutral, textured stoneware that adds character without cluttering your visual space.
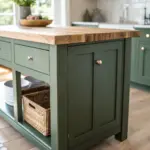
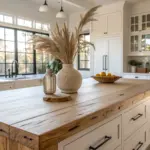
Plywood-Wrapped Kitchen Island
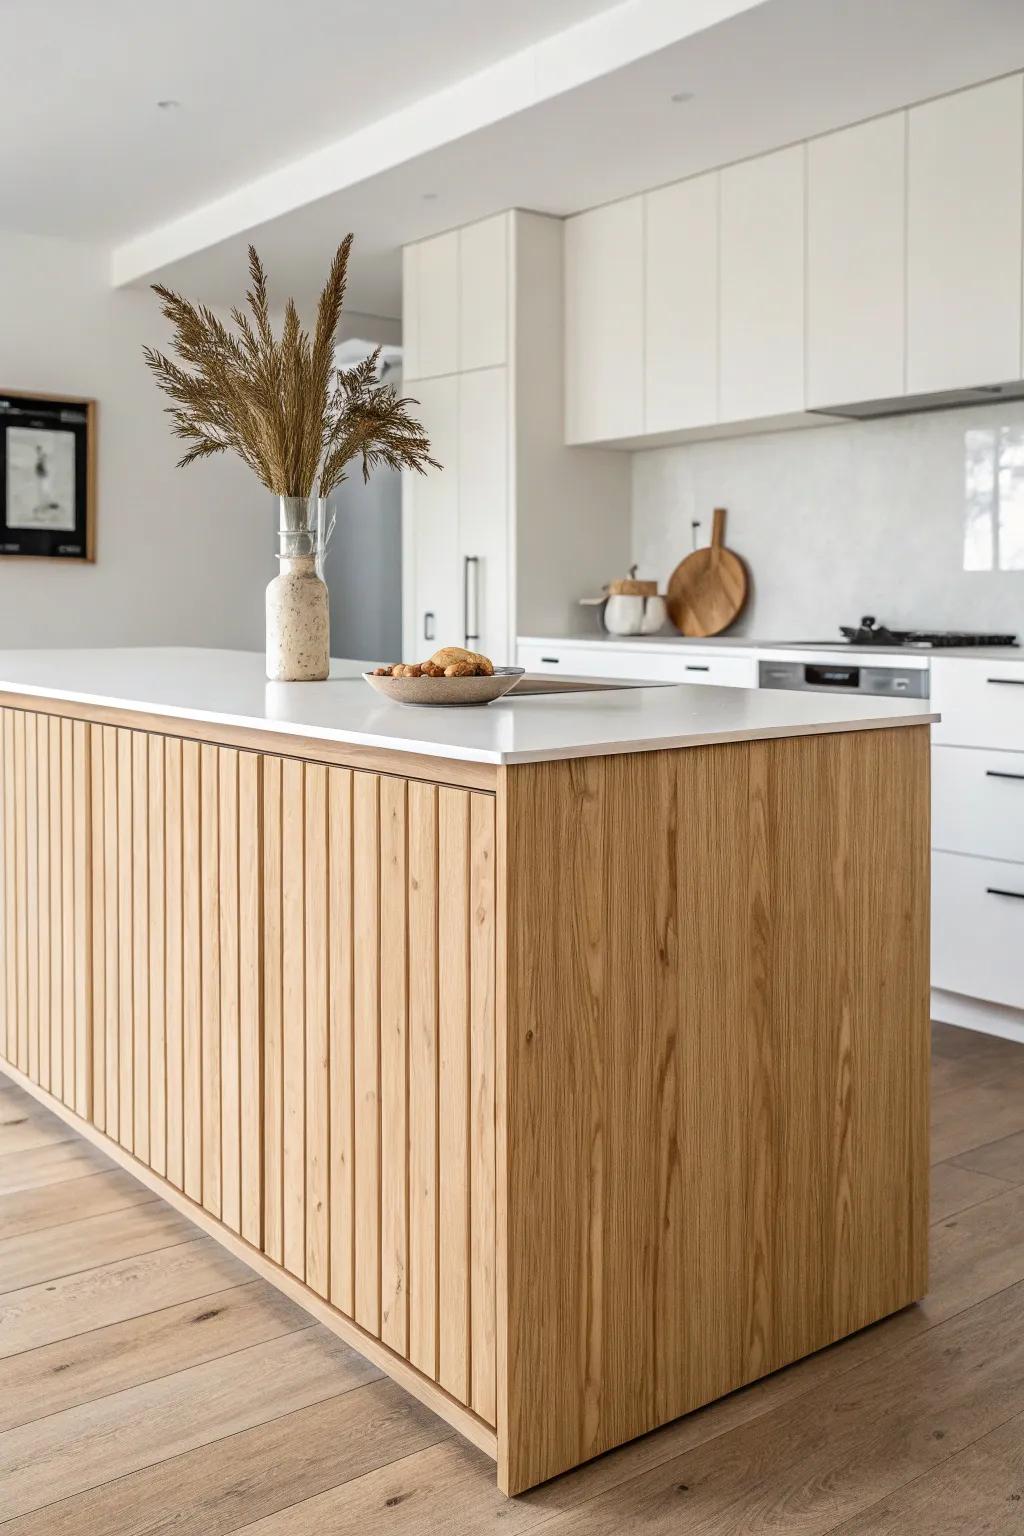
Cladding a kitchen island in plywood panels is one of the most classic moves for that modern woodbox look. I did this in a small kitchen once, and the island suddenly felt like a piece of furniture instead of just a cabinet in the middle.
A few suggestions:
- Flexible Wood Slat Paneling: Achieve the fluted texture seen in the photo easily by wrapping your island curve or flat sides with these panels.
- Clear Matte Wood Sealer: Protect your new plywood cladding from kitchen spills while maintaining that natural, raw wood aesthetic found in modern designs.
- Construction Adhesive: Ensure a durable, permanent bond when attaching your plywood or wood slats to the existing kitchen island structure.
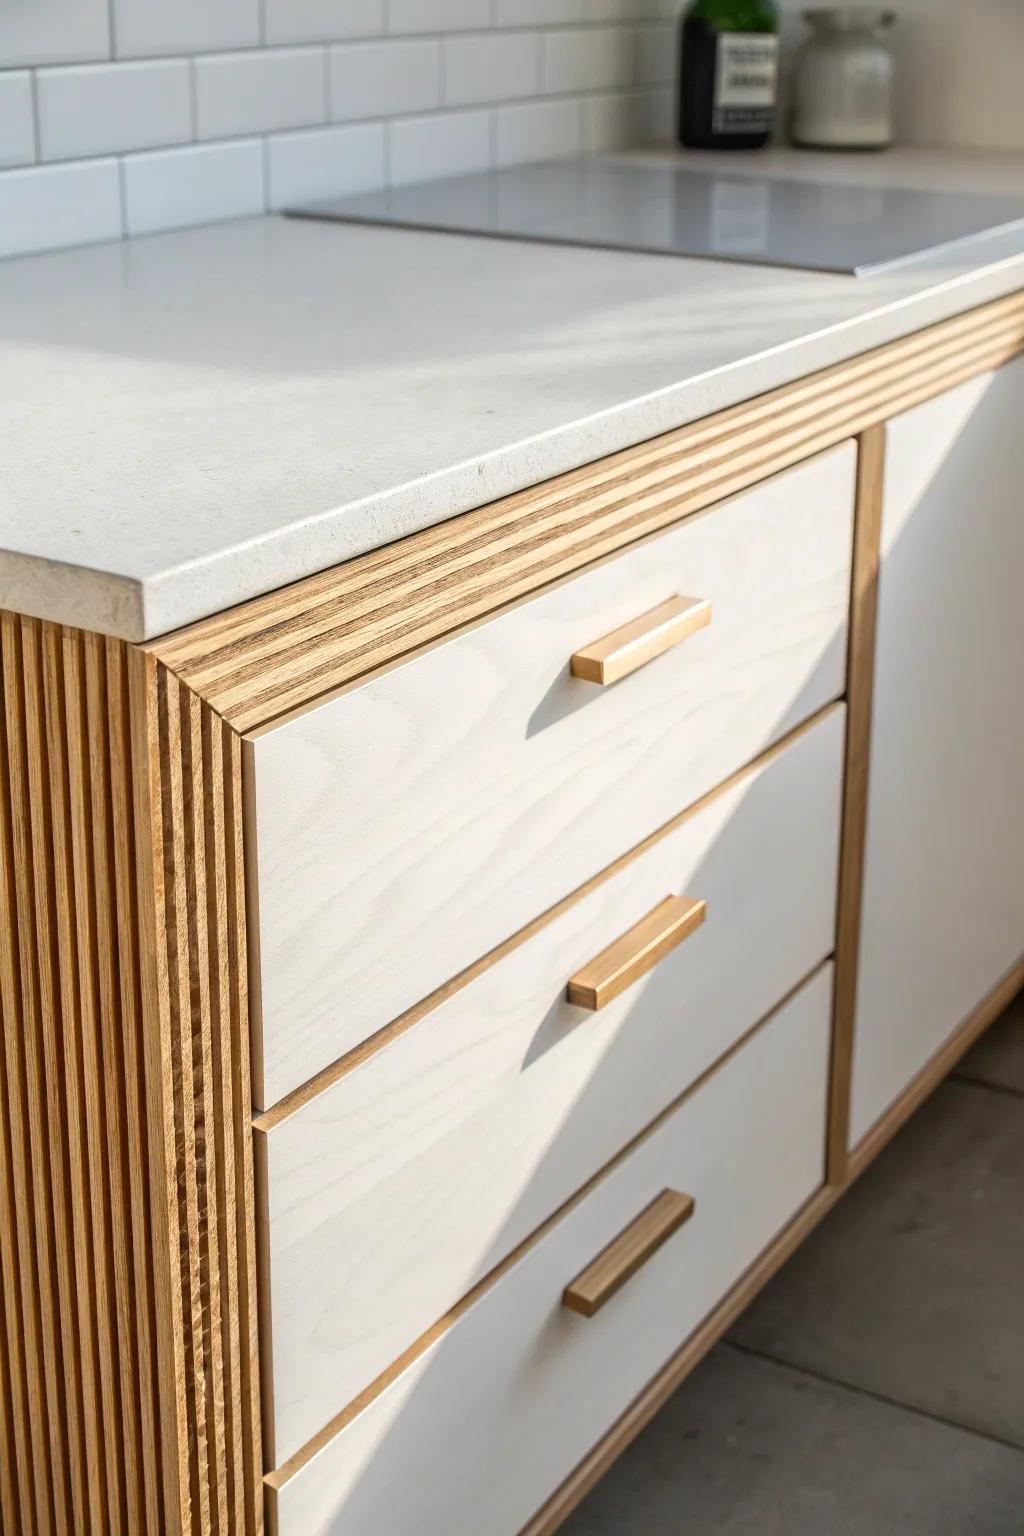
Plywood With White Countertops
Pairing warm plywood cabinetry with a crisp white countertop is a combo I keep coming back to because it brightens everything without feeling cold. In my own projects, that light-on-light contrast makes the grain pop even on cloudy days.
Check if these fit your needs:
- Clear Glass Cylinder Vase: Add a simple, airy touch to your counter by displaying dried stems in this minimalist glass vessel.
- Matte Ceramic Pitcher: Introduce texture and functionality with a sleek, neutral pitcher that perfectly complements white surfaces and wood tones.
- Stoneware Serving Bowl: Ground your bright countertop arrangement with a dark or grey stoneware bowl for subtle, natural contrast.
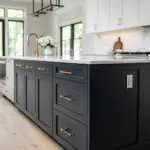
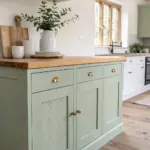
Two-Tone Plywood and Painted Lowers
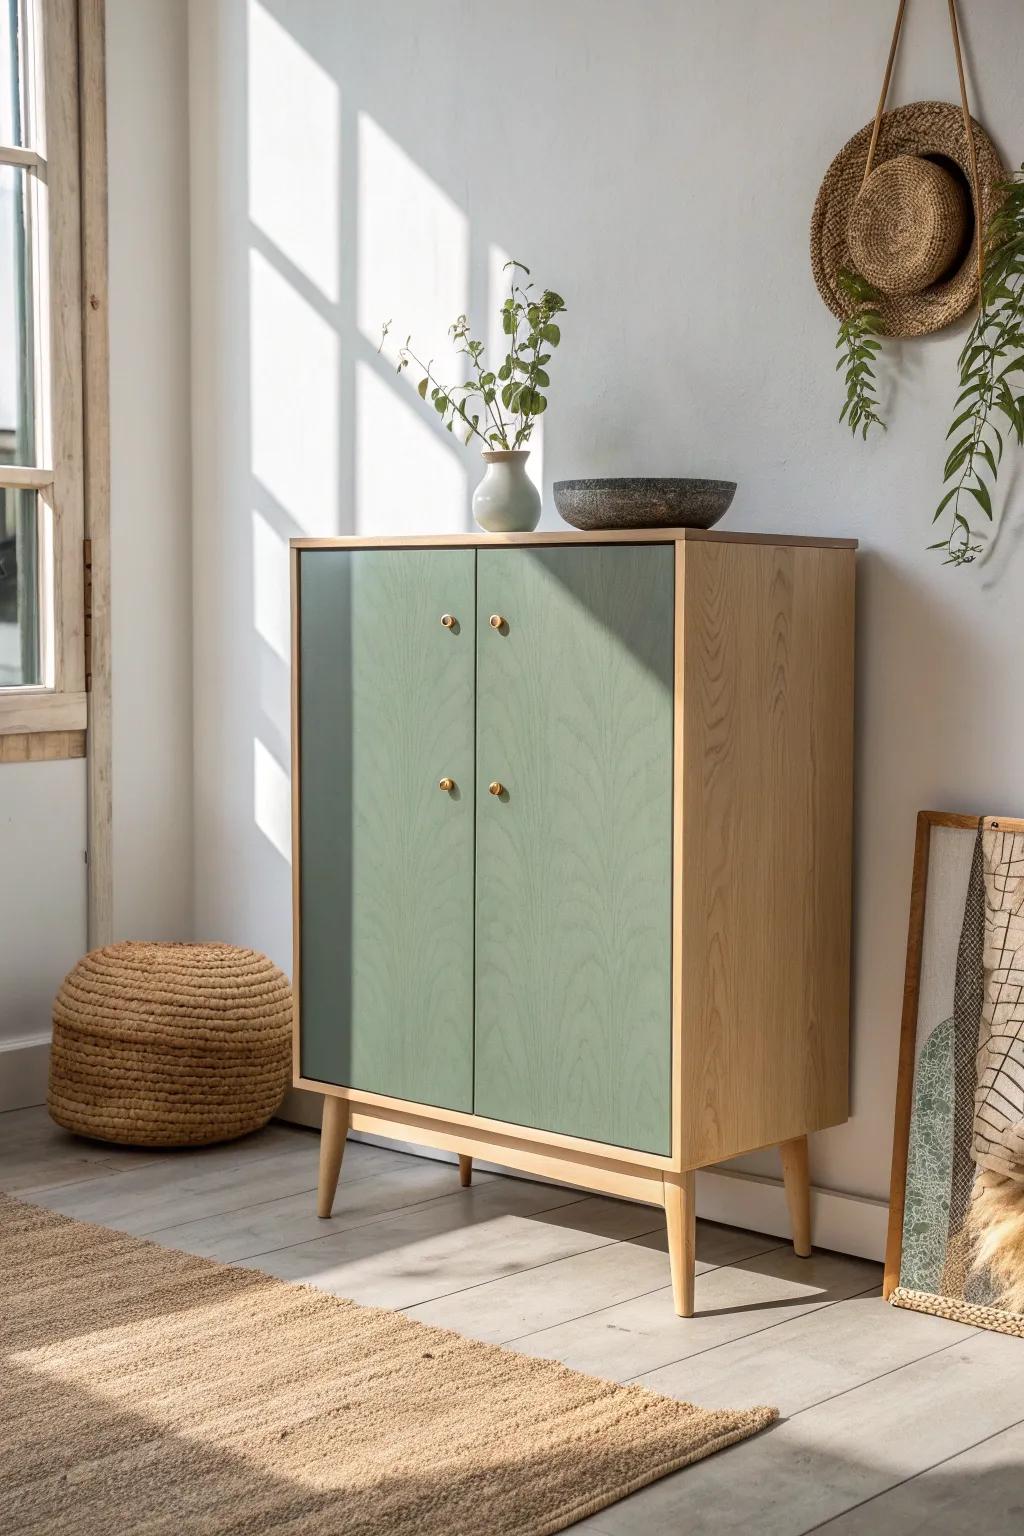
Try two-tone plywood cabinets by keeping uppers natural and painting the lowers for a grounded, farmhouse-meets-modern feel. I’ve done this with muted colors, and the plywood instantly looks more “designed” without being loud.
Useful items to consider:
- Matte Sage Green Cabinet Paint: Transform your lower cabinets with muted paint for that grounded, modern farmhouse contrast against natural wood.
- Gold or Brass Cabinet Knobs: Add small brass knobs to elevate the painted plywood fronts and creating a polished, cohesive finish.
- Clear Matte Wood Varnish: Protect your exposed plywood upper cabinets or frames while maintaining that beautiful, natural raw wood aesthetic.
Shadow-Line Toe Kicks
A recessed toe-kick under plywood base cabinets gives you that clean “floating” shadow line that looks custom. I started doing this after one client asked for a furniture vibe, and now it’s basically my signature detail.
Possibly handy products:
- Adjustable Cabinet Leveling Legs: Raise your plywood cabinets perfectly to create that recessed space needed for a sleek, floating shadow line effect.
- Brass Finger Pull Hardware: Complement your minimal shadow line toe kick with sleek brass pulls that enhance the custom, modern furniture aesthetic.
- Veneer Edge Banding Tape: Apply real wood veneer to exposed plywood edges on your toe kick for a seamless, professional finish.
Plywood Uppers Framed by Paint
I’ve had great results framing a run of plywood upper cabinets with a painted surround so the wood reads like art on the wall. The first time I tried it, the plywood looked even richer because the paint made it stand out on purpose.
A few choices to try:
- Matte Interior Wall Paint: Choose a muted interior paint color to create the perfect high-contrast frame for your natural wood cabinets.
- Clear Matte Wood Varnish: Protect your raw plywood doors and enhance the grain pattern without altering the natural light wood tone.
- Minimalist Brass Cabinet Hardware: Add subtle detail with simple brass hinges or pulls that complement light wood and painted surrounds.
Pegboard Plywood Island Side
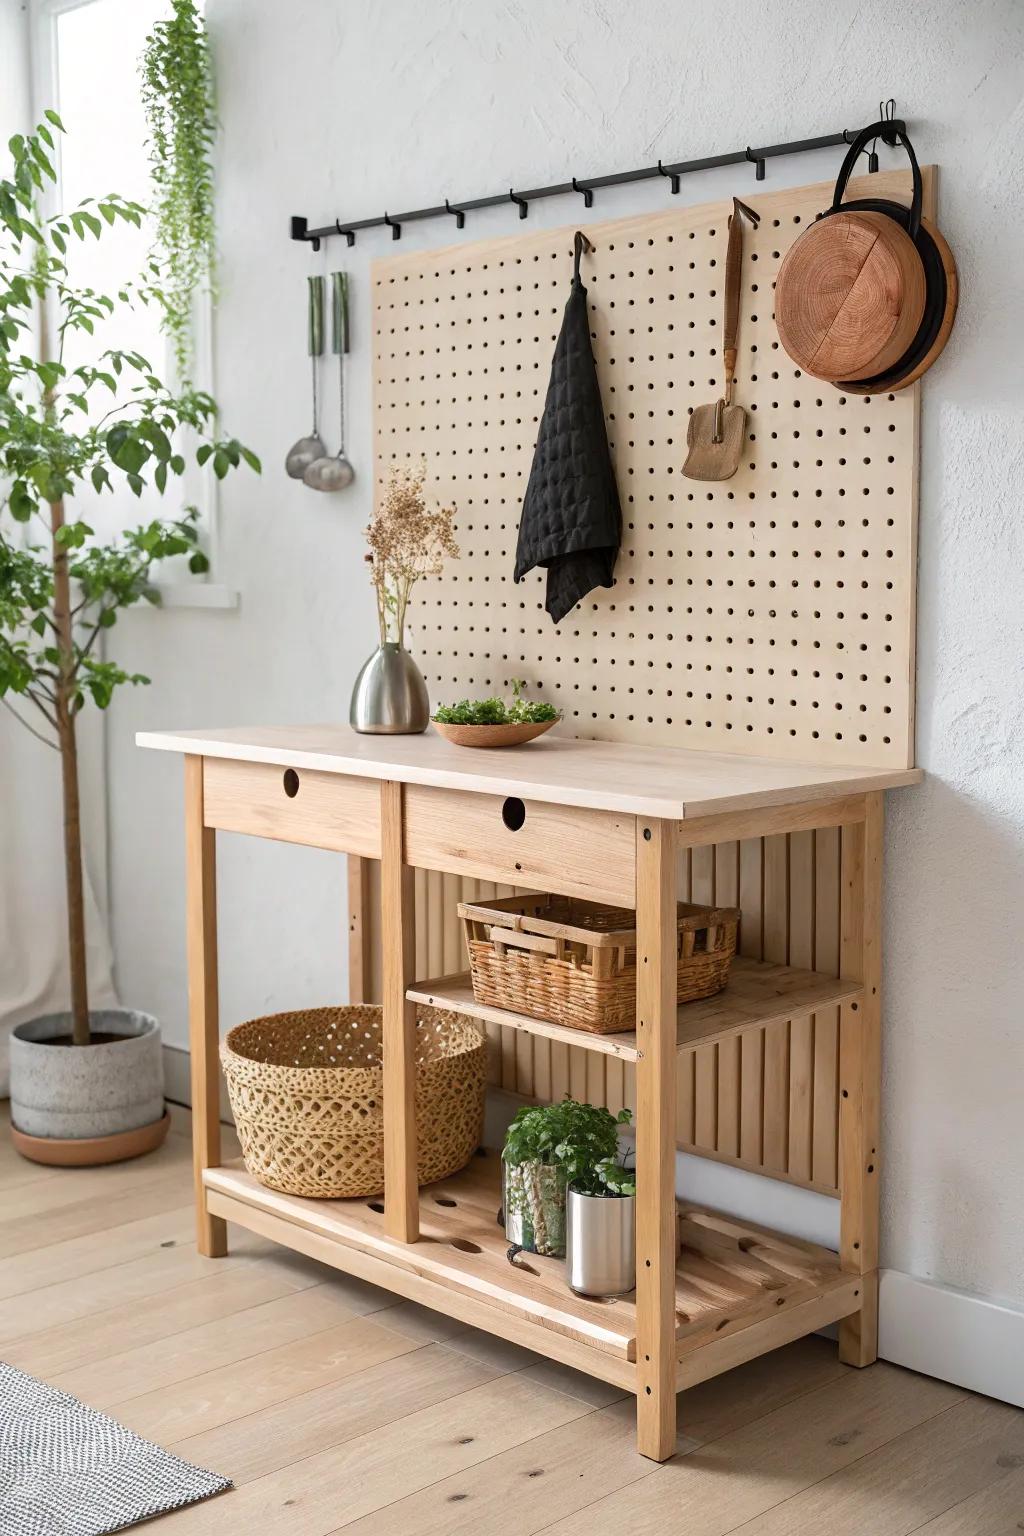
Adding a plywood pegboard panel to the side of a kitchen island is my favorite functional flex—spoons, pans, baskets, all right where you need them. I tried it in my own workshop kitchen setup, and it honestly changed how tidy I could keep the counters.
Possibly helpful picks:
- Wooden Pegboard Panel: Create valuable vertical storage on your island or wall with a customizable, sturdy wooden panel foundation.
- Pegboard Hook & Accessory Kit: Keep essential utensils within easy reach by organizing them neatly using varied hooks and functional brackets.
- Hanging Basket Organization: Store produce or loose kitchen items stylishly by hanging woven or wire baskets directly from your board.
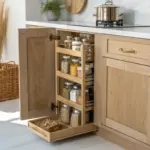
Plywood Drawer Dividers and Inserts
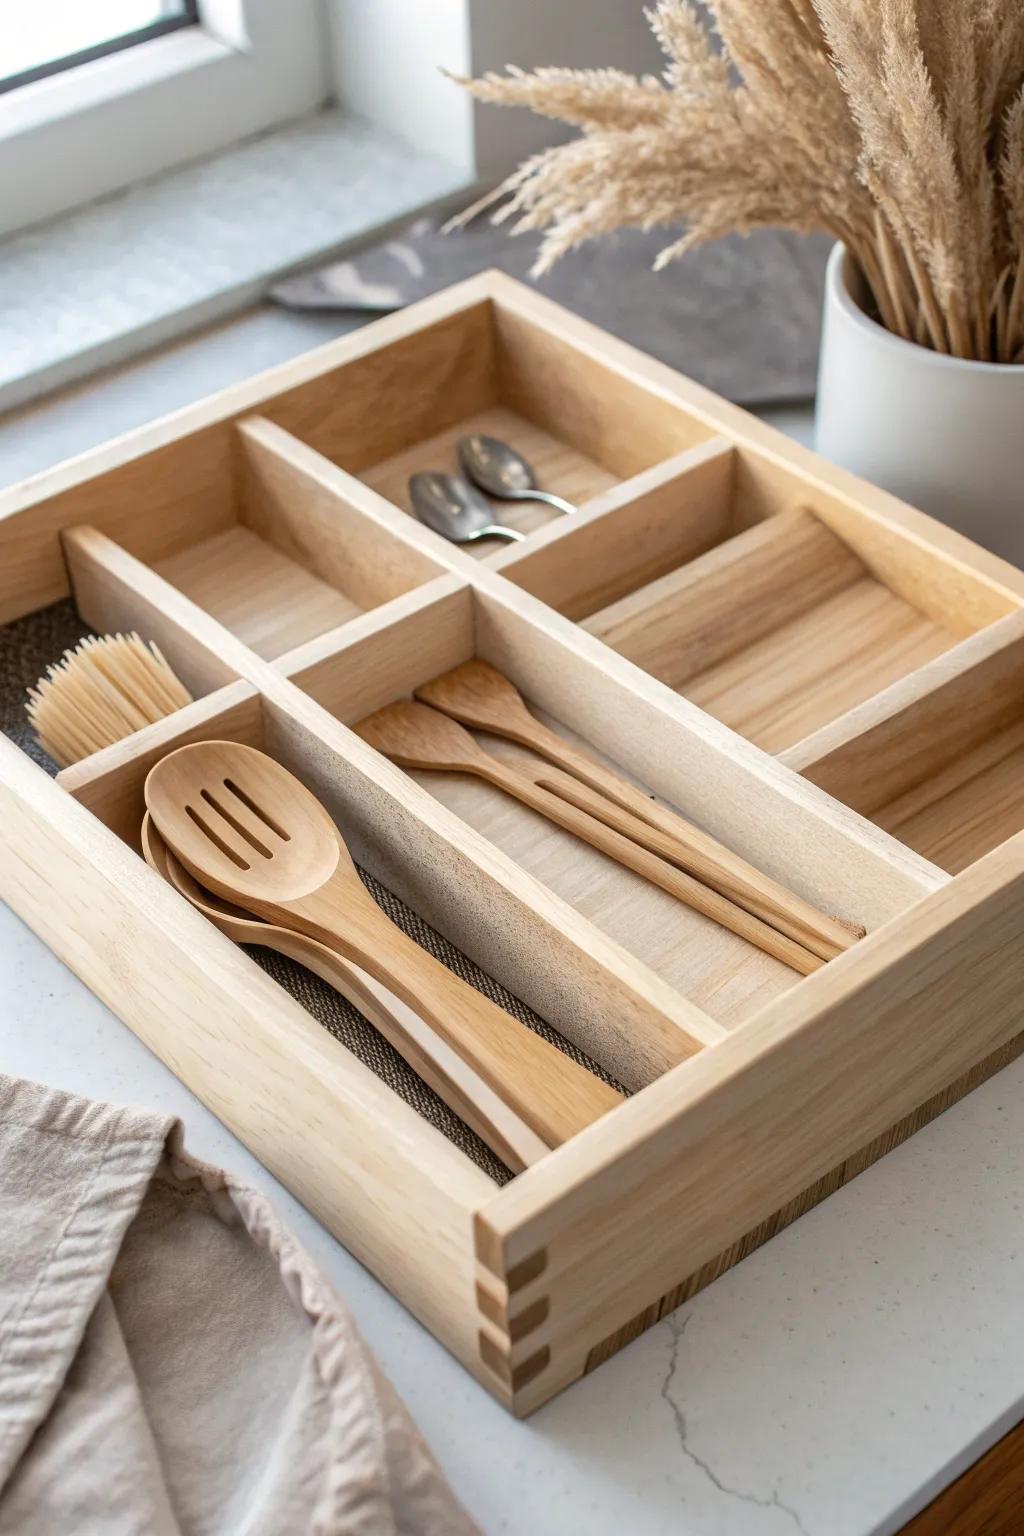
Even if you don’t redo the whole kitchen, plywood drawer organizers make everything feel upgraded fast. I batch-cut dividers from scrap ply all the time, and it’s wild how “custom kitchen” it feels once every utensil has a home.
A few relevant products:
- Bamboo or Wood Drawer Organizer Tray: Organize your utensils instantly with a sturdy wooden tray that mimics the custom plywood look effortlessly.
- Adjustable Drawer Dividers: Create custom sections in any drawer quickly using these spring-loaded dividers to separate your kitchen tools.
- Kitchen Drawer Liner Roll: Protect your new wooden inserts and keep utensils from sliding around with a non-slip, neutral drawer liner.
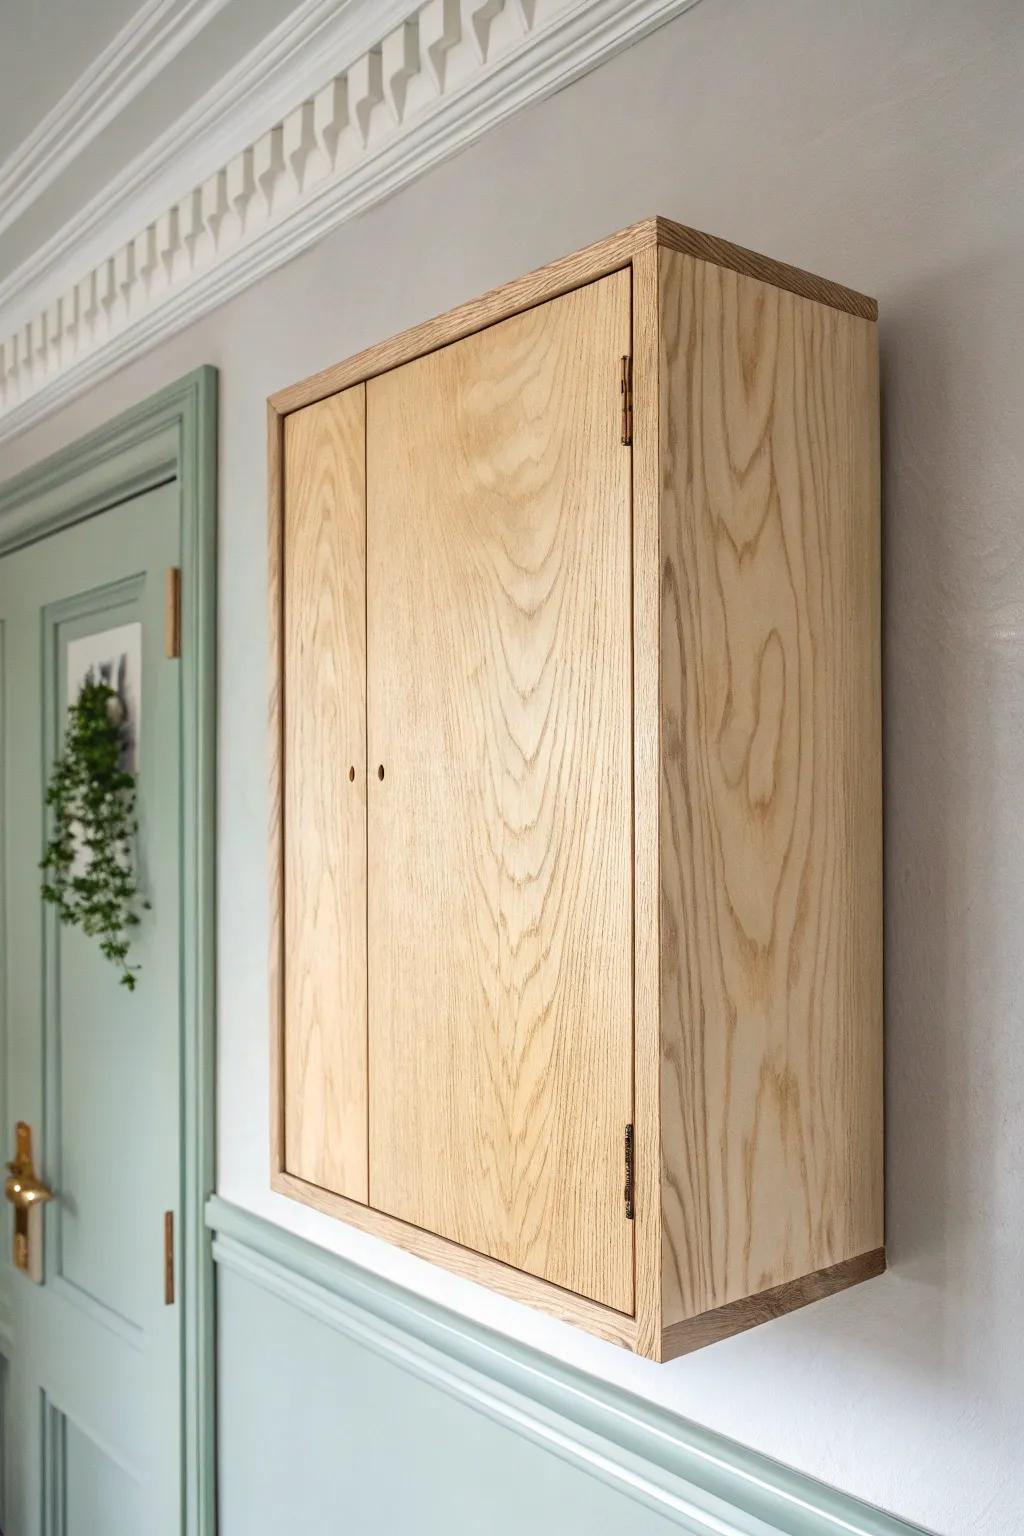
Plywood Appliance Garage
A plywood appliance garage (with a simple lift-up or sliding front) is my neat trick for hiding the daily clutter while keeping it accessible. I built one for a tiny kitchen, and it instantly gave us that calm, minimal countertop look.
Give these a look:
- Wooden Bread Box: Instantly hide counter clutter like snacks or small appliances with a stylish, warm wooden storage bin.
- Birch Plywood Sheets: Build your own custom appliance garage or matching kitchen accents using high-quality, durable birch plywood material.
- Cabinet Door Hinges: Ensure smooth operation for your DIY garage door with reliable, easy-to-install soft-close cabinet hardware.
Plywood Range Hood Cover

Wrapping the hood in a plywood range hood cover brings the wood tone up higher, which makes the whole kitchen feel more balanced. I’ve done a simple boxy shape and just sealed it well, and it looked like a designer feature for very little effort.
These products might help:
- Clear Wood Finish Sealer: Protect your custom hood from kitchen grease and moisture while enhancing the natural wood grain beautifully.
- Decorative Clavos / Nail Heads: Add a touch of rustic charm to the trim of your hood cover with these simple accents.
- Insert Range Hood Fan: Install a reliable ventilation unit inside your custom-built wooden shell to keep air fresh while cooking.
Sealed Plywood Backsplash Panels
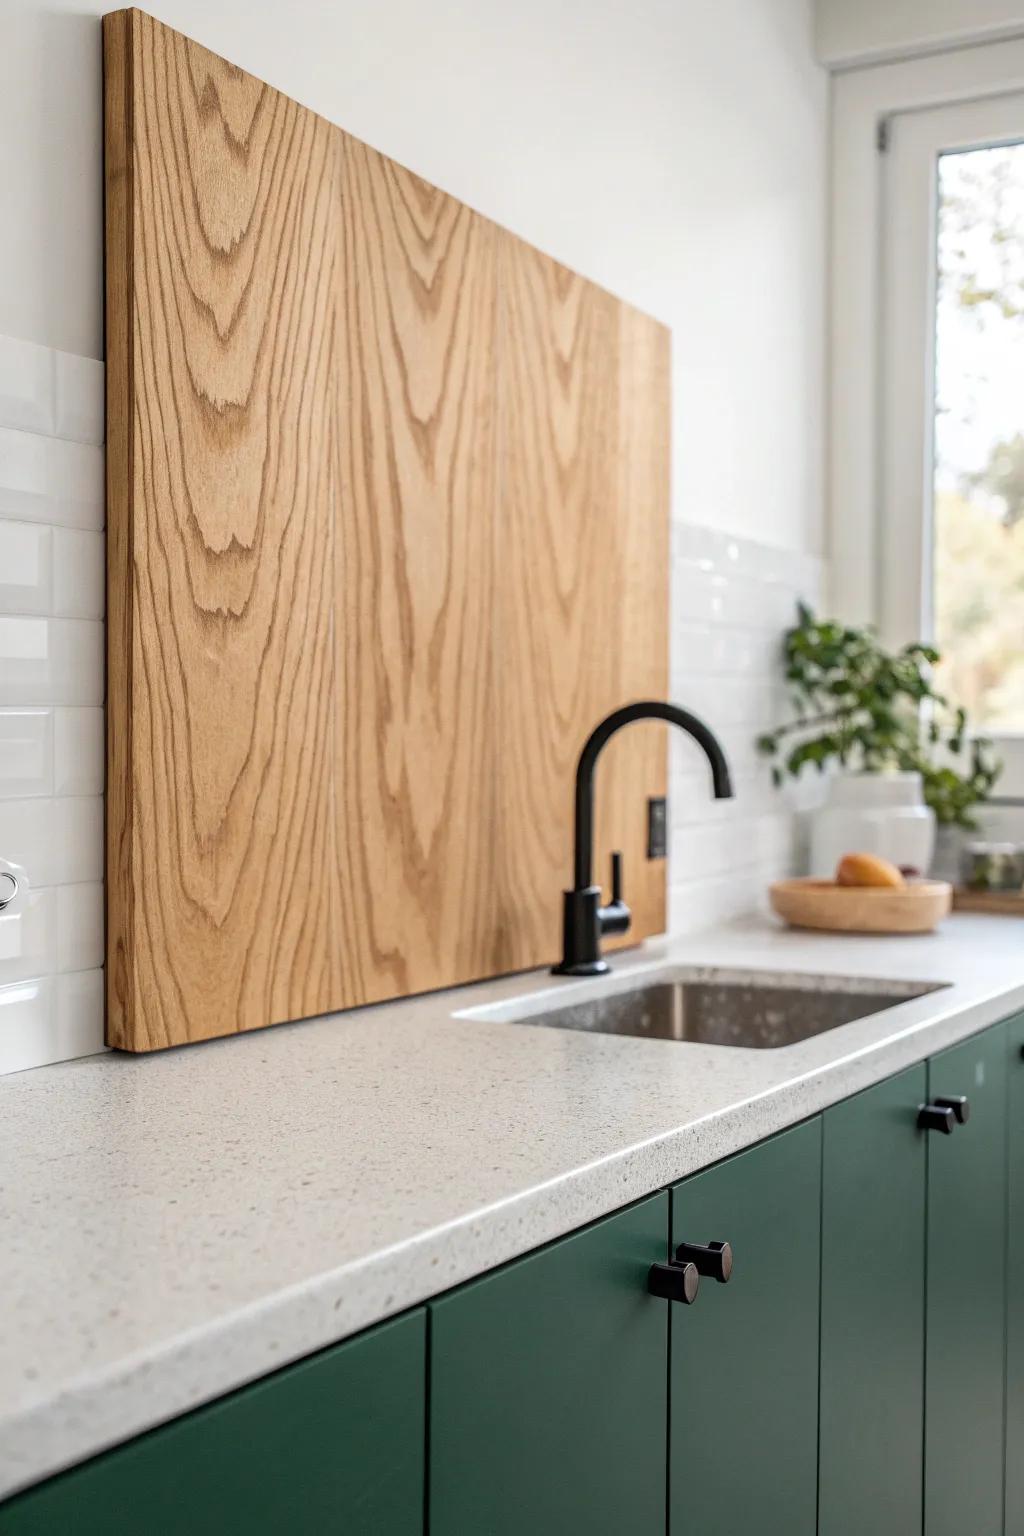
Yes, a plywood backsplash can work if you seal it properly and keep it away from direct splashes where possible. I tested this idea in a coffee station nook first, and it added so much warmth compared to tile that I started using it in more low-splash zones.
You might give these a try:
- Matte Polyurethane Sealer: Protect your wood panels from moisture and stains without altering the natural look by applying a durable matte sealer.
- Baltic Birch Plywood Sheets: Create a seamless, modern backdrop for your kitchen counter using high-quality, smooth-finished plywood sheets ready for installation.
- Clear Silicone Caulk: Ensure a watertight seal between your countertop and the wood panel to prevent water damage behind the backsplash.
Plywood Slat Wall for Herbs and Tools

For a real wow moment, I love building a plywood slat wall or rail panel in the kitchen to hang herb bundles, hooks, and small shelves like a functional art piece. I made one from offcuts as a weekend project, and it turned my plain wall into the most photographed spot in the room.
A few helpful options:
- Small Glass Mason Jars: Perfect for holding your fresh herb clippings, these small jars slide easily between slats for stylish display.
- Wood Slat Wall Panel Kit: Create a stunning backdrop quickly with pre-made slat panels that add instant texture and warmth to walls.
- Jute Twine for Hanging: Use natural jute twine to bundle drying herbs or hang tools, adding a rustic touch to your kitchen.


