
Oiled, waxed, or lacquered wood all protect and color the surface, but they change how your home feels, how the wood ages, and how much care you sign up for. When you understand what each finish actually does, you can choose with confidence—whether you’re styling a living room or refinishing a weekend thrift find.
At the most basic level, you’re choosing between finishes that soak in (oil, oil‑wax, wax) and finishes that sit on top (lacquer/varnish). That single distinction affects the look, feel, durability, and how you repair them later.
Quick overview table
| Finish | How it works | Look & feel | Protection | Typical use at home |
|---|---|---|---|---|
| Oil / oil‑wax | Penetrates the wood fibers and partly seals the surface. | Natural, warm, visible grain; low to satin sheen. | Moderate; good against liquids, average against dents. | Dining tables, counters, floors, everyday furniture. |
| Wax | Sits close to the surface, often over bare or oiled wood. | Soft, velvety, low sheen; very tactile. | Light; best on low‑wear pieces. | Vintage pieces, wall paneling, decorative objects. |
| Lacquer / varnish | Forms a hard film on top of the wood. | Smooth, from matte to high gloss; more “finished” look. | High; very good against scratches and moisture. | Cabinets, tables, kids’ furniture, high‑traffic pieces. |
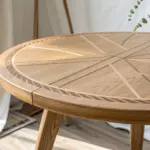
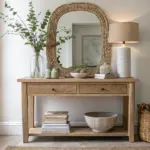
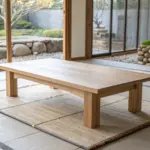
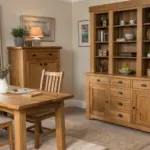
Oiled Wood: Natural, Repairable, Tactile

Oil (often with wax mixed in) sinks into the wood, bonding with the fibers and leaving a thin, breathable layer at the surface. The result is wood that still feels like wood—slightly warm, gently textured, and not plastic or glassy.
When I oil a dining table, the grain deepens and the color gains a quiet richness, but it never shouts; it just looks like the best version of that species—white oak becomes honeyed, walnut turns almost chocolate.
When oil is a great choice
- You love seeing grain and tiny natural imperfections rather than a perfectly flat surface.
- You want to be able to spot‑repair rings and scratches instead of refinishing a whole piece.
- You have solid wood that can be lightly sanded from time to time.
Styling ideas with oiled wood
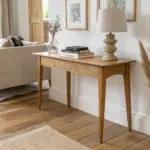
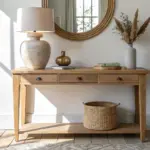
- Oiled oak dining table with linen runners and stoneware: the low sheen keeps everything calm and textural rather than glossy and formal.
- Wide oiled plank floors paired with simple painted drywall: the wood becomes a quiet anchor, especially in open‑plan American homes.
- A slim oiled walnut picture ledge instead of a bulky shelf: the finish makes the ledge disappear visually, so the artwork reads first.
How to Oil Wood (DIY‑Friendly)
You don’t need a workshop to refresh an oiled table or countertop—just patience and a bit of sanding. For most interiors, once‑a‑year maintenance is enough for heavily used pieces; less for shelves and accents.
Step‑by‑step: re‑oiling a table

- Prep and clean
- Clear the surface and wipe with a slightly damp cloth to remove crumbs and dust.
-
If there’s built‑up grime or old oil, use mineral spirits (or a manufacturer‑recommended cleaner) with fine steel wool, then let dry fully.
-
Sand lightly (or more, if needed)
- For a simple refresh, sand with fine 220‑grit following the grain to smooth micro scratches.
-
For deep stains or damage, start around 150–180 grit and work up to 220–400, being VERY gentle on veneer.
-
Apply the oil
- Pour a small amount directly on the wood or onto a lint‑free cloth.
- Work it in with circular motions, then finish by wiping along the grain.
-
Allow the surface to stay “wet” with oil for about 20–30 minutes so the wood can drink what it needs.
-
Wipe off the excess
- Buff with a clean cloth until there is no oily film left; the surface should feel almost dry to the touch.
-
Any oil left sitting on top will cure badly and stay sticky.
-
Let it cure
- Most oils harden over 24 hours; some oil‑wax systems may need longer.
- Avoid placing heavy objects or covering the surface while it cures.
Everyday care for oiled wood
- Wipe spills quickly; standing water can leave marks.
- Use felt pads under lamps and decor to prevent polished “rings” in the finish.
- Refresh high‑wear zones (like the center of a dining table) without stripping the entire piece—just sand that area softly and re‑oil.

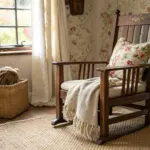
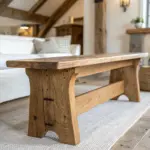
Waxed Wood: Soft Glow for Gentle Use

Wax creates a thin, almost velvety layer that can be used alone on low‑wear pieces or on top of oil for extra softness and subtle sheen. It keeps the pores of the wood more open and flexible, which is lovely for texture but less protective against heavy wear.
Waxed surfaces feel particularly at home in romantic, vintage‑leaning, or boho interiors—spaces where patina is welcome and perfection isn’t the point.
Where wax works best
- Decorative wall paneling in a bedroom or study where you want light to skim and glow rather than bounce.
- Vintage dressers or sideboards that are more about character than daily abuse.
- Small accessories: carved bowls, statement picture frames, mantle pieces.
Pros
- Beautifully enhances texture and subtle color variations.
- Easy to refresh with another light coat and buff.
Cons
- Less resistant to heat, scratching, and liquids than lacquer.
- Needs more frequent touch‑ups in active households.
Simple waxing process
- Lightly sand or scuff the wood with very fine paper or a synthetic pad.
- Apply a thin, even coat of wax with a soft cloth in circular motions, then finish along the grain.
- Allow it to haze, then buff with a clean cloth or brush until you see a gentle, even glow.
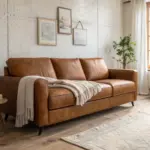
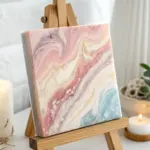
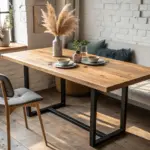
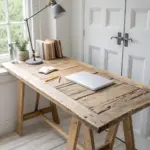
Lacquered Wood: Durable and Polished

Lacquer (and similar film‑forming finishes) builds a hard shell on top of the wood, creating one of the most durable finishes for household use. It can be matte, satin, or high gloss, but will always feel more “finished” and sealed than oil or wax.
In design terms, lacquered pieces are ideal when you want reflection, crisp lines, or a more modern mood—think smooth cabinet doors, a sleek console in the entryway, or nightstands next to a water glass and a book stack.
When lacquer makes sense
- High‑traffic or family‑heavy spaces: kids’ desks, coffee tables, dining tables in busy homes.
- Kitchens and bathrooms, where moisture, cleaning products, and constant contact are a given.
- Any time you want strong color or deep, piano‑like gloss.
Maintenance realities
- Day‑to‑day: wipe with a soft cloth and mild soap solution; avoid aggressive chemicals and abrasives.
- Small scratches can sometimes be polished or buffed out; serious damage usually requires sanding and recoating a larger area or the entire surface.
How to Lacquer Furniture at Home
Spraying lacquer at home takes a bit more setup, but the steps themselves are simple if you go slow and follow instructions. Always work in a very well‑ventilated area and follow the safety notes on your specific product.
Step‑by‑step: basic lacquer process
- Prepare the surface
- Sand to a smooth 150–220 grit, always along the grain.
- Remove dust thoroughly with a vacuum and tack cloth.
-
If recommended, apply a lacquer‑compatible primer or sanding sealer and sand lightly when dry.
-
First coats (light and even)
- If using spray: keep the nozzle about 5–6 inches from the surface and move in steady, overlapping passes.
- Start spraying just before the piece and stop just after, so you avoid “blobs” at the edges.
-
Apply 2–3 light coats instead of one heavy one to avoid drips and orange‑peel texture.
-
Drying and sanding between coats
-
Let each coat dry until it is no longer tacky—often around 30 minutes, depending on product and conditions.
-
Lightly sand with very fine grit (320–400 or higher) to knock down dust nibs.
-
Final coat
-
Apply a final light, even coat for a uniform sheen.
- Allow the piece to cure fully before heavy use; this can take several days even if it feels dry on the surface.
Matching Finish to Lifestyle and Room

In practice, your choice is less about “which is objectively best” and more about what you want to feel and maintain in a specific room. When planning a space, it helps to think in zones: where do you want softness, where do you need resilience, and where can patina be a feature instead of a flaw?
Room‑by‑room suggestions
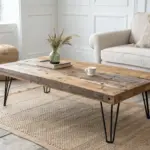
- Living room
- Oiled coffee table and side tables for a relaxed, hand‑touched feel.
- Lacquered media cabinet fronts to bounce a bit of light and resist fingerprints from remotes and consoles.
-
Waxed wall paneling or beams if you want a cozy, cocooning effect without too much shine.
-
Kitchen
- Hardwax‑oiled butcher‑block counters you can sand and refresh as needed.
-
Lacquered or varnished cabinet doors for easy wipe‑downs and durability.
-
Bedroom
- Oiled or waxed headboard and side tables for a soft, tactile atmosphere.
-
Lacquered closet doors in a matte finish to keep it calm but practical.
-
Kids’ rooms & entryways
- Lean heavily on lacquer or similar film finishes for furniture and wall hooks; they’re easier to clean and more forgiving of rough use.

Simple Decision Guide
If you like having a clear rule of thumb, this is the one that tends to work in American homes that juggle style with real‑life use.
-
Choose oil / oil‑wax if you:
-
Love natural, hand‑touched surfaces.
-
Are willing to do occasional light sanding and re‑oiling.
-
Choose wax if you:
-
Have low‑wear, character pieces or wall paneling.
-
Enjoy the idea of a soft, evolving patina.
-
Choose lacquer if you:
-
Need maximum durability and easy cleaning.
- Prefer a sleek, sealed, or high‑color look.
When these finishes are used intentionally, they become part of the visual language of your home: the matte calm of an oiled dining table, the gentle shimmer of waxed paneling, the precise reflection of lacquered doors—all quietly shaping how you live with wood every day.


