
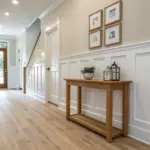
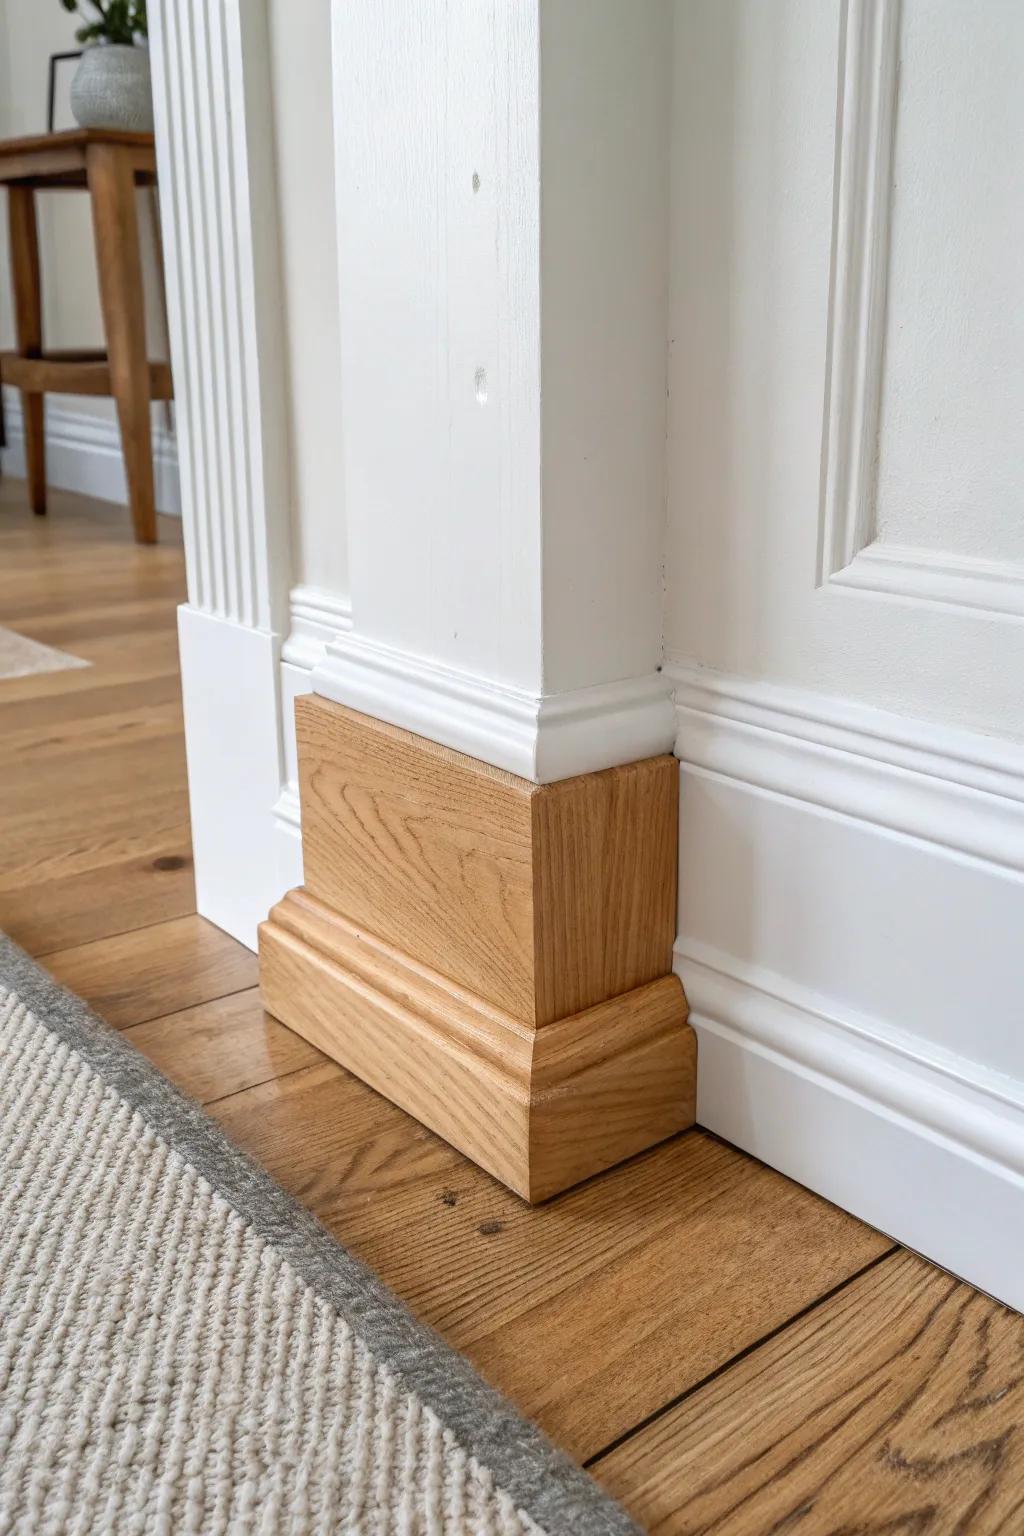
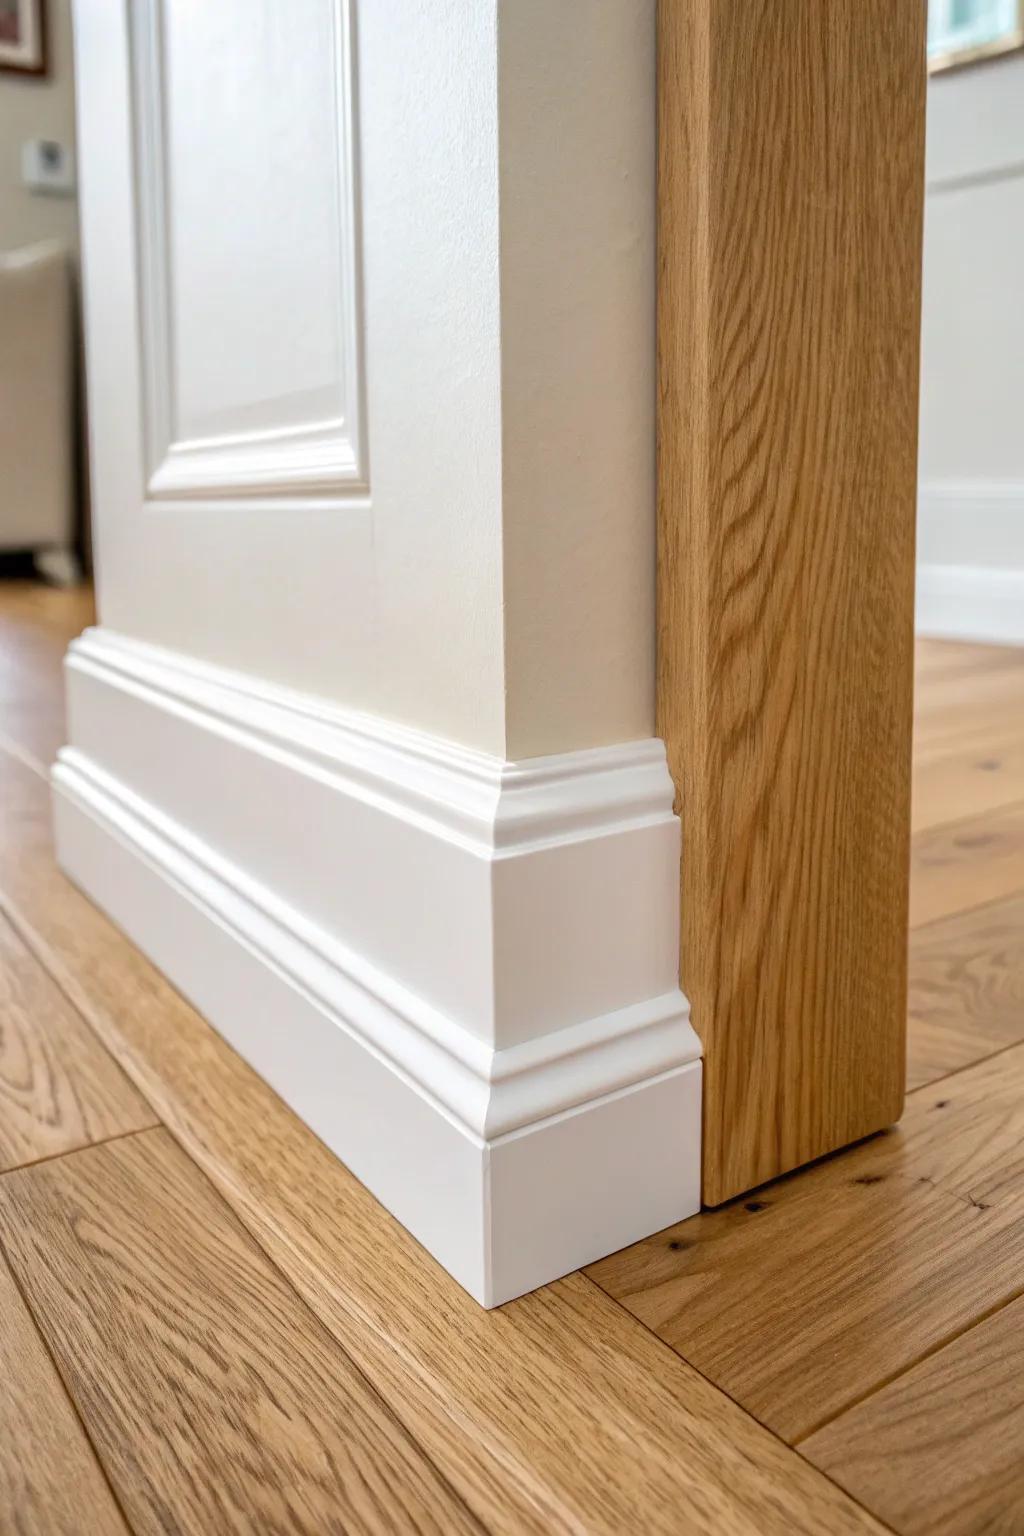
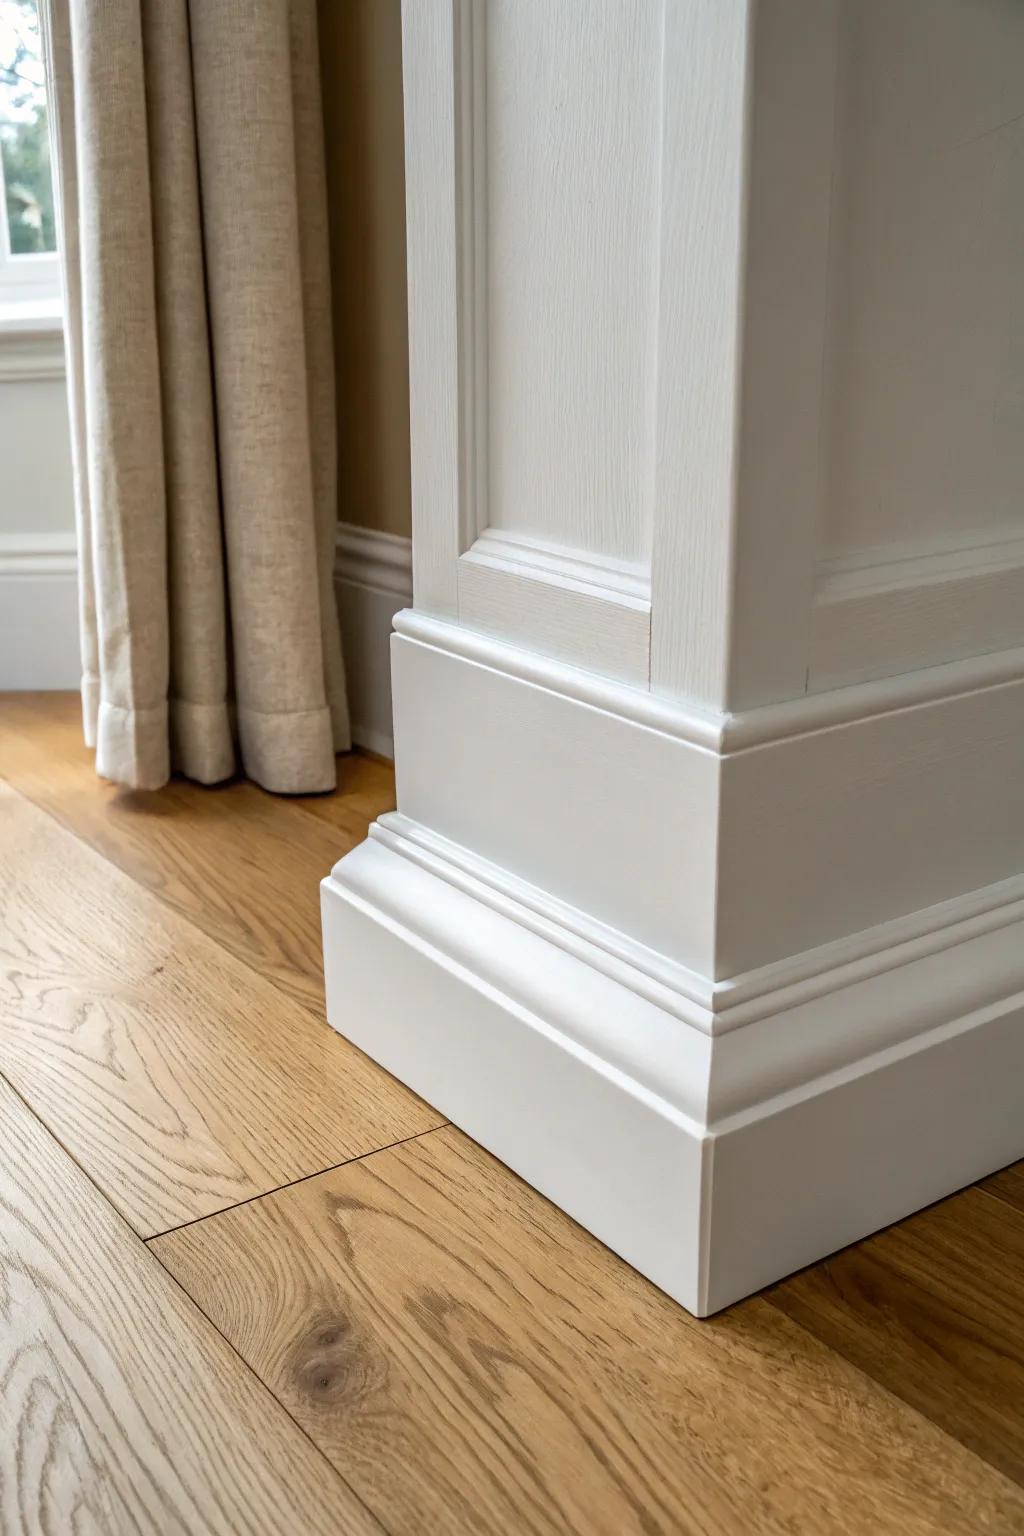
Plinth blocks are that little detail at the bottom of your door casing that makes your trim look finished instead of fussy. I use them all the time to create a clean, intentional transition between baseboard molding and door casing—especially when the house is a little wonky.
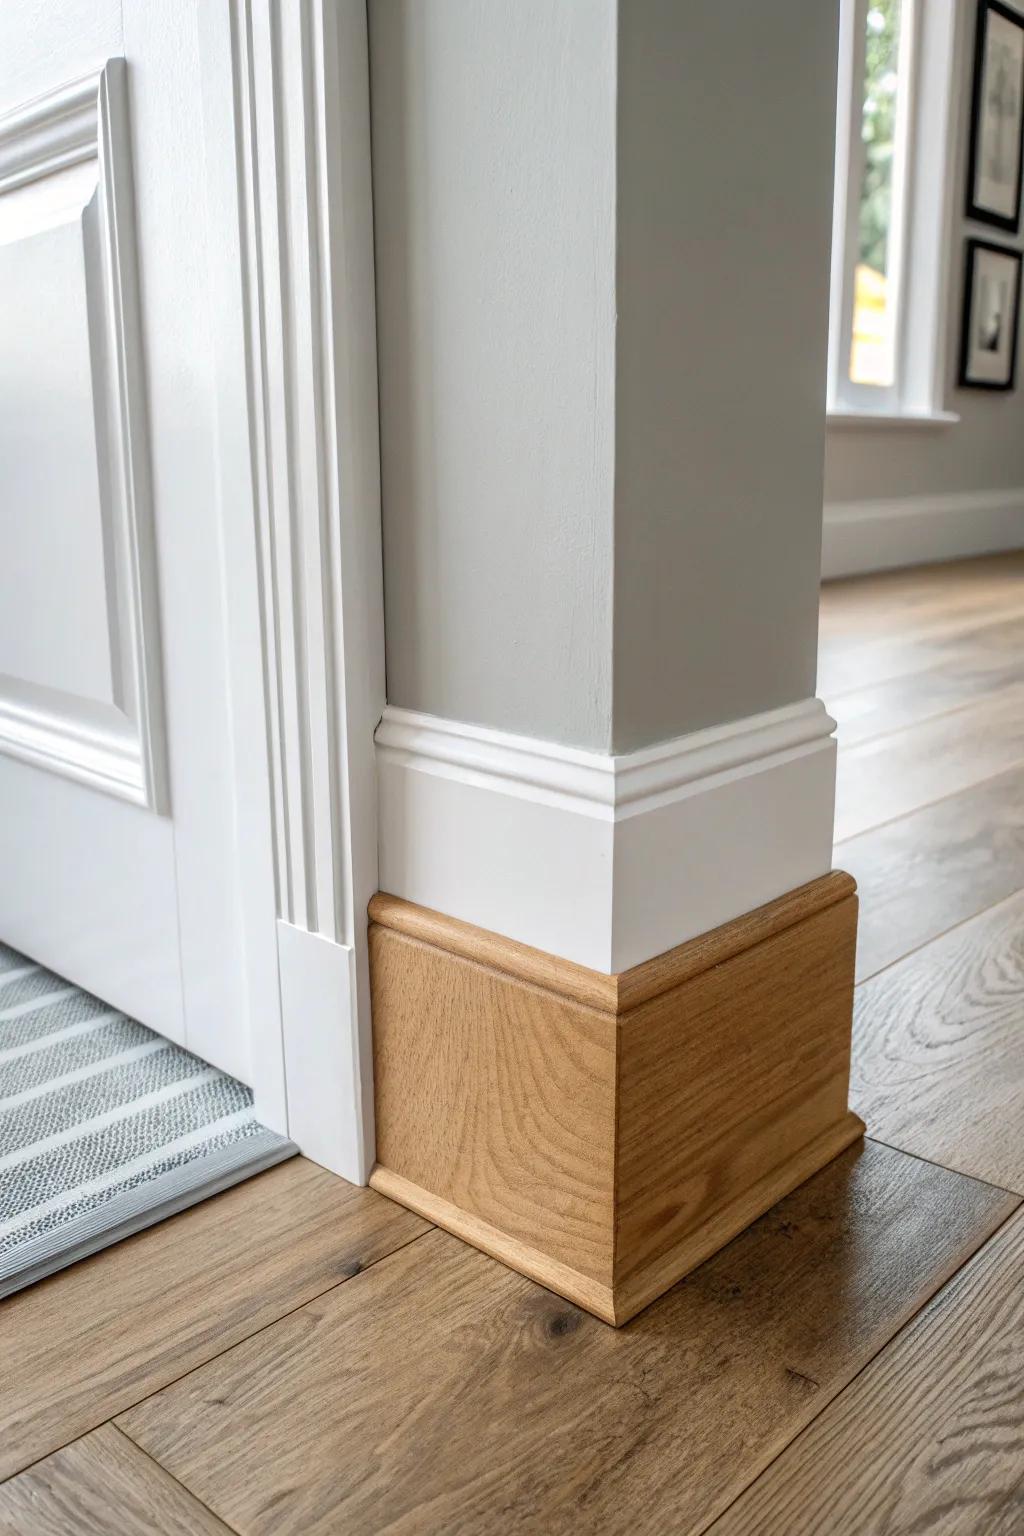
Stained Wood Plinth Blocks on Painted Trim
A stained wood plinth block against painted casing is such a subtle contrast, like adding a tiny piece of furniture at the base of the door. I tried this with warm-toned reclaimed wood and it pulled the whole floor color into the trim in the best way.
A few things you might like:
- Unfinished Oak Plinth Blocks: Select solid, unfinished wood blocks that allow you to stain them perfectly to match your existing hardwood flooring.
- Wood Stain in Warm Tones: Apply a high-quality wood stain to your raw plinth blocks to create that beautiful, furniture-like contrast against white trim.
- Satin Polyurethane Finish: Protect your newly stained plinth blocks from scuffs and moisture while adding a professional, subtle sheen to the wood.


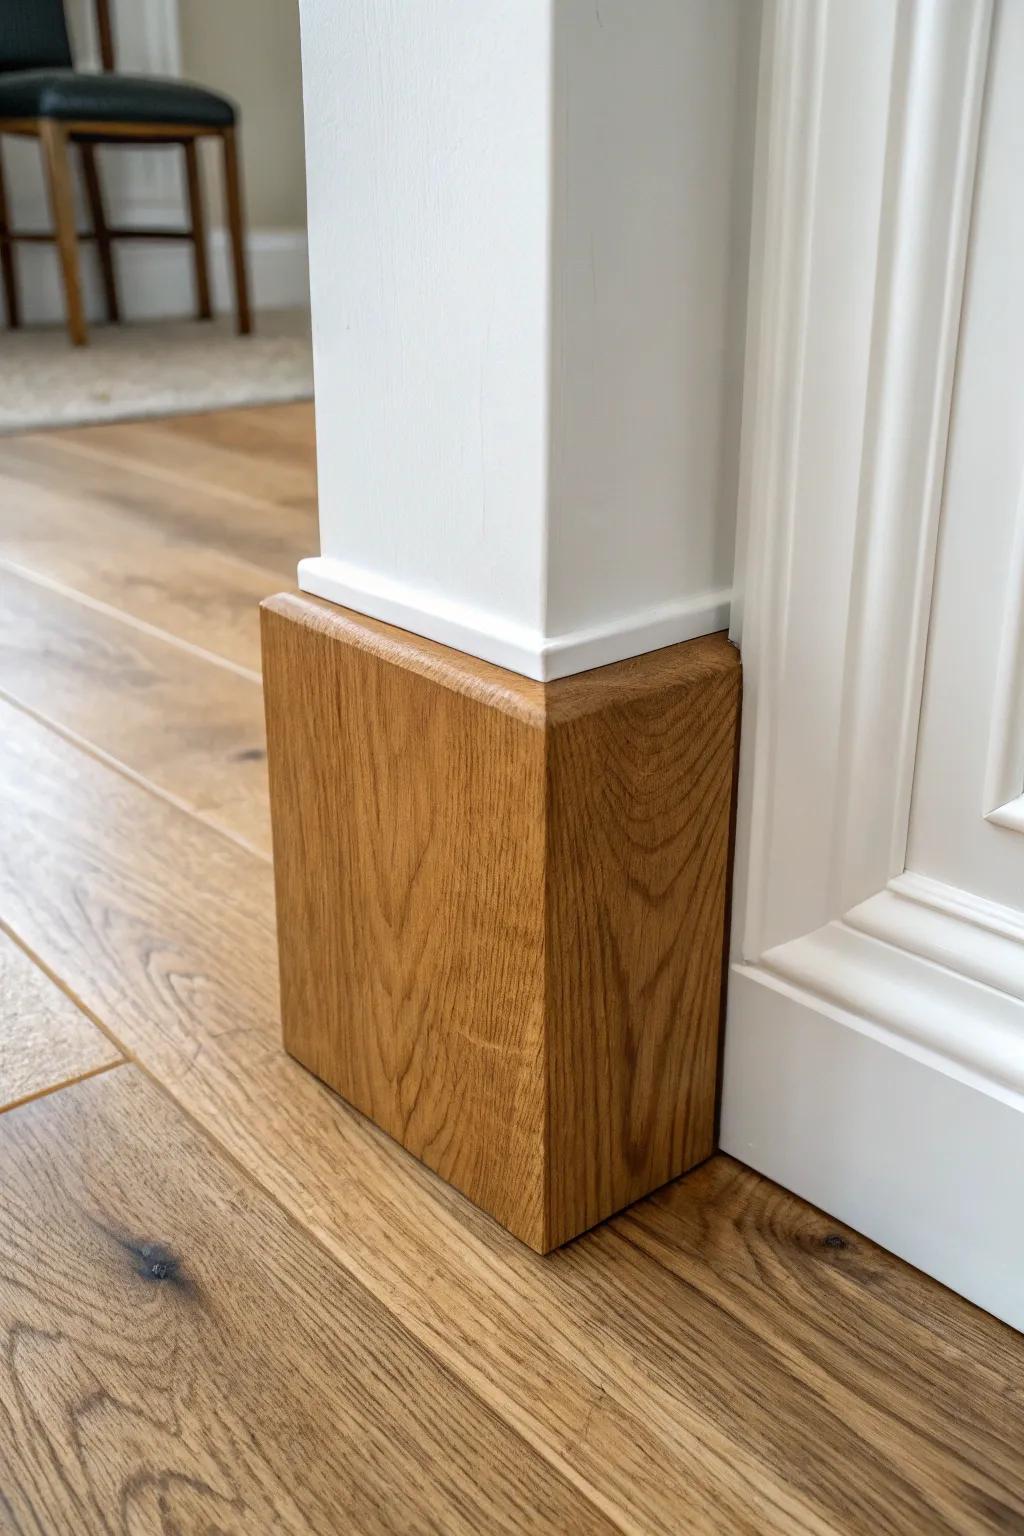
Extra-Thick Plinth Blocks for Gaps
When flooring changes leave that awkward space at the bottom of the casing, I reach for thicker plinth blocks to bridge the gap cleanly. I’ve saved so many old casings this way instead of re-trimming the whole doorway.
These products might help:
- Unfinished Solid Hardwood Plinth Blocks: Choose these solid wood blocks to bridge flooring gaps; stain or paint them to match your existing trim perfectly.
- Paint-Grade MDF Plinth Block Sets: Instantly upgrade your door casing with these smooth, ready-to-paint blocks that easily cover uneven floor transitions.
- Wood Filler for Trim Gaps: Ensure a seamless professional finish by filling any remaining small gaps between your new block and the wall.

Plinth Blocks With Baseboard Returns
I love letting the baseboard return die into the plinth block so the end grain disappears and everything looks crisp. In my workshop projects, this is the fastest way to make baseboard-to-casing joints look pro.
Check these products out:
- General Purpose Miter Saw: Achieve precise 45-degree cuts essential for creating those crisp, professional-looking baseboard returns and tight corners.
- Wood Glue & CA Glue Kit: Secure your small return pieces instantly with a cyanoacrylate adhesive and activator for seamless, gap-free joints.
- Unfinished Oak Baseboard Molding: Match the visual style shown here by selecting high-quality oak molding ready for your custom stain finish.

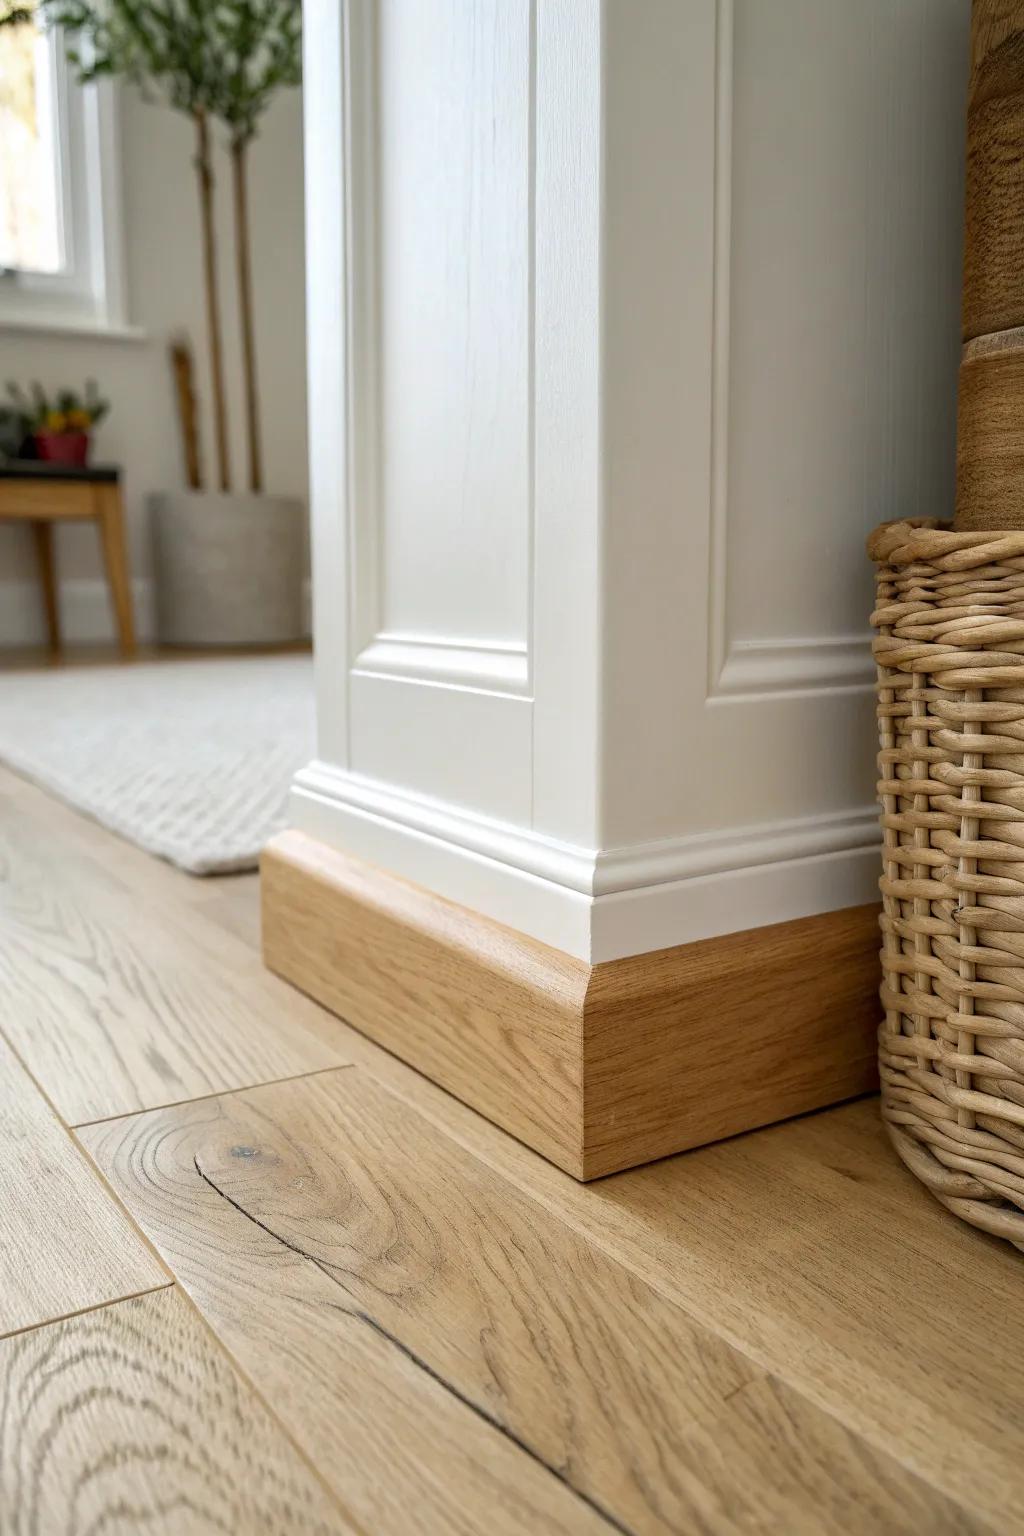
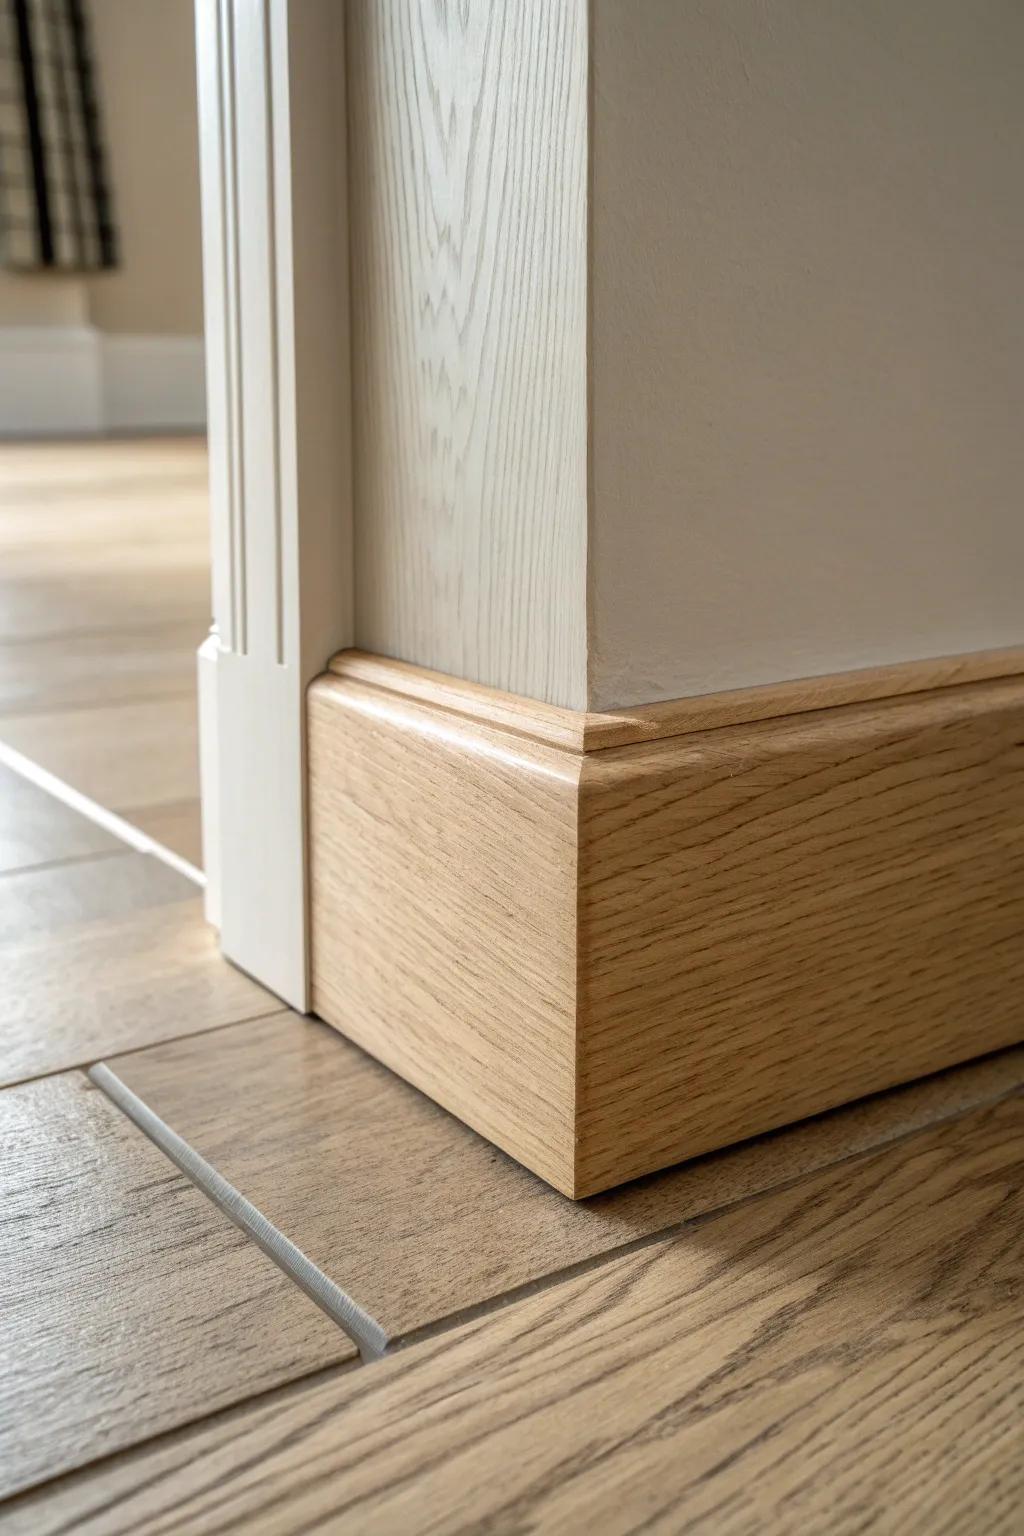
Plinth Blocks That Match Casing Width

For a seamless look, I size the plinth block width to be just a hair wider than the door casing so it frames the trim like a little pedestal. I did this in a client’s cottage remodel and the doors suddenly felt taller and sturdier.
Explore these options:
- Solid Wood Plinth Blocks: Upgrade your door trim instantly by installing these solid wood blocks for a classic, finished architectural appearance.
- Digital Caliper Measuring Tool: Ensure your plinth block is perfectly sized slightly wider than your casing with precise digital measurements.
- Wood Stain and Finish: Match your new plinth blocks to your existing flooring seamlessly with high-quality wood stain and finish.
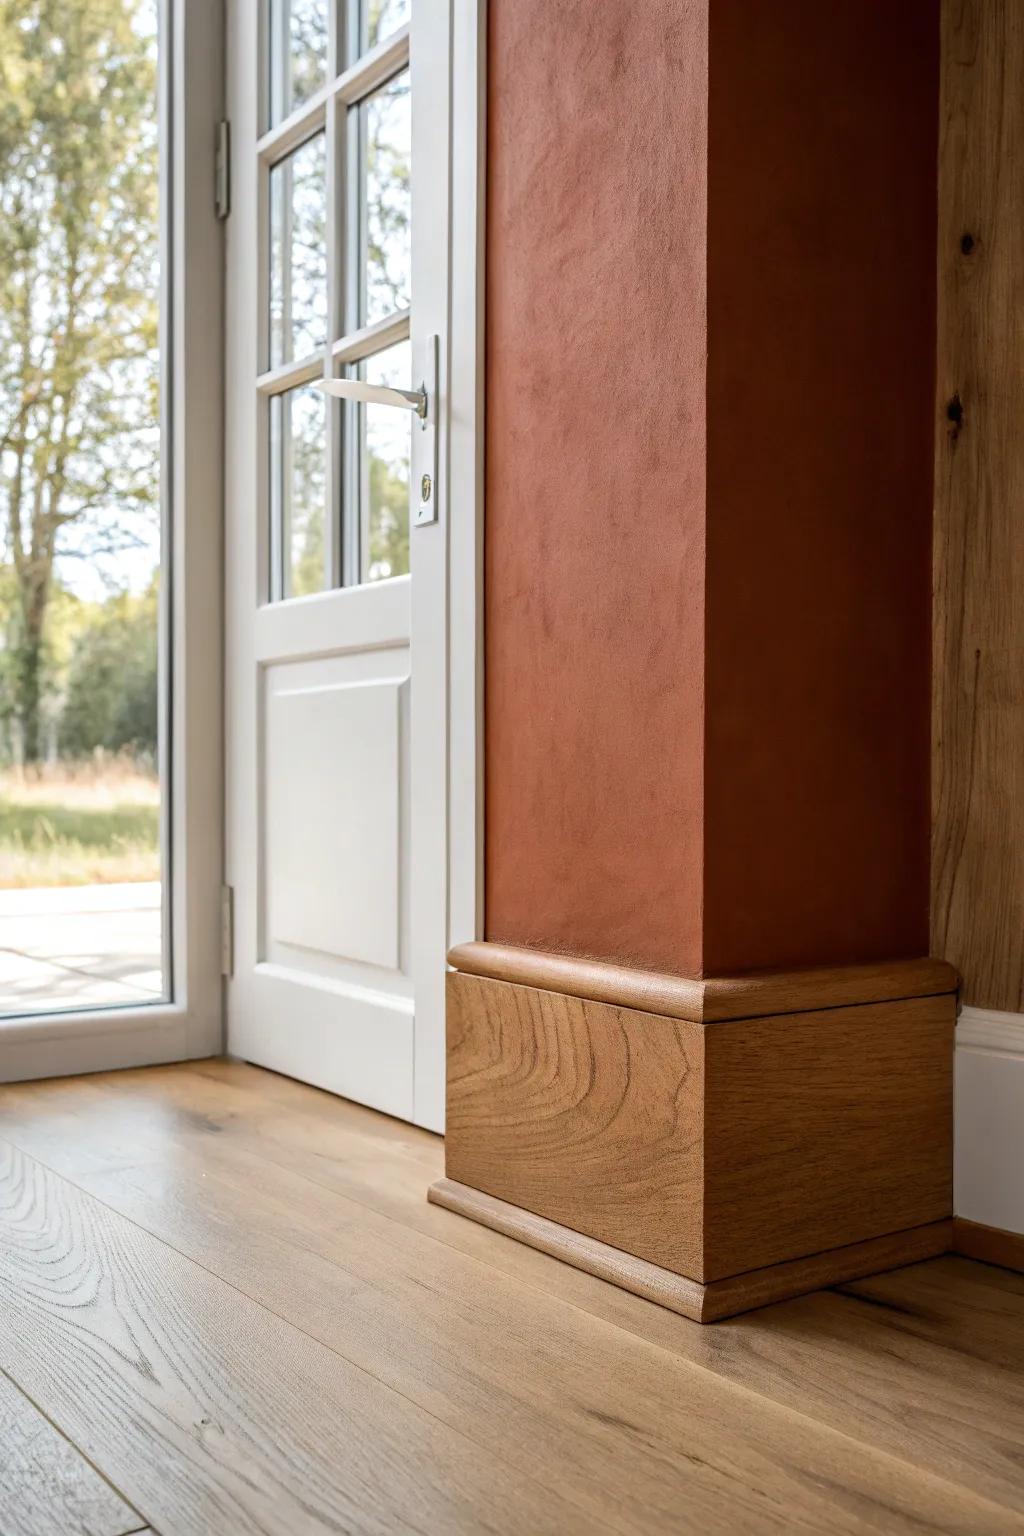
Oversized Plinth Blocks for Old Homes
In older houses with wavy walls, I purposely go bigger with plinth blocks to hide uneven reveals and imperfect corners. I’ve watched these blocks turn a frustrating trim day into an easy win more times than I can count.
Maybe worth checking out:
- Solid Oak Plinth Block Molding: Use these durable solid wood blocks to create a substantial base that easily masks uneven wall corners.
- Contour Gauge Profile Tool: Replicate irregular wall shapes accurately to cut your oversized plinth blocks for a perfectly tight fit.
- Brad Nailer Kit: Secure your new plinth blocks firmly into place without splitting the wood or leaving large holes.
Plinth Blocks With Wrap-Around Corners
If a doorway sits close to an outside corner, I’ll wrap the baseboard around and let it meet a corner plinth block so the transition stays clean. I used this trick in my own place and it completely solved that “crammed corner” trim look.
Some ideas to consider:
- Primed Pine or MDF Plinth Blocks: Choose classic primed plinth blocks to create a substantial, elegant transition between your baseboards and door casings.
- Tall White Baseboard Moulding: Select tall, architectural baseboard trim to wrap around corners and seamlessly butt against your new plinth blocks.
- Miter Saw for Precise Corner Cuts: Ensure crisp, professional-looking corners on your wrap-around baseboards by using a reliable miter saw for accurate cuts.

Shaker-Style Flat Plinth Blocks
For modern farmhouse or minimalist spaces, I keep plinth blocks dead flat with clean edges and tight caulk lines. I’ve paired these with simple square trim, and the whole doorway looks calm and tidy.
Possibly helpful picks:
- Primed MDF Plinth Blocks: Create a smooth, paint-ready foundation for your trim work with these essential installation blocks.
- Paintable White Wood Caulk: Achieve seamless transitions and clean edges by sealing gaps between blocks and molding effectively.
- High-Density Foam Mini Paint Roller: Ensure a flawless, brush-mark-free finish on your flat trim surfaces with this specialized tool.
Decorative Carved Plinth Blocks
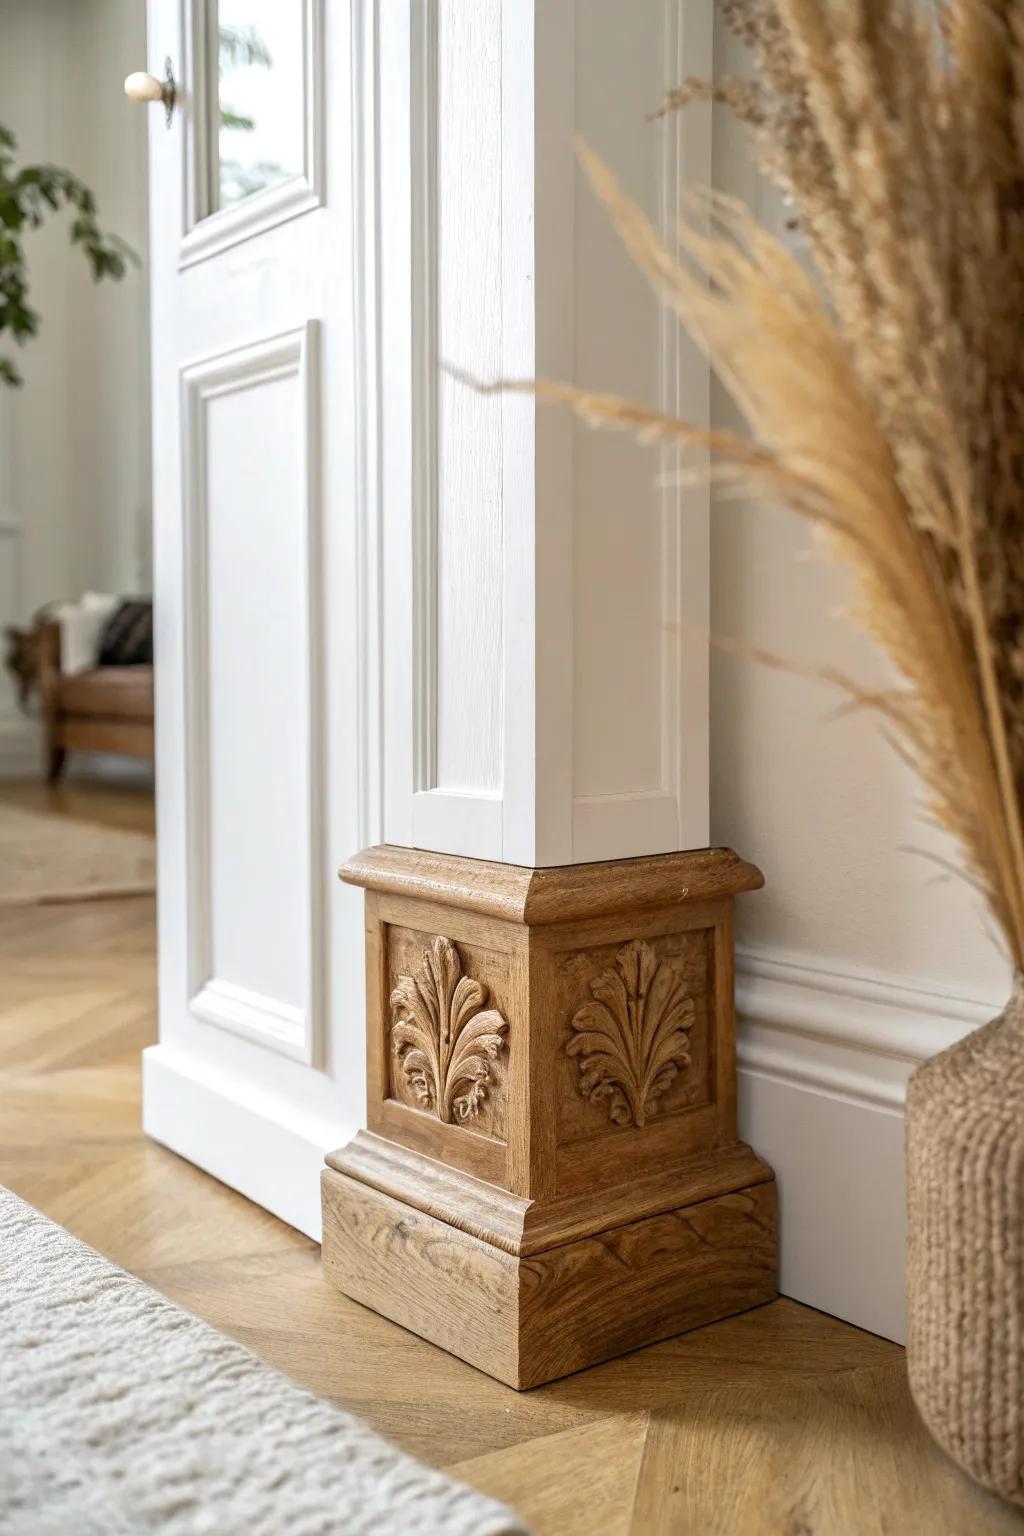
For a little vintage drama, try carved plinth blocks with a recessed center detail so the doorway feels more ornate. I installed a pair on a linen closet door once and it weirdly became one of my favorite trim moments in the house.
Some handy options:
- Ornate Wood Plinth Blocks: Add architectural interest to your doorways by installing these decorative carved blocks at the column base.
- Wooden Floral Appliques: Customize plain plinth blocks yourself by adhering these detailed wood carvings into recessed panel centers.
- Unfinished Hardwood Rosettes: Enhance your door casings with these classic corner blocks, ready for staining or painting to match.
Two-Tone Painted Plinth Blocks
Painting plinth blocks one shade darker than your casing can make the whole doorway feel intentionally framed. I tested this in my studio—same trim style, just a two-tone shift—and the contrast made the trim transition pop beautifully.
Consider these options:
- Solid Wood Plinth Blocks: Upgrade your doorways with stainable or paintable solid wood blocks to create a distinct, substantial foundation.
- High-Quality Paint Brush Set: Achieve crisp lines and smooth coverage when applying your contrasting paint colors for a professional finish.
- Painters Tape for Precision: Ensure perfectly sharp transitions between your casing and plinth block colors without messy bleed-through or mistakes.
Plinth Blocks With Inlaid Wood Strips
For a real wow factor, I’ll inlay a thin strip of contrasting wood into the face of a plinth block like a tiny piece of fine furniture. I’ve done walnut-on-oak, and people always crouch down to look because they can’t figure out why it feels so special.
Give these a look:
- Wood Veneer Strips (Variety Pack): Add elegant detail to your existing trim by applying thin, contrasting wood veneer strips for a custom inlay look.
- Chisel Set for Woodworking: Carve precise grooves into your plinth blocks to perfectly fit your contrasting wood inlays with a sharp chisel set.
- Strong Wood Glue: Ensure your delicate inlay strips stay permanently attached to the base moulding with high-quality, professional-grade wood glue.
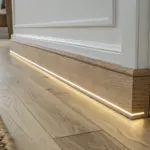
Hidden LED Glow Plinth Blocks
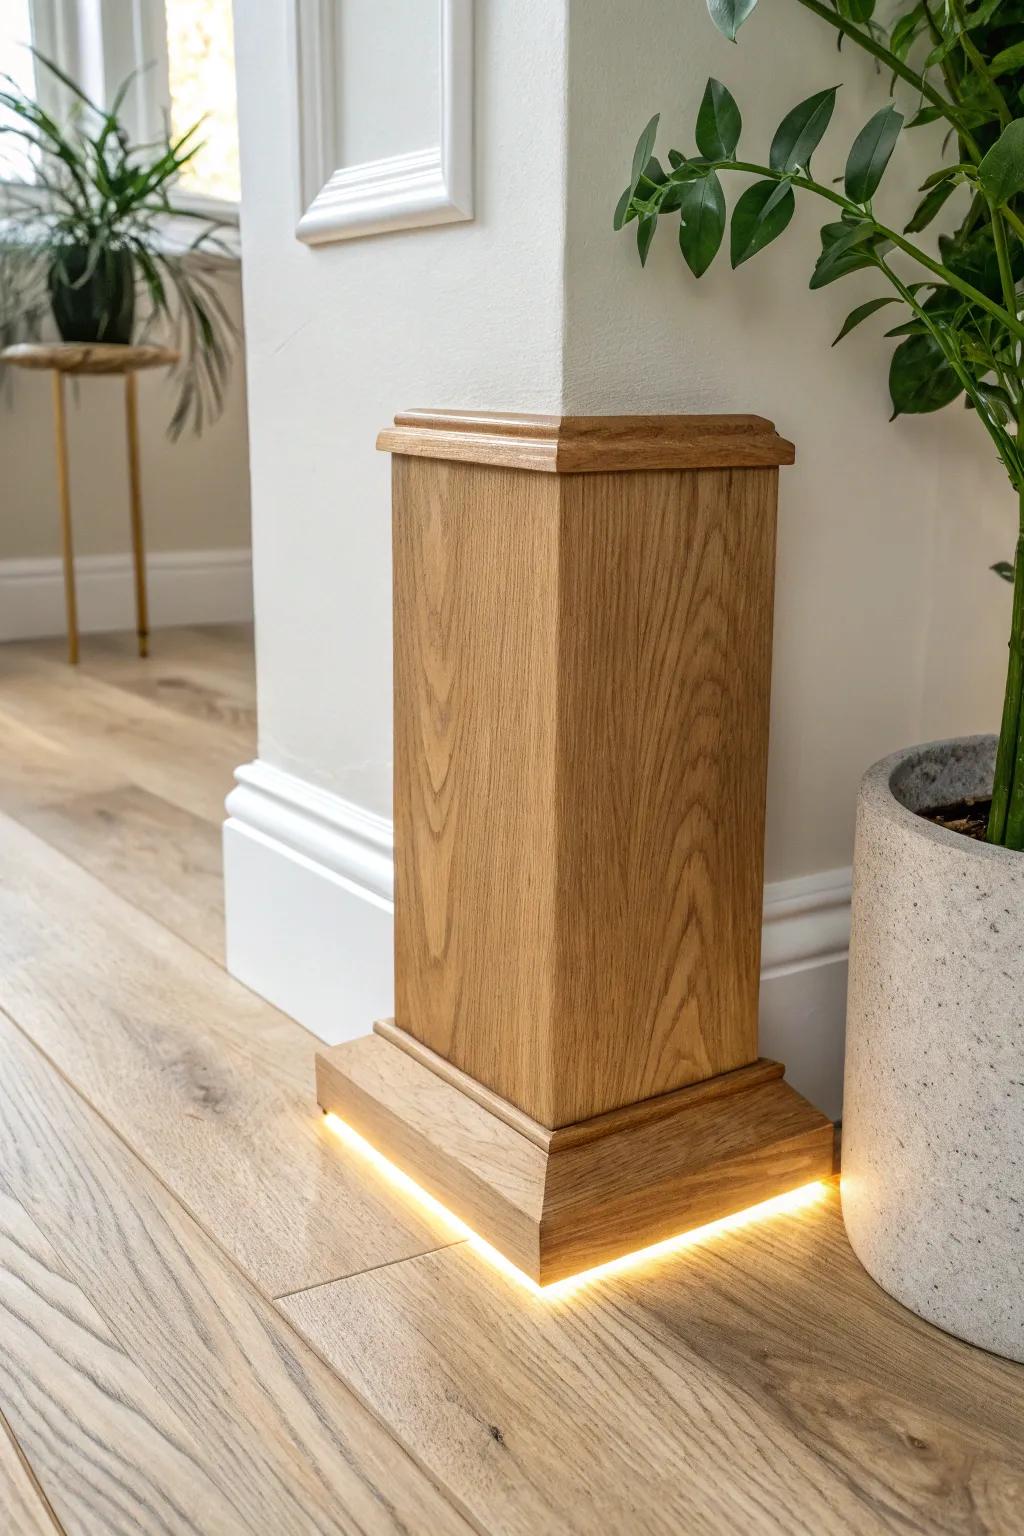
I’ve built plinth blocks with a tiny recessed channel underneath so a soft light washes the floor at night, like subtle pathway lighting. It sounds extra, but on a dark hallway makeover it made the door casing base feel high-end and surprisingly cozy.
You might like:
- Flexible LED Strip Lights Warm White: Add a soft glow under your plinths with these flexible strips, creating a cozy and high-end ambiance.
- Small 12V DC Power Supply: Power your lighting setup safely and efficiently with a compact driver that hides easily behind trim or walls.
- Recessed Aluminum LED Channel: Achieve a professional finish and diffuse light evenly by installing strips inside these protective, flush-mount metal channels.


