
Colonial trim is all about depth, symmetry, and those crisp shadow lines that make a room feel instantly established. Here are my favorite interior colonial trim ideas that I’ve built on real walls in my shop and in friends’ homes, from classic millwork details to a couple of unexpected showstoppers.
Built-Up Crown Molding
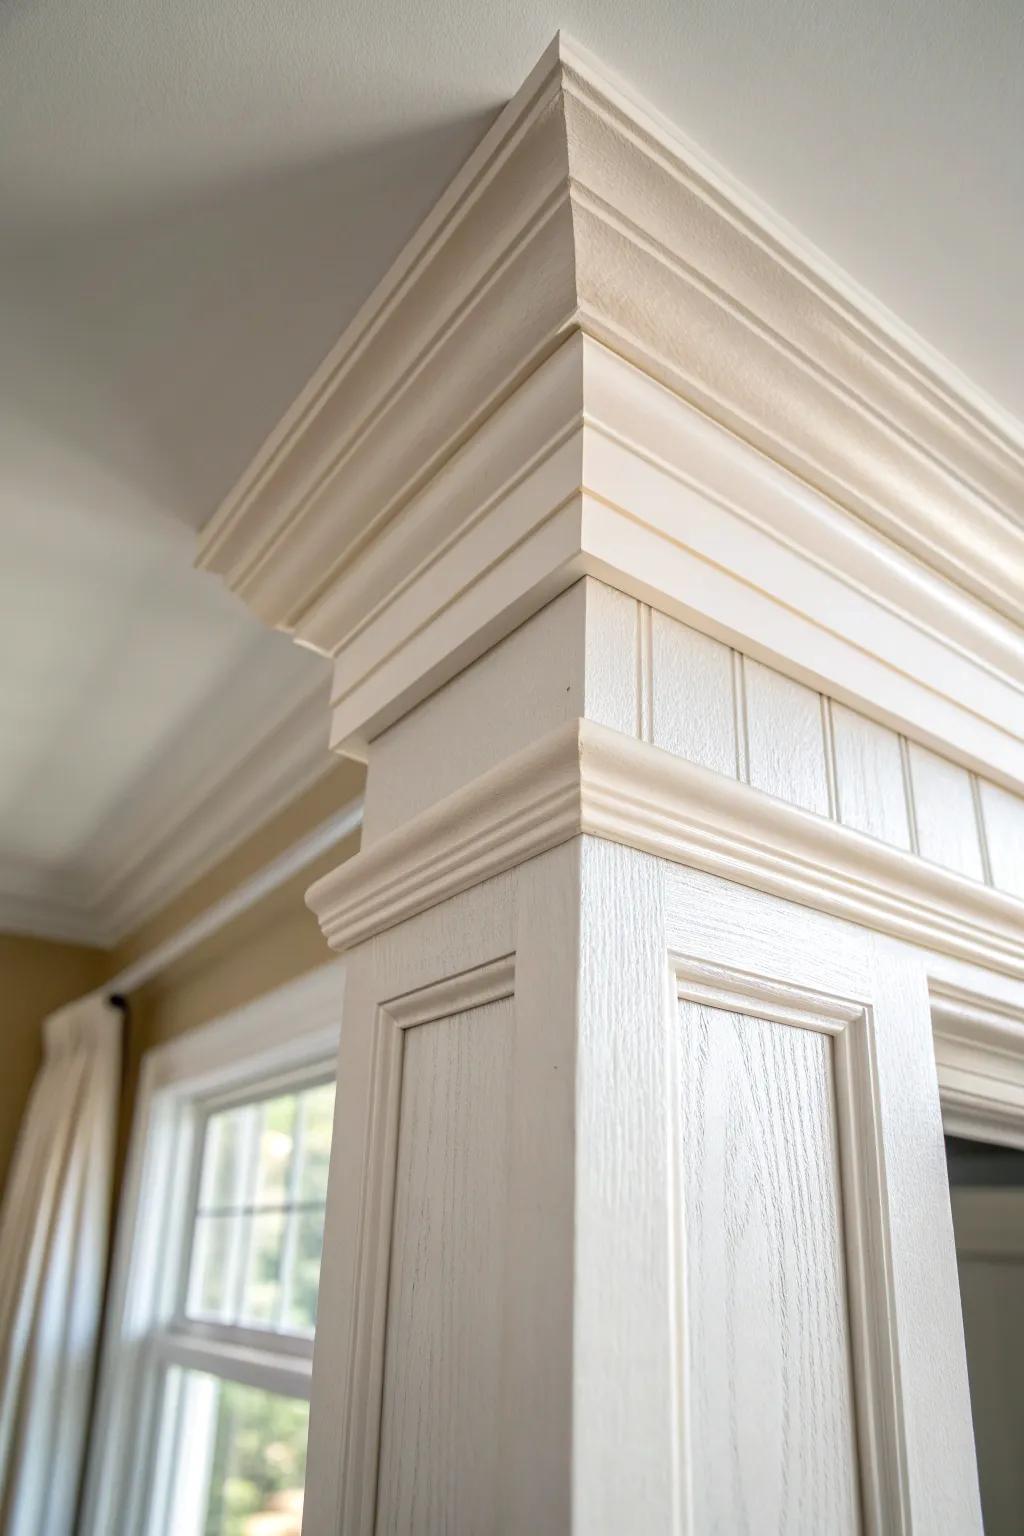
My go-to upgrade is built-up crown molding, where I stack two or three profiles so the ceiling line has real depth instead of a skinny strip. I’ve done this in low-ceiling rooms too, and the extra layering still reads “colonial” because the shadow line is what your eye notices.
Some handy options:
- Primed Polyurethane or Wood Crown Molding: Start your layered look with a classic crown profile that serves as the main architectural feature for your ceiling.
- Decorative Baseboard or Flat trim: Use flat molding below the crown to extend the height and create that impressive, built-up colonial appearance.
- Brad Nailer Kit: Secure your stacked molding pieces cleanly and efficiently with a reliable nailer designed for detailed trim work.


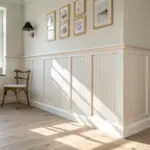
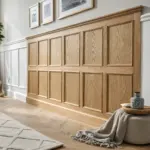
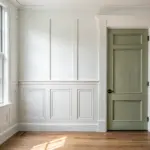
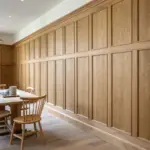
Raised-Panel Wainscoting

Whenever I want that instant historic vibe, I build raised-panel wainscoting with a sturdy chair rail and keep the layout perfectly even across the wall. I’ve learned the “magic” is consistent spacing—once I started making a quick story pole, my panels stopped looking wonky.
A few things you might like:
- Brad Nailer Kit: Secure your trim pieces cleanly and efficiently with a reliable brad nailer for professional-looking results.
- Panel Molding Router Bits: Create custom raised panel profiles on your lumber to achieve that authentic, high-end colonial aesthetic.
- Construction Adhesive: Ensure a long-lasting bond between your panels and the wall to prevent warping and movement.

Thick Door Casings With Backband
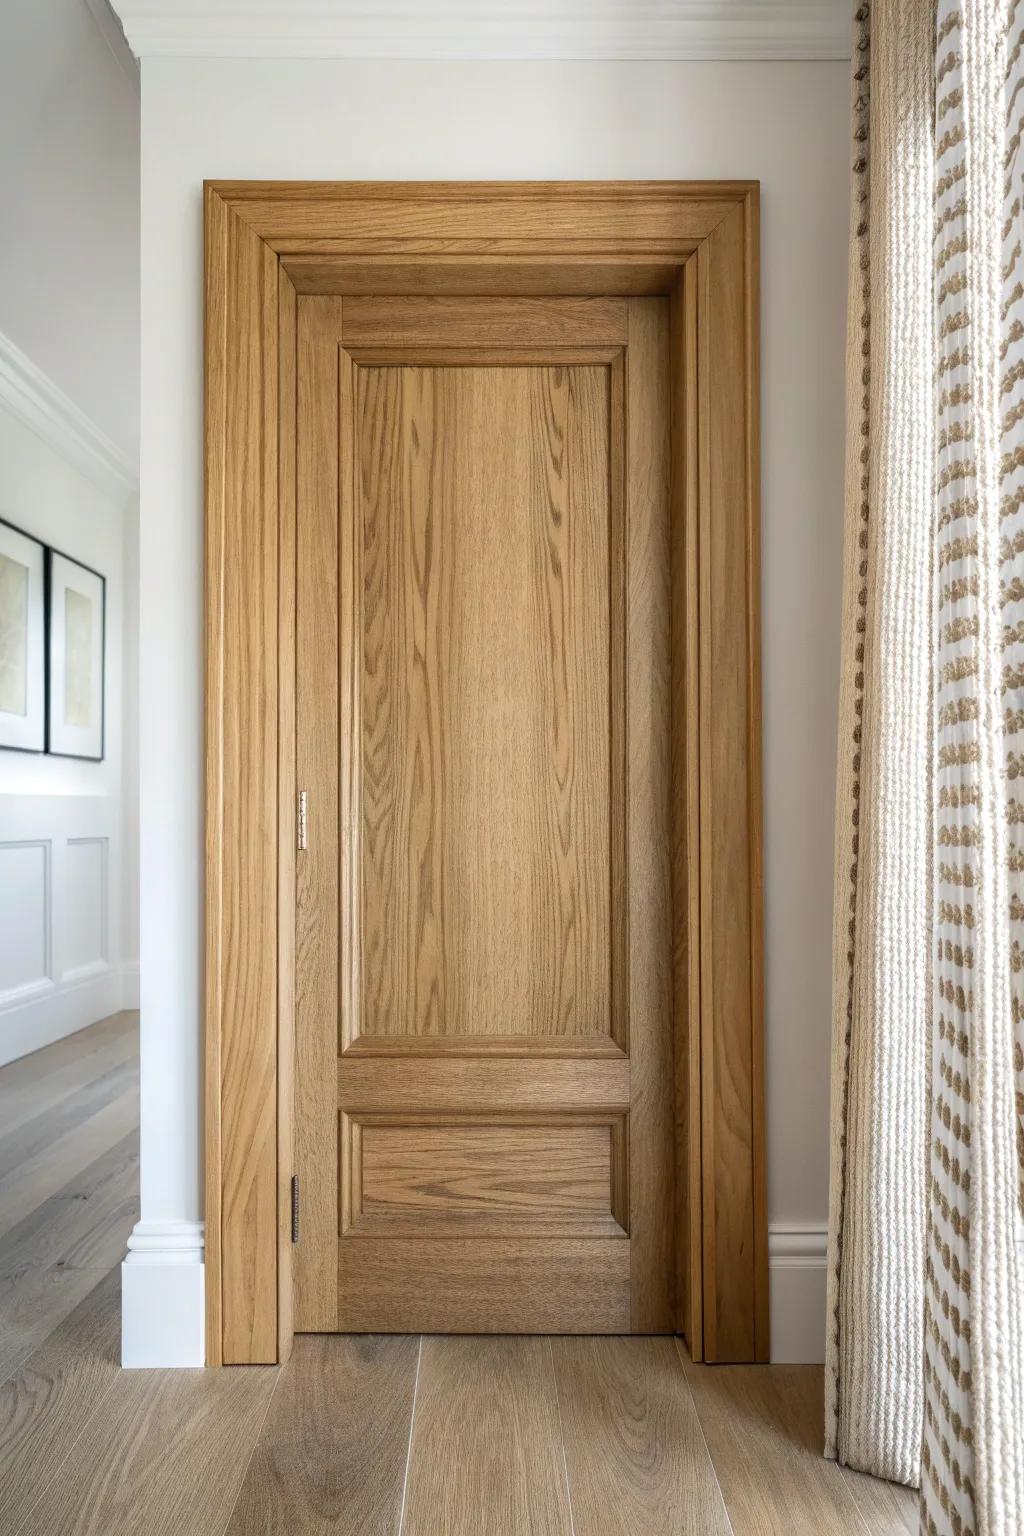
For doors, I love a chunky colonial door casing finished with a backband to create that rich, framed look. The first time I added backband in a hallway, I couldn’t believe how much more “finished” the whole space felt without changing anything else.
You might like:
- Colonial Style Door Casing Molding (Oak/Unfinished): Build that elegant foundation by choosing wide, unfinished wood casing profiles ready for your custom stain.
- Wood Backband Molding Trim: Add depth and that crucial ‘chunky’ border to existing flat casings for an instantly upgraded, high-end look.
- Brad Nailer Kit: Ensure a clean, professional installation of your new trim work with reliable fastening tools for precision results.


Window Casings With a Header
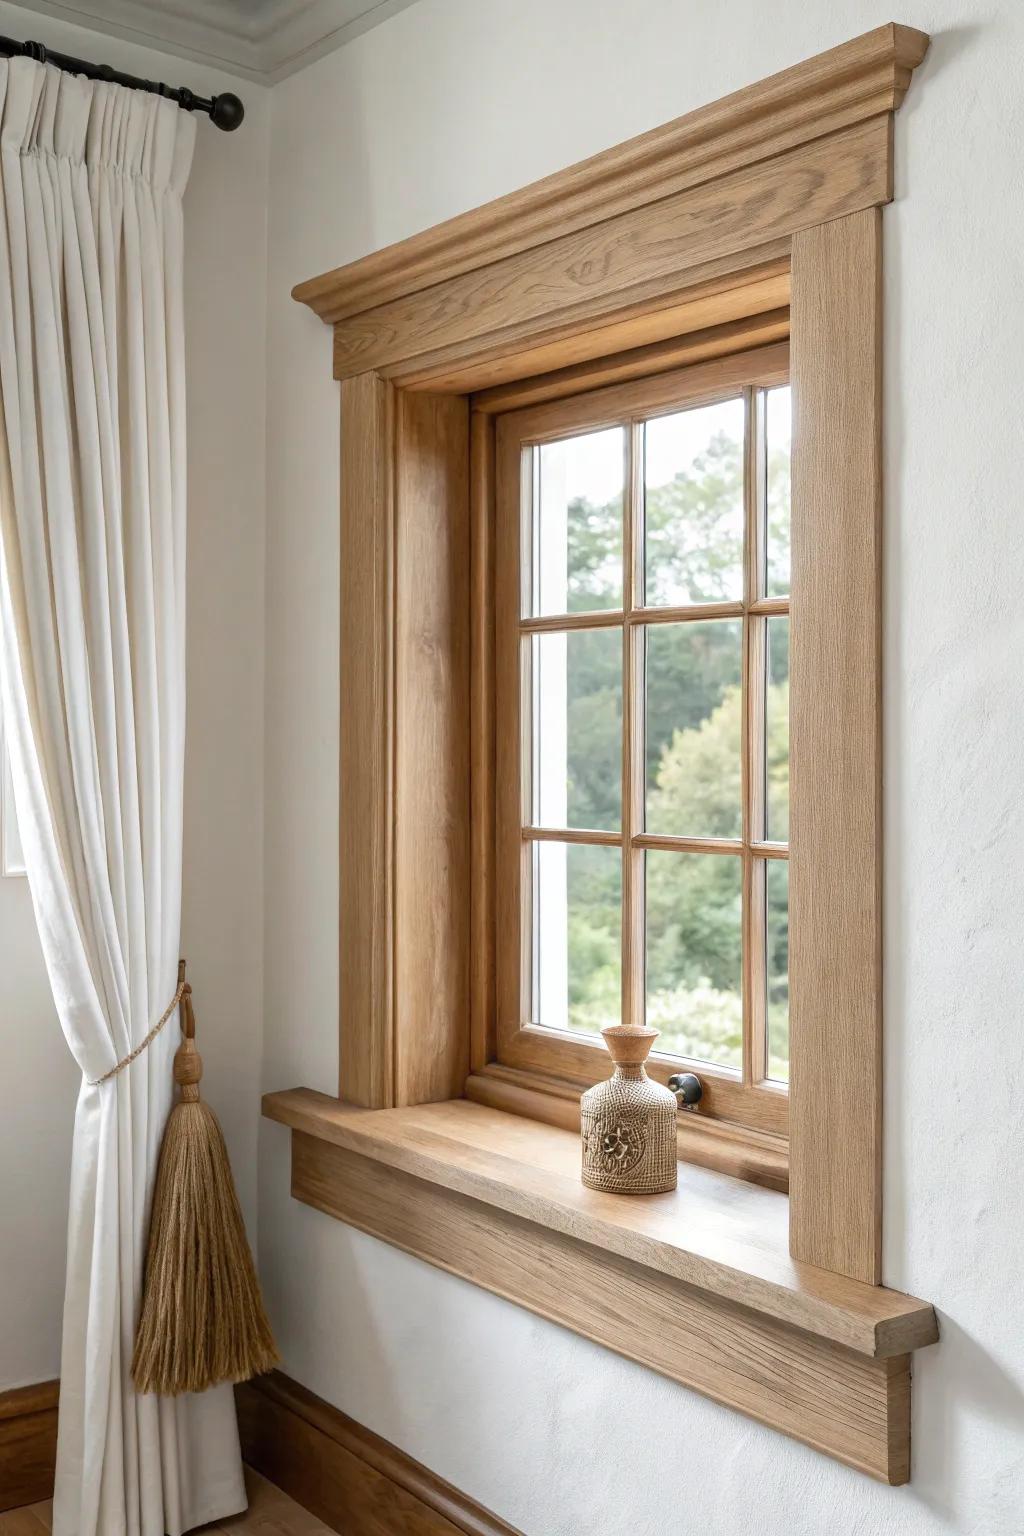
If you want true colonial character, add a flat window header (that little “shelf” look) instead of just mitering the corners. I’ve trimmed plain builder windows this way, and it instantly gave them that entablature-style presence.
These products might be useful:
- Oak Board Lumber for Header: Build your own custom flat headers with solid oak boards to perfectly match the traditional colonial aesthetic shown here.
- Crown Molding for Top Trim: Add a classic cornice detail to your window header by attaching a strip of elegant wooden crown molding.
- Brad Nailer Kit: Secure your new window casings seamlessly with a reliable brad nailer, essential for clean, professional-looking trim installation.
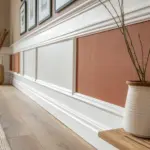
Tall Baseboards With a Cap
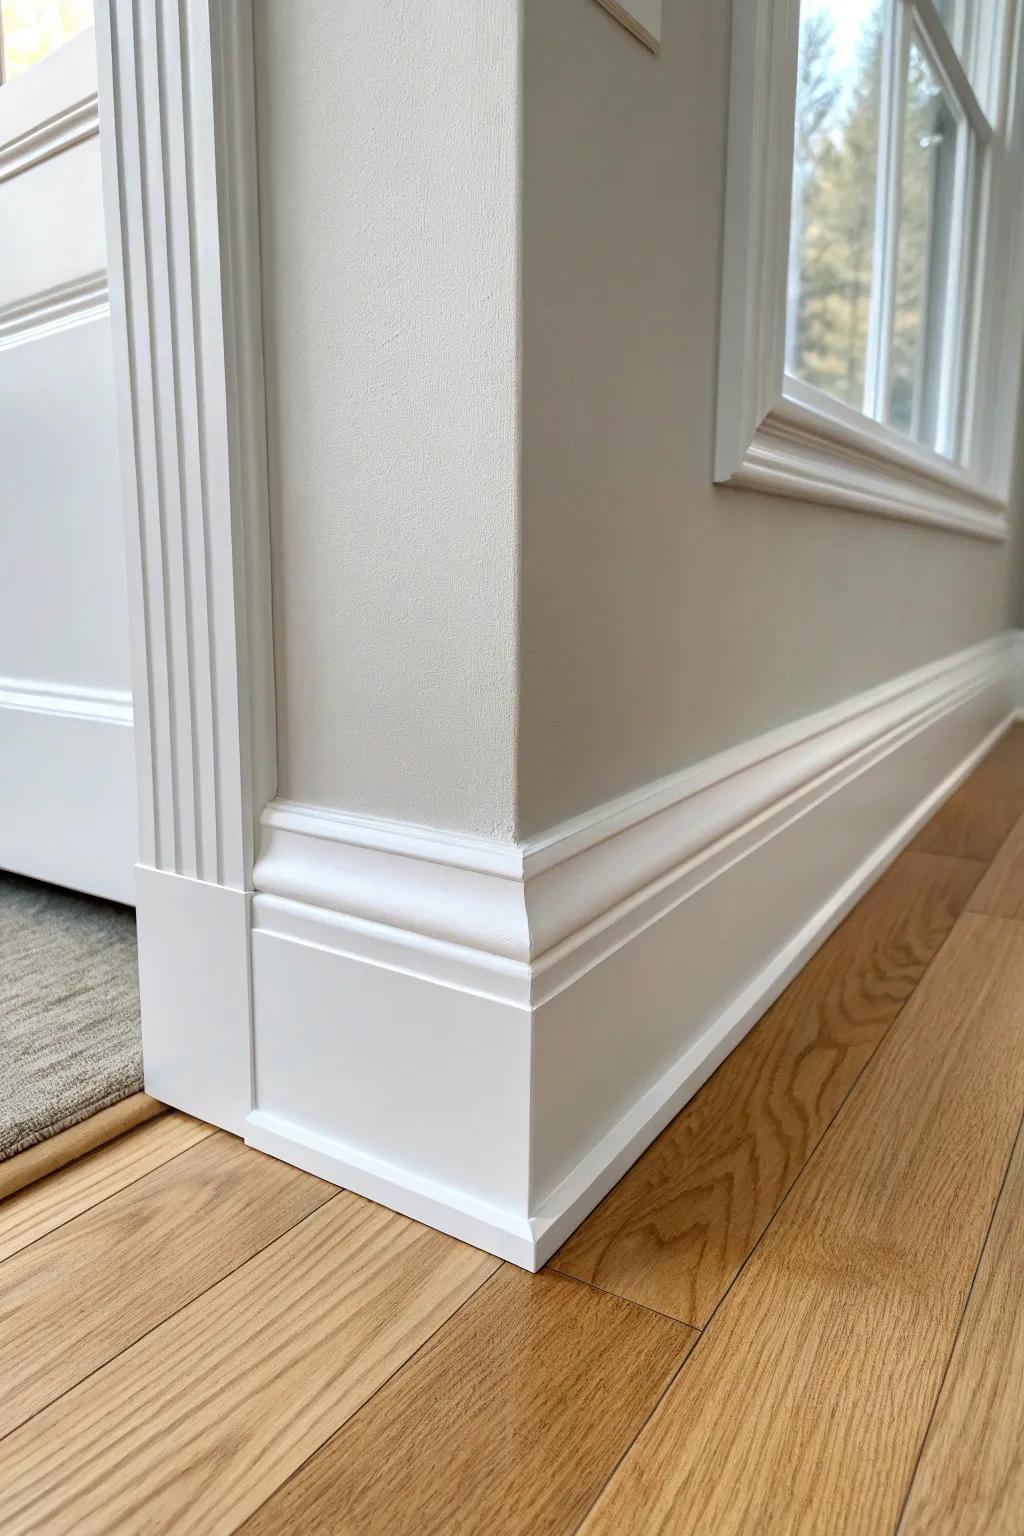
I’m a big fan of tall baseboards—they ground the room and make the walls feel more substantial, especially with a small base cap profile. I’ve put 7-inch base in a modest bedroom, and it made the whole space feel quietly upscale.
Give these a look:
- Decorative Base Cap Molding: Add this decorative cap to standard lumber to create a custom, high-end baseboard look instantly.
- Primed MDF Baseboard Boards: Use these tall, flat primed boards as the sturdy foundation for your substantial new baseboard project.
- Baseboard Plinth Blocks: Create a seamless, professional transition between your new tall baseboards and door casings with these blocks.
Plinth Blocks at Doorways
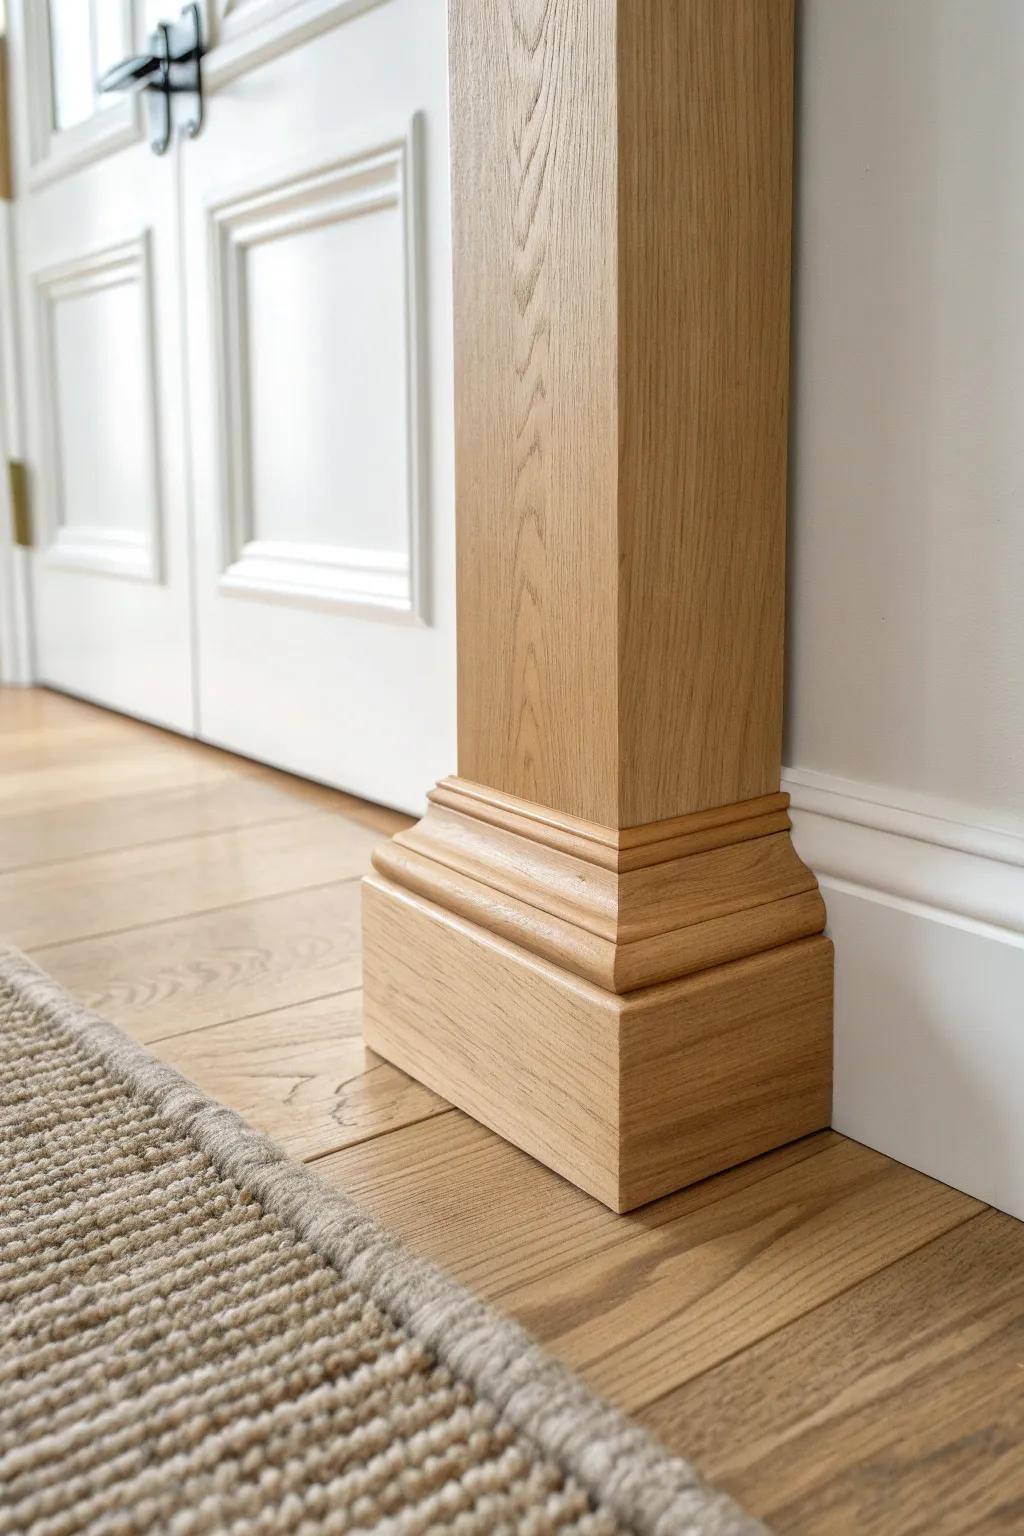
Adding plinth blocks is one of my favorite “small effort, big payoff” colonial trim moves because it makes doorways look heavier and more traditional. I started using them after restoring an older home’s trim, and now I miss them immediately when they’re not there.
Try these:
- Solid Oak Wood Plinth Blocks: Add instant architectural weight to your doorways by installing these solid wood blocks at the base of your casing.
- Fine Grit Sanding Sponges: Ensure a perfectly smooth finish on your new wood trim before staining or painting with these flexible sanding sponges.
- Construction Adhesive for Wood Trim: Secure your new plinth blocks firmly to the wall and baseboards with a strong, quick-grabbing construction adhesive.

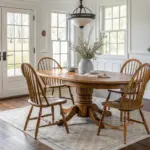
Chair Rail With Boxed Panels
A classic colonial look I keep repeating is a clean chair rail with simple box molding panels above or below it for structure and symmetry. I’ve used this in dining areas, and it’s amazing how it makes even basic furniture feel more “formal room ready.”
Check these products out:
- Pre-Primed Chair Rail Molding: Establish your room’s dividing line easily with this molding; paint it to match your decor for instant elegance.
- Wall Paneling Frames / Picture Frame Molding Kit: Create the classic box look quickly using pre-cut molding frames that add instant definition and symmetry to walls.
- Construction Adhesive & Caulk Gun: Ensure a secure, seamless installation of your new trim pieces with strong adhesive designed for interior molding projects.
Layered Fireplace Surround Trim
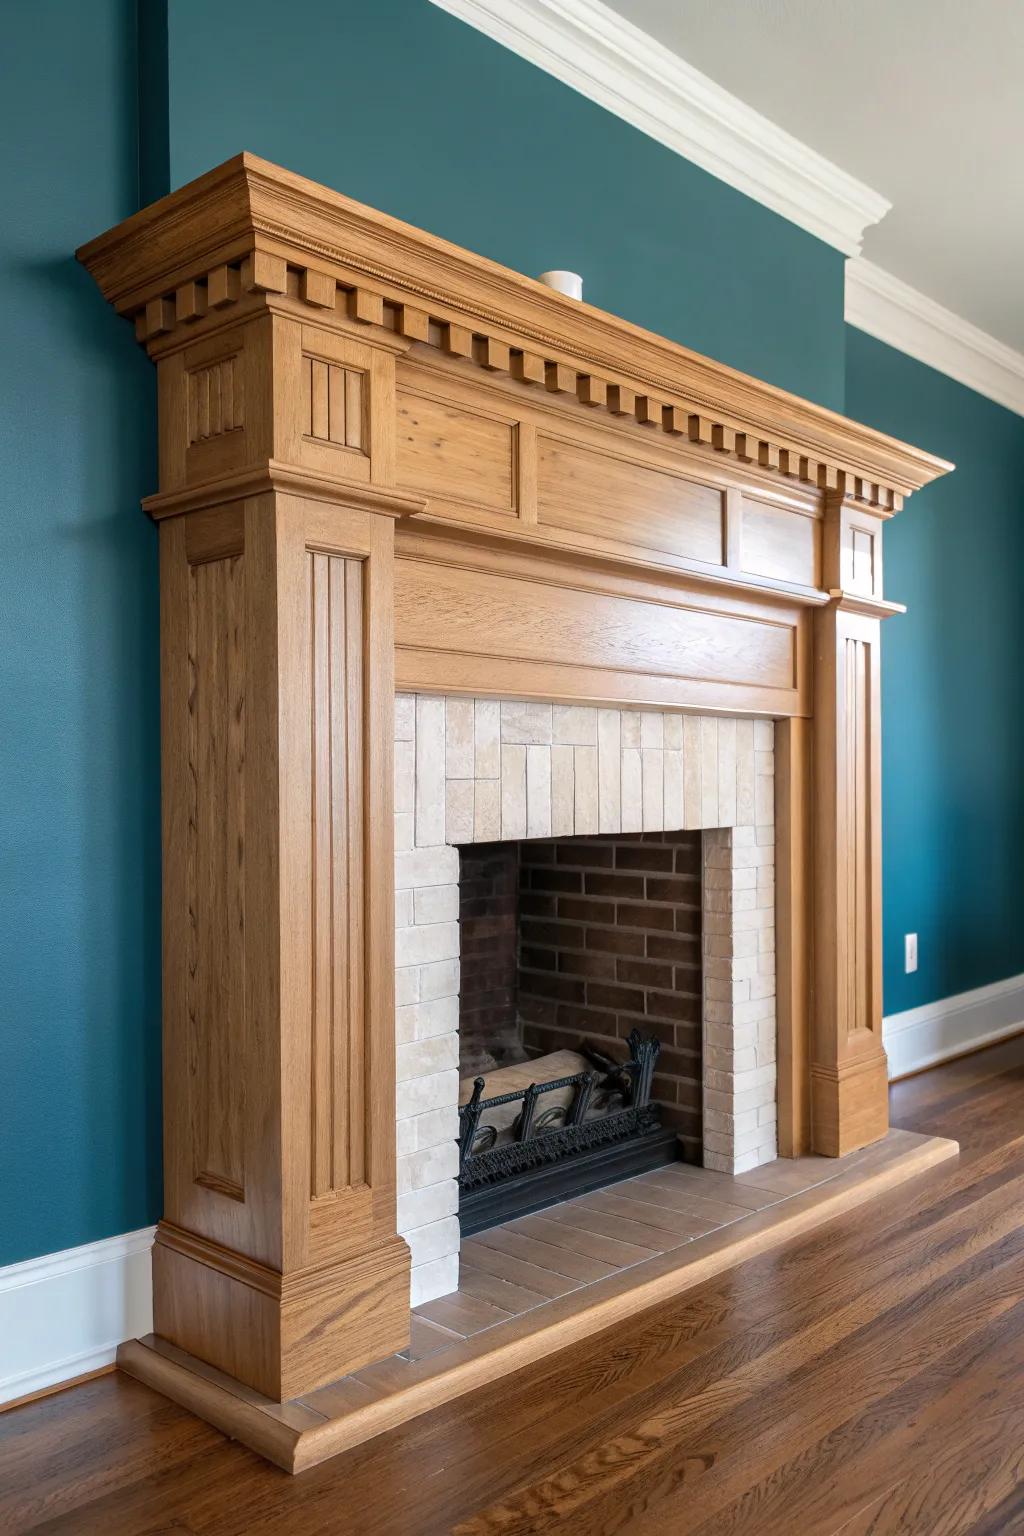
If your room has a fireplace, give it the colonial treatment with a layered fireplace surround—think wide legs, a strong header, and built-up molding returns. I once rebuilt a plain surround with trim “stack-ups,” and it became the focal point before I even painted it.
May just do the trick:
- Dentil Molding Strips: Add classic colonial detail under your mantel shelf quickly with these easy-to-install decorative wood trim accents.
- Fluted Casing or Pilaster Kit: Create substantial, wide legs for your fireplace surround by applying these vertical grooved trim pieces.
- Wood Crown Molding: Build up your mantel header’s return and projection using traditional crown profiles for a layered look.
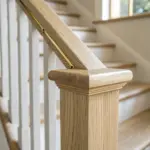
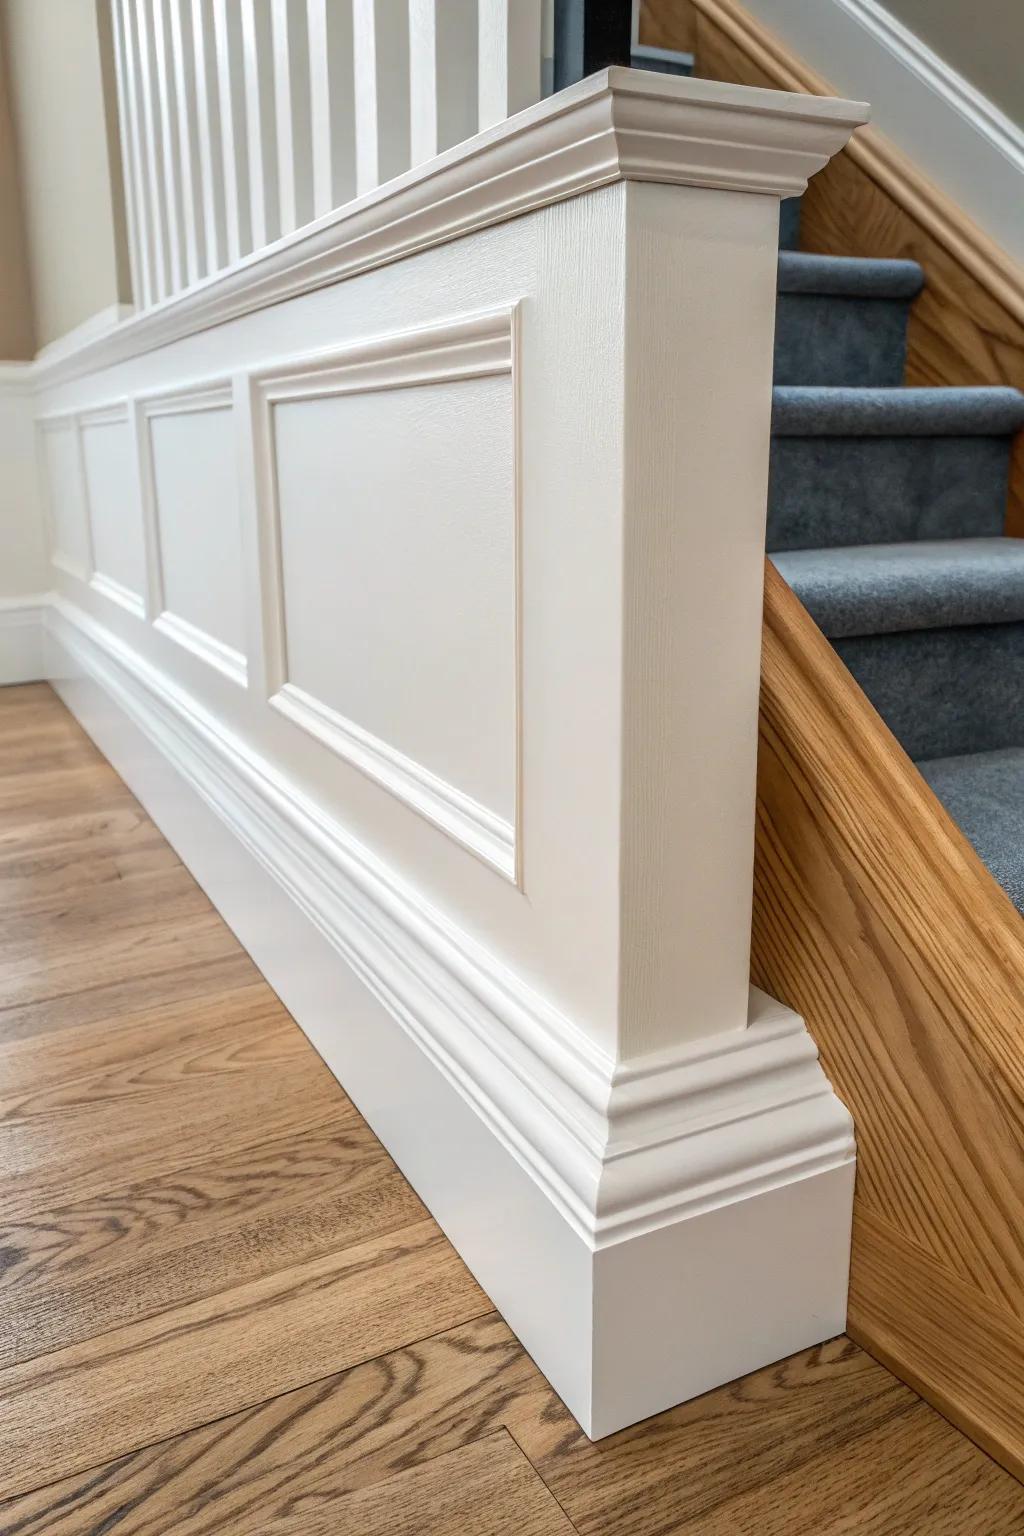
Stairwell Wainscoting Run
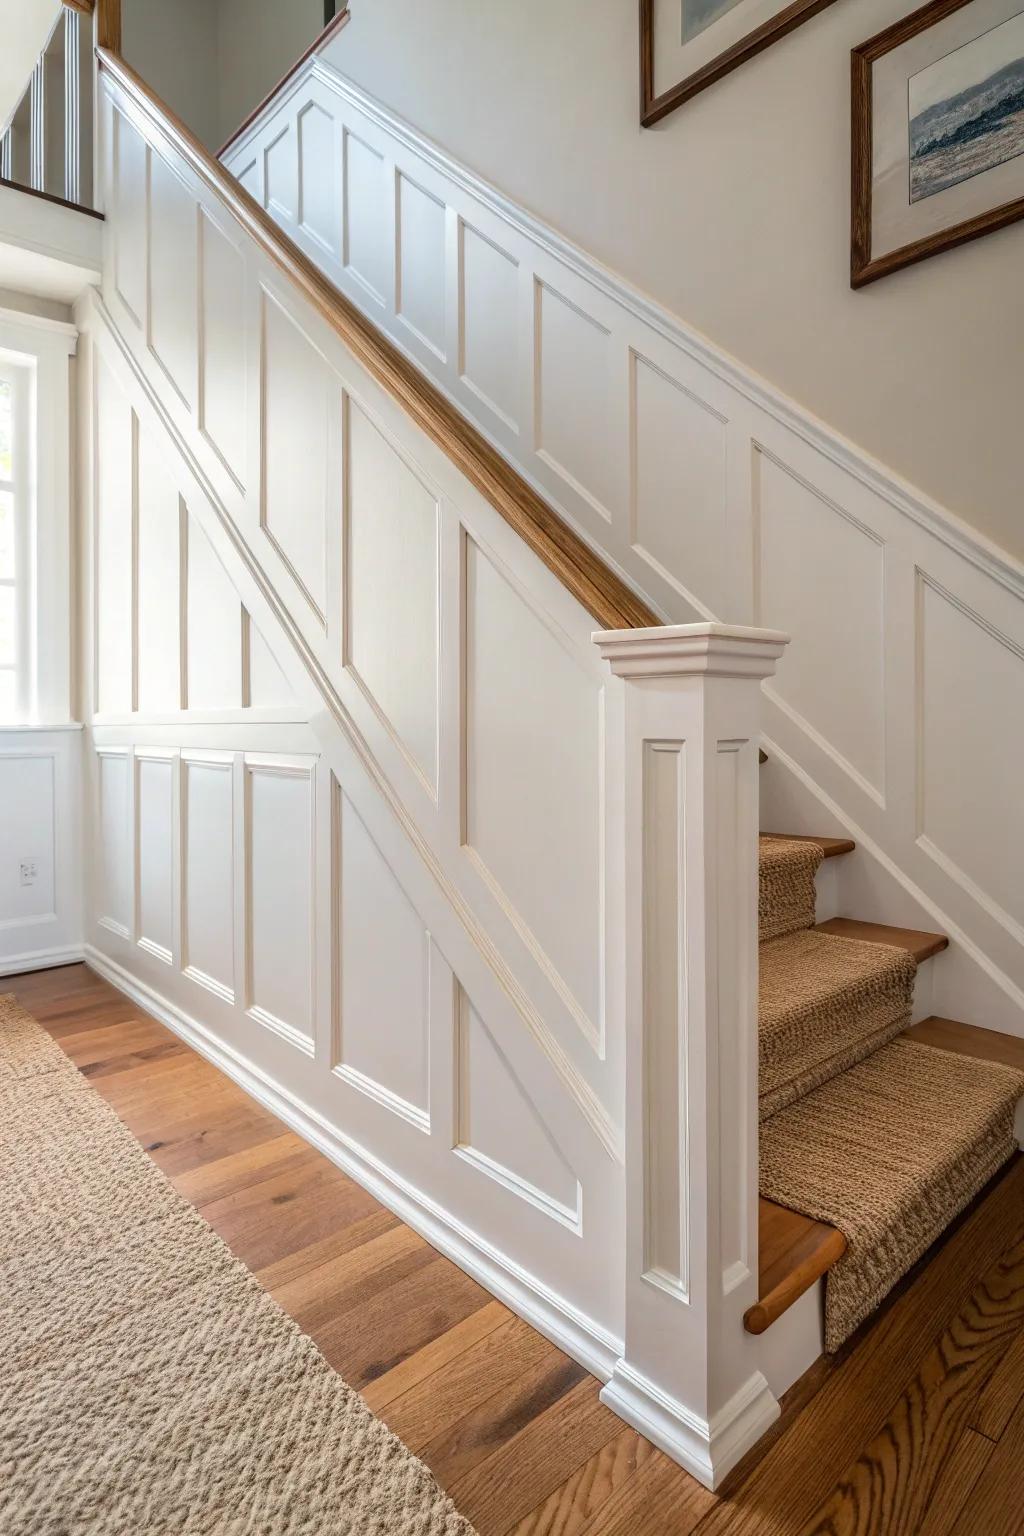
Running wainscoting up a stairwell feels so old-home in the best way, and it protects the wall where hands and bags love to scrape. I’ve installed it in a narrow stair hall, and the vertical rhythm of the panels made the space feel taller and more intentional.
Possibly handy products:
- DIY Pre-Primed Wainscoting Kits: Transform your stairs quickly these kits; they simplify measuring and cutting for a customized, classic panel look.
- White Semi-Gloss Trim Paint: Achieve that durable, polished finish that resists scuffs from bags and hands while brightening your stairwell.
- Brad Nailer Tool Kit: Ensure your panels stay secure and seamless by using the right pneumatic tools for professional-grade installation.
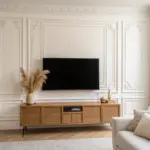
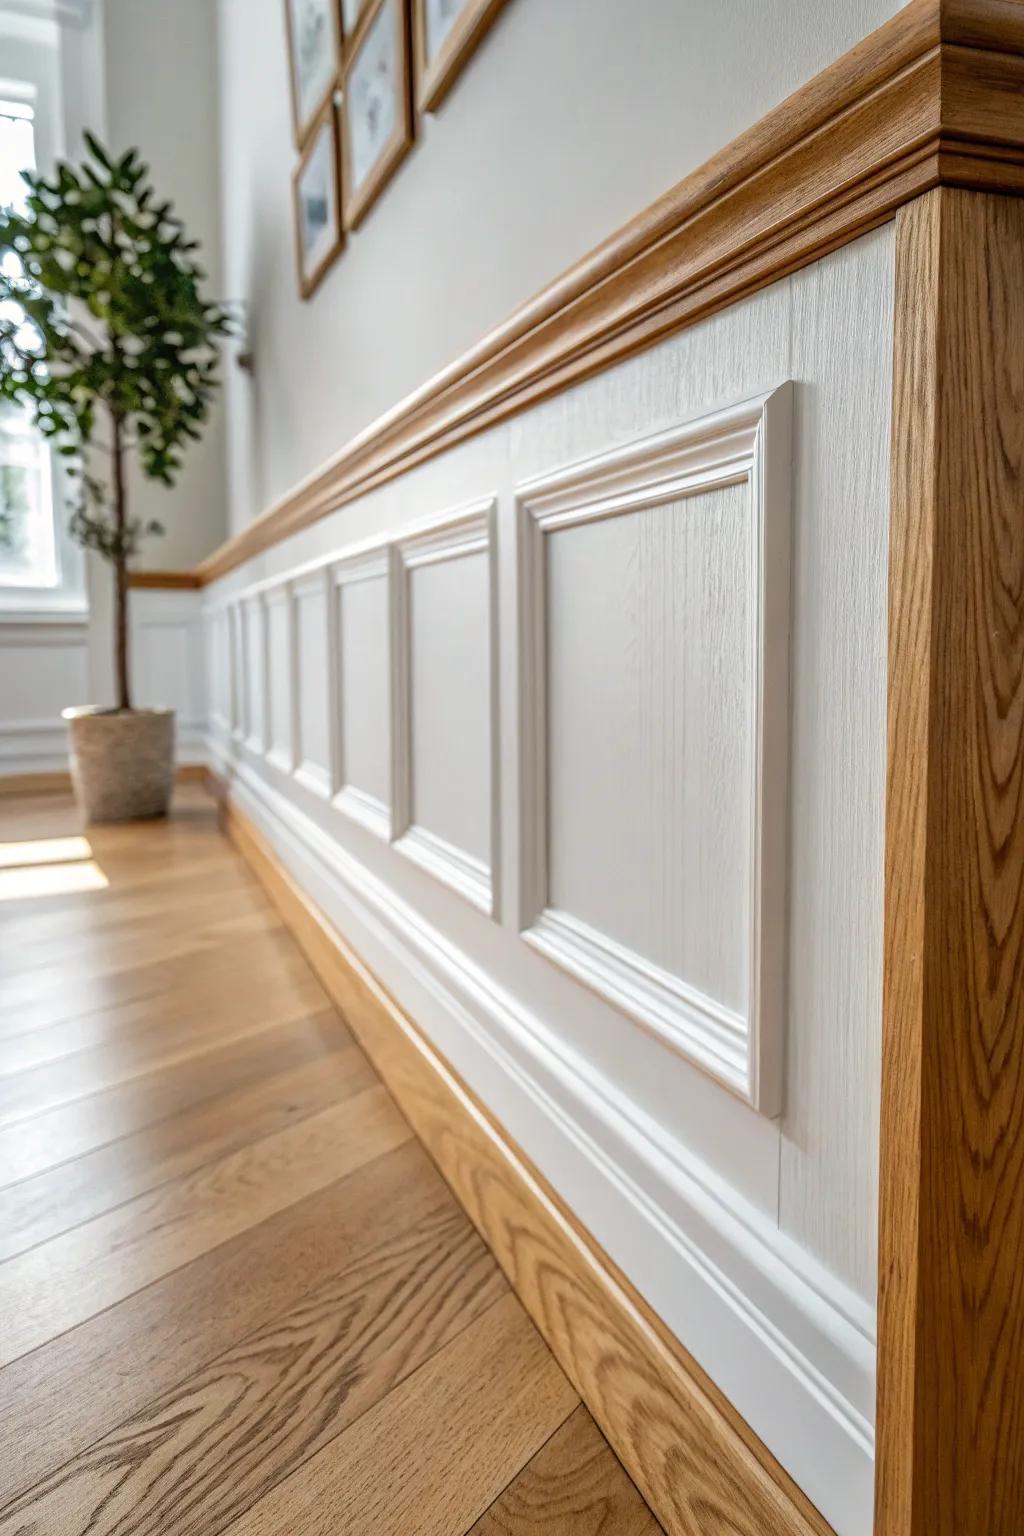
Symmetrical Panel Molding Walls
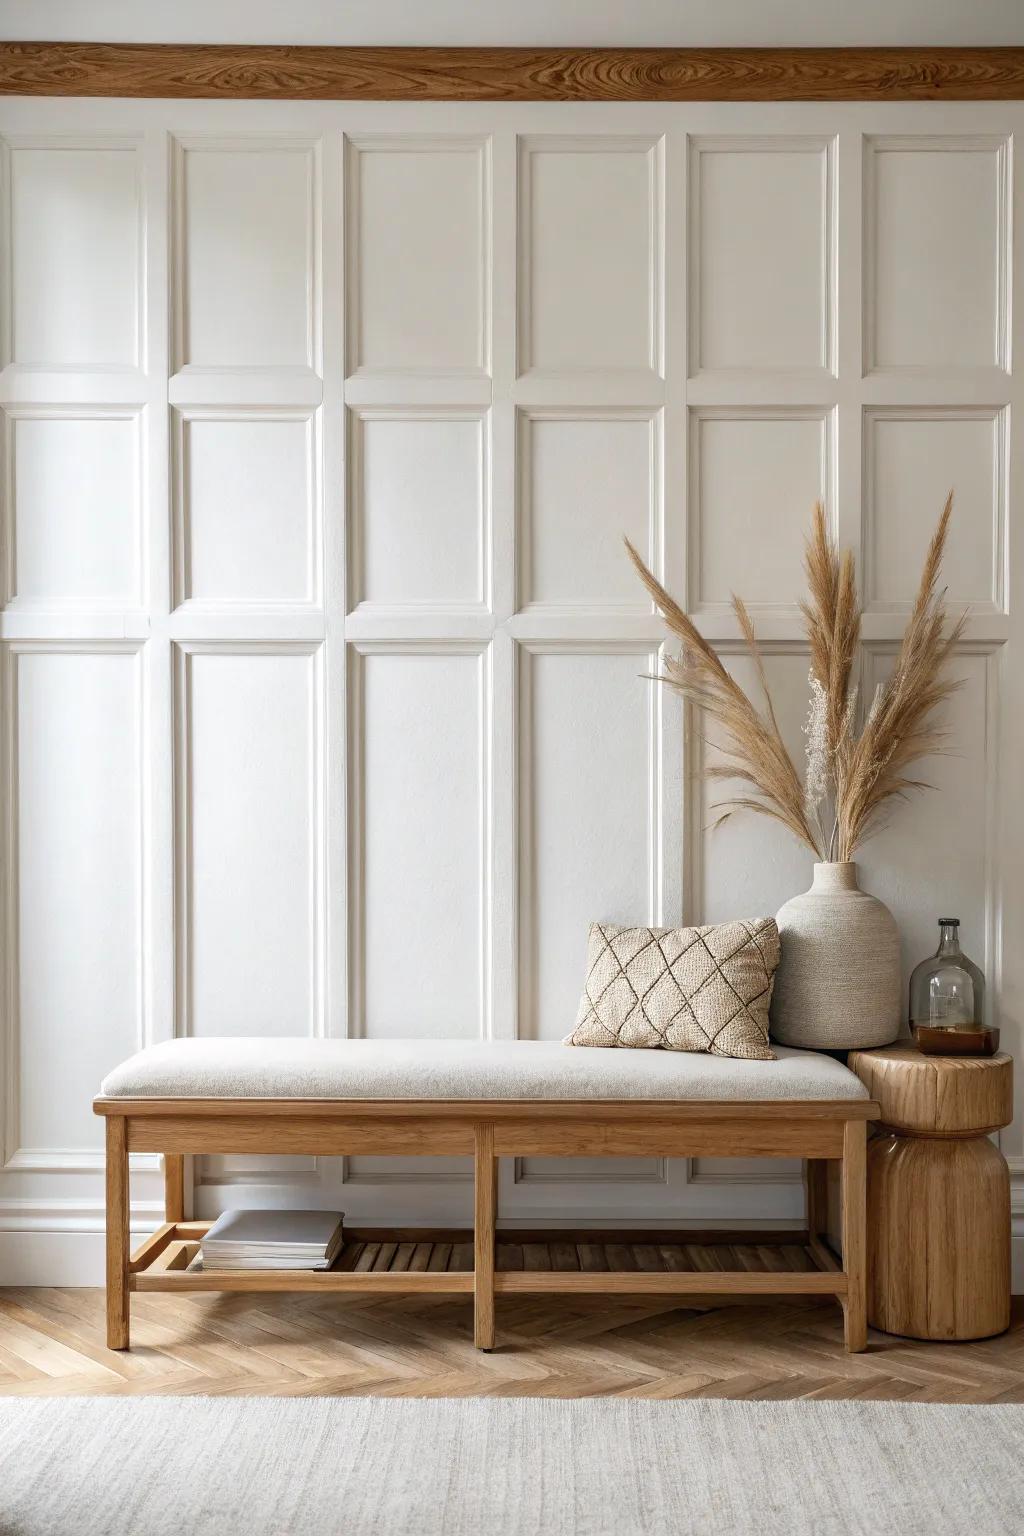
Colonial style loves order, so I like laying out panel molding in symmetrical grids on big blank walls (especially in formal living spaces). The first time I did this, I kept checking the room like, “Who added architecture in here?”—it was that dramatic.
Some ideas to consider:
- Pre-Primed Wall Panel Molding Kit: Create elegant grids instantly with ready-to-install molding sets that simplify measuring and ensure perfect symmetry.
- Laser Level Self-Leveling Tool: Achieve flawless alignment for your geometric wall panels with a reliable laser level, preventing crooked lines.
- Paintable Caulk and Gun Set: Finish your trim project professionally by sealing gaps for that seamless, built-in architectural look.
Cased Openings With Pediments
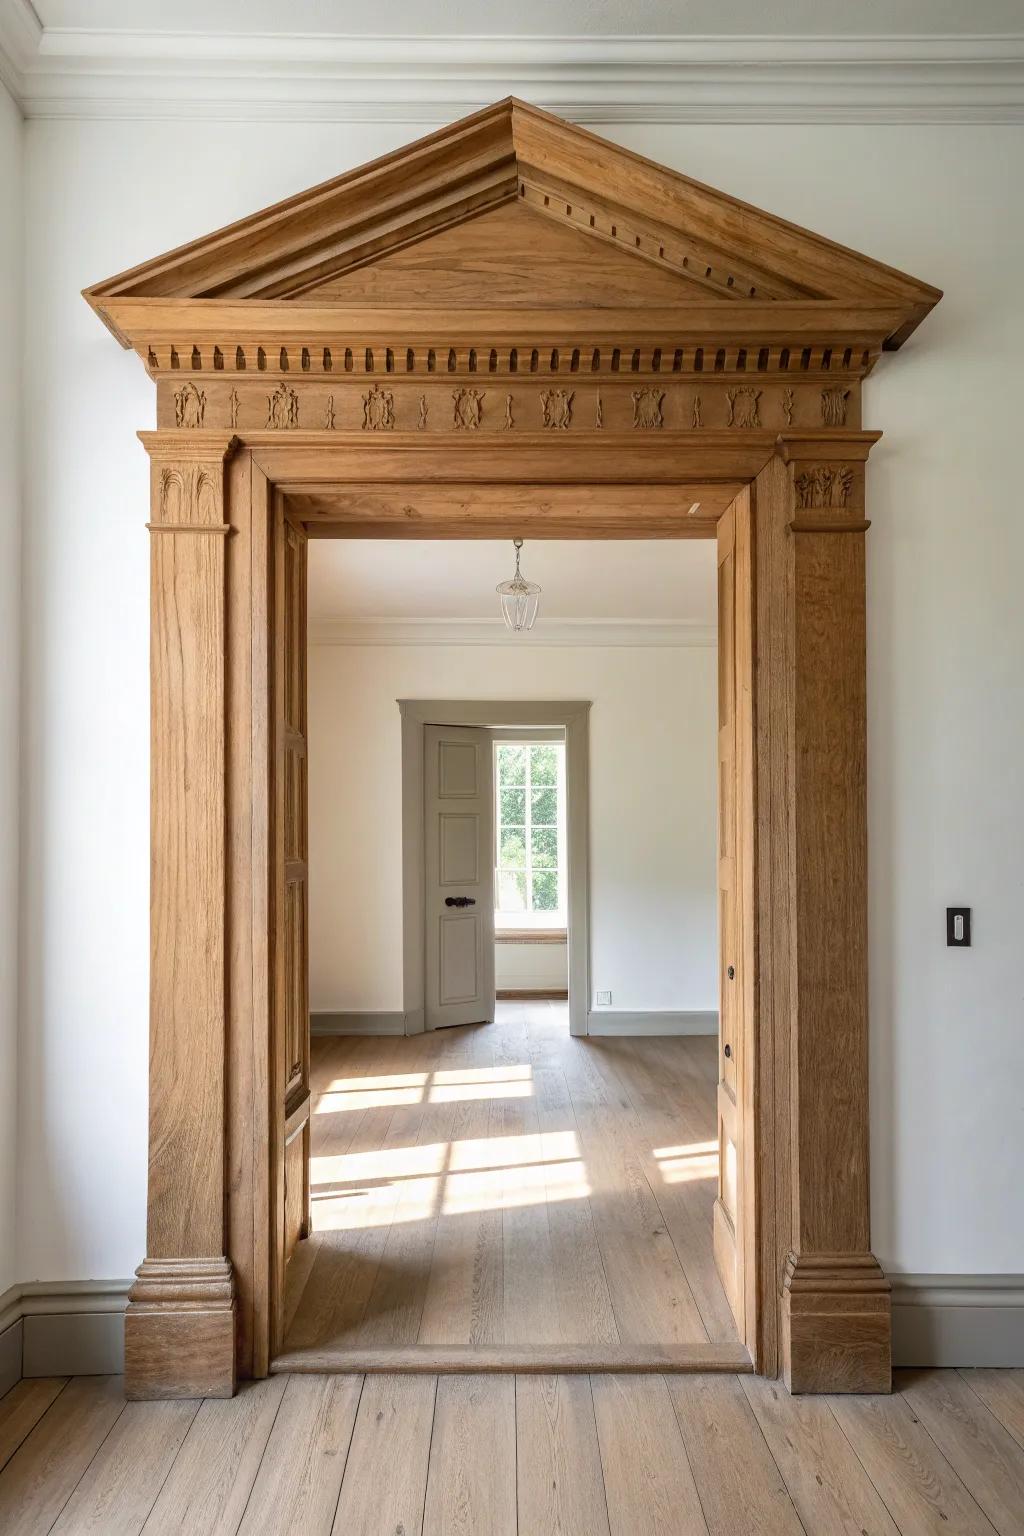
For pass-throughs and room-to-room openings, I’ll add cased openings with a simple pediment-style top detail to mimic older interior door surrounds. I tried this on a plain rectangular opening, and it suddenly felt like the house had a real floor plan “hierarchy.”
Useful items to consider:
- Pre-Primed Door Pediment Molding: Add instant architectural height and elegance to standard doorways with this easy-to-install decorative upper trim detail.
- Decorative Fluted Casing Kit: Frame your opening with classic vertical lines that mimic traditional columns for a stately, cohesive look.
- Corner Rosette Blocks: Simplifies installation by eliminating miter cuts while adding a distinct, vintage victorian or colonial accent corner.
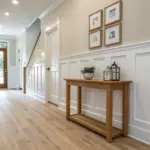
Picture Rail Above Wainscoting
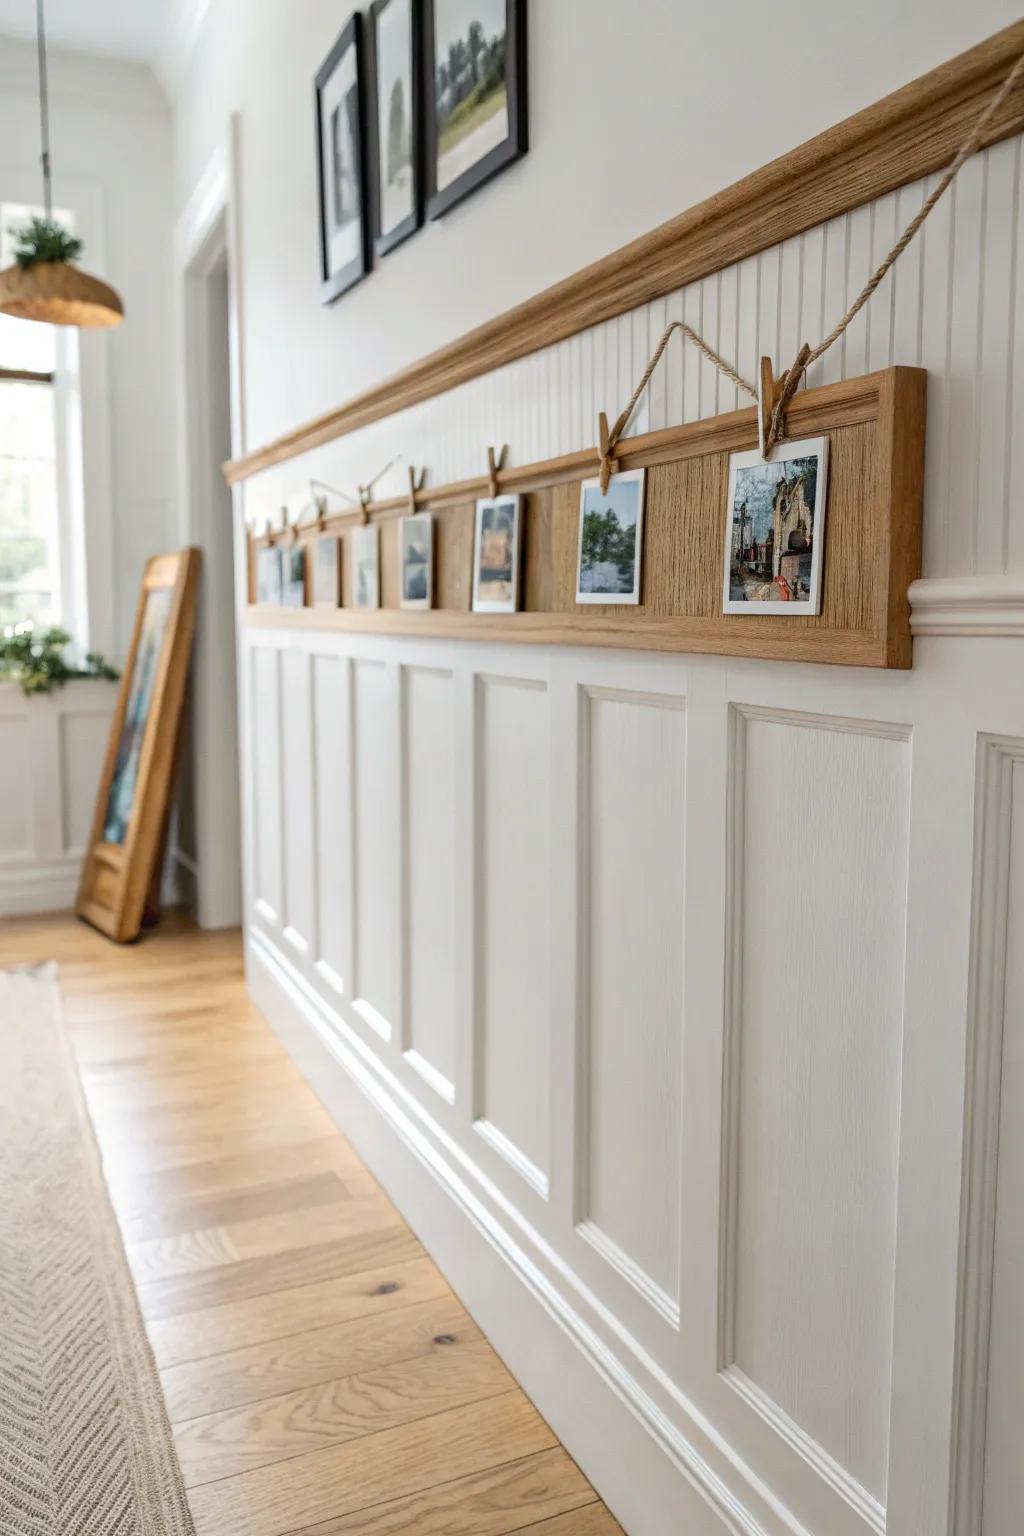
A picture rail is such a classic colonial finishing touch, especially above wainscoting or panel molding in rooms with taller walls. I added one in a hallway and loved not only the look, but also being able to hang art without punching extra holes everywhere.
Products that could assist:
- Unfinished Wood Picture Ledge: Install this versatile wooden ledge to display your favorite photos while adding architectural interest to plain walls.
- Jute Twine for Hanging: Use natural jute twine to create a rustic, charming way to suspend photos from your new rail.
- Mini Wooden Clothespins: Secure your printed memories to the hanging twine with these small clips for an adjustable, casual display.
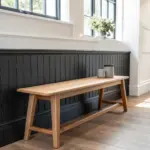
Two-Tone Paint for Trim Contrast
My favorite way to spotlight colonial trim is a high-contrast, two-tone paint scheme—bright trim against a moodier wall color. I’ve done this with raised panels and heavy casings, and the profiles finally show off all those gorgeous curves and steps.
Check if these fit your needs:
- High-Quality Paint Brushes for Trim: Achieve crisp lines on your colonial molding with brushes designed specifically for detailed trim work and control.
- Painter’s Tape for Delicate Surfaces: Protect your fresh wall color and ensure razor-sharp edges between the trim and wall with precision tape.
- Sanding Blocks for Woodwork: Prepare your casings and raised panels for a flawless finish by smoothing out imperfections before painting.
Hidden-Light Crown for Soft Glow
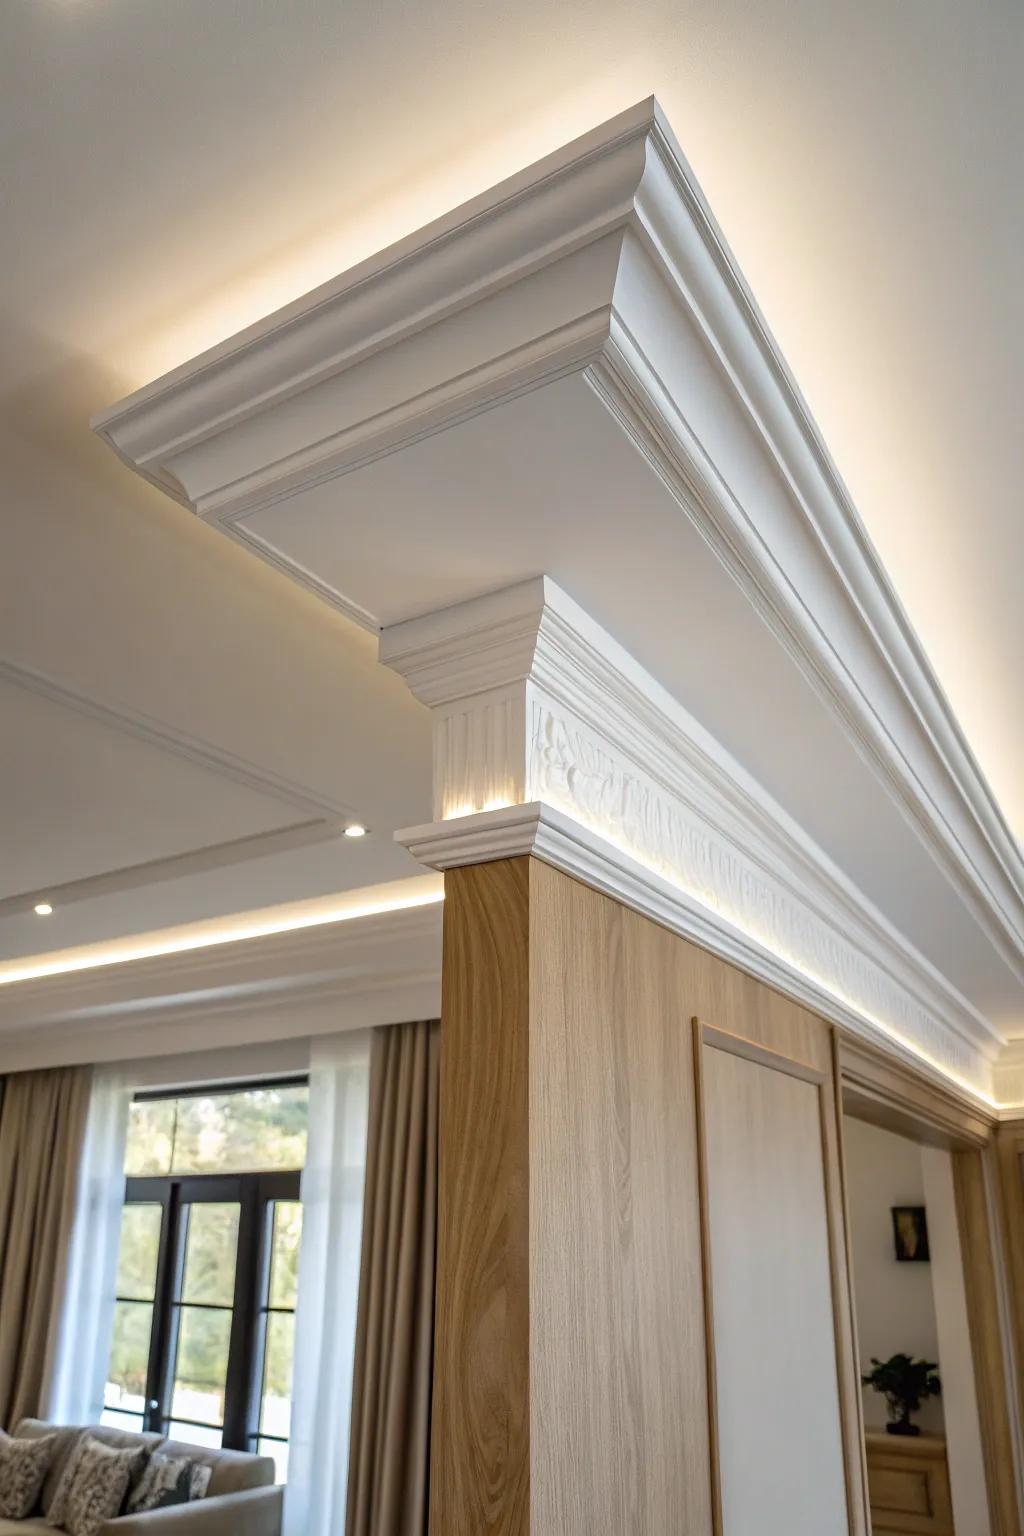
For a “wait, how did you do that?” moment, I’ve built crown molding with a small cove detail to hide indirect lighting along the ceiling line. It still reads colonial because the molding is substantial and layered, but the glow makes it feel fresh and a little magical.
Might be a good match:
- LED Strip Lights with Remote: Add a dimmable, warm glow behind your molding to create instant ambiance without complicated wiring.
- Indirect Lighting Crown Molding: Install specialized molding designed with a ledge to perfectly conceal your LED strips for seamless illumination.
- Aluminum LED Channel Diffusers: Ensure a smooth, professional light distribution and protect your LED strips from dust by using these channels.
Upholstered Panels Inside Wainscoting
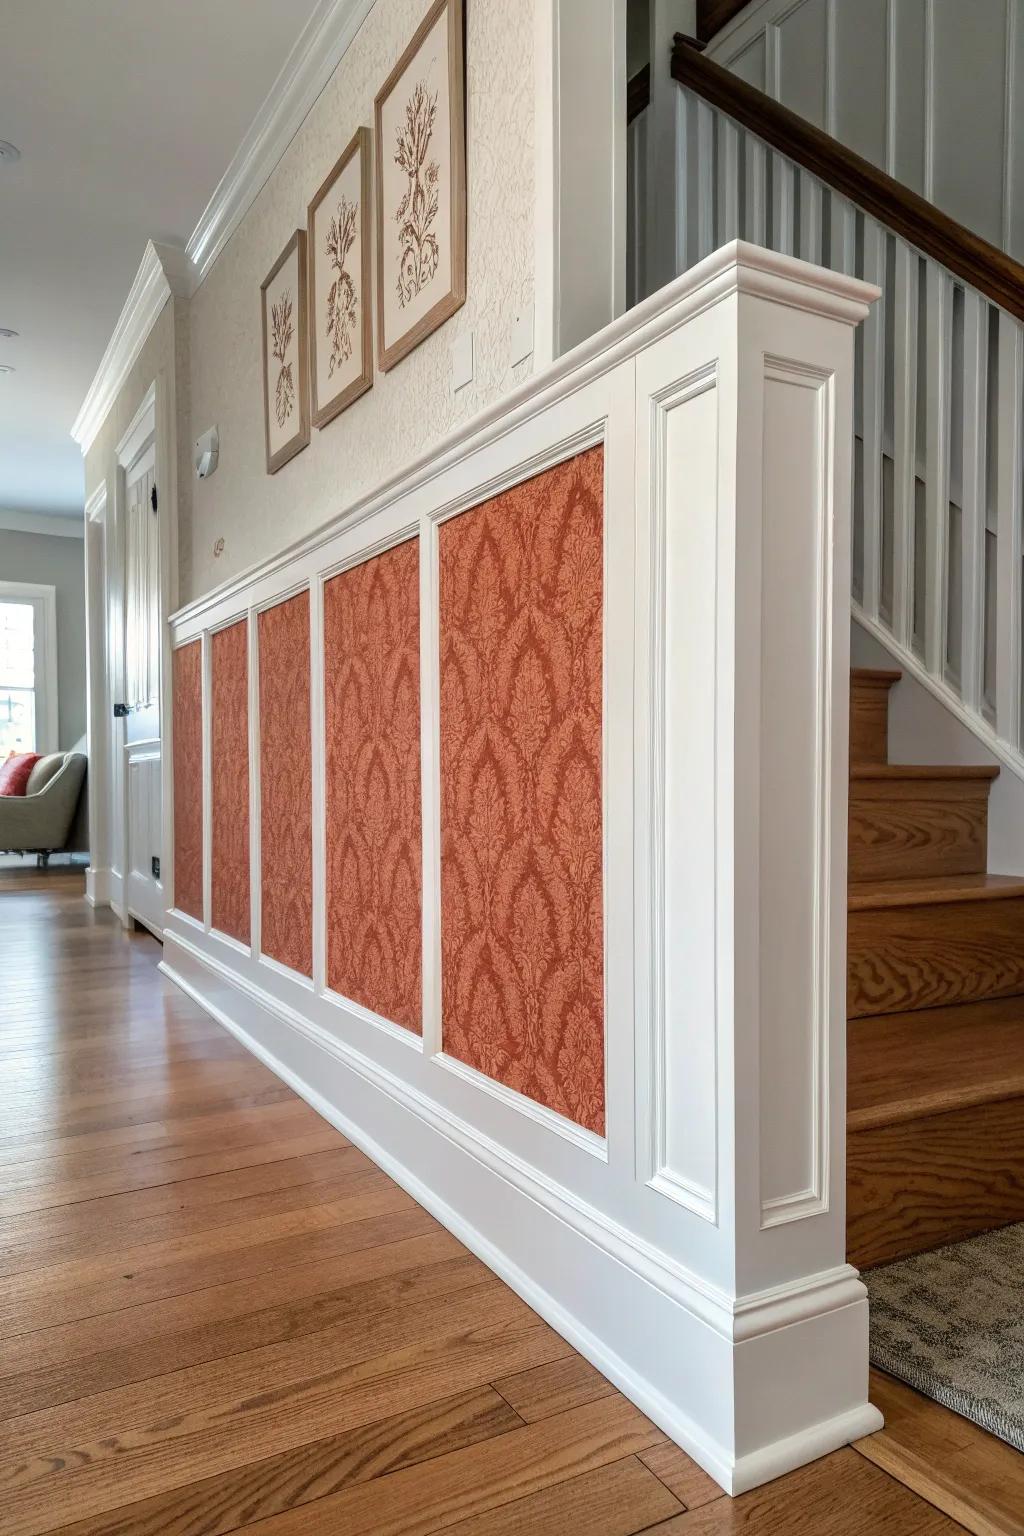
One of my most unexpected projects was inserting fabric-wrapped boards inside raised-panel wainscoting frames, like a colonial wall detail met a cozy upholstered headboard. It kept the colonial trim architecture intact while adding softness, and honestly, everyone who sees it reaches out to touch it.
Explore these options:
- Heavyweight Upholstery Fabric (Damask or Jacquard): Choose a durable, patterned fabric to add texture and visual interest to your custom wall panels.
- General Purpose Spray Adhesive: Use this glue to securely attach fabric to backing boards without creating wrinkles or loose spots.
- Heavy Duty Staple Gun: Secure your fabric tightly to the back of the panel inserts for a professional, smooth finish.


