
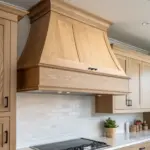
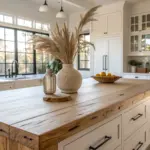
A rustic range hood can turn your cooktop wall into the coziest focal point in the whole kitchen. I’ve built a bunch of them in my shop, and the magic is always the same: warm wood textures paired with a little metal patina.
Chimney-Style Hood to the Ceiling

Running a rustic range hood “chimney” all the way up makes the kitchen feel taller and more high-end. I did one with stacked wood panels up to the crown line, and it became the obvious centerpiece without adding clutter.
Give these a look:
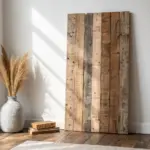
- Reclaimed Wood Planks: Create that authentic, time-worn texture for your hood by facing the frame with real reclaimed wood boards.
- Decorative Wood Molding: Add a polished finish to your custom hood design by trimming the edges with stainable wood moulding.
- Matte Clear Wood Finish: Protect your new wooden range hood from cooking grease while maintaining a natural, low-sheen rustic appearance.

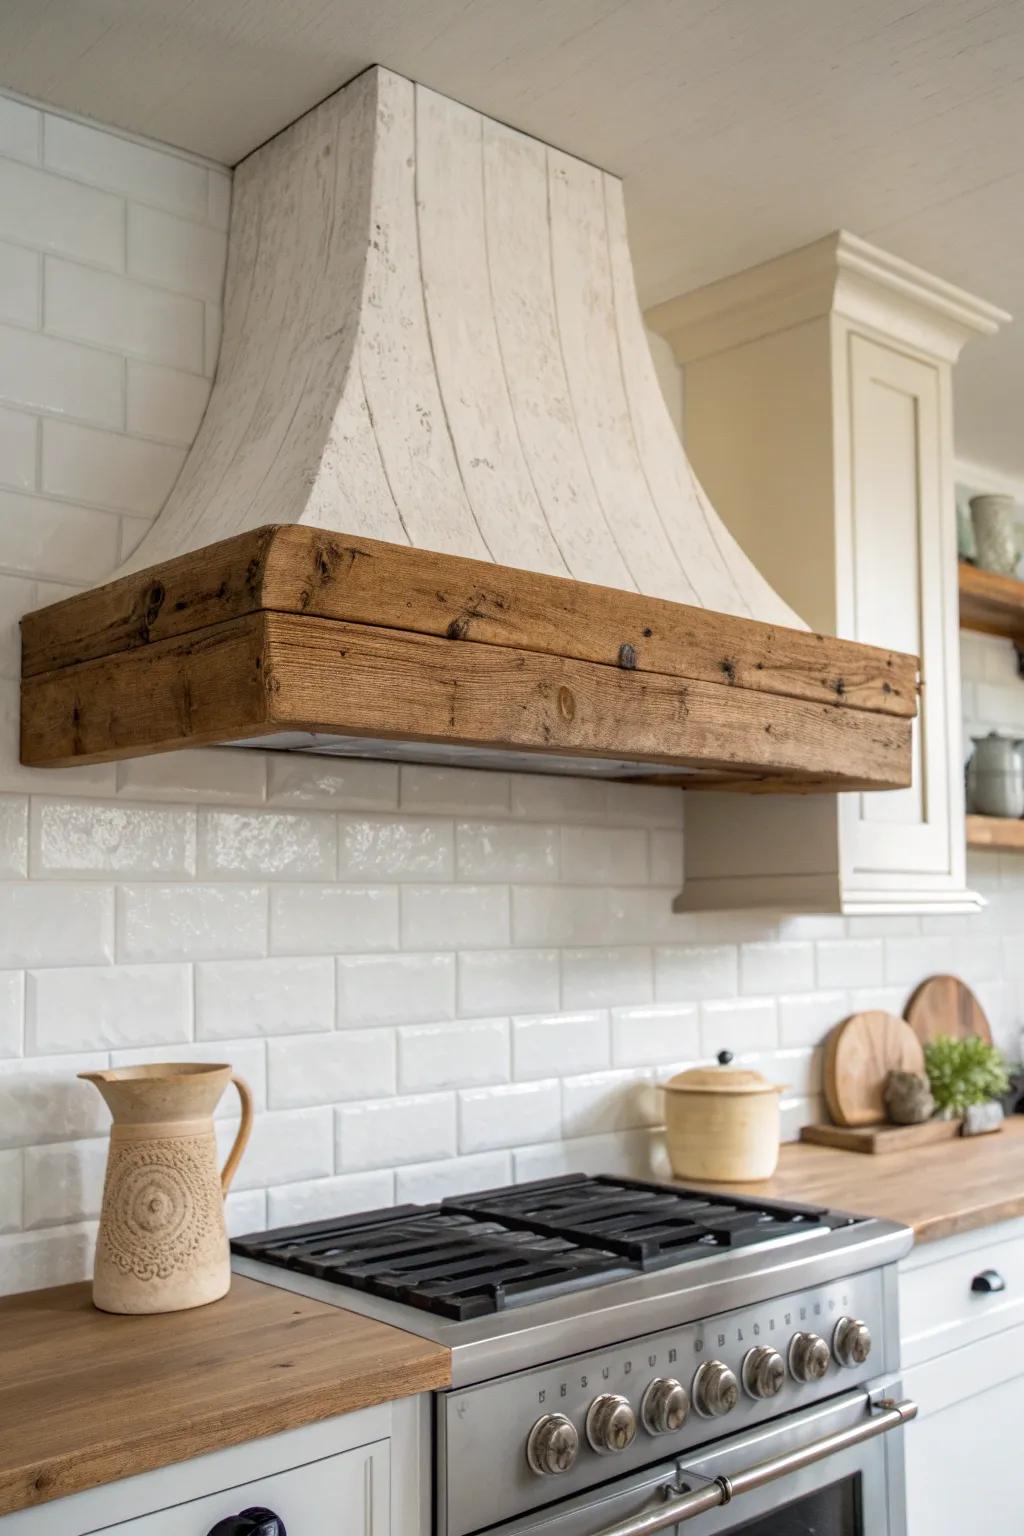
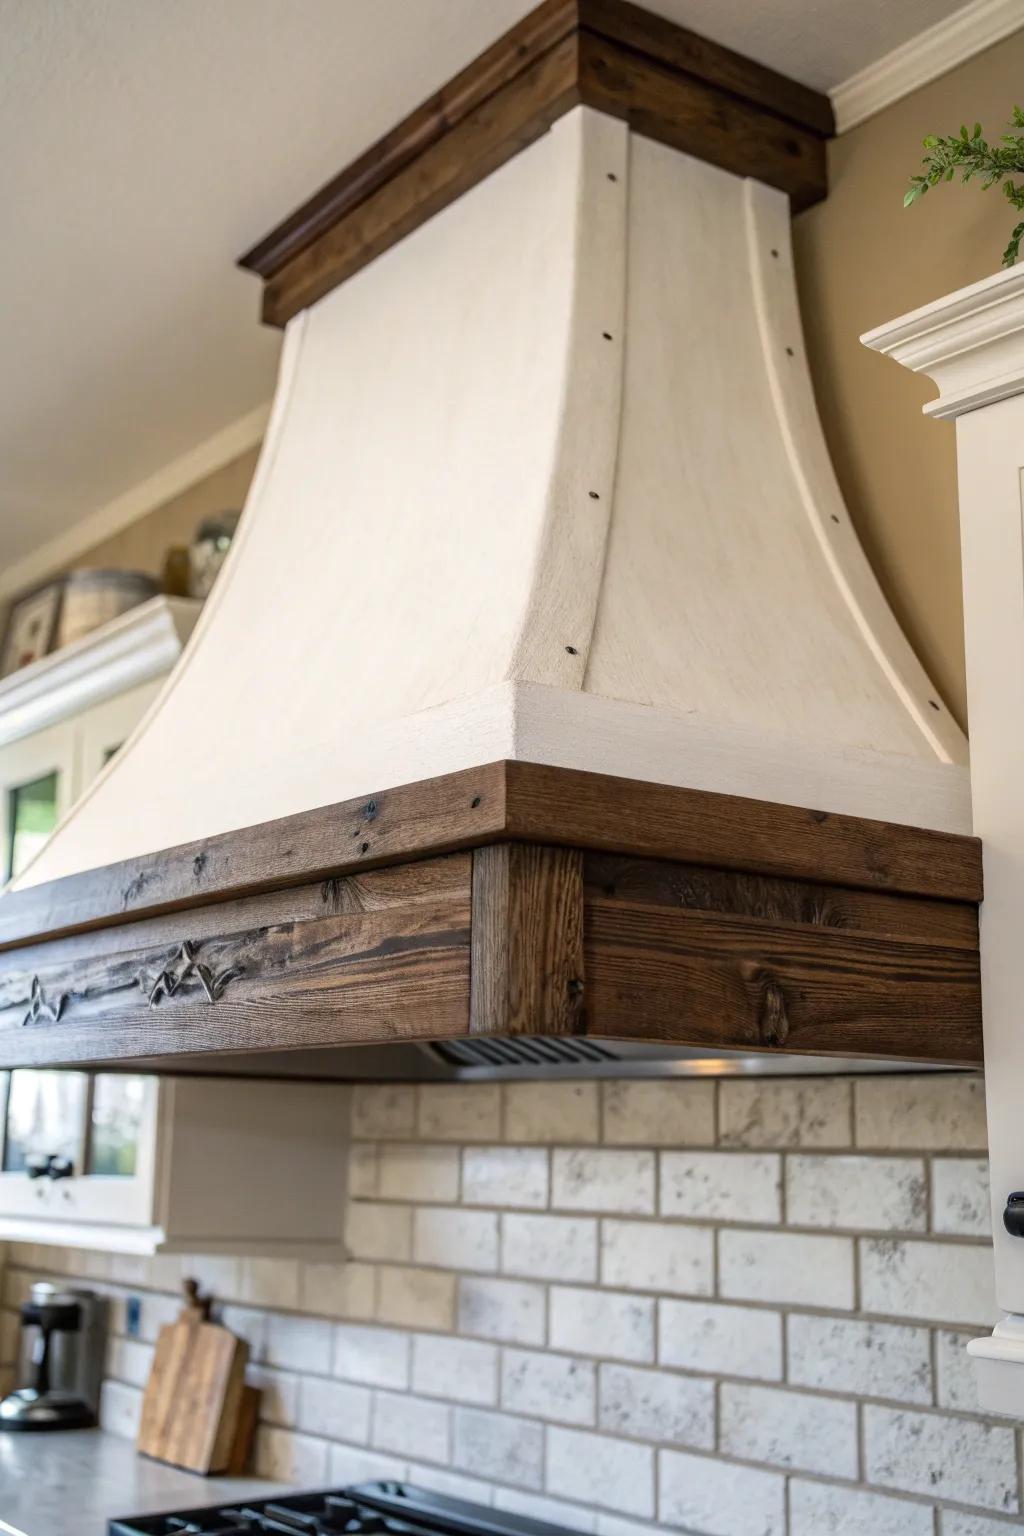
Reclaimed Wood Box Hood
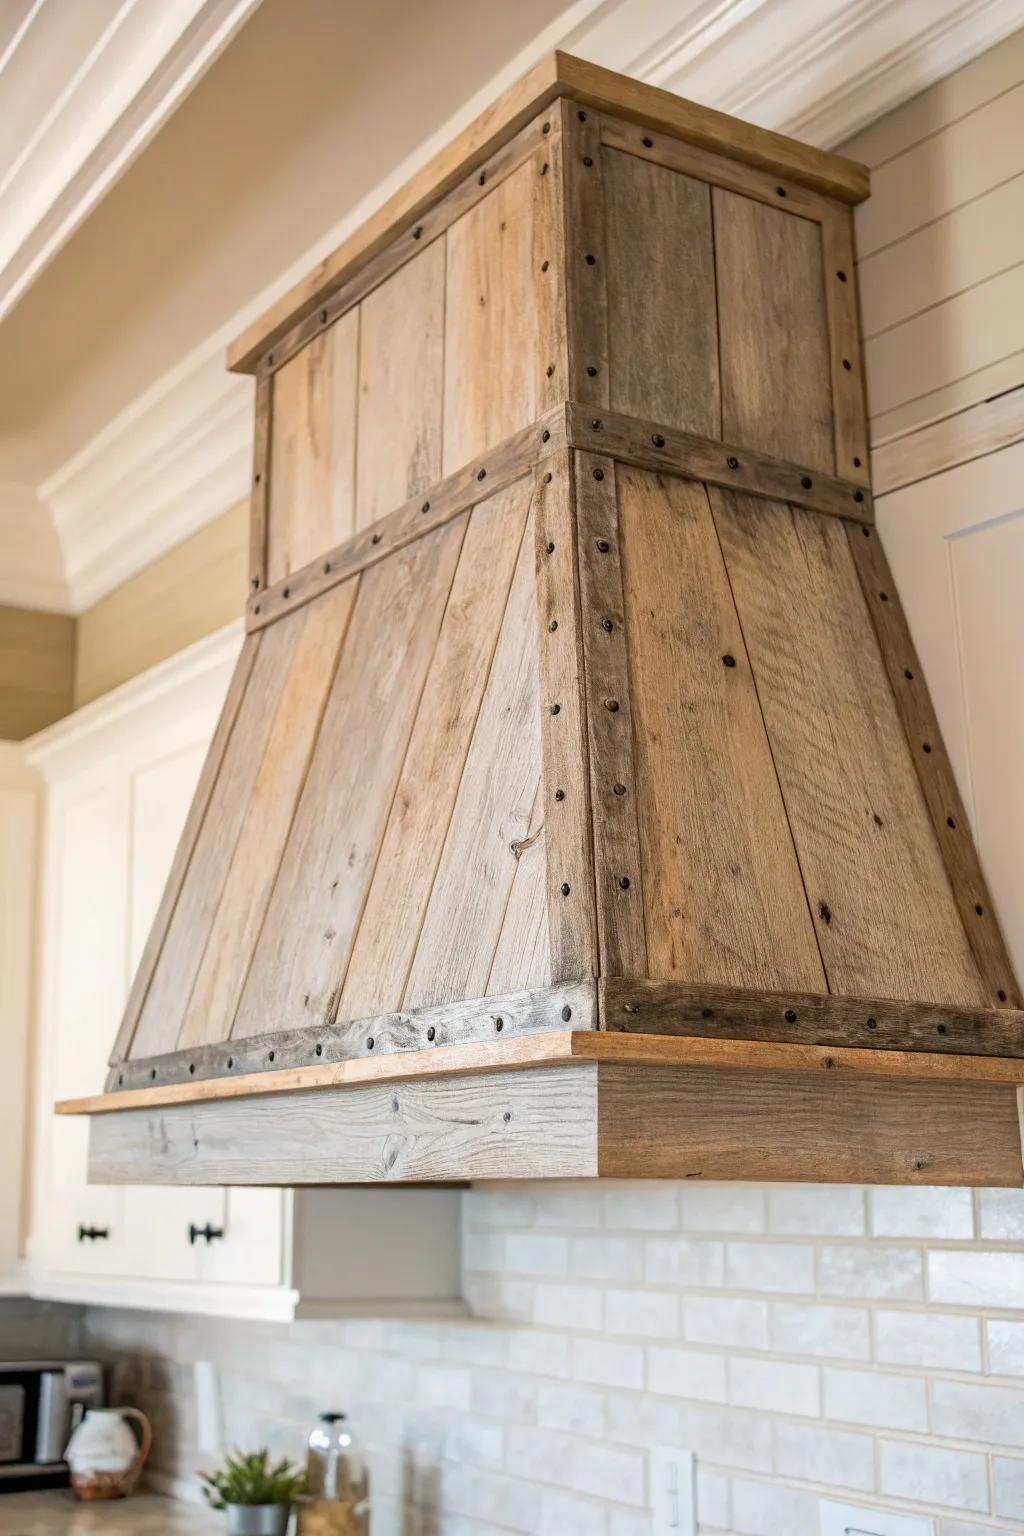
When I wrap a range hood insert with reclaimed wood, it instantly looks like it’s been there forever (in the best way). I love leaving saw marks and old nail holes because they make the rustic range hood feel real, not “new pretending to be old.”
Consider these options:
- Reclaimed Barn Wood Planks: Instantly add authentic texture to your range hood build with these peel-and-stick or nail-down reclaimed wood planks.
- Iron Upholstery Tacks: Replicate the industrial metal strapping look by securing wood or metal bands using these rustic iron decorative nails.
- Range Hood Insert: Install this powerful ventilation unit inside your custom wooden enclosure for modern function hidden by rustic charm.
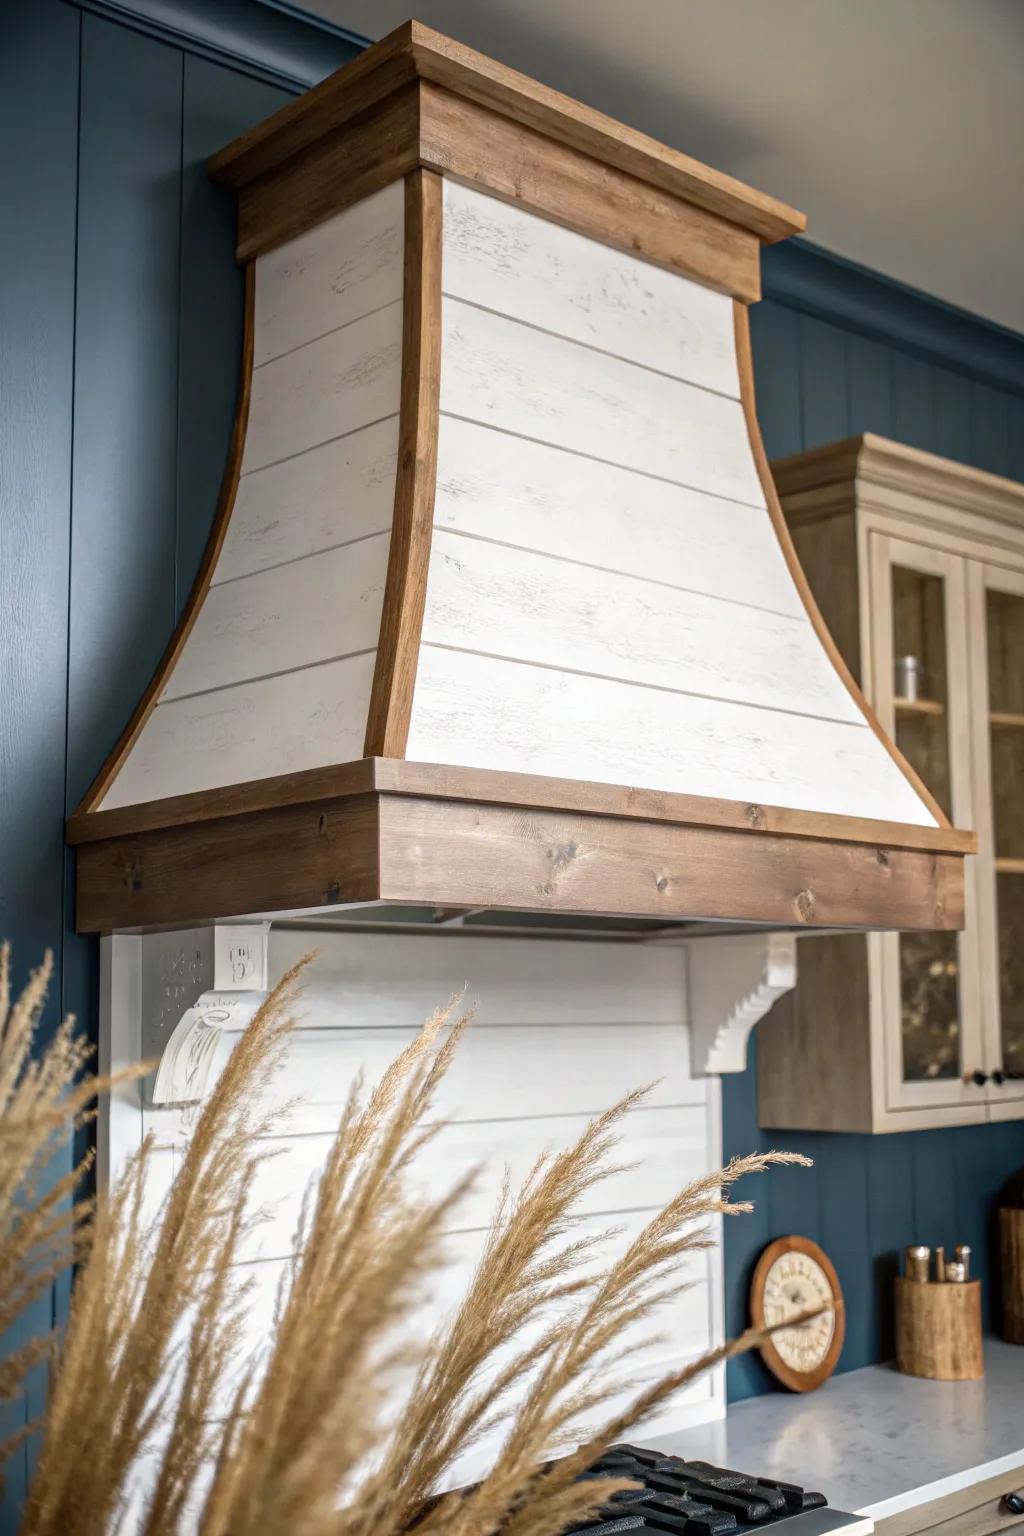
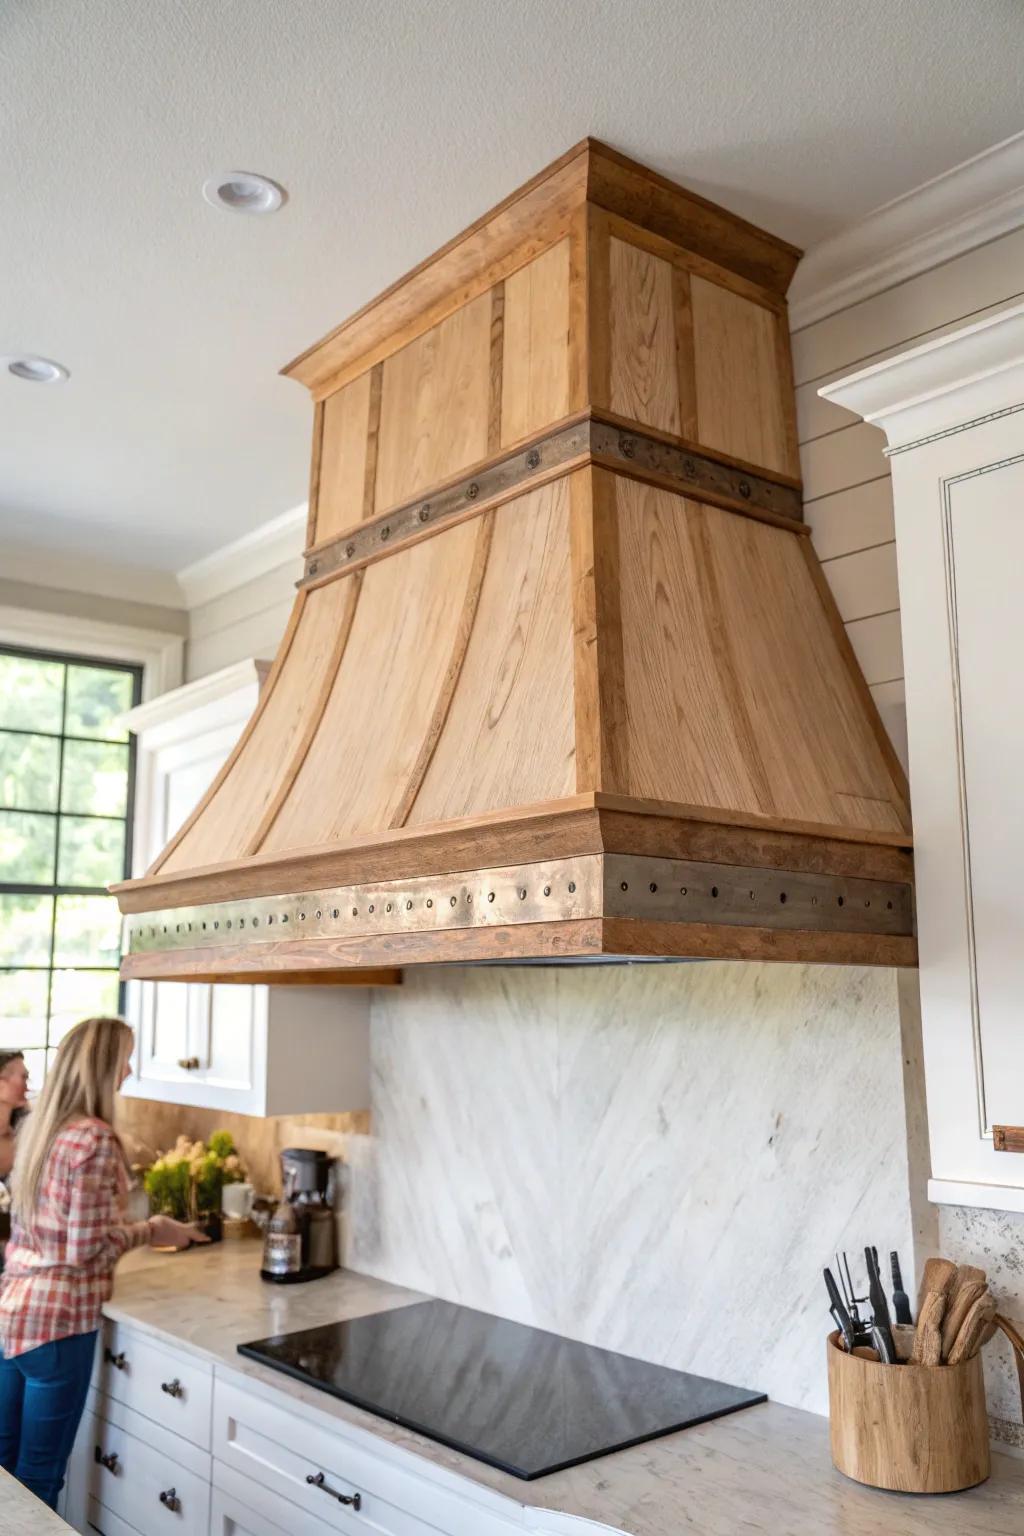
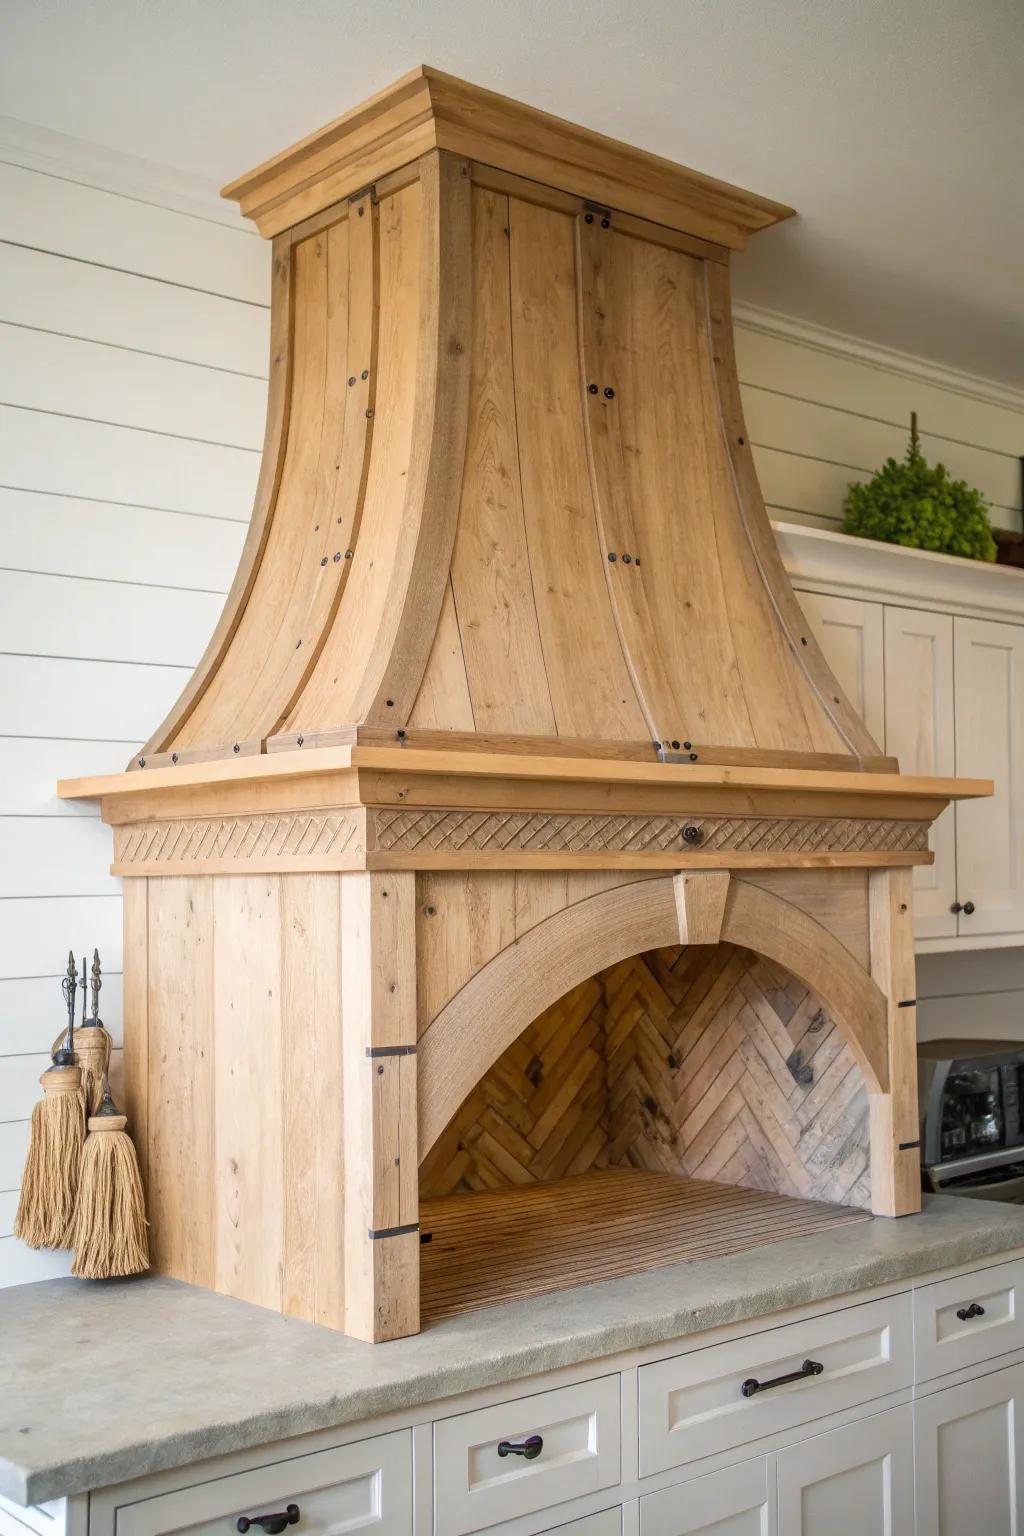
Tapered Farmhouse Wood Hood
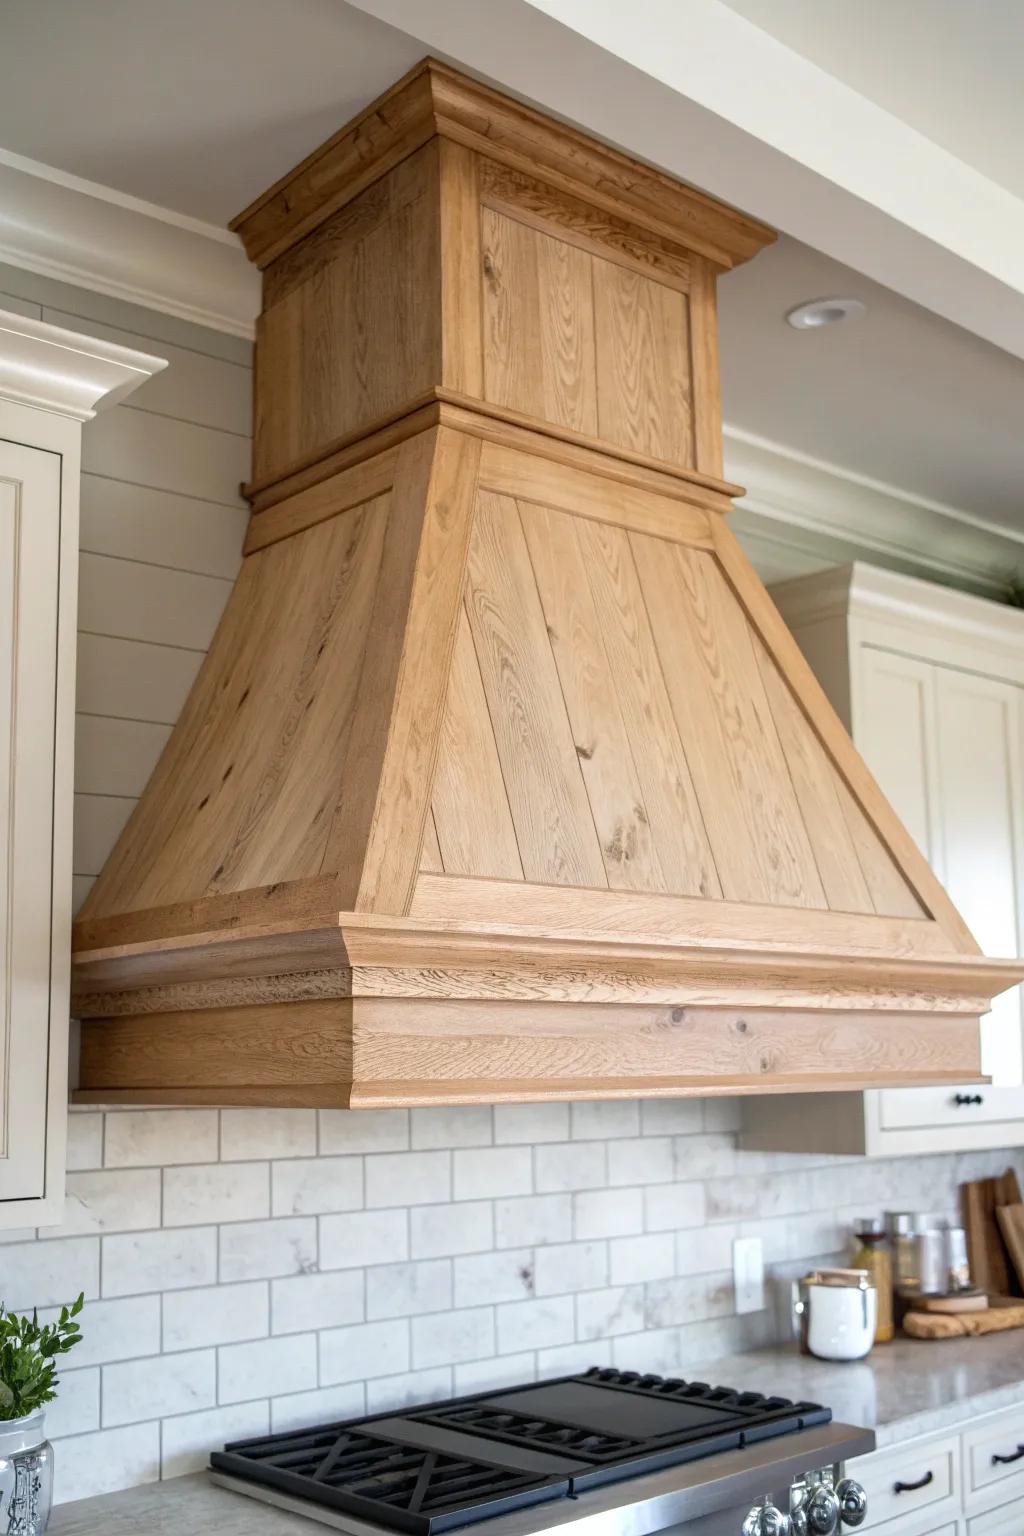
A classic tapered range hood is my go-to when someone wants that true farmhouse style silhouette. I usually build the frame from plywood, then skin it in wood planks so it looks hefty without weighing a ton.
May just do the trick:
- Reclaimed Wood Plank Paneling: Achieve that authentic farmhouse texture instantly by covering your hood frame with these easy-to-install real wood planks.
- Wood Corbels or Trim Molding: Add architectural detail to the base of your hood to create a polished, custom-built furniture look.
- Range Hood Insert Vent: Ensure your beautiful custom cover functions perfectly by installing a powerful, hidden ventilation unit underneath.
Mantel-Style Range Hood Shelf
Adding a chunky mantel shelf to the bottom of a rustic range hood is such an easy way to make it feel architectural. I’ve installed a few with a beam-like ledge, and it’s the perfect spot for a simple crock or a little greenery.
Check these products out:
- Reclaimed Wood Floating Beam Shelf: Add instant rustic character to your range hood design by mounting a sturdy, rough-hewn wooden shelf.
- Antique Whitewash Wood Stain: Recreate the distressed look of the upper hood section by applying a vintage-style whitewash finish.
- Decorative Rustic Clavos or Nails: Enhance the architectural feel of your wooden mantel shelf with these authentic-looking iron accent nails.
Shiplap-Wrapped Hood Face
A shiplap front on a range hood gives you that clean farmhouse rhythm without getting fussy. I’ve had great luck running the boards vertically for extra height, especially in kitchens with standard ceilings.
A few things you might like:
- Peel and Stick Reclaimed Wood Paneling: Instantly create that rustic farmhouse look on your own range hood with easy-to-apply, authentic wood planks.
- Dark Walnut Wood Stain: Achieve the rich, contrasting trim color shown in the photo by applying a dark walnut stain.
- Decorative Wooden Corbels: Add architectural interest under your range hood shelf with supportive, ornate wooden brackets ready for painting.
Tongue-and-Groove Plank Hood
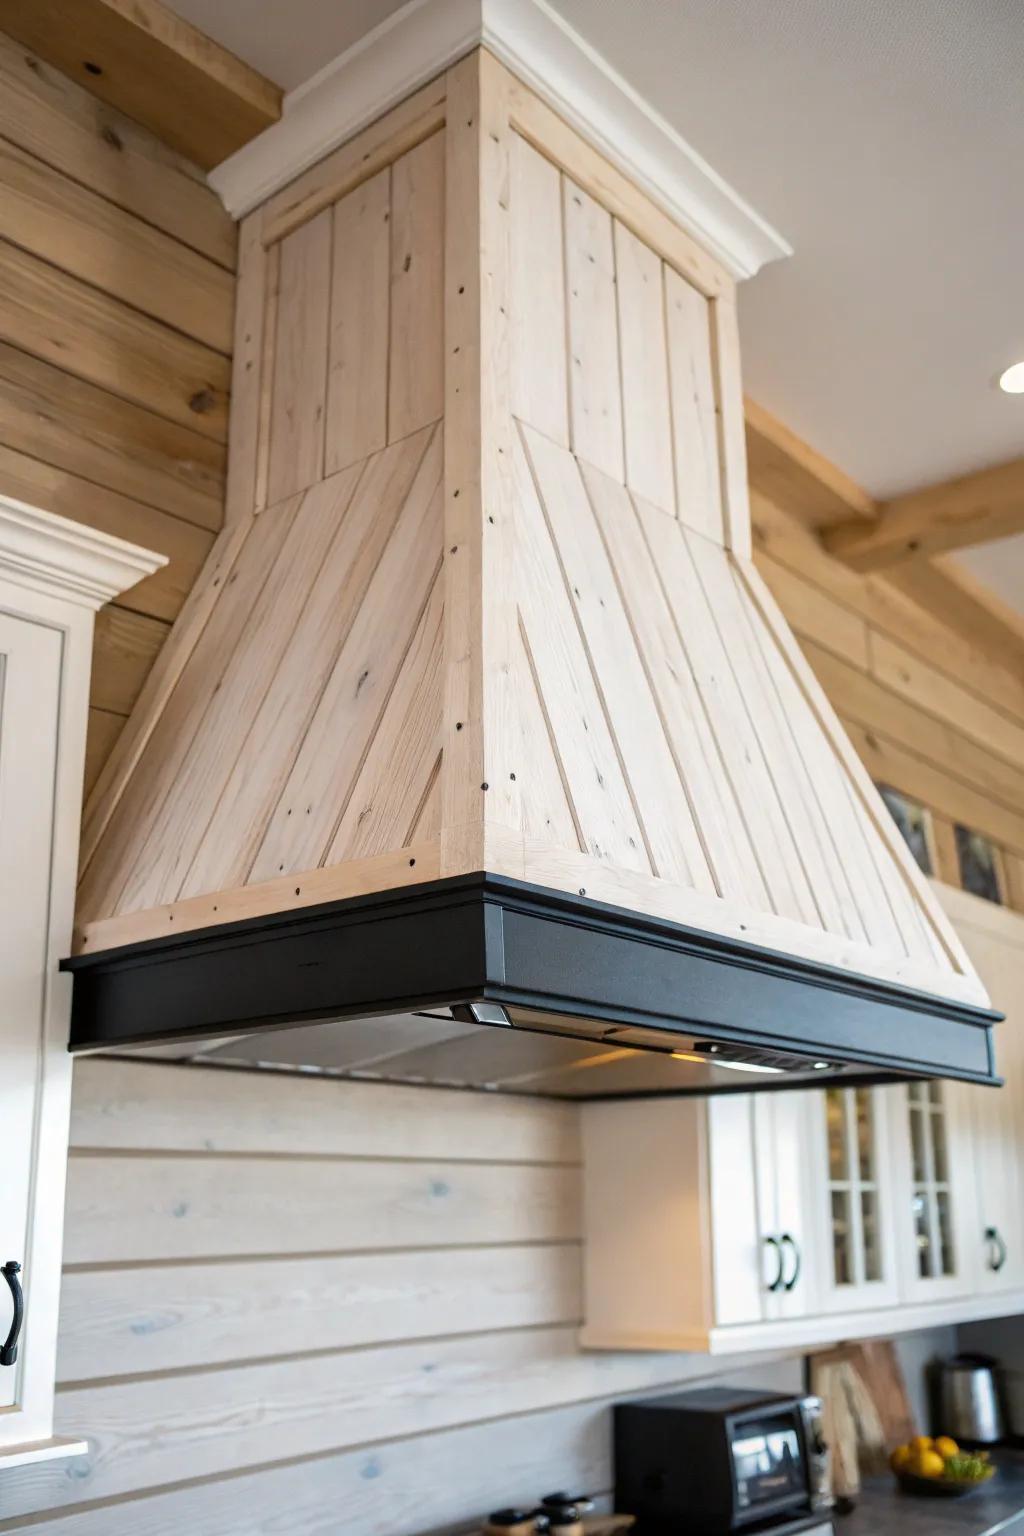
If you want a tighter, more “built-in” rustic range hood look, tongue-and-groove planking is my favorite. I used it on a hood that needed to match a wood ceiling, and the whole kitchen suddenly felt intentional.
These products might help:
- Tongue and Groove Wood Paneling Boards: Create that classic rustic texture by using real wood planks for your custom range hood build.
- Insert Range Hood Vent: Provide powerful ventilation hidden underneath your custom wood enclosure with a reliable stainless steel insert.
- Whitewash Wood Stain: Achieve the light, airy finish seen in the photo by applying a soft whitewash stain.

Whitewashed Wood Hood
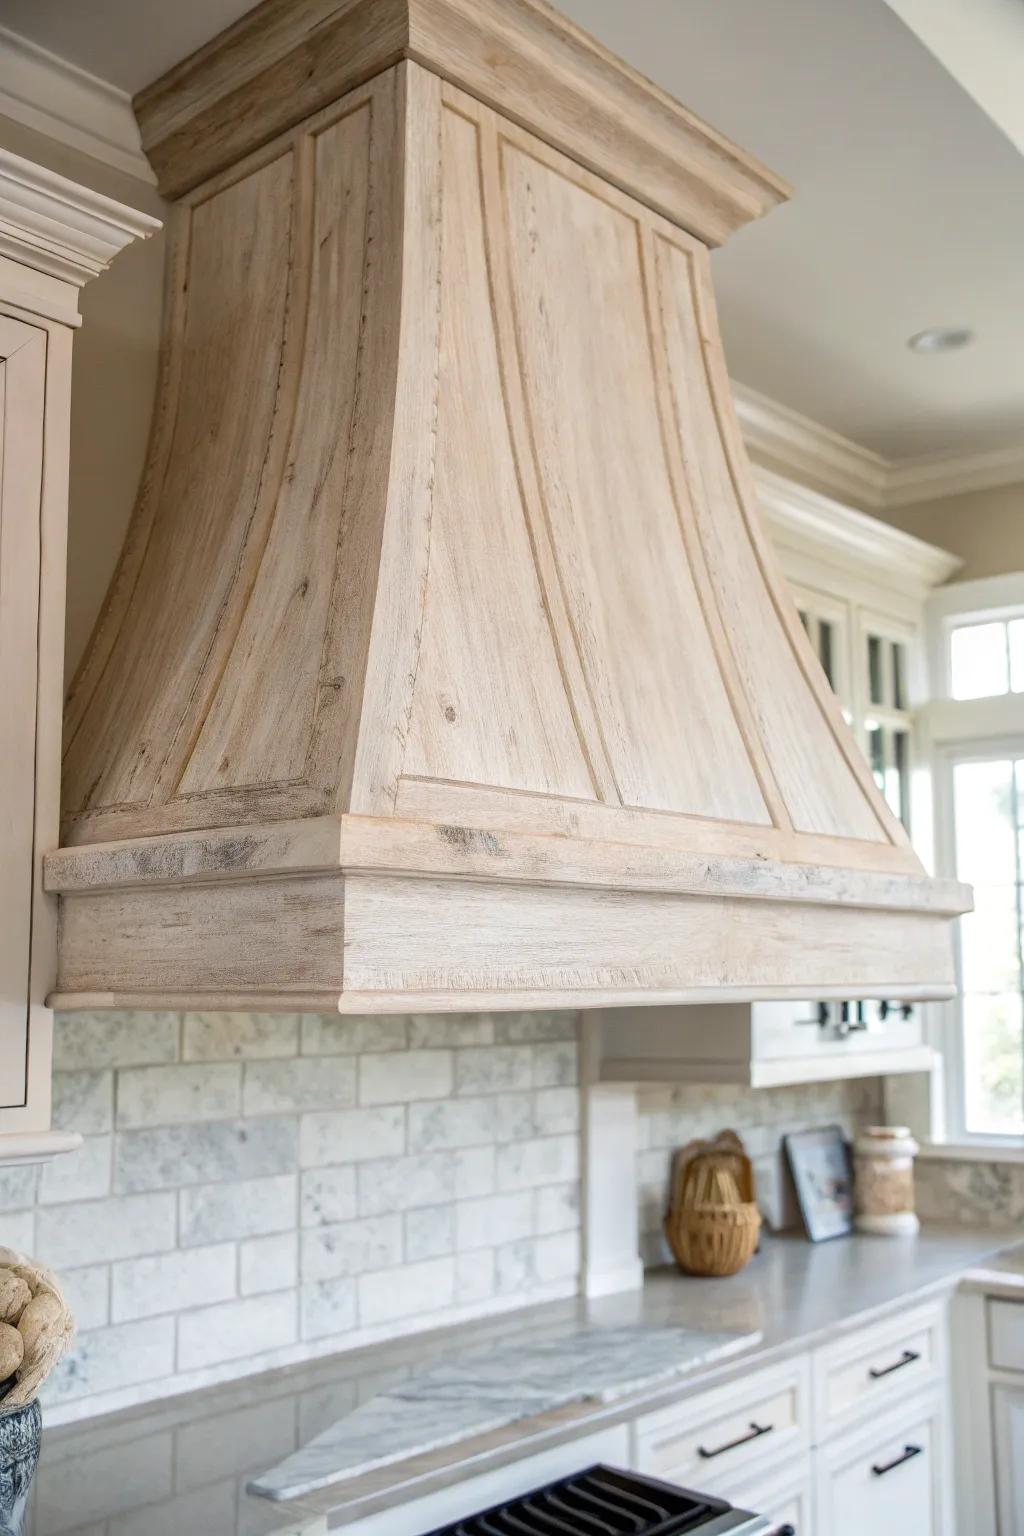
A whitewashed wood range hood keeps the rustic vibe but plays nicer with bright cabinets and light counters. I usually test my wash mix on scrap first because every board drinks stain differently (ask me how I know).
Products that could assist:
- Whitewash Wood Stain: Achieve that airy, coastal-rustic look yourself by applying this specialty stain to untreated wood surfaces.
- Matte Polyurethane Sealer: Protect your custom wood finish from steam and grease without adding unwanted shine or gloss.
- Range Hood Insert Fan: Power your custom wooden enclosure with a reliable ventilation unit designed to fit hidden inside.
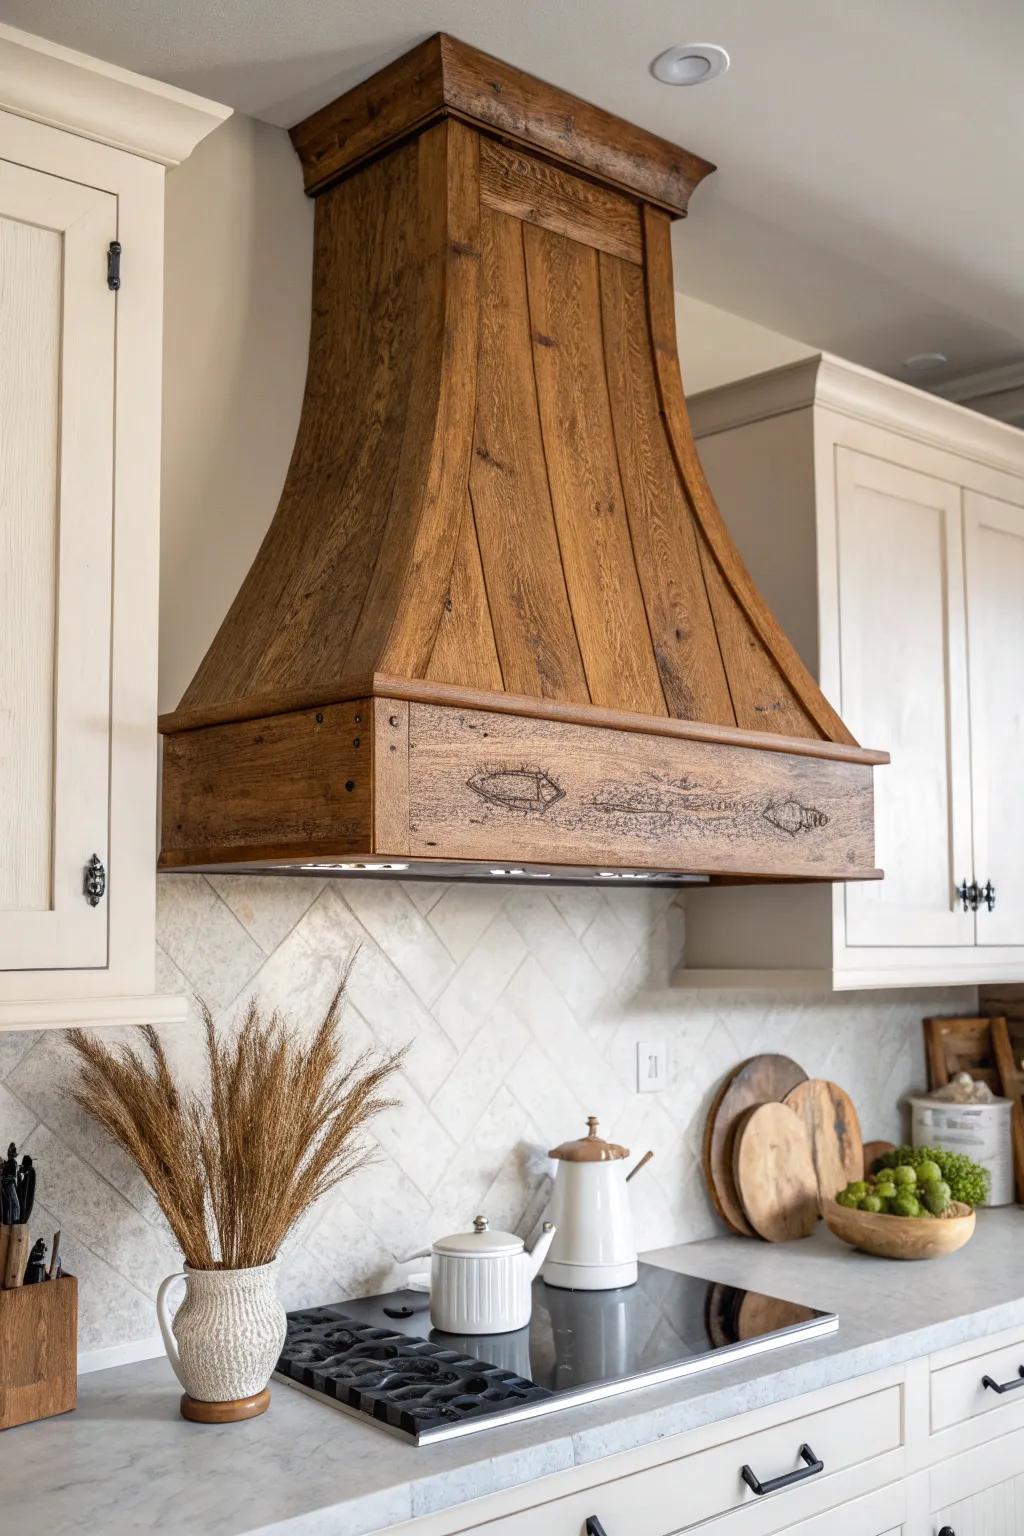
Dark-Stained Beam Base
I love building a rustic range hood with a thick, dark-stained timber beam at the base for contrast. I did this over a light tile backsplash once, and the hood looked like it “framed” the whole cooking zone.
Useful items to consider:
- Dark Walnut Wood Stain: Achieve that rich, custom timber look by applying a high-quality dark stain to your wooden range hood base.
- Faux Wood Floating Beam: Install a lightweight faux wood mantel if building a heavy timber structure is too difficult for your DIY project.
- Decorative Clavos / Nail Heads: Add authentic rustic charm to the hood’s vertical edges with hammered iron nail heads for a handcrafted finish.
Mixed Wood and Black Metal Trim
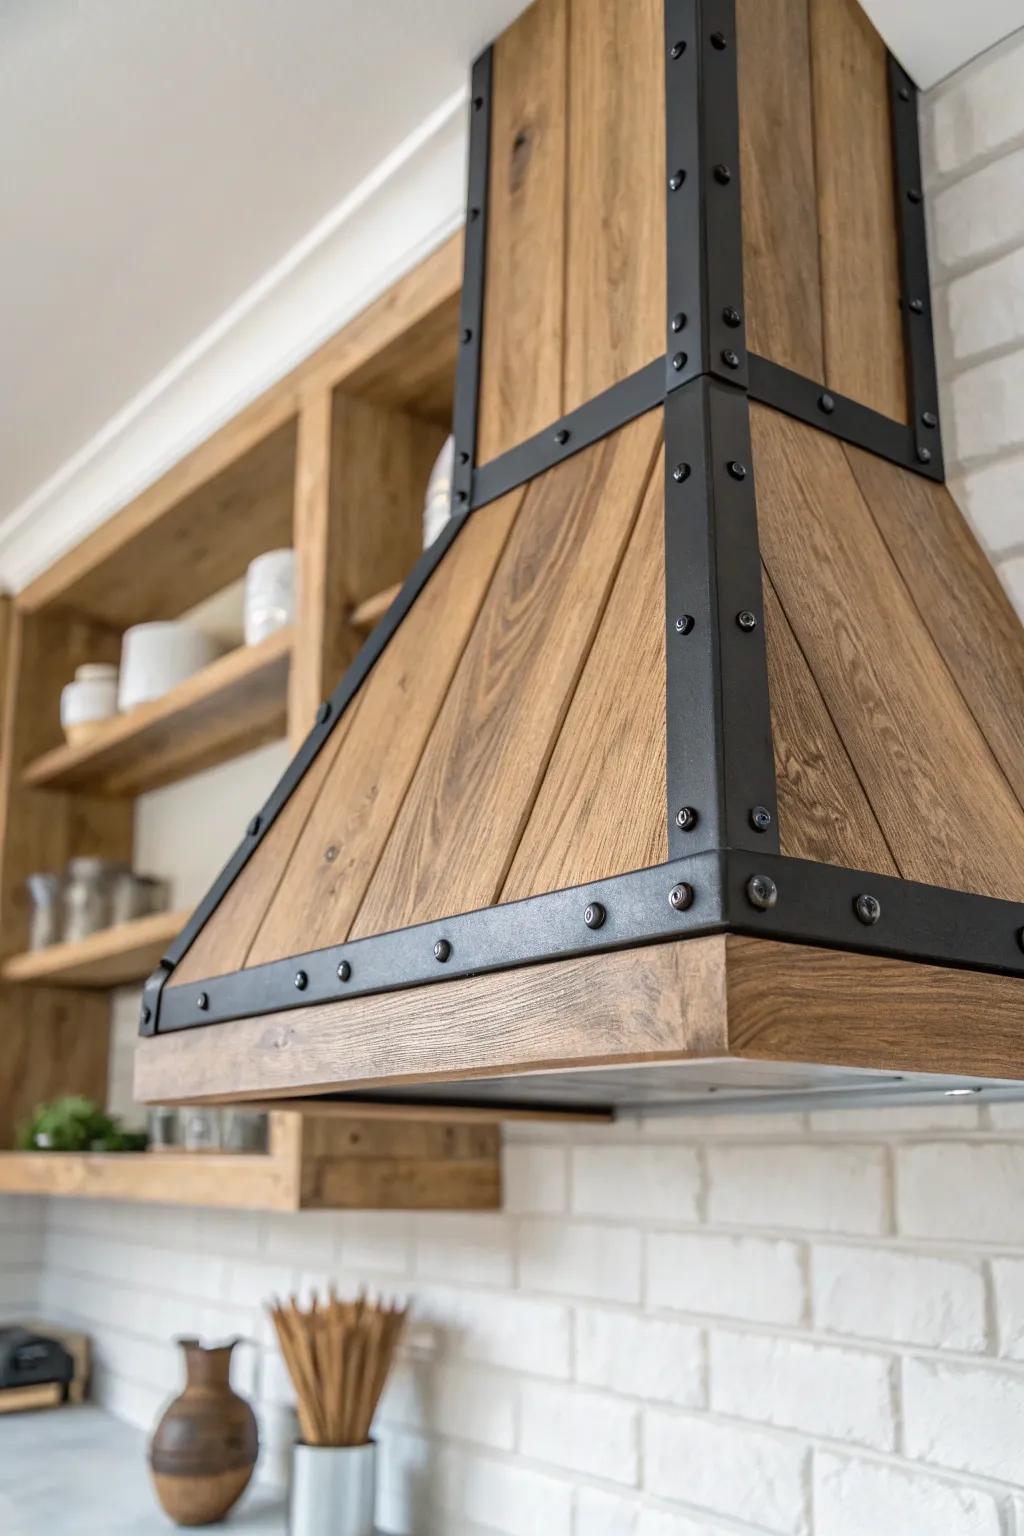
A little black metal trim on a wood range hood adds that modern-rustic edge without losing warmth. I’ve used simple flat bar straps and faux rivets, and it instantly reads like old-world craftsmanship.
A few helpful options:
- Flat Black Metal Strapping: Use these durable metal strips to create the industrial framing for your custom wood range hood project.
- Black Decorative Clavos or Rivets: Add authentic old-world character easily by installing these rustic nail heads along your metal strapping.
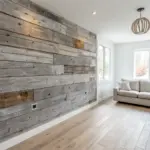
- Reclaimed Wood Planks: Achieve the textured, rustic base for your hood design with these easy-to-install weathered wood wall planks.
Aged Copper-Tone Insert Surround
Even a small band of copper-toned metal around a range hood opening makes the whole setup feel richer. I’ve done this as a thin apron detail, and the warm patina plays so nicely with oak and walnut.
Try these:
- Adhesive Copper Metal Roll: Add a realistic metallic look to your range hood trim easily with this peel-and-stick solution.
- Decorative Clavos or Rivets: Install these rustic nail heads into wood or faux metal trim to mimic hammered industrial details.
- Copper Decorative Strapping: Use flexible metal strapping to create structural-looking bands around the base of your wooden hood.
Stone Alcove Range Hood
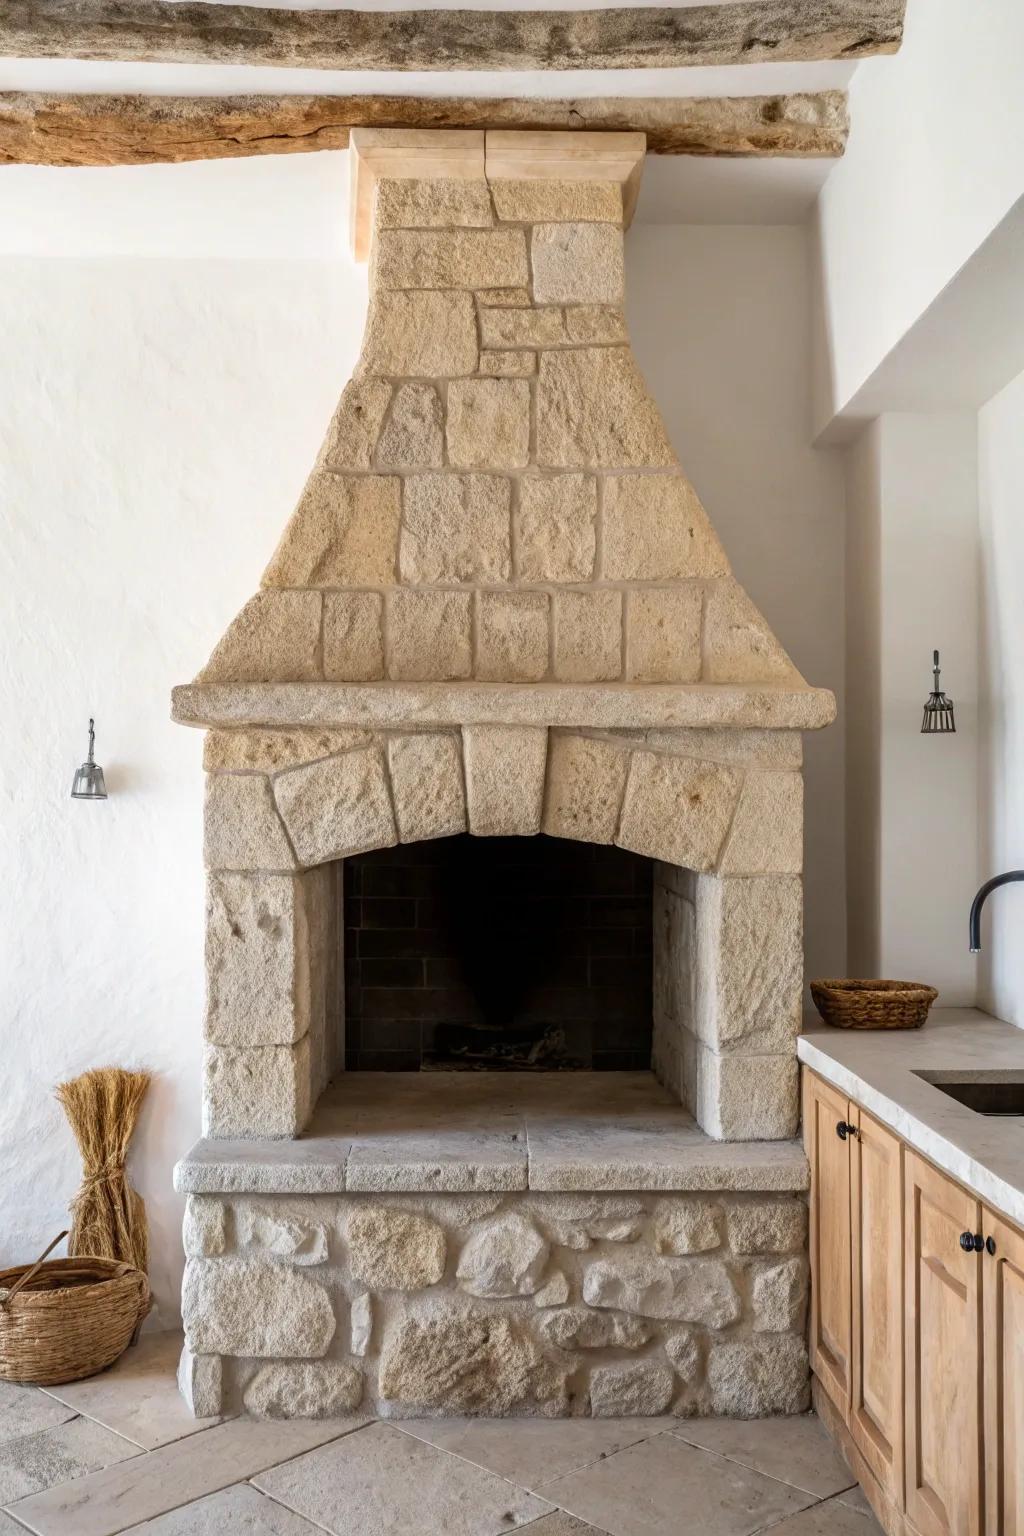
If you want a dramatic rustic range hood moment, building the hood into a stone surround feels like a cozy hearth. I helped on one where the stone wrapped the cooktop wall, and it turned everyday cooking into a cabin vibe.
These products might be useful:
- Faux Stone Veneer Panels: Create the look of a solid stone hearth easily by applying lightweight, realistic veneer panels to existing structures.
- Rustic Wooden Mantel Beam: Add warmth and contrast to your stone surround by installing a rough-hewn floating shelf or mantel beam.
- Woven Storage Baskets: Enhance the natural, rustic aesthetic while organizing kitchen essentials with durable, texture-rich woven storage baskets nearby.
Plaster Hood With Wood Beam Trim
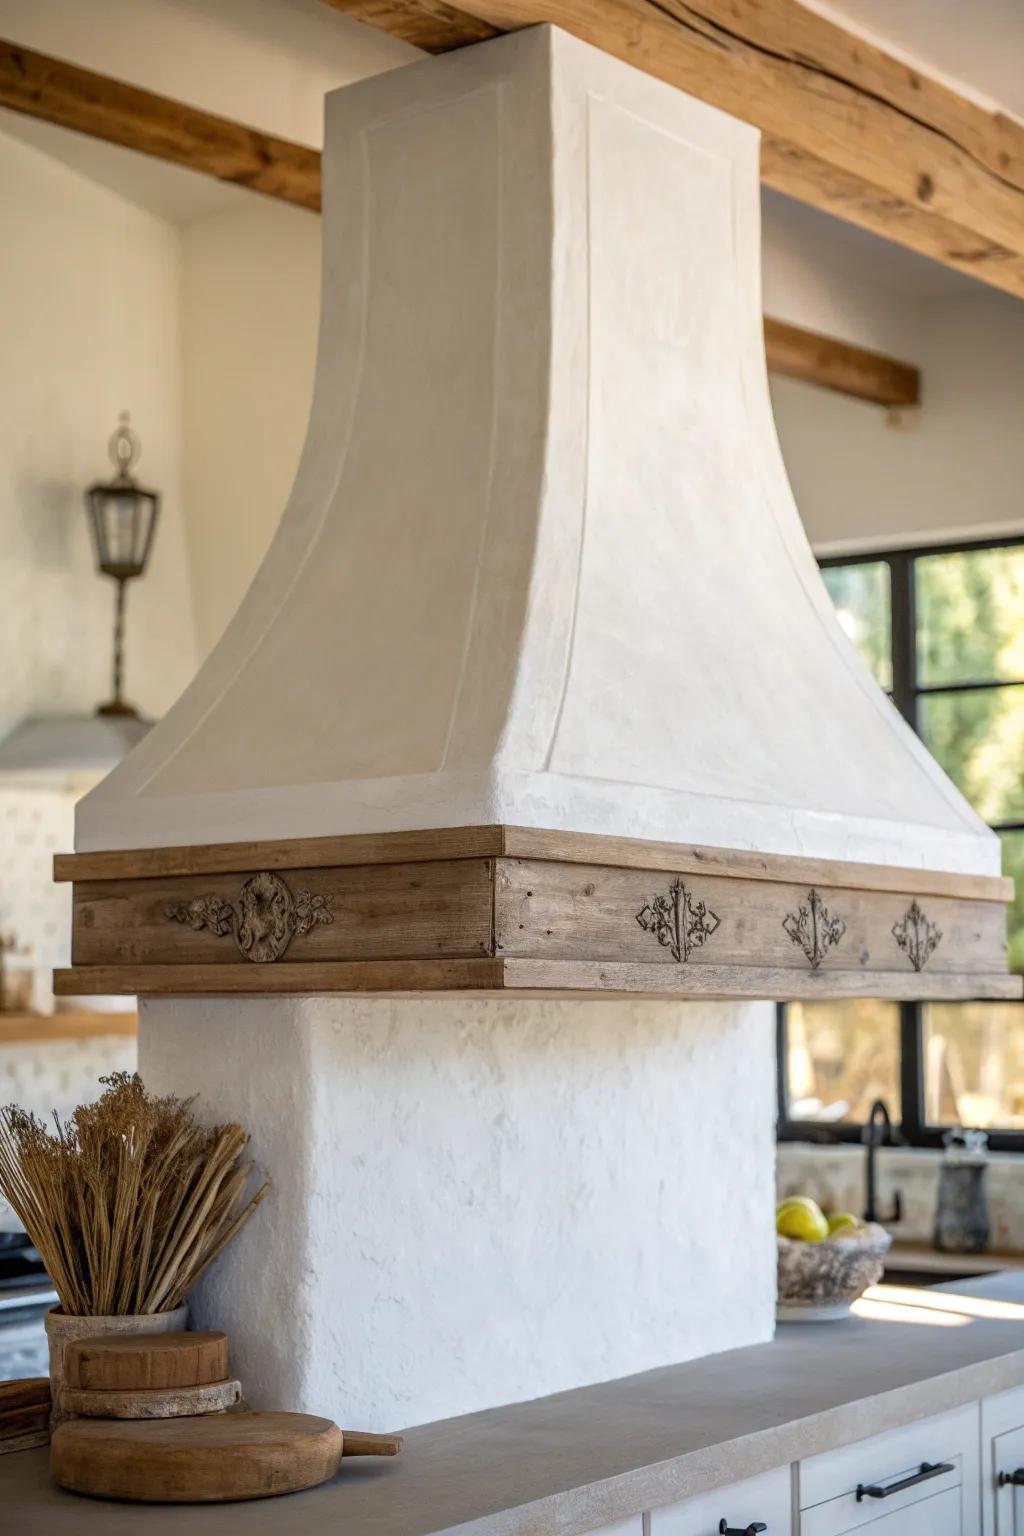
A smooth plaster hood trimmed with a rustic wood beam is such a pretty mix of soft and rugged. I’ve used this approach when clients wanted “old farmhouse” but still wanted the hood to feel light and sculptural.
You might give these a try:
- Decorative Wood Appliques: Add intricate vintage details to plain beams or mantels instantly with these easy-to-install carved wood accents.
- Venetian Plaster Finish: Create that authentic, high-end smooth stone look on your range hood box using this specialized plaster finish.
- Reclaimed Wood Floating Shelves: Mimic the rustic beam look easily by installing a thick, distressed wood shelf as your range hood trim.
Arched Rustic Range Hood Opening
An arched opening makes a rustic range hood feel custom in a way straight lines just don’t. I’ve built the arch with a simple template and thin plywood ribs, then finished it in wood planks for that handmade look.
Possibly handy products:
- Flexible Plywood Sheets: Create smooth, custom arches for your range hood frame easily using bendable wood designed for curved structures.
- Reclaimed Wood Planks: Achieve an authentic rustic look by covering your range hood frame with weathered, textured real wood planks.
- Decorative Clavos (Nail Heads): Add charming, vintage-style metal accents to the corners and panels of your wood hood for finished detail.
Built-In Plate Ledge on the Hood
A shallow plate ledge built into the face of a rustic range hood is such a charming detail when you want decor but hate dusting open shelves. I’ve added little side returns to keep it looking intentional, not like an afterthought.
A few choices to try:
- Decorative Wood Corbels: Add architectural interest to your hood design by incorporating sturdy, rustic wood corbels beneath your shelf or ledge.
- Vintage-Style Decorative Plates: Display charming vintage-inspired ceramic plates on your new ledge to create a warm, lived-in farmhouse aesthetic.
- Iron Plate Display Stands: Secure your favorite heirlooms safely on the range hood ledge with these simple, low-profile iron display stands.
Salvaged Tin Tile Hood Skin
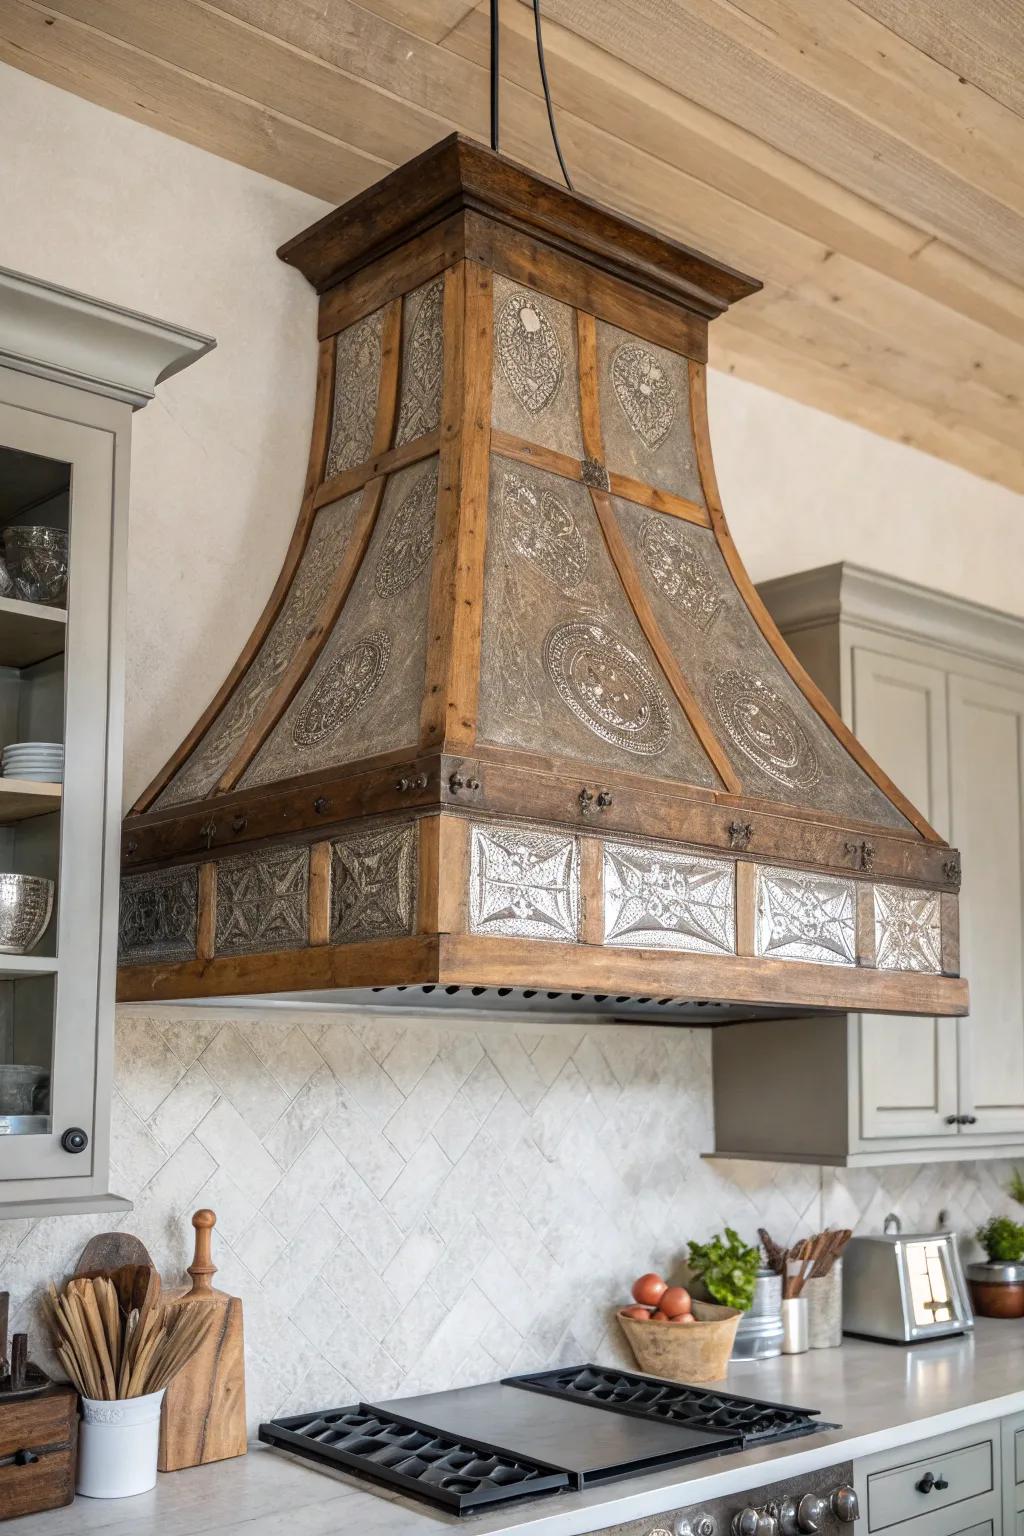
Wrapping a range hood with tin ceiling tile is a total wow move, especially if you let the aged finish show. I’ve done this with a wood frame underneath, and the mix of embossed metal and rustic wood feels seriously vintage.
You might like:
- Faux Tin Ceiling Tiles: Create a vintage metal look instantly by applying these embossed tiles directly to your custom range hood frame.
- Reclaimed Barn Wood Planks: Frame your tin panels with authentic weathered wood to achieve the sturdy, rustic structure seen in this design.
- Decorative Clavos / Nail Heads: Add the final industrial touch to your woodwork by hammering these rustic iron accents into the trim.
Charred Wood (Shou Sugi Ban) Hood

A charred wood rustic range hood brings instant drama, and it hides fingerprints better than most finishes I’ve tried. I’ve sealed the burned boards carefully so the surface stays clean while still showing that deep, crackly grain.
Items that may come in handy:
- Propane Torch Kit: Create your own charred finish safely by using a reliable torch to burn the wood grain perfectly.
- Matte Polyurethane Sealer: Protect your charred wood hood and lock in potential soot with a durable, clear matte finish sealer.
- Decorative Black Moulding: Add architectural detail to the hood edges with trim that can be charred to match the main panels.
Driftwood and Rope Trim Hood
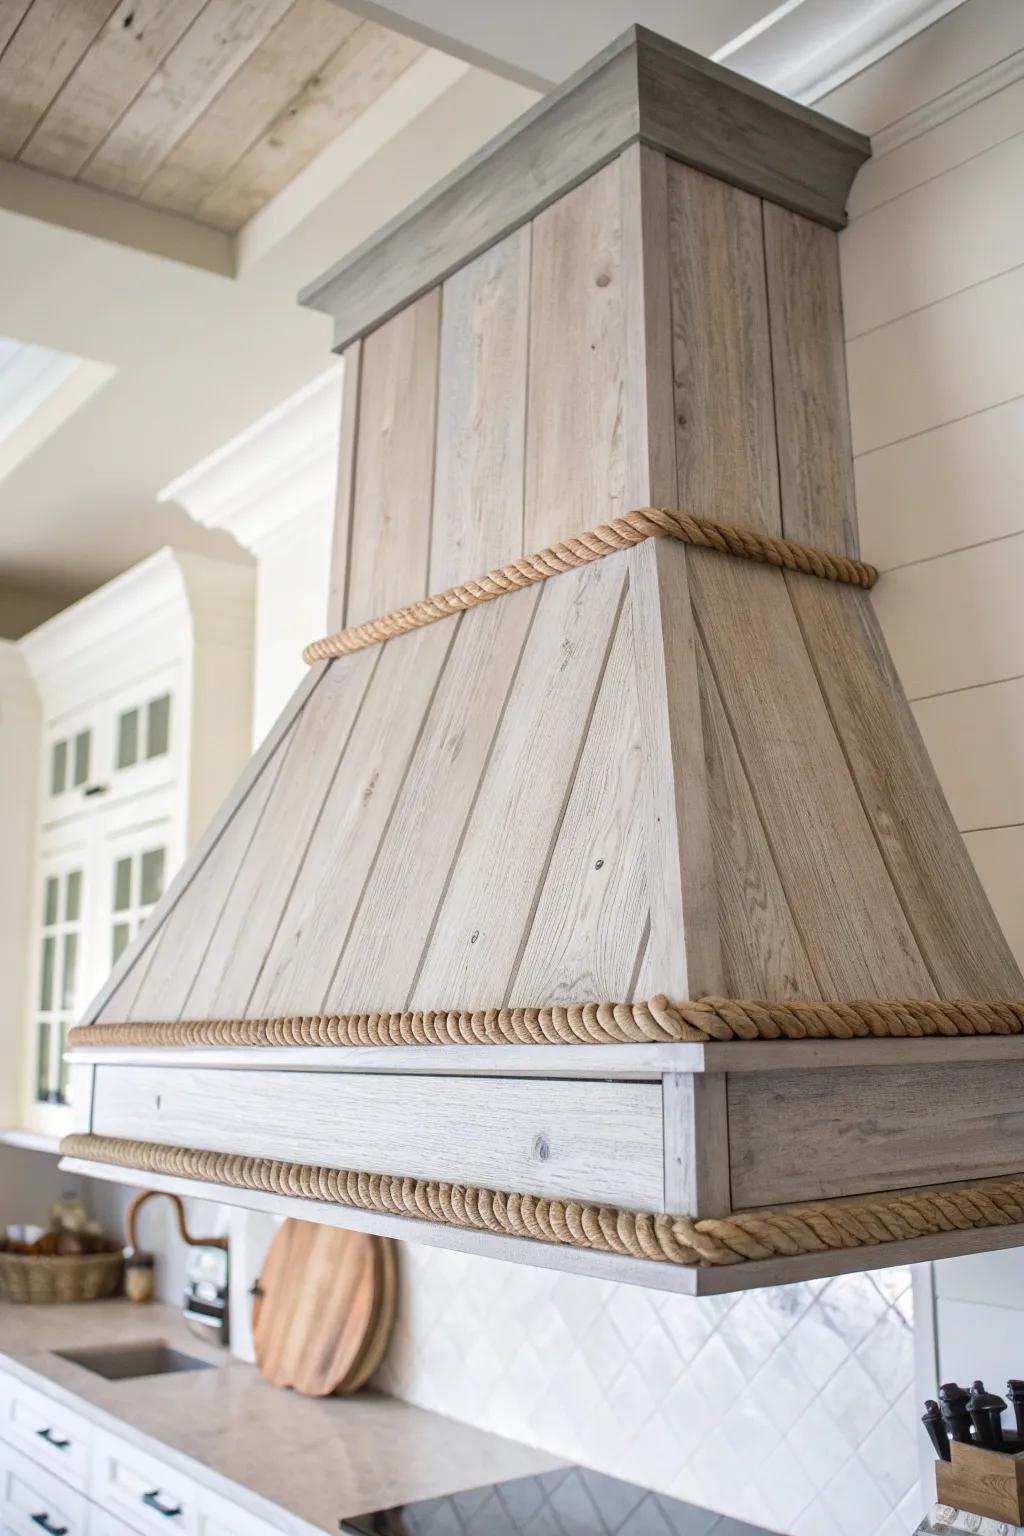
For a coastal-rustic twist, I once trimmed a range hood with driftwood and a subtle rope detail (kept up and away from heat zones, of course). It sounds wild, but the soft gray wood tones made the hood feel like a found treasure.
Might be a good match:
- Twisted Manila or Jute Rope: Use thick, natural fiber rope to wrap around your hood’s trim for that authentic coastal-rustic texture.
- Grey Wood Stain or Weathering Wash: Achieve that sun-bleached driftwood look on new lumber by applying a specialized grey weathering stain.
- Reclaimed Wood Planks or Paneling: Build the structure of your custom hood using authentic reclaimed wood planks for instant rustic character.


