
Base trim is one of those small details that makes a room feel instantly finished.
Extra-Tall Statement Base Trim
I’m a little obsessed with tall baseboards, especially in open rooms where you want the walls to feel grounded. The first time I installed oversized base trim, the whole space looked more “custom” even before I decorated.
Maybe worth checking out:
- Self-Adhesive Wall Molding Trim: Create a custom look quickly by applying this easy-to-use trim to boost your existing baseboard height.
- Heavy-Duty Construction Adhesive: Ensure your new oversized baseboards stay perfectly flush and secure against the wall for years.
- Digital Sliding T-Bevel Angle Finder: Get professional, gap-free corners on your trim projects by measuring tricky angles with precision.


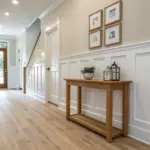
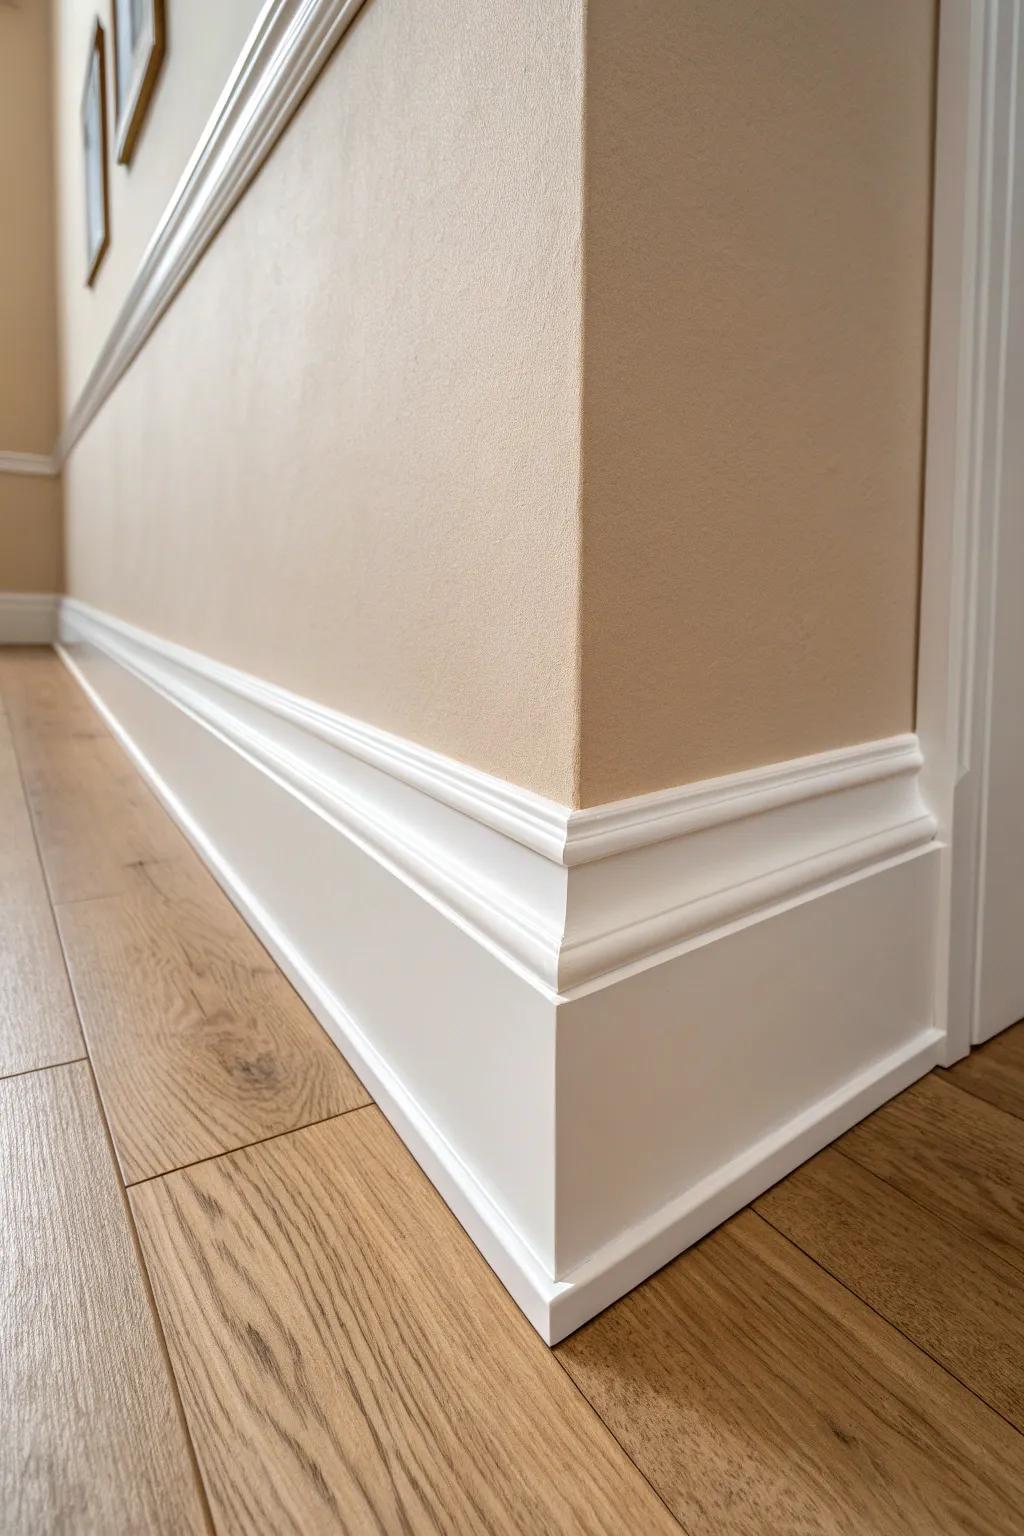
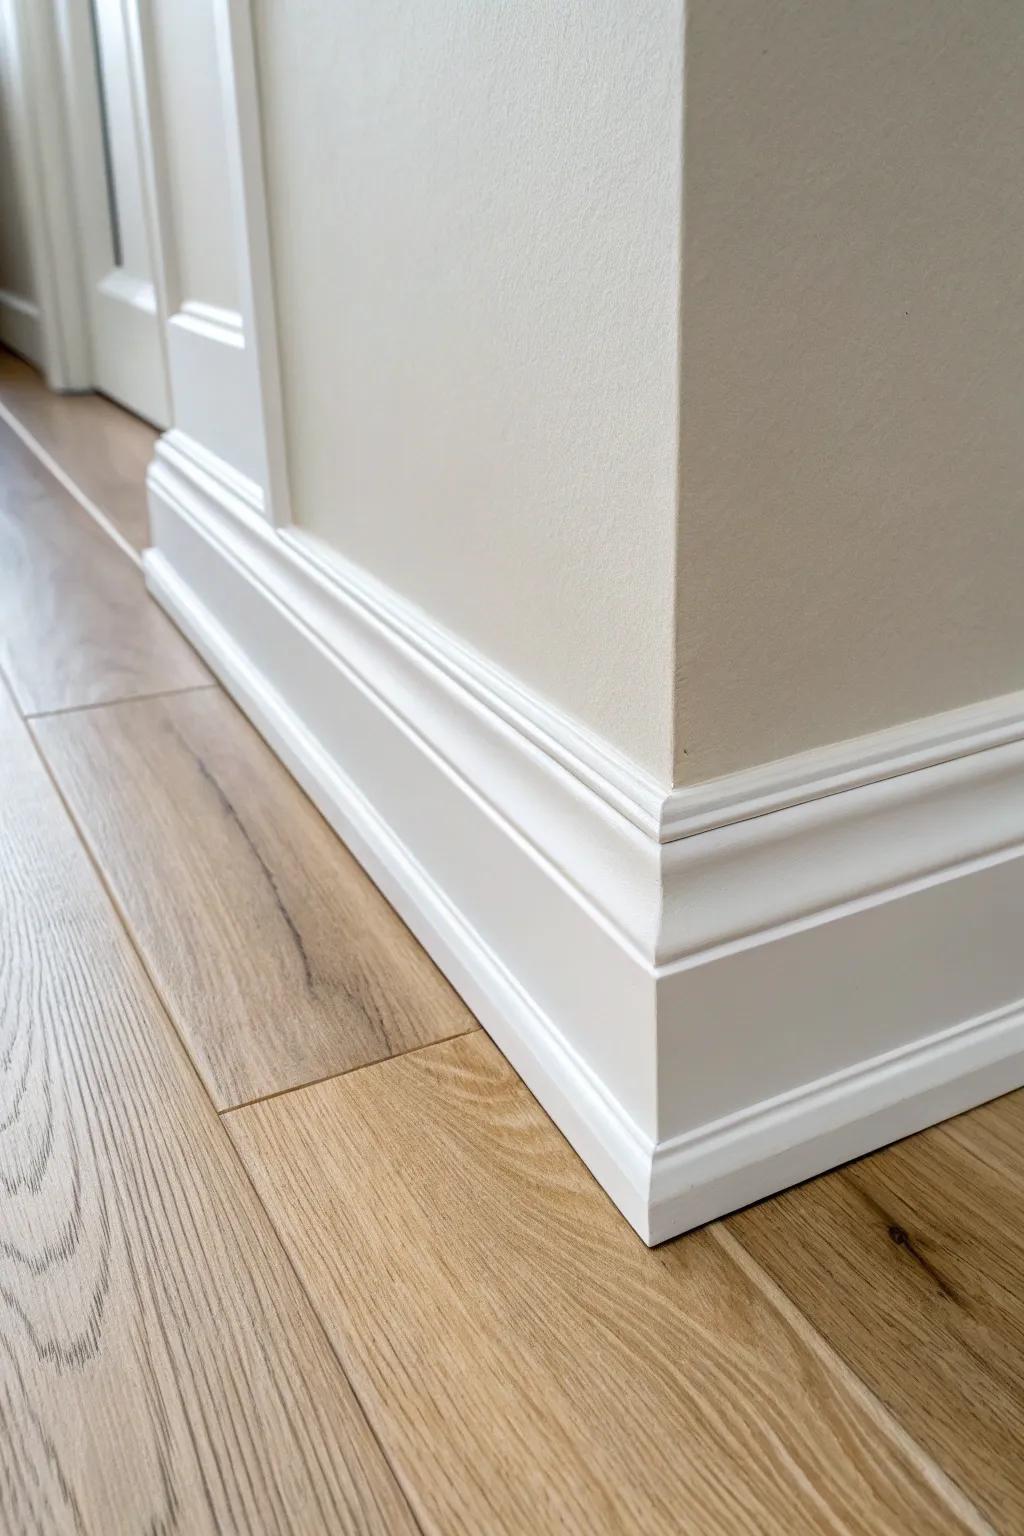
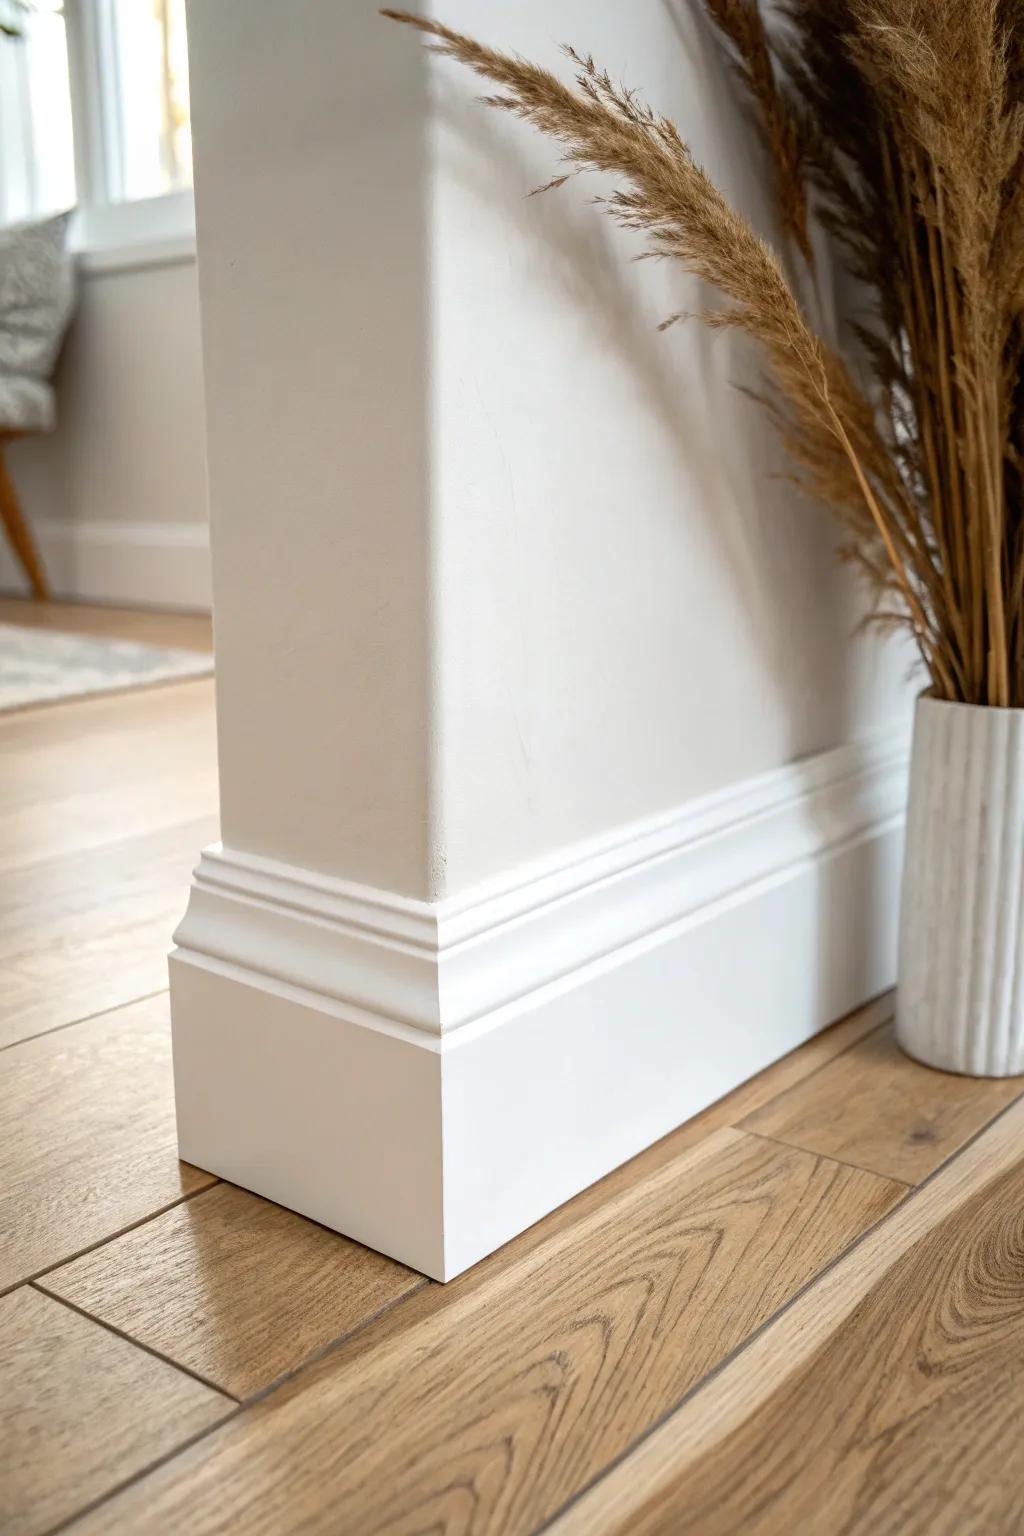
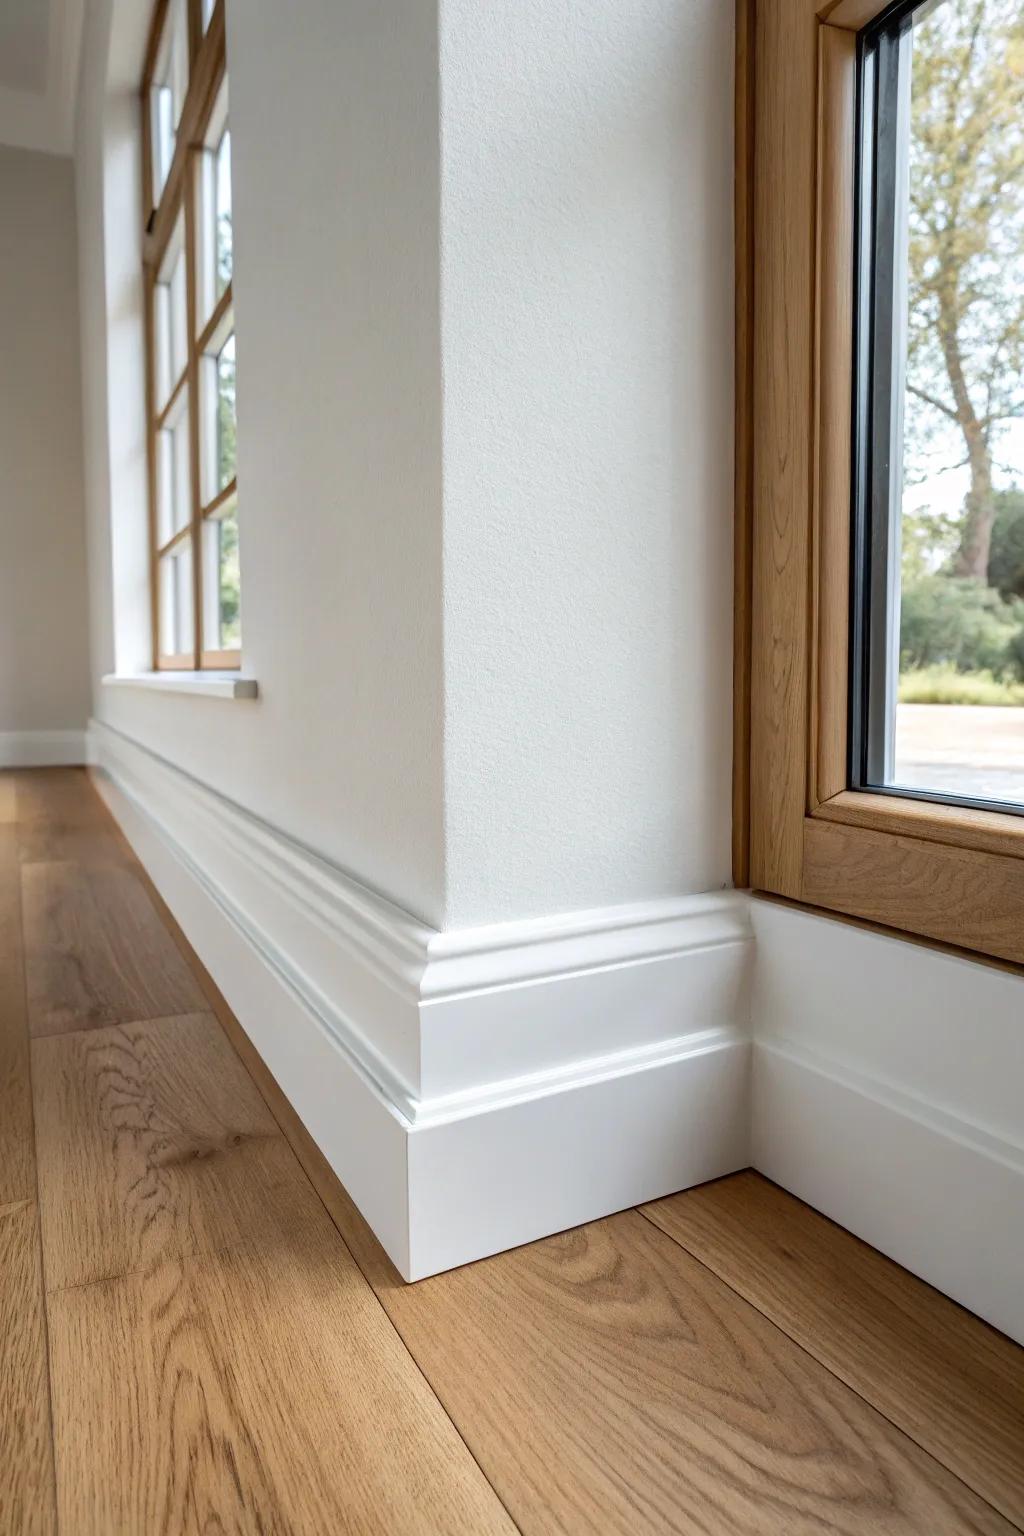
Classic White Painted Baseboards
When I’m not sure what a space needs, I reach for classic white base trim because it cleans everything up fast and looks crisp against almost any wall color. I’ve found a slightly higher-sheen finish on baseboards makes scuffs wipe off way easier.
Explore these options:
- Primed MDF Baseboard Molding: Upgrade your rooms with pre-primed molding that is ready to paint and easy to install for a custom look.
- Semi-Gloss White Trim Paint: Protect your baseboards from scuffs and moisture with durable, easy-to-clean semi-gloss paint designed for interior trim.
- Miter Box and Saw Set: Achieve perfect corners on your baseboards quickly using a simple manual saw and guide for precise angle cuts.

Stained Wood Baseboards for Warmth
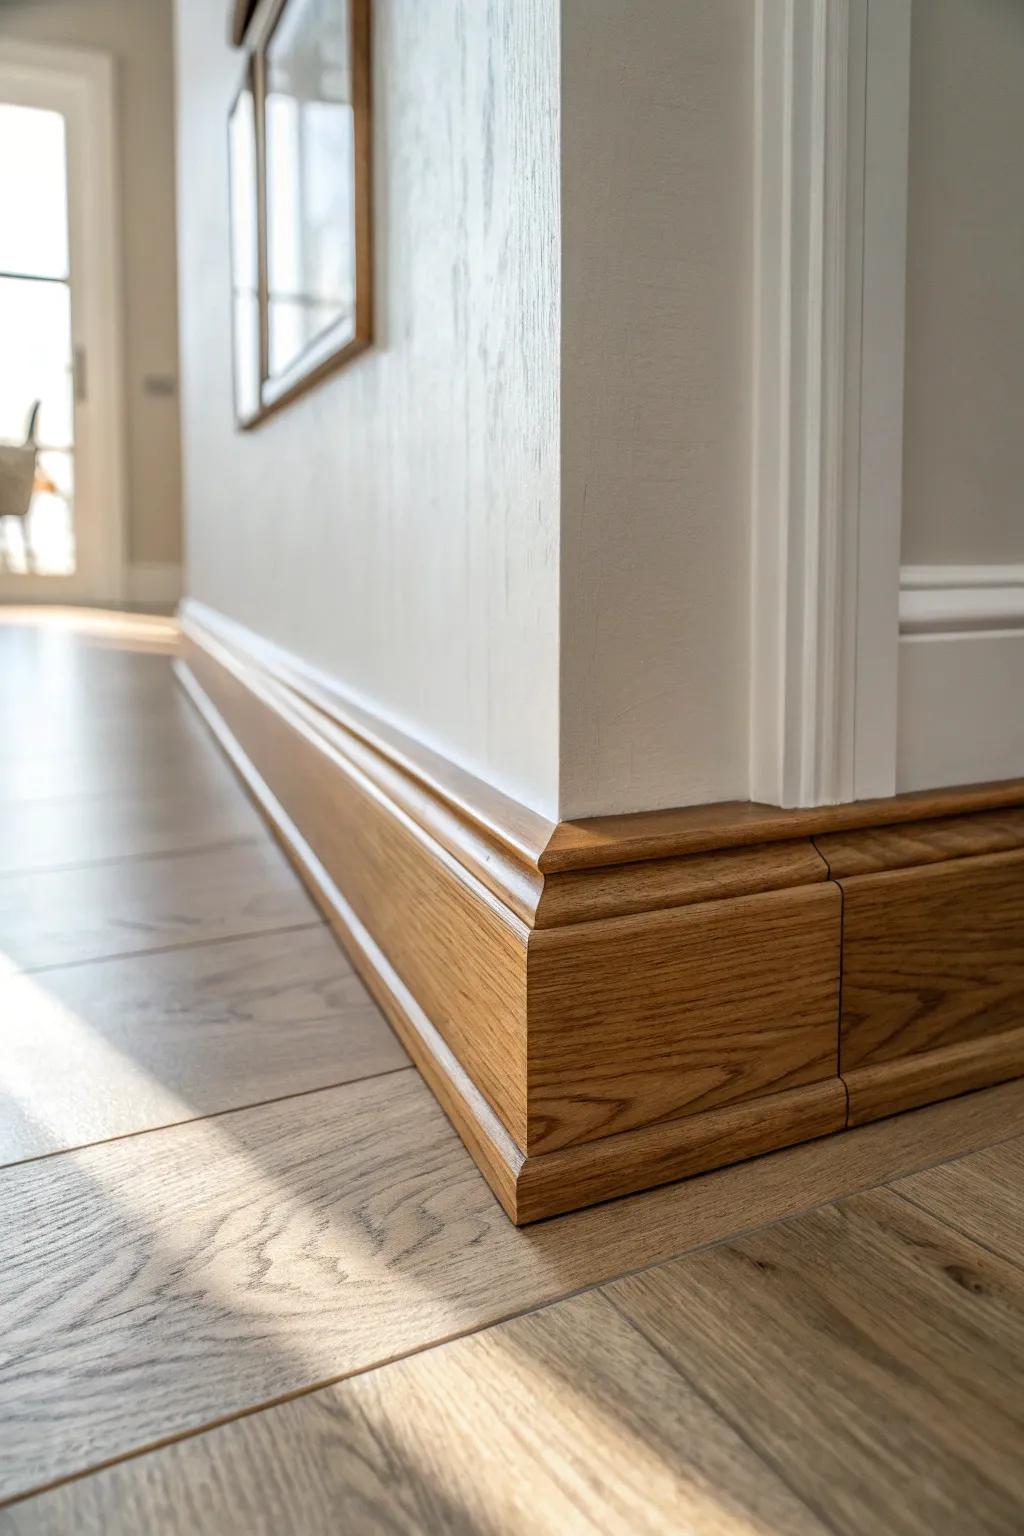
If you want cozy instantly, I’ve found stained wood baseboards bring in warmth that paint just can’t fake. I like matching the stain to other wood tones in the room so the base trim feels like it belongs.
Some handy options:
- Wood Stain: Enhance natural wood grain and add deep warmth to your unfinished baseboards with a quality stain.
- Unfinished Oak Baseboard Moulding: Start your project right by choosing unfinished hardwood moulding ready to accept your preferred custom stain color.
- Trim Puller Tool: Safely remove old baseboards without damaging your walls to prepare the space for your new installation.


Base Trim Matched to Wall Color
When you’re craving calm, I’ve painted base trim the same color as the walls and it makes everything feel seamless. I tried this in a small room and the baseboards basically disappeared in the best way.
Possibly helpful picks:
- Paintable Baseboard Molding: Choose primed, ready-to-paint molding to easily customize your trim color and achieve that seamless, modern look.
- Angled Sash Paint Brush: Use a high-quality angled sash brush to cut in clean lines along the floor and corners effortlessly.
- Paintable Caulk: Fill gaps between the wall and trim with paintable caulk for a smooth, professional, and invisible finish.
Bold Contrast Baseboards
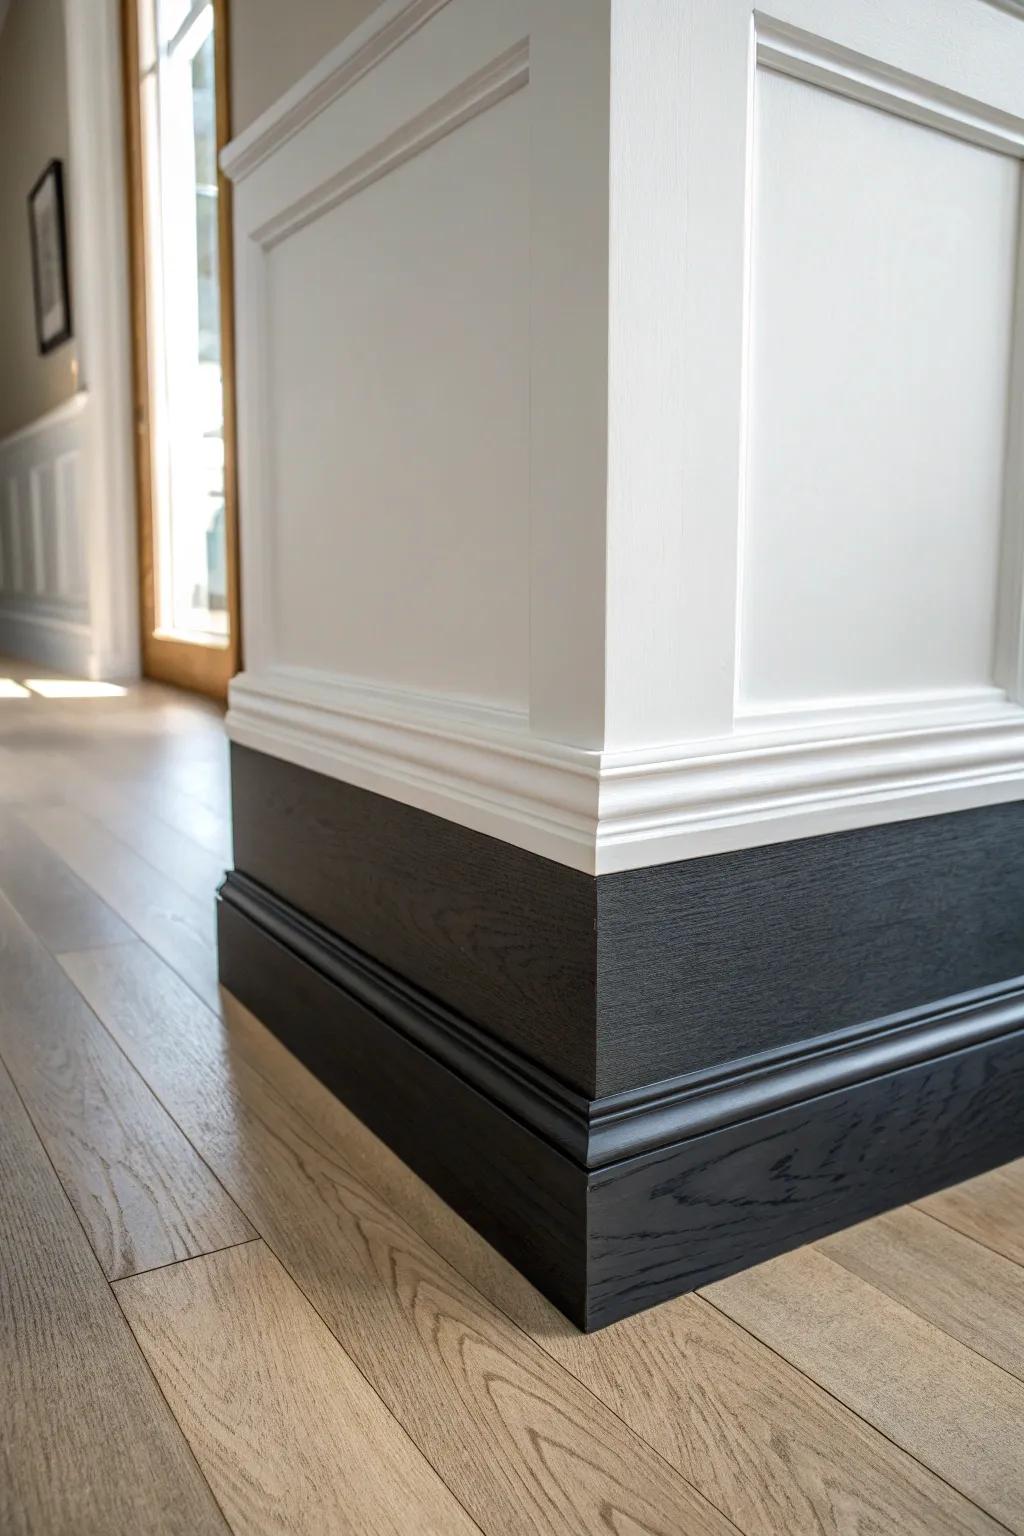
For a little drama, I’ve painted baseboards a deep contrasting color and it frames the room like a picture. I’ve done this with light walls and it made the base trim feel like a real design feature instead of an afterthought.
Try these:
- Matte Black Interior Paint: Transform your existing trim quickly with high-quality dark paint for that dramatic, modern framing effect.
- Angled Sash Paint Brush: Ensure crisp, clean lines between your floor and new dark baseboards with a professional-grade cutting tool.
- Painter’s Tape for Delicate Surfaces: Protect your light walls and hardwood floors from dark splatters while achieving razor-sharp paint edges.
Two-Tone Base Trim and Shoe Molding
One of my favorite upgrades is pairing a main baseboard color with a slightly different shoe molding color for a subtle layered look. I first tried it to hide uneven flooring gaps, and it ended up looking way more intentional than I expected.
You might give these a try:
- Primed Baseboard Shoe Molding: Add a classic finish to your flooring by painting this trim to create your desired two-tone look.
- High-Quality Paint Brush Set: Achieve crisp lines and a professional two-tone finish on your trim with these precise painting tools.
- Paintable Caulk for Trim: Seal gaps seamlessly between your baseboard and shoe molding for a flawless and durable paint application.

Simple Baseboards With Quarter Round
If you need a quick fix for floors that don’t meet the wall perfectly, I’ve used quarter round with basic base trim and it’s a lifesaver. It’s not my fanciest look, but I can’t deny how clean those baseboards finish when the gaps vanish.
Possibly handy products:
- Primed Quarter Round Molding: Cover unsightly floor gaps effortlessly with this essential trim piece that creates a polished, finished transition.
- White Baseboard Trim: Establish a clean foundation for your room with sturdy baseboards, perfect for pairing with shoe molding.
- Brad Nailer Kit: Secure your new baseboards and quarter round quickly and neatly for a professional-looking DIY installation.
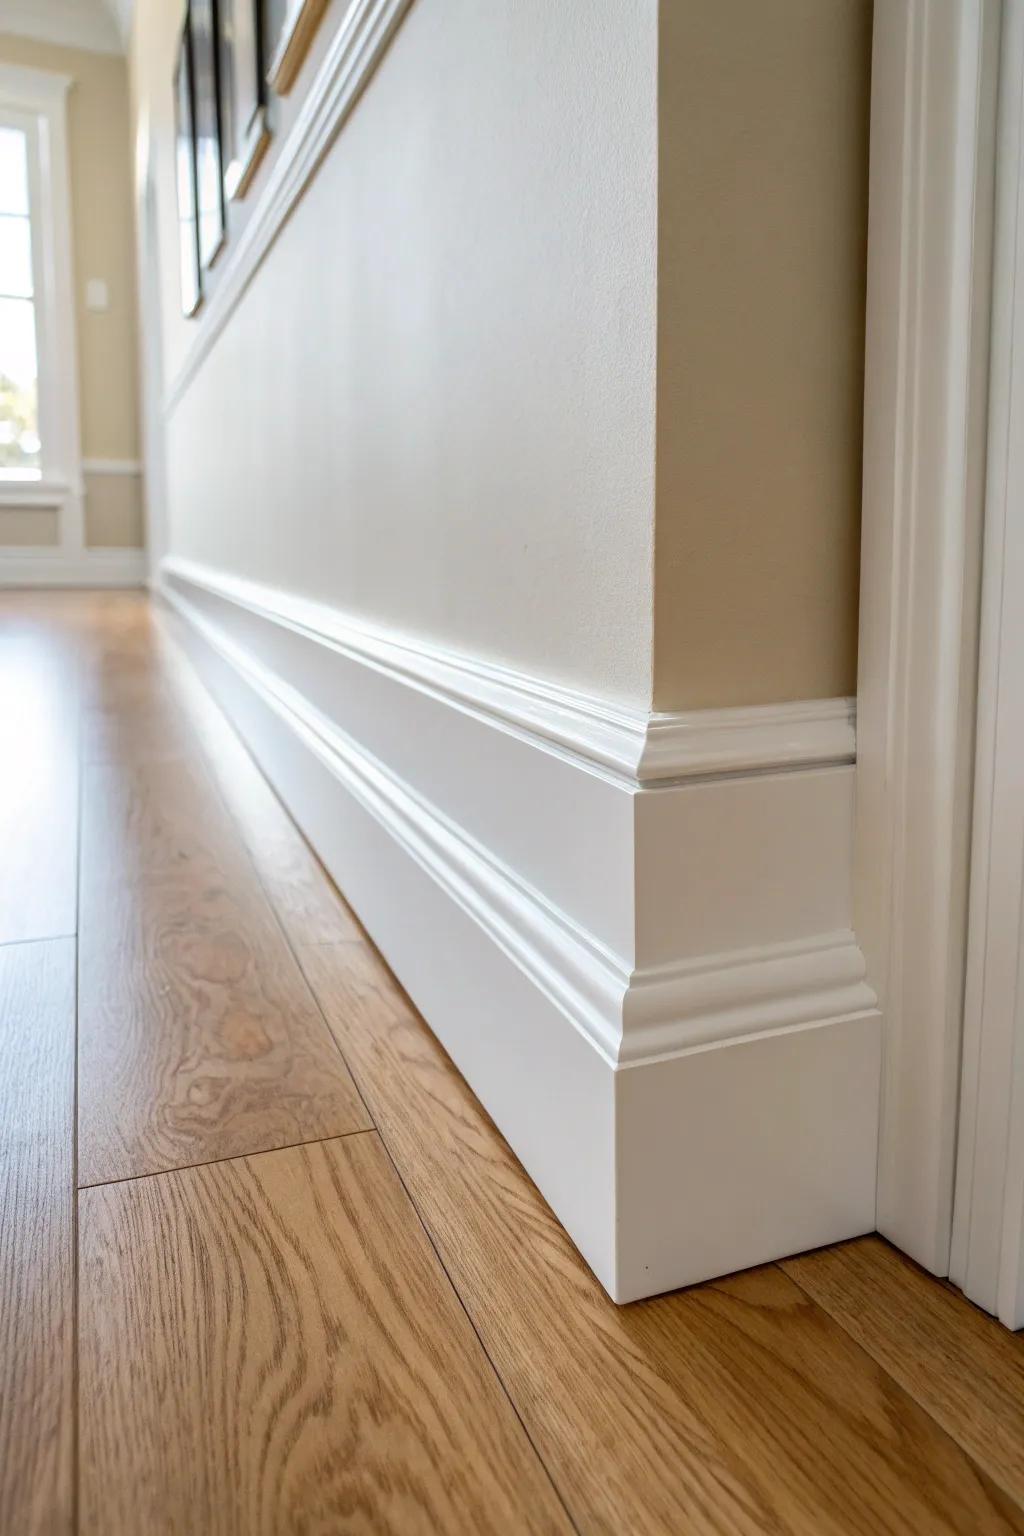
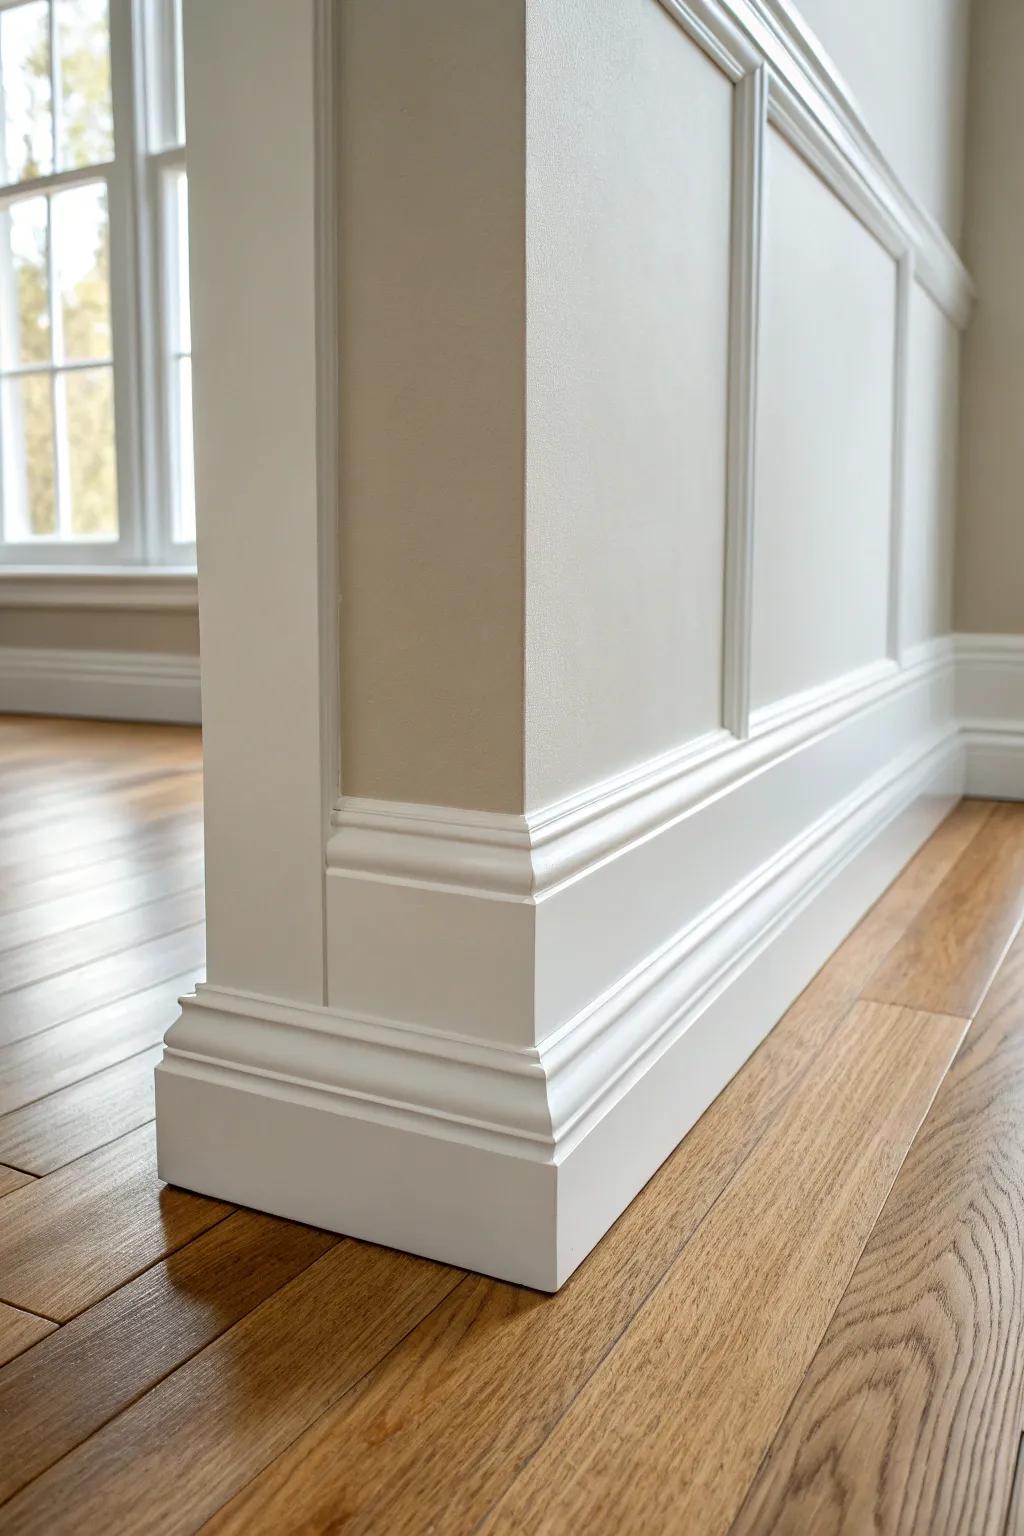
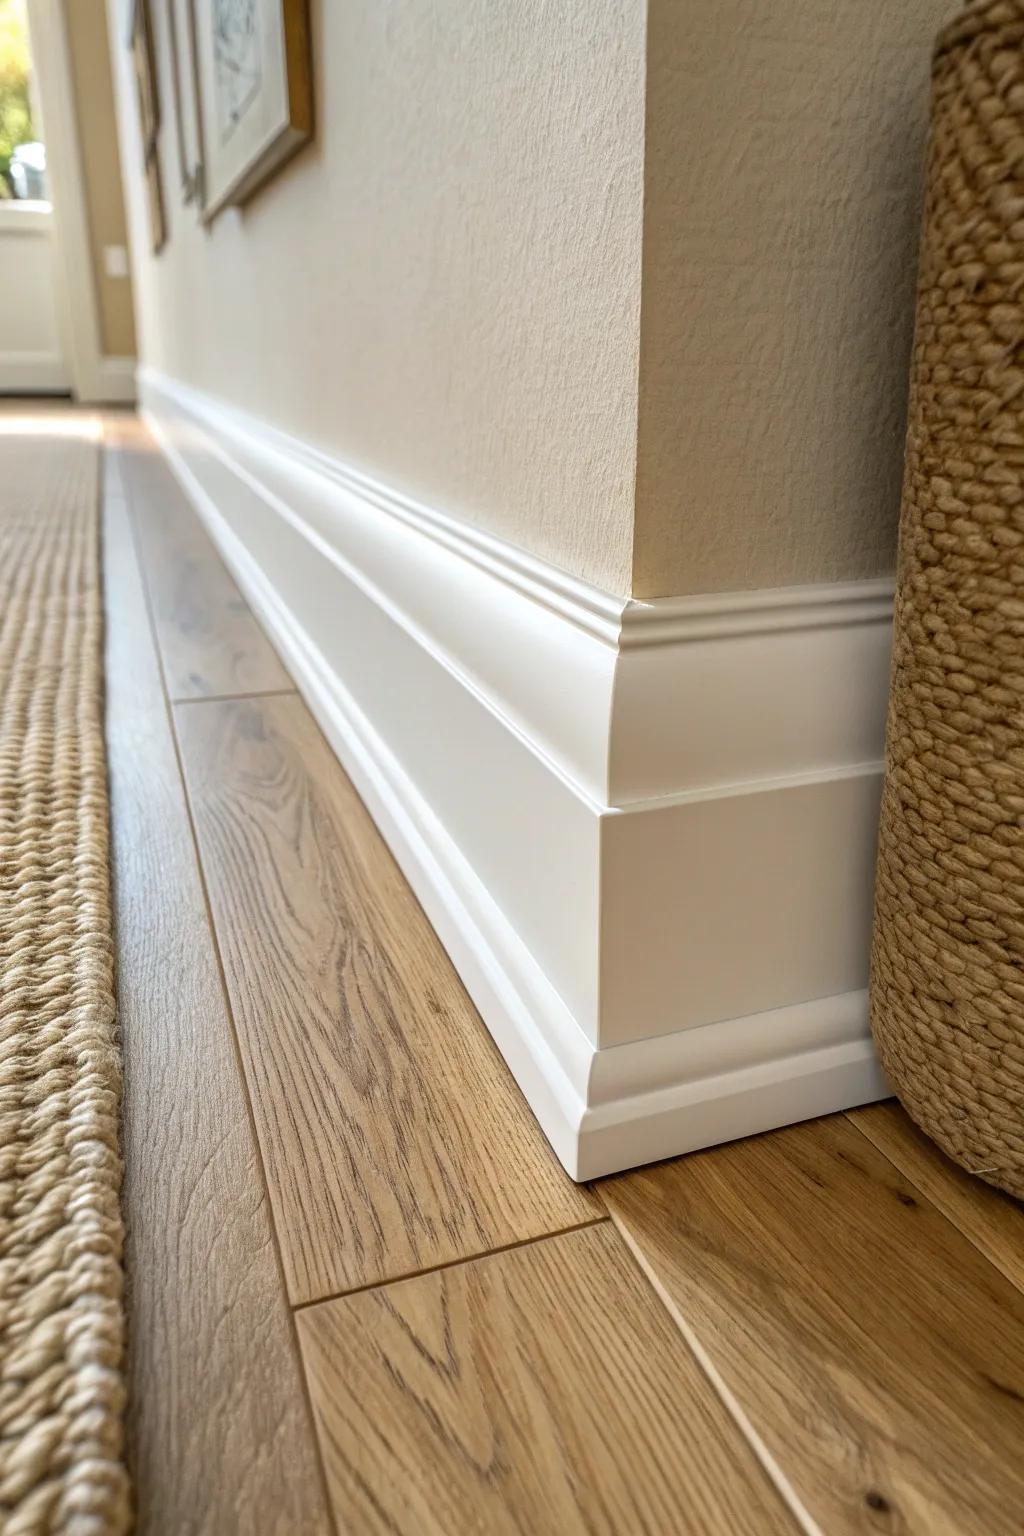
Layered Build-Up Base Trim

When I want a high-end look on a budget, I build up base trim using a flat board plus a small cap piece. I’ve done this in multiple makeovers, and the thicker, layered baseboards instantly feel more substantial.
A few things you might like:
- Primed MDF Baseboard Molding: Create a solid foundation for your layered look with flat, primed boards ready for your custom paint.
- Decorative Base Cap Molding: Add this decorative cap to the top of flat stock to achieve that high-end, custom profile instantly.
- Brad Nailer Kit: Secure your layered trim pieces cleanly and efficiently without damaging the wood surface during installation.
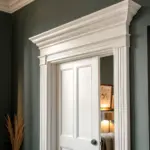
Base Trim With Plinth Blocks
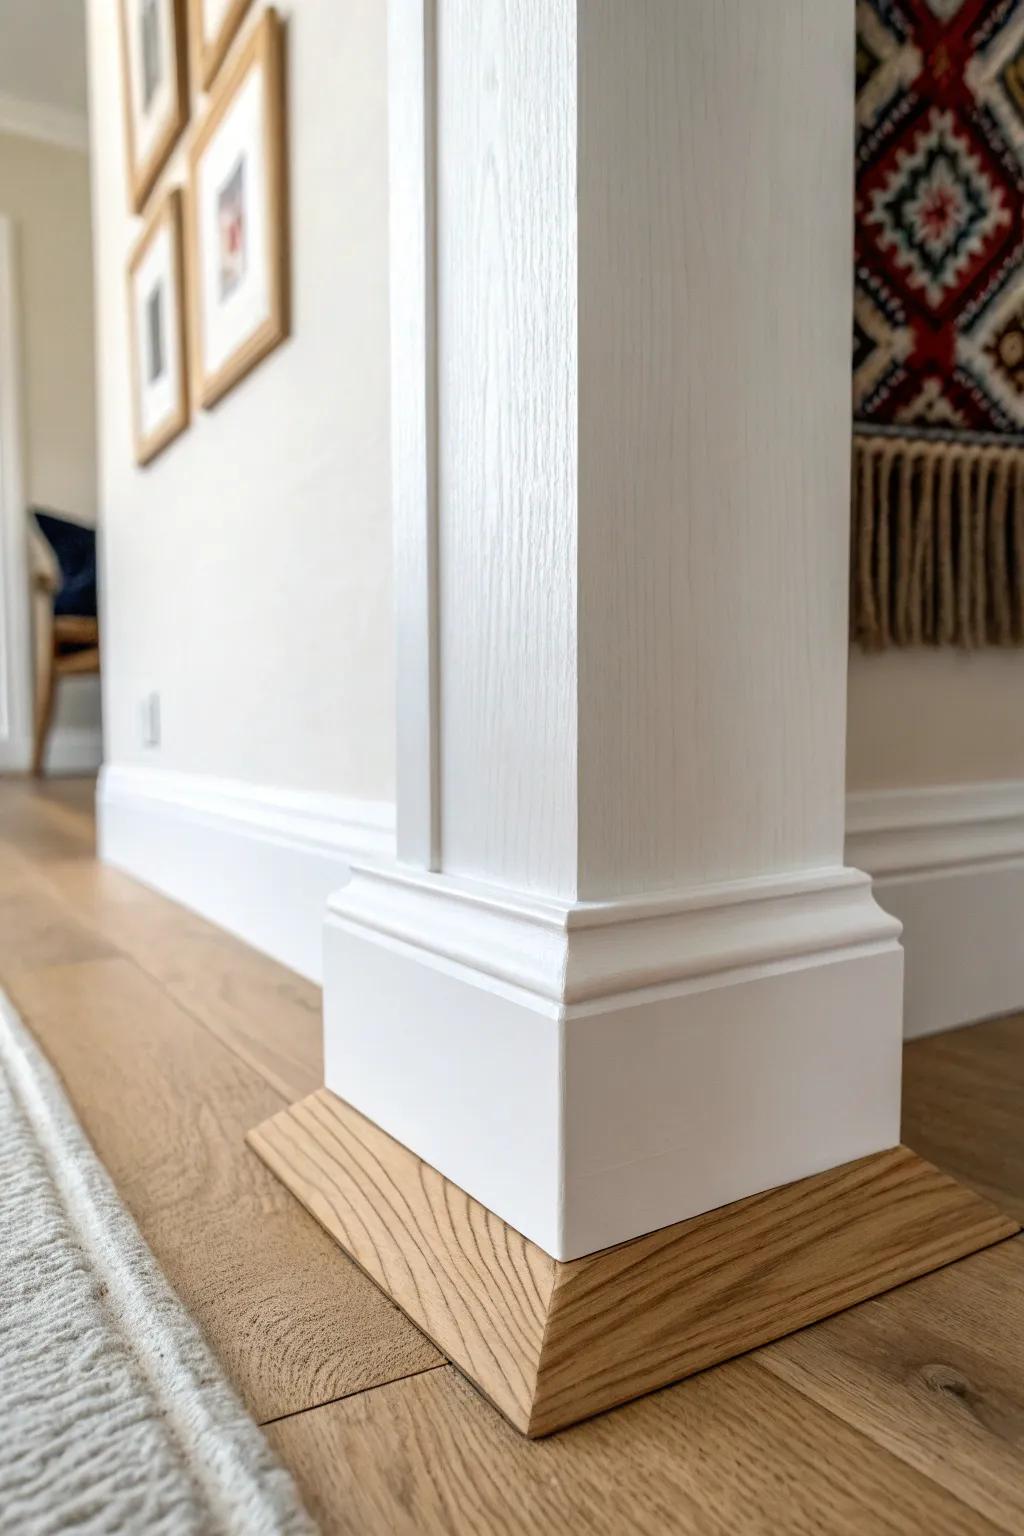
I’m a big fan of plinth blocks at door casings because they make transitions look crisp and “planned.” The first time I added them, my baseboards stopped looking like they were awkwardly bumping into trim, and everything clicked.
A few helpful options:
- Wood Plinth Blocks: Instantly upgrade your door casings with these solid blocks to create seamless, professional-looking transitions between trim pieces.
- White Baseboard Moulding: Refresh your room’s perimeter with crisp white moulding that pairs perfectly with plinth blocks for a clean finish.
- Construction Adhesive: Ensure your new trim stays securely in place without excessive nailing by using a strong capable construction adhesive.
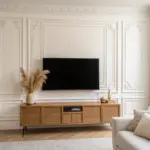
Base Trim That Wraps Built-Ins
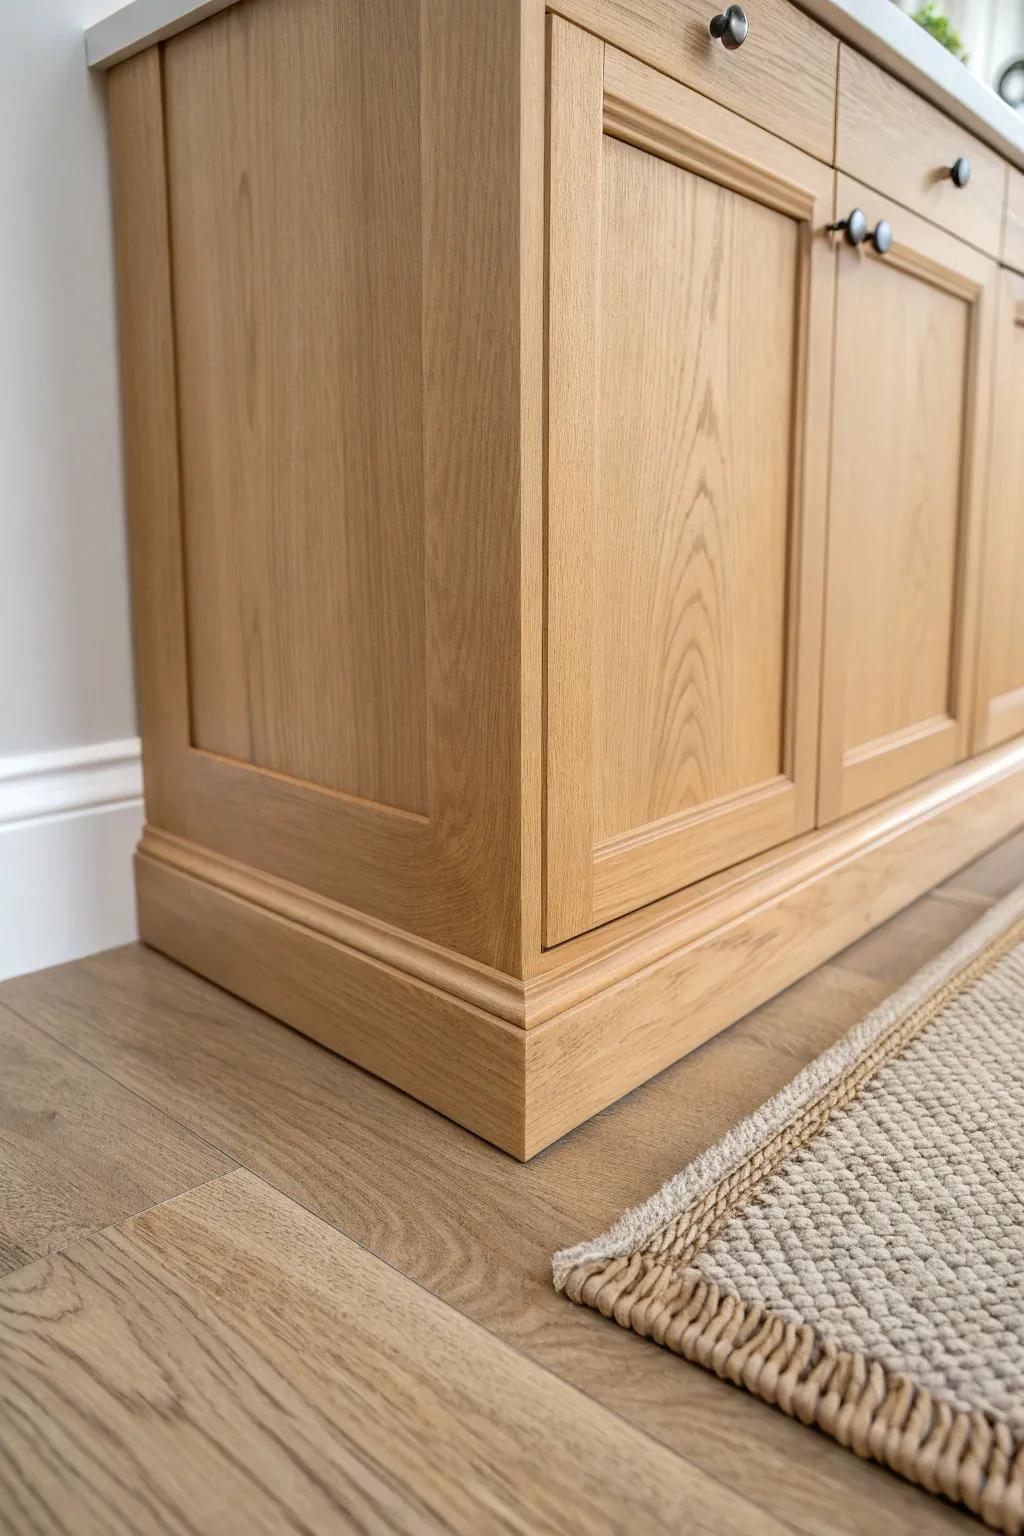
I always run base trim across the fronts of built-ins and cabinet bases when I can, because it ties the whole room together. I’ve wrapped baseboards around kitchen-style toe kicks and it made the cabinetry look more like furniture.
Useful items to consider:
- Oak Baseboard Molding: Upgrade your built-ins with wooden molding that adds architectural interest and seamlessly blends cabinetry into your room’s design.
- Brad Nailer Kit: Secure your new baseboards quickly and cleanly with a pneumatic nailer, ensuring a professional and sturdy finish.
- Wood Filler for Oak: Hide nail holes or small gaps effortlessly to create a smooth, seemingly continuous surface on your finished trim.
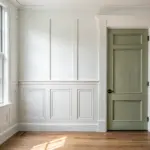
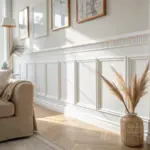
Beadboard or Wainscoting Into Baseboards
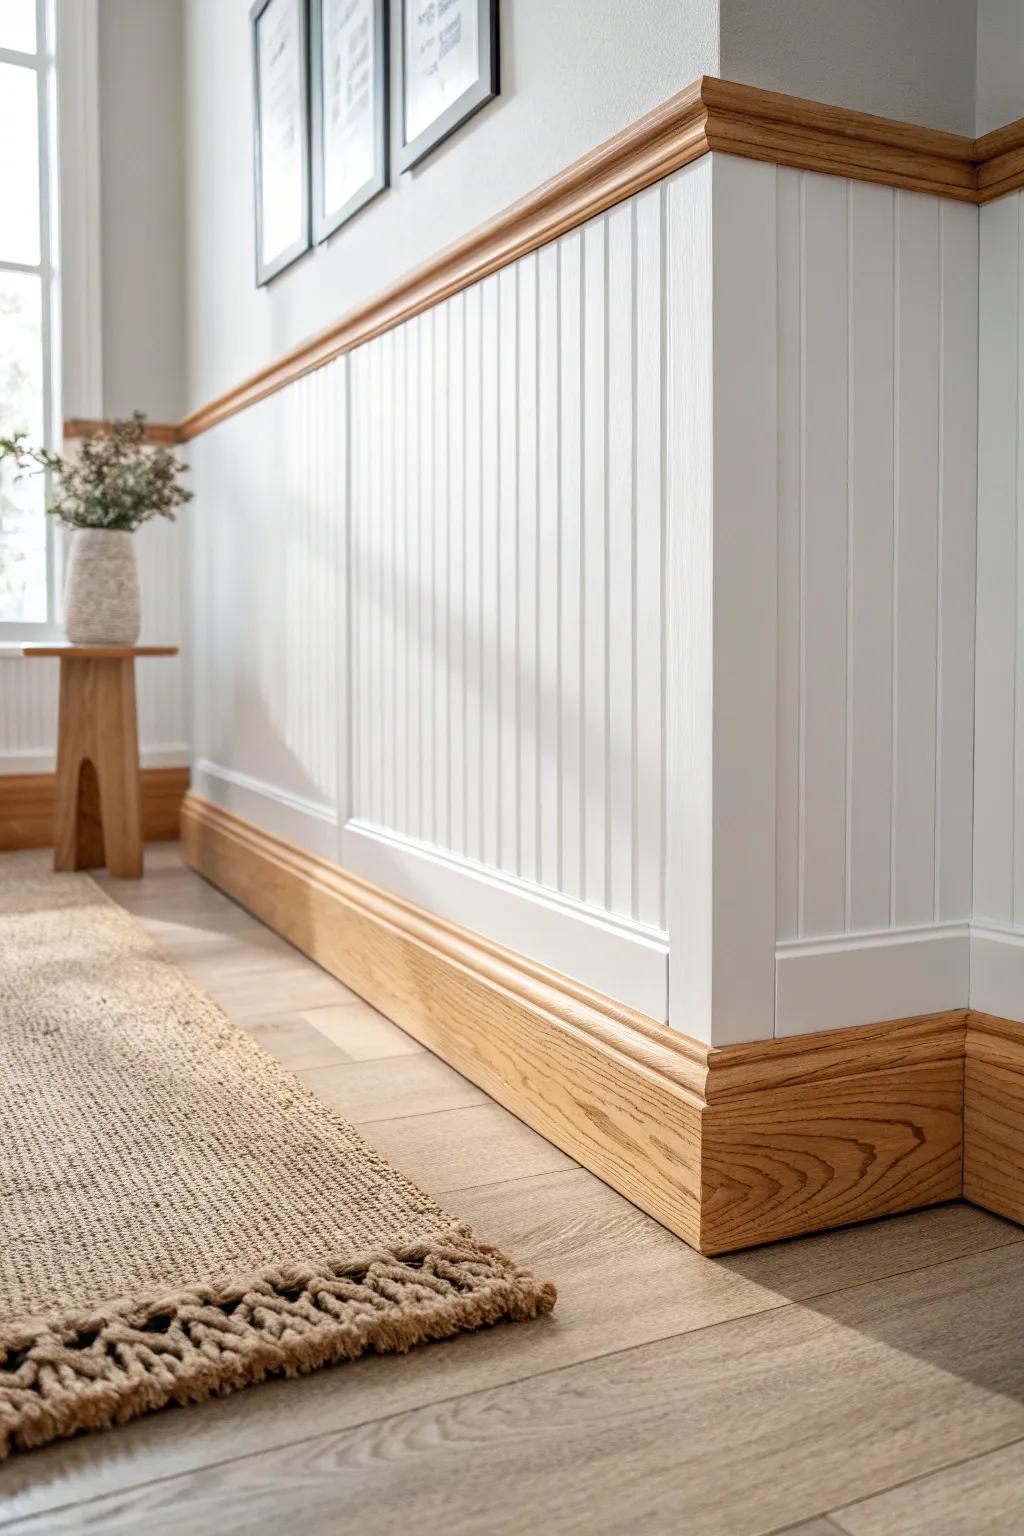
If you’re adding wall paneling, I love letting the base trim act as the “footer” so the whole wall looks intentional. I’ve done beadboard with chunky baseboards, and that combo screams cozy farmhouse without trying too hard.
Items that may come in handy:
- Beadboard Paneling Kits: Transform your walls instantly with easy-to-install paneling kits that create that classic, cozy farmhouse texture.
- Oak Wood Baseboard Molding: Ground your design using solid wood baseboards to achieve a sturdy, high-end footer for your paneling.
- Brad Nailer Kit: Ensure professional results by securing your new trim and paneling firmly and cleanly with this essential tool.
Rustic Reclaimed Wood Base Trim
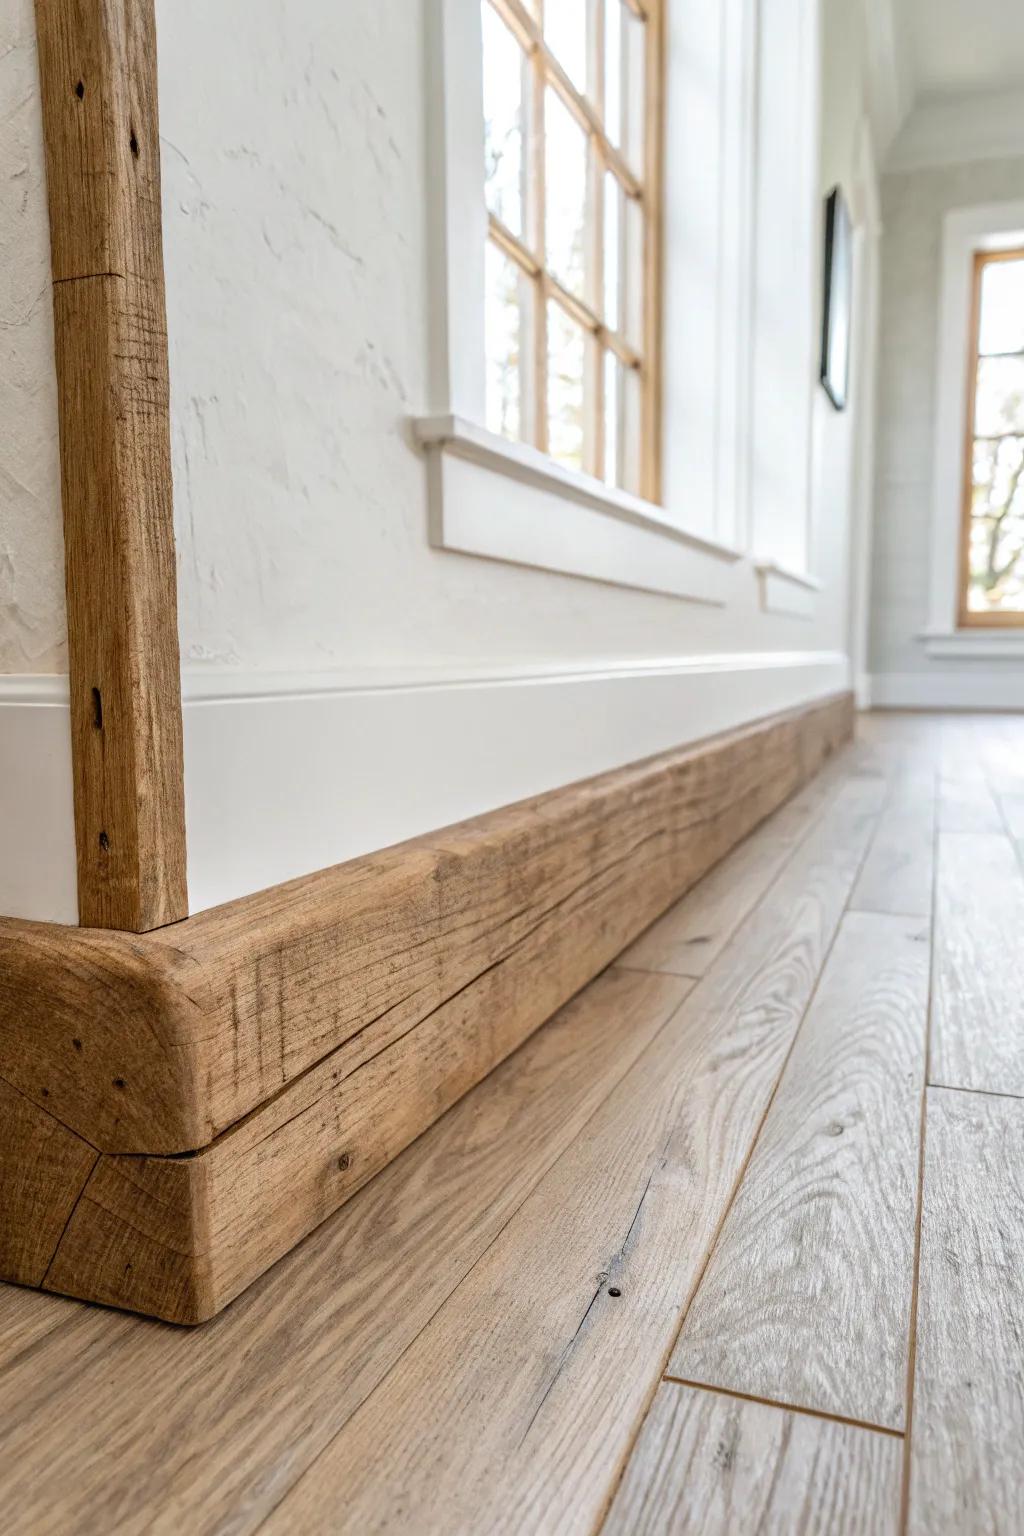
Whenever I want texture, I’ve used reclaimed wood base trim with all the knots and saw marks left visible. In my experience, those imperfect baseboards make a room feel warmer and more collected over time.
Products that could assist:
- Reclaimed Barn Wood Planks: Use authentic weathered planks to create truly custom baseboards that add immediate history and warmth to your room.
- Peel and Stick Rustic Wood Paneling: Achieve the look of solid timber baseboards quickly with easy-to-install adhesive wood panels designed for DIY projects.
- Clear Matte Wood Sealer: Protect your raw wood trim without altering its natural color or texture by applying a high-quality water-based finish.
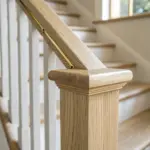
Stair Skirt Base Trim Continuation
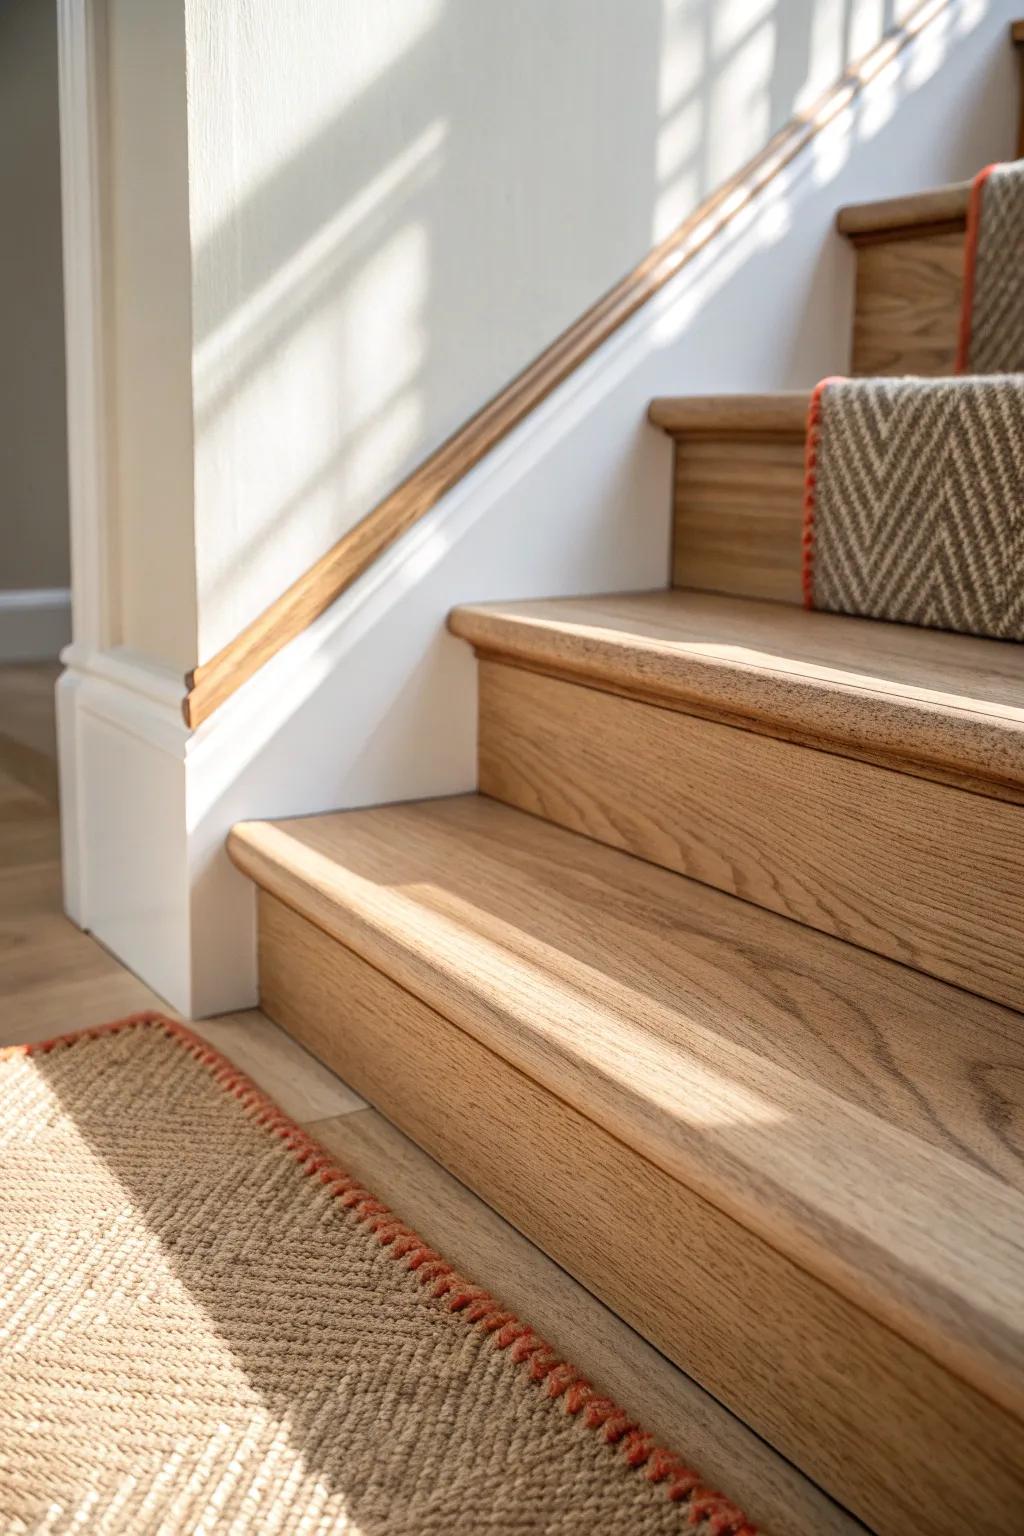
I like carrying the same base trim into the stair skirt area so the trim line flows naturally through the house. I’ve noticed this makes the baseboards feel like a design “thread” instead of random pieces room to room.
Give these a look:
- Flexible Molding Trim for Curves: Easily navigate tricky angles and curves on your staircase with pliable molding designed for seamless transitions.
- Wood Filler and Repair Kit: Use professional-grade wood filler to hide nail holes and gaps, ensuring your trim looks perfectly continuous.
- Miter Shears for Angled Cuts: Achieve precise angles for stair skirts without a saw using these handy, accurate cutting tools.
Scribed Baseboards for Uneven Floors
In older houses, I’ve had to scribe base trim to match wavy floors, and it’s worth the extra time for that tight fit. The first time I did it, the baseboards looked custom-built even though the floor was doing its own thing.
A few choices to try:
- General Purpose Carpenter’s Compass: Trace floor contours accurately onto your baseboard for a tighter fit that eliminates gaps along unsightly uneven surfaces.
- Contour Gauge Duplicator Tool: Instantly replicate odd angles and wavy floor shapes to easily transfer precise cutting lines directly to your trim.
- Fine-Tooth Coping Saw: Make intricate, curved cuts along your scribed lines to ensure the baseboard sits flush against irregular flooring.
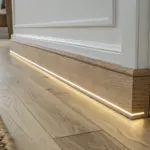
Recessed Shadow-Gap Base Trim
For a sleek “floating wall” vibe, I’ve experimented with recessed base trim that creates a shadow line instead of a traditional profile. It’s a little more planning, but the finished look makes standard baseboards feel suddenly modern.
A few suggestions:
- Primed White Finger-Jointed Baseboard Molding: Achieve the crisp, clean finish shown in the photo with these ready-to-paint, durable wood molding profiles.
- Construction Adhesive for Trim and Molding: Ensure a seamless, nail-free appearance or secure your complex shadow-gap profiles firmly with heavy-duty construction adhesive.
- Paintable White Caulking for Baseboards: Create that flawless, professional transition between wall and trim by filling gaps with high-quality, paintable caulk.
Curved Base Trim for Rounded Walls
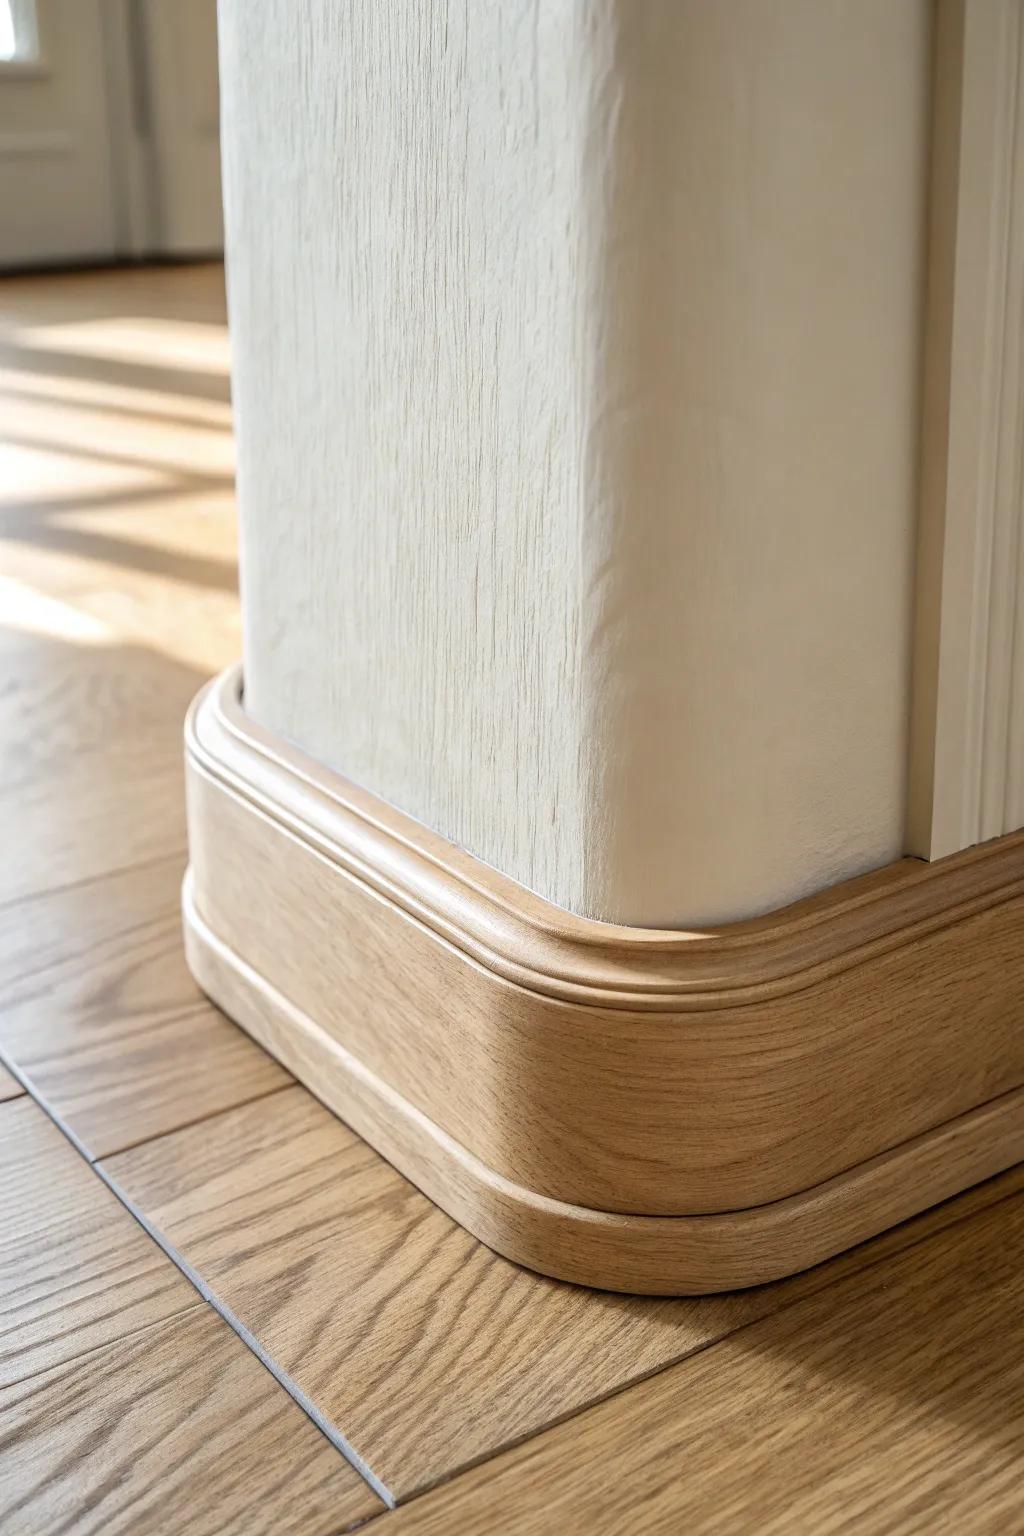
When I’ve worked around rounded corners, I’ve used thin, bendable base trim (or kerf cuts on the back) to get a smooth curve. It’s one of those details that makes people do a double-take because curved baseboards look so custom.
You might like:
- Flexible Molding Trim: Create seamless curves around rounded corners effortlessly with this bendable molding material designed for custom architectural details.
- Wood Putty and Filler: Ensure a flawless finish by filling gaps or kerf cuts to achieve that perfectly smooth, professional appearance.
- Coping Saw: cut precise angles and cope joints manually to ensure your trim fits snugly against complex wall contours.


