
Distressed furniture is my favorite way to make a plain old piece feel like it has a story and a little soul. When I’m in my workshop working on a makeover, I’m always chasing that perfect mix of aged patina and “still practical for real life.”
Textured Paint That Chips Like Old Farm Pieces
If you want true chippy paint, I sometimes add a subtle grit or texture to the paint layers on a distressed cabinet so it breaks and wears in a more antique way. The first time I tried it, I couldn’t believe how much more “barn-found” it looked once I sanded the edges.
A few things you might like:
- Milk Paint Powder: Create an authentic, naturally chipping finish perfect for achieving that antique farmhouse look on your furniture projects.
- Salt Wash Paint Texture Additive: Mix this powder into any paint to add gritty texture and create layers that distress beautifully when sanded.
- Medium Grit Sanding Block: Use these durable blocks to gently rub away paint edges and reveal the wood or base layers underneath.

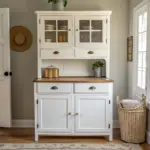
Chippy Painted Dresser With Worn Edges
My go-to classic is a distressed dresser with layered paint that I sand back on corners, drawer lips, and feet so it looks naturally handled over time. I’ve learned to stop as soon as the wood starts peeking through in a few spots—less “perfect” always looks more real.
A few suggestions:
- Chalk Style Furniture Paint: Apply smooth, matte layers that distress easily to create that authentic, time-worn vintage finish on your furniture.
- Assorted Grit Sanding Blocks: Use these flexible blocks to gently rub away paint on corners and edges for a naturally aged appearance.
- Clear Furniture Wax: Seal your distressed masterpiece with wax to protect the chippy finish and add a soft, subtle sheen.
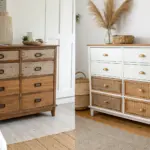
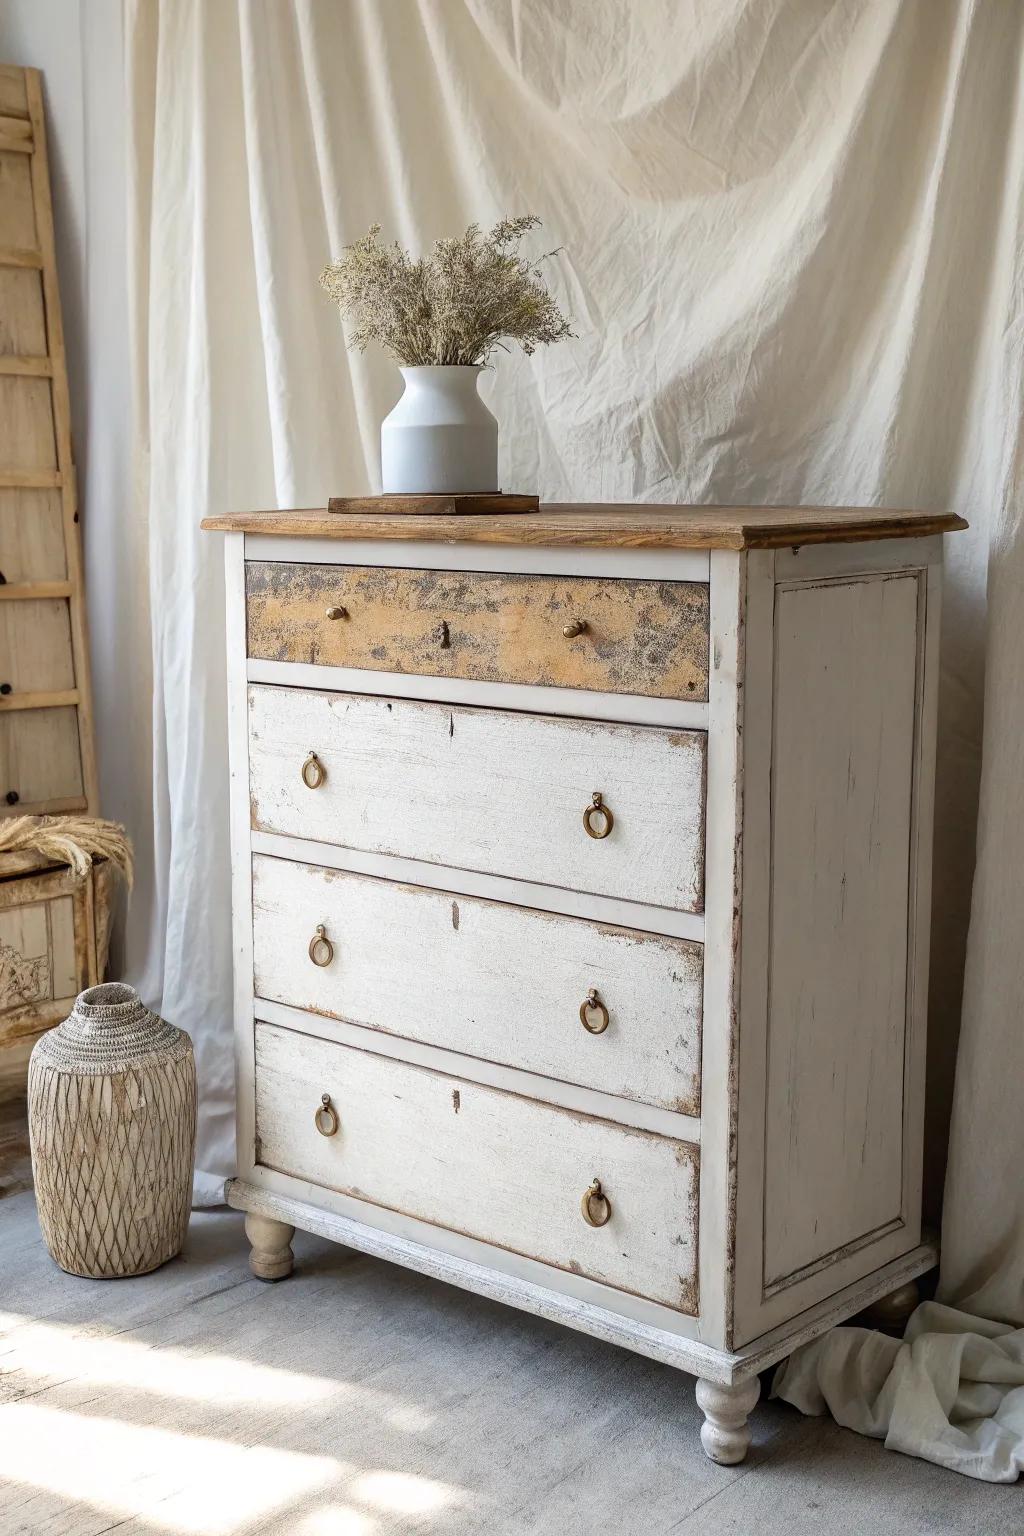
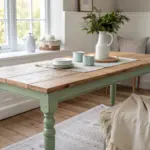
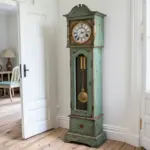
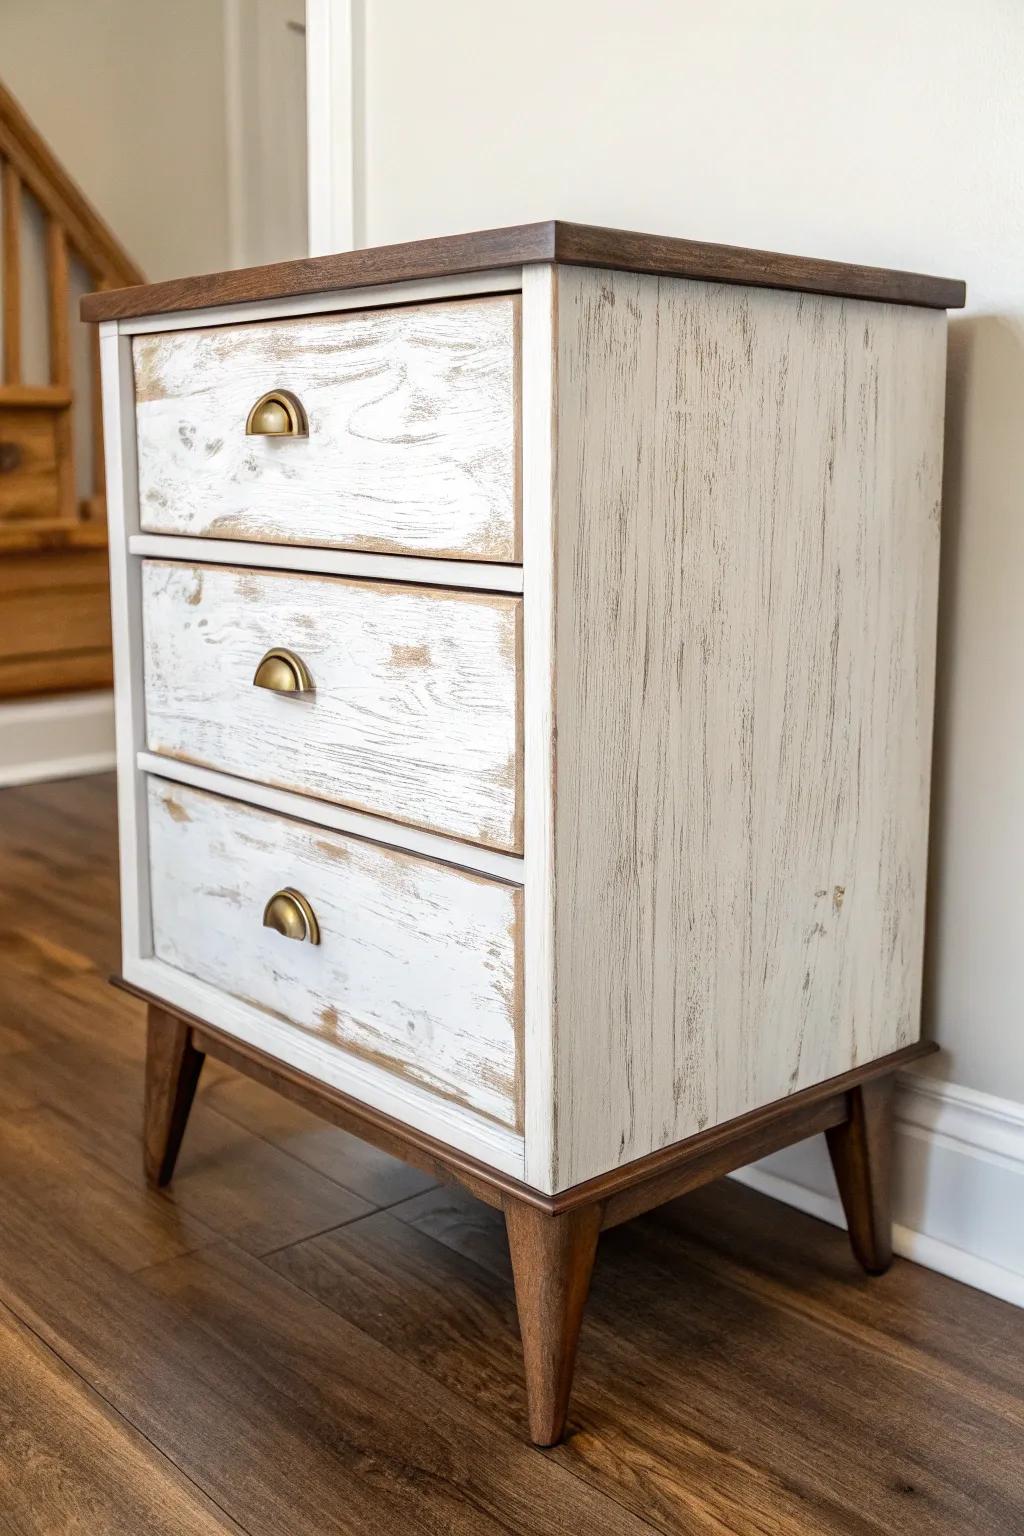
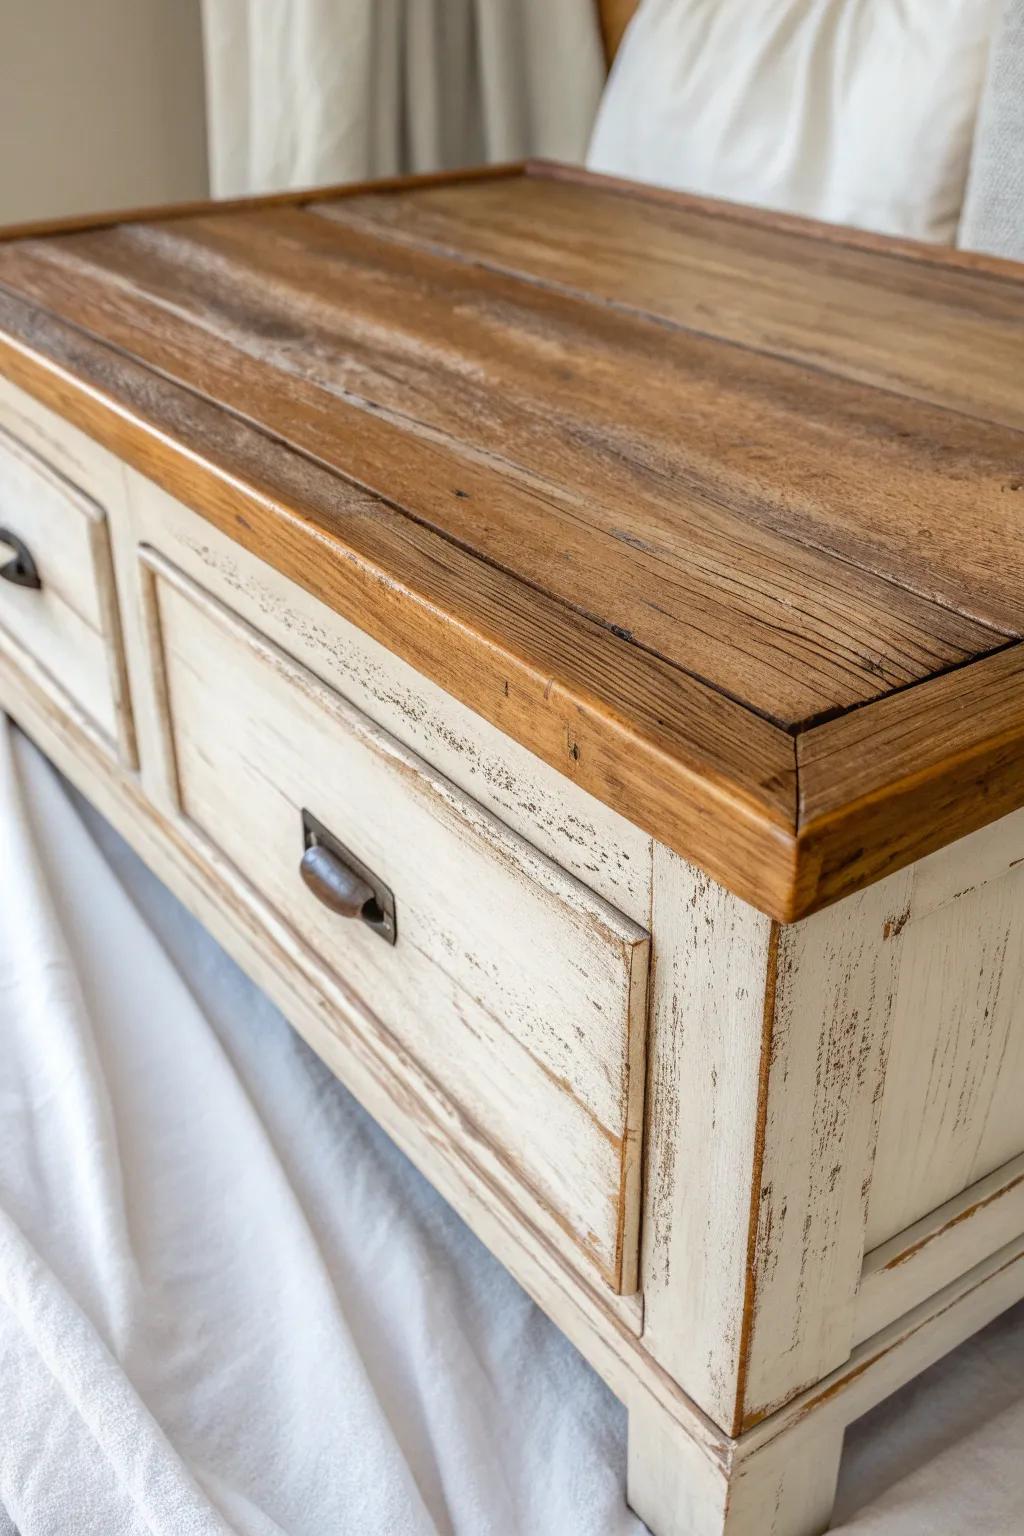
Two-Tone Chest With a Soft Whitewash

I love doing a darker base coat on a chest of drawers and then brushing a thin whitewash layer over it so the undertone glows through. In my own projects, a slightly streaky brush pattern is what makes it feel old instead of freshly painted.
Consider these options:
- Whitewash Paint Stain: Create that dreamy, translucent finish effortlessly by applying this specialized stain over darker wood tones for instant character.
- Natural Bristle Chip Brushes: Use these bristles to achieve the perfect streaky, authentically aged texture when applying your whitewash layer.
- Unfinished Wood Chest: Start fresh with this blank canvas, ready for you to stain the frame dark and whitewash the drawers.
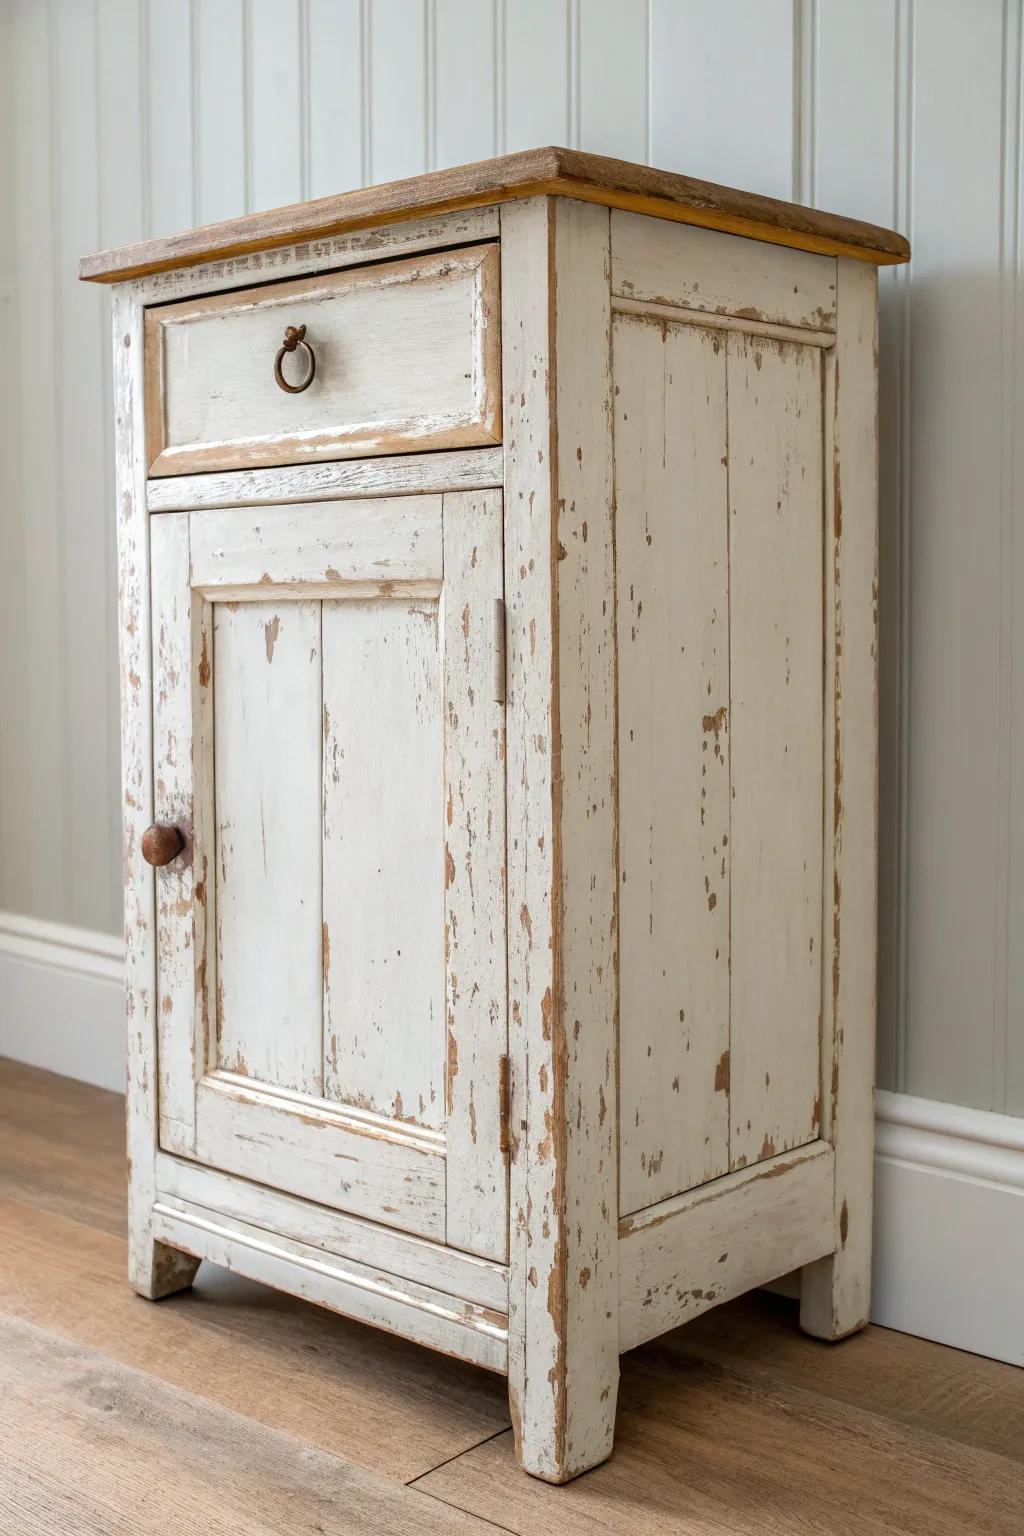
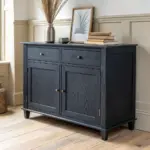
Distressed Nightstand in Moody Dark Paint
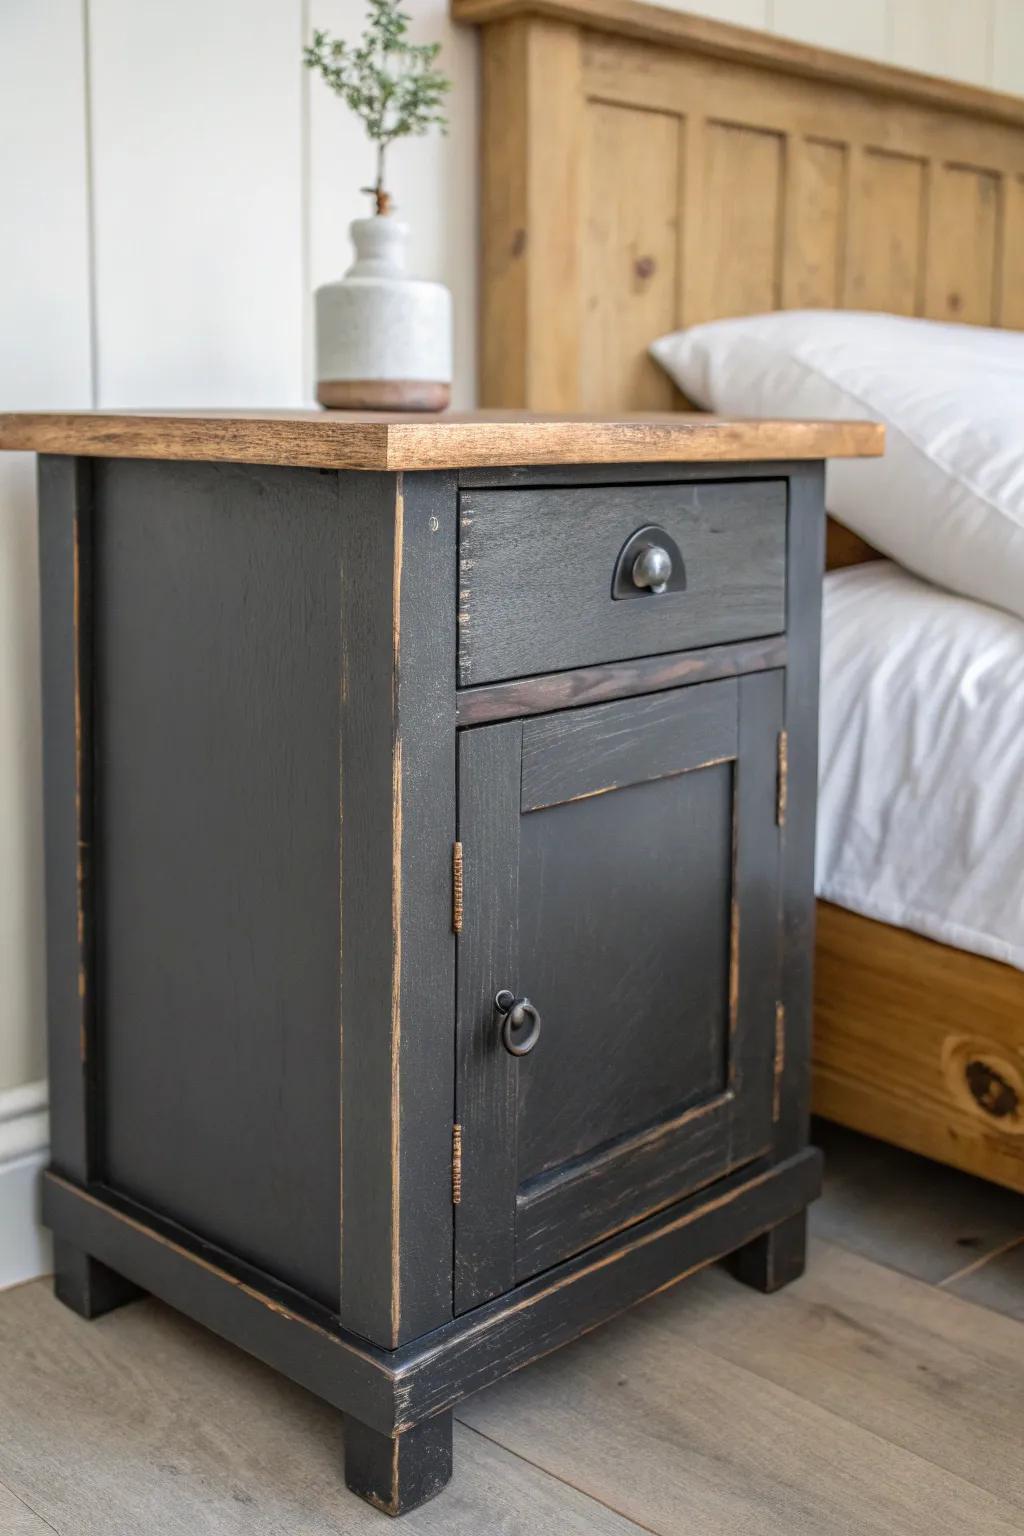
A small distressed nightstand is where I test new looks, and a deep charcoal finish with rubbed-back edges gives instant vintage drama. I usually hit just the high-traffic spots—top front edge, knob area, and the bottom corners—because that’s where hands and shoes would really scuff it.
Give these a look:
- General Purpose Sandpaper Assortment: Use varied grits to effectively scuff edges and corners, revealing the natural wood underneath for vintage character.
- Charcoal Black Chalk Style Paint: Apply a rich, matte finish that adheres easily to furniture and distresses beautifully for an authentic aged look.
- Antique Bronze Ring Pull Hardware: Swap out basic knobs with vintage-inspired metal hardware to instantly elevate the rustic charm of your project.
Antiqued Sideboard With Dark Glaze in Details
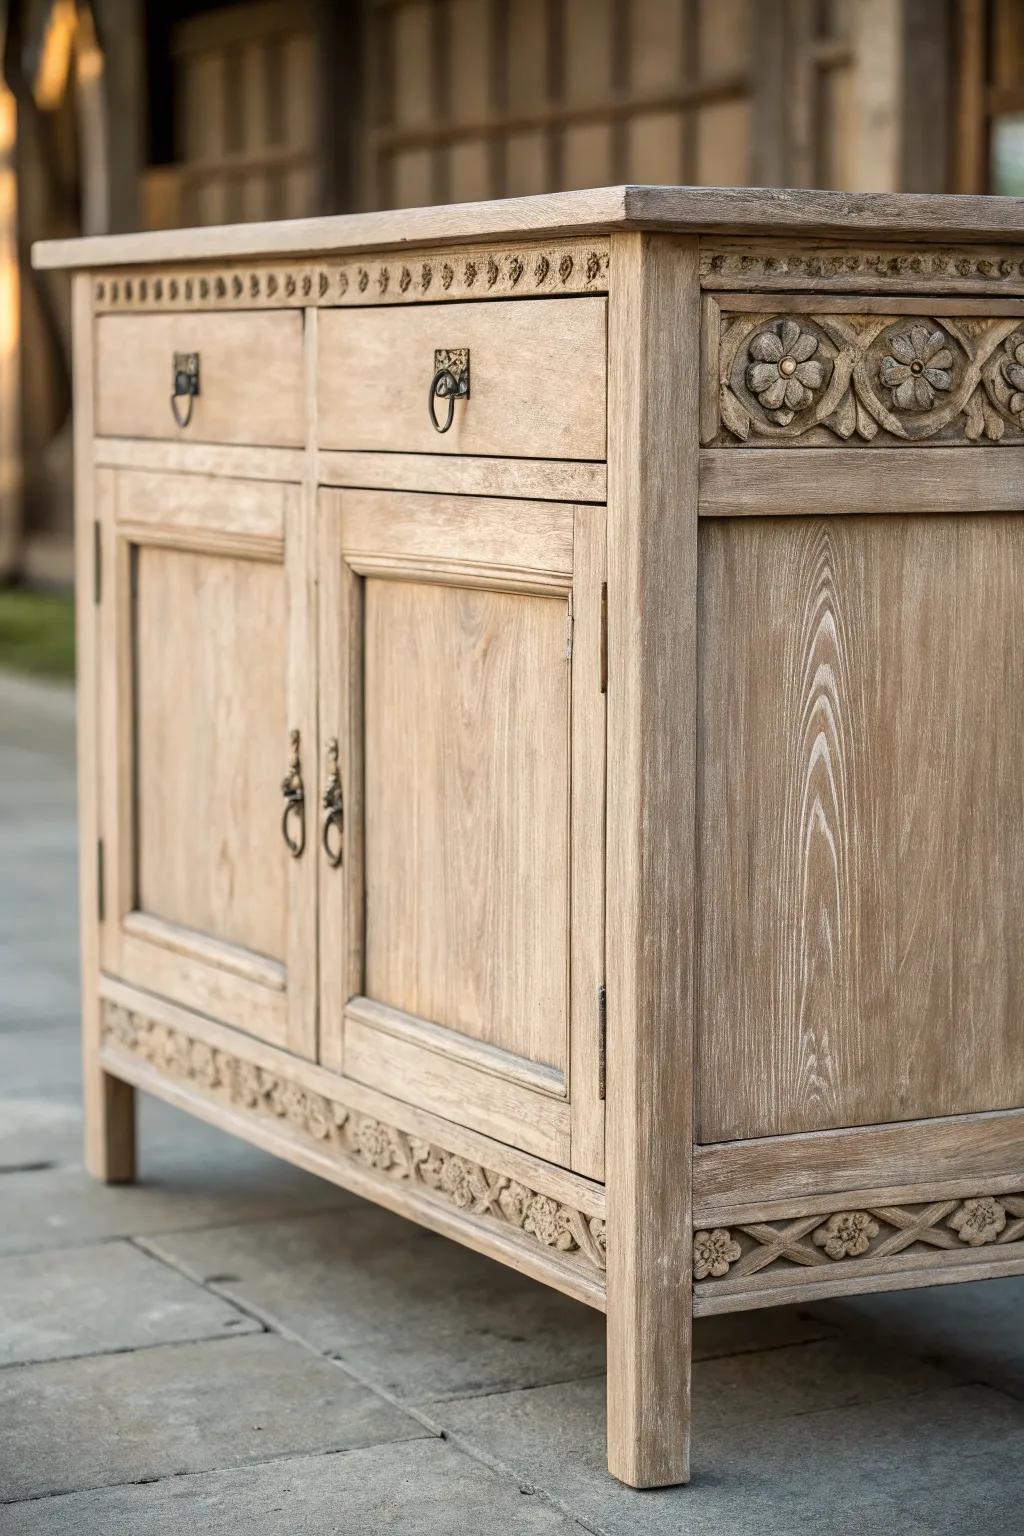
For a bigger statement, I’ll take a distressed sideboard and work a thinned dark glaze into carvings, grooves, and around drawer frames. I’ve found wiping it back with the grain keeps it looking like real age instead of “painted-on dirt.”
Useful items to consider:
- Dark Antiquing Furniture Glaze: Apply this glaze into detailed carvings to instantly create convincing depth and an authentic, time-worn appearance.
- Lint-Free Staining Cloths: Use these cloths to wipe back excess glaze smoothly, ensuring a streak-free finish that enhances wood grain.
- Small Detail Paint Brush Set: Reach into tighter grooves and intricate floral carvings easily with these precision brushes for targeted application.
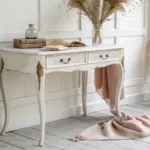
Distressed Mirror Frame to Match a Dresser
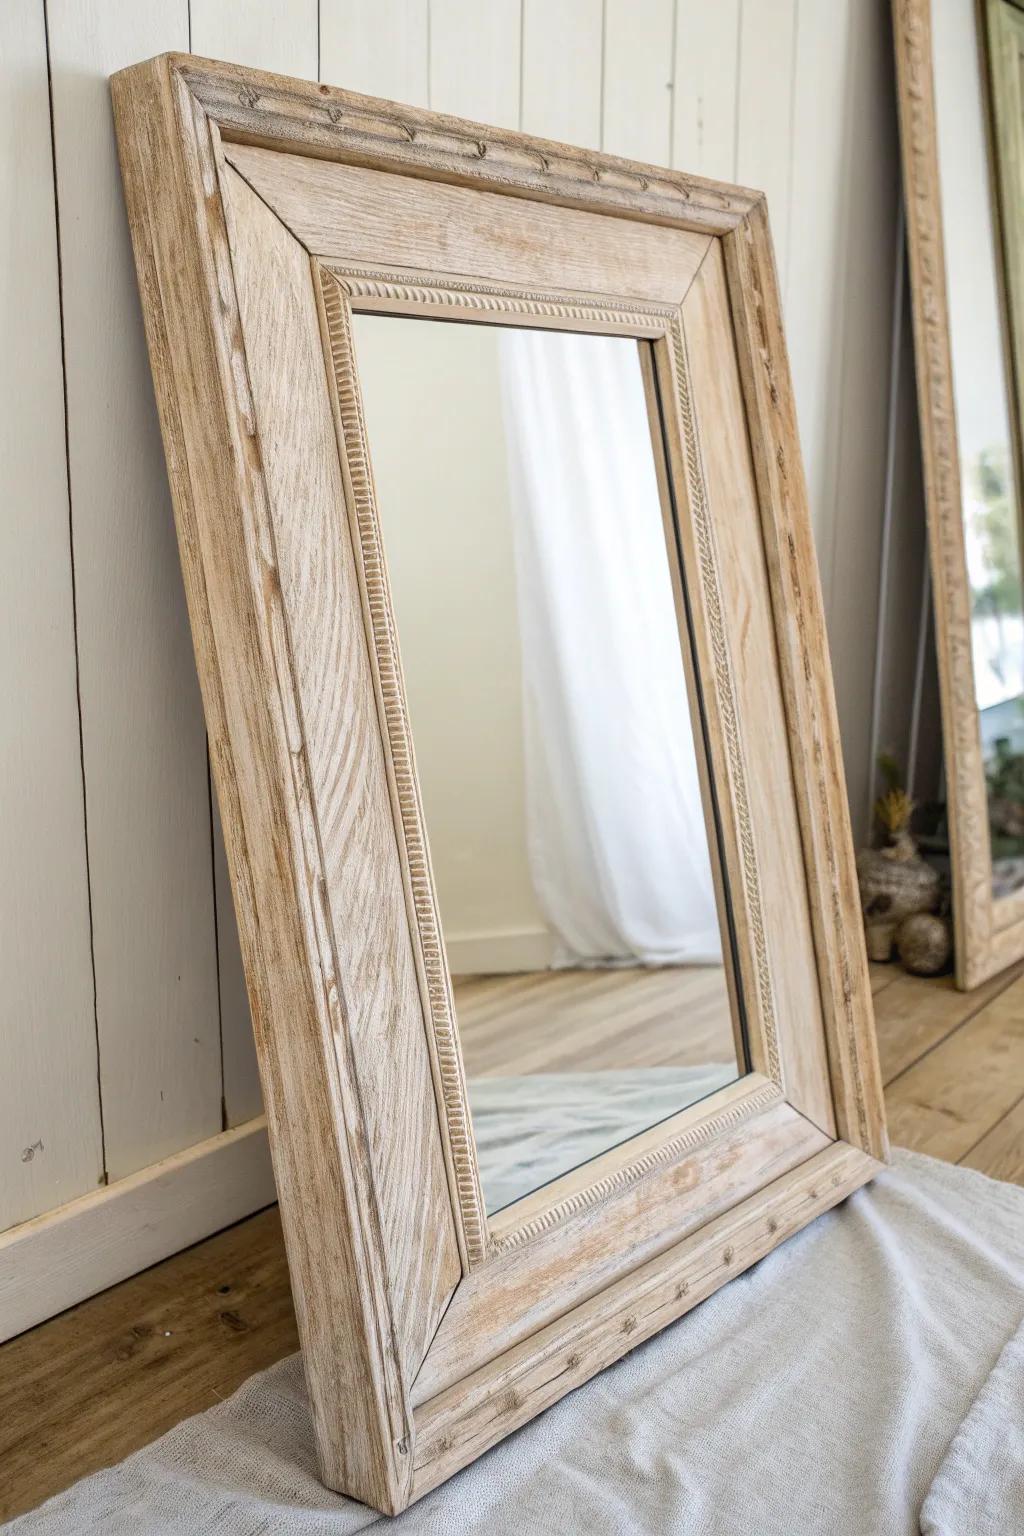
Pairing a dresser with a distressed mirror frame is one of those simple upgrades that makes the whole corner feel styled. When I do this, I distress both pieces in the same spots (edges, corners, raised trim) so they look like they’ve lived together forever.
Check these products out:
- Unfinished Wood Wall Mirror: Choose a raw wood mirror frame to easily paint and distress for a custom, perfectly matched finish.
- Chalk Style Furniture Paint: Use matte chalk paint to create that vintage, weathered base layer before sanding and distressing your frame.
- Sanding Block Set: Gently rub away paint on corners and raised details with these blocks to achieve an authentic aged look.
Wet-Distressed Paint for Natural Fade
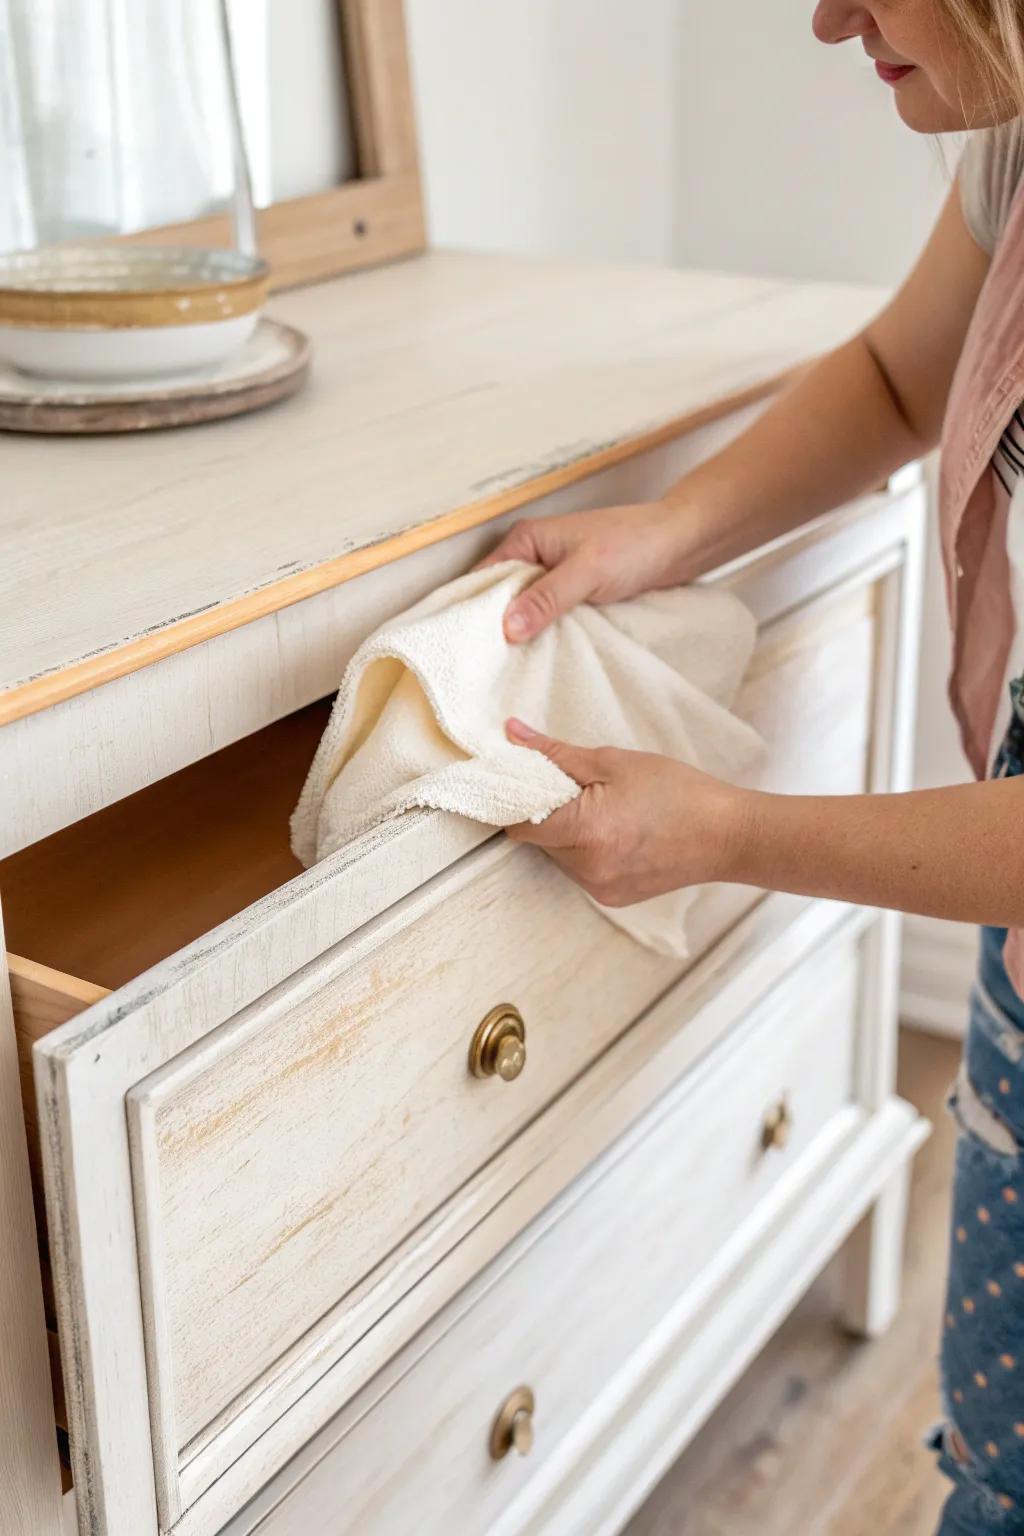
If you hate sanding dust, try wet distressing—I’ve used a damp rag to rub paint back on edges and raised profiles while it’s still fresh enough to move. On my last dresser makeover, it gave me the most believable, soft-worn look with almost zero mess.
Items that may come in handy:
- Cotton Rags: Use these lint-free cloths to gently rub back paint on edges for that perfectly soft, time-worn finish.
- Chalk Style Paint: Choose a high-quality matte paint that stays workable longer, allowing you time to distress wet edges easily.
- Furniture Wax: Seal and protect your newly distressed finish to enhance durability and add a subtle, professional-looking sheen.
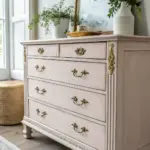
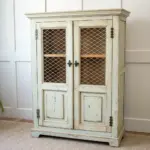
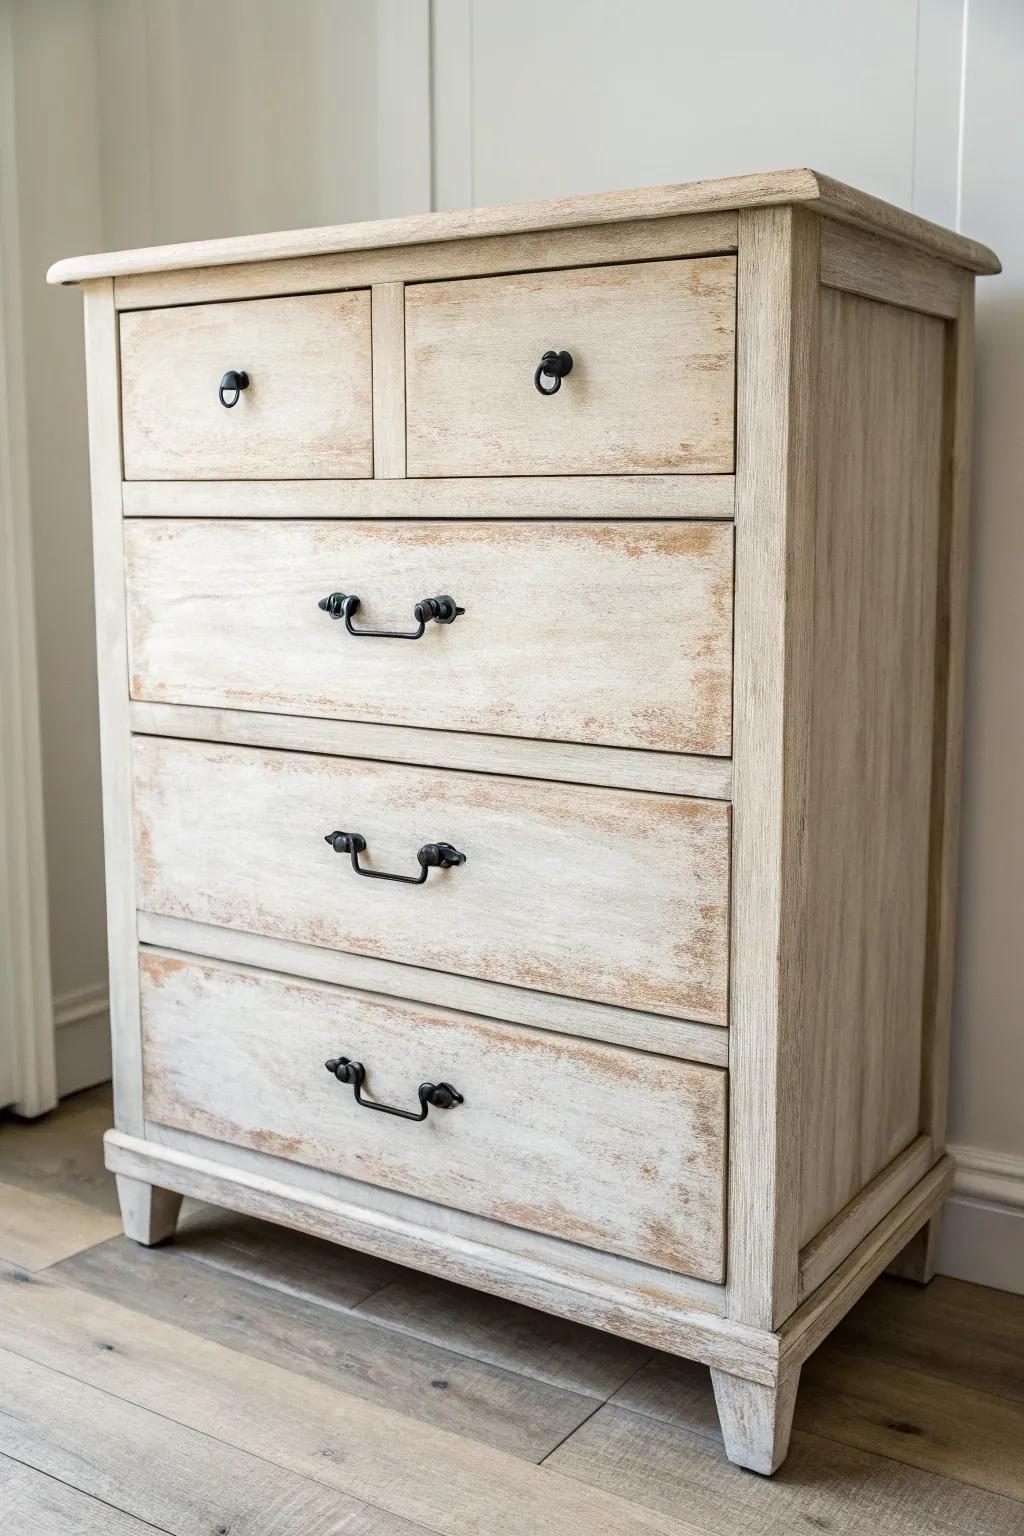
Farmhouse Armoire With Layered Neutral Patina
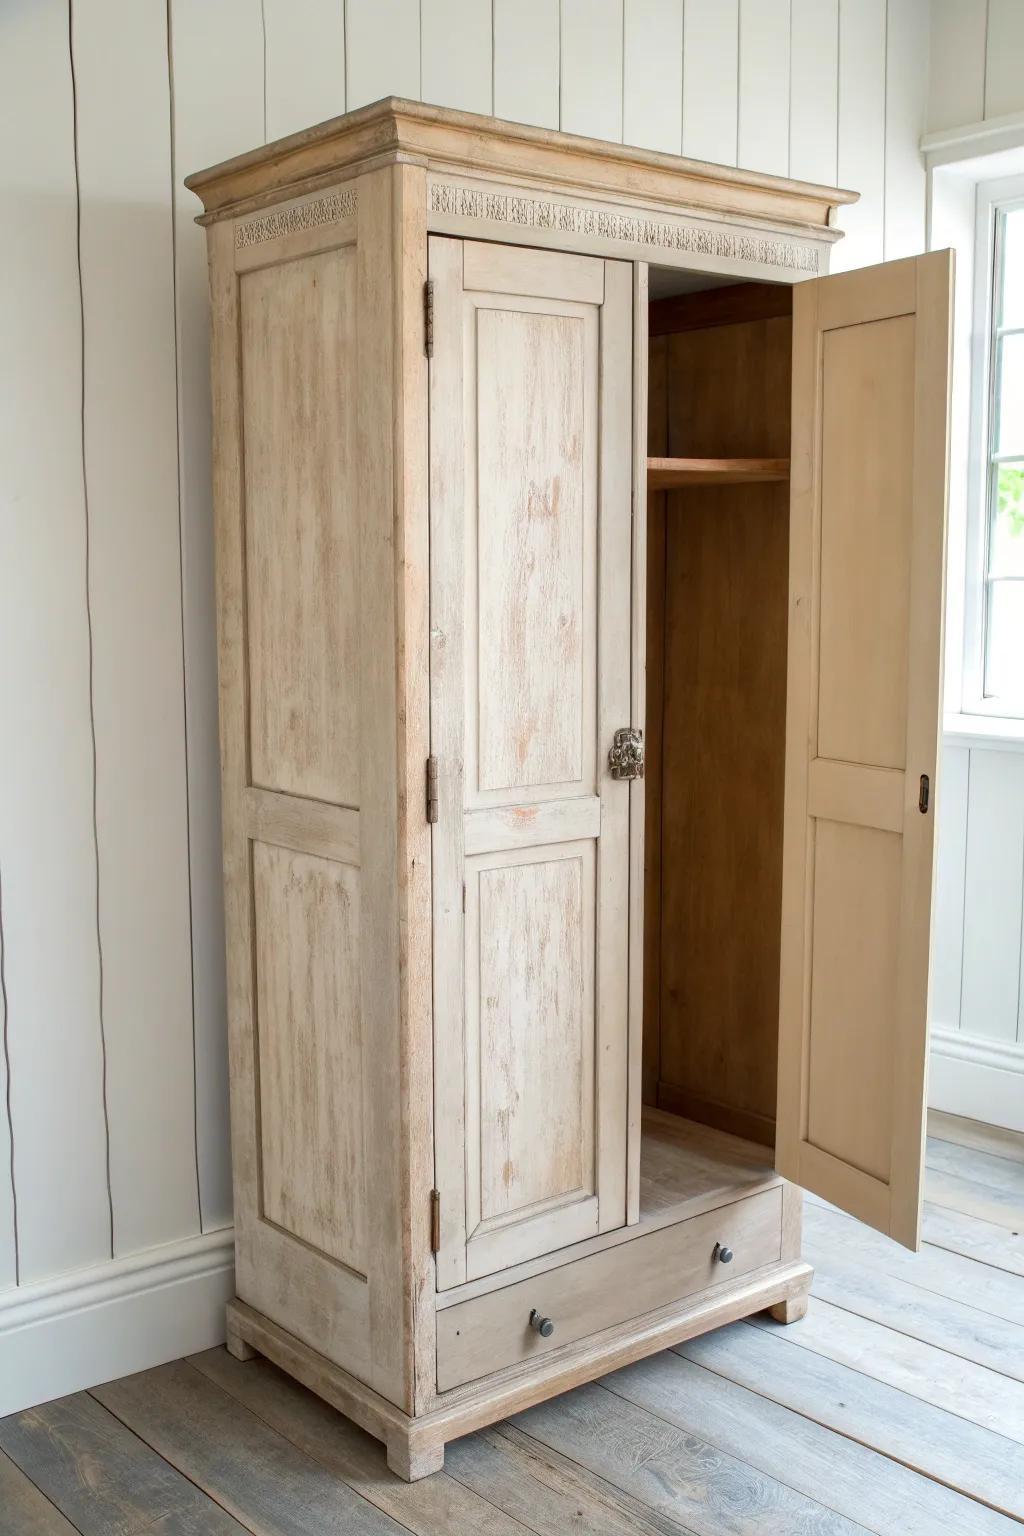
A tall distressed armoire looks incredible with two close neutral tones layered and lightly rubbed through on the corners and door edges. I’ve learned to leave the interior mostly alone, because shelves and hanging rods get beat up fast and I’d rather not be doing touch-ups constantly.
A few choices to try:
- Chalk Style Furniture Paint (Cream/Off-White): Create that soft, farmhouse base layer by applying this matte finish paint designed for easy distressing and layering.
- Assorted Grit Sanding Blocks: Achieve the perfect rubbed-through look on edges and corners with these easy-to-handle sponges for controlled distressing.
- Antique Furniture Wax: Seal your painted layers and add a subtle aged patina that deepens the finish and protects the wood.
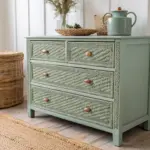
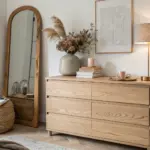
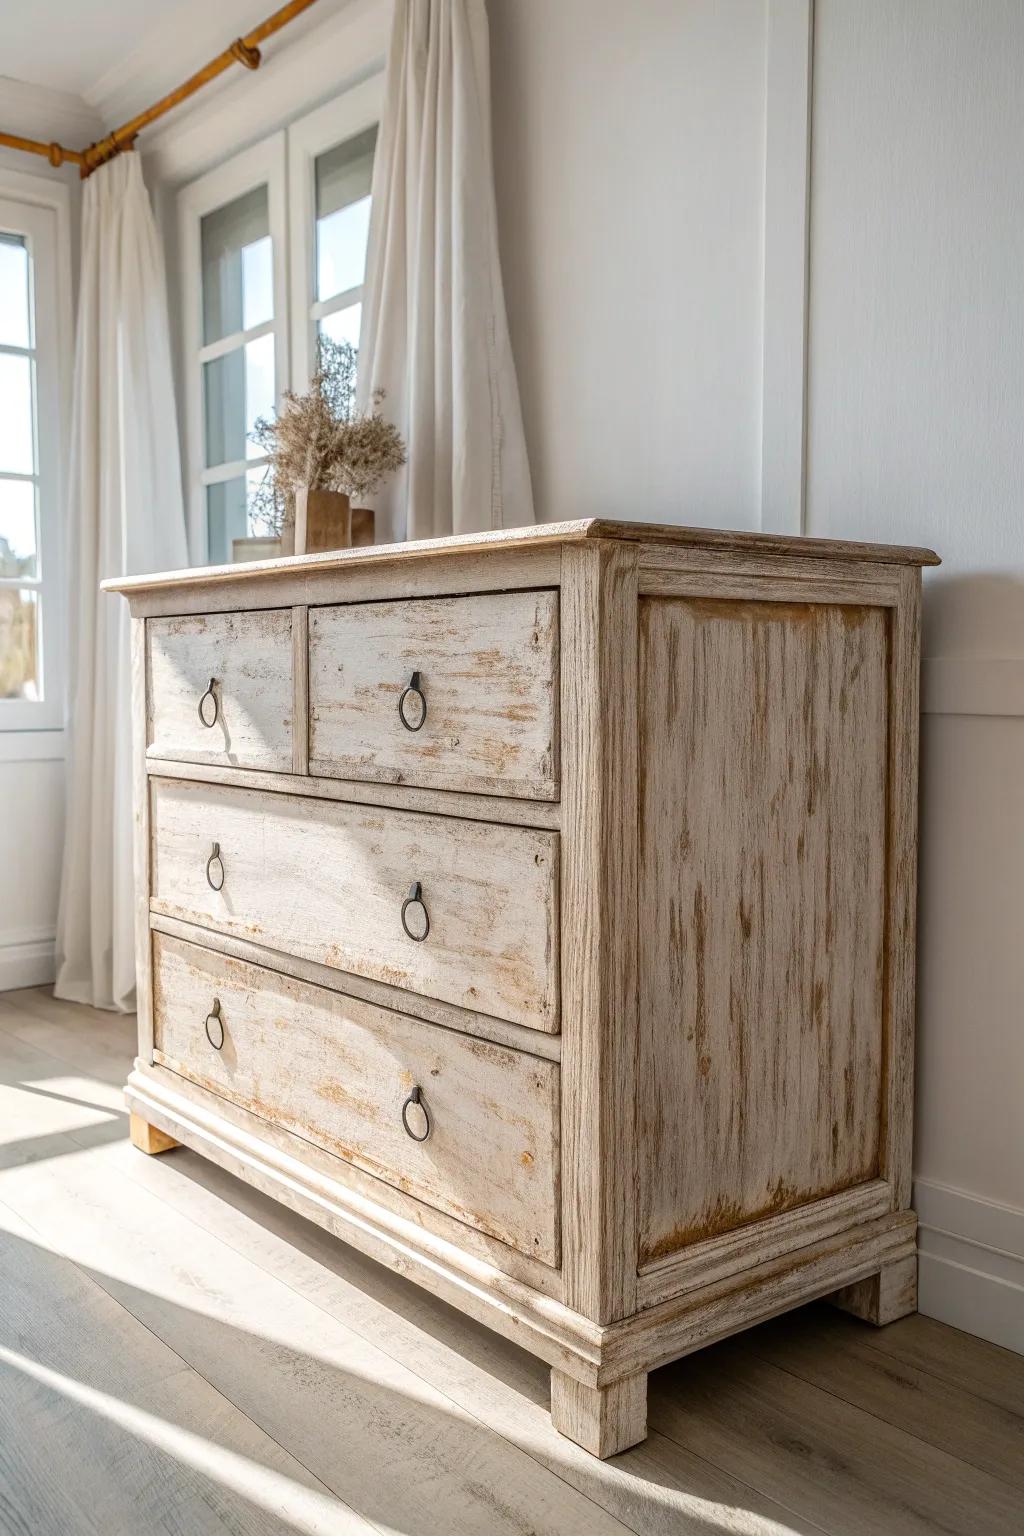
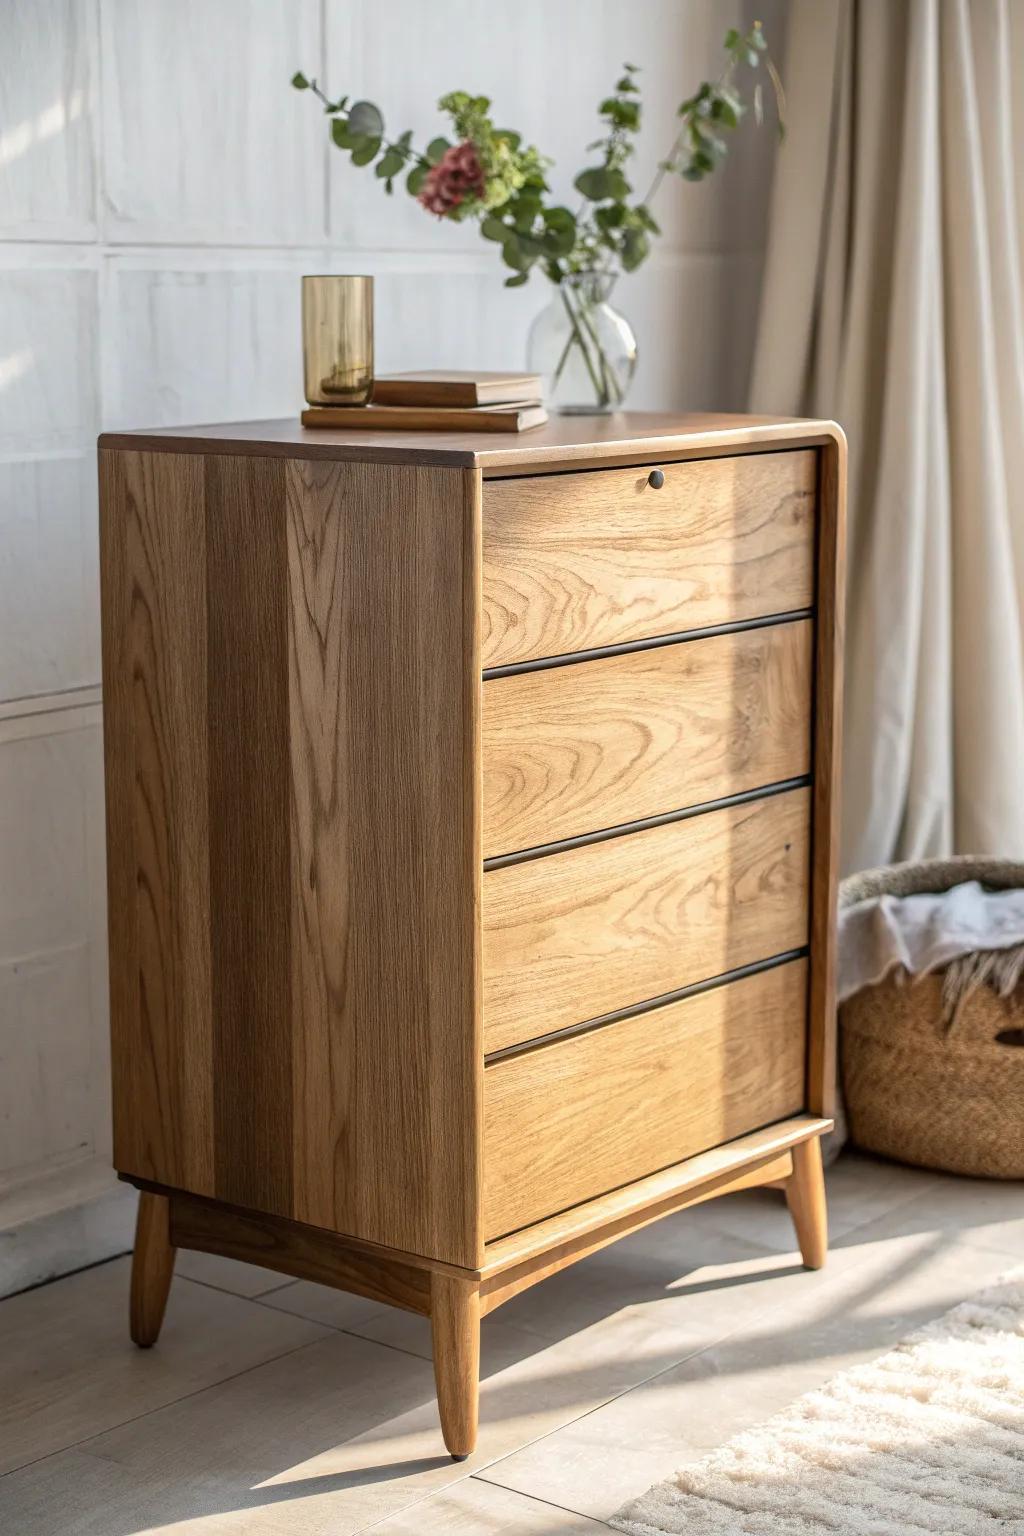
Coastal Driftwood Wash on Drawer Fronts
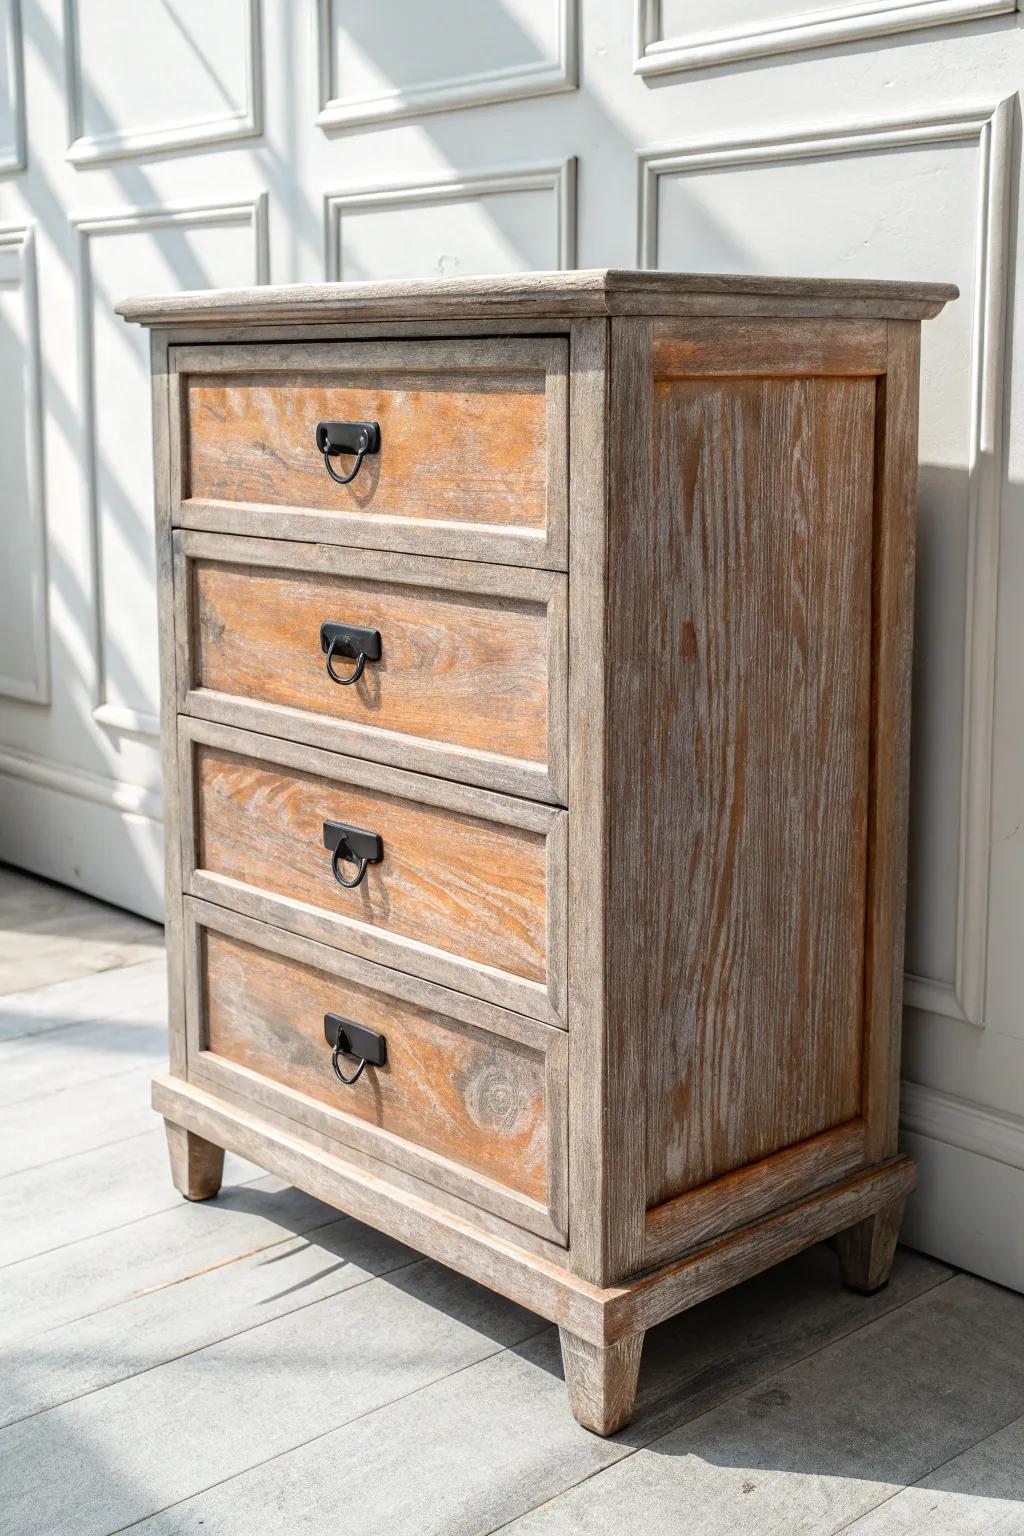
For a breezy vibe, I’ll brush a gray-beige driftwood wash onto a distressed dresser and then wipe it back so the grain still leads the show. I’ve done this on orange-toned wood and it instantly calmed everything down without hiding the character.
Some handy options:
- Gray Driftwood Stain or Glaze: Create that breezy, weathered look by brushing on this stain to neutralize warm tones in your wood.
- Cotton Rags for Wiping: Wipe back excess stain easily to reveal the natural grain pattern and control the intensity of color.
- Matte Polyurethane Top Coat: Seal your new finish with a flat, non-yellowing coat that protects without adding an artificial glossy shine.
High-Contrast Sand-Through on White Paint
A bright distressed white finish sanded back to a dark stained base is bold, classic, and super photogenic. I’ve found the trick is focusing the heavy sand-through on edges and hardware areas so it reads like years of use, not random scraping.
These products might help:
- Chalk Style Paint (Pure White): Achieve that classic matte base layer easily with smooth, durable paint perfect for distressing projects.
- Sanding Sponge Block Set: Control your distressing technique on edges and curves with flexible blocks that allow precise paint removal.
- Dark Walnut Wood Stain: Create the rich, high-contrast base layer that pops beautifully once you sand back your topcoat.
Faded Stencil Details That Look Timeworn
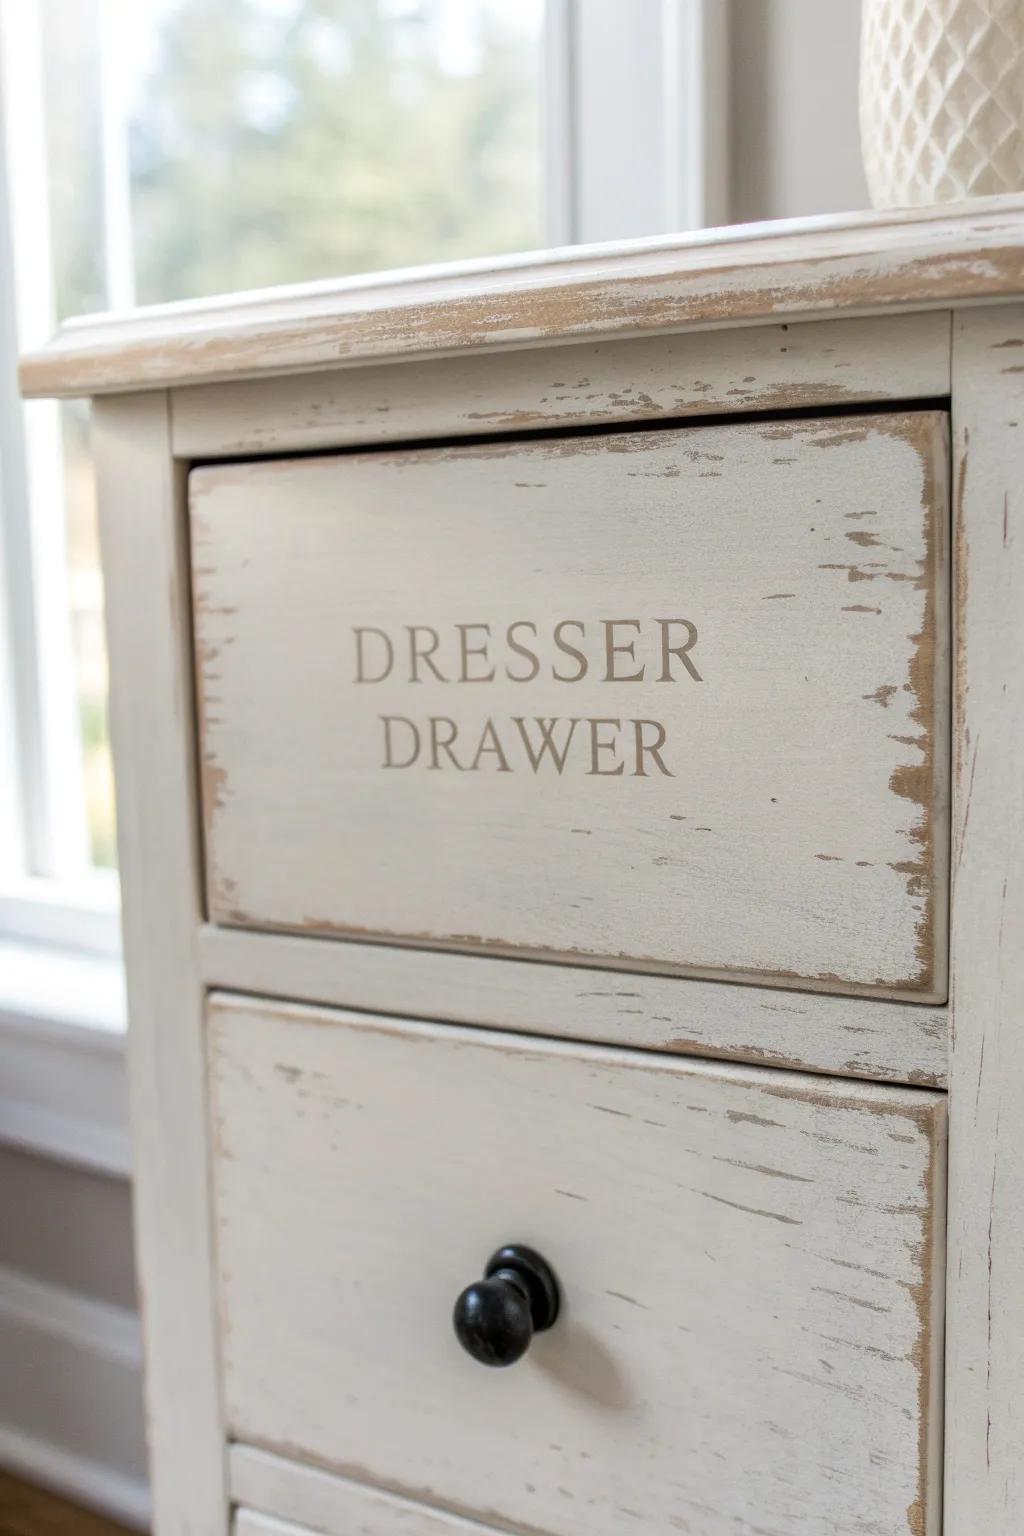
I’m a sucker for a distressed dresser with a faded stencil on a couple drawer fronts—just enough to feel found, not themed. When I do it, I lightly sand the stencil itself so the lettering looks weathered and broken-in.
You might give these a try:
- Reusable Alphabet Letter Stencils: Create your own custom vintage labels easily with durable, reusable stencils perfect for furniture upcycling projects.
- Matte Finish Chalk Style Paint: Achieve that classic aged look with matte paint that adheres well and distresses beautifully when sanded.
- Fine Grit Sanding Sponge: Gently fade your stenciled designs to perfection with a flexible sanding block that offers controlled distressing.
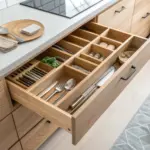
Patina-Friendly Hardware and Scuffed Pull Zones
Swapping to simple metal pulls and then distressing right around them makes a distressed chest of drawers feel convincingly handled. I always scuff the “grab zone” above each pull because that’s exactly where my own furniture wears first.
Check if these fit your needs:
- Dark Iron Bail Pulls: Swap out existing knobs for these classic dark pulls to instantly add vintage farm-style character to drawers.
- Medium Grit Sanding Sponges: Use these flexible sponges to gently scuff the finish around handles, simulating years of natural wear.
- Dark Wax Finishing Paste: Apply this into your newly scuffed areas to deepen the color and create an authentic, age-worn shadow.
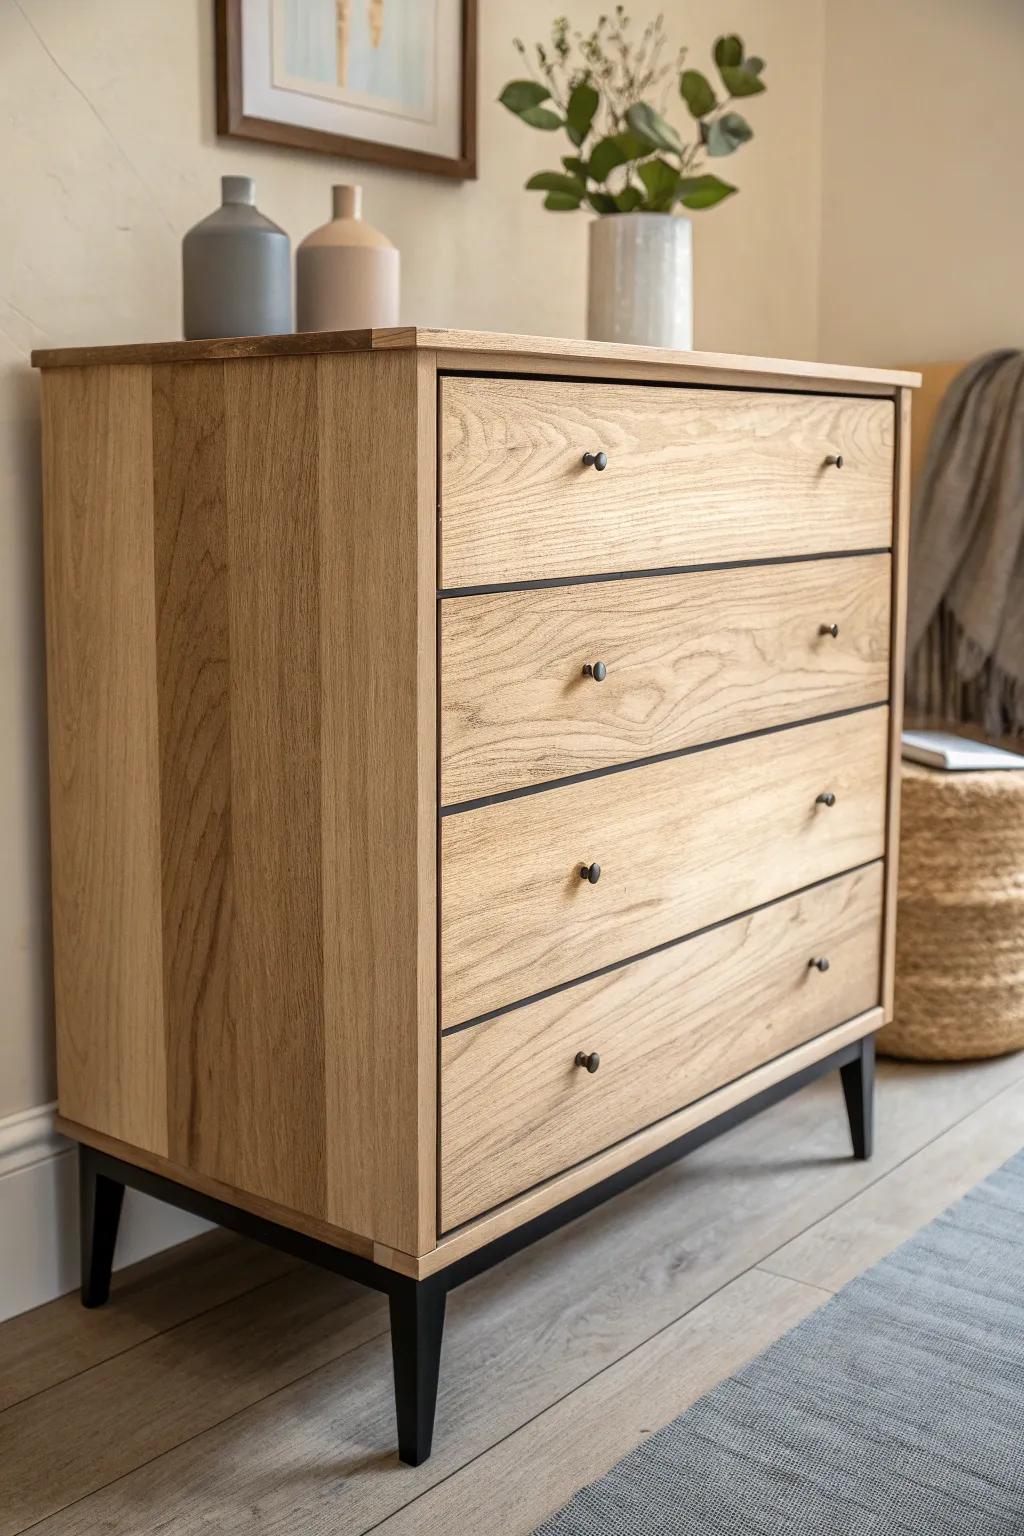
Planked Drawer Fronts With a Distressed Finish
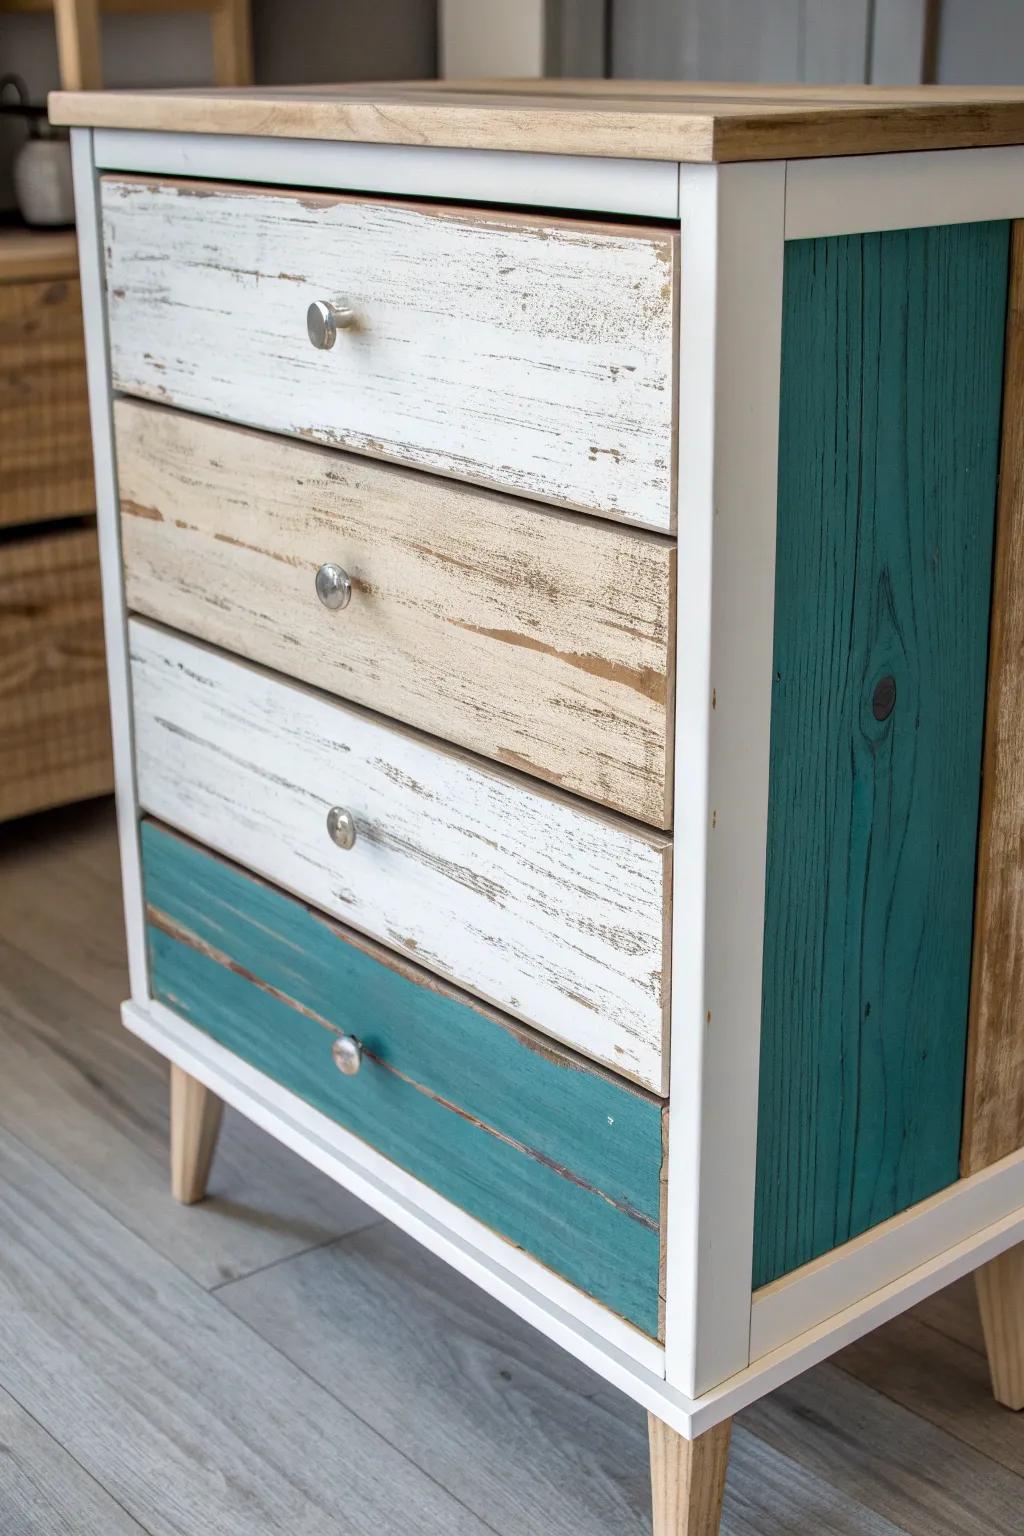
One of my favorite upgrades is adding thin wood planks to drawer fronts, then painting and distressing the whole piece so it looks like reclaimed wood furniture. I’ve done this on basic dressers and it totally changes the vibe from bland to rustic.
May just do the trick:
- Thin Wood Crafting Planks: Overlay your existing drawer fronts with these lightweight strips to create an authentic shiplap or reclaimed texture.
- Chalk Style Furniture Paint: Achieve that matte, vintage look easily with rich colors like teal or white that distress beautifully when sanded.
- Medium Grit Sanding Sponges: Use these flexible blocks to gently rub away paint layers on edges and corners for that perfect time-worn effect.
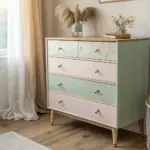
Sun-Bleached Look With Uneven Wash Layers
To fake that “left by a bright window for years” vibe, I build up uneven, watered-down coats on a distressed dresser and then softly rub back the center panels. I’ve used this when a piece felt too heavy visually, and it instantly made it look lighter and older.
Products that could assist:
- Chalk Style Paint (White or Off-White): Use a matte, chalk-style paint to create easily layered, watered-down washes that mimic sun-bleached wood tones.
- Fine Grit Sanding Sponges: Gently rub back paint on center panels and edges with these sponges to reveal the woodgrain underneath.
- Antique Ring Pull Hardware: Complete the vintage aesthetic by swapping modern handles for classic, dark metal ring pulls like these.
Steel-Wool Rubbed Stain for Smoky Age
On stained pieces, I’ll skip paint and create a distressed finish by rubbing with steel wool and then glazing a smoky brown into corners and around trim. I’ve used this on dressers with pretty grain, and it keeps the wood front-and-center while still feeling timeworn.
A few helpful options:
- Fine Grade Steel Wool Pads: Use these gentle abrasive pads to lightly scuff wood surfaces, creating an authentic, worn texture before glazing.
- Antiquing Glaze (Smoky Brown): Apply this specialized finish into corners and details to instantly add depth and a rich, aged patina.
- Lint-Free Staining Cloths: Wipe away excess glaze cleanly with these durable rags to ensure a smooth, professional-looking finish without lint.
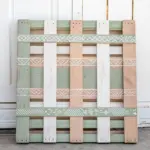
Patchwork Reclaimed Top With Worn Paint Base
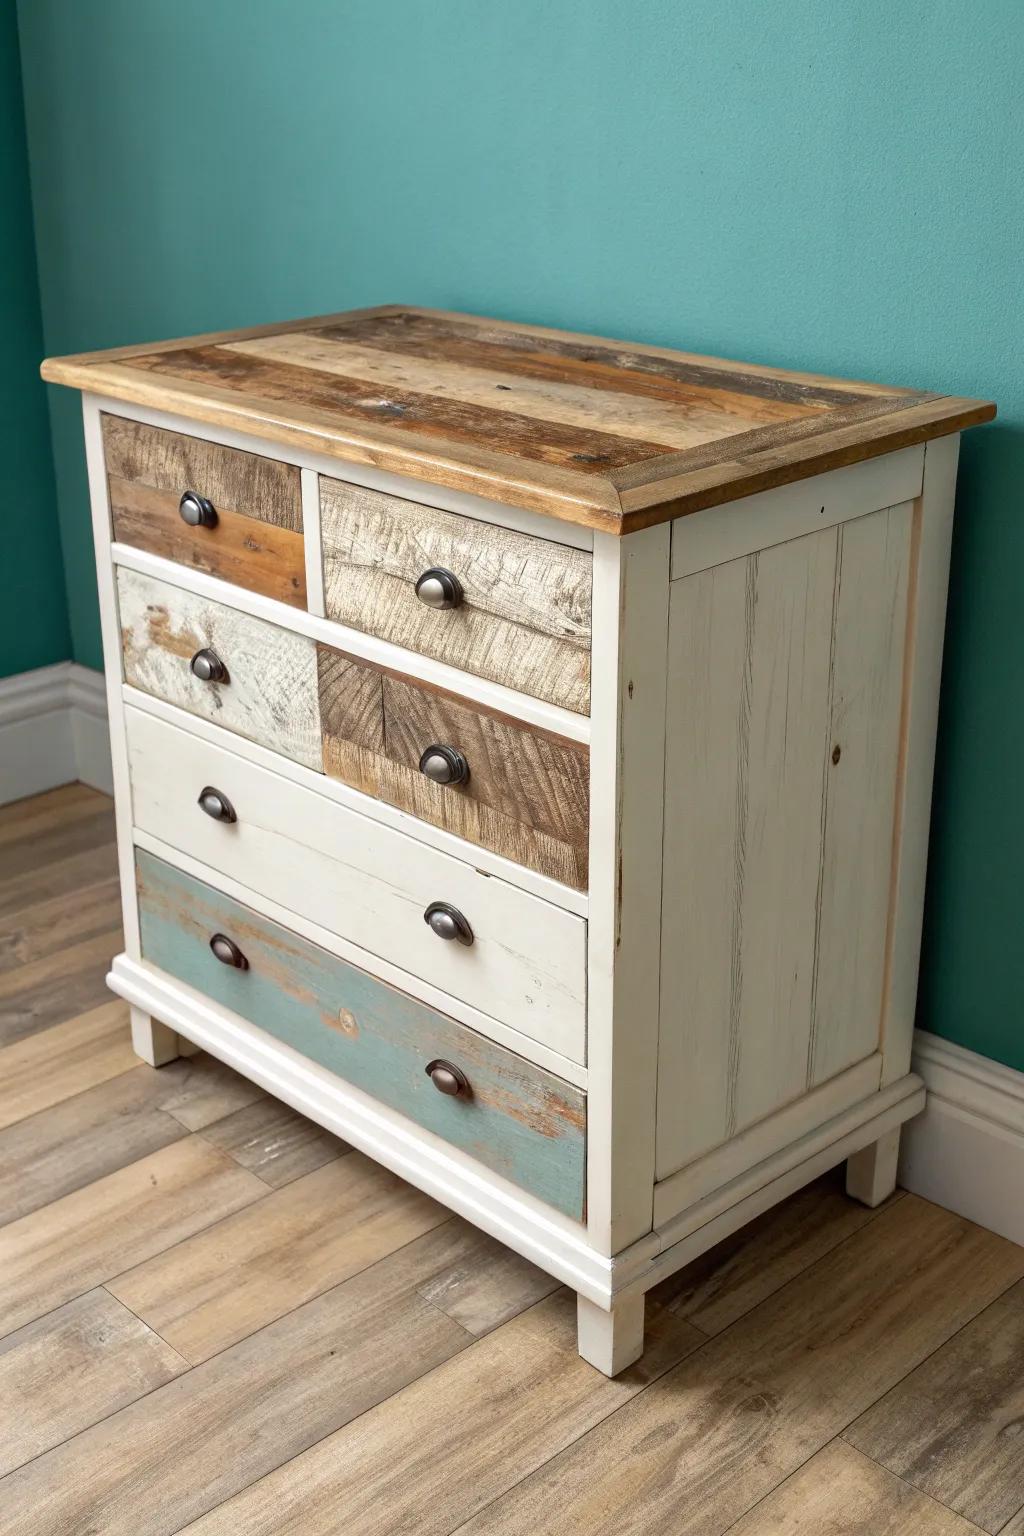
For a real wow moment, I’ve built a patchwork reclaimed wood top on a distressed dresser and kept the base softly chippy in a calm neutral. The mix of mismatched boards and rubbed edges makes it look like it lived a whole previous life before landing in your home.
Possibly helpful picks:
- Reclaimed Wood Planks: Create your own unique patchwork top by selecting various weathered planks for an authentic, rustic texture.
- Chalk Style Paint: Achieve that classic matte, distressed finish easily on the base with this creamy, furniture-friendly paint.
- Sanding Blocks: Use these various grits to gently distress edges and reveal layers of paint for a time-worn look.
Resin-Filled Cracks With an Antiqued Wash
When a piece has splits or checks, I sometimes fill them with tinted resin, sand it flush, and then do an antiqued wash over the whole distressed furniture surface. I tried this on a beat-up drawer top once, and the contrast between old wood and glossy-filled cracks was seriously addictive.
You might like:
- Clear Casting Epoxy Resin Kit: Fill natural splits and cracks seamlessly with this durable casting resin to stabilize and enhance older wood.
- Antiquing Wax or Glaze: Apply this specialized finish over paint to create instant age, depth, and that coveted distressed furniture look.
- Metallic Mica Powder Pigment Set: Mix these vibrant powders into your epoxy resin to highlight cracks with stunning color and contrast.
Charred-and-Sanded Distress for Bold Texture
If you want something unexpected, a light charred finish (then sanded back) on drawer edges gives a distressed chest of drawers a deep, dramatic texture that still reads rustic. I’ve done this in small doses—just corners and trim—and it adds instant “artisan-made” energy without overpowering the piece.
Possibly handy products:
- Handheld Propane Torch Kit: Apply controlled heat to wood edges to create distinct charred effects before sanding for a rustic, artisan-made appearance.
- Assorted Grit Sandpaper Pack: Use varied rough to fine grits to sand back charred areas, revealing the grain and smoothing the texture.
- Clear Matte Polyurethane Finish: Seal your charred and sanded masterpiece with a clear coat to protect the texture without adding unwanted shine.


