
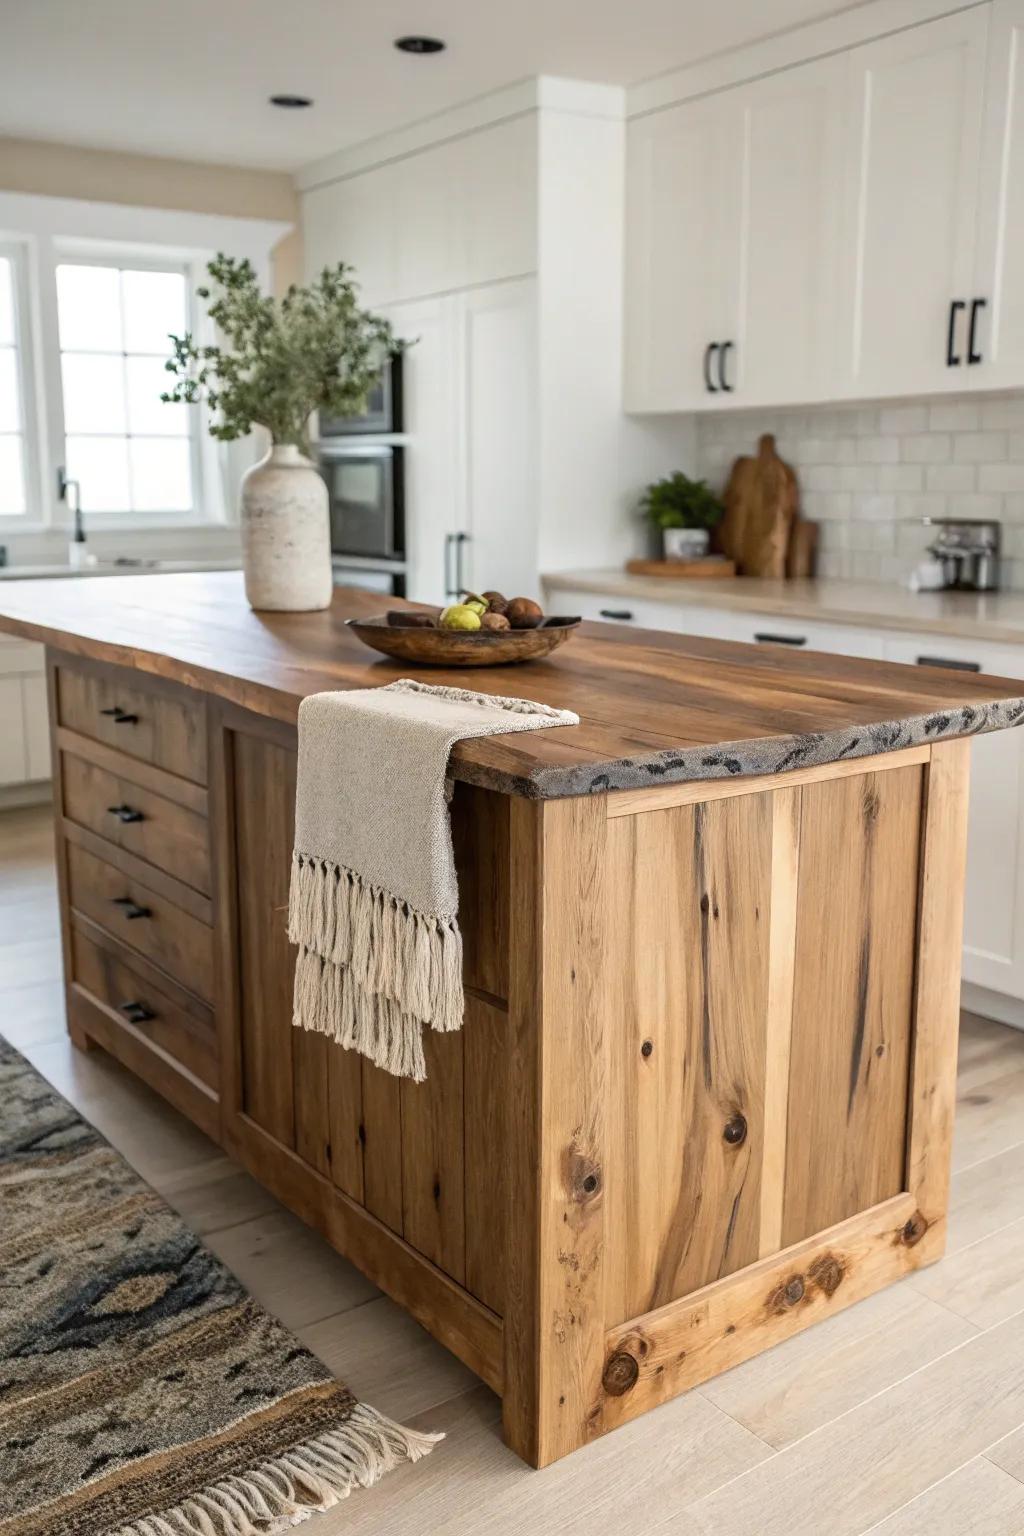
A live edge kitchen island is one of those pieces that instantly makes a kitchen feel warmer, richer, and more alive.
Split Slab With Center Feature
Try a two-piece live edge kitchen island top with a deliberate center gap filled with glass, stone, or resin for a dramatic “river” moment. I’ve mocked this up in my workshop, and that negative space makes the live edges feel even more wild and sculptural.
Give these a look:
- Deep Pour Epoxy Resin Kit: Create a stunning river effect between wood slabs with clear, high-gloss resin designed for deep casting applications.
- Mica Powder Pigment Set: Add vibrant color or metallic swirls to your resin river to customize the look of your kitchen island.
- Slab Flattening Router Jig: Ensure your two wood slabs are perfectly level and smooth before pouring your resin center feature.
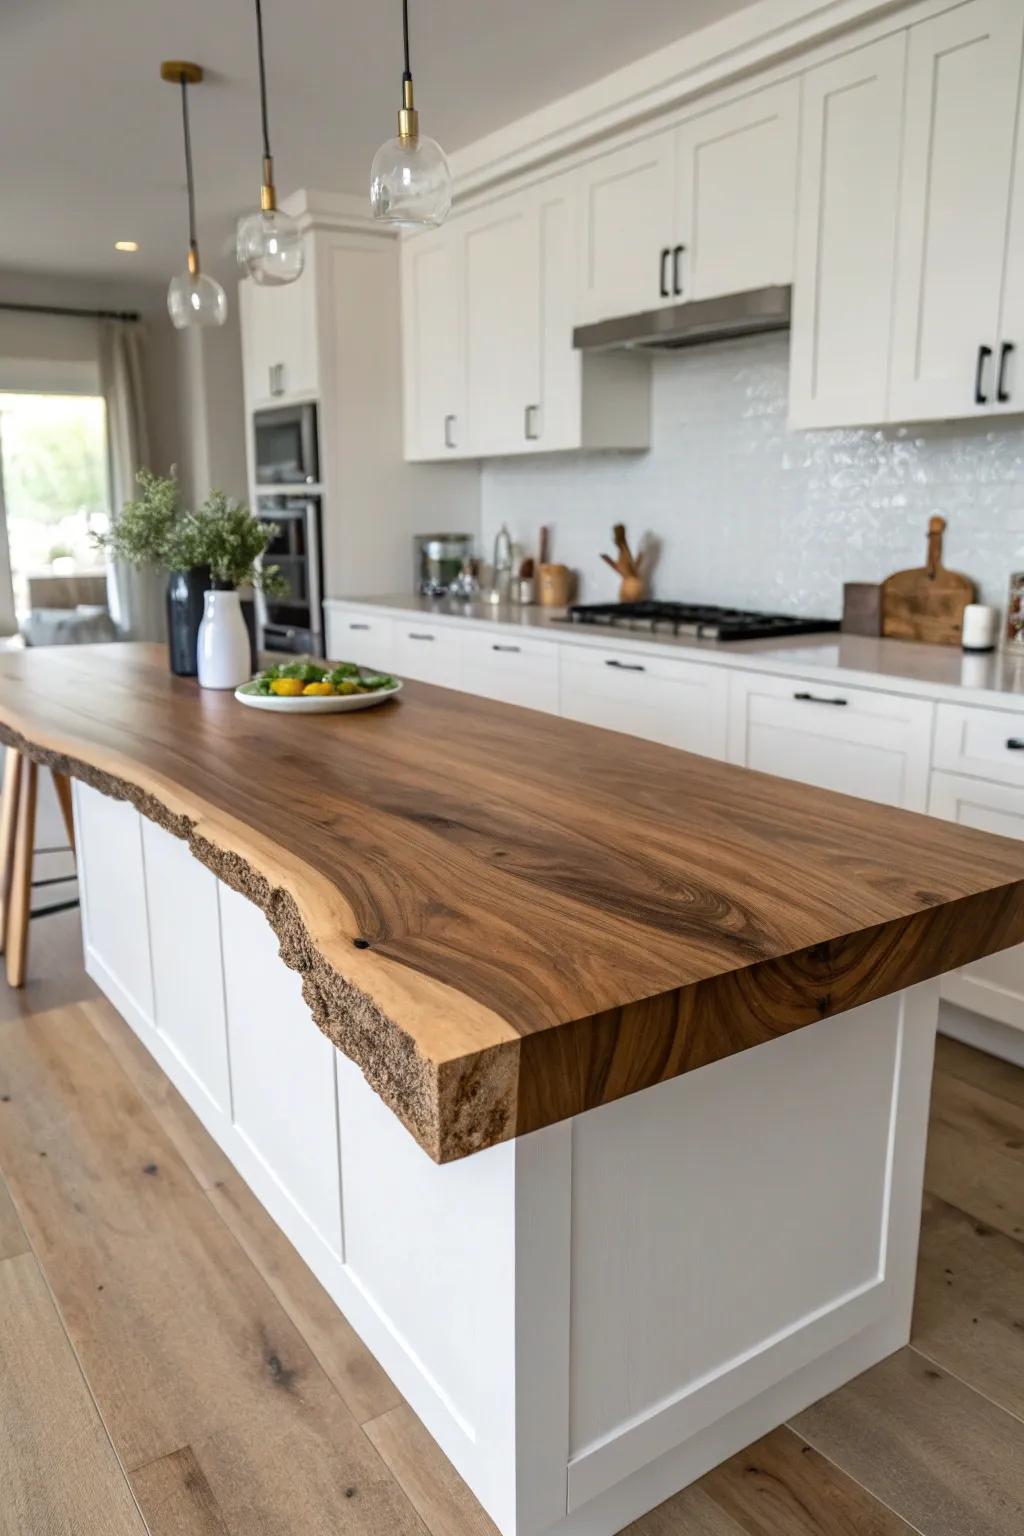
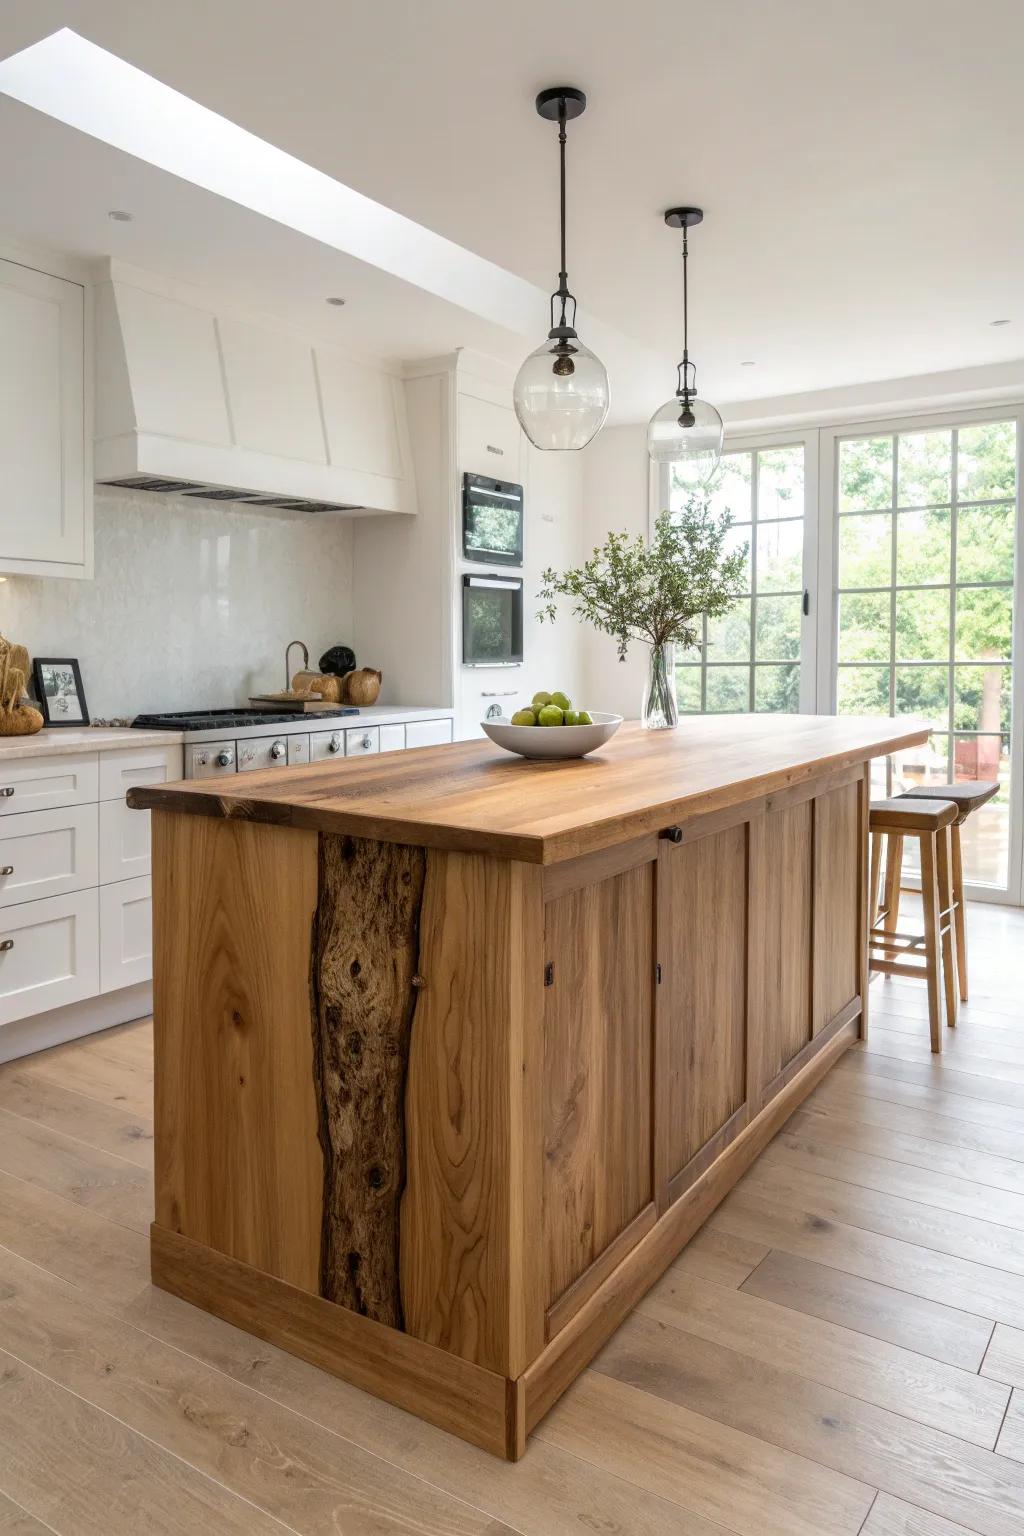
Single-Slab Statement Top
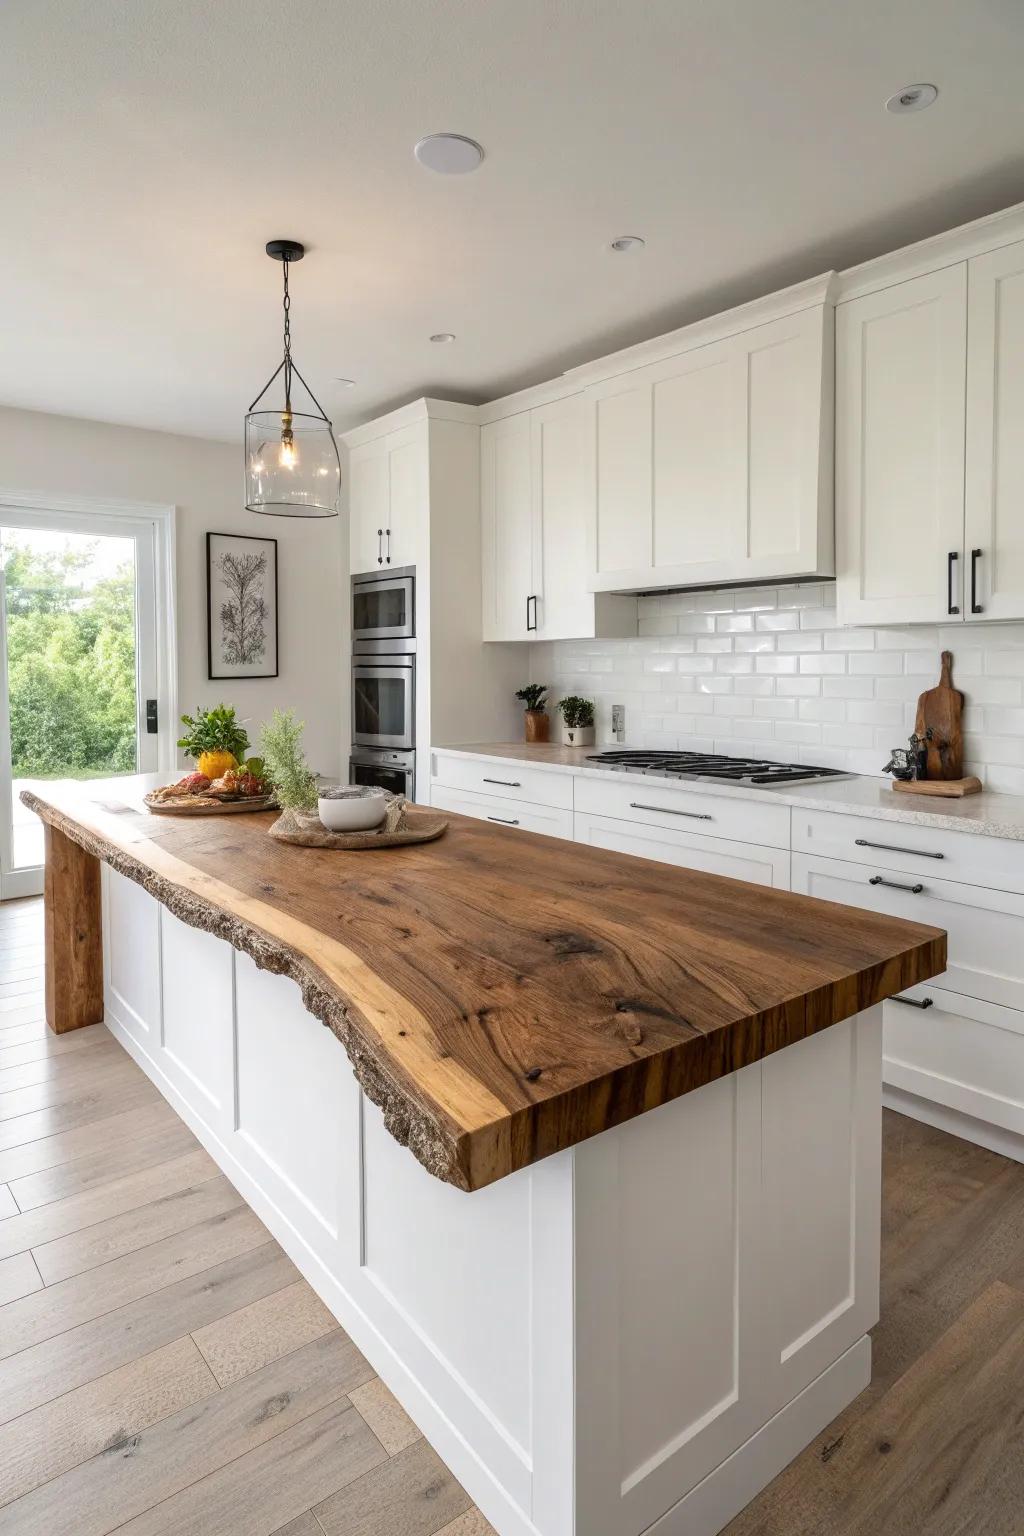
My go-to live edge kitchen island idea is a thick, single slab top on a clean, simple base so the grain does all the talking. I’ve found that even in a busy kitchen, that one bold piece of natural wood makes everything feel pulled together.
Check if these fit your needs:
- Food-Safe Wood Wax & Conditioner: Protect your stunning natural wood slab and enhance its grain patterns with regular application of conditioning wax.
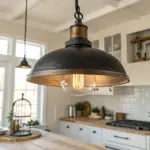
- Modern Glass Pendant Light Fixture: Complement the natural wood textures below by installing simple, elegant glass pendants that won’t clutter the view.
- Wooden Bread & Serving Board: Echo the island’s rustic charm by styling your countertop with organic-shaped wooden serving boards or trays.
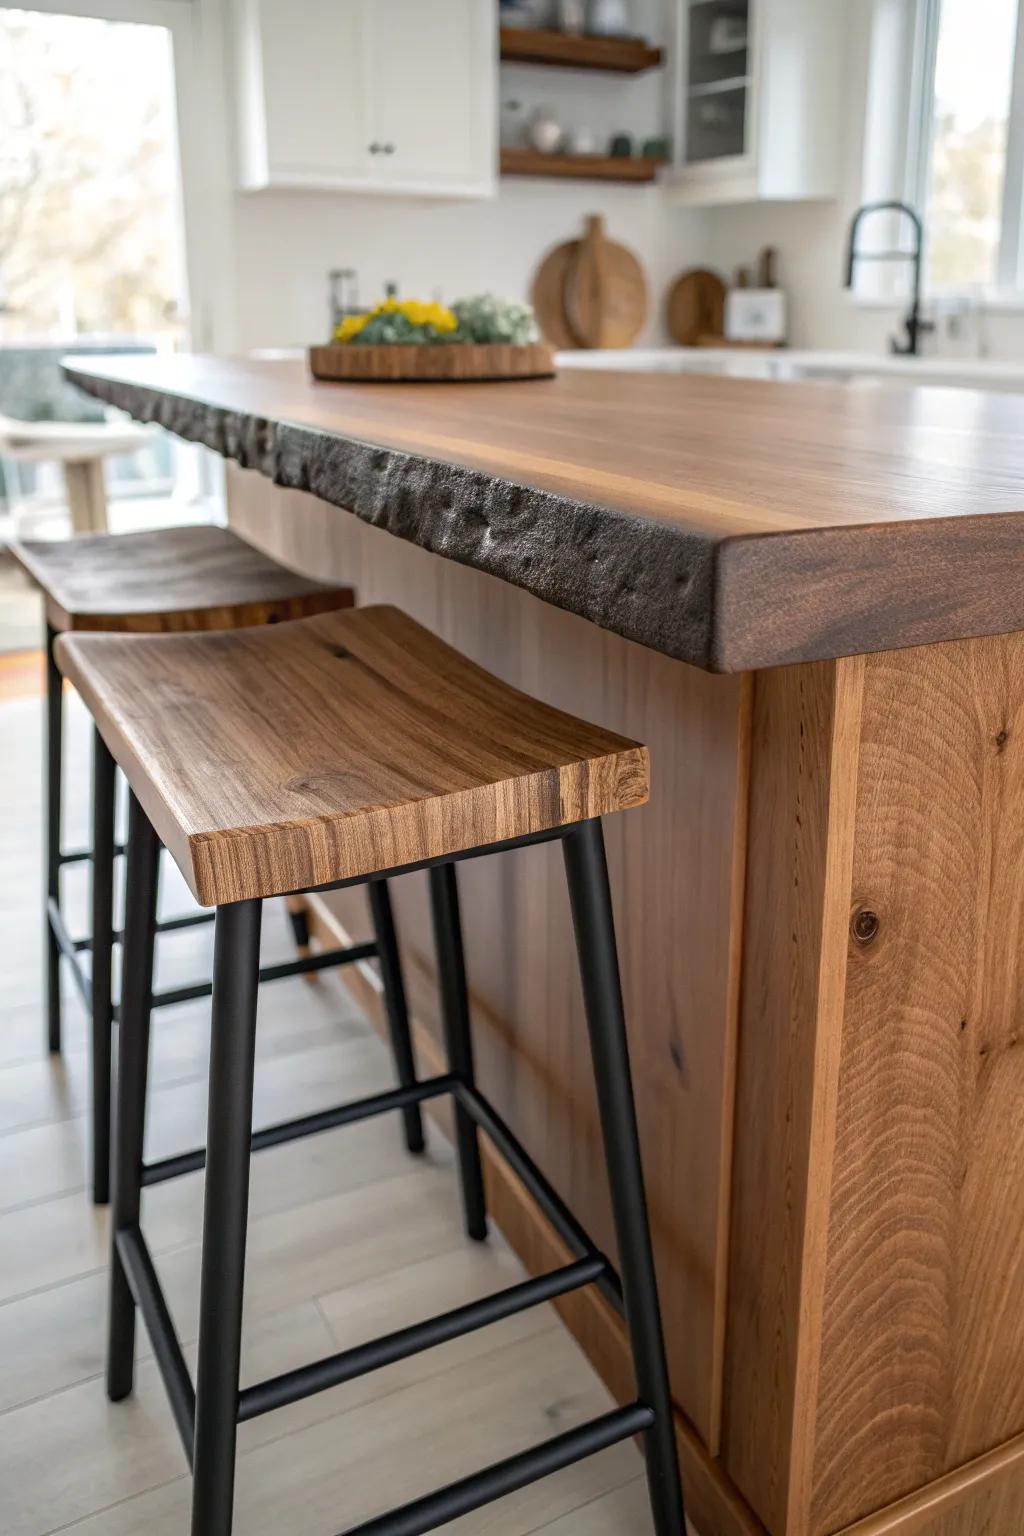
Live Edge Breakfast Bar Overhang
Add a generous overhang and your live edge kitchen island becomes the hangout spot for coffee, homework, and late-night snacks. I’ve built a few with a comfy bar seating depth, and it’s always the feature people drift toward first.
A few helpful options:
- Modern Backless Bar Stools: Complete your breakfast bar setup with sturdy, minimalist seating that tucks neatly under the counter overhang.
- Glass Pendant Light Fixtures: Illuminate your live edge surface and create ambiance with elegant glass pendants hanging above the seating area.
- Large Ceramic Fruit Bowl: Keep fresh snacks accessible and add a stylish centerpiece to your new solid wood countertop space.
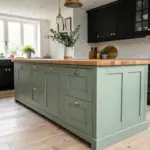
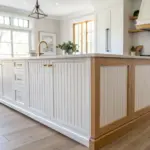
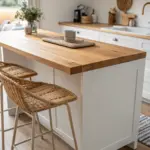
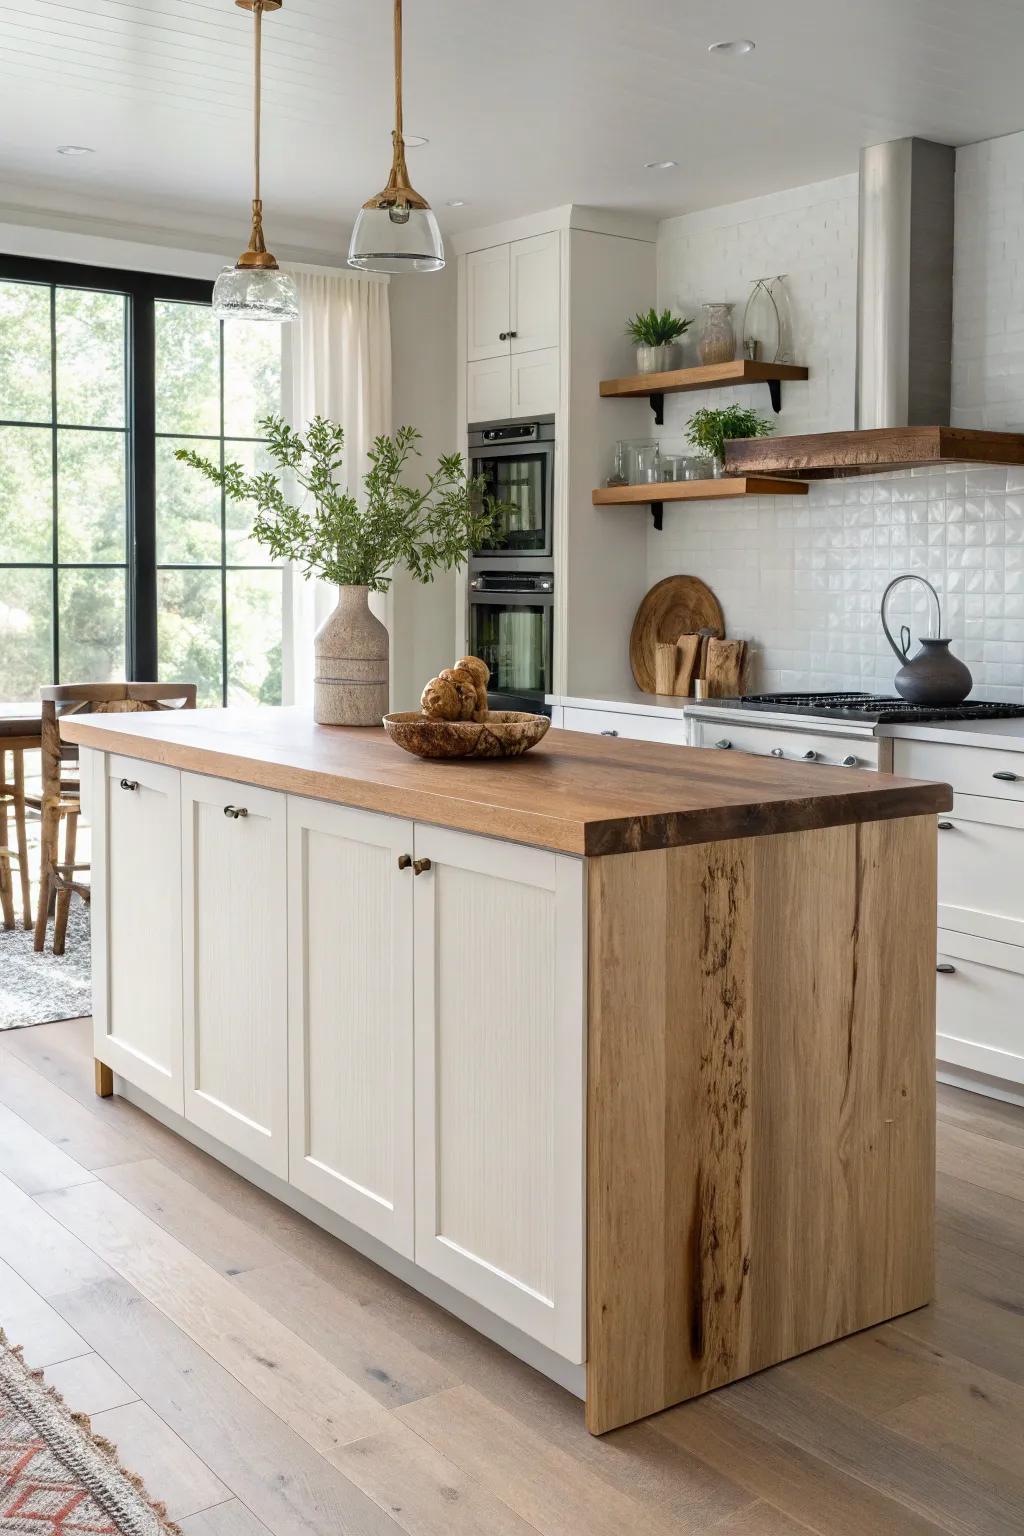
Modern Farmhouse White Base

Pair a warm slab with a crisp painted base for that classic modern farmhouse contrast in a live edge kitchen island. I’ve done this combo for clients who want rustic character without the kitchen feeling heavy.
Possibly helpful picks:
- Butcher Block Conditioner & Oil: Protect your island’s wood surface and enhance its natural grain with food-safe conditioning oil.
- Decorative Wooden Serving Tray: Style your countertop with a rustic wooden tray perfect for organizing decor or serving drinks.
- Woven Storage Baskets: Add texture and practical storage to your island’s open shelving with natural woven baskets.
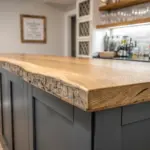
Moody Dark Base Contrast
A dark base under a live edge kitchen island top makes the wood look even richer and more dramatic. I tried this on a makeover last year, and the high-contrast look instantly made the island feel custom.
Items that may come in handy:
- Matte Charcoal or Black Cabinet Paint: Transform your existing island base deeply dark to create a stunning, dramatic backdrop for natural wood tones.
- Industrial Black Metal Table Legs: Support your heavy live edge slab with these sturdy legs that perfectly complement a moody, dark aesthetic.
- Woven Rope Counter Stools: Add texture and a light visual break against the dark base while providing comfortable, stylish seating.
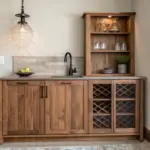
Reclaimed Wood Cabinet Base
Using reclaimed wood for the base gives your live edge kitchen island a layered, storied look that new lumber just can’t fake. I’ve built bases from salvaged boards and loved how every dent and nail hole added real charm.
May just do the trick:
- Reclaimed Barn Wood Planks: Face your existing island cabinetry with authentic barn wood planks to instantly create that weathered, historic look.
- Matte Black Cabinet Hardware: Add simple, rustic drawer pulls to complement the reclaimed wood texture without distracting from its natural character.
- Wood Conditioner and Stain: Protect your salvaged lumber and enhance its natural grain patterns with a quality wood conditioner and stain.

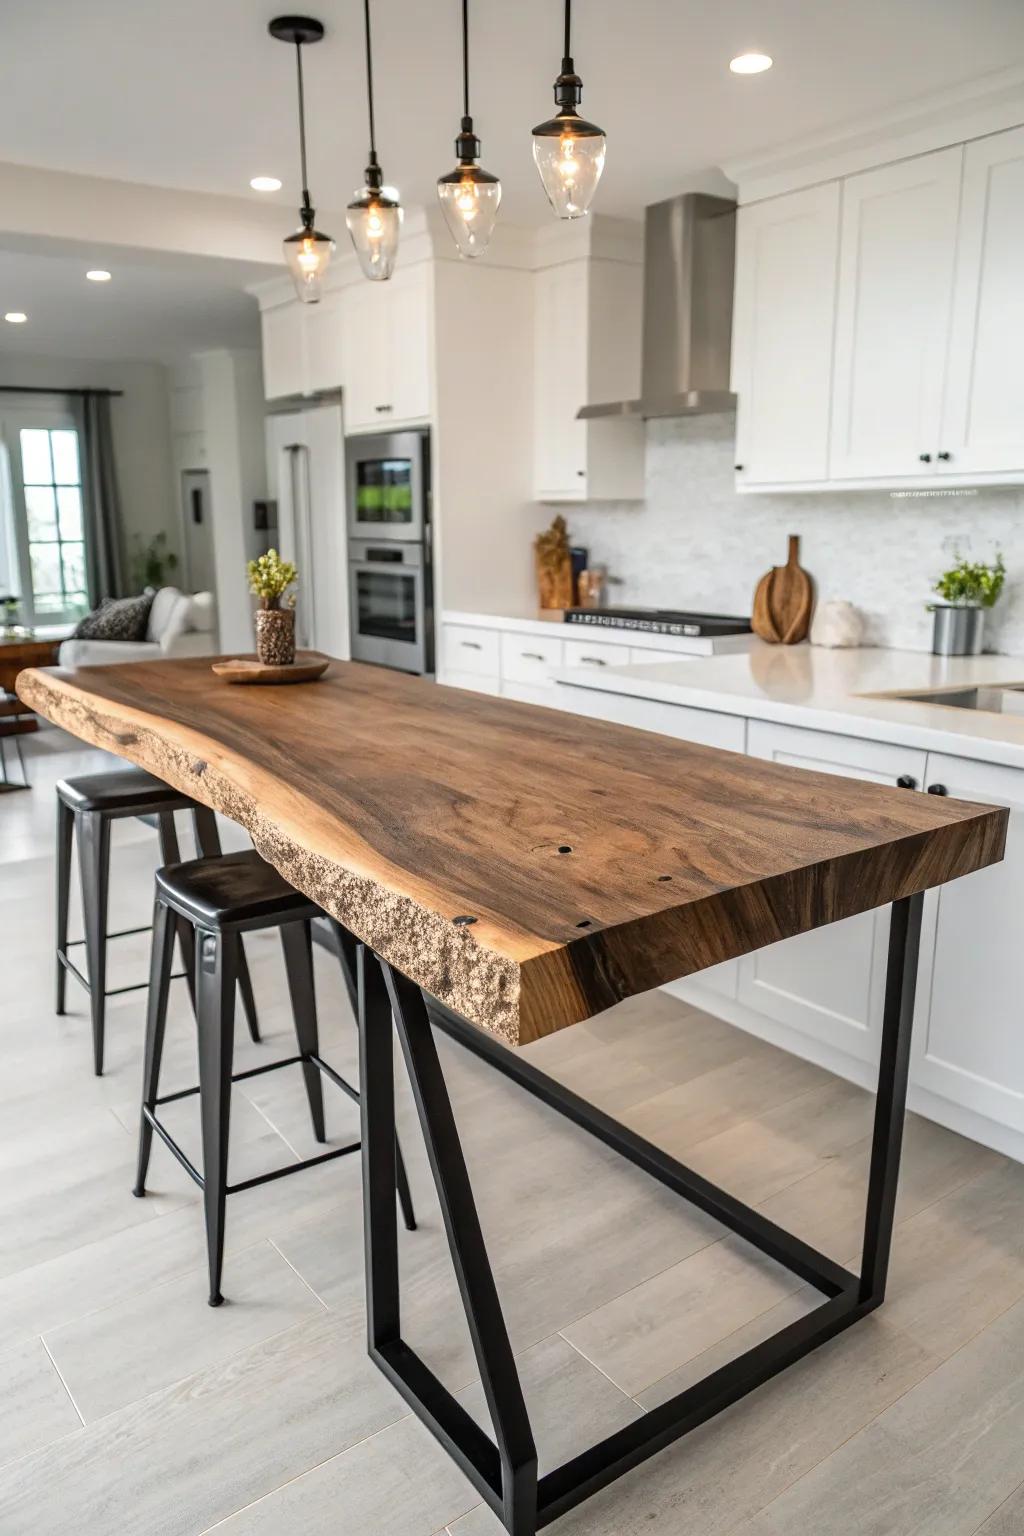
Industrial Metal Frame Base
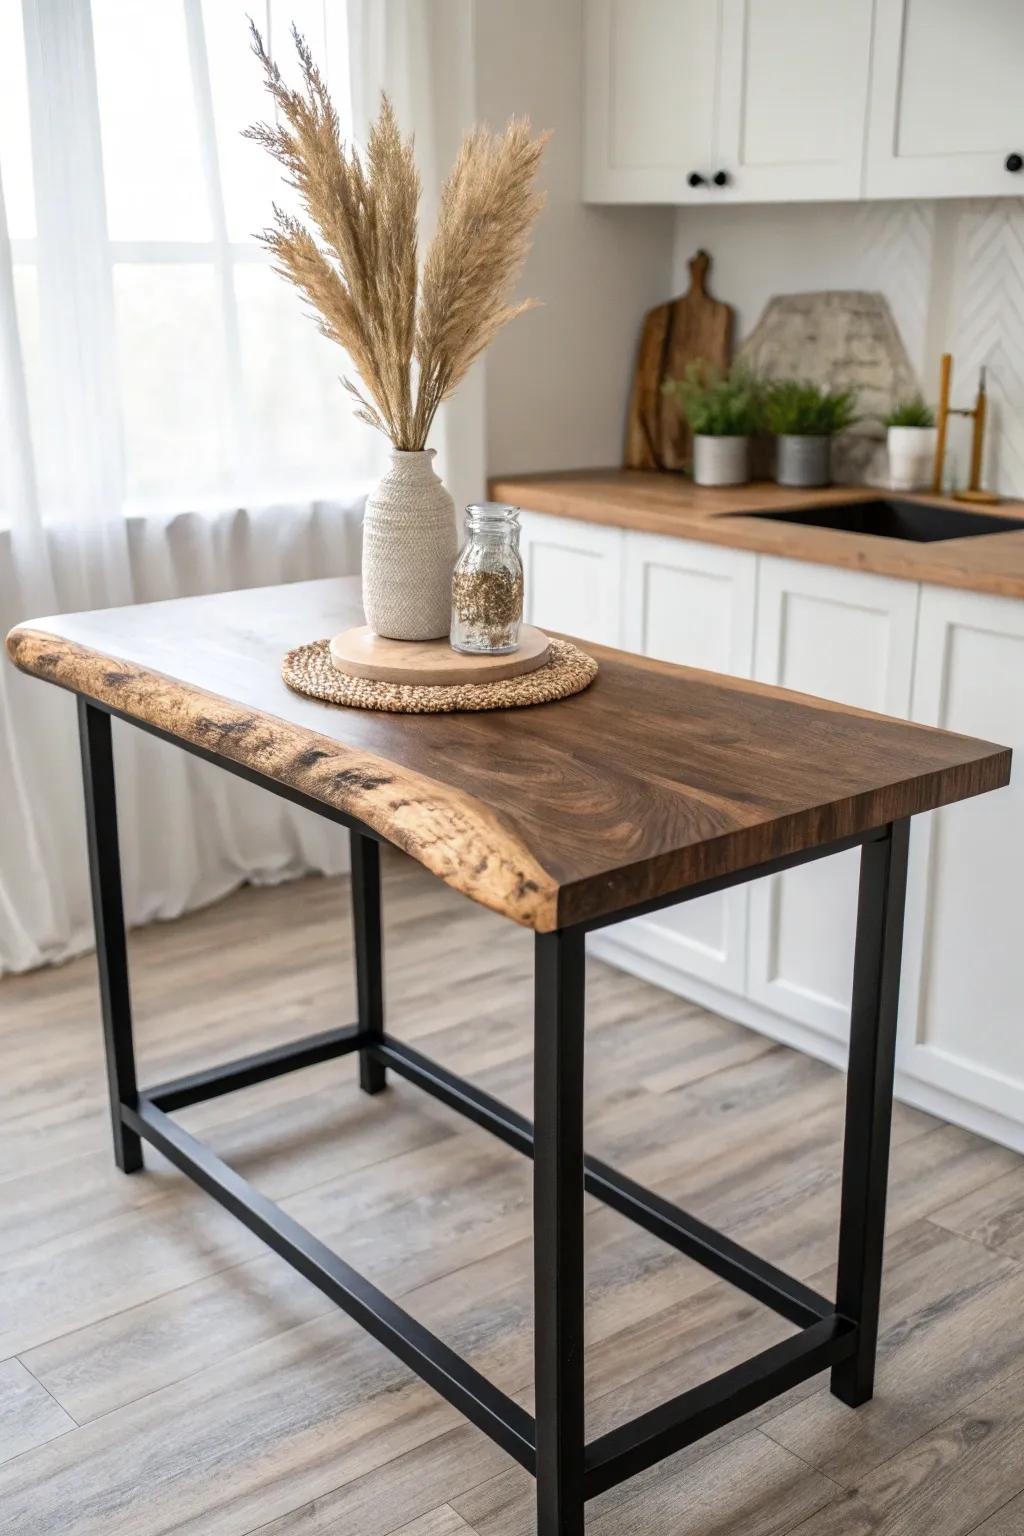
A simple steel frame makes a live edge kitchen island feel light, modern, and super intentional. In my shop, I’ve paired black metal with a slab top and watched it bridge rustic and contemporary in the coolest way.
These products might help:
- DIY Metal Table Legs (Black, H-Frame or Box): Build your own custom island by attaching these sturdy, industrial-style steel legs to any wooden slab top.
- Live Edge Wood Slab Countertop: Secure the perfect rustic foundation for your island project with a unique, natural-edge solid wood slab.
- Matte Black Polyurethane Metal Paint: Refresh existing table legs or customize raw steel frames to achieve that sleek, modern industrial black finish.
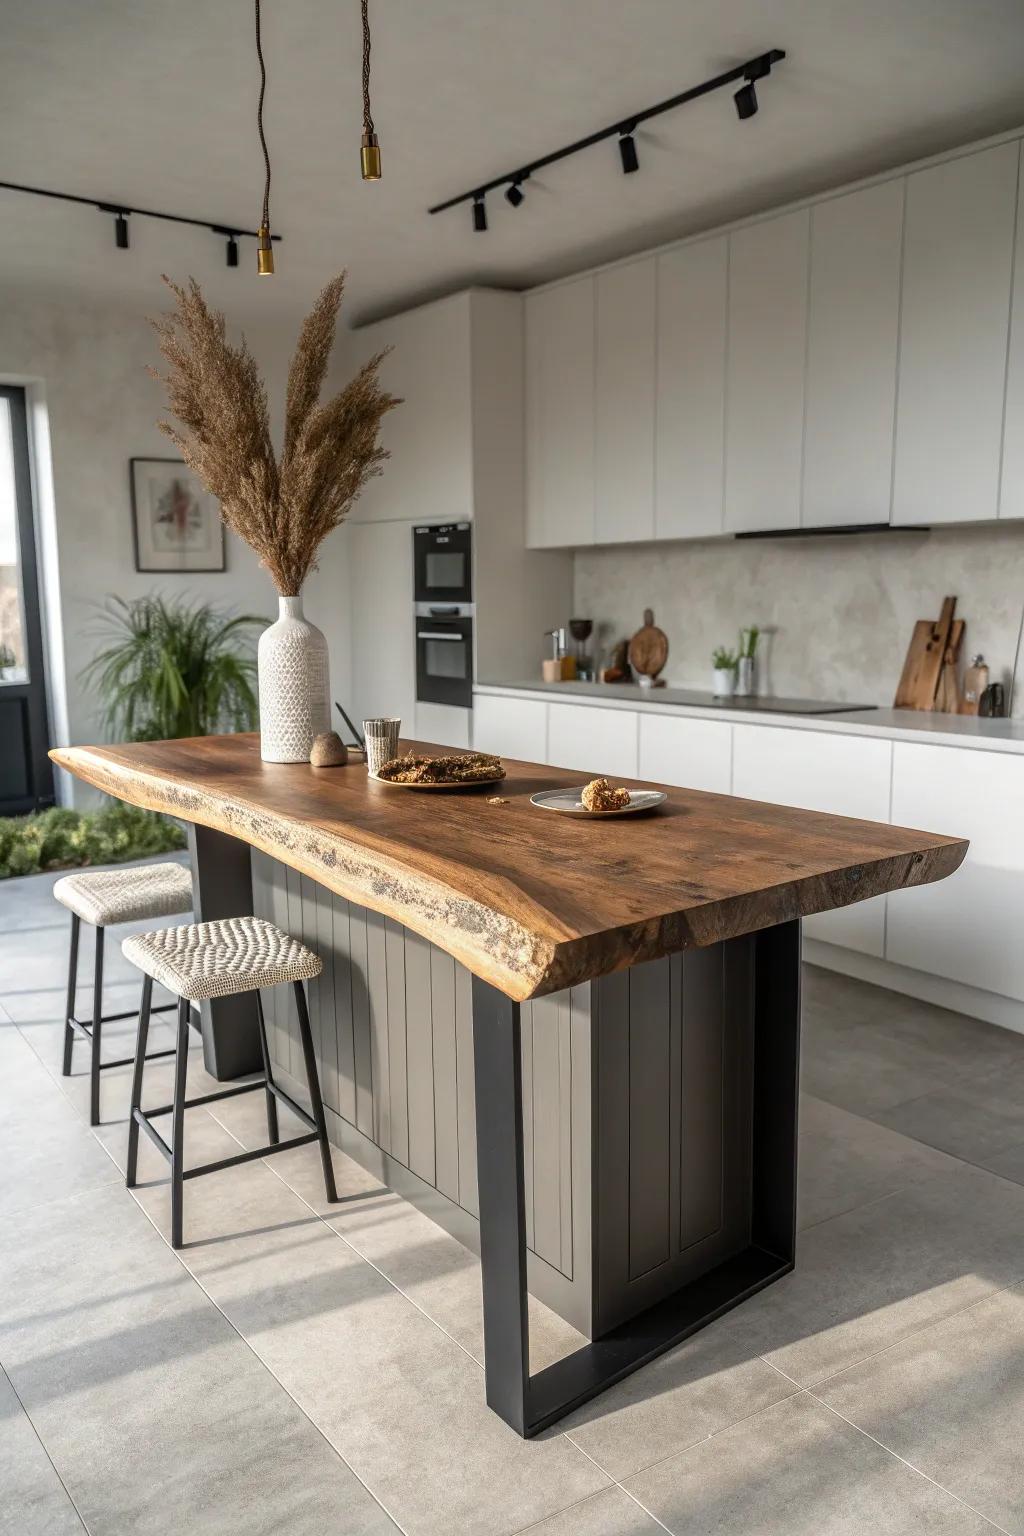
Waterfall Side With Live Edge
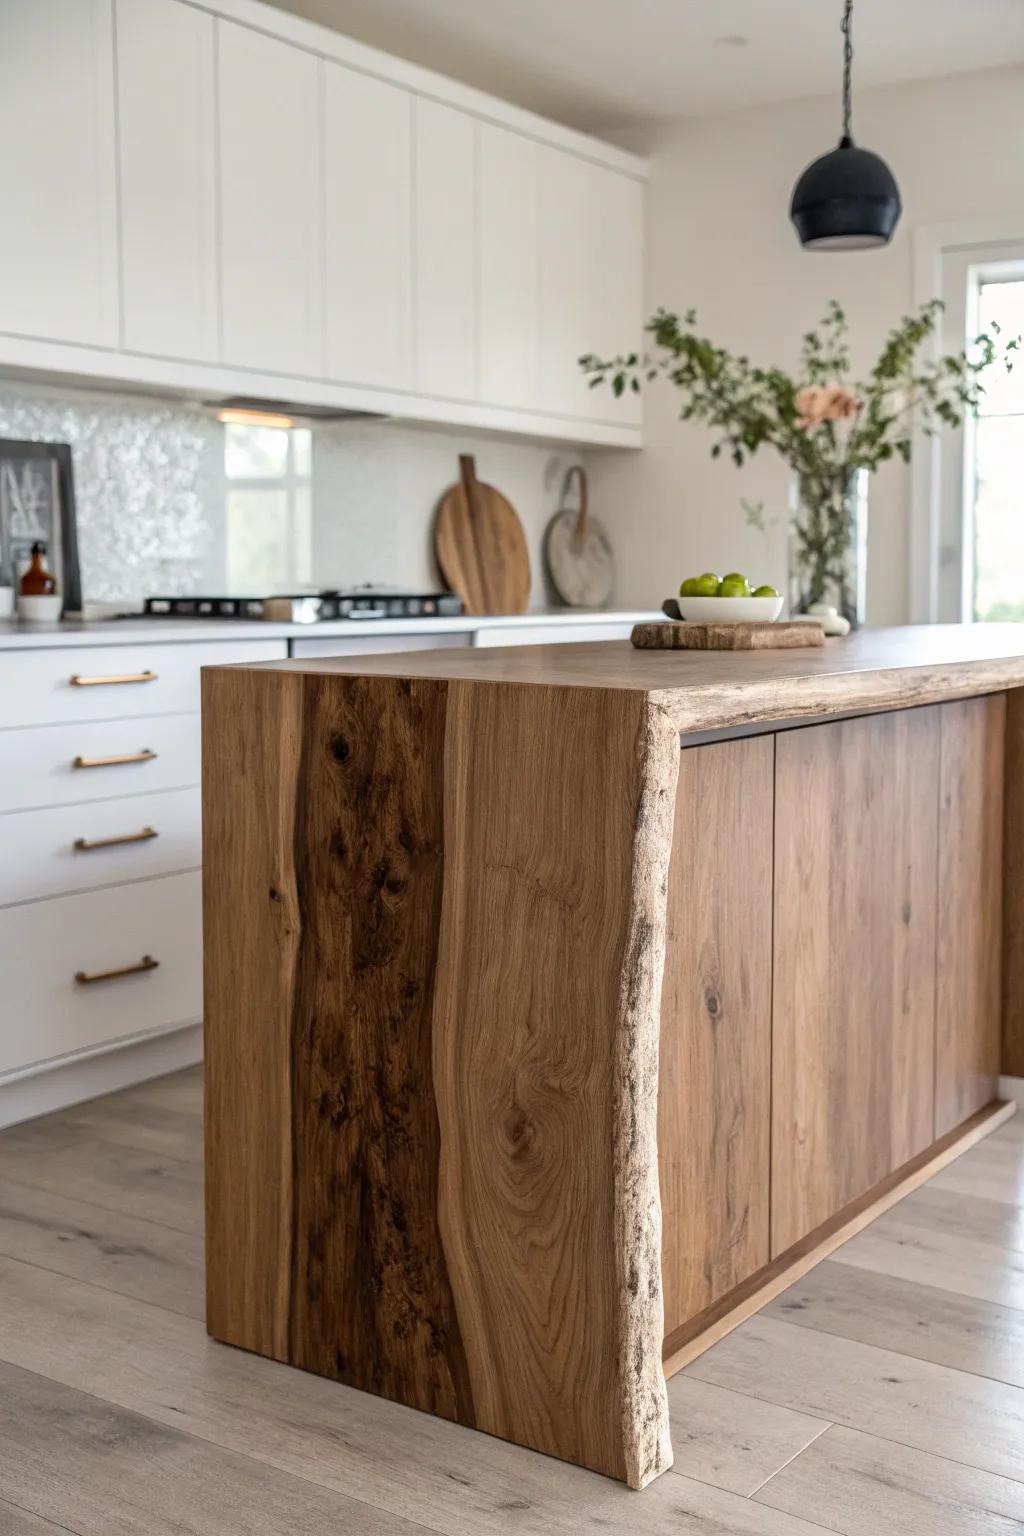
A waterfall edge is such a power move for a live edge kitchen island, especially when the slab grain wraps down the side. I’ve done one where we carefully kept the organic edge on the outside, and it looked like a sculpture you can cook on.
These products might be useful:
- Live Edge Slab: Create your dream island by selecting a raw wood slab with unique grain patterns perfect for waterfall designs.
- Wood Conditioner & Sealer: Protect your island’s natural beauty and enhance the grain depth with a high-quality, food-safe wood finish.
- Modern Bar Stools: Complement the organic feel of your new live edge island with sleek, minimalist seating options for guests.
Stone Base, Wood Top Combo
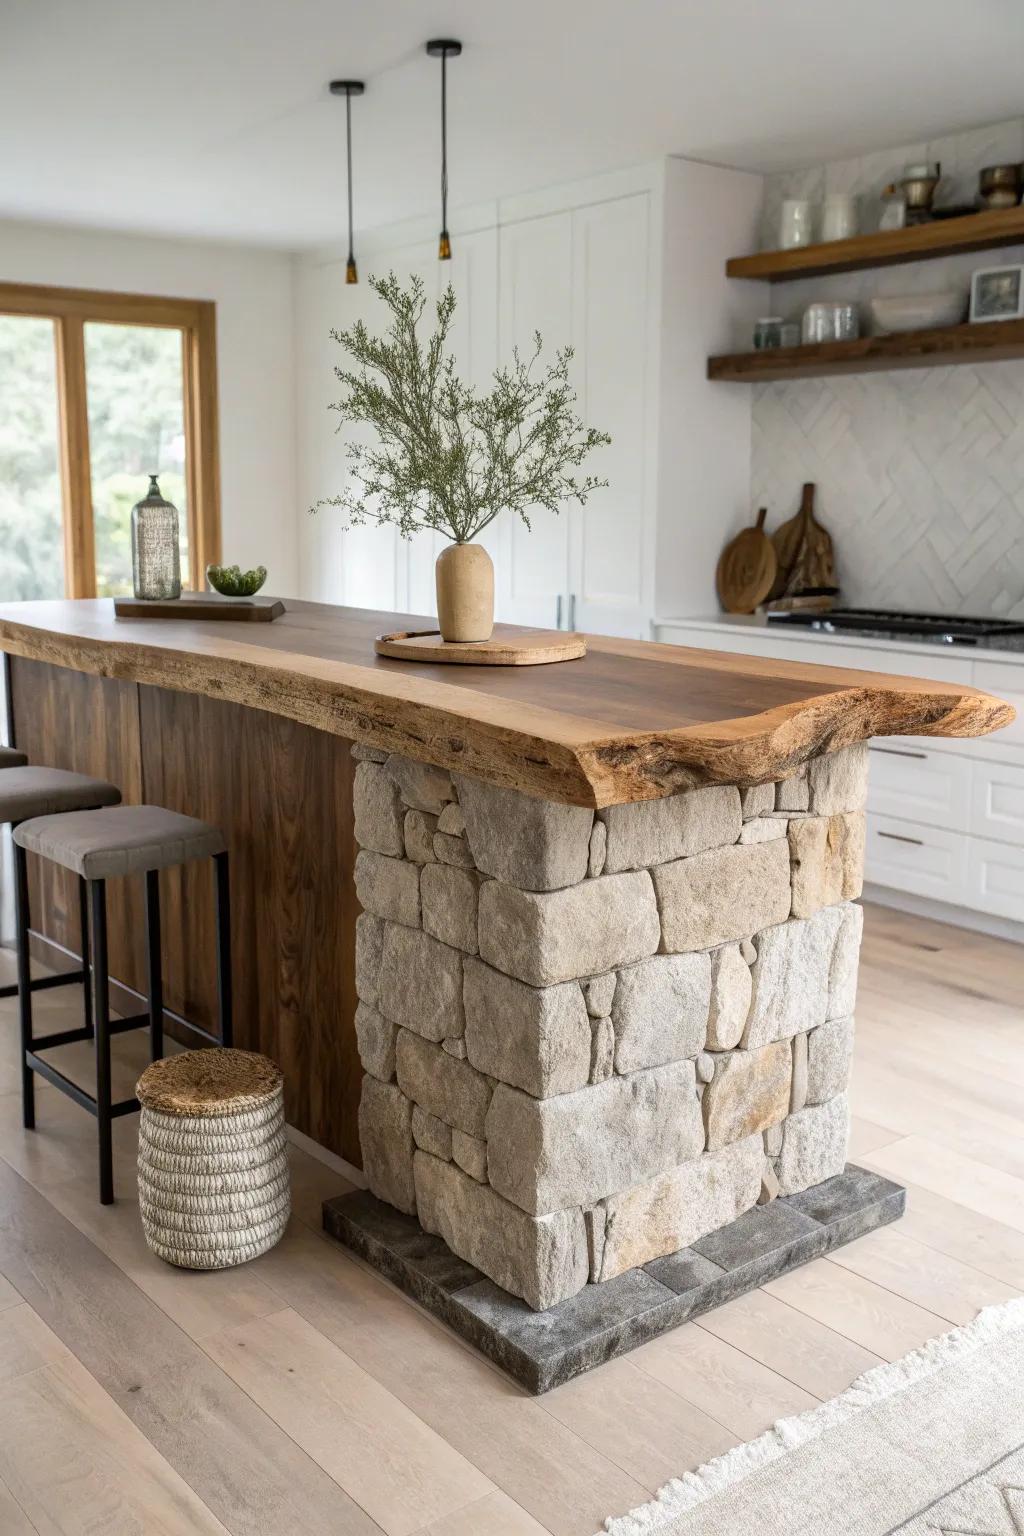
A chunky stone base under a live edge kitchen island top brings major lodge energy without feeling themed. I helped install one with stacked stone, and the mix of rough rock and silky wood was seriously jaw-dropping.
A few choices to try:
- Faux Stacked Stone Facing: Create a robust, rustic base look easily by adhering these textured stone veneer panels to your existing cabinetry.
- Live Edge Slab Countertop: Source a stunning, natural wood slab to serve as the focal point and durable surface of your island.
- Backless Counter Bar Stools: Tuck these low-profile seats under the overhang to keep visual focus on the beautiful wood and stone textures.
Squared Base, Organic Top
Let the cabinet base stay perfectly straight while the live edge kitchen island top overhangs in its natural curves. I’ve done this when a slab had beautiful bumps and swoops, and it turned those “weird” edges into the whole point.
Explore these options:
- Unfinished Live Edge Wood Slab: Create a stunning custom island top by finishing a raw, natural wood slab to fit your space.
- Food-Safe Wood Finish Oil: Protect your beautiful wooden island surface with a food-safe oil that enhances the natural grain patterns.
- Heavy Duty Island Legs: Support your heavy live edge slab securely with sturdy, minimalist legs or brackets for overhangs.
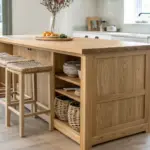
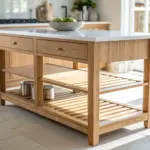
Open Shelves Under the Slab
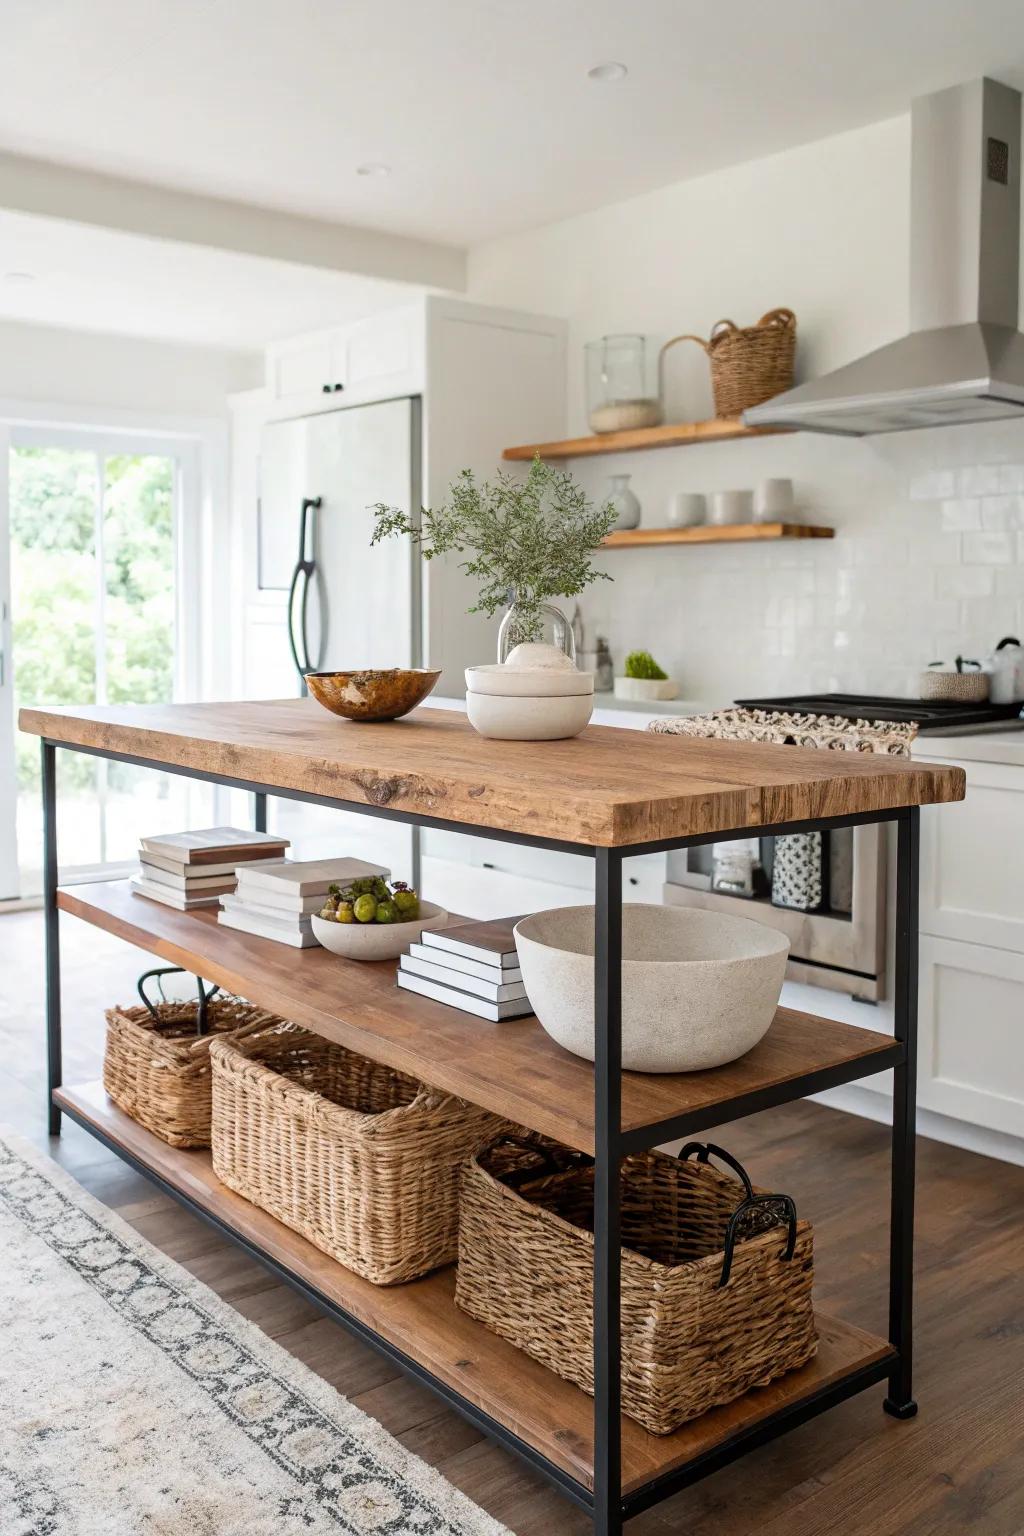
An open-shelf base keeps a live edge kitchen island feeling airy and makes room for baskets, cookbooks, and big mixing bowls. I built one with chunky shelves and it looked styled even when it was just holding everyday stuff.
You might give these a try:
- Woven Seagrass Storage Baskets: Organize clutter instantly while adding texture to your open shelves with these sturdy, natural woven baskets.
- Stoneware Mixing Bowl Set: Display these beautiful, functional bowls on your open shelving to keep prep tools within easy reach.
- Large Ceramic Decorative Vase: Create a stunning centerpiece on your island or shelves with a textured vase for fresh greenery.
Built-In Footrest Bar
If you’re doing stools, a sturdy footrest bar is a small detail that makes a live edge kitchen island feel finished. I’ve added a simple metal rail before, and everyone comments on how much more comfortable it is.
A few suggestions:
- Industrial Black Iron Pipe Kit: Add rustic charm and sturdy support by installing a simple black iron pipe rail along your island base.
- Brass Foot Rail Bracket Set: Elevate your island’s look with classic brass brackets that securely hold a foot rail for added comfort.
- Matte Black Metal Bar Railing: Install a sleek, matte black metal bar to create a durable and stylish resting spot for tired feet.
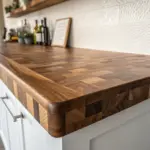
End-Grain Prep Insert
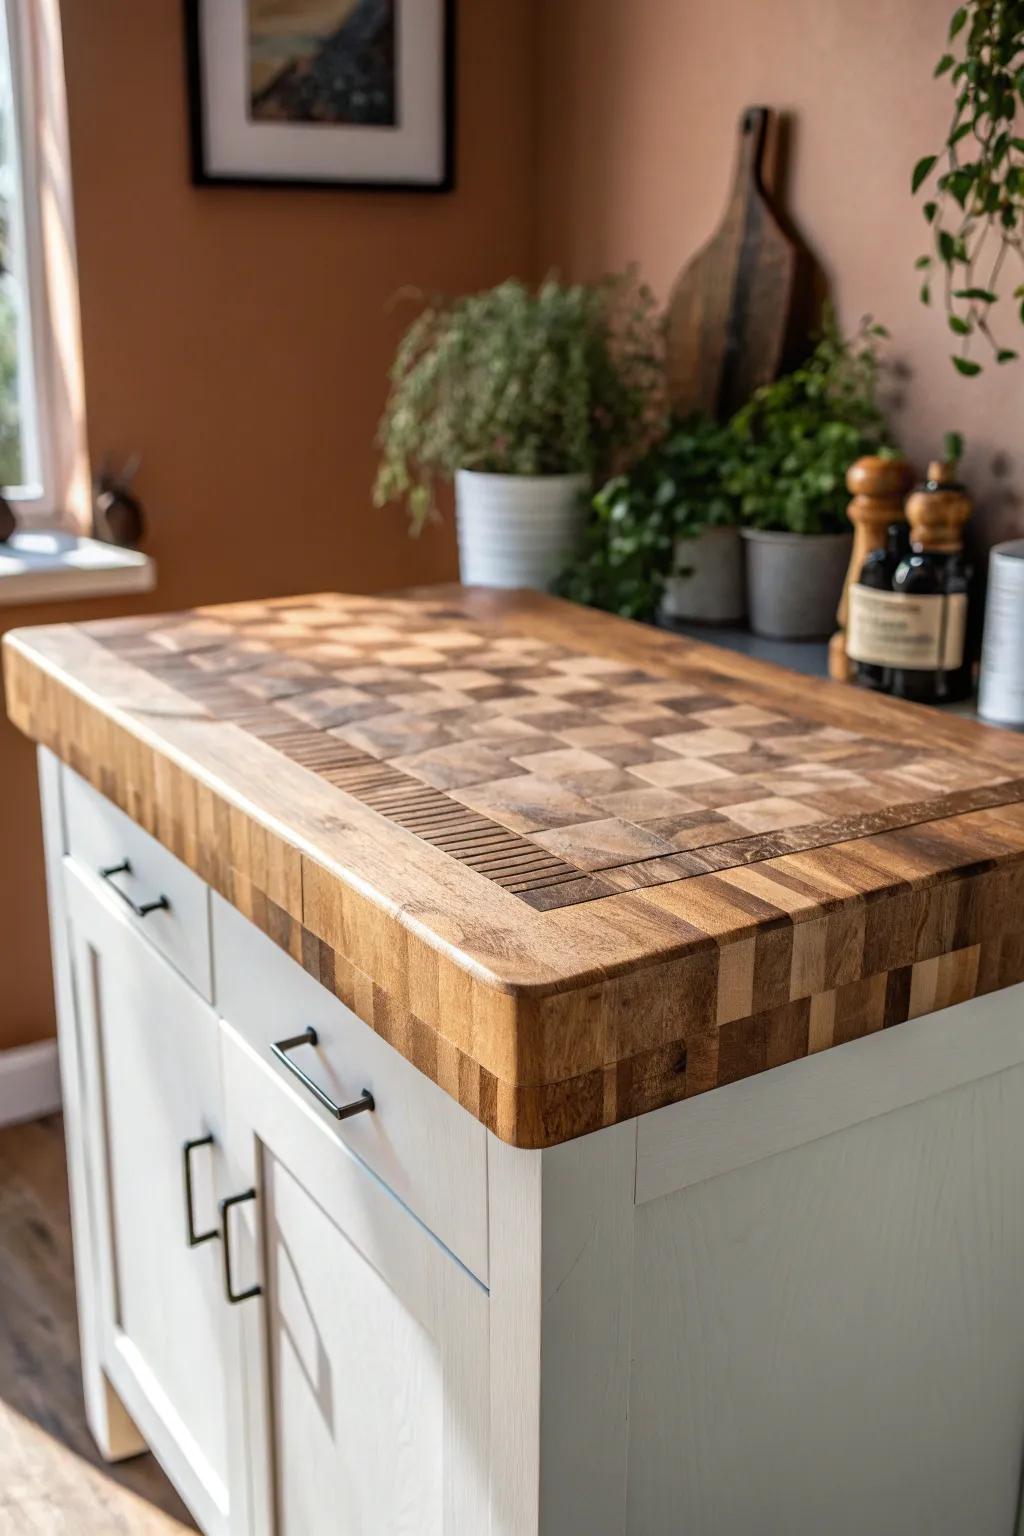
Cut in a removable end-grain block so your live edge kitchen island can handle real chopping without babying the whole slab. I’ve built this setup for a friend who cooks a ton, and it’s been the perfect mix of pretty and practical.
Useful items to consider:
- End-Grain Cutting Board: Choose a thick, durable block that fits your cutout space perfectly to protect your main island surface.
- Food-Safe Mineral Oil: Keep your new butcher block insert hydrated and crack-free with regular applications of high-quality conditioning oil.
- Woodworking Router: Use this precise tool to carve out the perfect recessed niche in your island for the chopping block.
Live Edge Seating Nook End
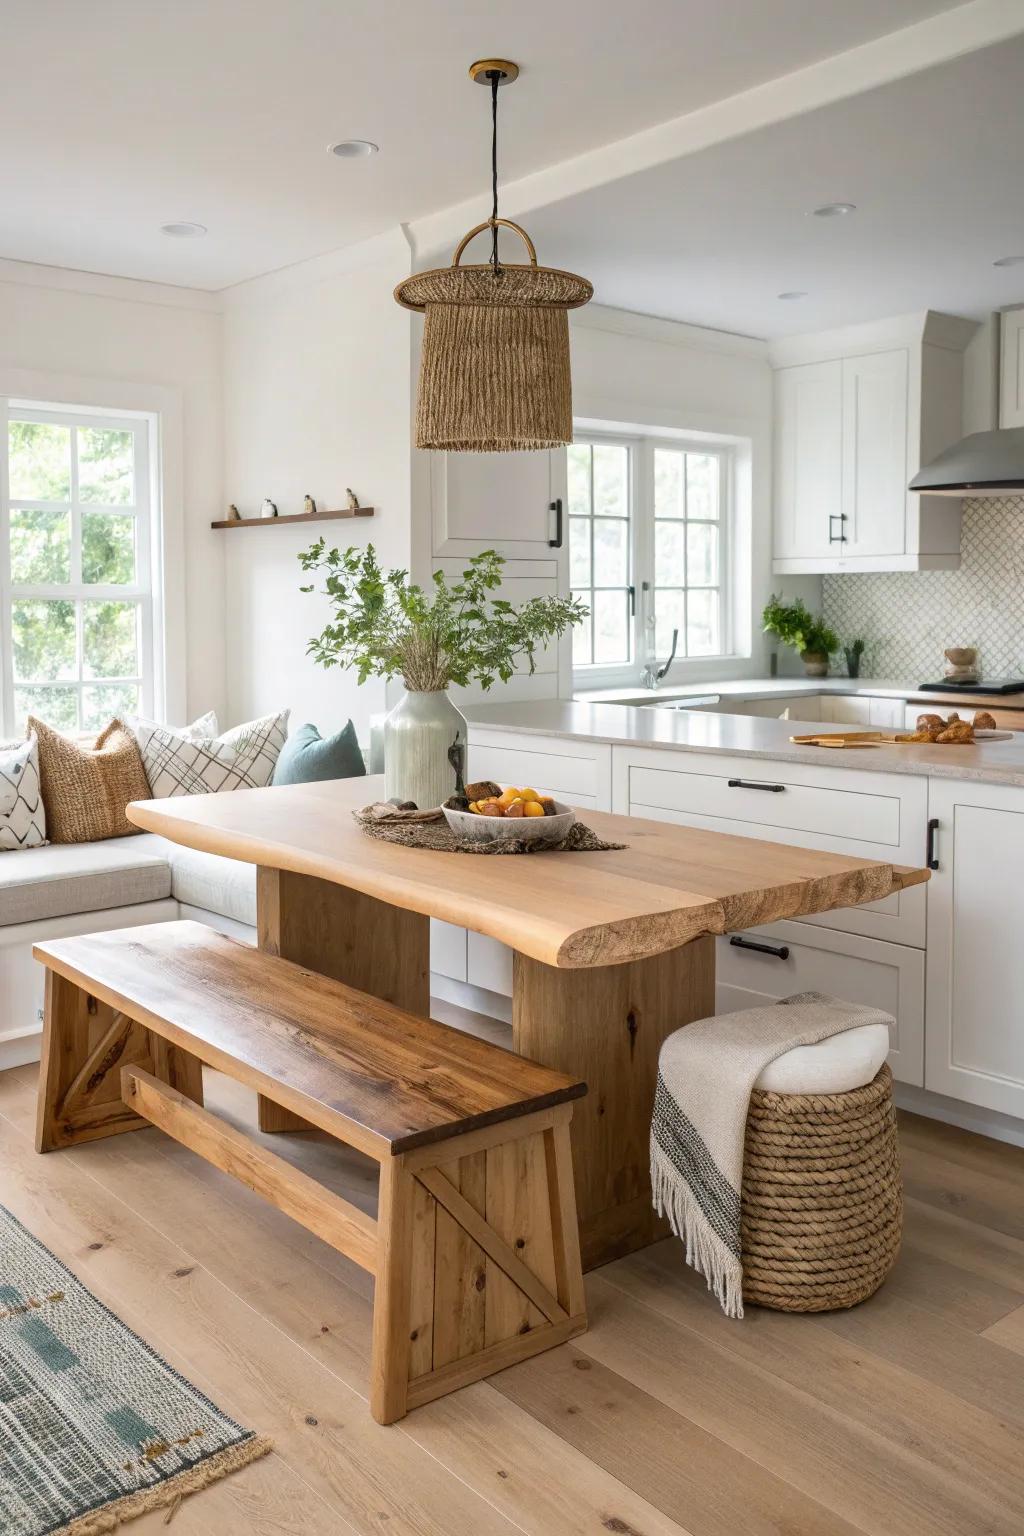
Extend the live edge kitchen island into a cozy little end perch—think a thicker “cap” area that feels like a mini table attached to the island. I’ve done this when a slab had extra width on one end, and it created an instant casual dining spot.
Check these products out:
- Woven Rope Stool or Ottoman: Add flexible seating with a textured woven stool that tucks easily beneath tables to save valuable kitchen space.
- Wooden Dining Bench: Create ample seating for family gatherings by placing a sturdy, rustic wooden bench alongside your live edge table.
- Ceramic Vase with Greenery: Bring life to your nook by displaying fresh or faux branches in a large, simple ceramic vase centerpiece.
Built-In Herb Trough
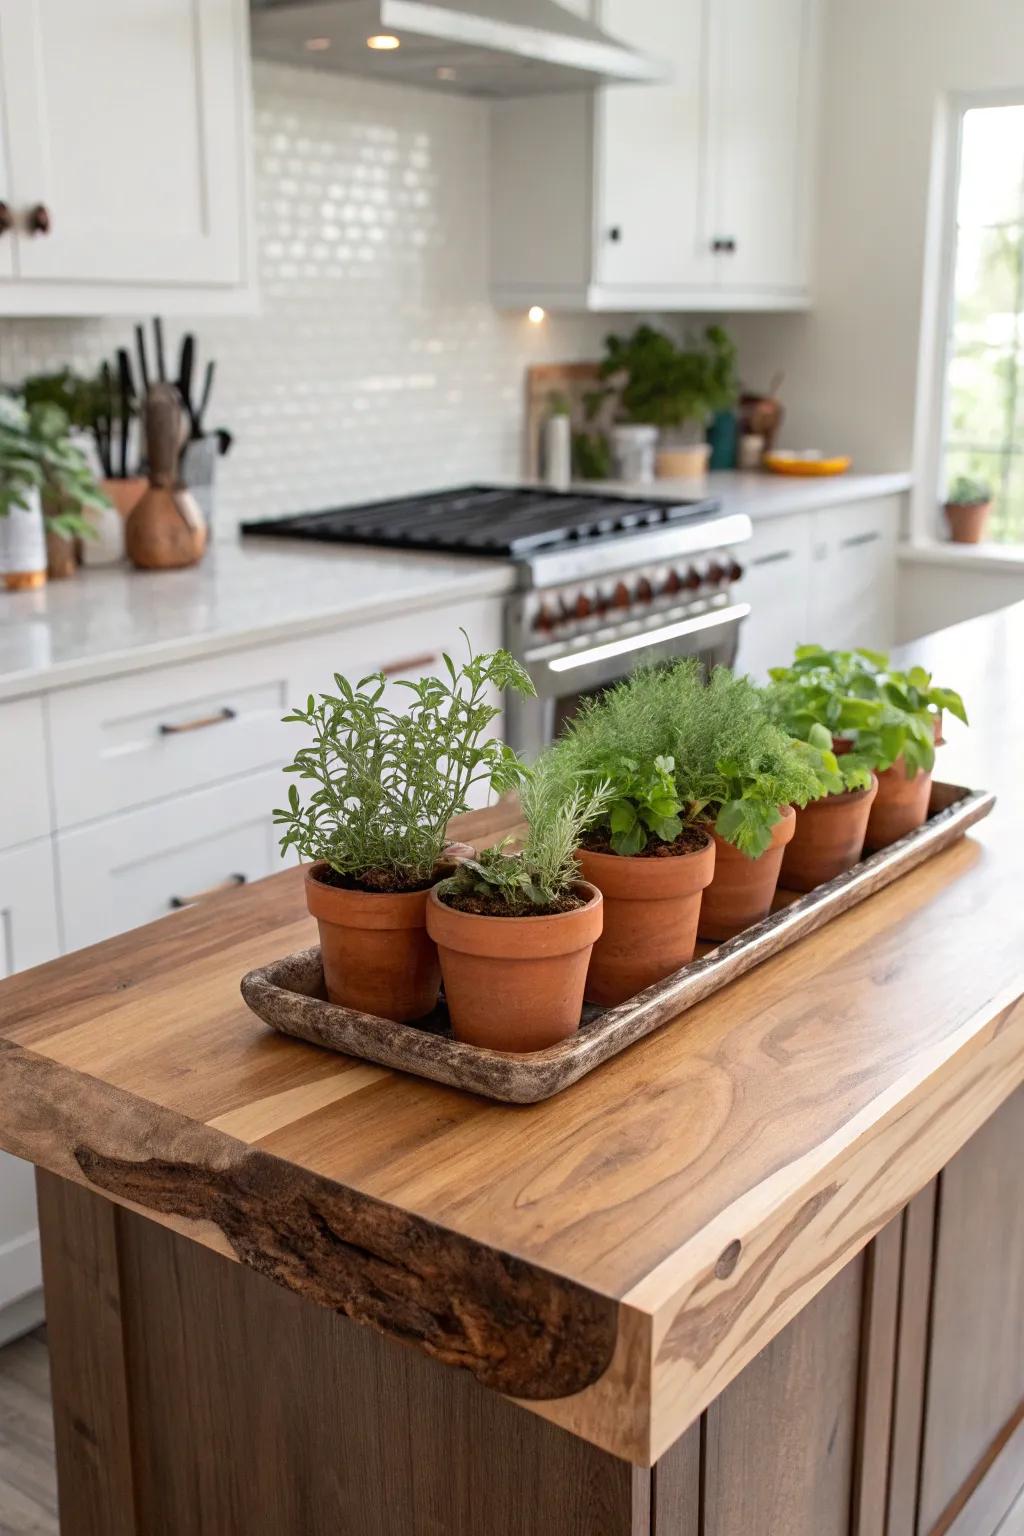
For a real conversation piece, route a sealed trough down the center of your live edge kitchen island for herbs in small pots. I tried this on a custom slab build, and the mix of natural wood and fresh green looked like a magazine spread.
A few relevant products:
- Long Narrow Wooden Dough Bowl: Recreate the rustic look shown in the photo by using a long, wooden bowl to effortlessly hold your herb pots.
- Set of Small Terracotta Herb Pots: Fill your trough with uniform greenery using these classic terracotta planters that provide excellent drainage for your fresh kitchen herbs.
- Wood Router Tool for DIY Troughs: Carve your own custom recessed trough directly into your slab with a reliable router if you prefer a built-in design.
Epoxy-Filled Knots and Cracks
If your slab has checks, filling them with clear resin keeps the live edge kitchen island food-safe and wipeable while still showing off the character. I’ve done a few epoxy fills, and it’s oddly satisfying watching a rough crack turn into a glossy feature.
Some handy options:
- Crystal Clear Epoxy Resin Kit: Create a durable, glossy finish by filling wood cracks and knots with this easy-to-use clear casting resin.
- Silicone Mixing and Measuring Set: Ensure precise ratios and clean pouring for your epoxy projects with these reusable, non-stick silicone mixing cups.
- Orbital Random Sander: Smooth out your cured epoxy and wood surfaces effortlessly to achieve a professional, seamless finish on your island.
Metal Bowtie and Line Inlays
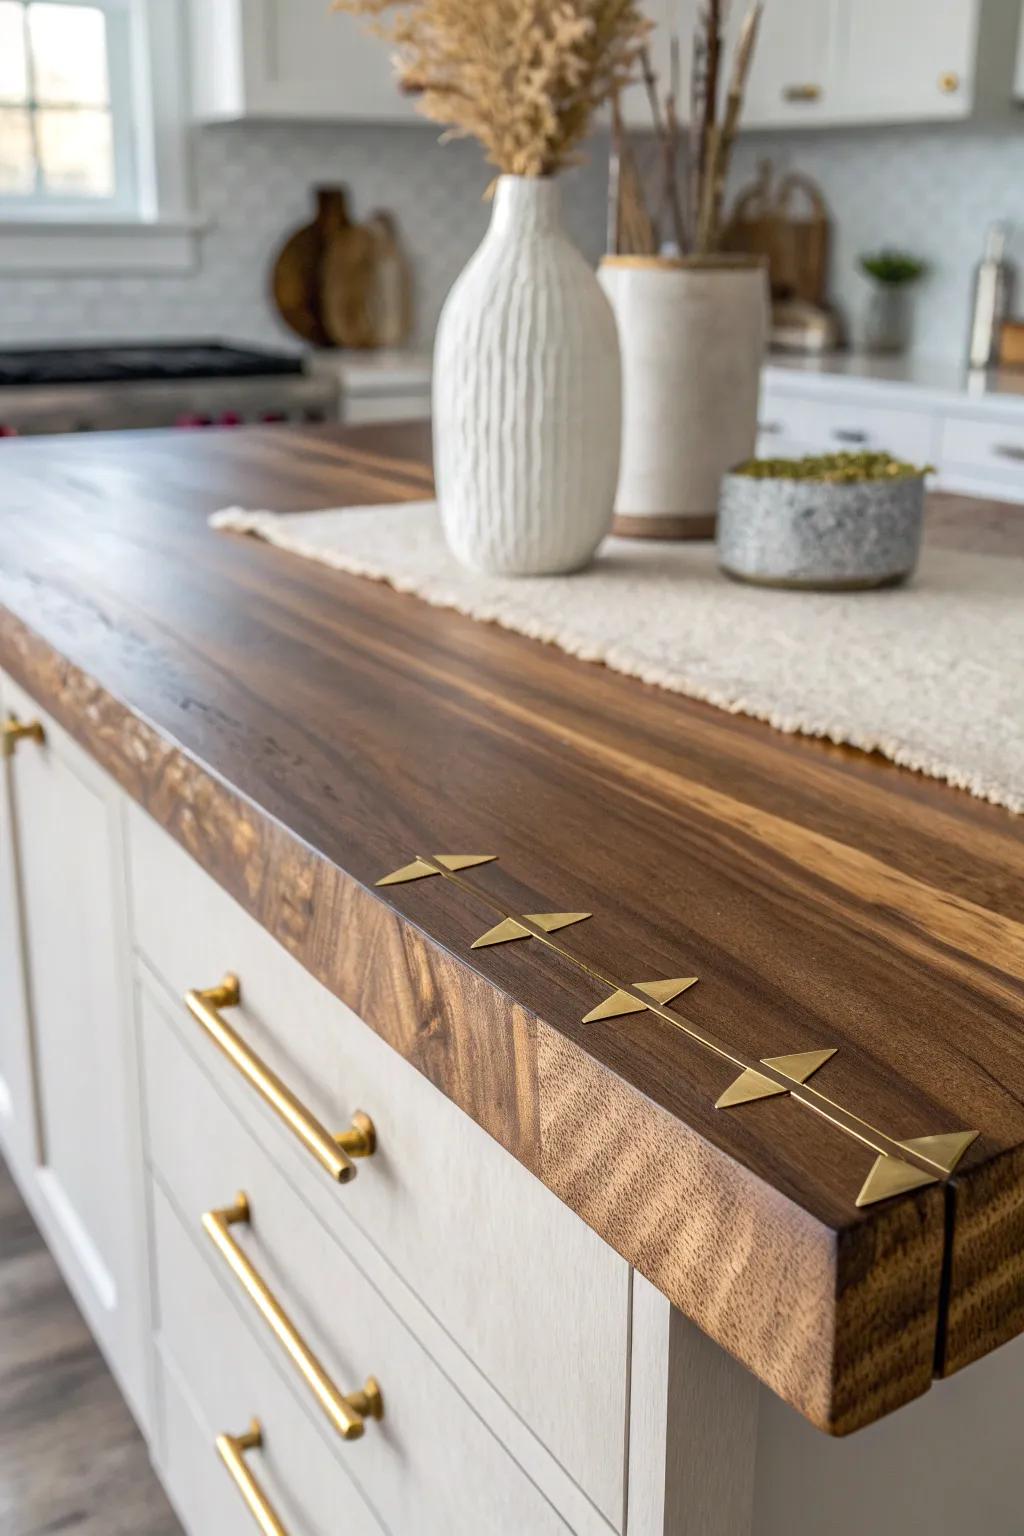
Inlay a few metal bowties to stabilize splits and give your live edge kitchen island a subtle, modern edge. I’ve hammered in metal inlays on a slab that needed reinforcement, and it ended up looking like intentional jewelry for the wood.
Try these:
- Brass Bowtie Inlay Woodworking Templates: Create precise butterfly key recesses easily with these router templates, ensuring a perfect fit for your stabilizing inlays.
- Solid Brass Flat Bar Stock: Cut and shape custom decorative strips or butterfly keys from solid brass stock to add unique metallic accents.
- Brass Woodworking Hammer: Tap delicate metal inlays into place gently without damaging the surrounding wood surface using a specialized soft-faced hammer.


