
Wood decoupage is my favorite way to make plain wood feel collected, cozy, and totally one-of-a-kind.
Decoupage Under a Glass-Smooth Clear Pour
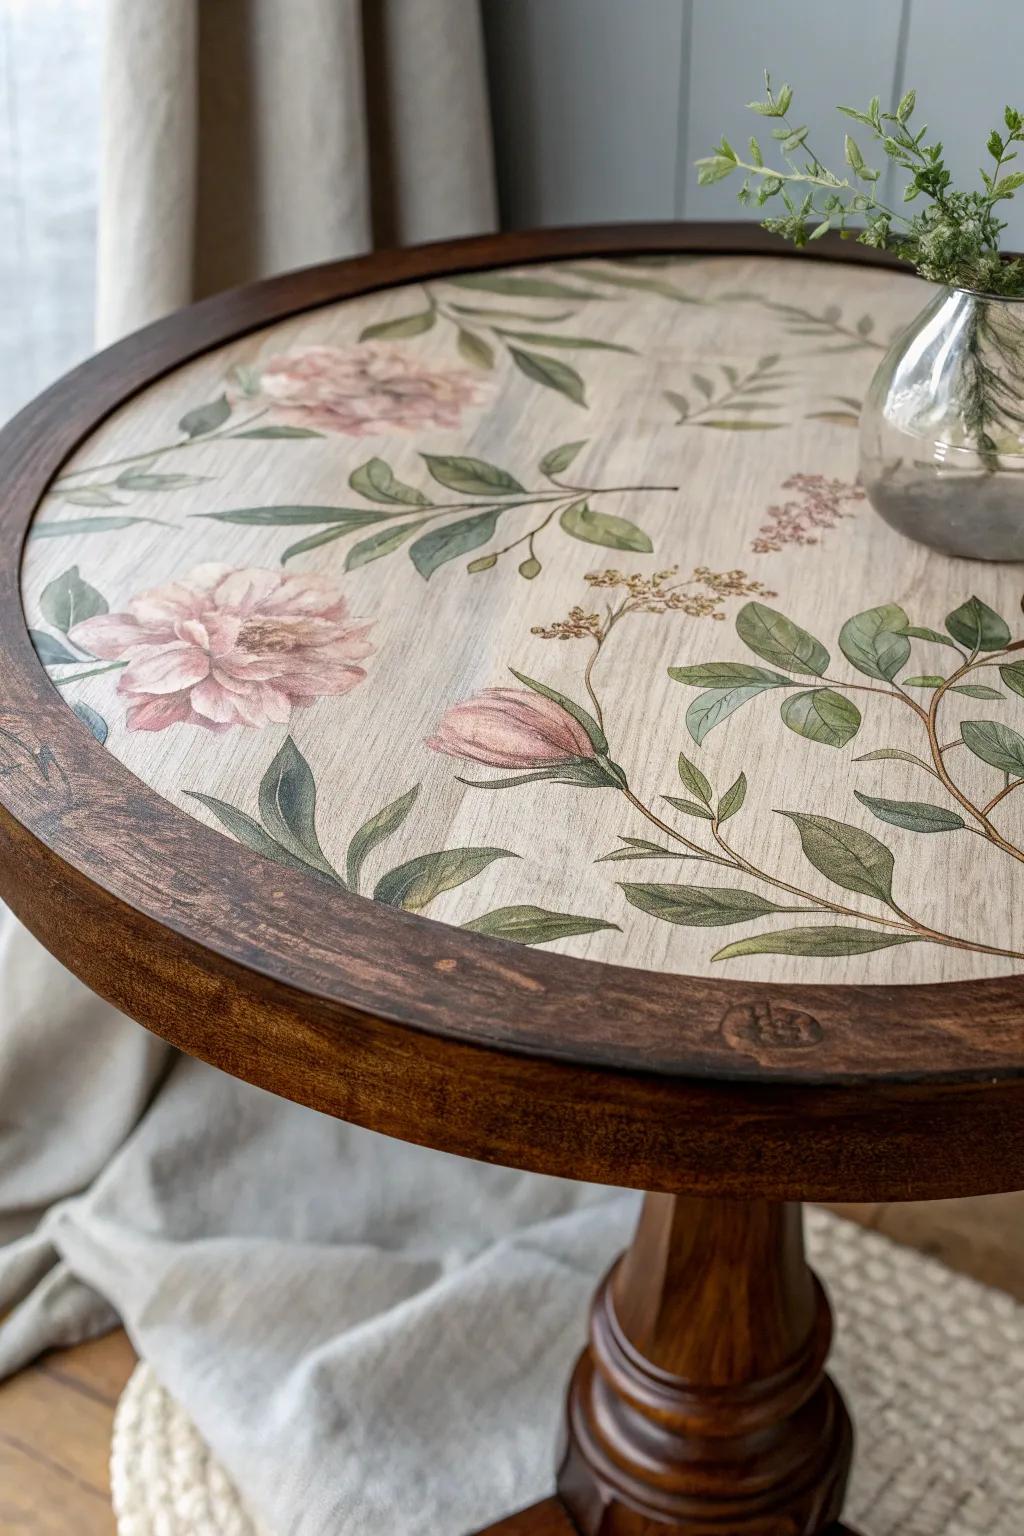
For a true wow-factor finish, I decoupage on a wood round or tabletop and then seal it under a thick, glassy clear pour for a deep, layered look. I’ve used this when I want the wood grain and the artwork to feel “locked in” like a custom-made statement piece.
A few things you might like:
- Clear Pour Epoxy Resin Kit: Create that stunning, deep glossy finish on your table by pouring this durable sealant over your artwork.
- Vintage Botanical Decoupage Paper: Find beautiful floral and botanical prints to carefully arrange and adhere to your wooden surface for classic charm.
- Unfinished Round Wood Panel: Start your custom project with a smooth, sturdy wooden circle ready for sanding, painting, and intricate decoupage work.
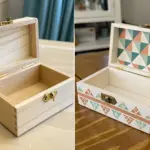
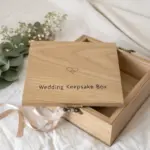
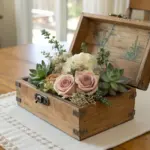
Floral Keepsake Box Topper
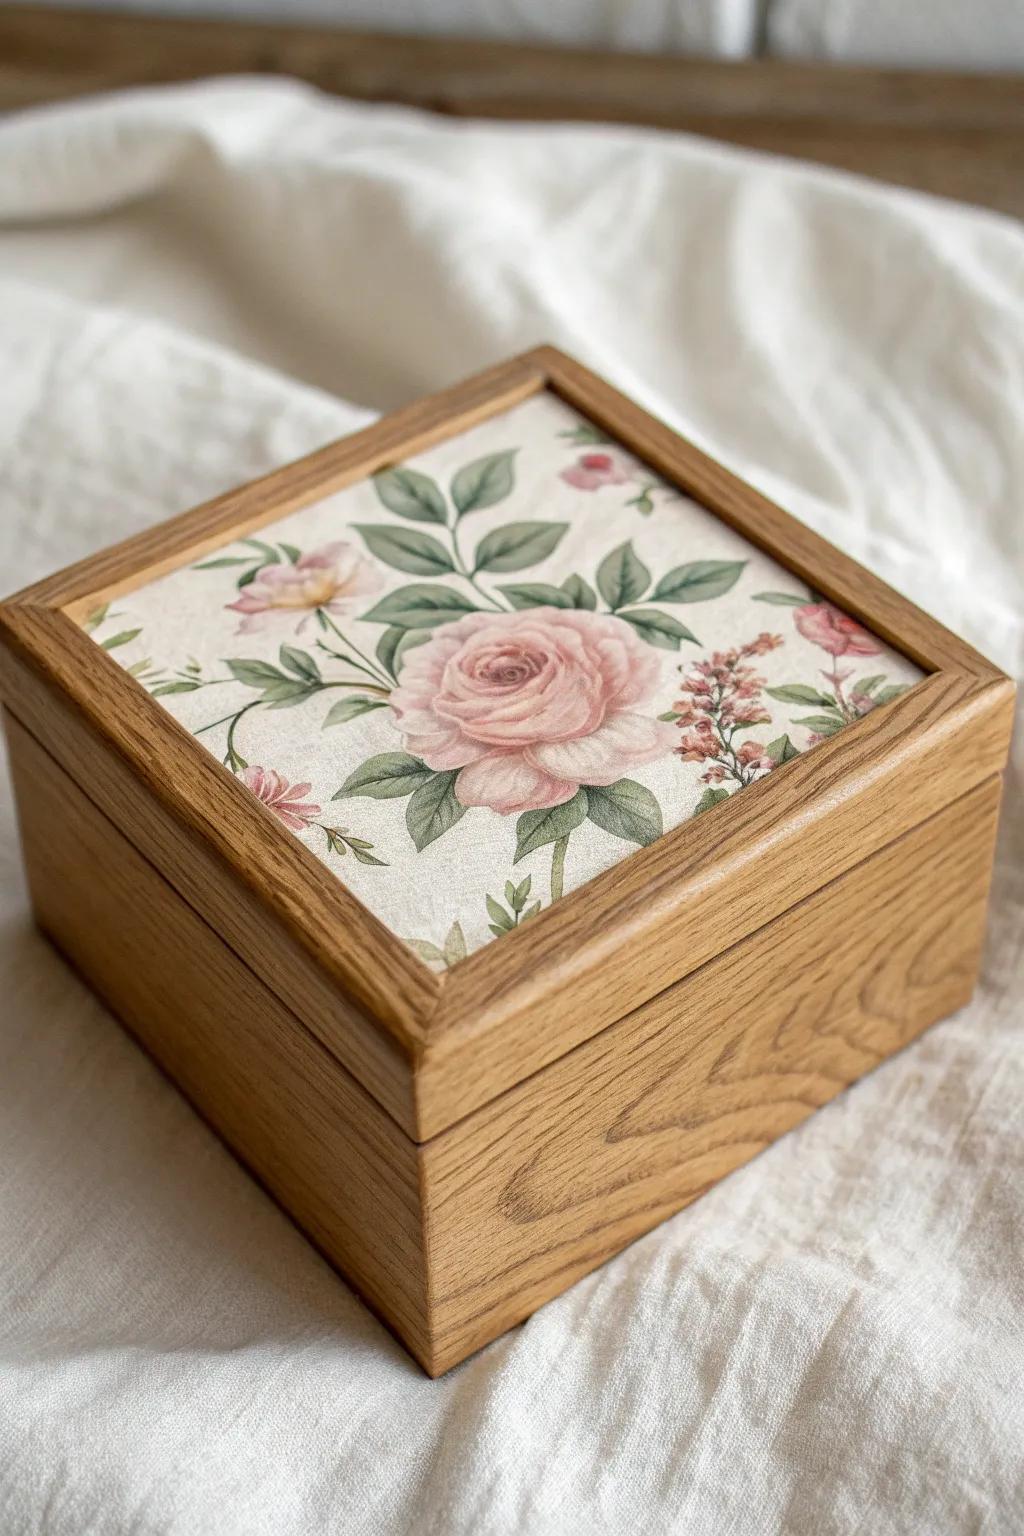
I love decoupaging floral paper right on the lid of a small wooden box because it instantly looks like a vintage find. In my shop, I finish it with a couple thin coats of decoupage medium so it feels smooth and gift-worthy.
These products might help:
- Small Unfinished Wooden Box: Start your project with a plain pine or paulownia box that is ready for your creative transformation.
- Vintage Floral Decoupage Paper: Choose botanical or rose-themed rice paper sheets to effortlessly achieve that charming antique aesthetic for the lid.
- Matte Decoupage Medium: Use two or three coats of this sealant to glue your paper down and create a durable finish.

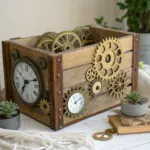
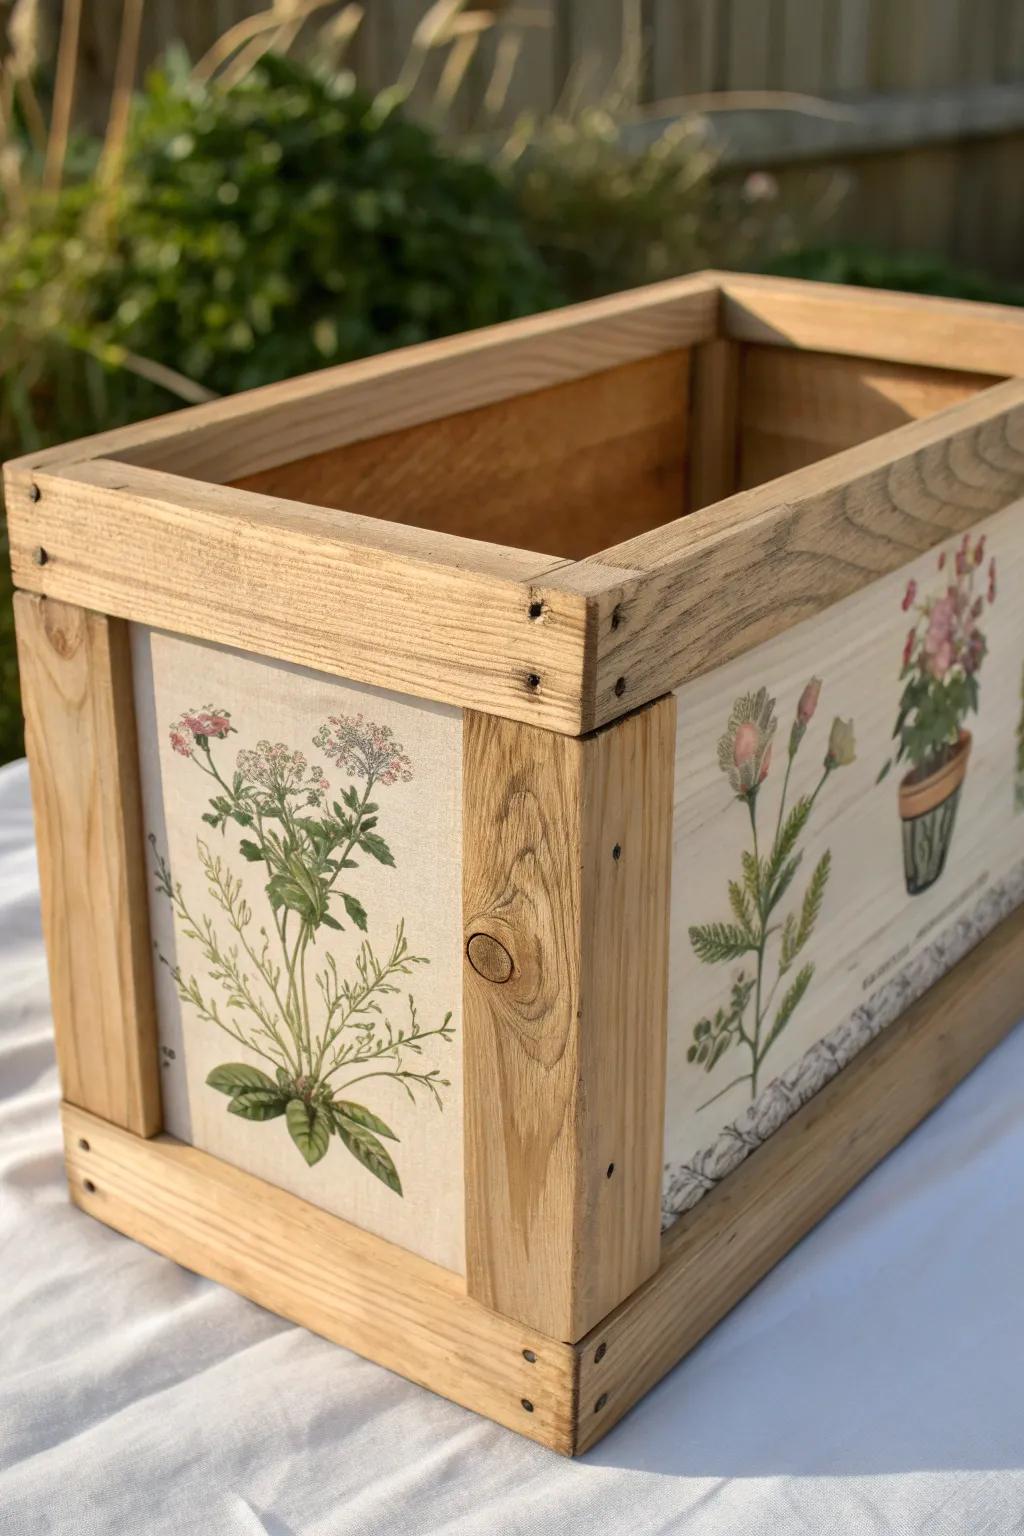
Vintage-Style Fruit Crate Makeover
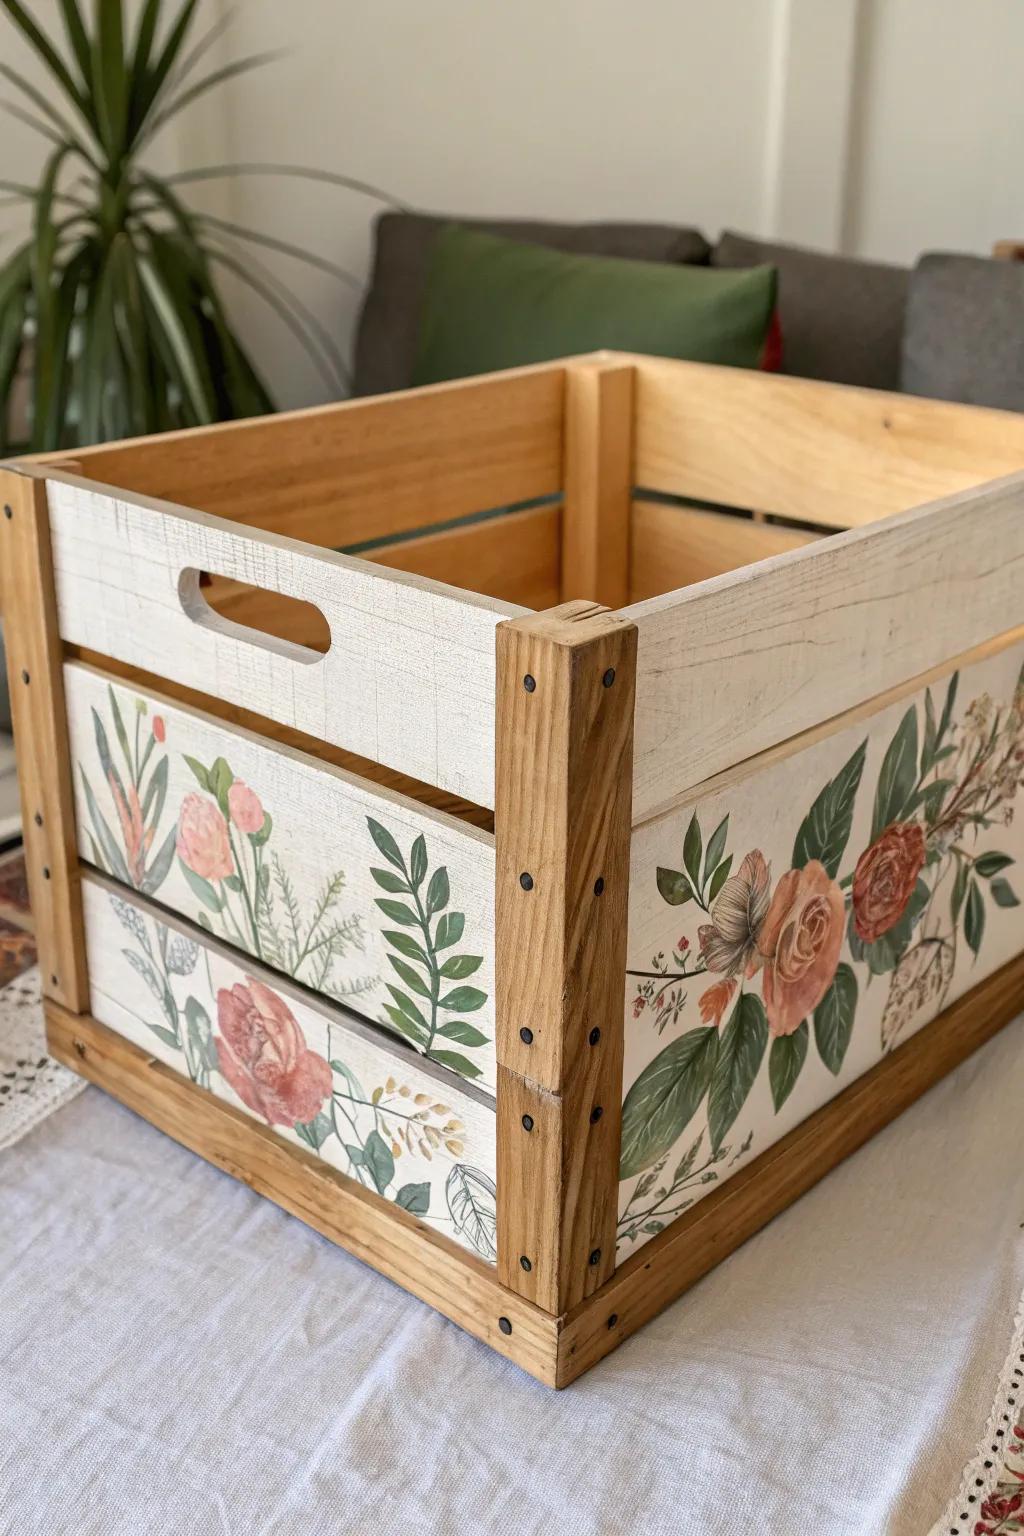
One of my go-to wood decoupage projects is dressing up an old wood crate with bold botanicals on the sides and a lightly distressed paint edge. I’ve done this for pantry storage, and it makes “messy but functional” look intentional.
Some handy options:
- Unfinished Wood Crate: Start your project with a sturdy base by choosing a plain pine crate perfect for customizing.
- Vintage Botanical Decoupage Paper: Achieve the classic floral look easily with specialized decorative tissues featuring large, colorful vintage flower prints.
- Matte Decoupage Glue & Sealer: Secure your paper design and protect the finish with an all-in-one adhesive that dries clear.

Napkin-Decoupaged Picture Frame
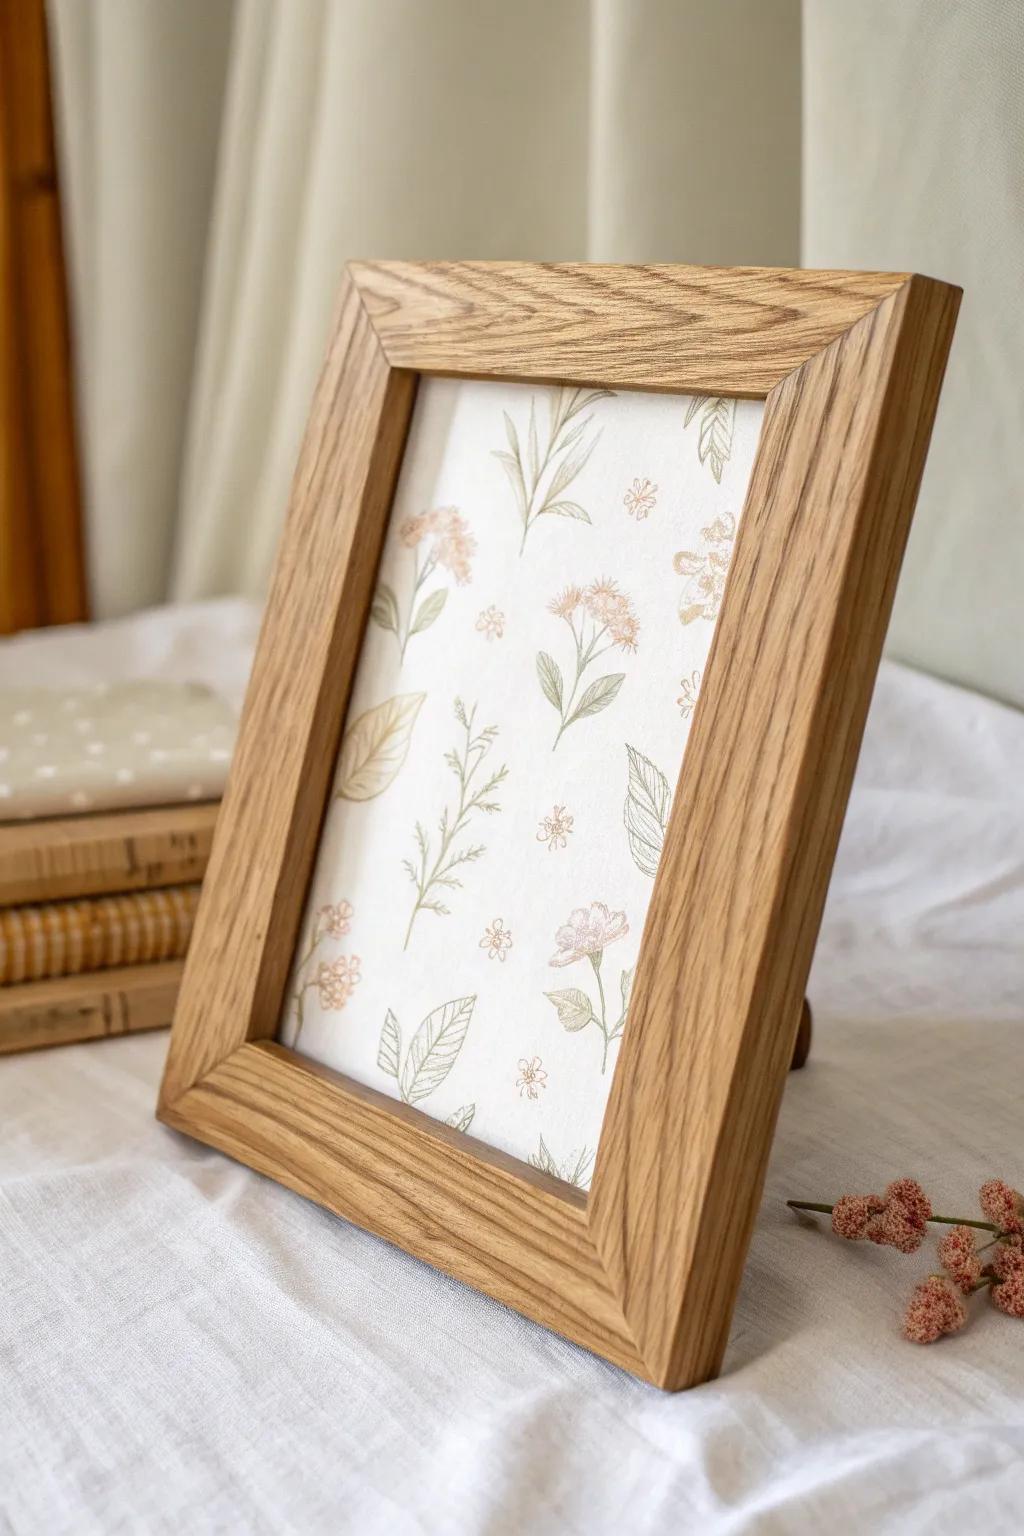
When I want fast gratification, I decoupage a thin paper napkin onto a basic wood frame and trim the edges clean once it’s dry. I’ve learned to go slow smoothing it out, because napkins wrinkle if you even look at them wrong.
Check if these fit your needs:
- Unfinished Wood Picture Frames: Start your project with a blank canvas; these smooth, unfinished frames are ready to be personalized.
- Floral Paper Napkins for Decoupage: Choose beautiful, delicate floral patterns to add a vintage or nature-inspired touch to your wooden frames.
- Matte Decoupage Glue & Sealer: Adhere delicate napkins smoothly and protect your artwork with this essential all-in-one glue and finish.
Botanical Serving Tray Base
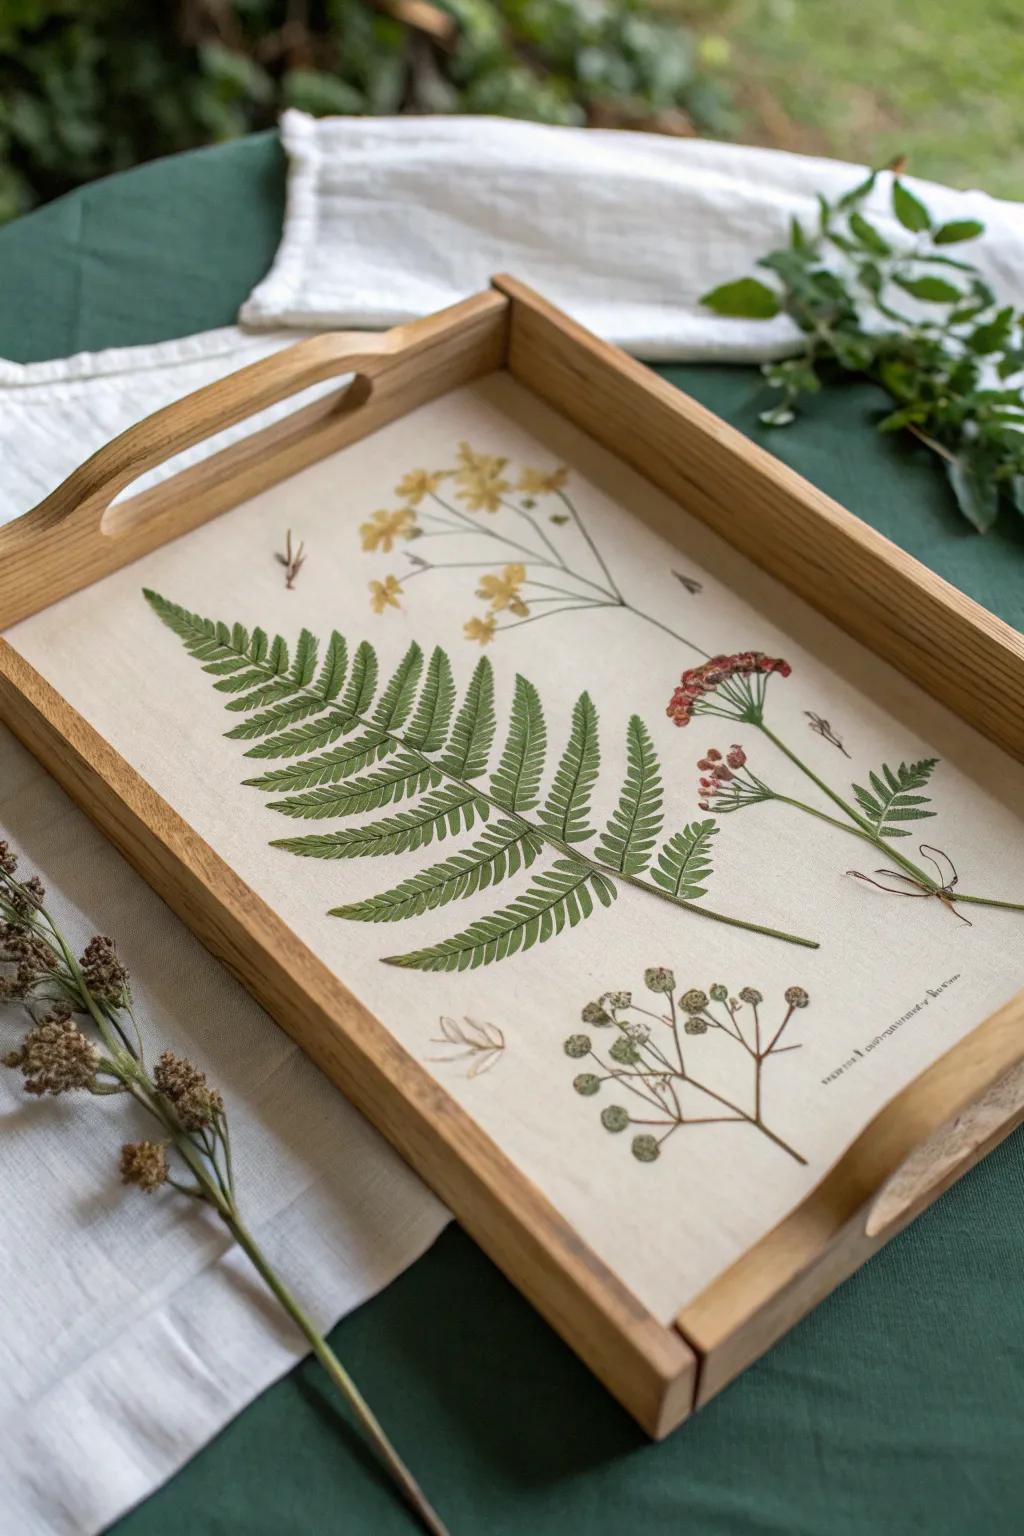
Decoupage a vintage botanical print inside a wood tray and it suddenly feels like farmhouse decor instead of a plain organizer. I like sealing mine with an extra-protective clear topcoat because my trays always end up holding coffee mugs and keys.
Explore these options:
- Unfinished Wood Serving Tray: Start your project with a sturdy, plain wooden tray ready to be transformed with paint and prints.
- Vintage Botanical Art Papers: Choose detailed fern and floral illustrations to create that authentic, farmhouse-inspired look for your tray base.
- Protective Clear Topcoat Sealer: Seal your finished tray with a durable, water-resistant coat to protect it from spills and scratches.
Tissue Box Cover With Wrapped Smoothing
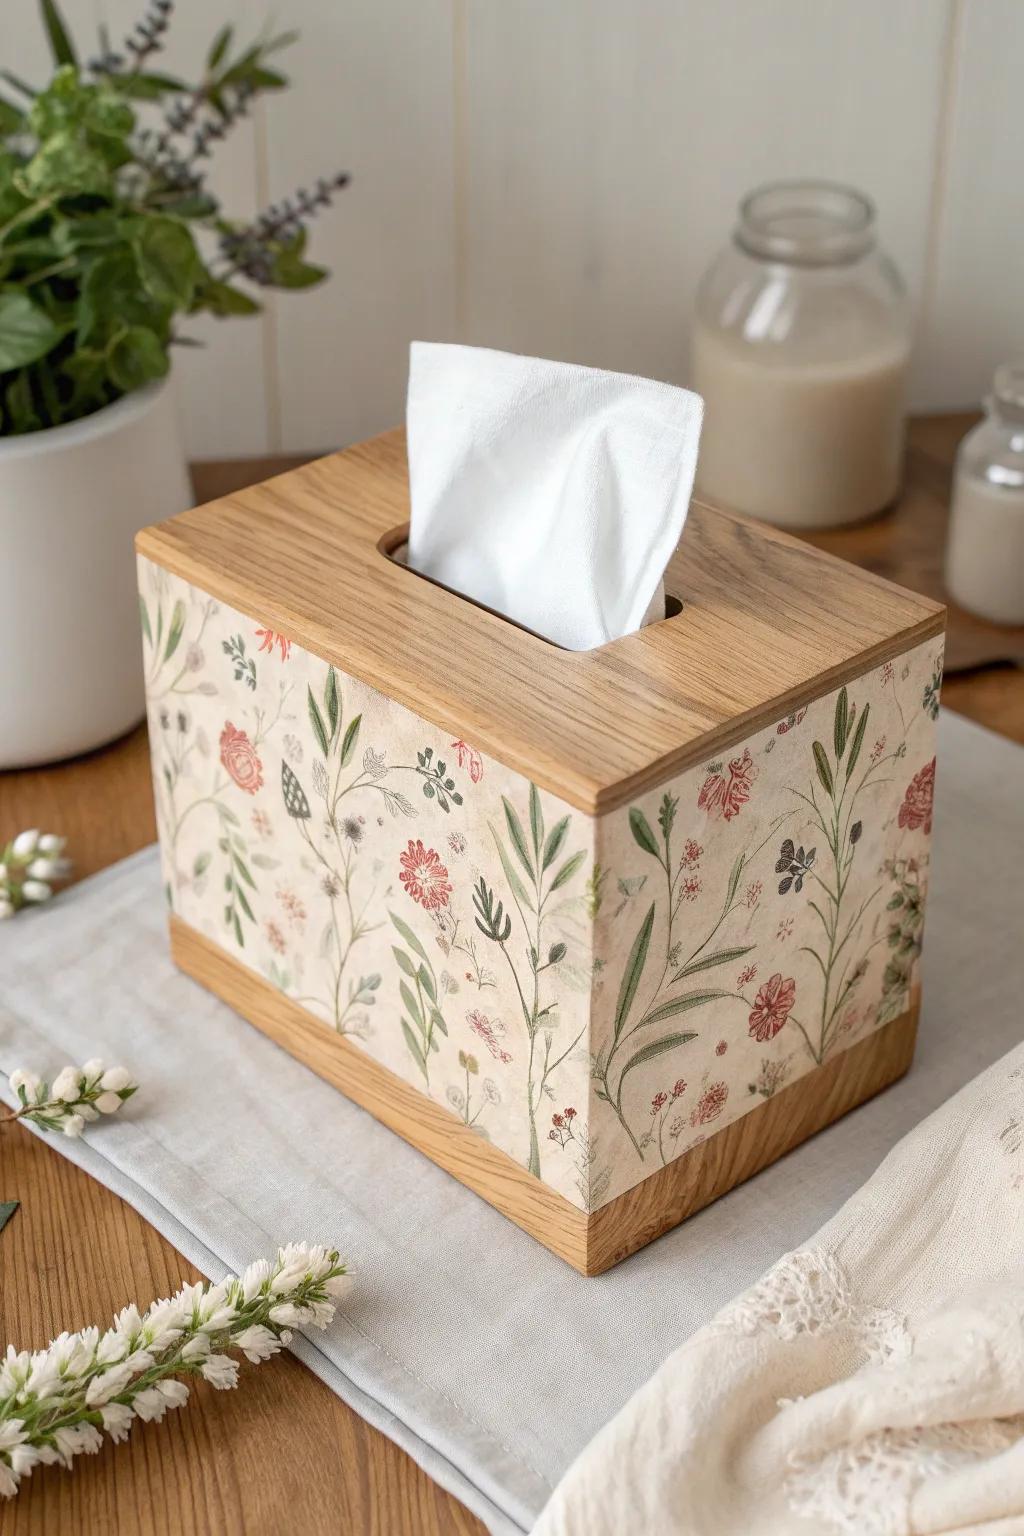
A wooden tissue box cover is basically a decoupage canvas, and I’ve made them look custom with soft florals or linen-style patterns. I smooth the paper with plastic wrap in my workshop so my fingers don’t grab and tear the design.
Items that may come in handy:
- Unfinished Wooden Tissue Box Cover: Start your project with a plain wooden base ready for sanding, painting, and applying your custom designs.
- Vintage Floral Decoupage Paper: Choose botanical or linen-style patterned papers to replicate the soft, custom floral look shown in the example.
- Decoupage Glue and Sealer (Matte): Secure your paper and protect the finish with a matte medium that allows for easy, smooth application.
Decor-Only Cutting Board Hang
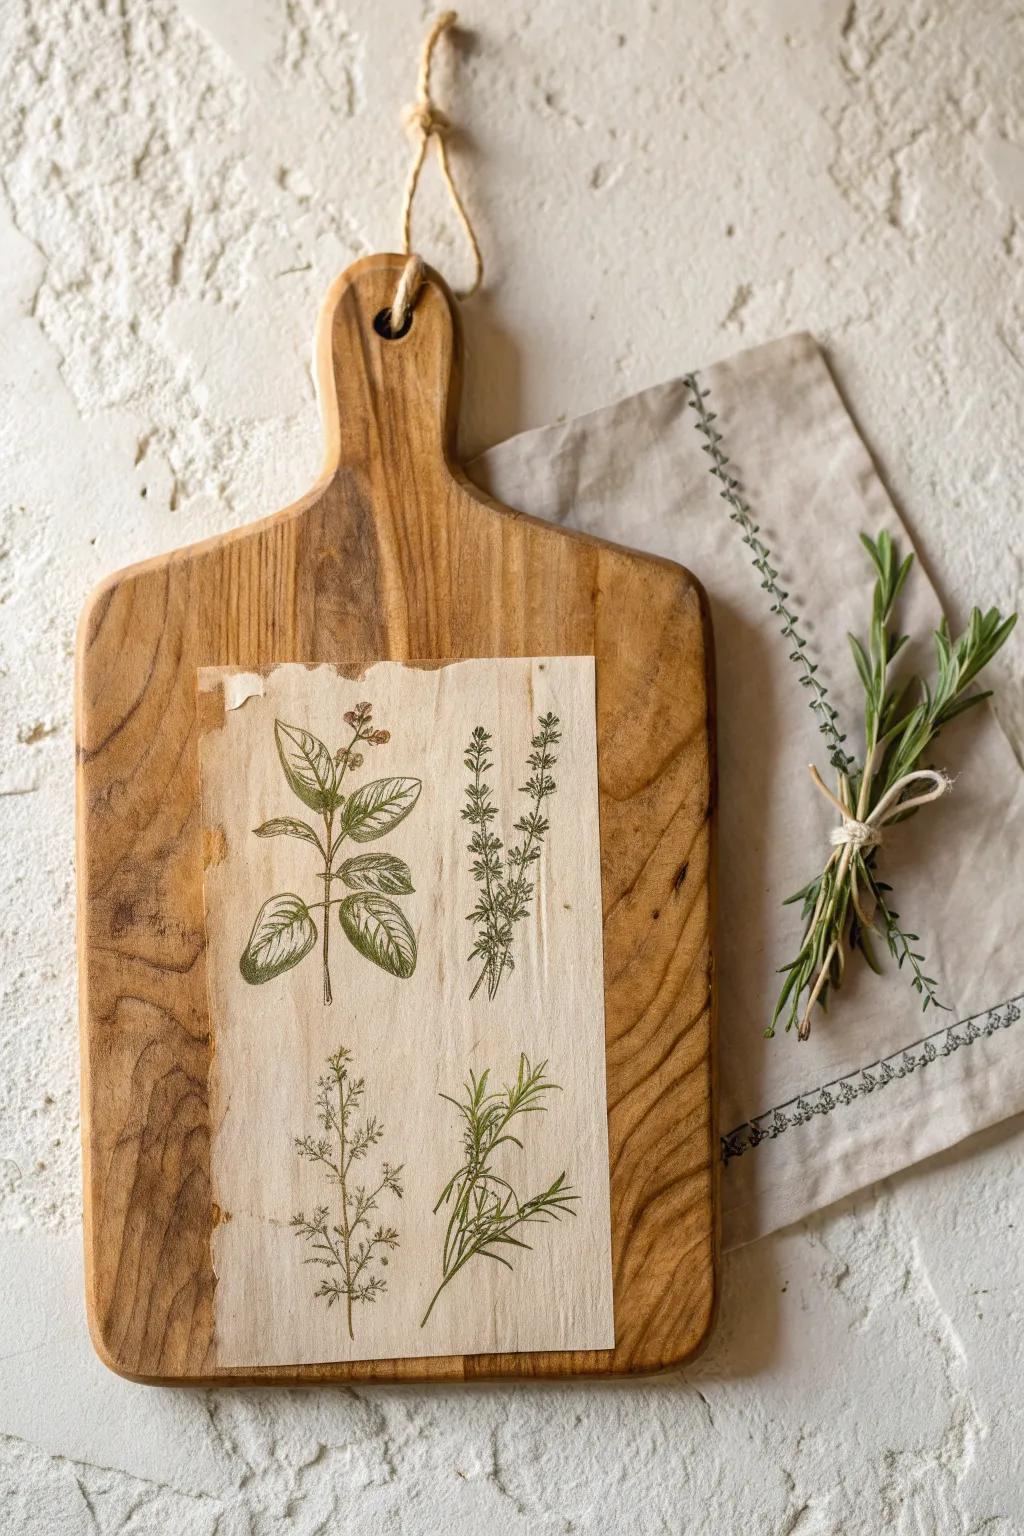
I’ve turned thrifted wood cutting boards into wall decor by decoupaging herb illustrations and adding a simple hanging loop. Just keep it decor-only—I never use a decoupaged board for food prep because the finish will get cut up.
A few choices to try:
- Wooden Bread Boards: Choose unfinished wooden paddles or cutting boards as the perfect base for your rustic herb wall art decor.
- Botanical Herb Decoupage Paper: Find vintage-style botanical prints and herb illustrations on rice paper or tissue specifically designed for smooth decoupage.
- Matte Decoupage Glue/Sealer: Seal your artwork securely with a matte finish medium to preserve the vintage look without adding unwanted gloss.
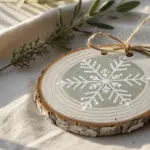
Wood Slice Coasters With Sealed Tops
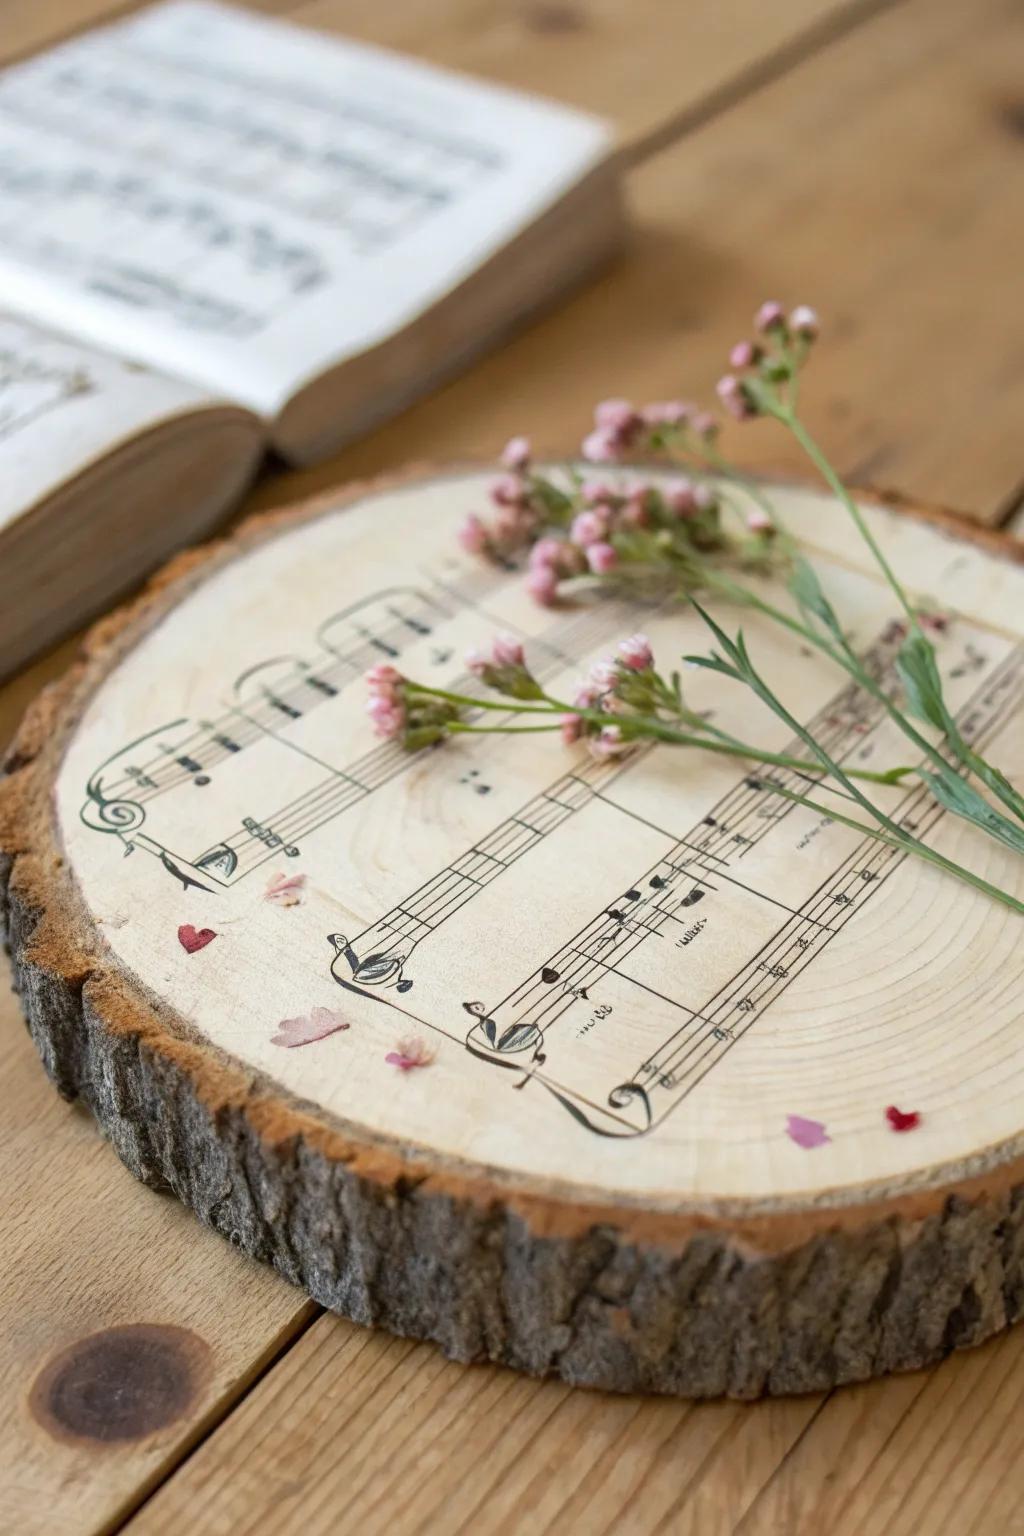
Decoupaging tiny florals or sheet music onto wood slices makes the sweetest rustic coasters, and I’ve made sets as quick gifts. I always add a durable clear topcoat so they survive real life condensation on my workbench.
Products that could assist:
- Natural Wood Slices: Start your rustic coaster project with these pre-sanded wood rounds, ready for your custom designs and decoupage.
- Decoupage Glue and Sealer: Adhere your sheet music securely and seal the surface in one step for a smooth, finished look.
- Waterproof Clear Acrylic Topcoat: Protect your finished coasters from drink condensation and spills with a durable, clear waterproof coating.
Sheet Music Wood Ornaments

I love decoupaging torn sheet music onto small wood shapes (stars, hearts, circles) for ornaments that look old-world in the best way. In my experience, rough torn edges look more natural than perfectly cut squares on wood.
These products might be useful:
- Unfinished Wooden Shapes: Start your project with plain wooden cutouts like stars or hearts, perfect for adhering paper layers.
- Vintage Sheet Music Paper: Use authentic-looking vintage music sheets to create that nostalgic, old-world charm on your custom ornaments.
- Mod Podge Decoupage Glue: Seal your torn paper edges securely to the wood surface for a durable and smooth finish.
Dresser Drawer Front Accent Panels
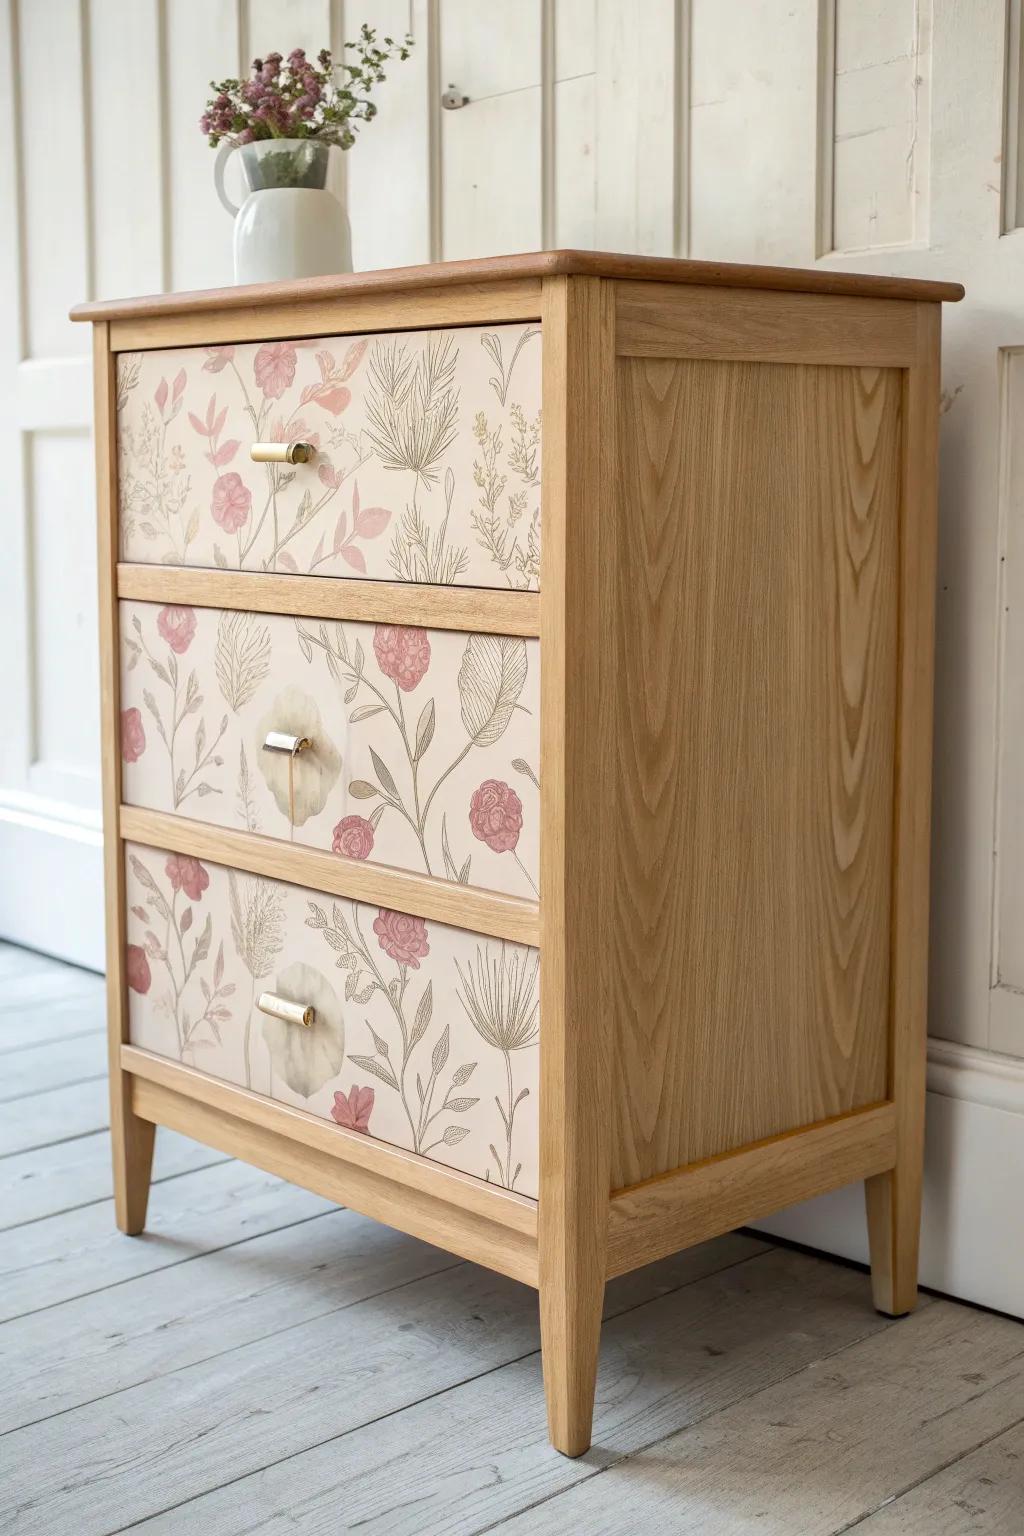
A classic furniture trick I use is decoupaging patterned paper just on the drawer fronts of a small dresser, like instant “wallpaper for wood.” I’ve found it’s the easiest way to update a piece while still letting the wood grain shine around the edges.
Check these products out:
- Floral Decoupage Paper or Tissue: Choose botanical or vintage floral prints to recreate the charming, nature-inspired look featured on these dresser drawers.
- Matte Decoupage Medium & Sealer: Secure your paper and seal the surface with a matte finish medium that protects without adding unwanted shine.
- Flat Synthetic Bristle Brush Set: Use wide, flat synthetic brushes for smooth, streak-free application of glue on large flat drawer surfaces.
Step Stool Top Pattern Pop
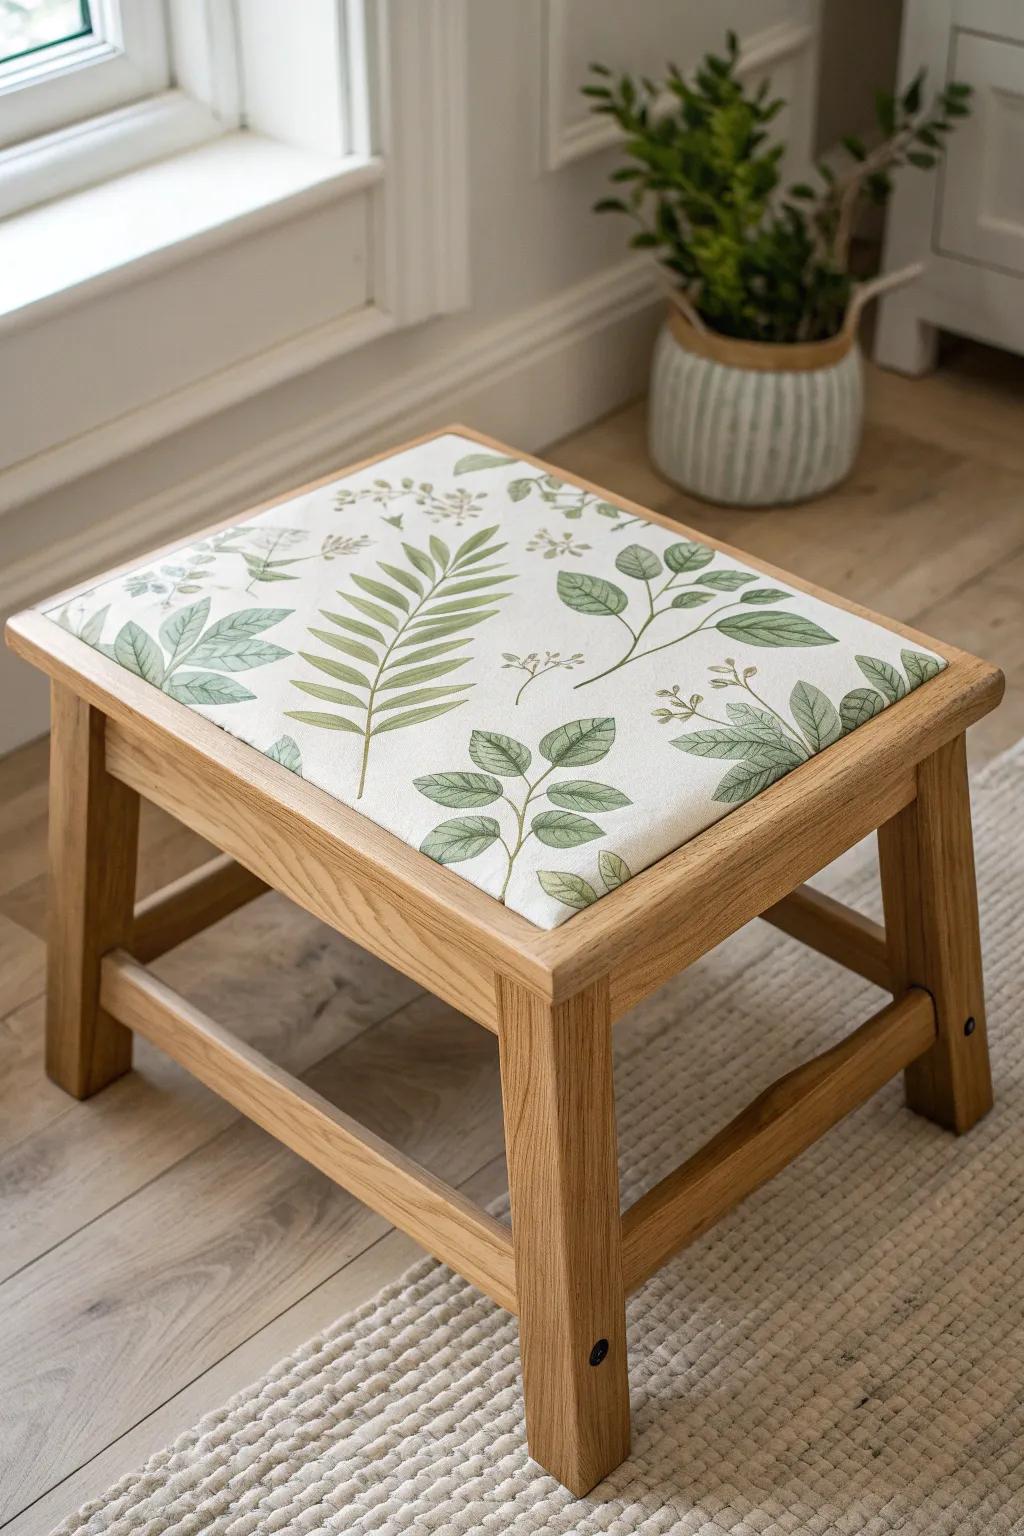
Decoupage on the top of a wood step stool is so satisfying because you get a big visual payoff with a small surface. I did one with a repeating botanical print, and it still makes me happy every time I grab it to reach high shelves.
You might give these a try:
- Unfinished Wooden Step Stool: Start your project with a sturdy, raw wood base that is ready for your unique decoupage design.
- Botanical Decoupage Paper: Choose lush green leaf or fern patterns to perfectly recreate the fresh, nature-inspired look shown here.
- Matte Decoupage Glue & Sealer: Secure your paper and protect the surface from daily wear with a durable, non-glossy finish.
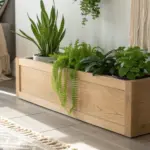
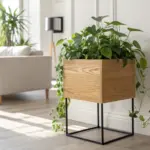
Planter Box With Outdoor Imagery
I’ve decoupaged seed-packet-style florals onto a wood planter box and it’s adorable on a porch shelf. The key from my own trial-and-error is using an outdoor-rated sealer over the decoupage so a little weather doesn’t ruin your work.
Possibly handy products:
- Unfinished Wood Planter Box: Start your project with a blank slate that is ready for sanding, staining, and accepting decorative paper designs.
- Botanical Decoupage Paper: Select vintage seed packet prints or floral illustrations to create that charming, garden-inspired aesthetic on your planter.
- Outdoor Decoupage Sealer: Protect your beautiful handywork from rain and sun damage by applying a durable, water-resistant top coat.
Shadow Box With Decoupaged Backing
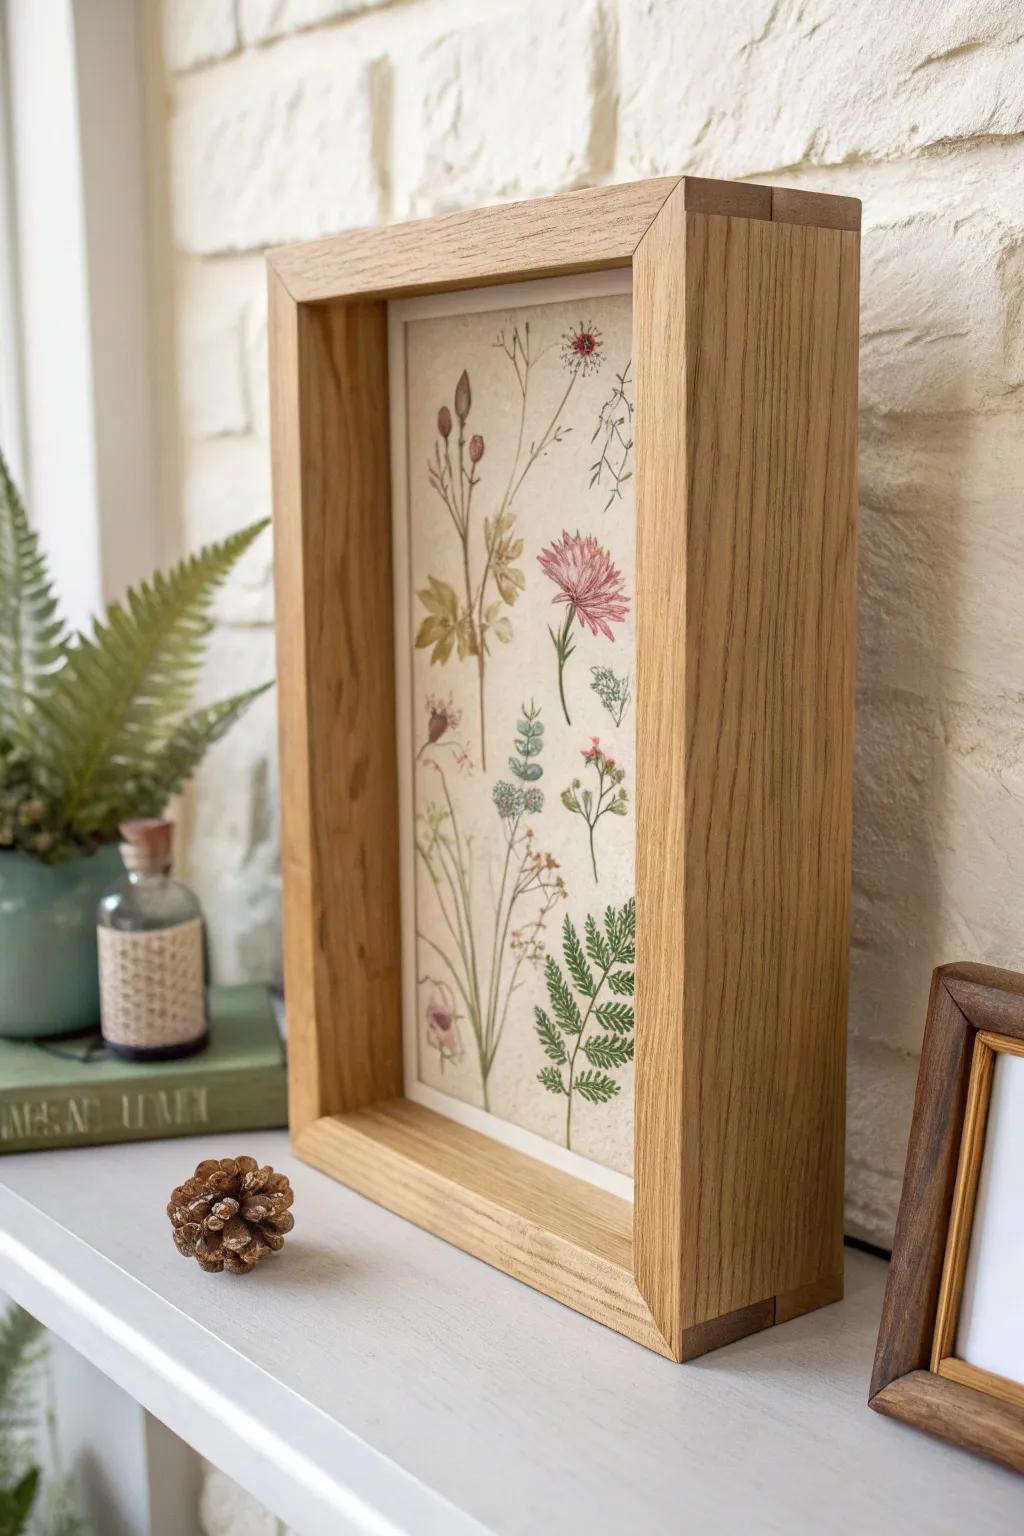
Instead of decoupaging the whole shadow box, I decoupage just the wood backing panel with a soft vintage print so whatever you display pops. I’ve used this for dried flowers and tiny found objects, and it feels like a mini gallery piece.
A few relevant products:
- Deep Wood Shadow Box Frame: Choose a deep wooden frame to hold your keepsakes and provide a sturdy base for your backing project.
- Vintage Botanical Decoupage Paper: Select soft, antique-style floral or botanical prints to create that elegant, gallery-worthy background texture.
- Matte Mod Podge or Decoupage Glue: Ensure a smooth, non-glare finish on your backing panel by using a high-quality matte adhesive sealant.
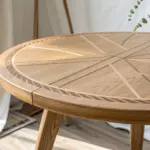
Faux Inlay Geometric Tabletop
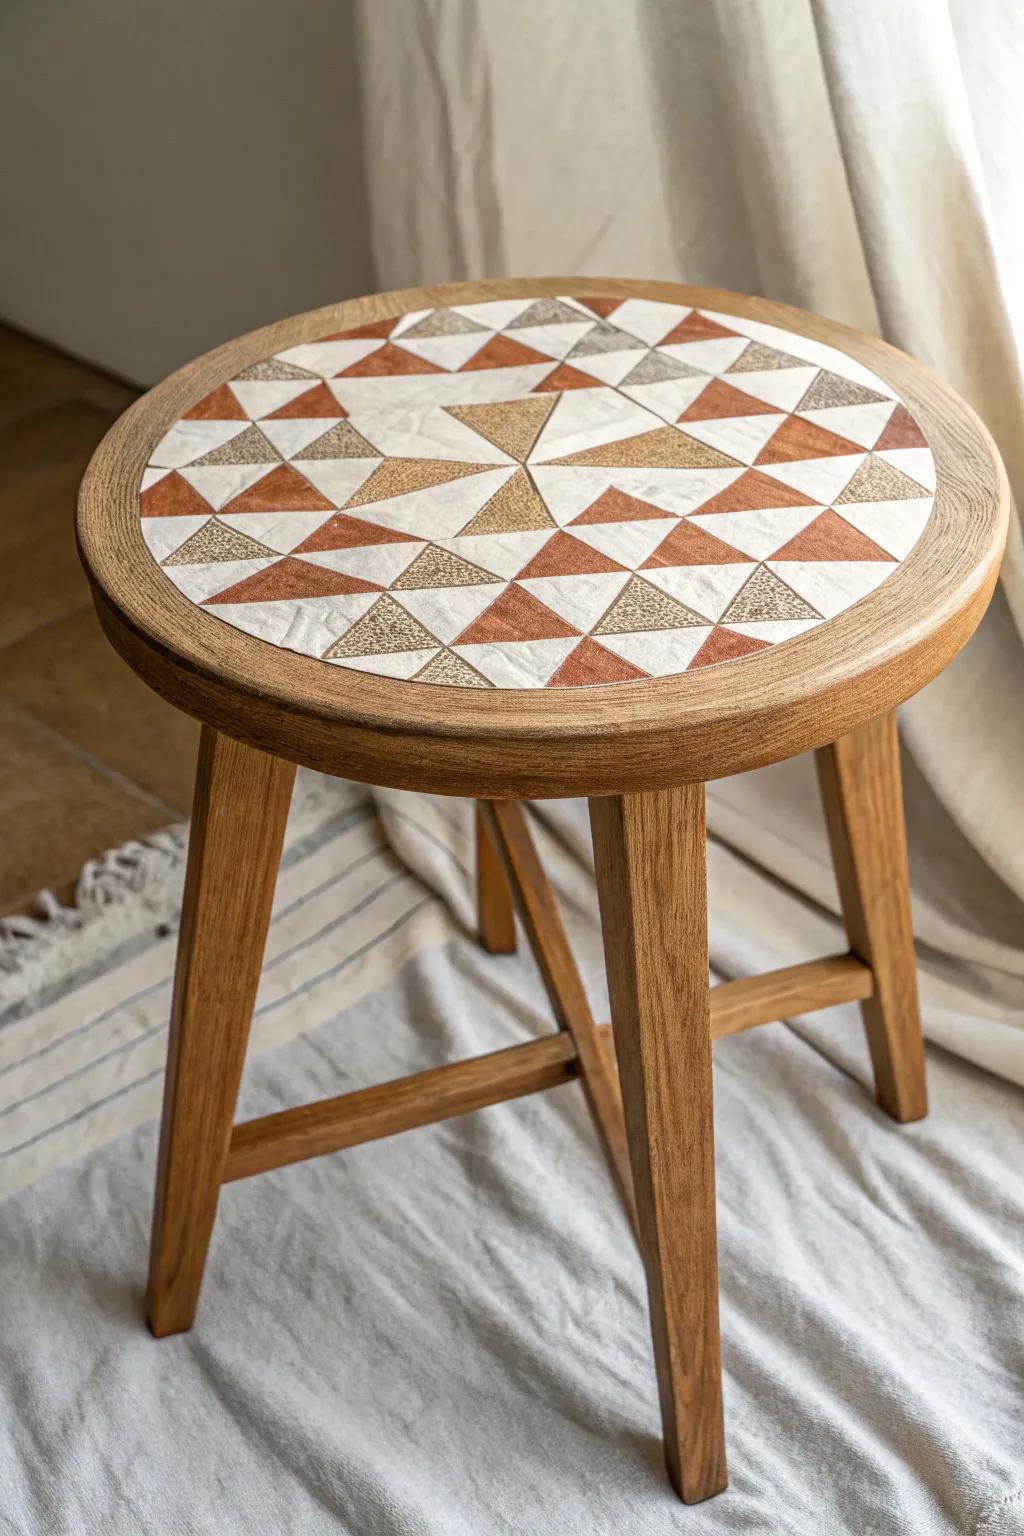
For a clean modern-farmhouse vibe, I cut crisp shapes and decoupage them into a geometric “inlay” on a small wood tabletop. I’ve done this on an end table, and people always assume it’s real veneer work until they look closer.
Some ideas to consider:
- Decorative Patterned Craft Paper: Select high-quality papers with geometric, terra cotta, or wood grain prints to create your custom faux inlay design.
- Precision Craft Knife Set: Use a sharp precision knife to cut clean, crisp triangles and shapes essential for a realistic inlay effect.
- Matte Finish Decoupage Glue: Seal your geometric design securely with a matte adhesive to mimic the natural, non-glossy look of real wood veneer.
Torn-Paper Patchwork Scrap Board Art
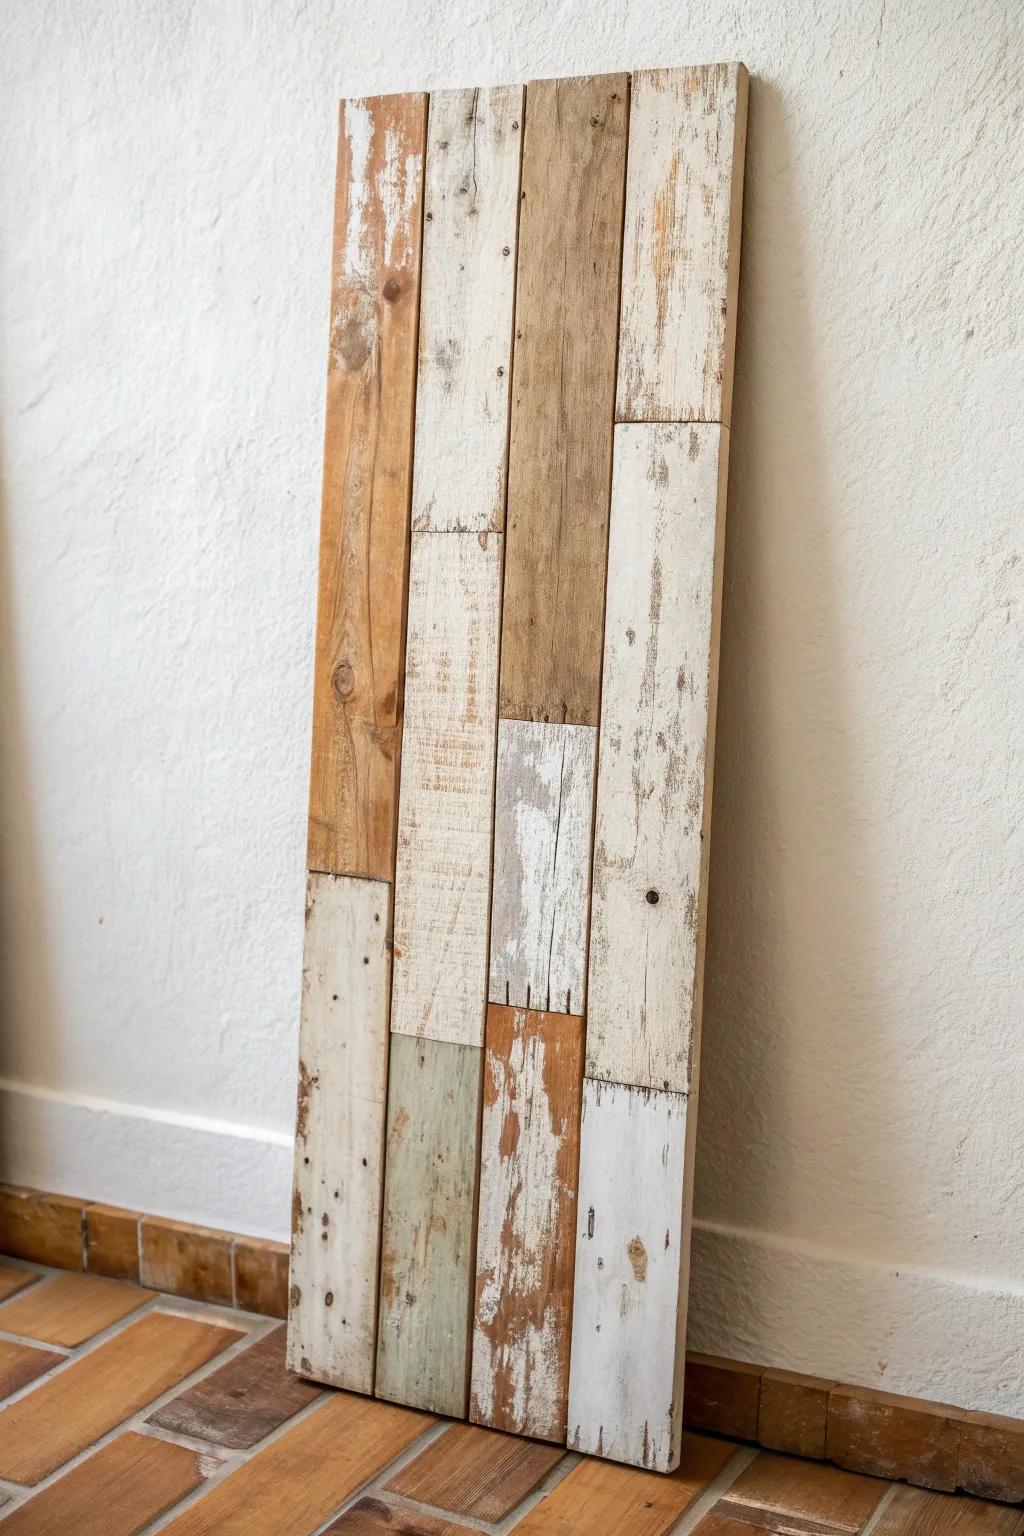
One of my favorite messy-pretty looks is wood decoupage with torn pieces layered like patchwork on a reclaimed board. I’ve found the overlapping edges hide imperfections in rough wood and make the whole thing feel intentionally rustic.
Possibly helpful picks:
- Matte Decoupage Glue & Sealer: Secure your paper scraps and create a durable, matte finish that enhances that rustic, vintage aesthetic.
- Decorative Scrapbook Paper Pack: Find assorted vintage-style patterns perfect for tearing and layering to create your unique patchwork design.
- Chalk Style Paint: Distress your wood base or paint over paper edges to blend layers for a cohesive, weathered look.
Fabric-Decoupaged Bench Slats
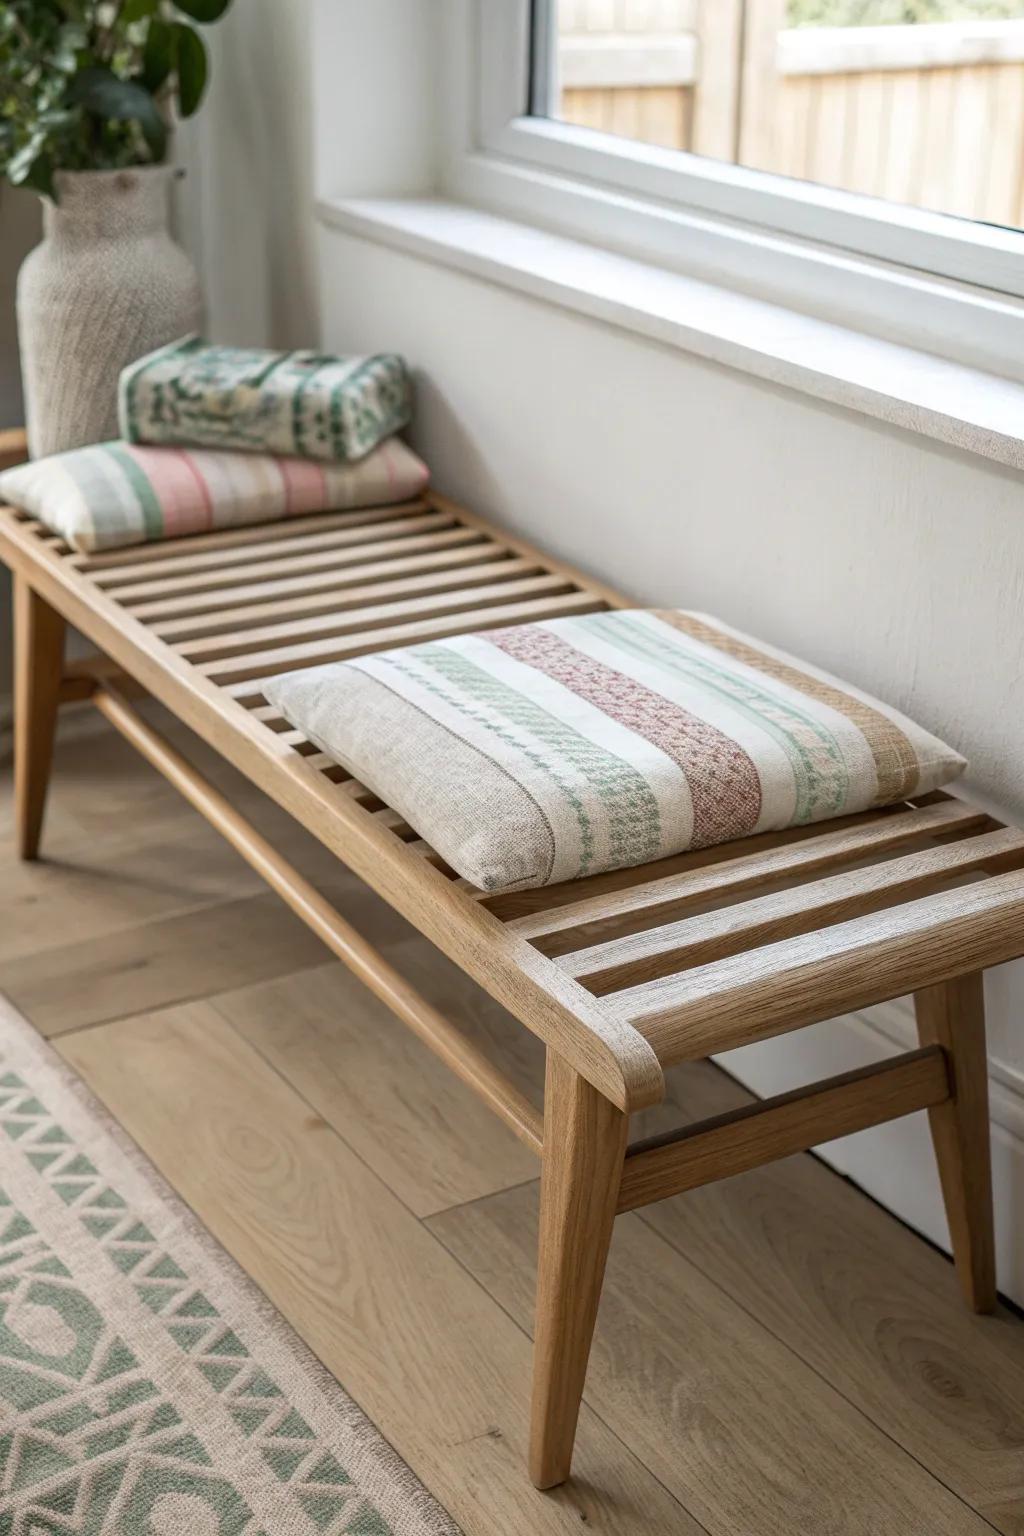
If you’ve got a slatted wood bench or shoe rack, try decoupaging strips of fabric across the slats for a soft, unexpected texture. I’ve done this with leftover textiles from my workshop bins, and it makes basic utility furniture feel styled.
A few suggestions:
- Cotton or Linen Fabric Remnants: Choose breathable, textured fabrics like these to wrap slats, creating a soft, custom look for your bench upgrade.
- Fabric Decoupage Medium (Mod Podge): Use this specialized adhesive to securely bond your chosen fabric to wood surfaces without excessive fraying or stiffness.
- Rotary Cutter and Mat Set: Ensure clean, perfectly straight fabric strips to match your bench slats with this essential precision cutting tool set.
Translucent Lantern Panel Decoupage
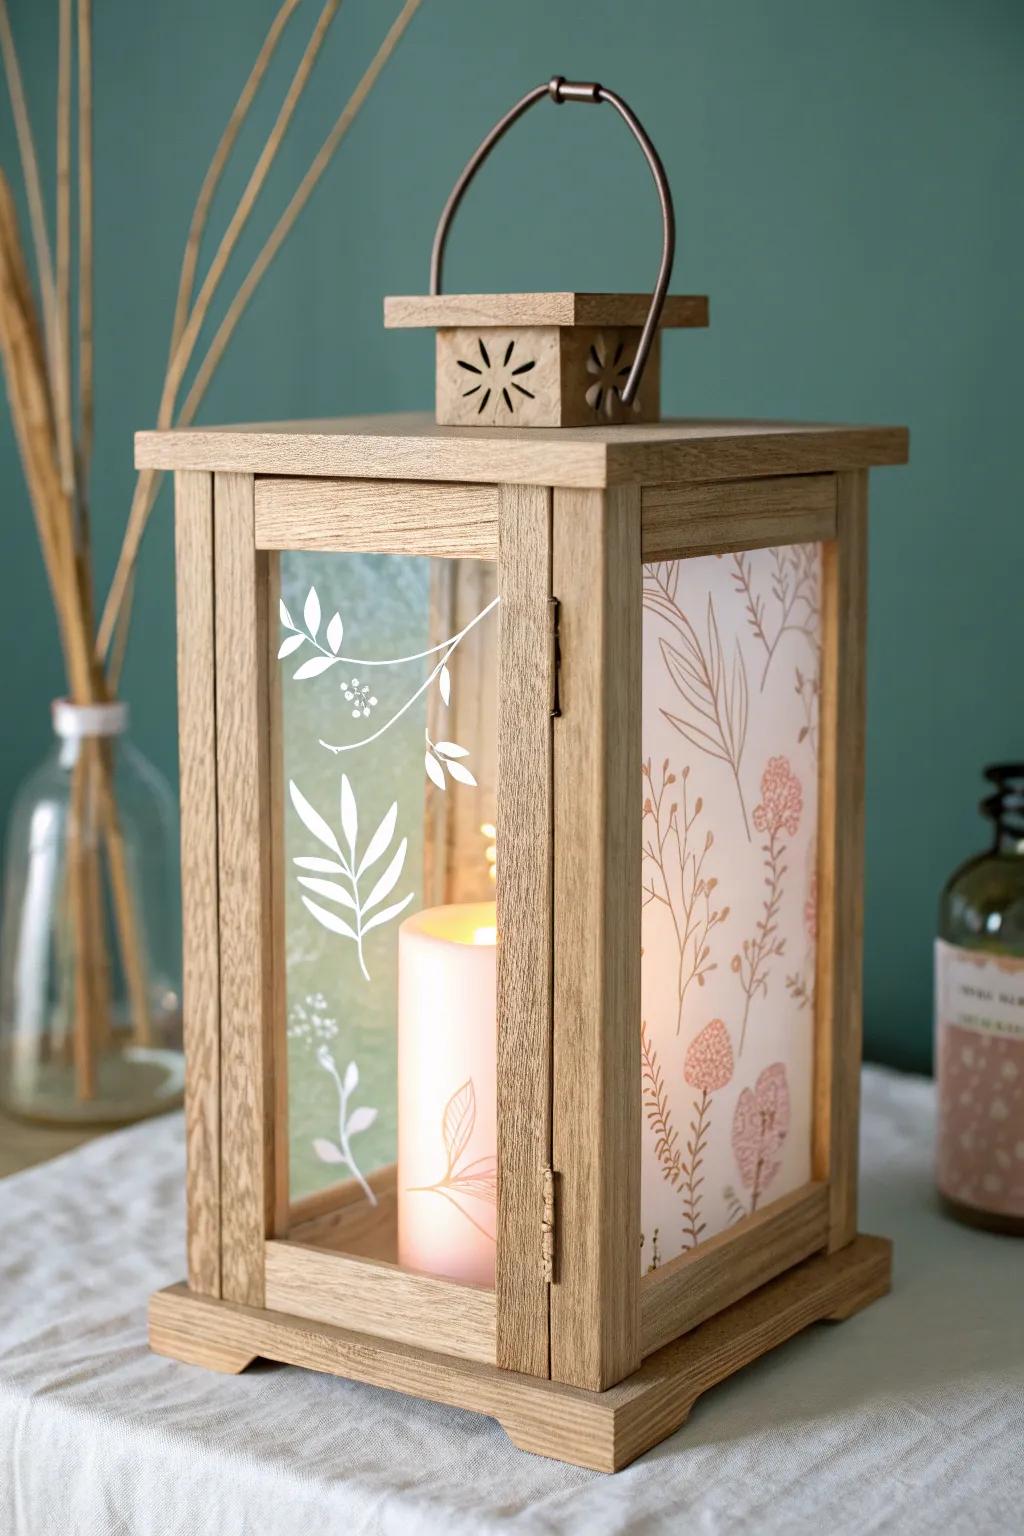
This one is a showstopper: I decoupage thin, light-colored paper onto wood lantern panels so the pattern glows when a light is inside. The first time I tried it, I couldn’t stop turning it on and off like a kid because it looked that magical.
Useful items to consider:
- Unfinished Wooden Lantern: Start your project with a blank slate by choosing a simple wooden lantern ready for your creative touch.
- Translucent Rice Paper or Vellum: Select thin, semi-transparent papers with botanical prints that allow light to filter beautifully through your design.
- Gloss Decoupage Medium: Use a quality adhesive that dries clear to securely attach your paper and protect the finish efficiently.
Woodburned Borders Around Decoupage
I’ll sometimes frame a decoupaged image with a simple woodburned border, and it makes the whole piece feel handcrafted instead of just “paper on wood.” I learned to burn first and decoupage second, because scorching near finished paper is a heartbreak waiting to happen.
You might like:
- Wood Burning Tool Kit: Etch beautiful custom borders onto wood surfaces before applying your decoupage for a truly handcrafted look.
- Unfinished Wood Plaques: Use these smooth, natural surfaces as the perfect canvas for your combined woodburning and decoupage projects.
- Matte Decoupage Glue: Seal your paper artwork seamlessly onto the wood without creating a glossy glare that distracts from the border.


