
When I need quick, cozy upgrades around the house, I reach for popsicle sticks and a handful of twigs before I touch any fancy lumber. These stick decoration ideas are low-cost, super customizable, and they always bring that warm, handmade vibe into a space.
Stick Starburst Wall Accent
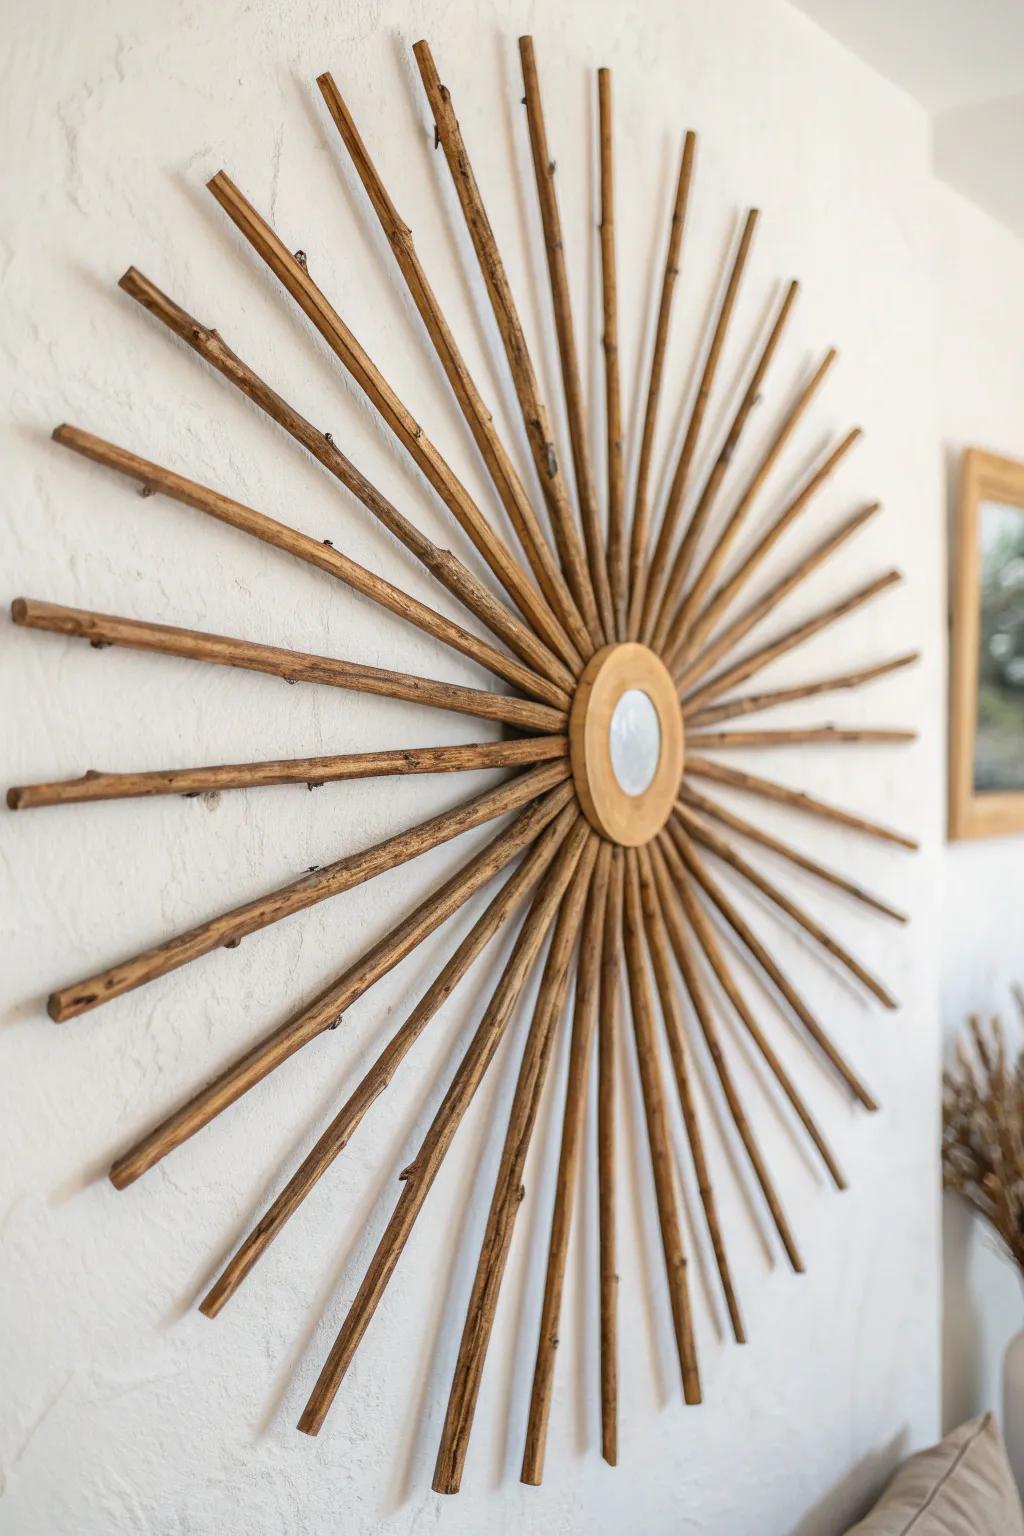
I’ve glued thin sticks in a radiating pattern around a small center circle, and it gives that punchy mid-century-ish energy without being fussy. I like mixing natural twigs with a few stained sticks for depth.
Explore these options:
- Natural Birch Wood Dowel Rods: Create the radiating sunburst effect easily by arranging these natural, sturdy wooden dowels around your center base.
- Round Unfinished Wooden Plaques: Use these sturdy wooden circles as the essential central hub to securely anchor your radiating stick pattern.
- Small Round Craft Mirrors: Add a reflective focal point to your starburst center to instantly elevate the mid-century modern aesthetic.
Popsicle Stick Photo Collage Grid
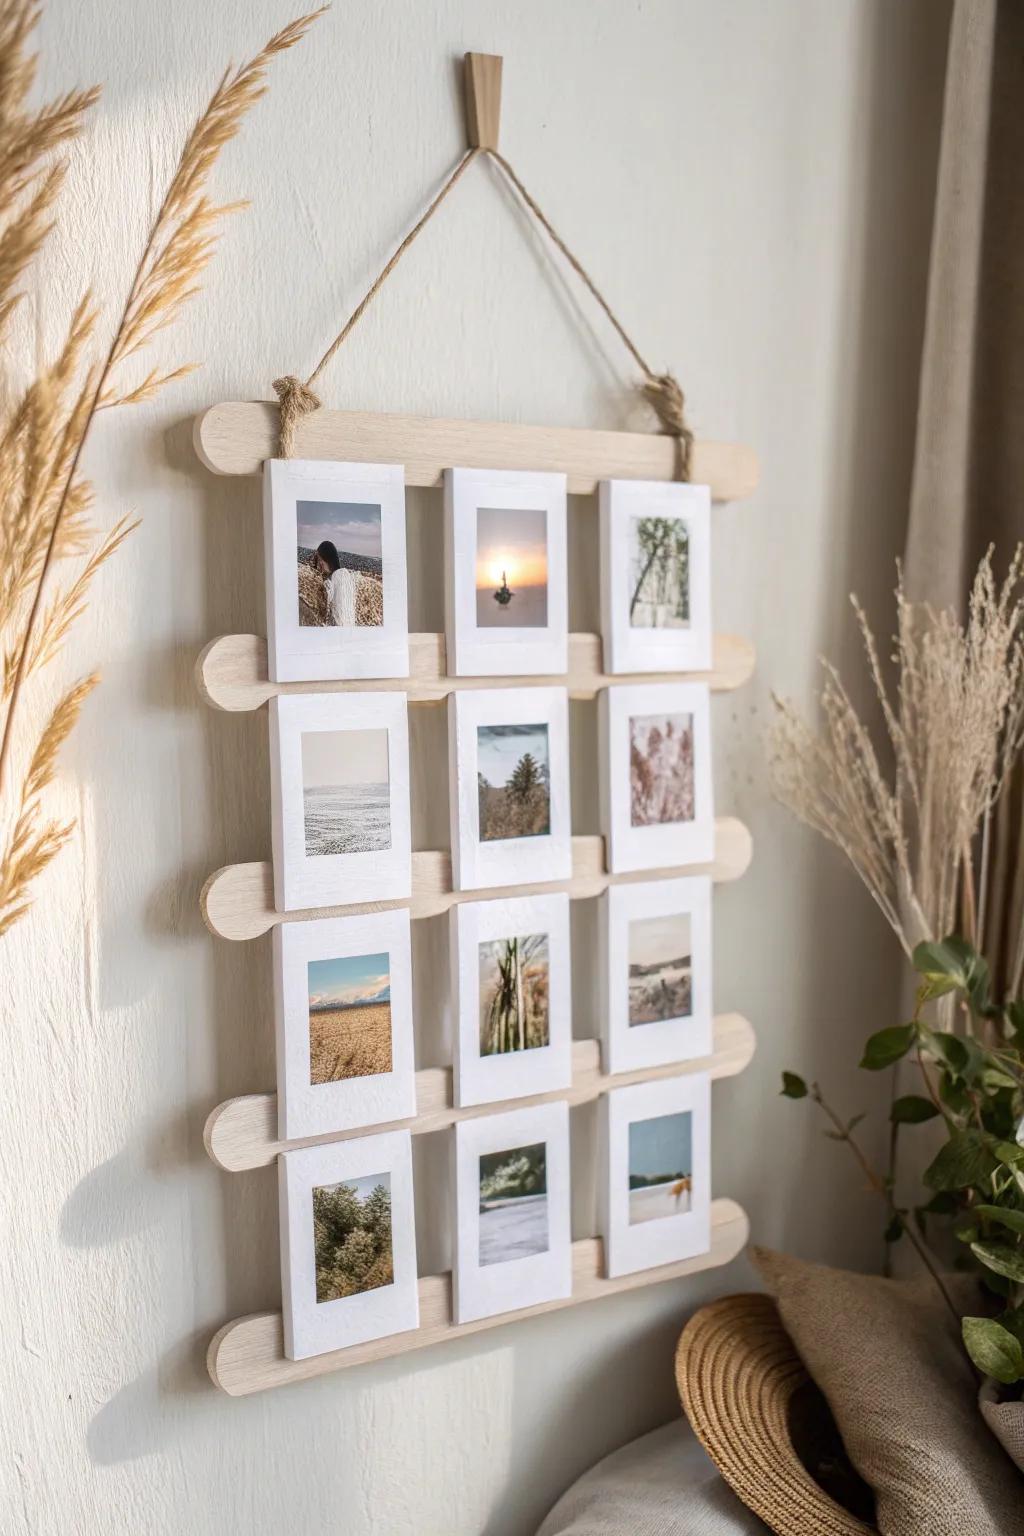
When I want easy wall art, I glue craft sticks into little squares and connect them into a grid for mini prints. I’ve painted mine matte white for a farmhouse look, but stain looks gorgeous too.
A few suggestions:
- Jumbo Craft Sticks: Build your sturdy grid base easily with these wide wooden sticks, perfect for creating framing structures.
- Mini Photo Printer Paper: Print perfect mini-sized photos instantly at home to fill your new collage frame with cherished memories.
- Jute Twine Rope: Add a rustic hanging element to your wall art with this durable, natural fiber cord.
Simple Stick Coaster Set
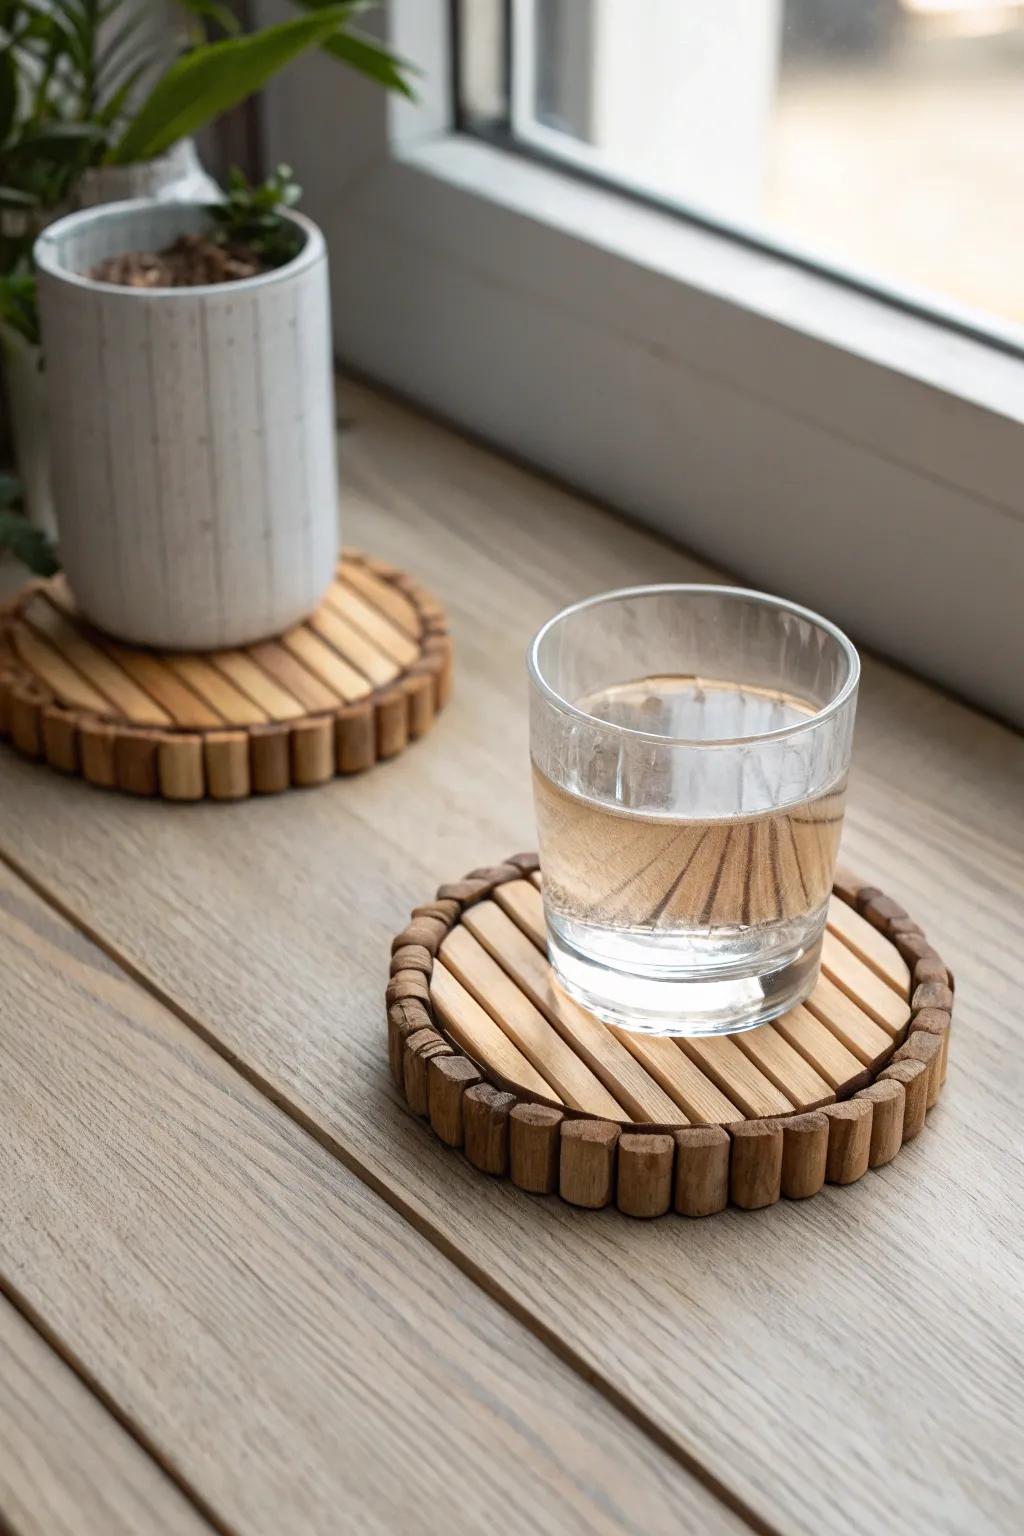
I’ve lined up popsicle sticks edge-to-edge and banded them with two sticks across the back, and they come out surprisingly sturdy. A quick coat of water-based sealer in my shop keeps them from getting gross around drinks.
These products might help:
- Natural Birch Wood Craft Sticks: Grab these smooth, natural sticks to build the perfect sturdy base for your new coaster project.
- Water-Based Clear Wood Sealer: Protect your handmade coasters from moisture rings and spills with a durable, easy-to-apply clear finish.
- Heavy Duty Wood Glue: Ensure your coasters hold together securely for years of use with a reliable, strong-bonding adhesive.
Popsicle Stick Planter Sleeve
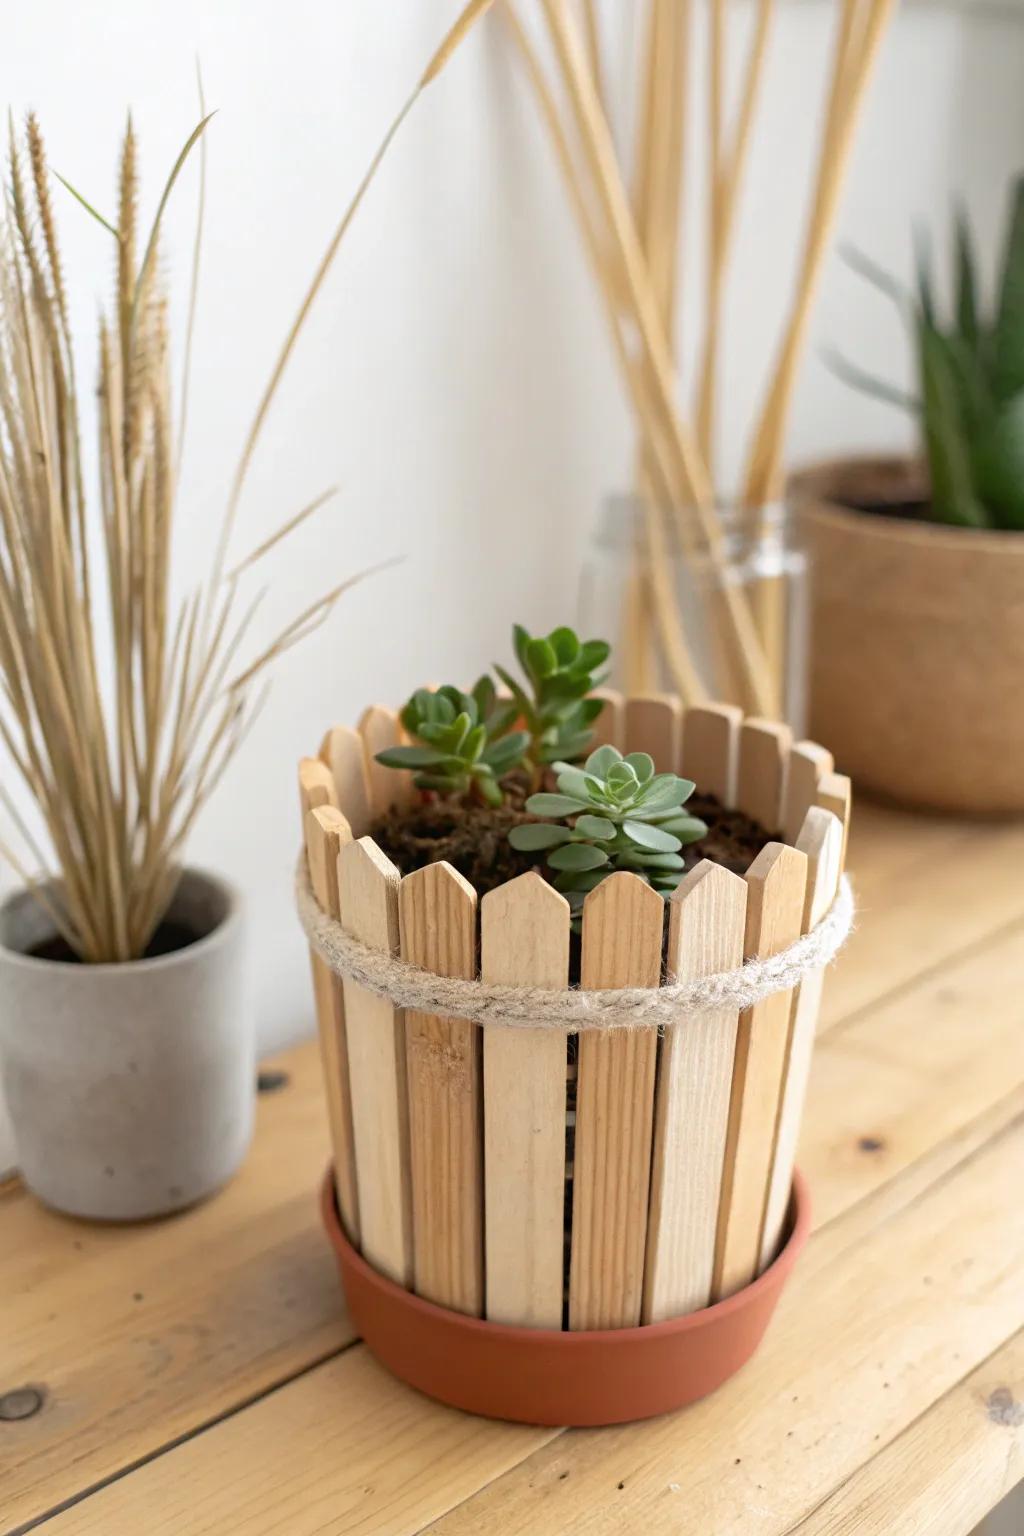
I’ve dressed up plain nursery pots by hot-gluing vertical craft sticks all the way around like a mini fence. It’s one of my favorite ways to make cheap pots look intentionally styled.
Consider these options:
- Jumbo Natural Craft Sticks: Build your charming fence-style planter sleeve using these versatile wooden sticks, perfect for adding rustic flair.
- Hot Glue Gun Kit with Glue Sticks: Secure your wooden slats quickly and easily to any nursery pot with this essential crafting tool.
- Jute Twine or Hemp Rope: Add a finishing country-chic touch by wrapping this natural cord around your new wooden planter sleeve.
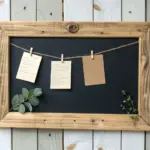
Hanging Stick Photo Display
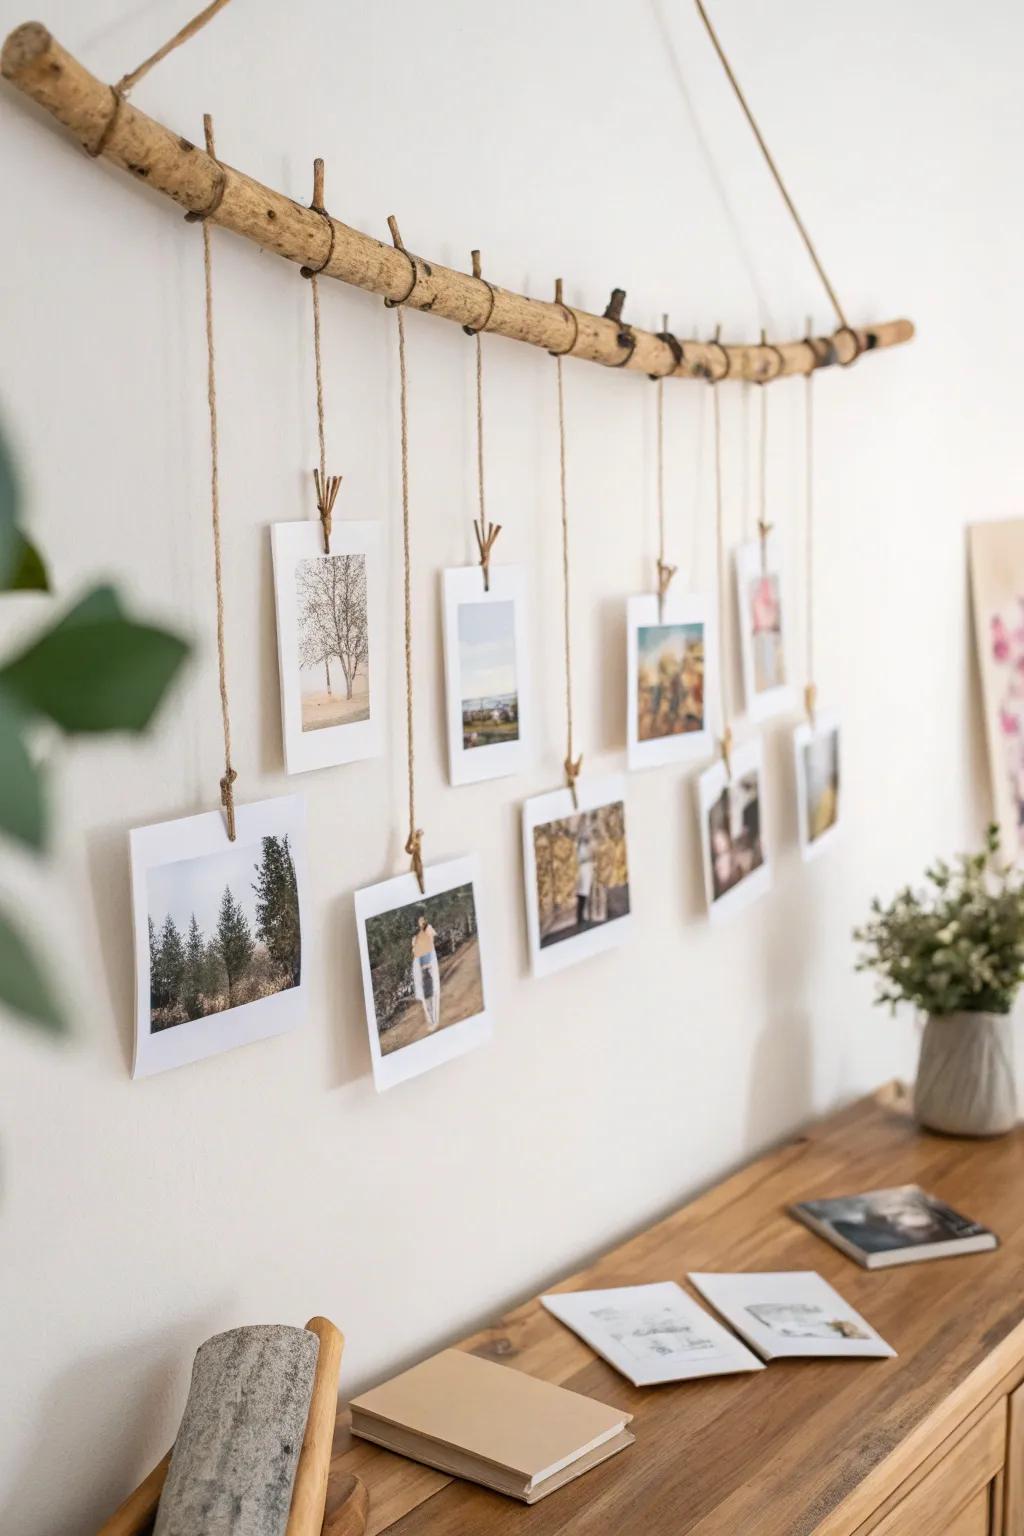
One of my go-tos is a single pretty branch with string hanging down to clip photos, and it looks so relaxed above a desk. I’ve learned the hard way to seal the twig first so it doesn’t shed little bits over time.
Give these a look:
- Jute Twine String: Use natural twine to hang your photos securely while adding a rustic, earthy touch to your display.
- Mini Wooden Clothespins: Secure your favorite memories to the strings easily with these tiny, charming wooden clips for crafting.
- Clear Wood Sealer Spray: Seal your branch quickly to prevent it from drying out or shedding debris over your furniture.
Garden Stick Plant Trellis
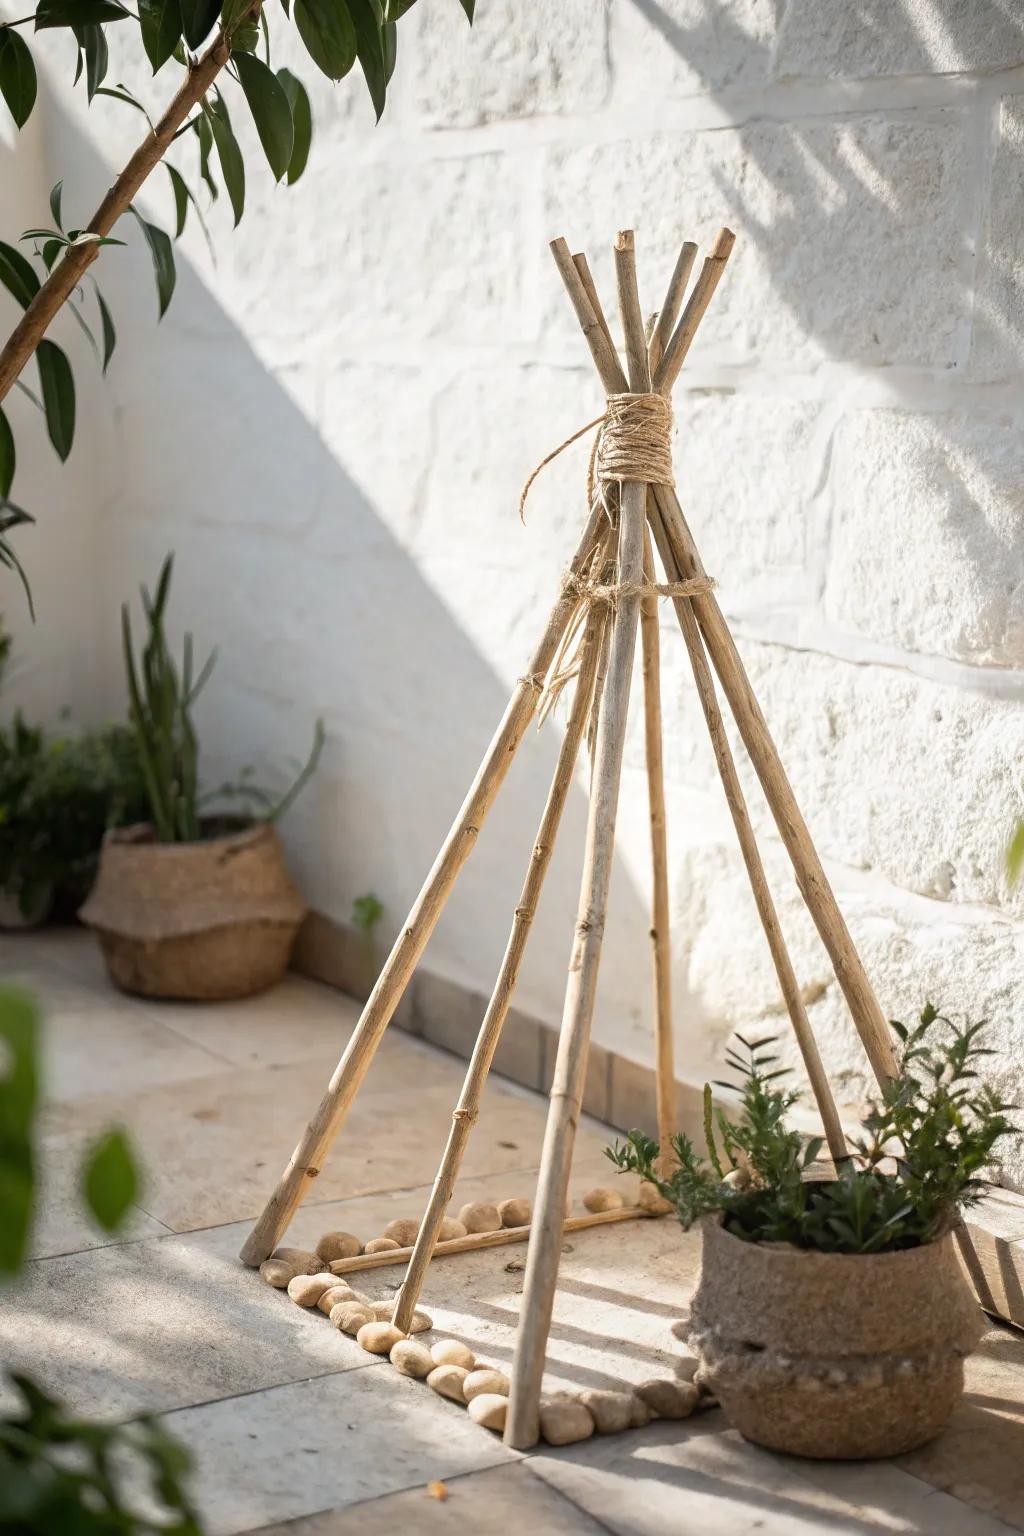
In my workshop garden, I tie three sticks into a little teepee trellis and it makes even tiny plants look styled. I like wrapping the joints with jute twine because it reads earthy and holds tight.
You might like:
- Natural Bamboo Stakes: Build your DIY trellis structure easily with these sturdy supports that blend seamlessly into any garden environment.
- Natural Jute Twine: Secure your stick joints firmly while adding a rustic, earthy aesthetic to your handmade garden creations.
- Decorative River Stones: Stabilize the base of your trellis and add a polished finishing touch with these smooth natural pebbles.

Decorative Herb Marker Sticks
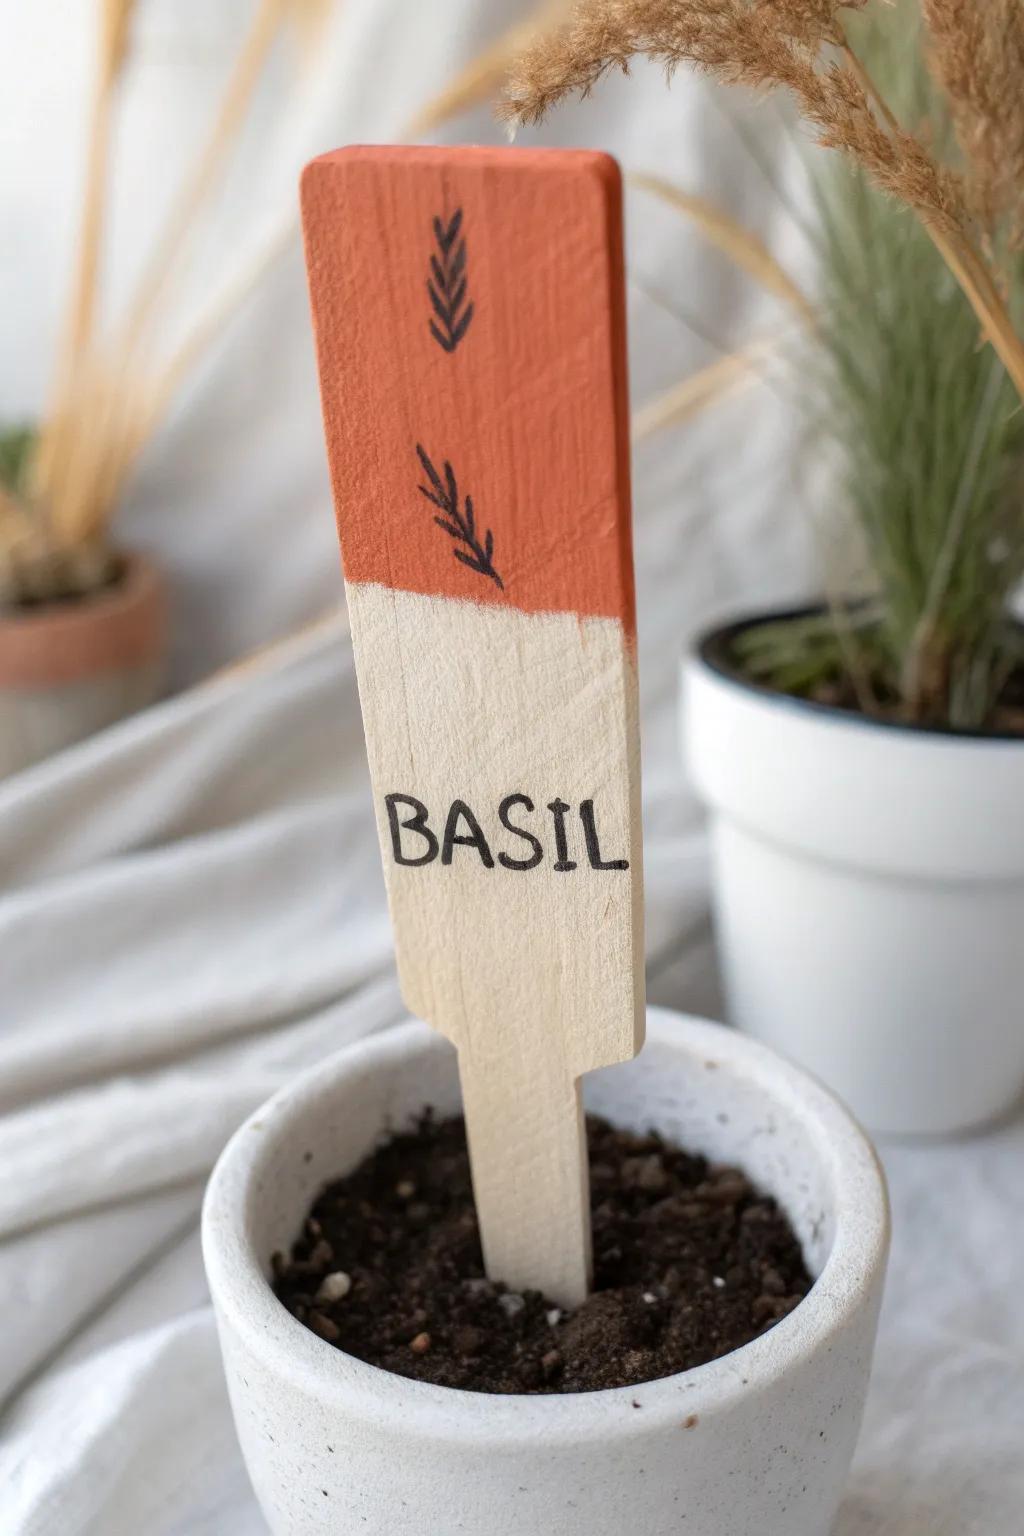
I’ve turned flat craft sticks into cute herb signs with paint and a simple handwritten label, and they make the whole planter look finished. A quick clear coat is my trick for keeping the letters from smudging outdoors.
May just do the trick:
- Jumbo Wood Craft Sticks: Grab these wide, sturdy wooden sticks as the perfect blank canvas for your custom garden labels.
- Acrylic Paint Set: Use these vibrant, versatile paints to color-block your markers and add creative designs to distinct herbs.
- Clear Waterproof Sealer Spray: Protect your work from water and sun damage with a quick spray of this durable clear coat.
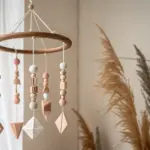
Driftwood Mobile for a Corner
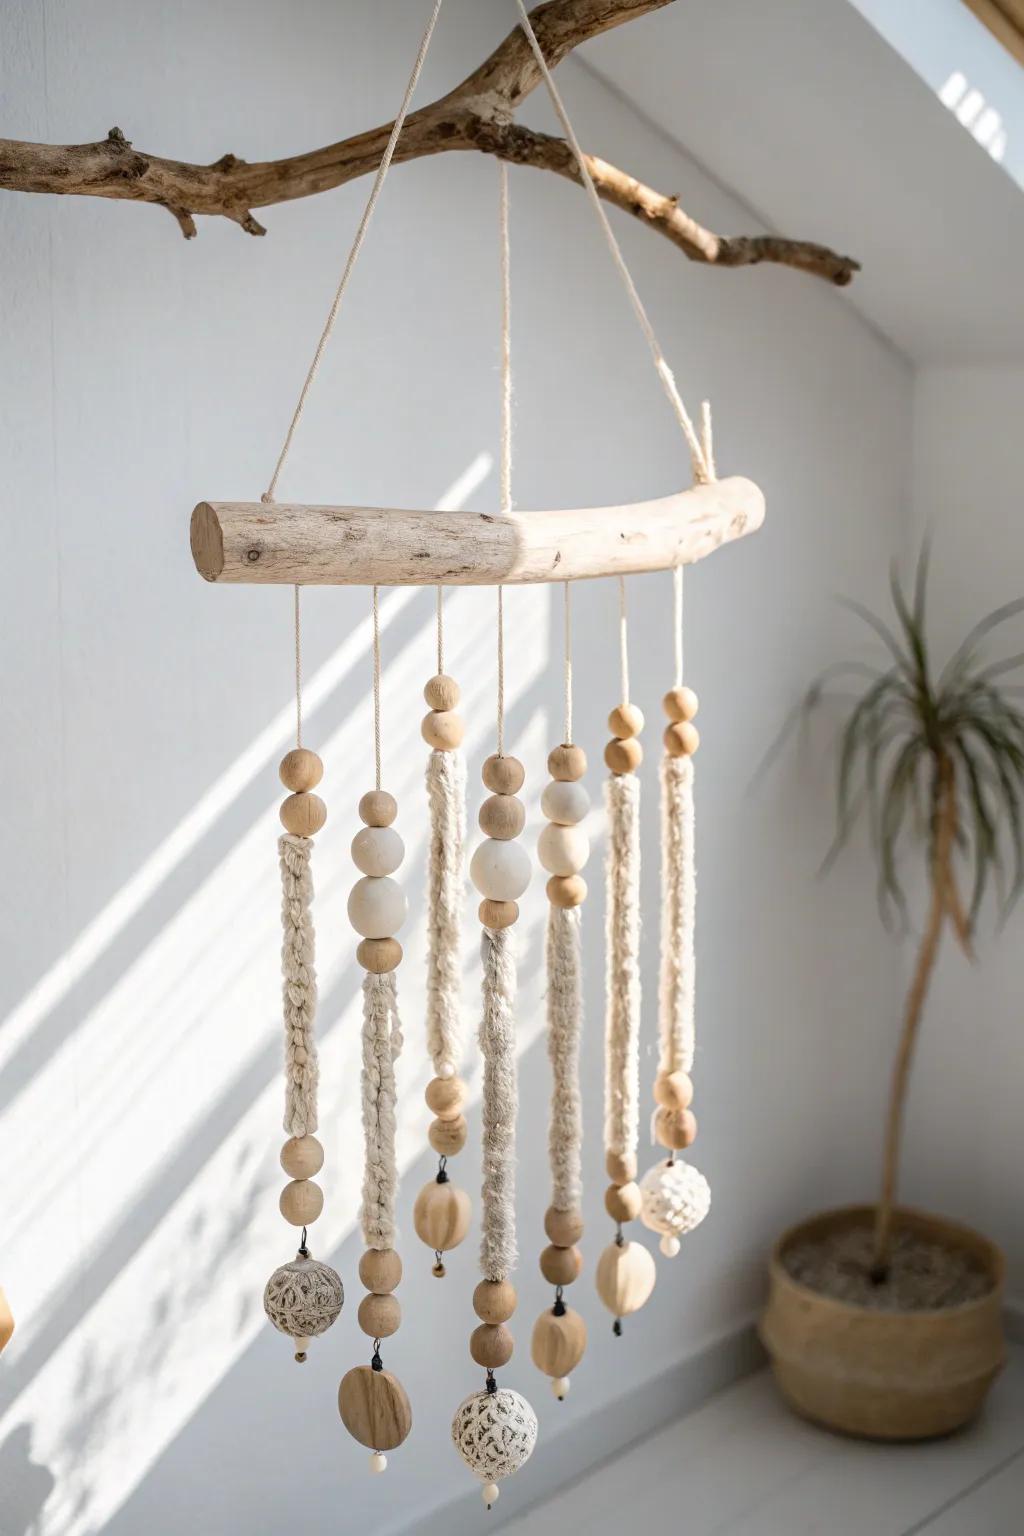
Whenever I find good driftwood, I turn it into a hanging mobile with smaller sticks, string, and a few wooden beads. I hang mine where it catches a breeze, and it adds that calm, natural movement I love.
Check if these fit your needs:
- Natural Wooden Beads: Add earthy charm to your mobile by stringing these beads for texture and visual interest in your design.
- Macrame Cotton Cord: Use strong, soft cotton cord to securely hang your driftwood pieces and create intricate knots for decoration.
- Natural Driftwood Pieces: Starting from scratch? Grab a set of natural driftwood pieces to create the perfect base for your mobile.
Stick Weaving Wall Hanging
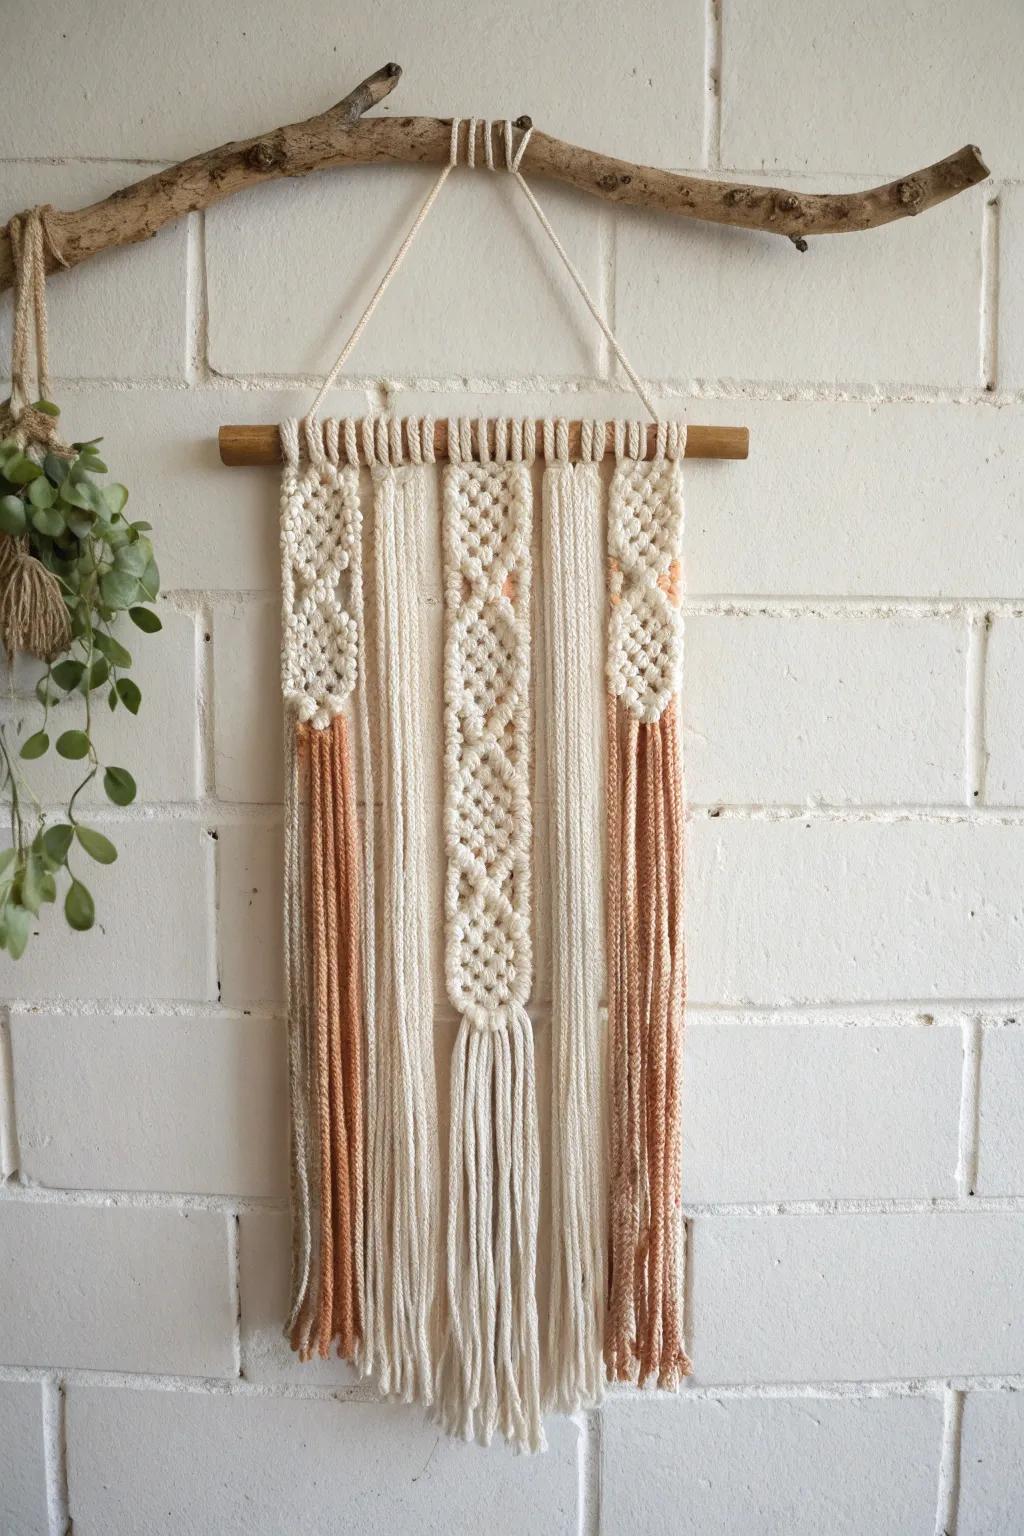
I’ve used a straight branch as the top bar and woven yarn around dangling sticks for a soft-meets-rustic wall decor piece. It’s such a forgiving project—my “mistakes” always end up looking intentional.
Useful items to consider:
- Natural Cotton Macrame Cord: Choose high-quality cotton cord to create soft textures and intricate knots for your custom wall hanging design.
- Wooden Dowel Rods: Use sturdy, smooth wooden dowels as the perfect foundation bar to hold your entire woven artwork securely.
- Driftwood Branches: Add an authentic rustic touch to your project by using real natural driftwood pieces instead of standard dowels.


