
Rustic baseboards are one of my favorite “small change, big payoff” upgrades, especially when you’re working with a tight budget. Here are my go-to cheap rustic baseboard ideas that I’ve actually used in real rooms (and a few that made my workshop friends do a double-take).
Fence Pickets Cut to Height
I’ve turned plain fence pickets into rustic baseboards by ripping them to a consistent height and softening the edges with sandpaper. With a medium stain, they come out looking like cabin trim for a fraction of the cost.
Useful items to consider:
- Medium Wood Stain: Protect your wood and bring out a warm, rustic tone that enhances the natural rugged grain patterns.
- Assorted Grit Sanding Block Set: Smooth down rough cut edges and splintered ends on your pickets easily to create a safer finish.
- Brad Nailer Kit: Secure your new custom baseboards quickly and cleanly without leaving large, visible hammer marks on the surface.

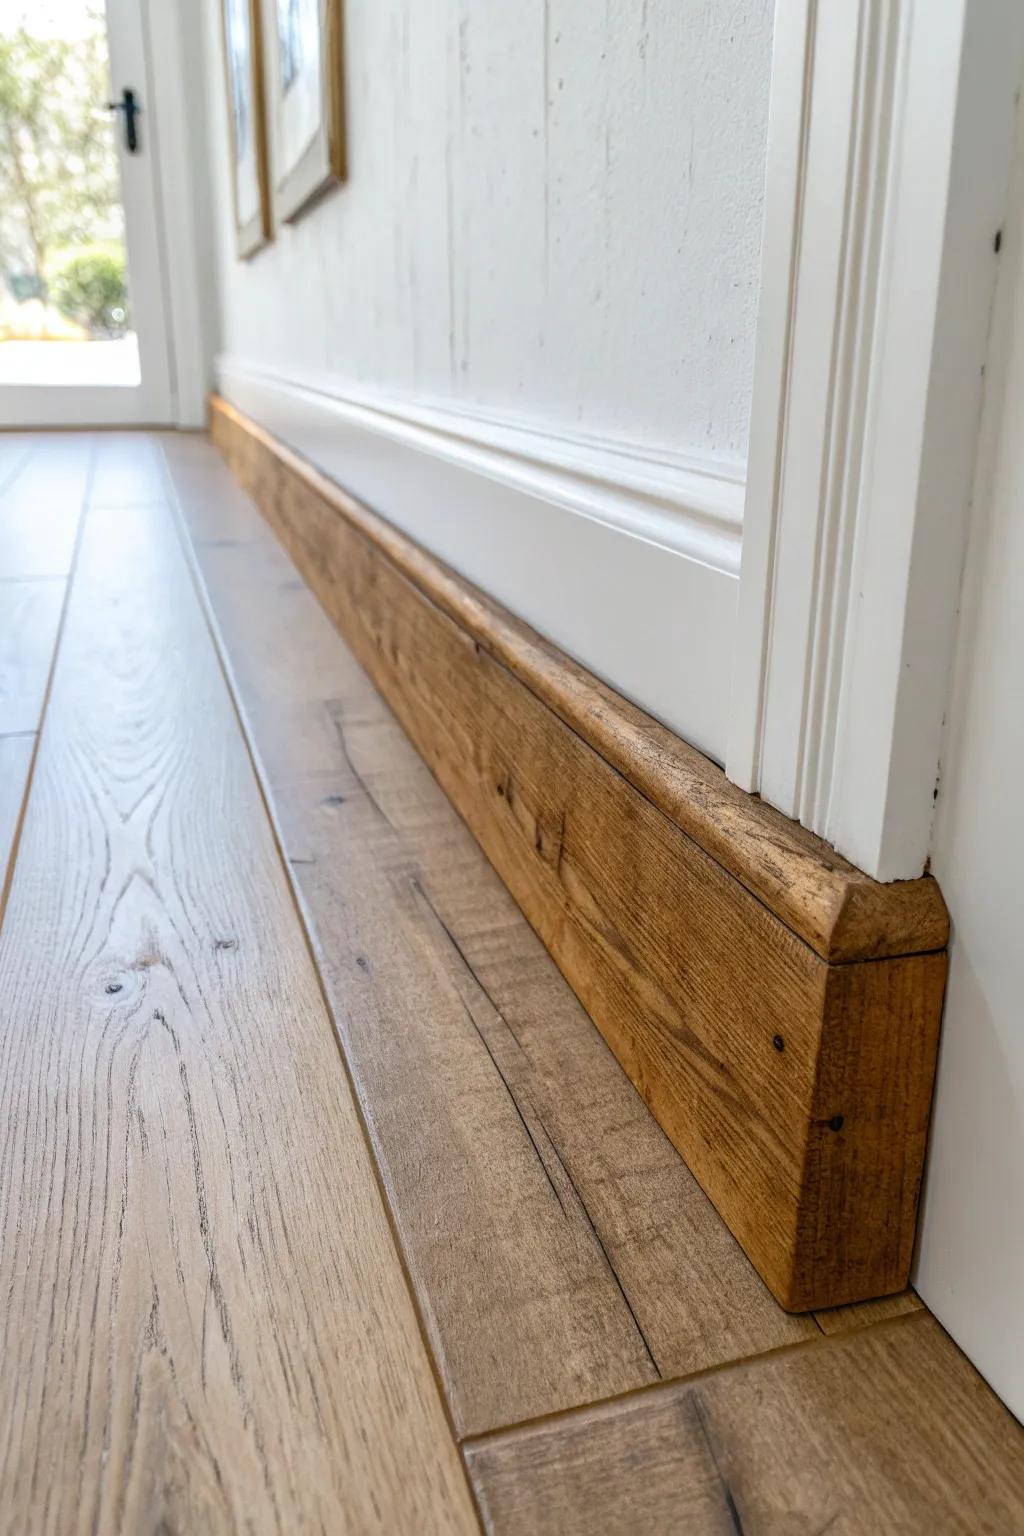
Stained 1×4 Pine Boards
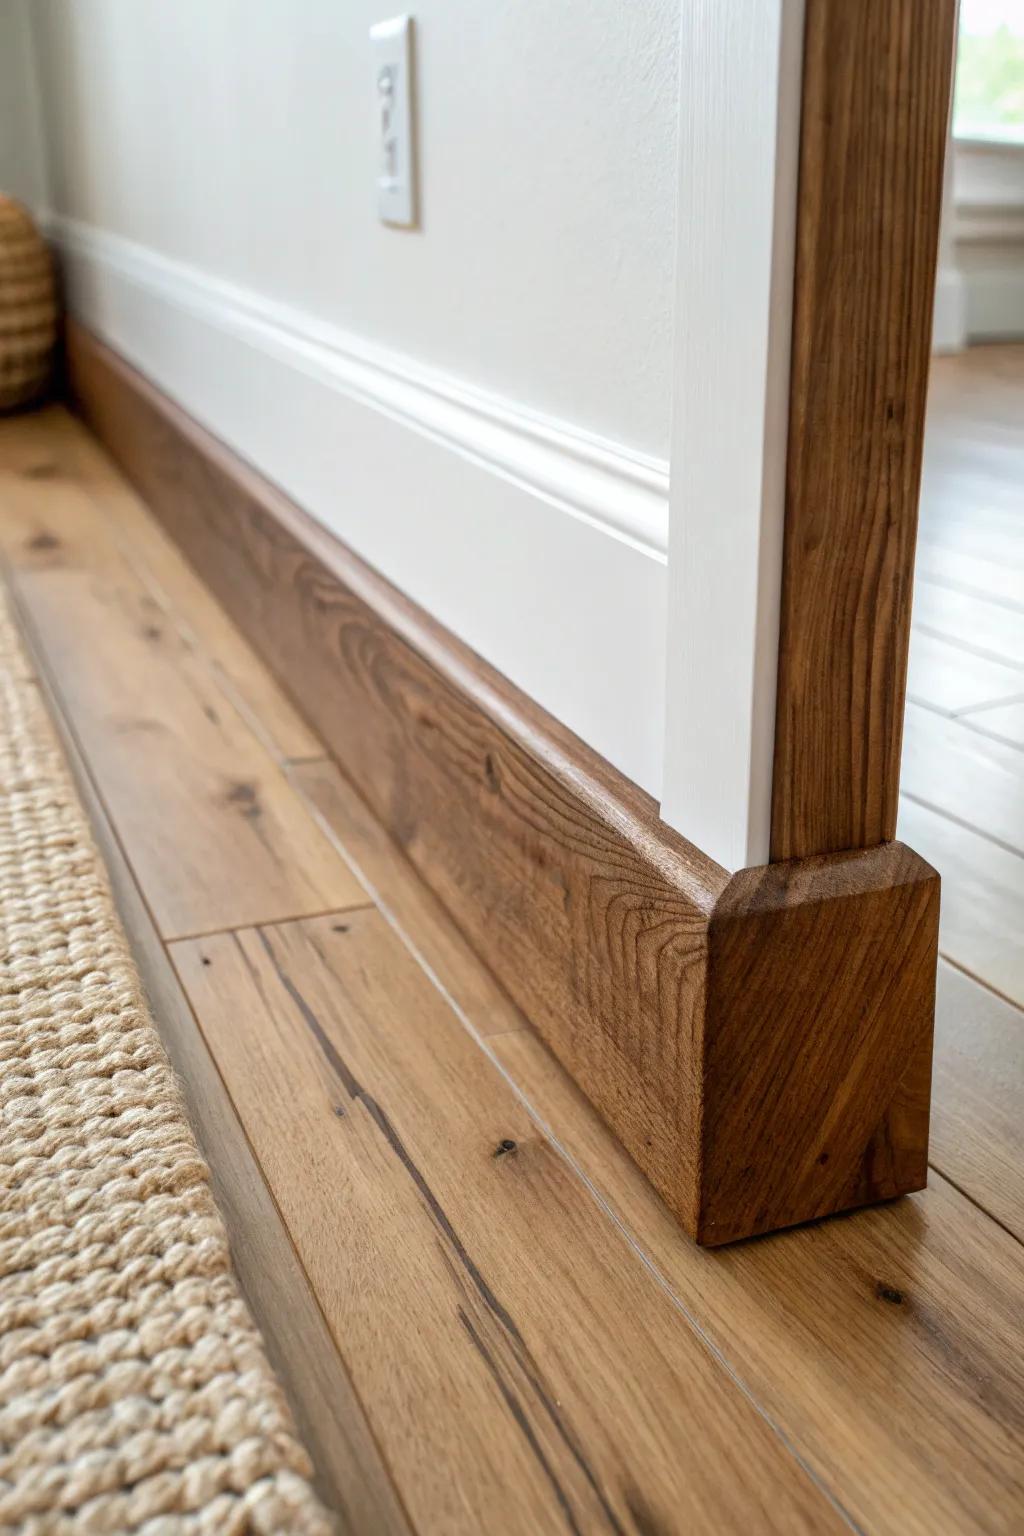
When I need fast, affordable rustic baseboards, I grab simple 1×4 pine and stain it to a warm brown so the grain does the decorating for me. I’ve installed it with easy butt joints in hallways, and it instantly reads “farmhouse” without fancy cuts.
Possibly handy products:
- Oil-Based Wood Stain: Choose a rich, medium-brown stain to highlight natural grain patterns and protect your pine boards effectively.
- Foam Brushes and Application Rags: Ensure a smooth, streak-free finish on your baseboards with these essential, disposable staining application tools.
- Brad Nailer Kit: Secure your 1×4 boards quickly and cleanly without splitting the wood using this essential installation tool.

Layered Flat Stock With a Cap
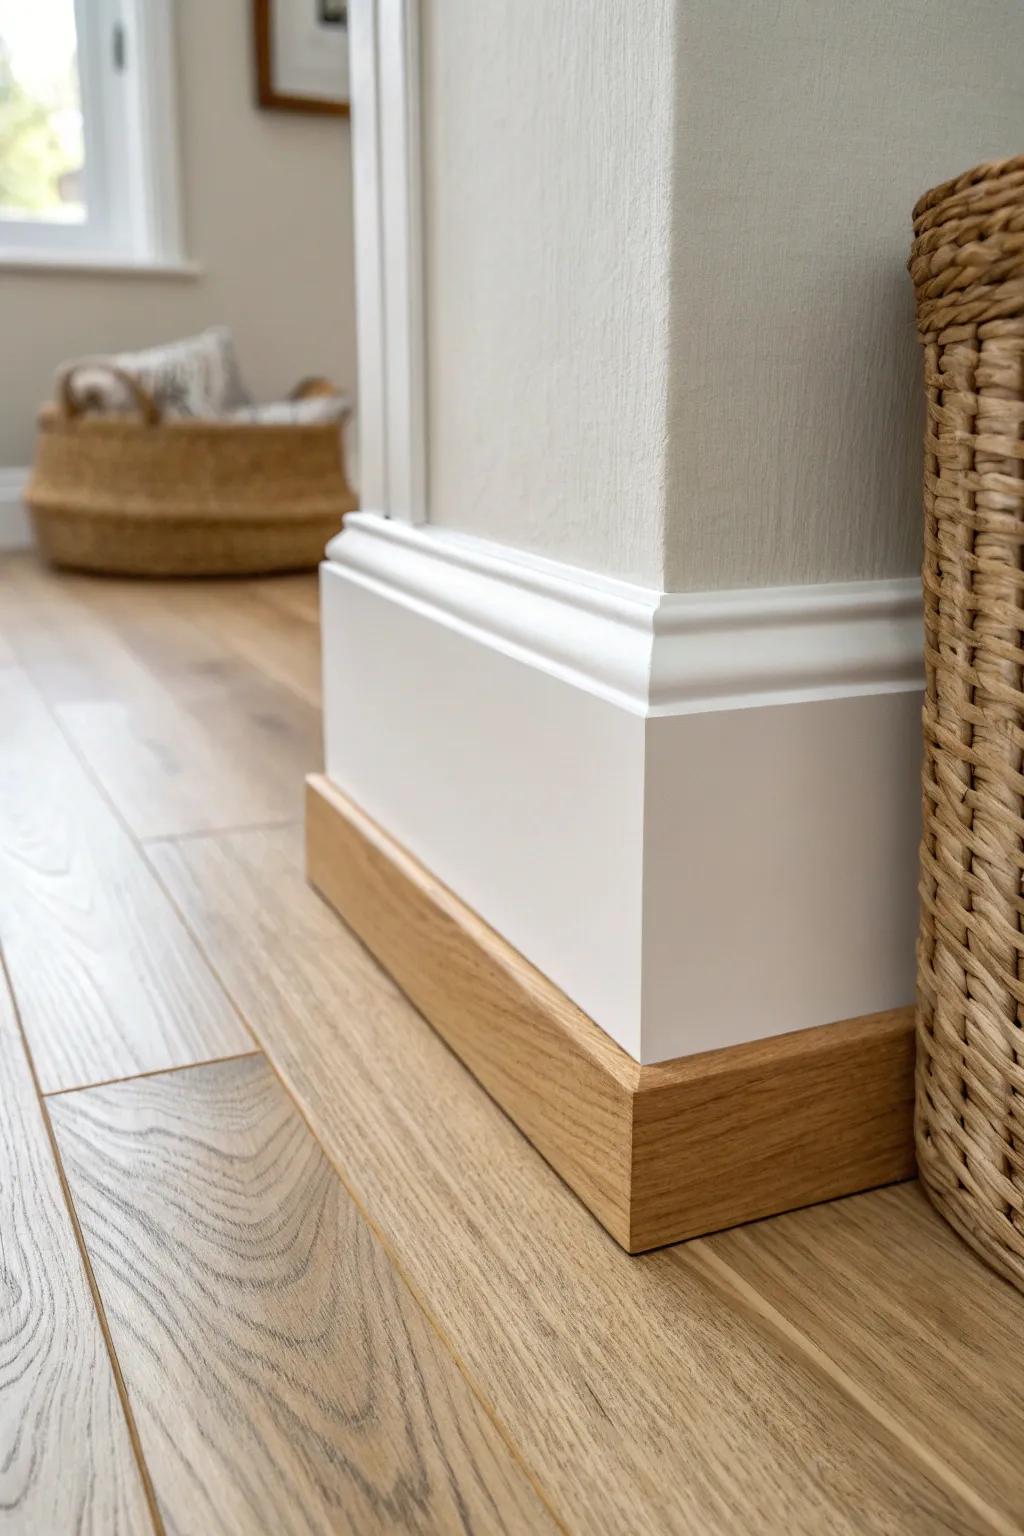
My favorite budget “built-up” trick is a wide base board plus a skinny top cap, like layered trim without the price tag. I’ve pieced this together from basic lumber scraps, and it looks surprisingly high-end once stained.
Try these:
- Unfinished Oak Flat Trim Board: Use these simple hardwood boards as the sturdy foundation layer for your layered rustic trim project.
- Wood Stain and Sealer: Apply a rich, warm finish to raw lumber to highlight the natural grain and match your flooring.
- Decorative Molding Cap: Add this smaller decorative profile on top of the flat stock to create an elegant, finished edge.

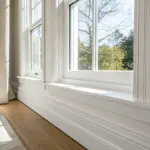
Reclaimed Barnwood Strips
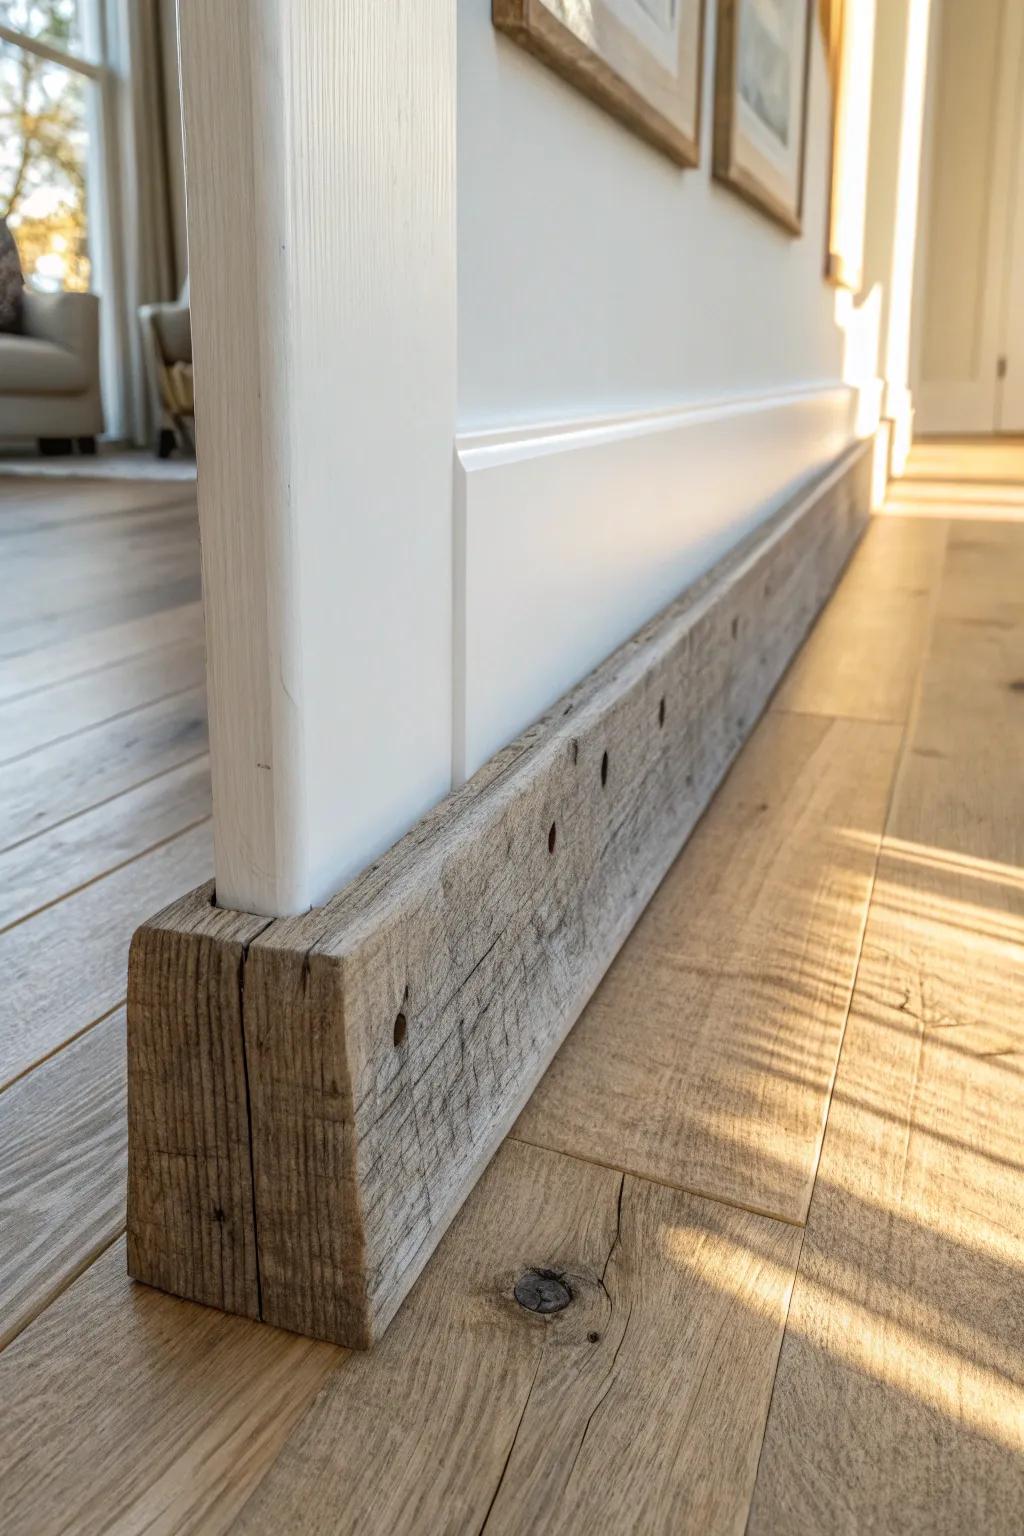
Nothing says rustic like reclaimed wood baseboards, and I love using old boards with nail holes and saw marks left visible. I’ve milled thin strips from salvage in my shop, and the patina does all the work for you.
A few choices to try:
- Real Reclaimed Wood Planks: Instantly add rustic character to your baseboards by applying these authentic wood planks directly to your walls.
- Matte Polyurethane Sealer: Protect your rustic wood trim without adding unwanted shine, keeping the natural, aged look intact.
- Heavy-Duty Construction Adhesive: Secure uneven reclaimed lumber firmly to your drywall without needing perfectly straight studs for every nail.
Pallet Wood Patchwork Baseboards
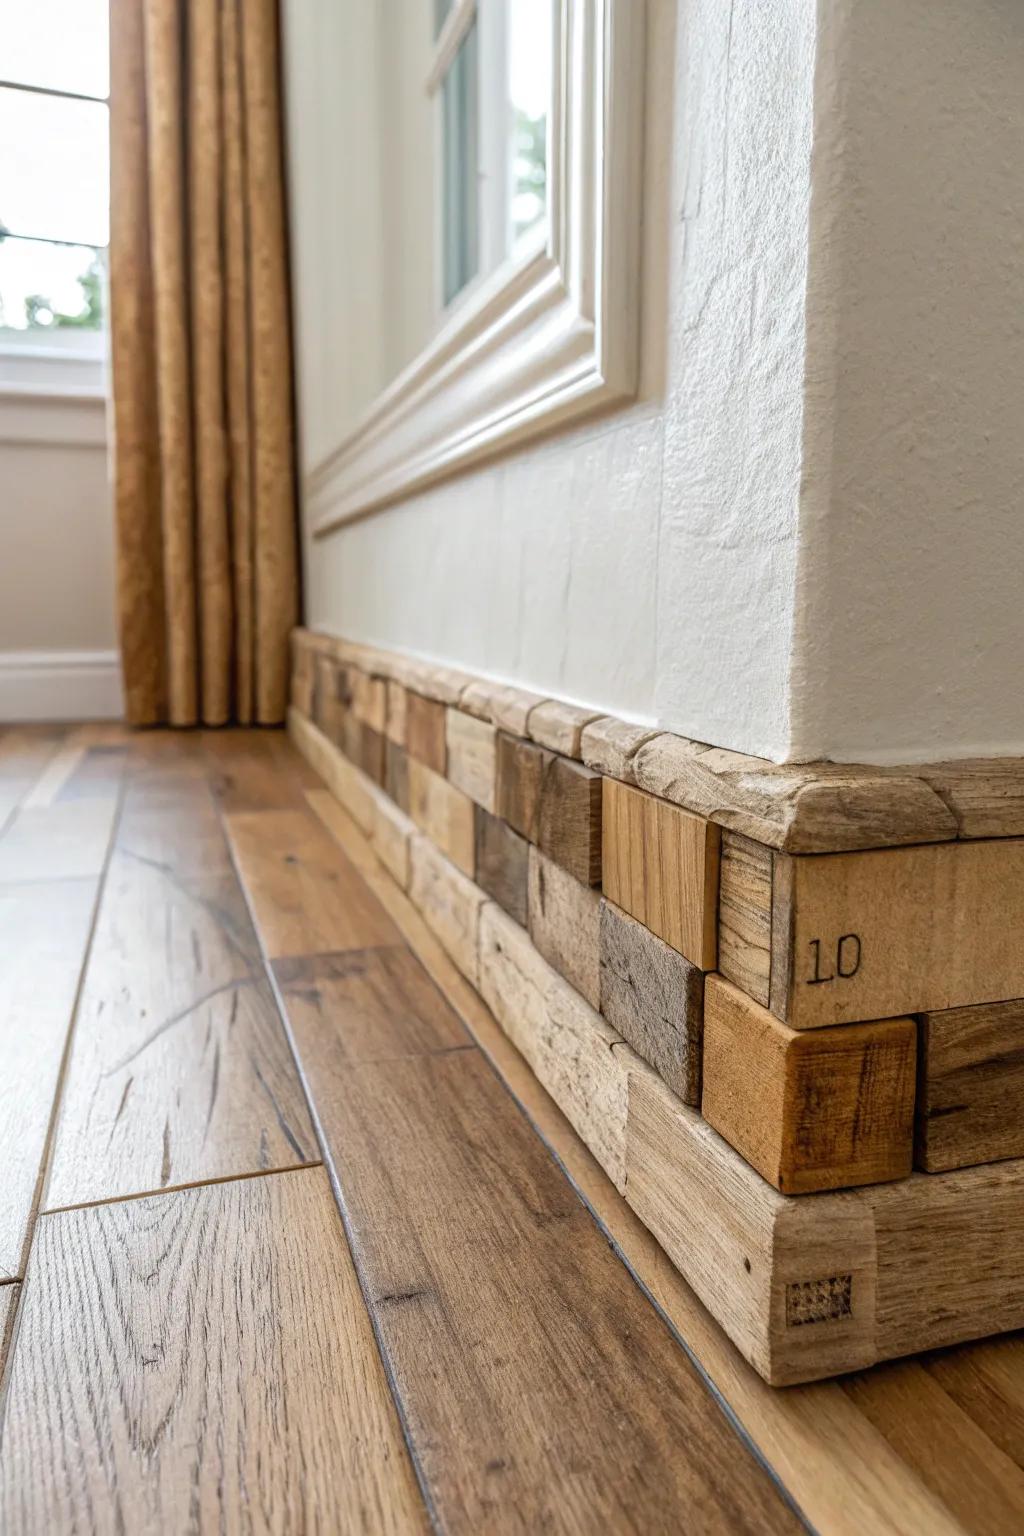
For a truly cheap rustic look, pallet boards can become a cool patchwork baseboard if you sand them smooth and seal them well. I’ve mixed lighter and darker pallet slats on one project, and the variation looked intentional (not “free wood”).
Consider these options:
- Orbital Sander or Sanding Block Kit: Smooth rough pallet edges quickly and prepare the wood surface for sealing with these essential sanding tools.
- Matte Polyurethane or Wood Sealer: Protect your rustic baseboards from moisture and wear while maintaining a natural, low-sheen finish.
- Construction Adhesive or Liquid Nails: Securely mount your uneven pallet wood blocks to the wall without needing visible nails or screws.
Plywood Strips With a Rough-Sawn Look
When lumber prices jump, I’ll slice plywood strips and texture the face with a wire brush to fake that rough-sawn feel. I’ve used this in a mudroom, and once it’s stained, most people assume it’s expensive milled boards.
You might like:
- Wire Brush Drill Attachment: Quickly distress your plywood strips to achieve that authentic rough-sawn texture without hours of manual scrubbing.
- Interior Wood Stain: Apply a rich color to your textured strips to mimic the look of expensive hardwood or aged lumber.
- Brad Nailer Kit: Secure your new baseboards cleanly and efficiently, ensuring a tight fit against the wall for a professional finish.

Door Casing Offcuts as Baseboards
I’ve used leftover trim offcuts from door casing runs to create matching rustic baseboards, especially in closets and small rooms. It’s one of my favorite “use what you already have” hacks that still looks cohesive.
You might give these a try:
- Construction Adhesive: Secure your trim pieces firmly to the wall without visible nails for a cleaner, professional-looking installation.
- Wood Stain or Varnish: Match your offcuts to existing flooring or add a protective finish to enhance the natural wood grain.
- Miter Saw or Hand Saw Box: Ensure your casing offcuts have precise, clean edges for tight corners and seamless joints along the wall.
Rope Trim Rustic Baseboards
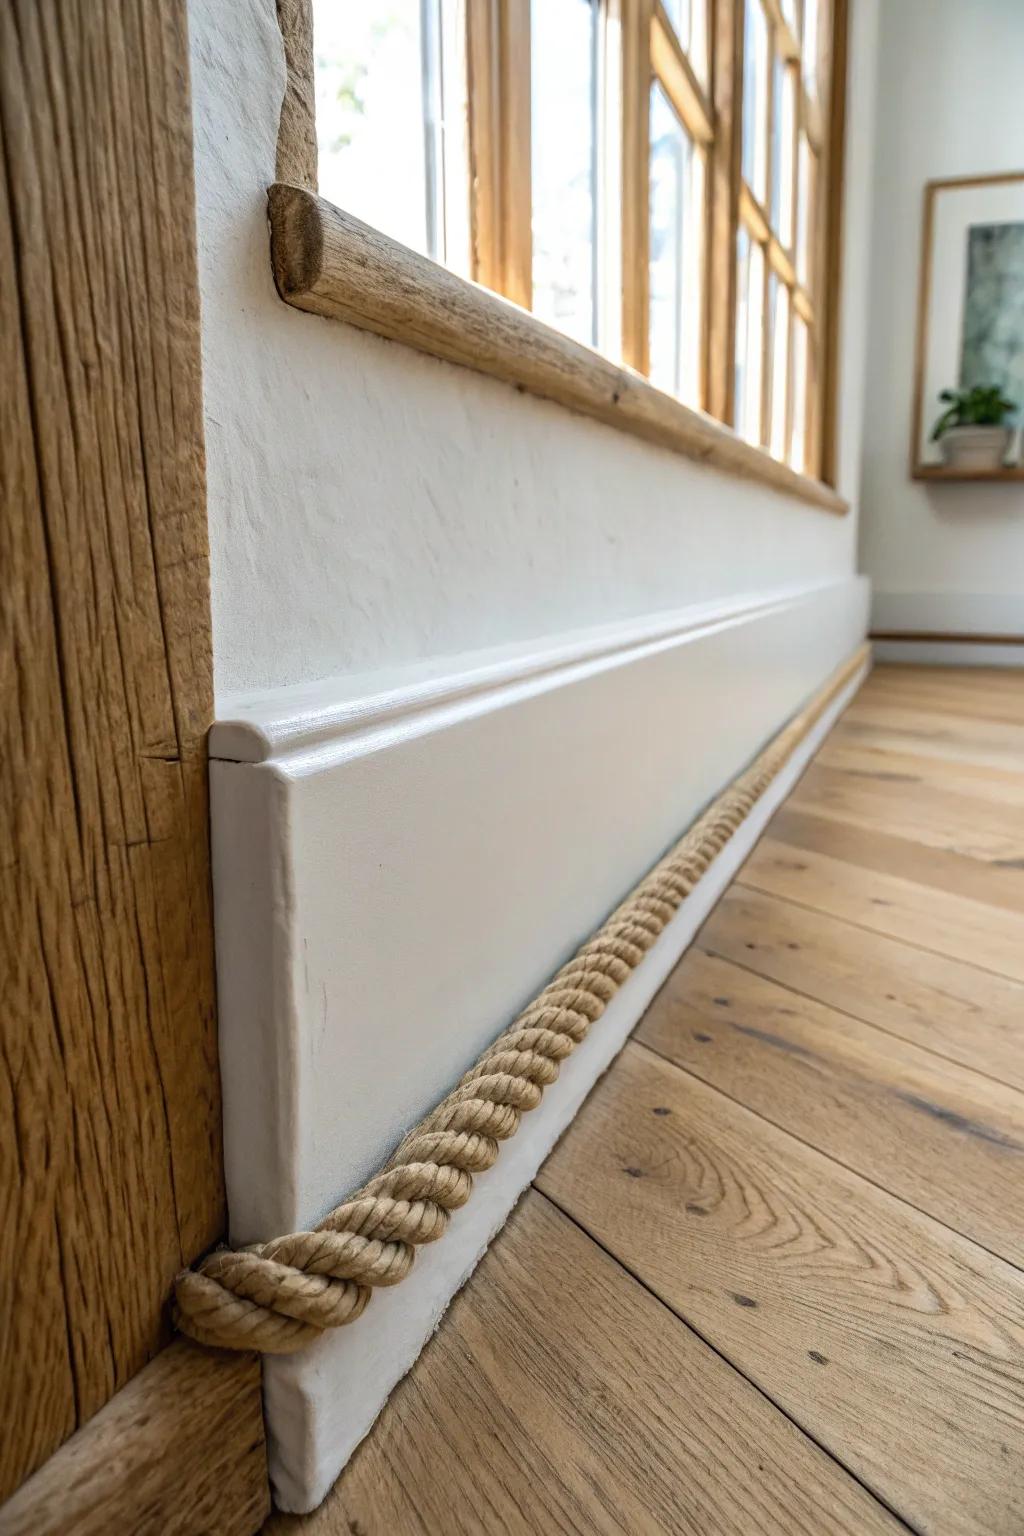
For a surprising twist, I’ve glued thick natural rope along the top edge of a plain board and sealed it, and it reads like vintage lodge trim. It’s cheap, it’s textured, and it makes basic baseboards feel handcrafted.
Some ideas to consider:
- Thick Natural Jute or Manila Rope: Add instant coastal charm to your baseboards with this durable, thick natural fiber rope for textured edging.
- Heavy-Duty Construction Adhesive: Secure your rope trim permanently to the baseboard with this high-strength adhesive designed for various materials.
- Hot Glue Gun with Industrial Sticks: Use this tool for quick tacking and immediate hold while positioning your rope along the trim.
Corrugated Metal With a Wood Cap
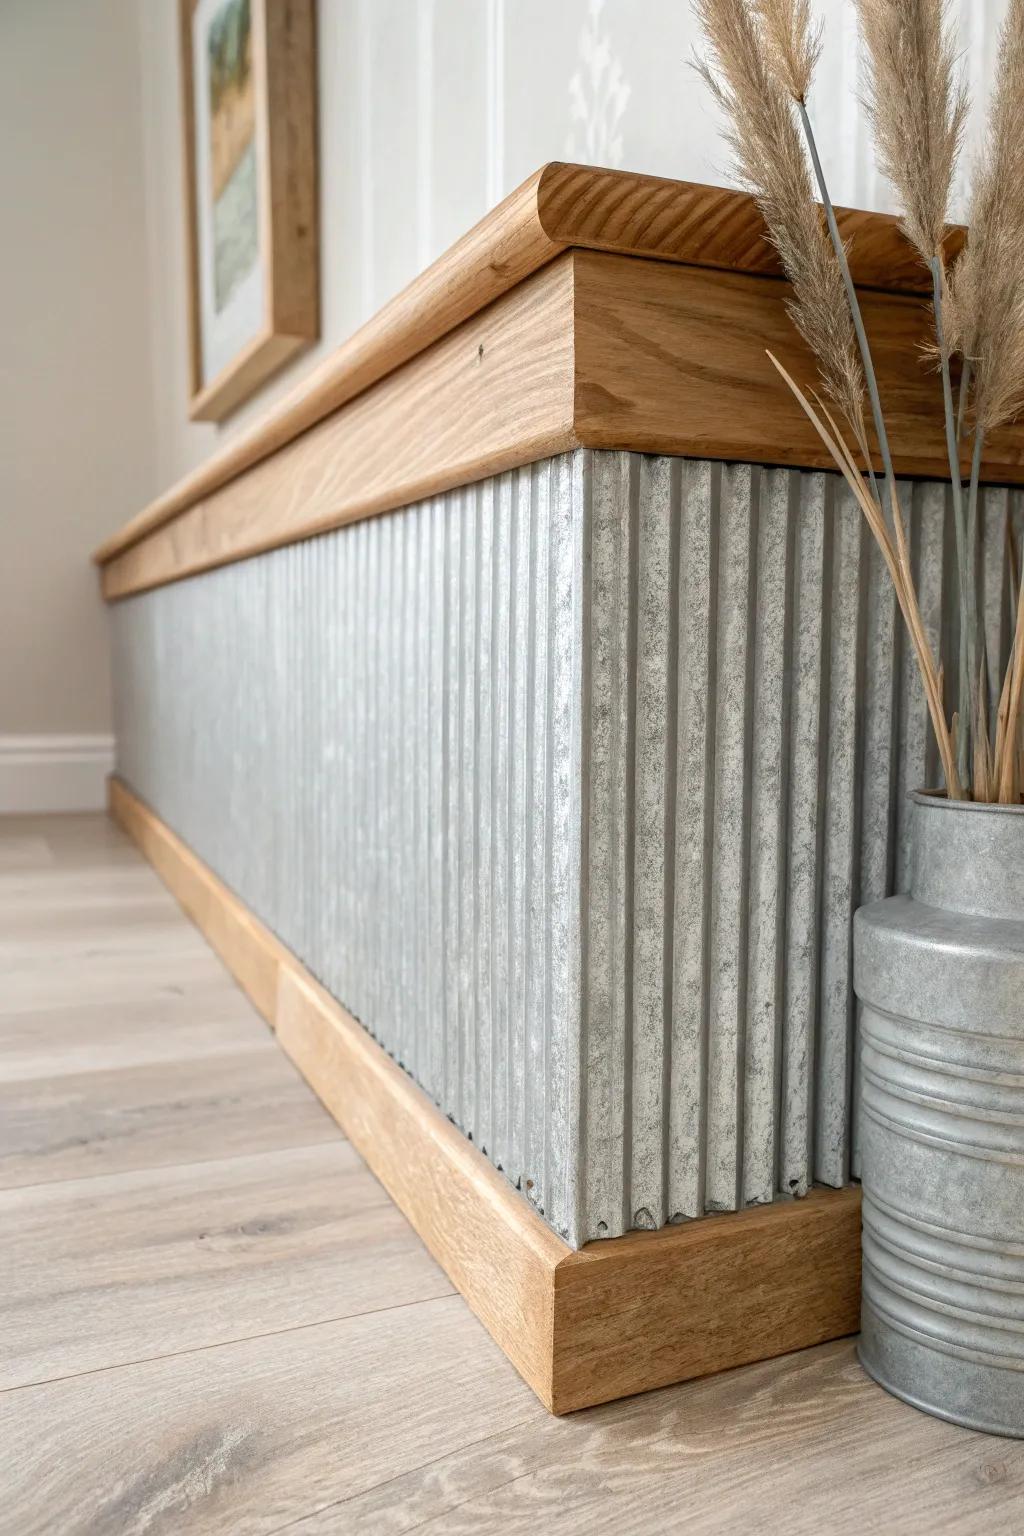
I once made rustic baseboards from corrugated metal panels with a simple wood cap, and it looked like a cool workshop-meets-farmhouse detail. It’s especially great where boots and vacuums are always bumping the wall.
Possibly helpful picks:
- Galvanized Corrugated Metal Sheets: Use these durable metal panels to protect your lower walls and create that distinct industrial farmhouse aesthetic.
- Tin Snips / Aviation Snips: Easily cut your metal panels to the perfect baseboard height with a pair of reliable, sharp snips.
- Unfinished Hardwood Trim Board: Finish the look by installing a simple wood cap along the top edge for a clean transition.
Cedar Shingle Overlap Baseboards
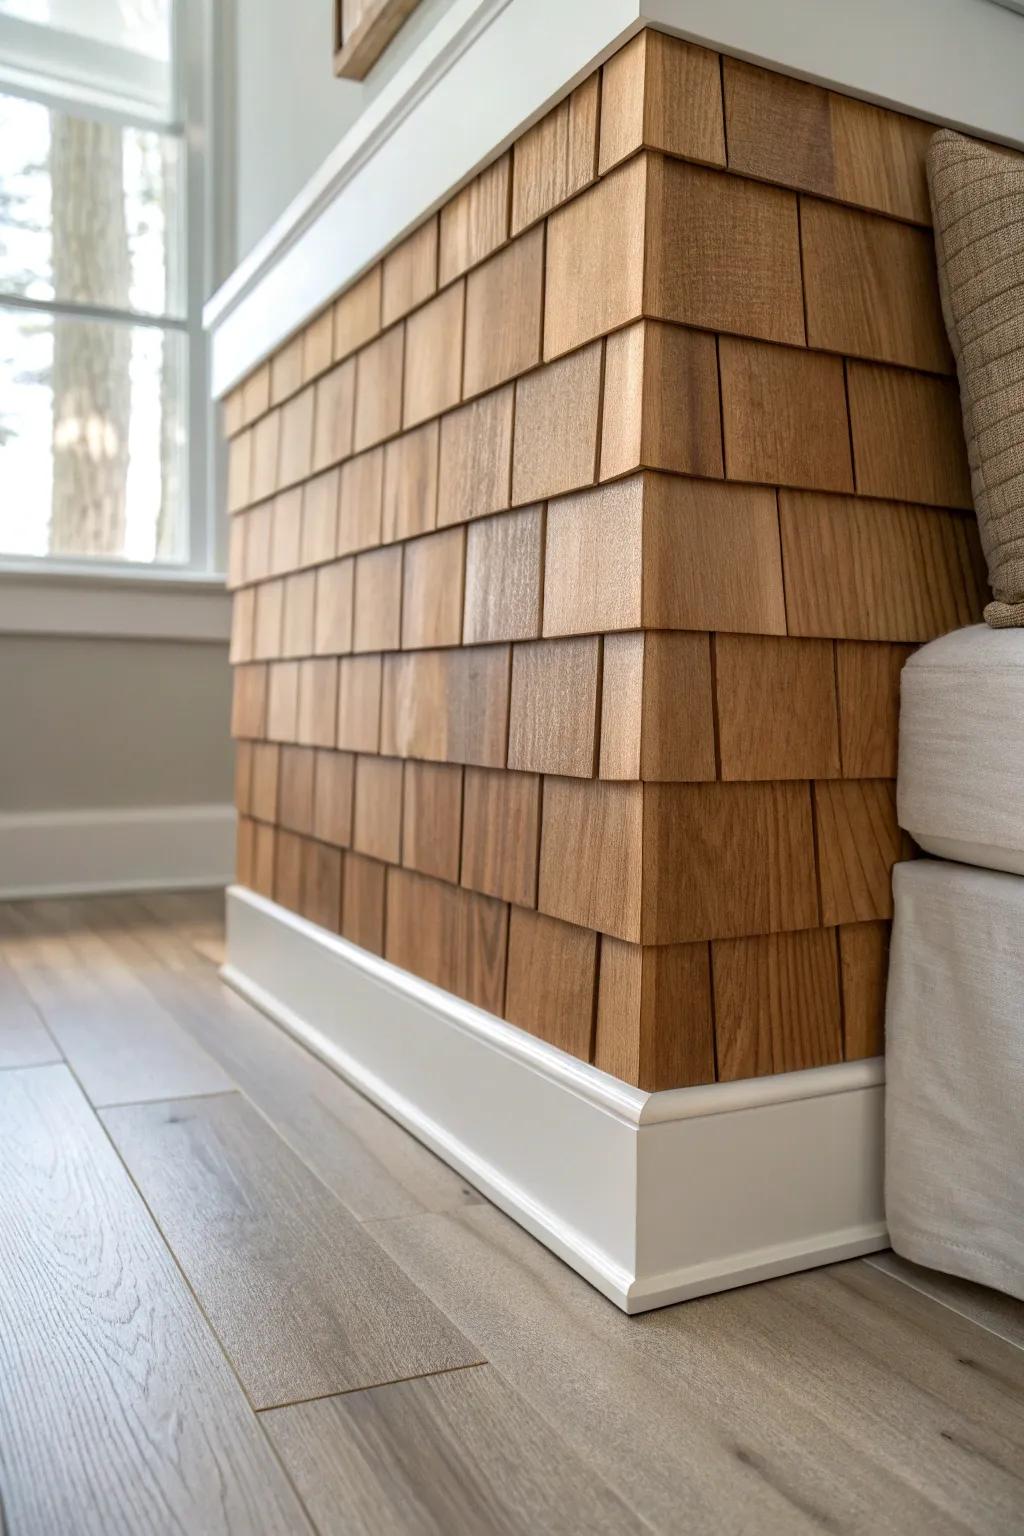
Overlapping cedar shingles as baseboard cladding is such a fun, rustic surprise, and it’s easy to patch if a piece gets damaged. I tested this in a little reading nook, and the shadow lines added instant character.
These products might help:
- Red Western Cedar Shingles: Use these authentic wood shingles to create the primary rustic layered texture for your unique baseboard project.
- Construction Adhesive: Secure your shingles firmly to the drywall or sub-layer with a strong, quick-grabbing construction adhesive.
- White Baseboard Molding: Finish the bottom edge cleanly with a crisp white trim piece to contrast beautifully against the wood.
Charred Wood “Burnt” Baseboards
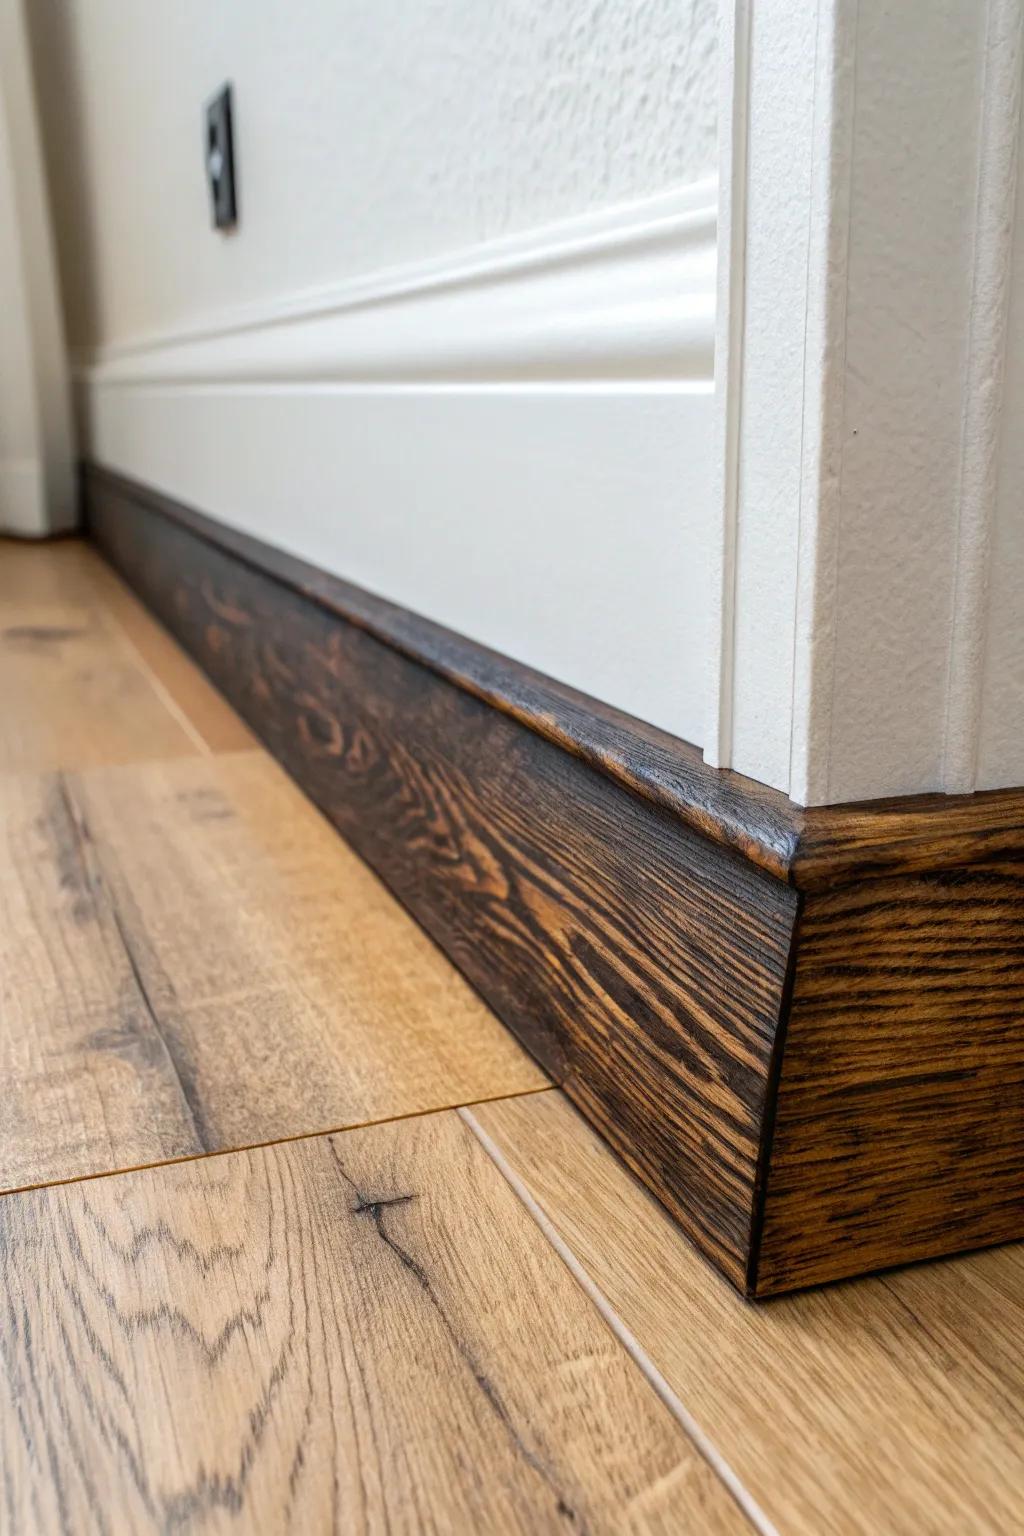
For drama on a budget, I’ve lightly torched cheap boards for a charred wood effect and then brushed and sealed them. The result is rustic and bold, and it hides dings like a champ.
Maybe worth checking out:
- Handheld Propane Torch Head: Use a reliable torch head to carefully scorch the wood surface, bringing out the unique grain patterns.
- Wire Brush for Wood Distressing: Remove the soft charred layer with a stiff wire brush to reveal the textured, dramatic wood grain beneath.
- Clear Polyurethane Wood Sealer: Protect your newly charred finish and prevent soot transfer by applying a durable, clear matte or satin sealant.


