
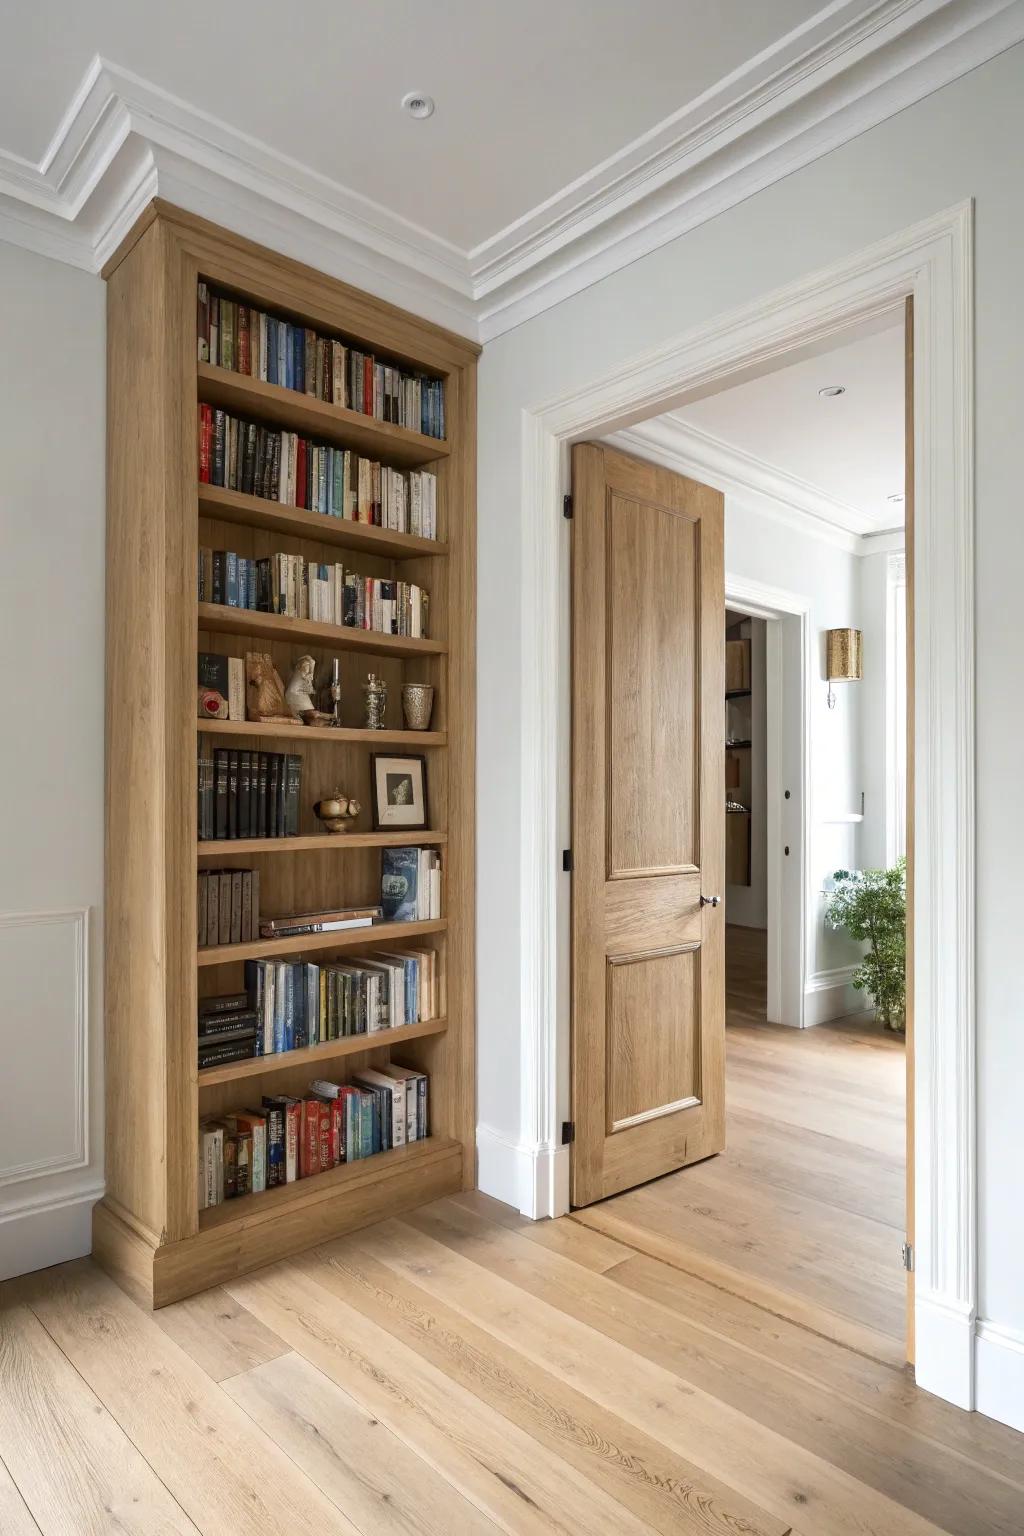
Library molding is the secret sauce that makes basic shelves look like they were built with the house.
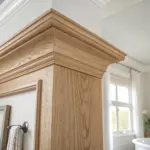
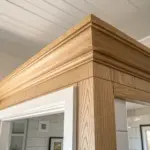
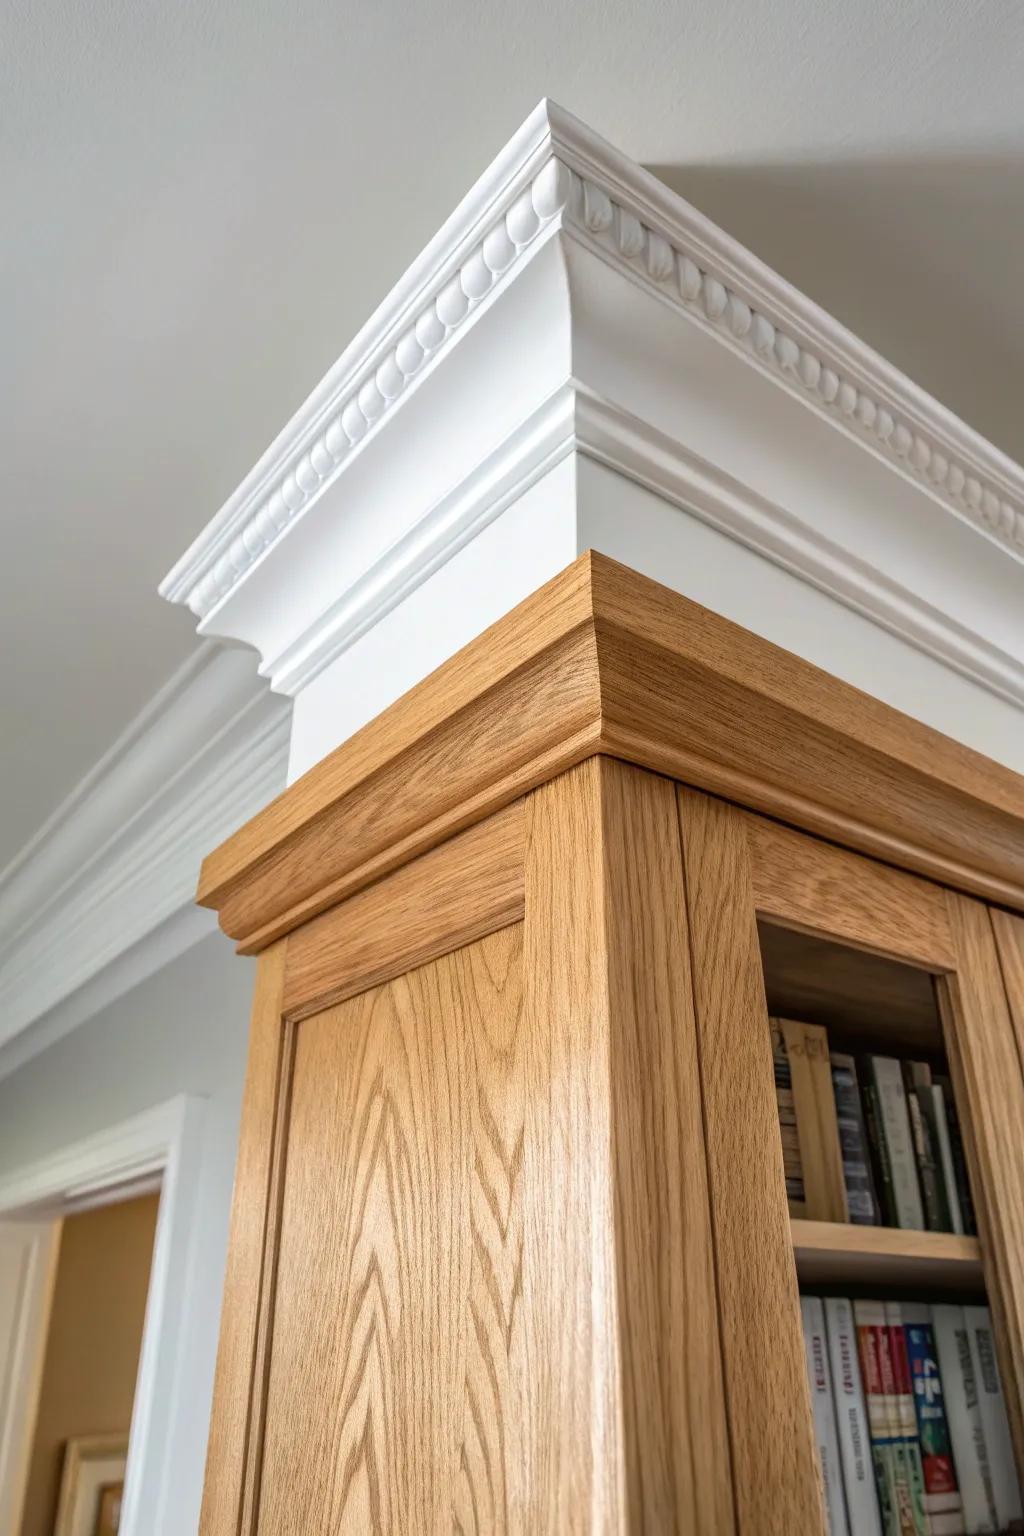
Crown Molding to the Ceiling
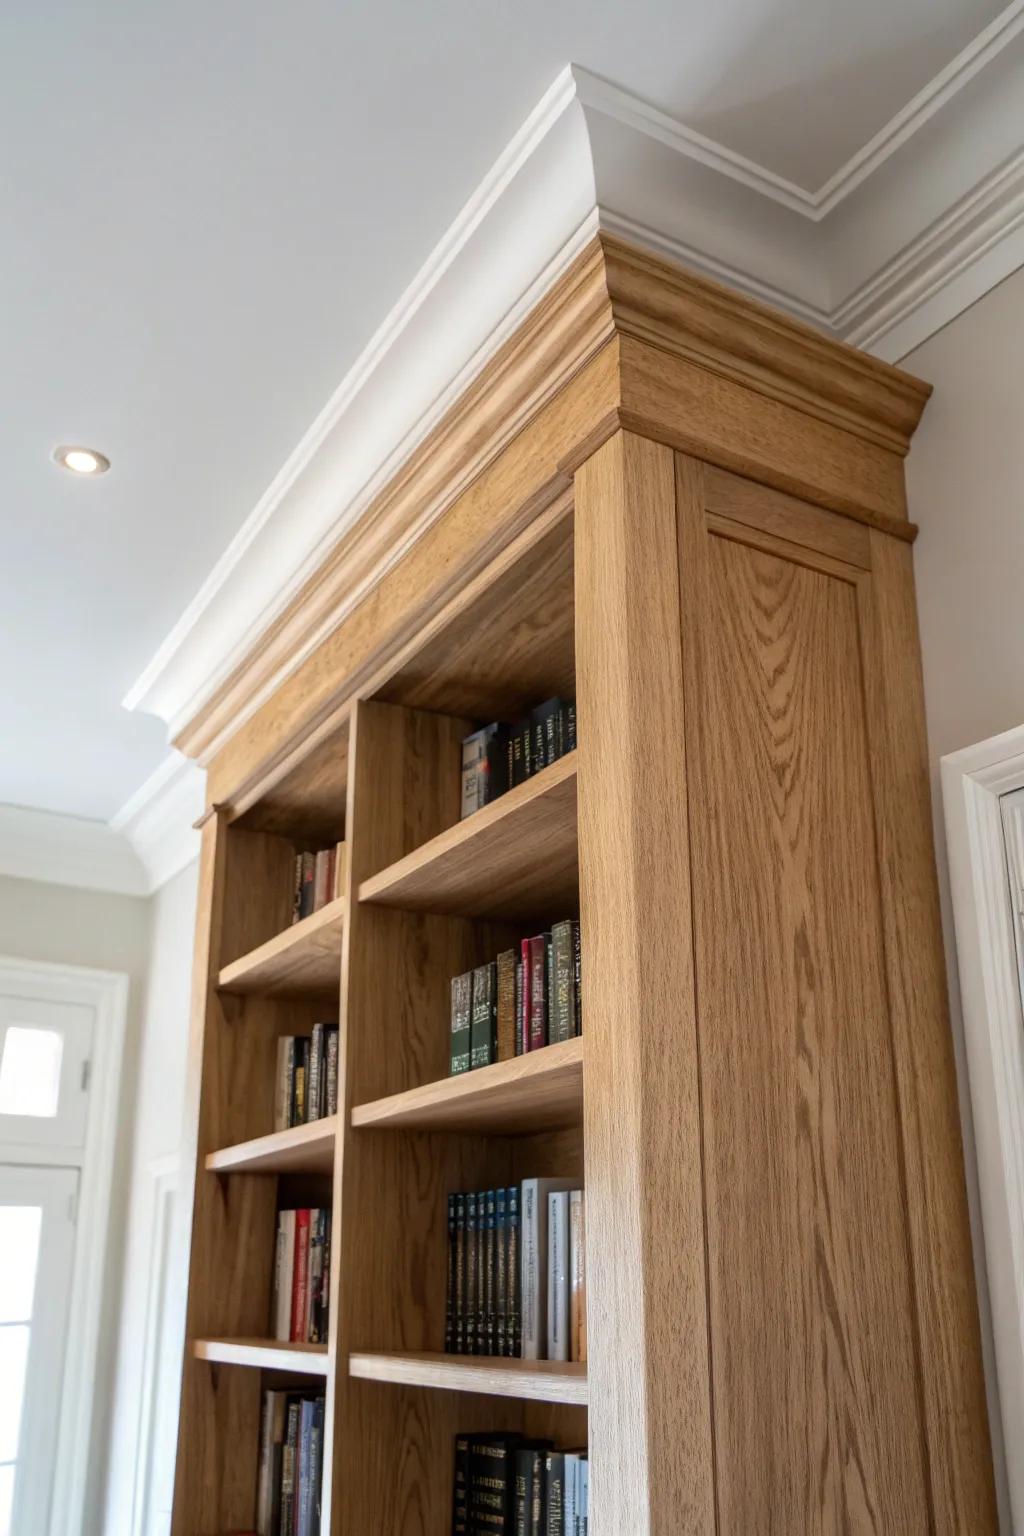
Whenever I add crown molding across the top of bookcases and run it tight to the ceiling, the whole wall suddenly reads as a true built-in. If your ceiling is a little wavy like mine usually is, I cope the joints and let a thin caulk line do the final “magic trick.”
Products that could assist:
- Coping Saw: Create tight, professional joints in your decorative molding corners by using a dedicated coping saw for precise cuts.
- Paintable Caulk: Seamlessly fill gaps along wavy ceilings and corner joints to achieve a flawless, built-in library appearance.
- Crown Molding Jig: Simplify complicated cutting angles and ensure your molding corners fit perfectly with this helpful cutting guide tool.
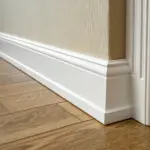
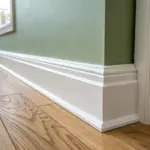
Baseboard Wrap for a Built-In Look
I love extending the room’s baseboard molding right across the front of the library so it feels planted, not like furniture shoved against a wall. You can even return the baseboard into the sides—I’ve done that in tight rooms and it looks ridiculously intentional.
Give these a look:
- Primed Wood Baseboard Molding: Choose a tall, paintable molding profile to wrap around your shelving unit for that seamless built-in appearance.
- Miter Saw for Angled Cuts: Ensure clean, professional corners when returning the baseboard into the sides with a reliable compound miter saw.
- Brad Nailer Kit: Secure your new baseboards quickly and neatly without damaging the wood using an efficient pneumatic brad nailer.


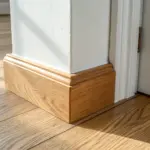
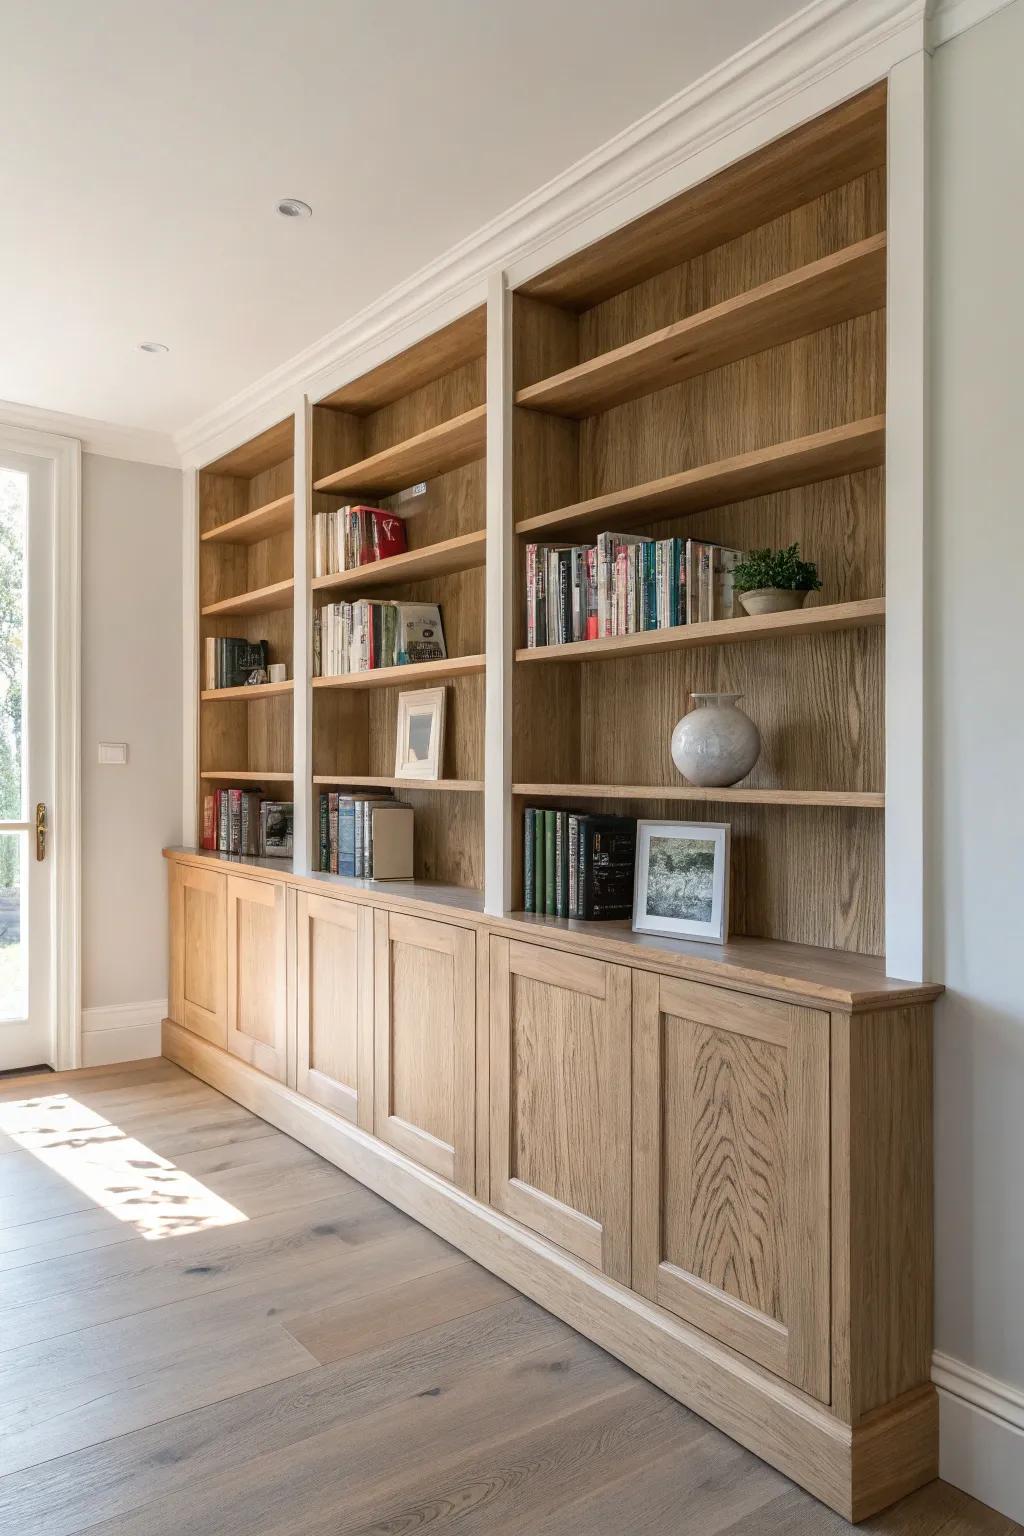
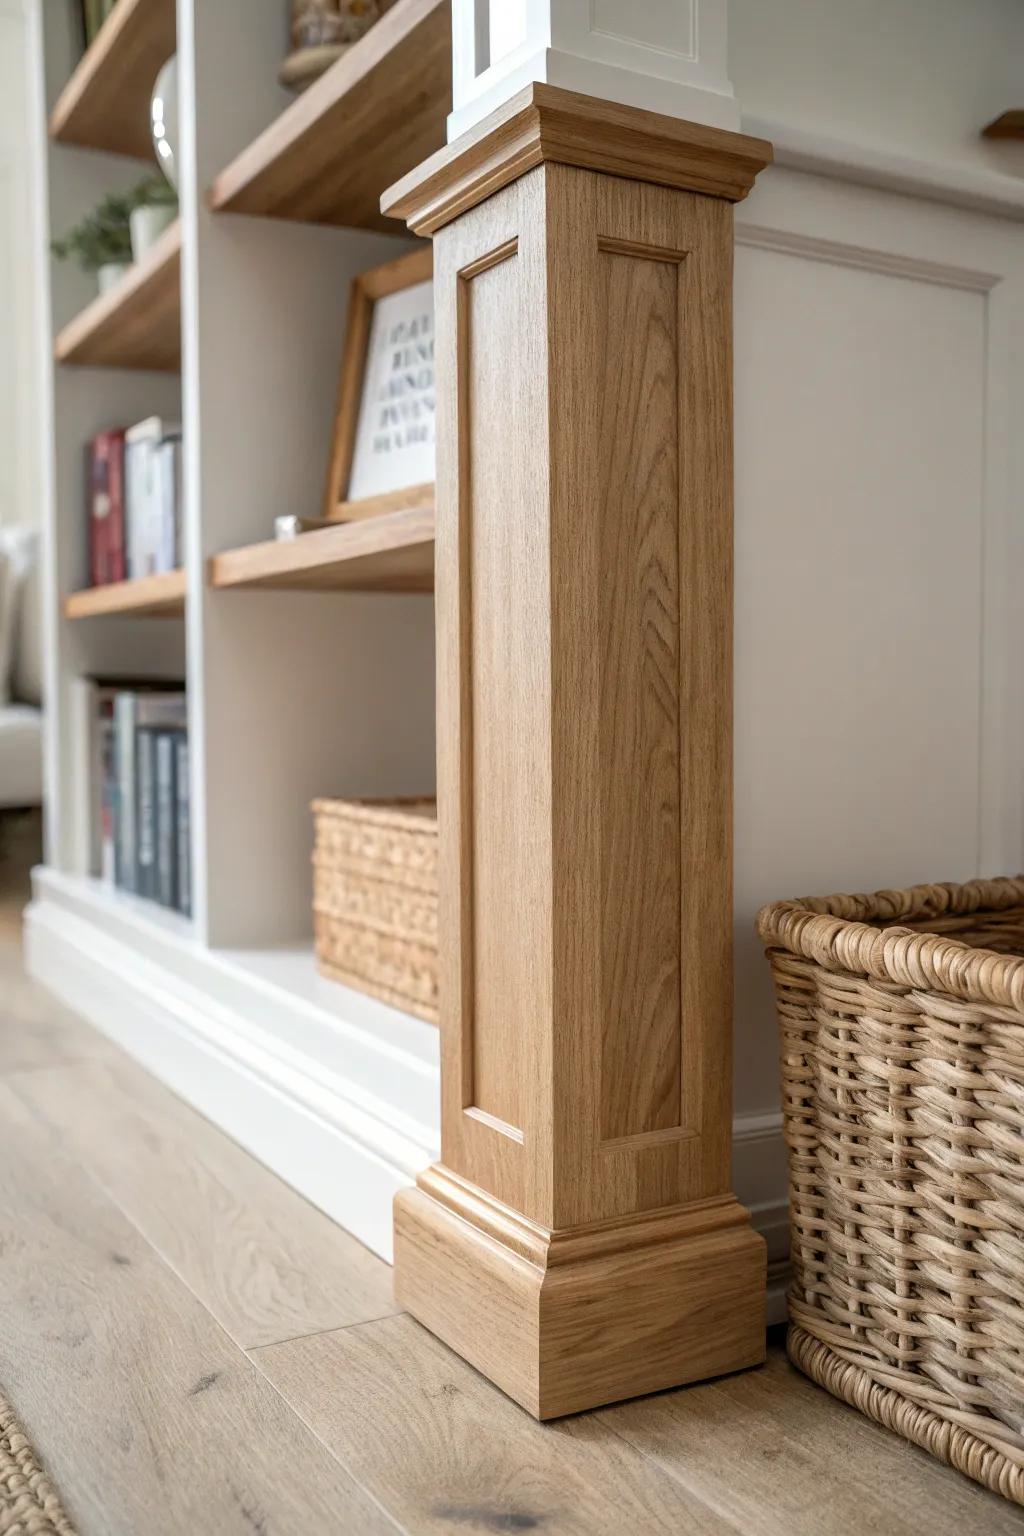
Plinth Blocks at the “Feet”

Adding chunky plinth blocks at the bottom corners gives your library that old-house architecture vibe without much work. I’ve built them from scrap hardwood offcuts, and they’re perfect for hiding little flooring gaps too.
Might be a good match:
- Oak Wood Board Lumber: Create custom plinth blocks that perfectly match your flooring with raw lumber ready for your specific measurements.
- Wood Stain and Finish: Match your new plinth blocks to your existing library molding or flooring with a high-quality wood stain.
- Decorative Wood Trim Molding: Add detailed profiling to the top of your plinth blocks to replicate the elegant transition seen here.


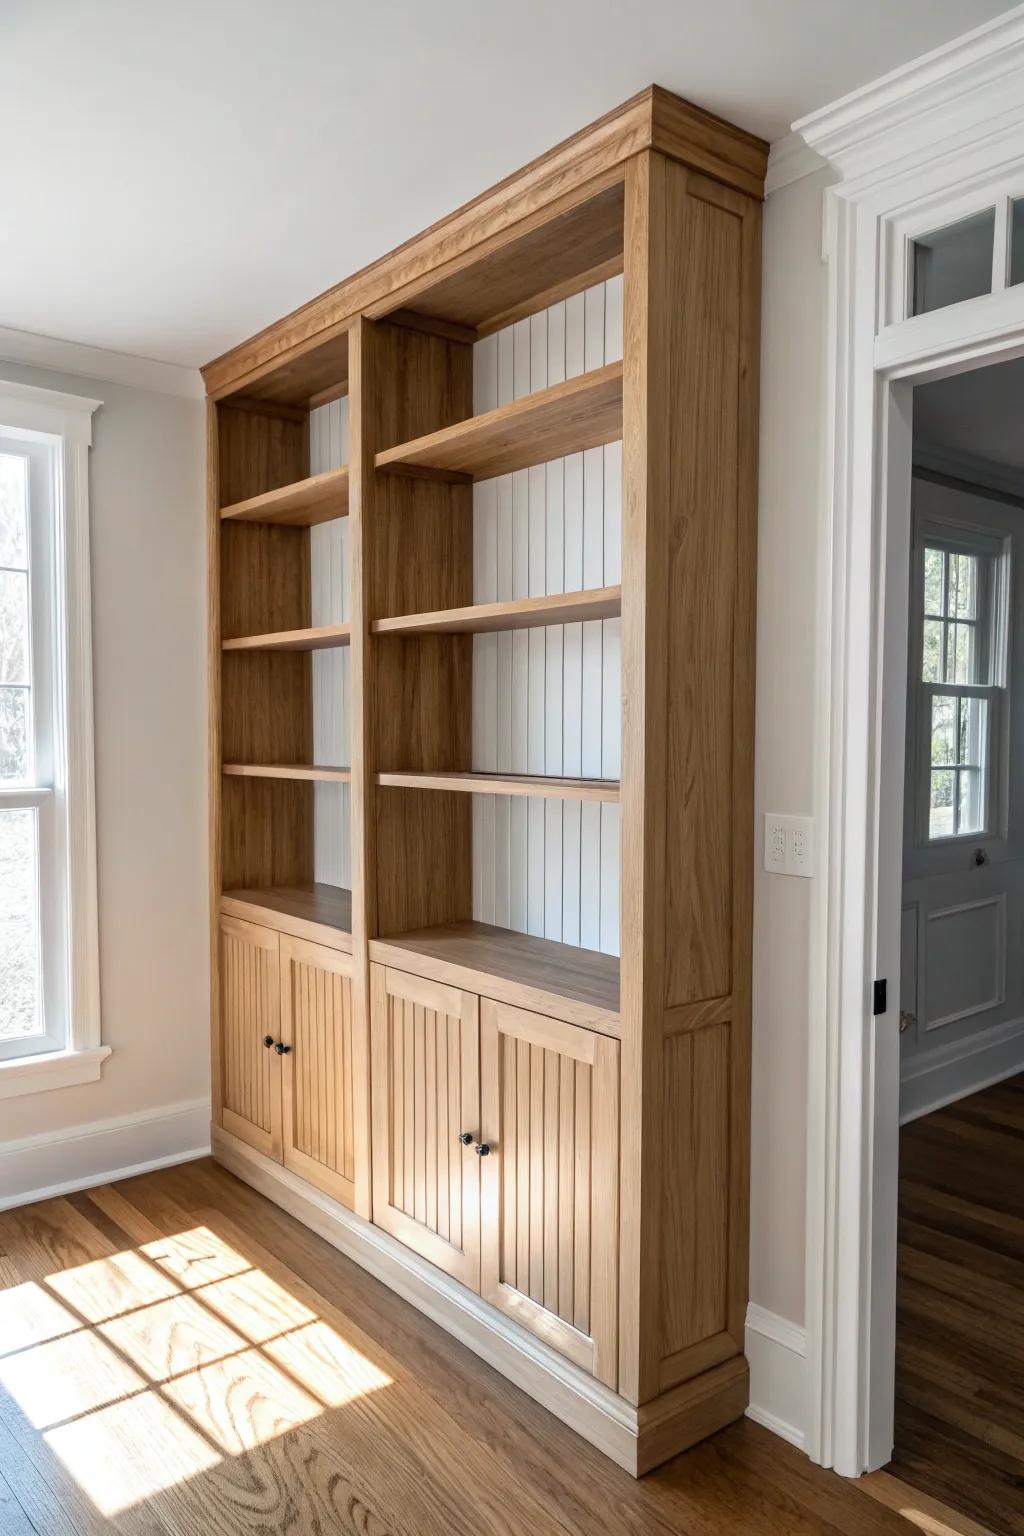
Thick Face Frame Around Each Bay

A simple face frame (stiles and rails) instantly upgrades sheet-goods shelves, and I use it constantly when I want a clean, tailored look. If you keep the frame slightly proud of the shelves, it creates nice shadow lines that make the whole library feel deeper.
Possibly helpful picks:
- Solid Oak Lumber Boards: Use these durable hardwood boards to create stiles and rails that perfectly match your bookshelf’s finish.
- Pocket Hole Jig System: This tool helps you join your face frames securely and invisibly for a professional, seamless result.
- Brad Nailer Kit: Attach your new face frames quickly and cleanly without damaging the wood surface using this essential tool.
Pilasters to Divide Sections
When a long library wall starts looking flat, I add pilasters between bookcase sections to break it up like real millwork. I’ve done this with plain boards and a cap/base trim, and it makes even budget shelving look custom.
Explore these options:
- Wood Pilaster Moldings and Columns: Add architectural interest to flat shelves by adhering these decorative wood columns between your bookcase sections.
- Decorative Baseboard Trim Molding: Create a grounded, custom look by wrapping the bottom of your pilasters with sturdy base molding.
- Cabinet Fluted Filler Strips: Use these vertical filler strips to fill gaps and mimic the look of classic column detailing easily.
Panel Molding on the Shelf Backs
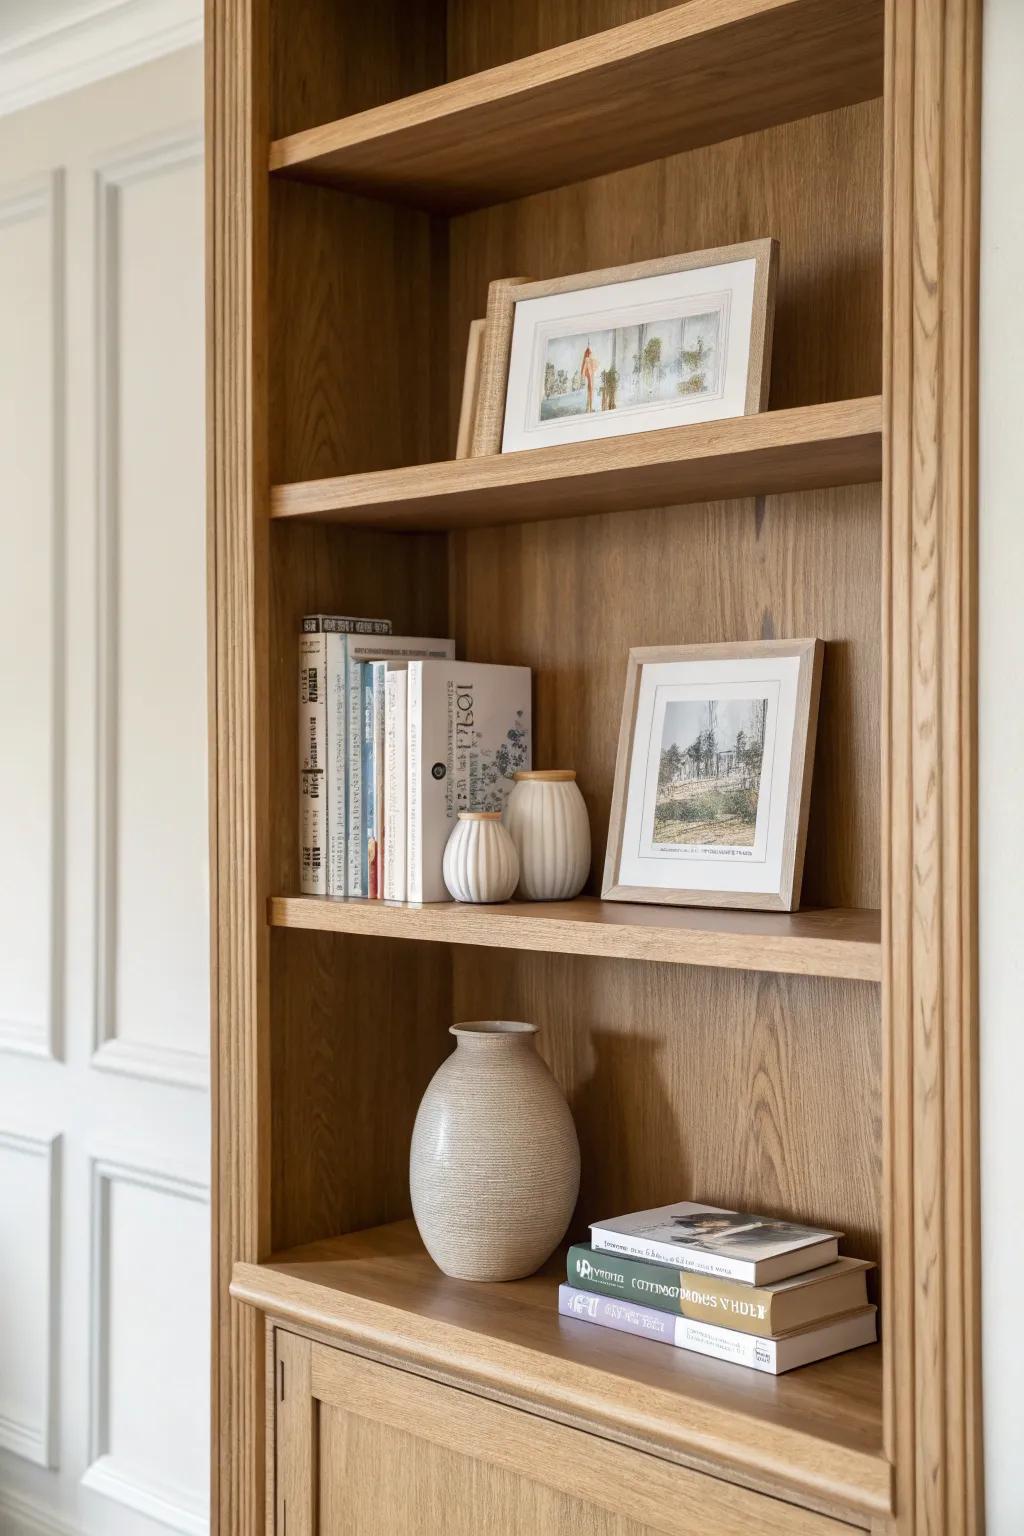
Framing the back of each section with picture frame molding makes your books look like they’re displayed, not stored. I first tried this in a small reading nook, and it instantly made the shelves feel more like a finished room feature.
Consider these options:
- Self-Adhesive Wall Trim Molding: Instantly create elegant frames on your shelf backs with this easy-to-cut, peel-and-stick trim option for any skill level.
- Wood Glue for Joinery: Ensure your wooden molding pieces stay permanently attached to the shelving with a reliable, strong-bond wood adhesive.
- Miter Shears for Angled Cuts: Cut precise 45-degree angles for your picture frame molding corners quickly without needing a large, expensive power saw.


Beadboard Insets Behind the Shelves
A strip of beadboard paneling behind the shelves adds cozy cottage character and hides less-than-perfect walls (ask me how I know). I like to trim the beadboard edges with a skinny stop molding so it looks intentionally “built in.”
May just do the trick:
- Beadboard Paneling Sheets: Add instant texture to your bookshelf backing with easy-to-install panels that create a classic, custom built-in look.
- Paintable Wood Molding Trim: Finish the edges of your beadboard cleanly with thin molding strips to hide gaps and elevate the design.
- Construction Adhesive: Secure your new paneling firmly in place without visible nails by using a strong, reliable construction adhesive.
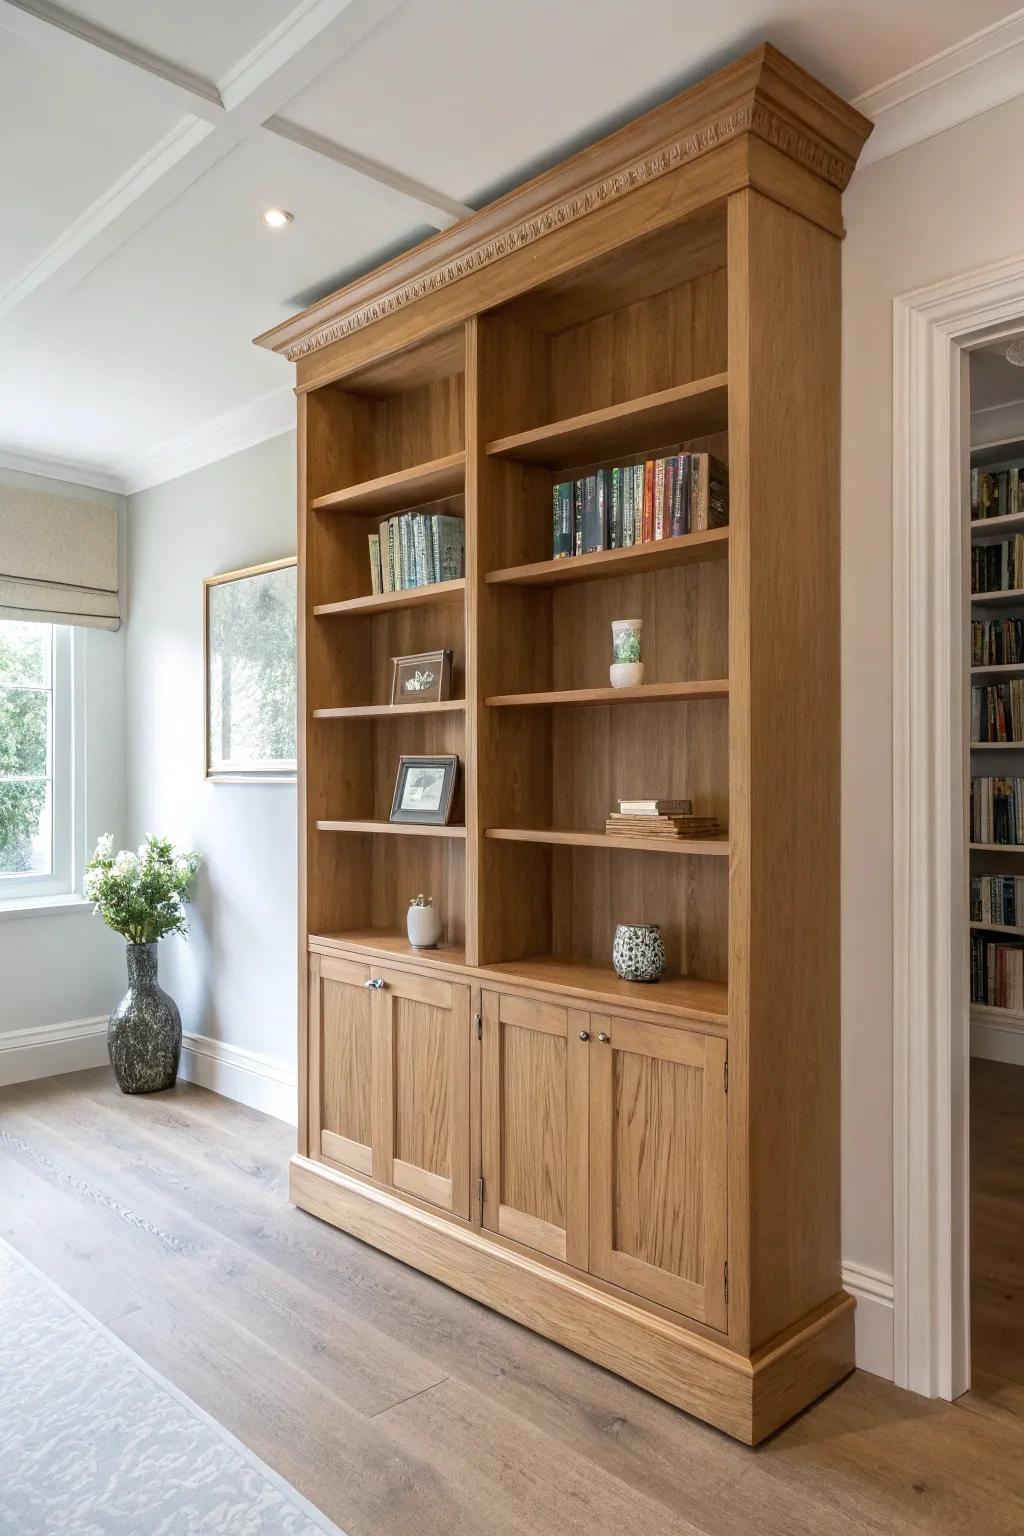
Layered Crown Stack for Drama
If you want the “wow” without changing the layout, stack crown molding with an extra bed molding or small cove underneath. I’ve done a two-piece build-up in one afternoon, and it made the whole library wall feel taller and richer.
Possibly handy products:
- Primed Polyurethane Crown Molding: Instantly elevate your library’s style with lightweight, easy-to-install molding that mimics the look of traditional plaster.
- Decorative Corner Blocks: Simplify your molding installation and avoid tricky miter cuts while adding an elegant architectural detail to corners.
- Brad Nailer Kit: Secure your layered molding stack professionally and cleanly, ensuring a tight fit without damaging the delicate trim.
Library Ladder Rail and Ledge Trim
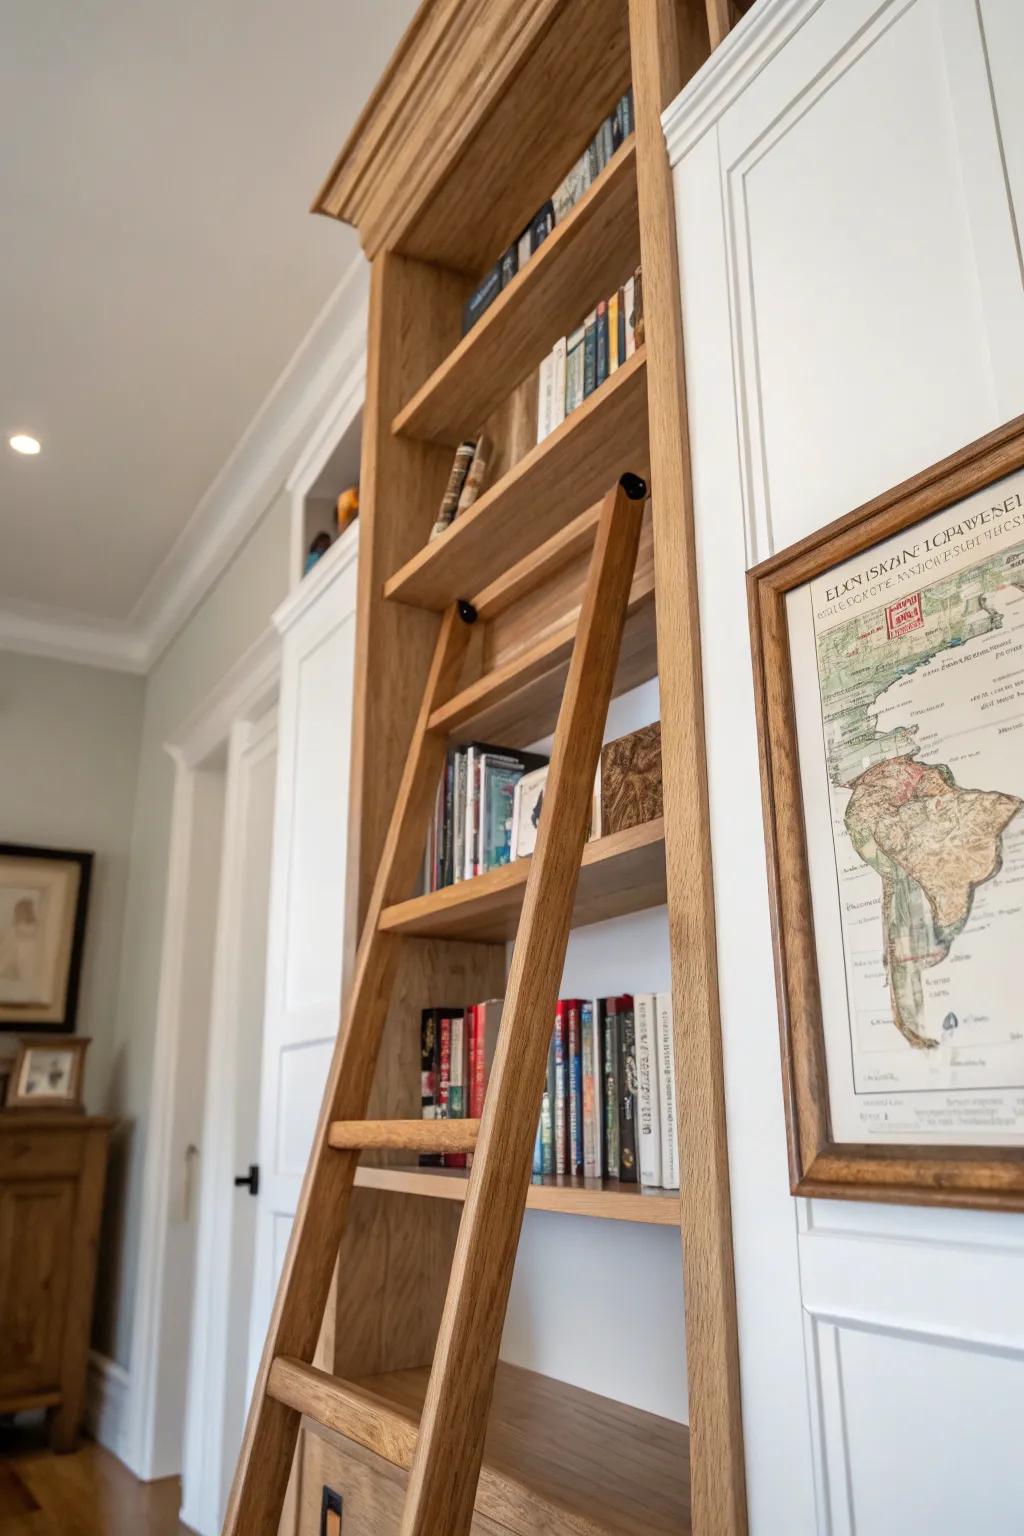
Even if you don’t have a rolling ladder, adding a rail molding near the top gives that classic library cue and a nice horizontal break. I like to cap it with a small ledge so it doubles as a picture shelf for framed art or maps.
Try these:
- Decorative Chair Rail Molding: Create the visual foundation of your library rail by installing a sturdy, classic wooden chair rail.
- Wooden Picture Ledge Shelf: Instantly add a display surface for art and maps by mounting a slim, floating wooden ledge.
- Library Ladder Hardware Kit: Add authentic metallic detail to your trim with a decorative rail kit, even just for aesthetics.
Lighting Blocks Built Into the Molding

I mount sconces or small fixtures on molding backer blocks so the lights look planned, not like an afterthought drilled into a face frame. It’s a tiny detail, but it saves you from weird gaps and makes the wiring feel cleaner.
Maybe worth checking out:
- Brass Wall Sconces with Glass Shade: Add warmth to your bookcases with these elegant fixtures that provide soft, directed library lighting.
- Decorative Wooden Rosettes & Plinth Blocks: Use these wood accents as the perfect foundation for mounting your light fixtures seamlessly.
- Vintage Style LED Edison Bulbs: Complete the classic look with bulbs that offer the charm of filaments without the heat.
Coffered Ceiling Trim That “Lands” on the Shelves
If your library has ceiling interest, run coffer trim so the grid visually lines up with the bookcase crown—I’ve done this in a den and it felt insanely cohesive. Even a simple beam-and-crosspiece pattern can make the shelving look like it belongs to the architecture.
Useful items to consider:
- Faux Wood Ceiling Beams: Instantly add architectural depth to your library ceiling with lightweight beams that mimic the look of solid timber.
- Crown Molding Profiles: Create a seamless transition between your bookcase and ceiling using elegant molding strips that bridge the gap effectively.
- Prefabricated Coffered Ceiling Kits: Simplify the installation of a grid layout with ready-made coffer kits designed for easier DIY ceiling transformations.
Reclaimed Beam Crown for Rustic Libraries
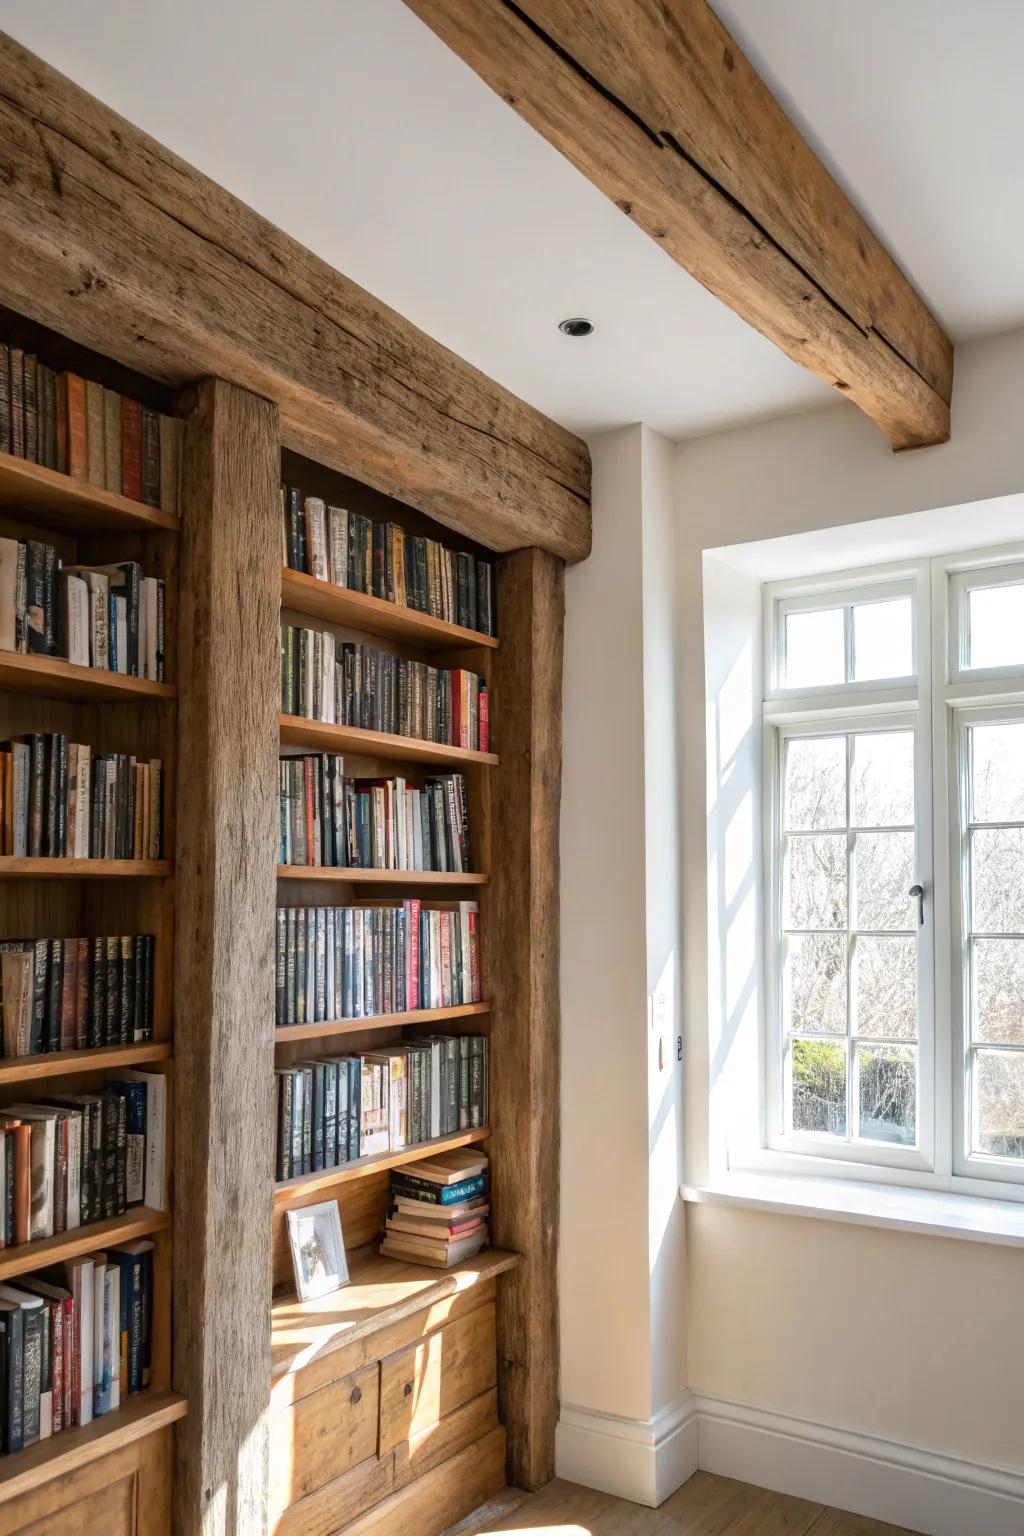
For a warmer, farmhouse feel, I use a reclaimed timber as a chunky beam-style crown above the shelves, then trim underneath with a small profile to clean up the transition. The dings and saw marks are the point—I’ve learned they make the library feel lived-in in the best way.
A few suggestions:
- Faux Wood Beam Mantel or Trim: Achieve the rustic timber look easily with lightweight faux beams that mimic the texture of real reclaimed wood.
- Reclaimed Barn Wood Planks: Use authentic weathered barn wood planks to face existing lumber for a genuine, textured farmhouse aesthetic.
- Wood Distressing Tools & Wax: Create your own aged timber effect on new pine boards using specialized distressing tools and finishing wax.
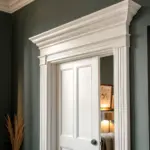
Secret Door Bookcase With Continuous Crown
A hidden doorway gets so much more believable when the crown molding and vertical trim run straight across the moving bookcase like nothing’s happening. I helped build one with a tiny shadow-gap at the seam, and watching guests miss the door entirely was the ultimate payoff.
These products might help:
- Hidden Pivot Hinge System: Install a sturdy pivot hinge to ensure your heavy bookcase door swings smoothly without revealing visible hardware.
- Crown Molding Profiles: Select elegant crown molding to run continuously across your bookcase and walls for a seamless built-in look.
- Magnetic Touch Latches: Use strong push-to-open latches to eliminate the need for handles, keeping your hidden doorway secret.


