
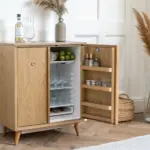
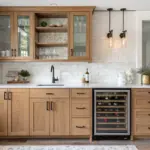
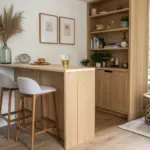
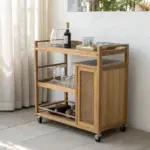
A vintage dry sink makes the sweetest little bar because it already has that built-in “station” feel—counter on top, storage below, and tons of character. I’ve turned a handful of these into drink hubs in my shop, and the best part is how easy it is to blend woodworking charm with real-life hosting function.
Classic Rustic Dry Sink Bar Setup
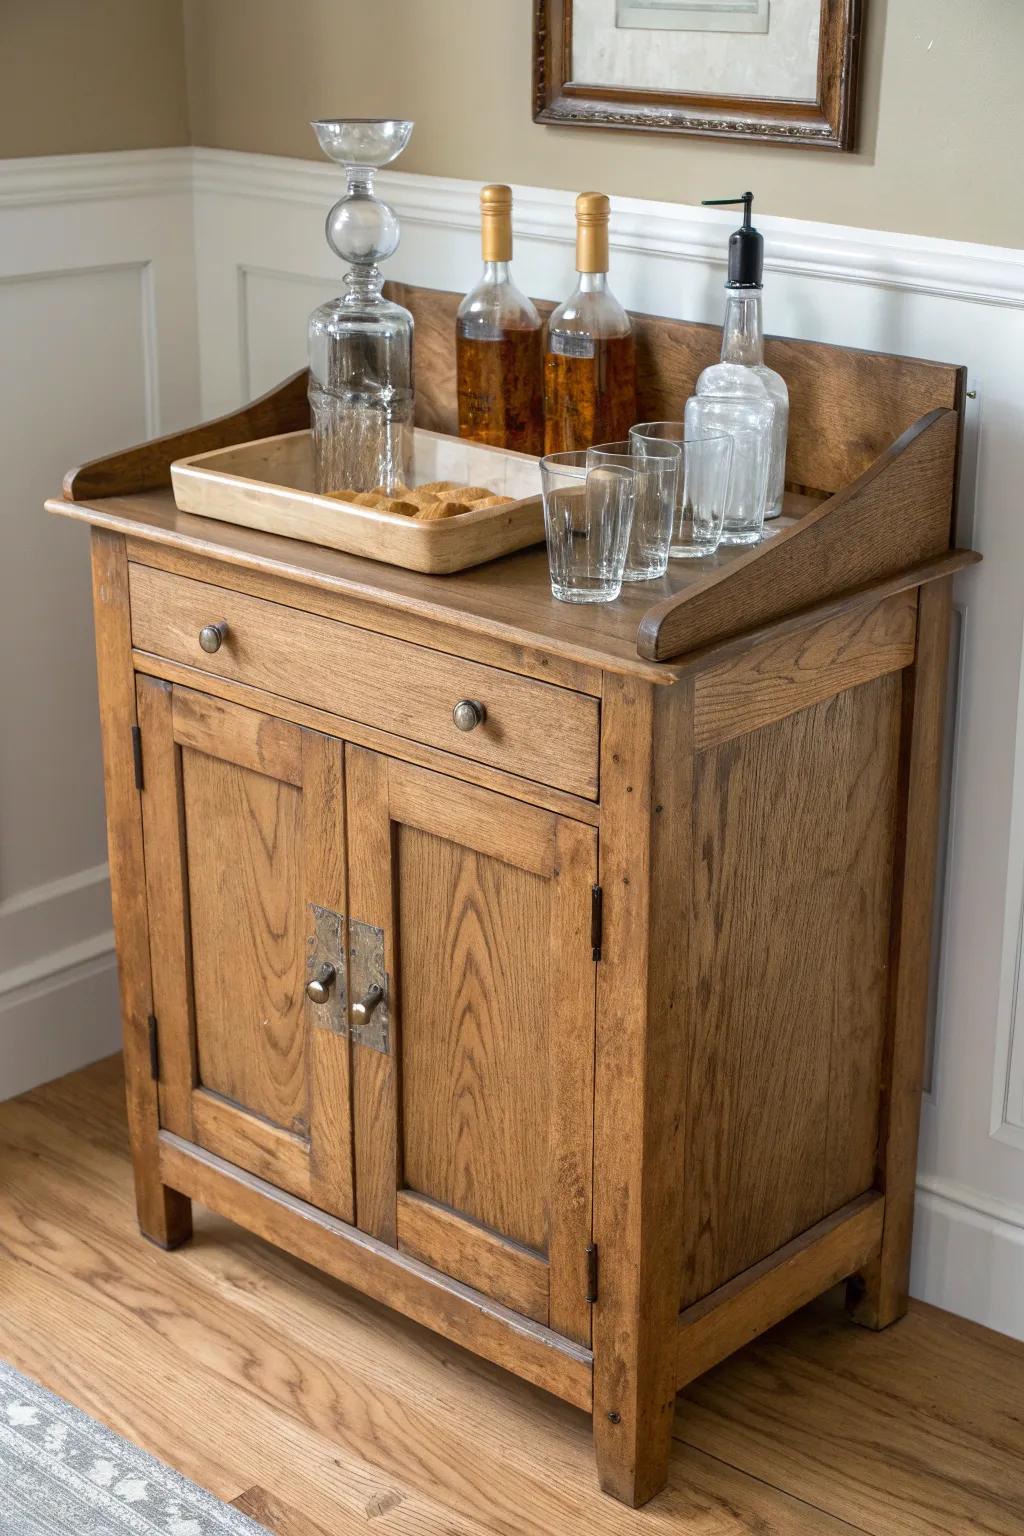
When I keep the original wood grain and just refresh it with a soft clean and wax, the dry sink instantly becomes a cozy, no-fuss bar that feels collected over time. I like to style mine with a simple tray for bottles and a little row of glassware so it looks intentional, not cluttered.
Useful items to consider:
- Clear Glass Beverage Decanter: Elevate your liquor display by transferring spirits into classic glass decanters for a cohesive, sophisticated look.
- Simple Wooden Serving Tray: Organize bottles or bar tools neatly inside the dry sink well to keep the surface tidy.
- Short Tumbler Glass Set: Keep a set of short, sturdy tumblers ready for serving simple cocktails or whiskey on the rocks.
Two-Tone Refinish With a Stained Top
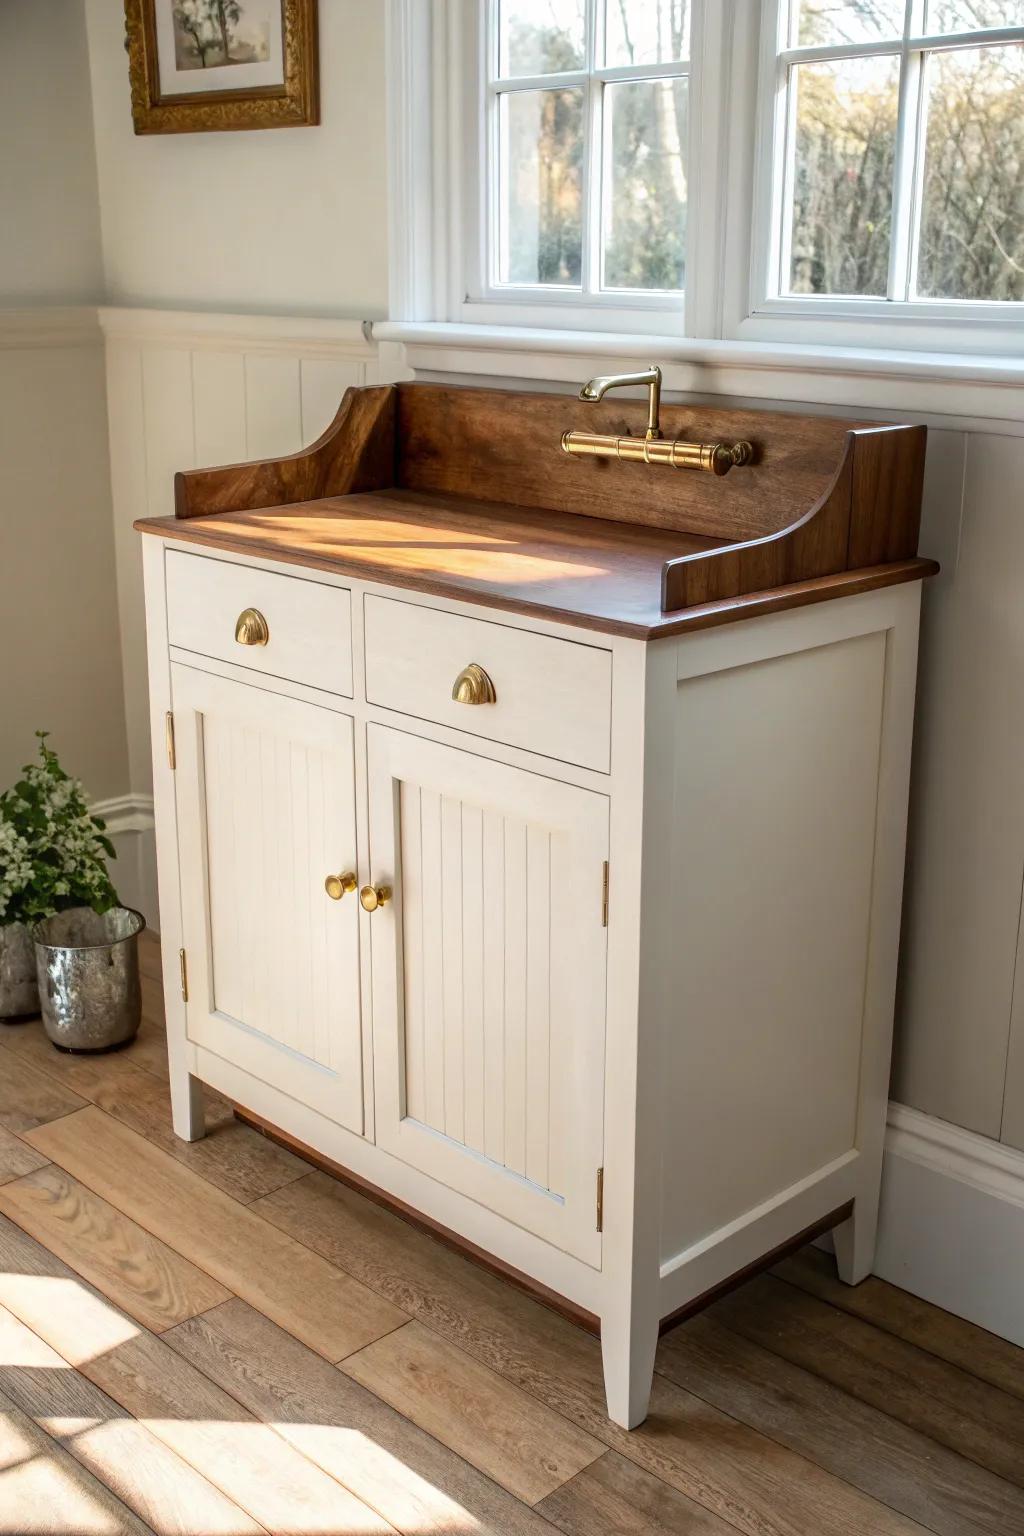
One of my go-to makeovers is a warm stained top with a painted base—this two-tone finish makes the dry sink bar feel updated without losing its vintage soul. I’ve done this when the top had great grain but the cabinet needed a clean, brighter look to work in a modern room.
You might give these a try:
- Brass Cup Pulls and Knobs: Upgrade your cabinet hardware to match this vintage aesthetic with these classic, warm-toned pulls and knobs.
- Creamy White Chalk Style Paint: Achieve that soft, matte finish on the base of your vanity with this easy-to-apply furniture paint.
- Dark Walnut Wood Stain: Bring out the rich grain in your wooden countertop to create a beautiful, warm contrast against the paint.
White Painted Farmhouse Dry Sink Bar
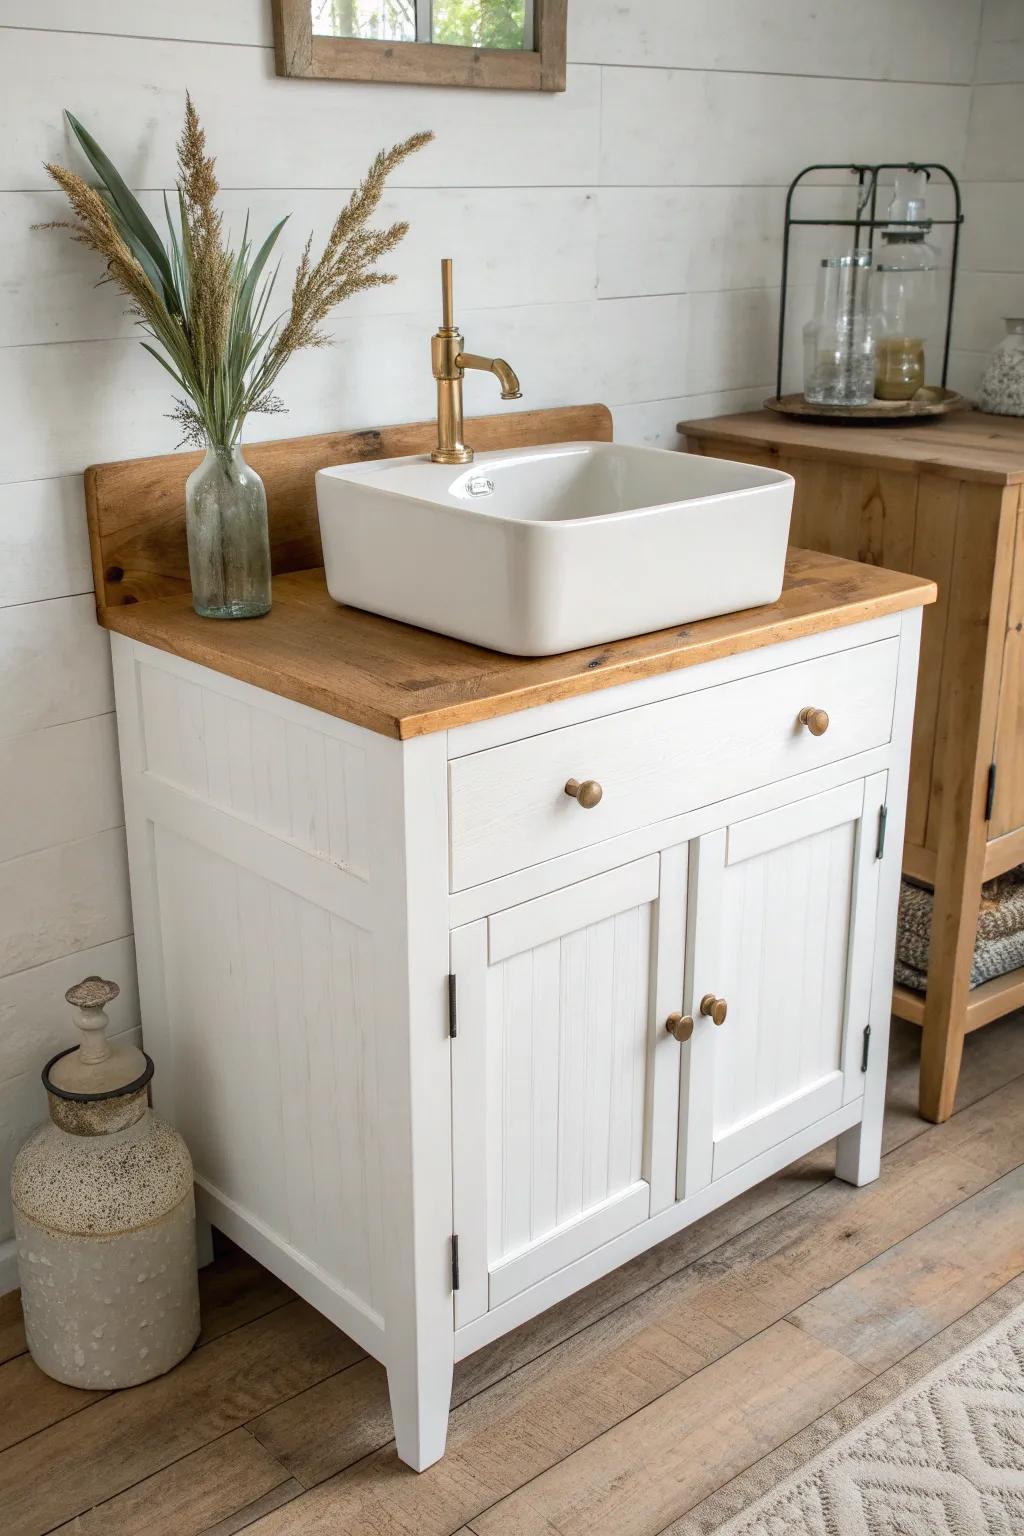
A crisp painted finish turns an old dry sink into that classic farmhouse bar you see in dreamy dining rooms, and I’ve used it to make beat-up pieces look fresh fast. I usually sand the edges lightly so the corners don’t feel too “new” and the details still pop.
Explore these options:
- Chalk Style Furniture Paint: Transform your furniture easily with this matte finish paint that adheres well and minimizes prep work.
- Antique Gold Cabinet Knobs: Update the hardware on your refurbished piece to instantly add warmth and a classic vintage feel.
- Sanding Sponge Blocks: Use these flexible sanding blocks to gently distress edges and corners for that authentic aged farmhouse look.
Moody Black Distressed Dry Sink Bar
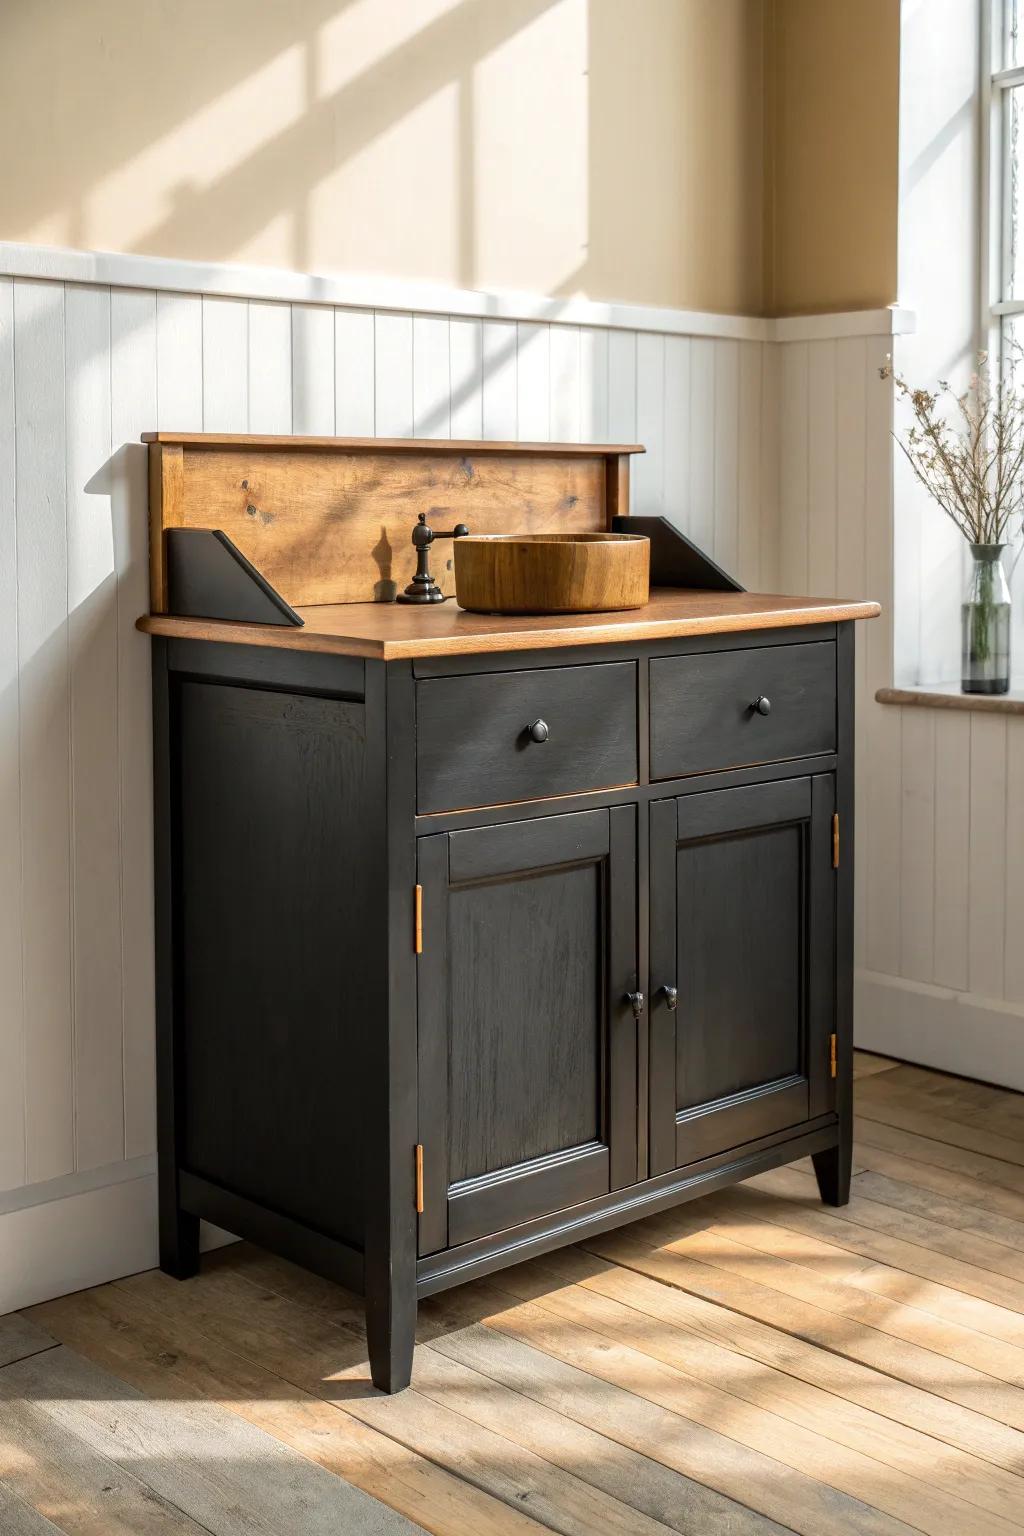
When I want drama, I paint the dry sink bar a deep black and distress the high points—instant vintage lounge vibe with almost zero extra decor. I’ve found black makes your bottles and glassware look like a styled display even on an ordinary Tuesday.
A few suggestions:
- Matte Black Chalk Style Furniture Paint: Transform your existing furniture by applying this ultra-matte black paint for that dramatic, vintage-inspired finish.
- Small Round Wood Bowl or Vessel Sink: Replicate the authentic dry sink look by adding a rustic wooden vessel bowl to your countertop surface.
- Antique Bronze Cabinet Knobs: Complete your moody renovation by swapping old hardware for subtle, oil-rubbed bronze knobs that blend perfectly.
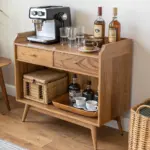
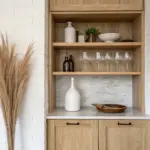
Coffee Bar Dry Sink With Mug Storage

I’ve converted a dry sink into a coffee bar by dedicating the top to the machine and using the cabinet for mugs, syrups, and extra beans. The little “sink well” area is perfect for a sugar jar and spoons so everything stays in one spot.
May just do the trick:
- Minimalist White Coffee Maker: Create a clean, cohesive look with a compact white coffee maker that fits perfectly under shelving.
- Set of White Ceramic Mugs: Upgrade your coffee corner with simple white ceramic mugs that stack easily on your new bar.
- Woven Storage Basket: Keep coffee pods, linens, or accessories organized and out of sight with a textured woven basket.
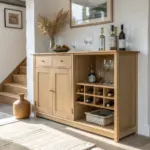
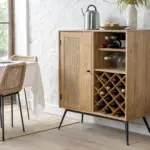
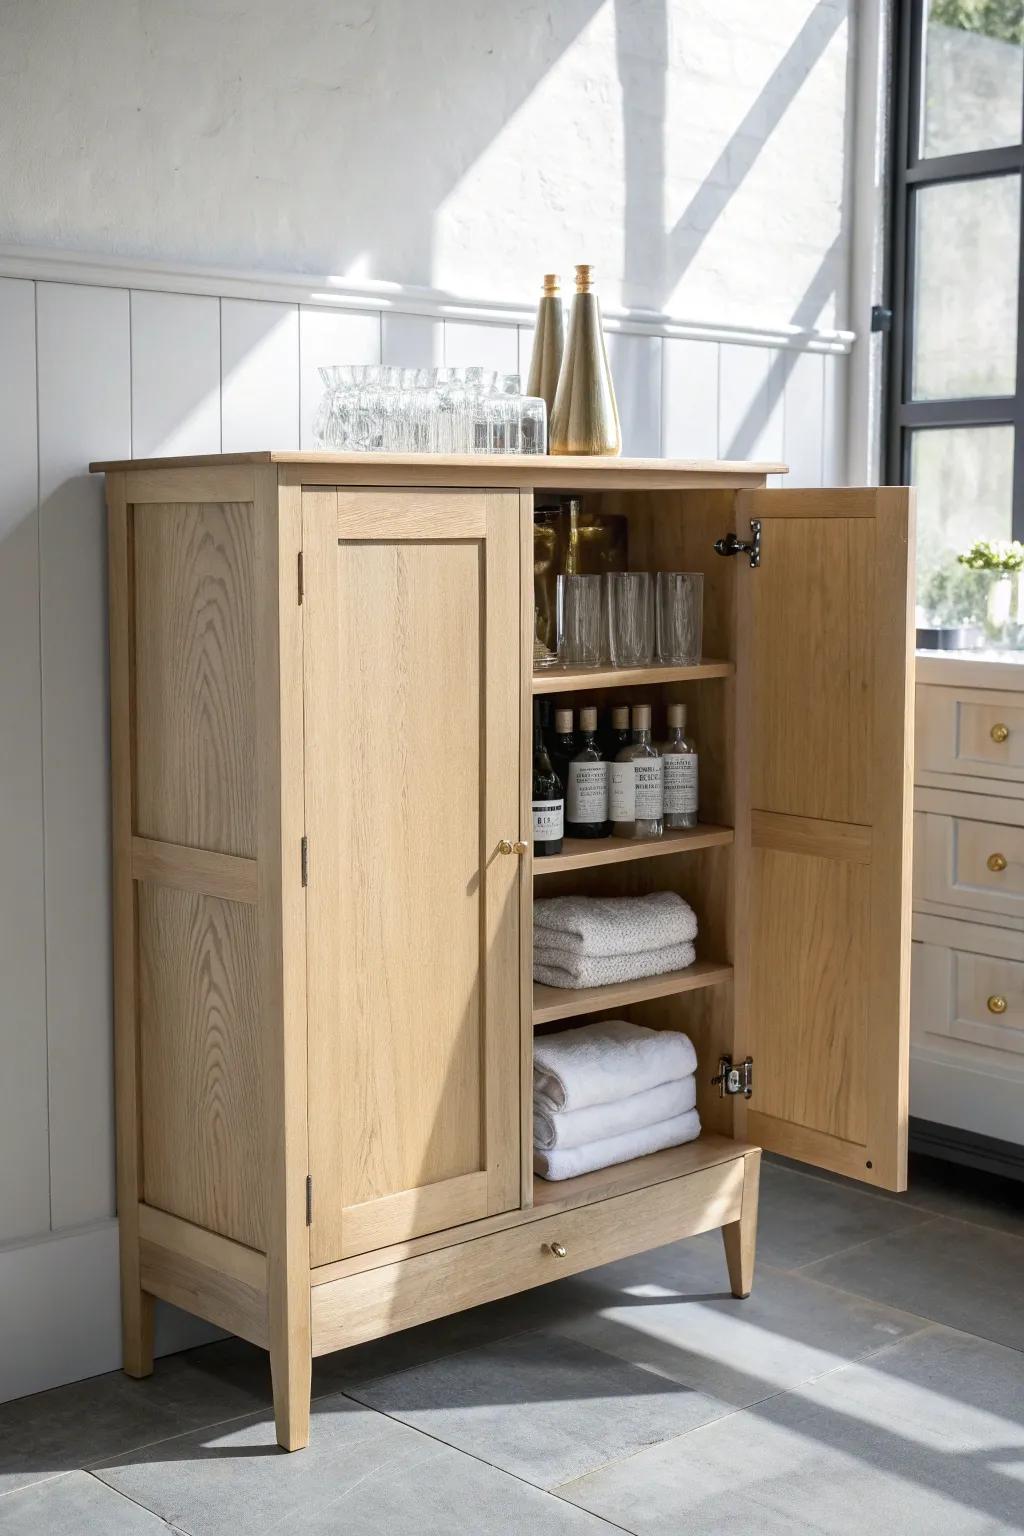
Dry Sink Bar With Bottle and Glass Zones

The easiest upgrade I’ve done is creating clear “zones” on a dry sink bar: bottles on one side, bar tools in a crock, and glassware on the other. Once I started doing that, my setup looked styled all the time and not like I was mid-party cleanup.
Consider these options:
- Wooden Serving Tray with Handles: Corral your liquor bottles or glassware on a sturdy tray to instantly create a defined, organized service zone.
- Gold or Brass Ice Bucket: Add a touch of elegance while keeping drinks chilled with a metallic ice container that matches warm wood tones.
- Woven Storage Basket: Hide away smaller essentials or organize extra bar napkins neatly in a textured basket for open shelf storage.
Add a Stemware Rack Under the Top
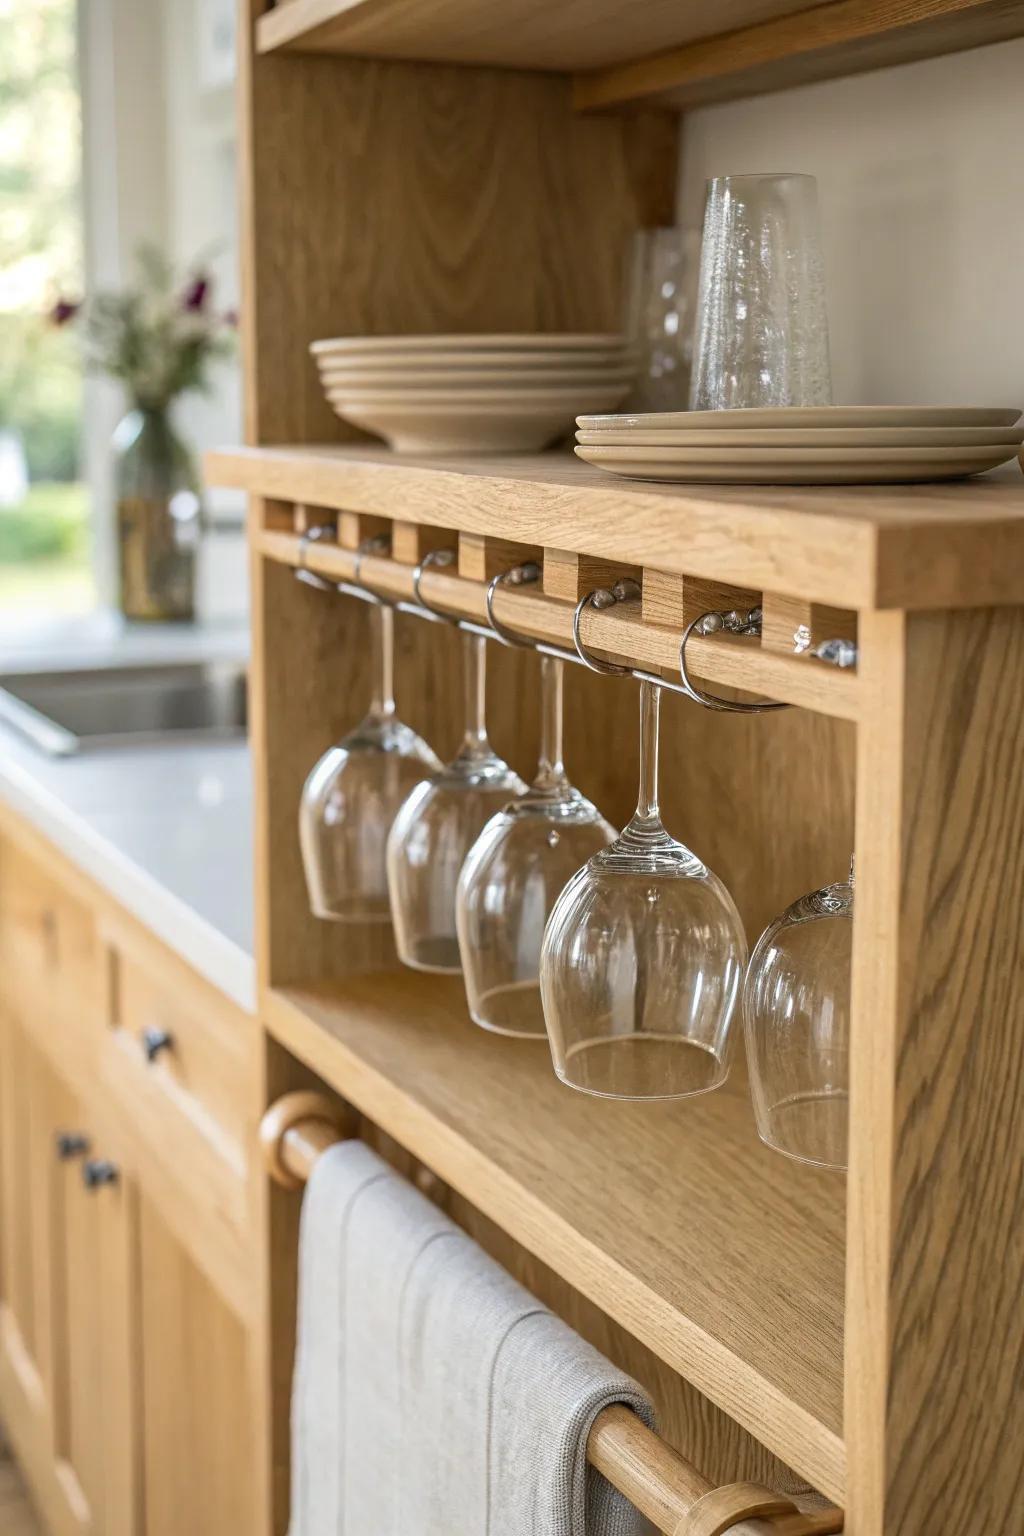
I’ve installed a simple under-shelf wine glass rack on a dry sink bar, and it’s one of those small upgrades that feels fancy immediately. It also frees up the cabinet space below for bigger stuff like pitchers or mixing bowls.
A few relevant products:
- Wooden Under-Cabinet Wine Glass Rack: Instantly neatly organize your stemware and add a rustic touch to your home bar setup efficiently.
- Chrome Wire Stemware Holder: Save valuable shelf space and easily access your glasses with this durable, simple mounting solution.
- Stoneware Dinner Set: Upgrade your bar’s aesthetic by stacking neutral, textured plates and bowls for a clean, modern look.
Convert the Sink Well Into an Ice Bucket
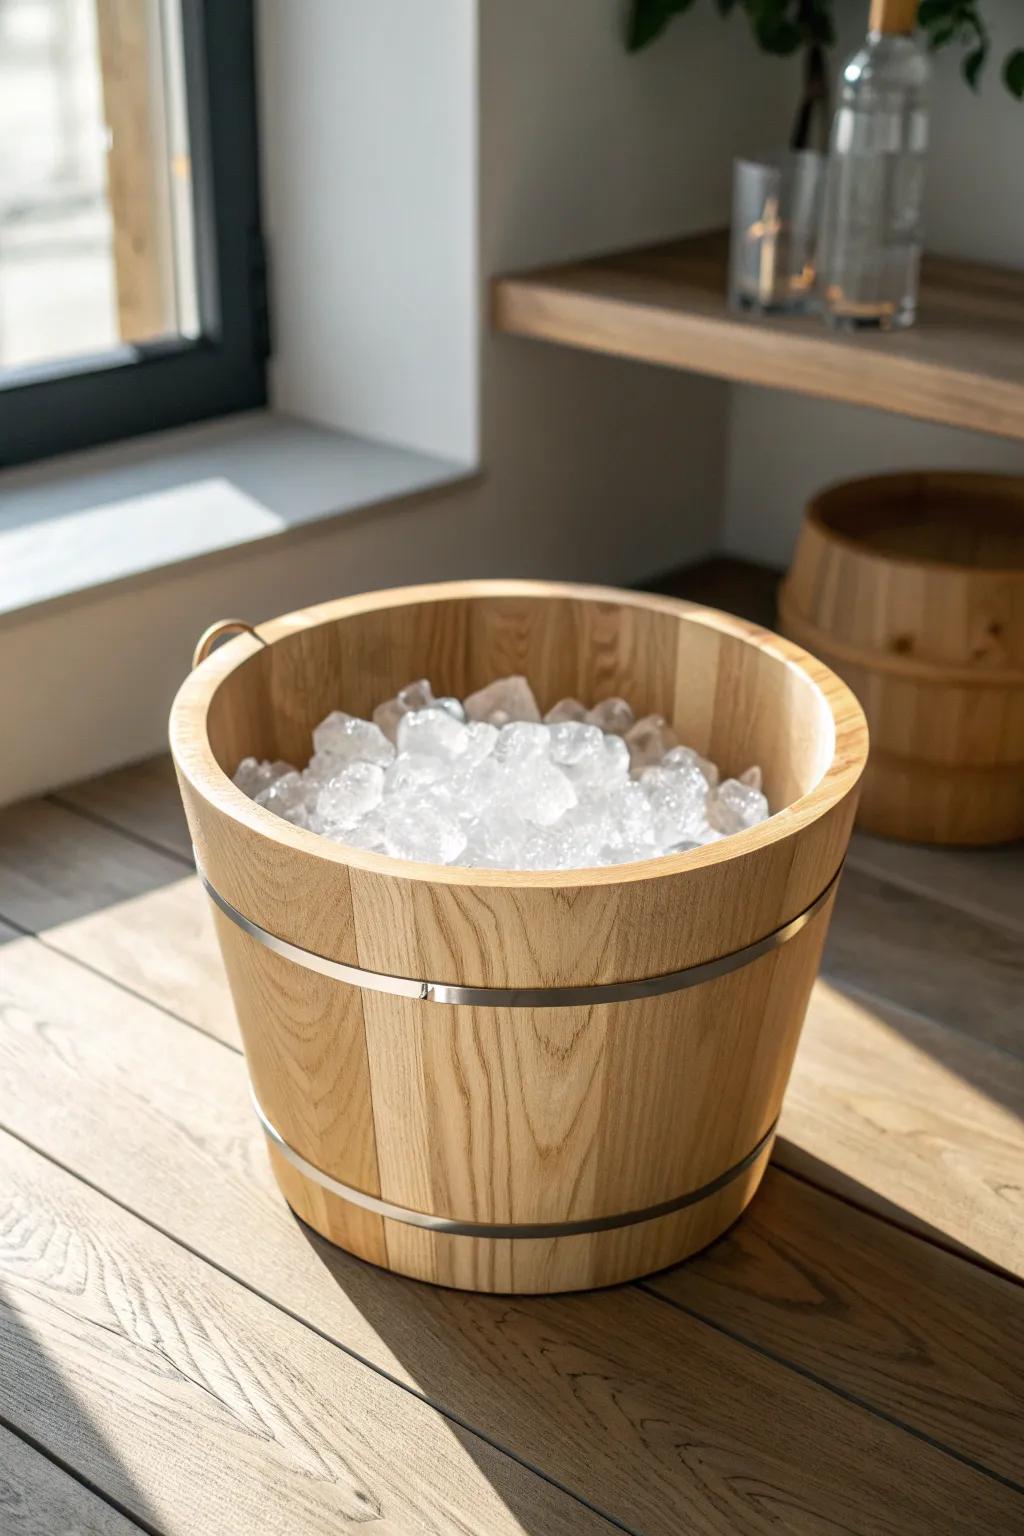
If your dry sink has that recessed “basin” area, I love dropping in a removable ice bucket or liner so drinks stay cold without any plumbing. I’ve done this for summer gatherings and it keeps the top from getting soaked with melting ice.
Check if these fit your needs:
- Wooden Sauna-Style Bucket with Liner: Replicate the rustic look from the photo by adding this wood-clad bucket to your dry sink setup.
- Stainless Steel Beverage Tub Liner: Drop this durable metal tub into your sink well to hold ice and keep condensation contained safely.
- Clear Acrylic Ice Bin Insert: Choose a simple, transparent bin to line your dry sink basin and keep melting ice completely managed.
Pull-Out Serving Tray Dry Sink Bar
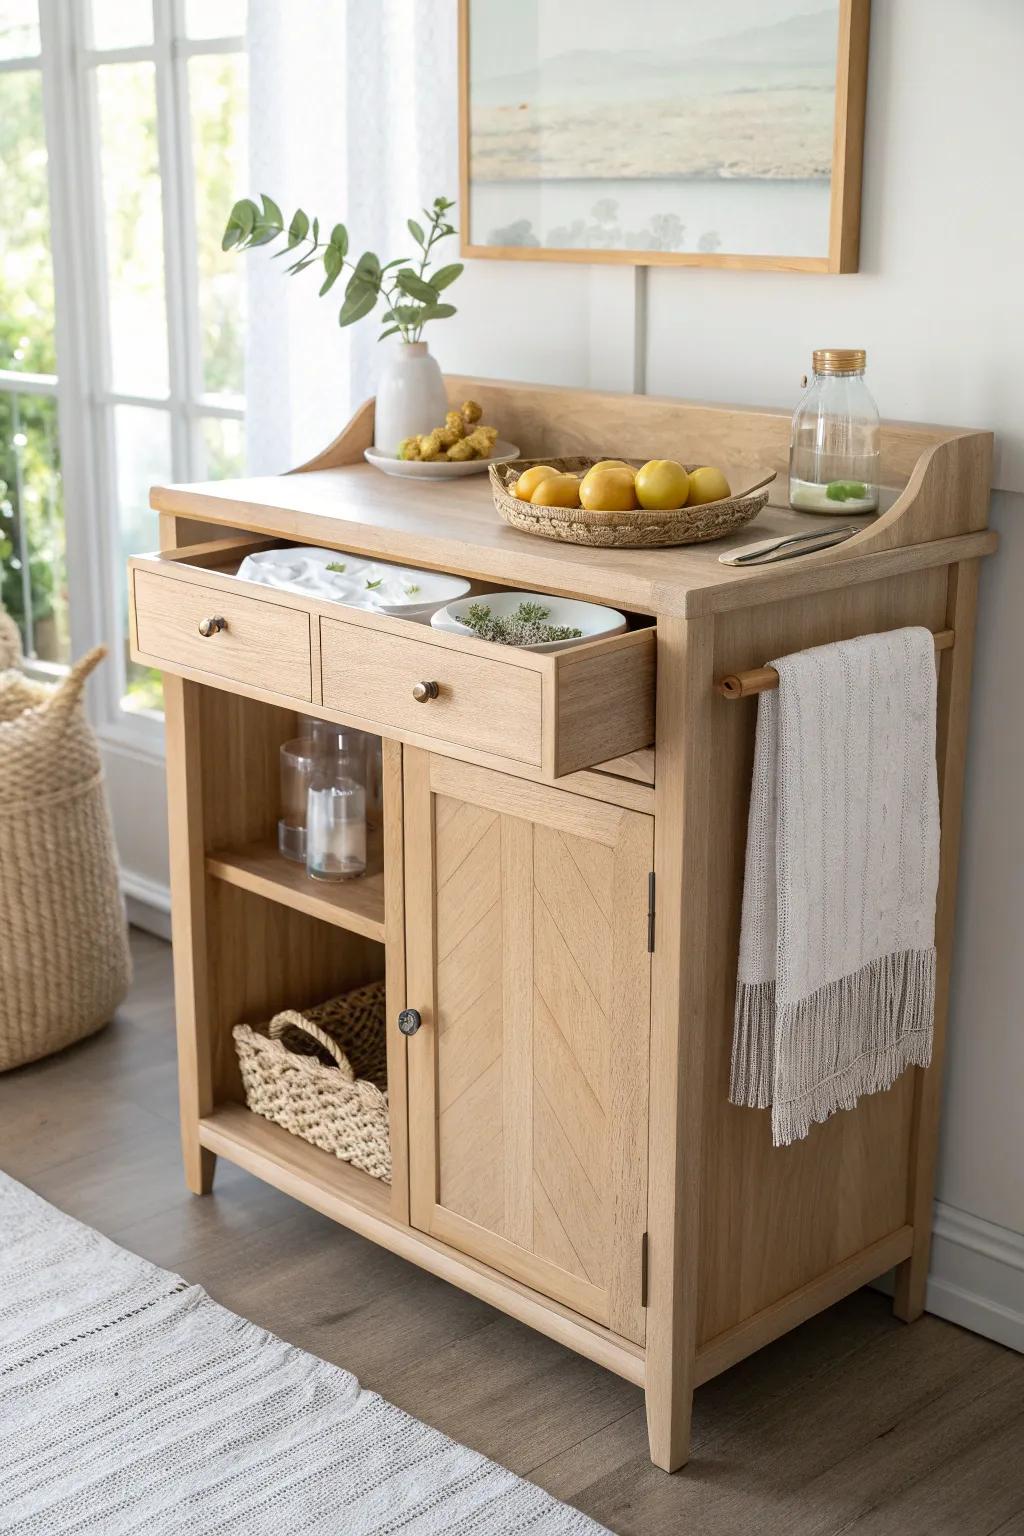
I’ve added a shallow pull-out tray right under the top so the dry sink bar has a built-in landing zone for garnishes and napkins. It’s such a satisfying little woodworking project, and it makes hosting feel way more organized.
Products that could assist:
- Heavy-Duty Drawer Slides: Ensure your new pull-out tray glides smoothly and supports weight by installing these essential, durable railing mechanisms.
- Cabinet Knob Pulls: Match your existing furniture style and make accessing your new serving tray effortless with these stylish hardware additions.
- Unfinished Oak Lumber Board: Create the perfect custom serving surface for your dry sink project using a sturdy, workable hardwood board.
Open-Shelf Dry Sink Bar for Display
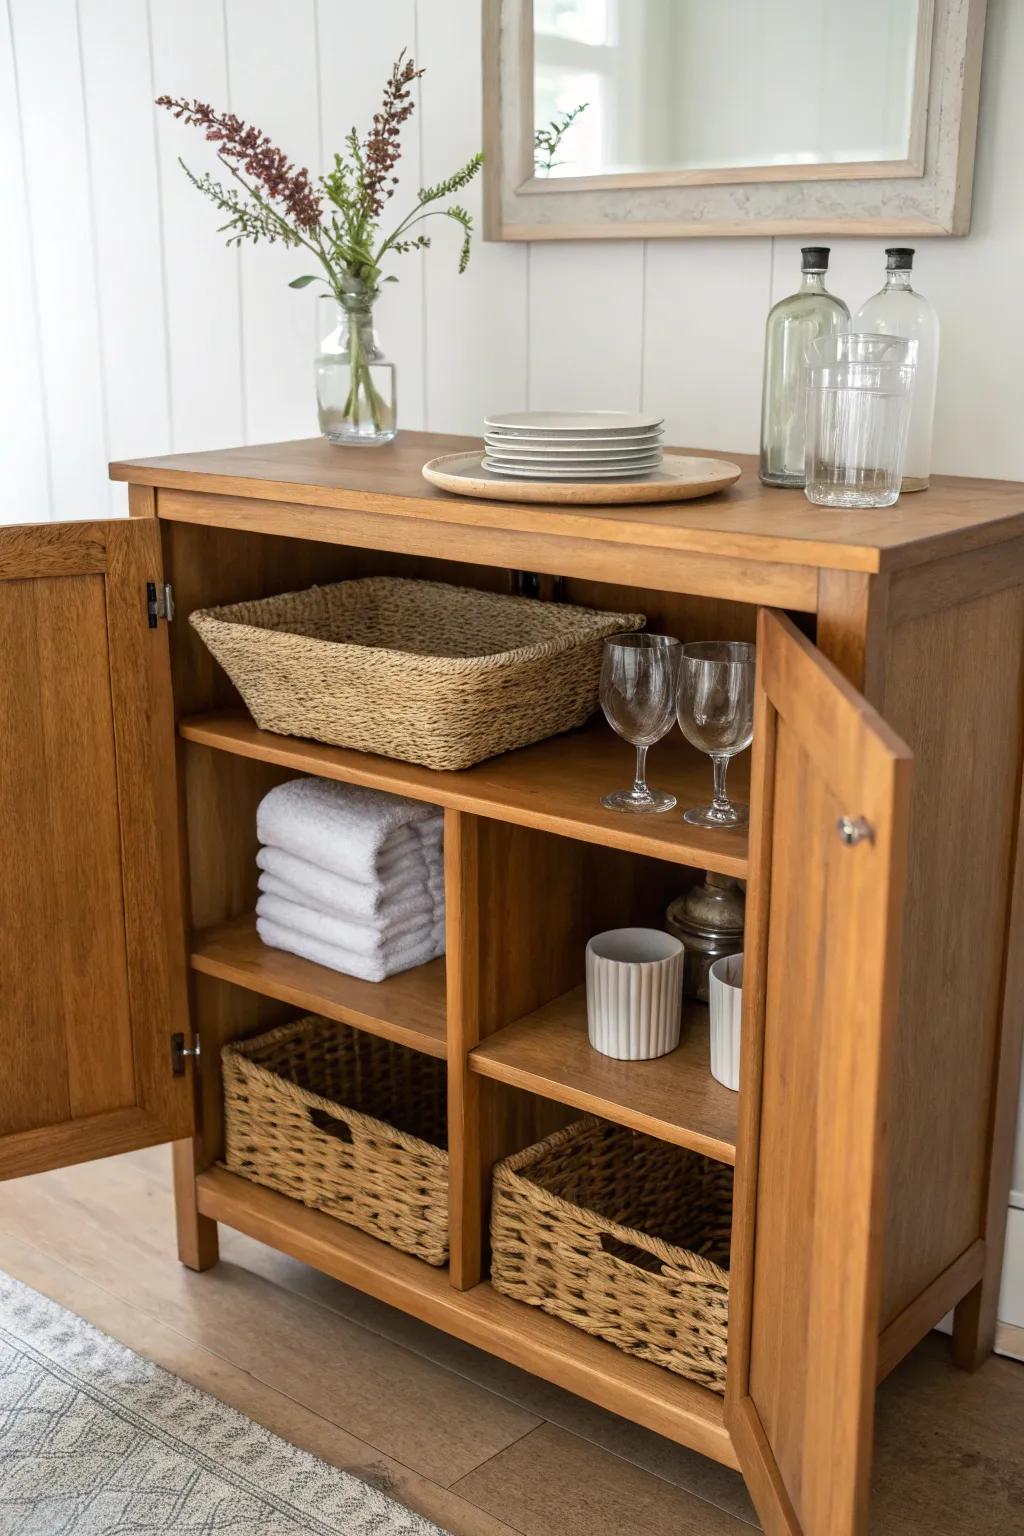
When a dry sink feels too heavy, I’ll remove the doors and turn the lower cabinet into open shelving for baskets and glassware. I’ve done this on pieces with damaged doors, and honestly it ends up looking like it was meant to be a bar all along.
Maybe worth checking out:
- Woven Storage Baskets: Use natural woven baskets to organize linens and accessories while adding warm texture to your open shelving display.
- Stemmed Wine Glasses: Display your glassware proudly on middle shelves for easy access and an instant, sophisticated bar cart atmosphere.
- Ceramic Utensil Holder: Keep bar tools or stirrers tidy in a ribbed ceramic vessel that doubles as modern shelf decor.
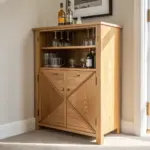
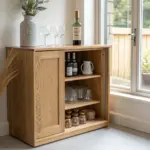
Hidden Storage Dry Sink Bar for Clutter
If you want the top to look calm, let the dry sink bar do the work behind closed doors—I stash extra bottles, backstock mixers, and spare towels in the cabinet. I’ve learned this is the secret to a bar that’s always “photo ready” even when life is busy.
Might be a good match:
- Freestanding Bar Cabinet: Stash your bottles and glassware behind stylish doors to keep your entertaining area looking perpetually tidy.
- Stemless Wine Glasses: Update your collection with modern glassware that stacks easily on shelves for organized, clutter-free storage.
- Cotton Bar Towels: Keep these soft, absorbent essentials neatly folded on lower shelves for quick access during spills.
Swap Hardware for an Instant Upgrade
Changing the cabinet hardware on a dry sink bar is one of the fastest transformations I’ve ever done, especially when the original knobs feel dated. I keep the rest simple and let the hardware be the little piece of jewelry that ties it together.
You might like:
- Brushed Gold Cabinet Knobs: Instantly modernize your dry sink bar with these warm metallic knobs for a subtle yet upscale refresh.
- Vintage-Style Brass Furet: Replace your standard fixture with an elegant brass faucet to create a sophisticated focal point for your bar.
- Slim Black Metal Mirror: Add contrast and depth above your dry sink by hanging a minimalist frame that complements gold hardware.
Raise It on New Legs for a Lighter Look
I’ve added legs to a dry sink bar to get it off the floor, and it instantly feels more modern while still being warm and vintage. Bonus: it’s way easier to sweep underneath, which I appreciate more than I’d like to admit.
Give these a look:
- Tapered Wooden Furniture Legs: Upgrade your vintage piece with these classic wooden legs to clear up floor space and modernize the silhouette.
- Heavy Duty Furniture Mounting Plates: Ensure your new legs stay securely attached to the cabinet base with these easy-to-install metal mounting plates.
- Wood Stain and Finish: Match your new raw wood legs to your existing dry sink perfectly with a quality stain and finish.
Add a Backboard With Floating Shelves
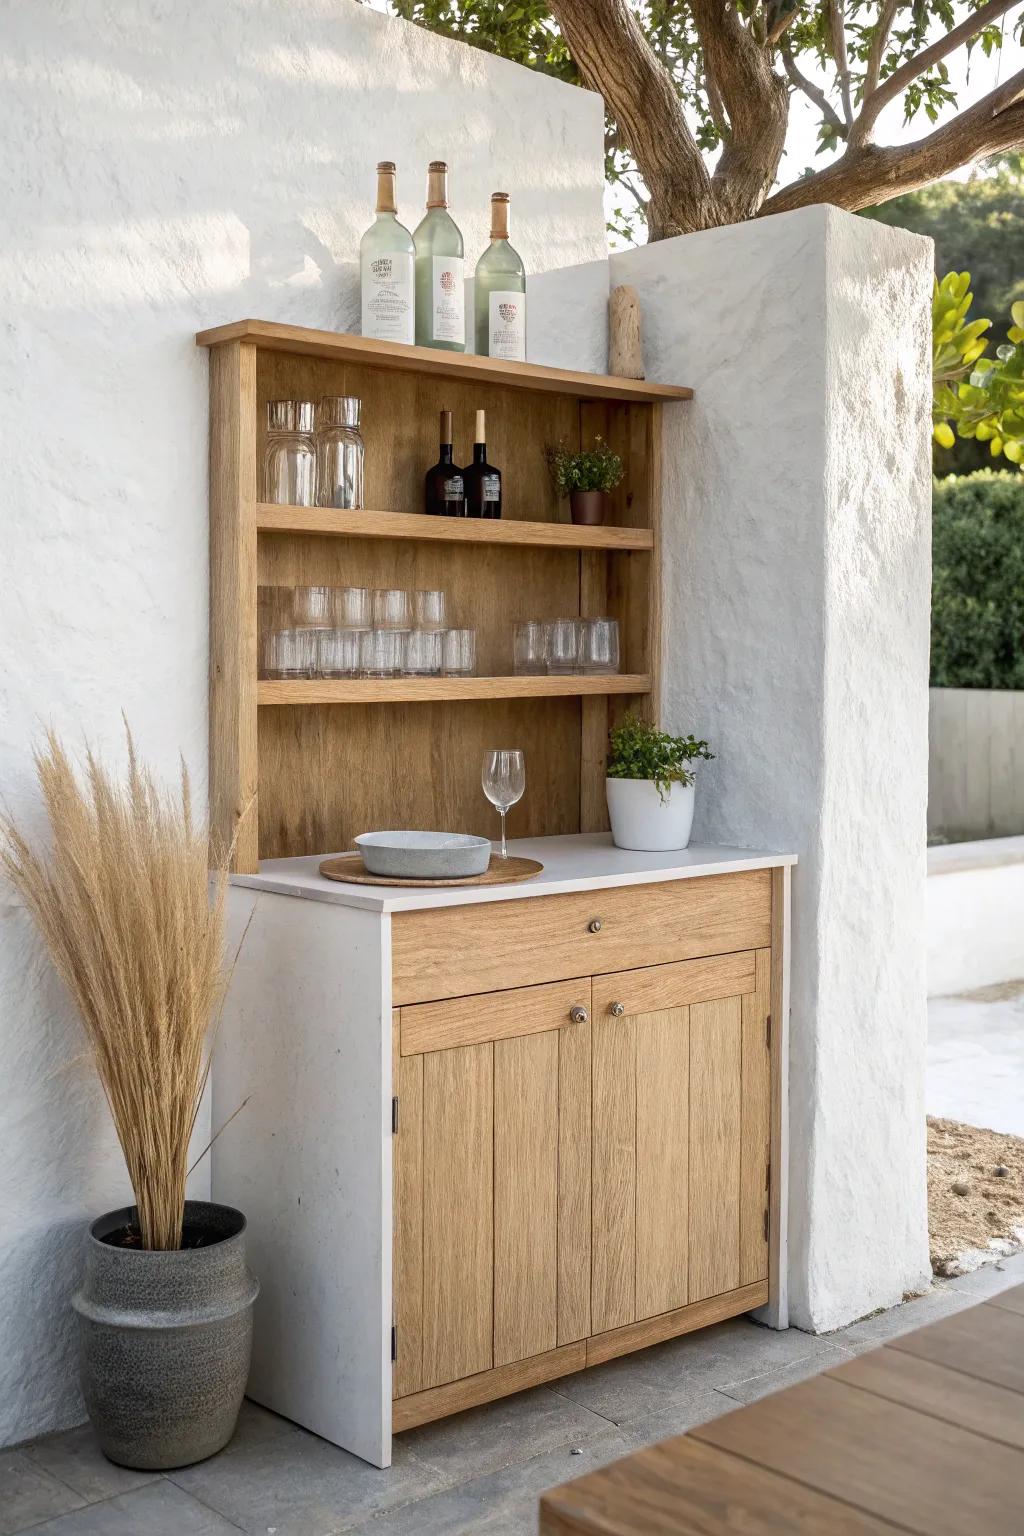
When I need more vertical storage, I mount a simple wood backboard behind the dry sink bar and add floating shelves for bottles and glasses. I’ve done this in tight corners where the bar needed to feel taller and more “built-in.”
Some ideas to consider:
- Natural Wood Wall Mounted Shelving Unit: Create valuable vertical storage space for your glassware and spirits with these easy-to-install, sturdy wooden wall shelves.
- Stemmed Wine Glass Set: Upgrade your new bar display with elegant, stemmed glassware that catches the light and elevates your hosting game.
- Small White Ceramic Planter Pot: Add a touch of greenery to your shelves to soften the look and bring life to your bar setup.
Tile or Wood-Slat Backsplash Behind the Bar
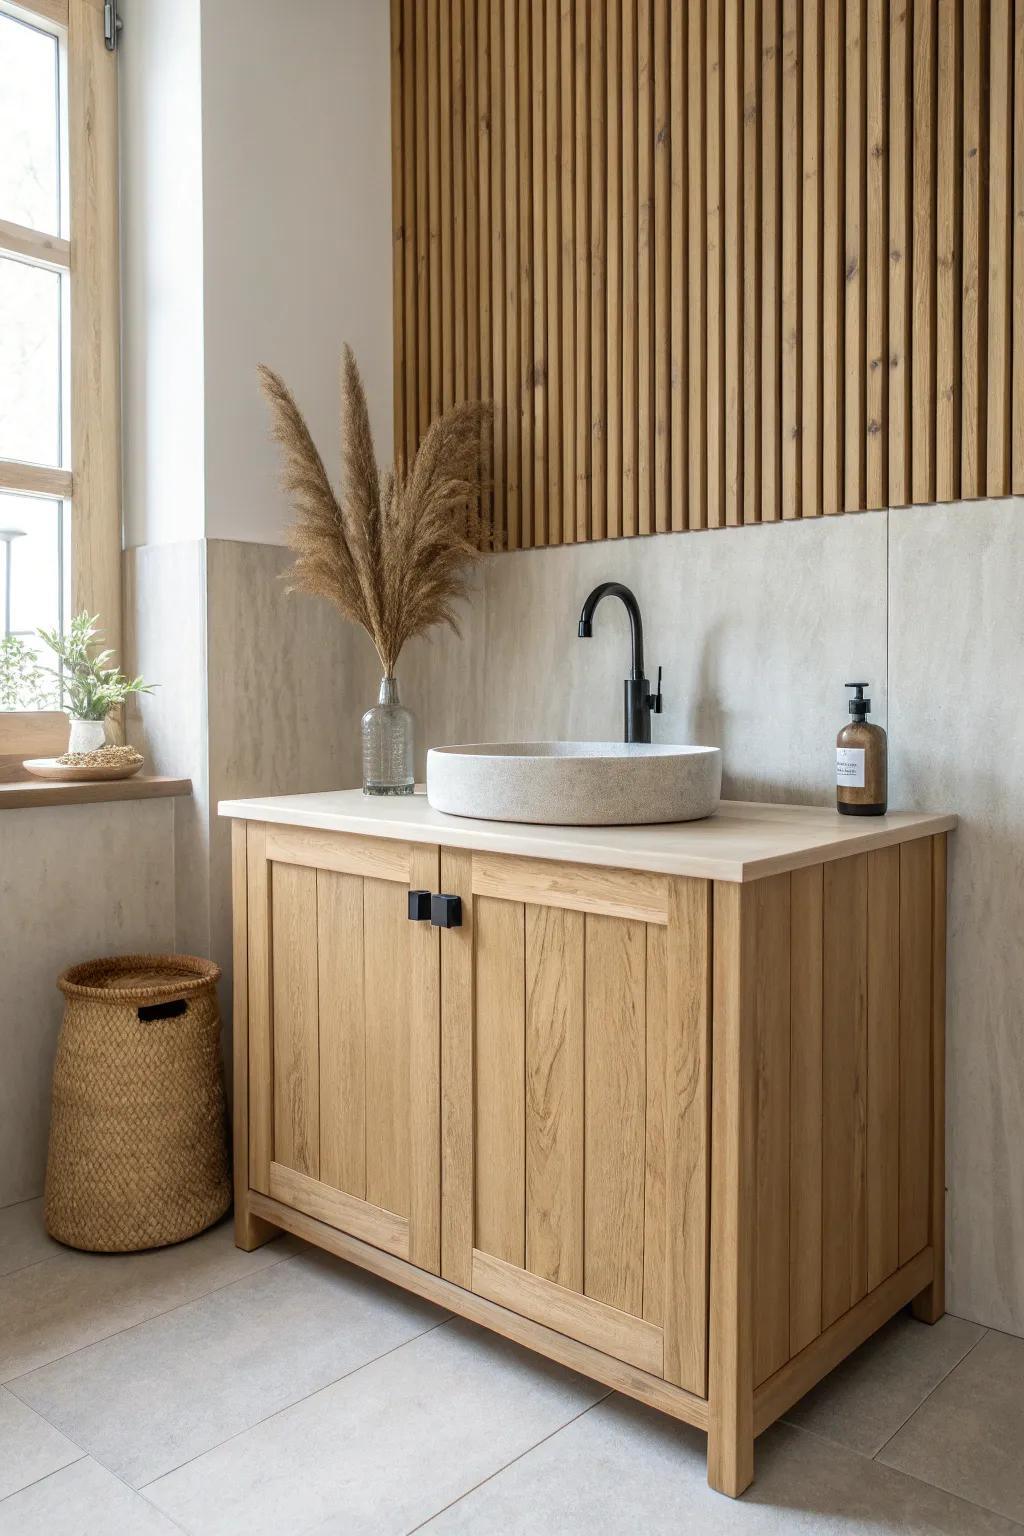
A bold backsplash behind a dry sink bar turns it into a real focal point, and I’ve used both patterned tile and skinny wood slats depending on the vibe. It’s one of those changes that makes the bar look expensive even if the dry sink itself was a thrifted find.
A few things you might like:
- Wood Slat Wall Panels: Instantly add texture and warmth to your bar area with easy-to-install vertical wood slat panels.
- Matte Black Bar Faucet: Update your dry sink with a sleek, modern matte black faucet to contrast beautifully against wood tones.
- Vessel Sink Bowl: Create a spa-like focal point by placing a stylish stone or ceramic vessel sink atop your vanity.
Lid-Top Dry Sink Bar With a Secret Compartment
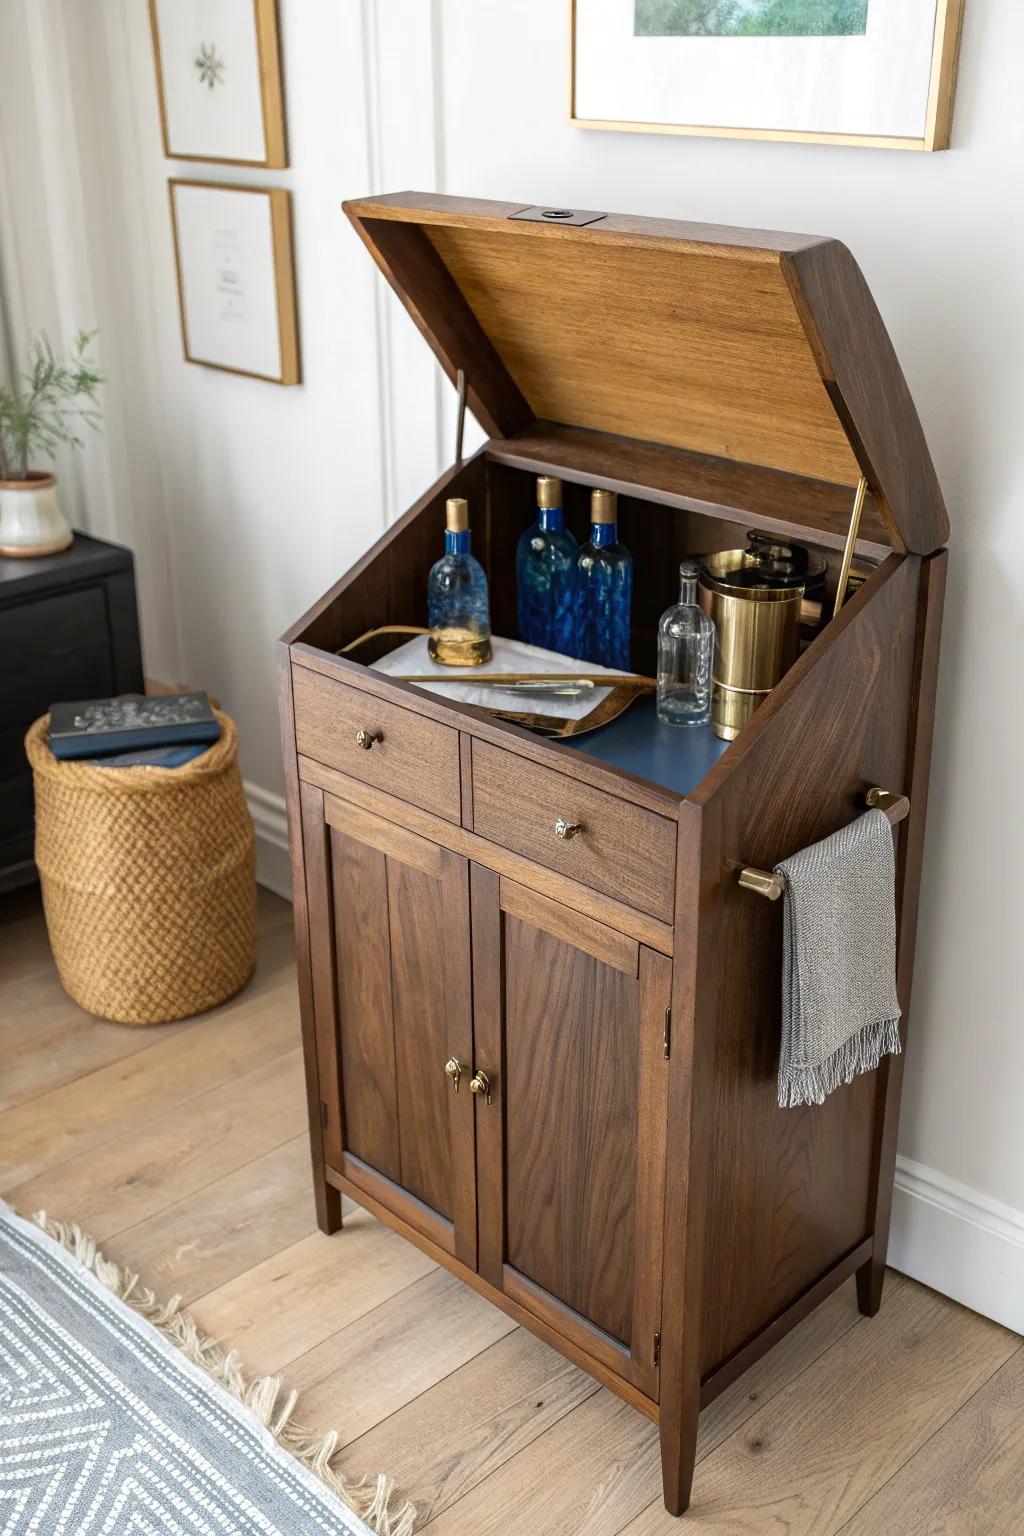
If your dry sink has a hinged top (or you’re up for adding one), turning it into a hidden bar compartment is a total crowd-pleaser. I built one with a simple stop hinge so the lid stays open safely while you mix drinks.
Some handy options:
- Lid Support Hinges: Install safety hinges to keep your dry sink lid open securely while you mix cocktails for guests.
- Non-Slip Serving Tray: Protect the interior wood surface from spills and stains by placing a stylish tray inside the compartment.
- Gold Cocktail Shaker Set: Elevate your hidden bar’s aesthetic with a matching gold shaker set that looks great on display.
Cane or Fabric Door Inserts for Texture
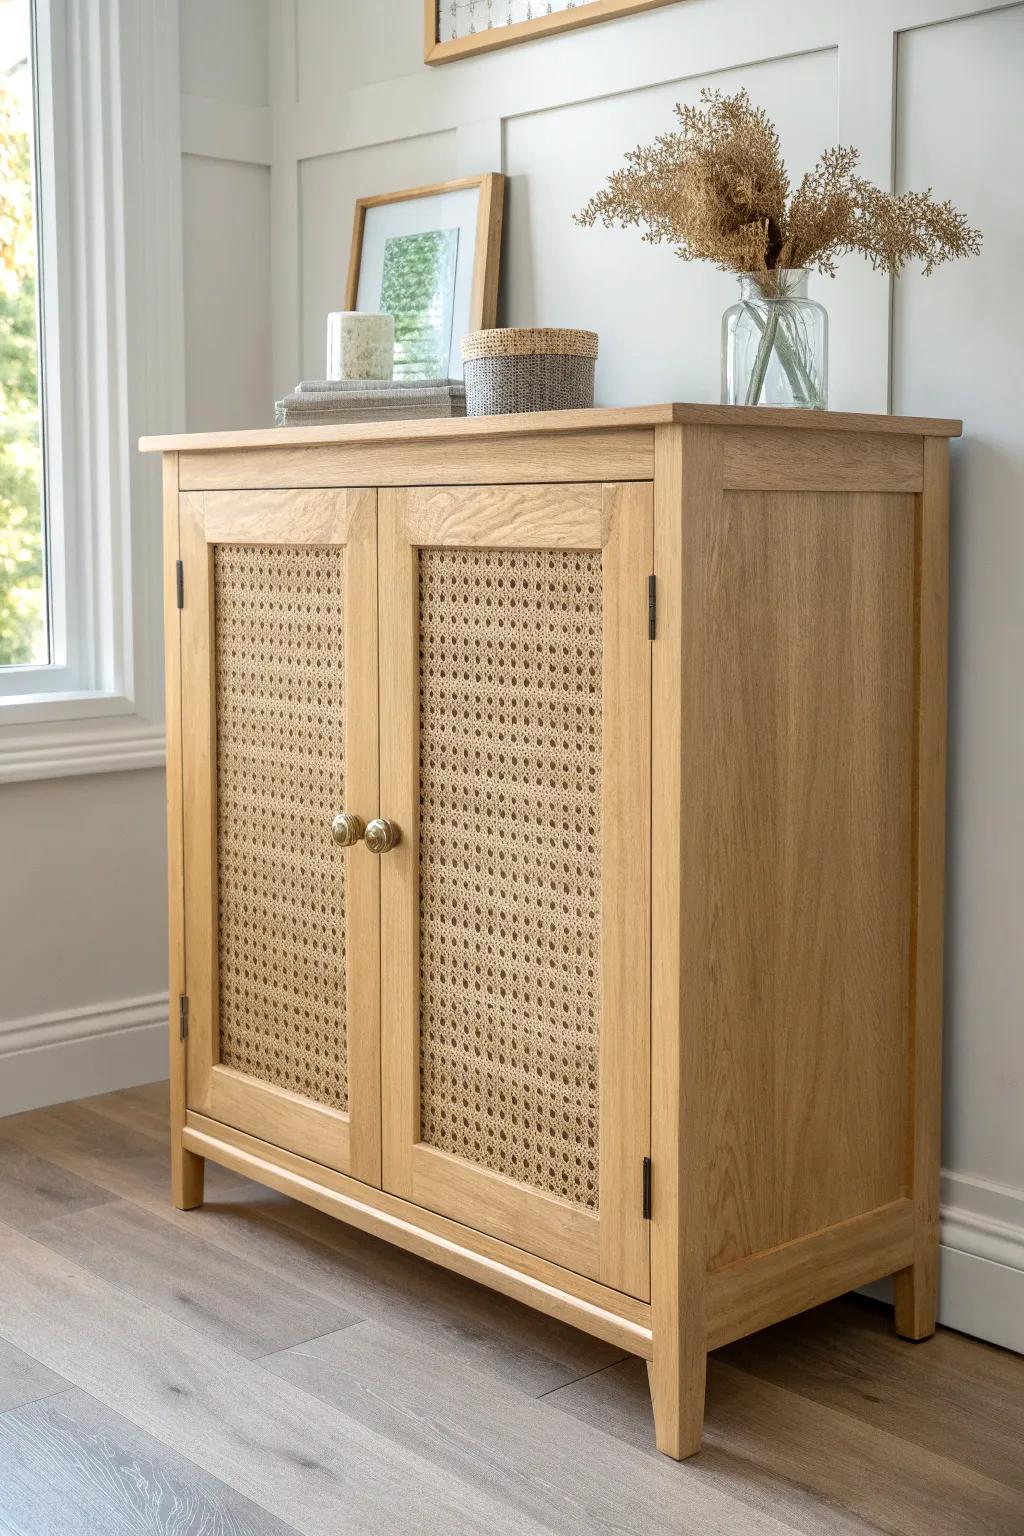
I’ve replaced solid door panels with cane webbing and even linen-like fabric on a dry sink bar, and it adds that breezy texture that makes the whole piece feel custom. It’s my favorite trick when the doors are plain but the cabinet shape is cute.
These products might be useful:
- Natural Rattan Cane Webbing Roll: Create that breezy, custom look by replacing solid panels with this natural, open-weave material for instant texture.
- Heavy-Duty Staple Gun Kit: Secure your new fabric or cane inserts firmly into place with this essential tool for DIY furniture upgrades.
- Brass Cabinet Knobs: Complete your cabinet’s transformation by adding these classic hardware accents that perfectly complement organic, textured door panels.
Metal and Wood Industrial Dry Sink Bar
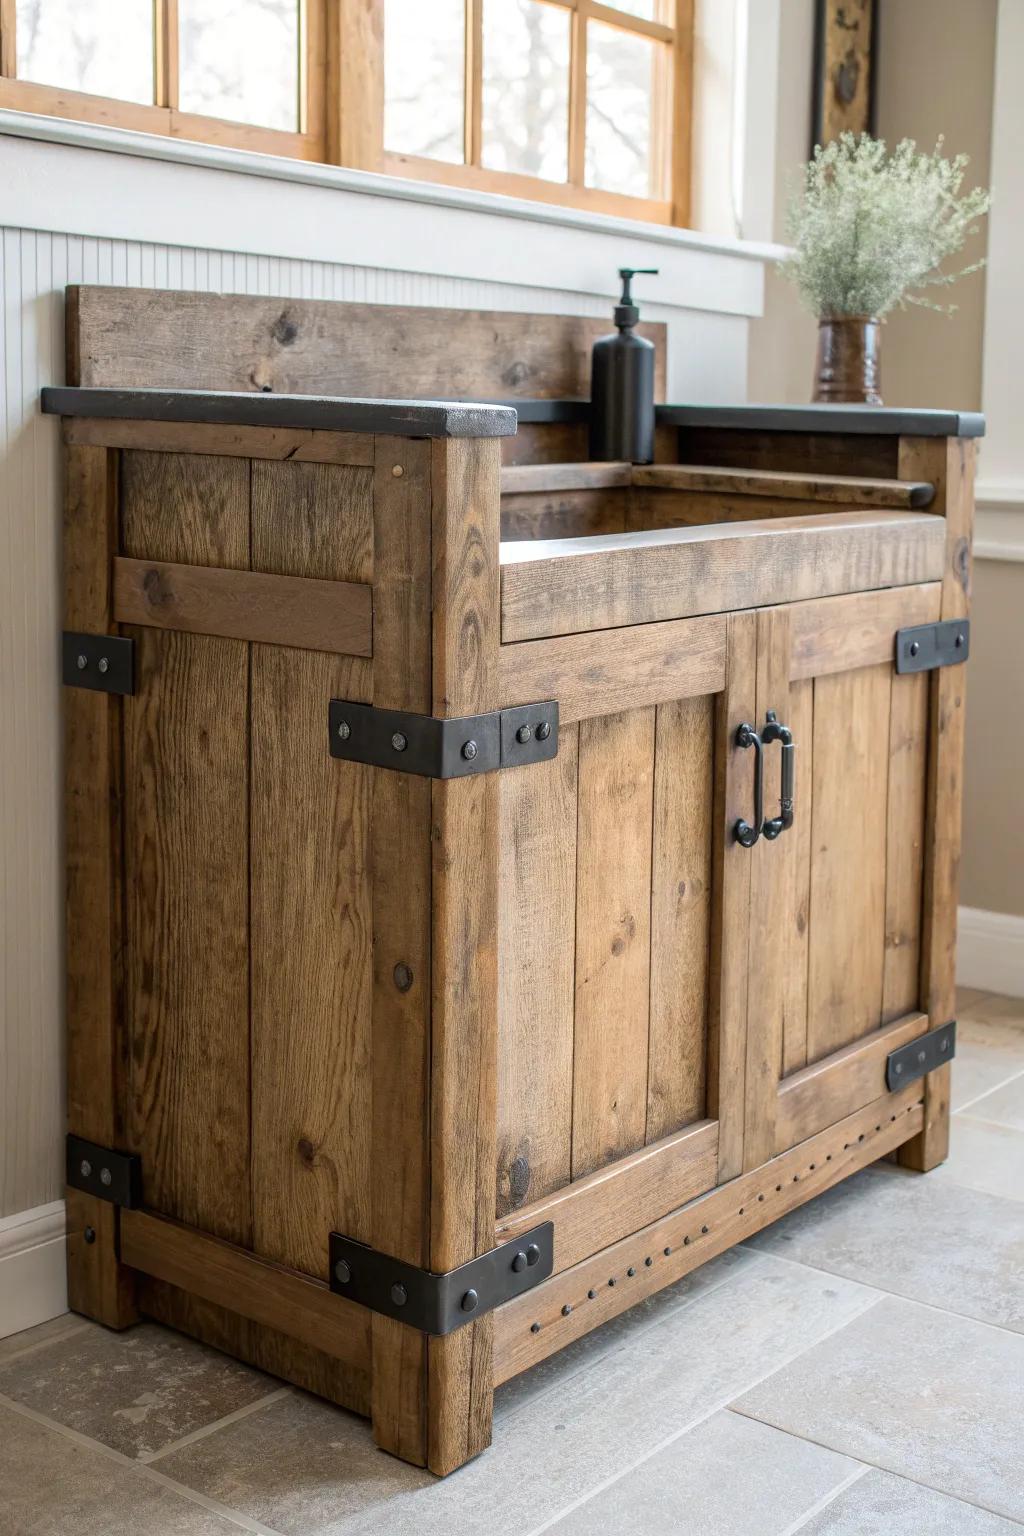
For a surprising twist, I’ve paired a vintage dry sink bar with metal straps or corner brackets so it reads a little industrial without losing warmth. The mix of aged wood and dark metal makes the whole setup look like an old workshop turned cocktail spot.
A few helpful options:
- Industrial Corner Brackets: Add these rugged metal corners to shelves or cabinets to instantly give your dry sink a vintage, industrial edge.
- Iron Door Handles: Swap out standard knobs for these heavy-duty pull handles to complete the rugged, workshop-inspired aesthetic on your bar.
- Soap Dispenser: Place this matte black pump on your dry sink surface for a functional, stylish touch that matches the hardware.
Resin “Spill” Top for a Conversation Piece
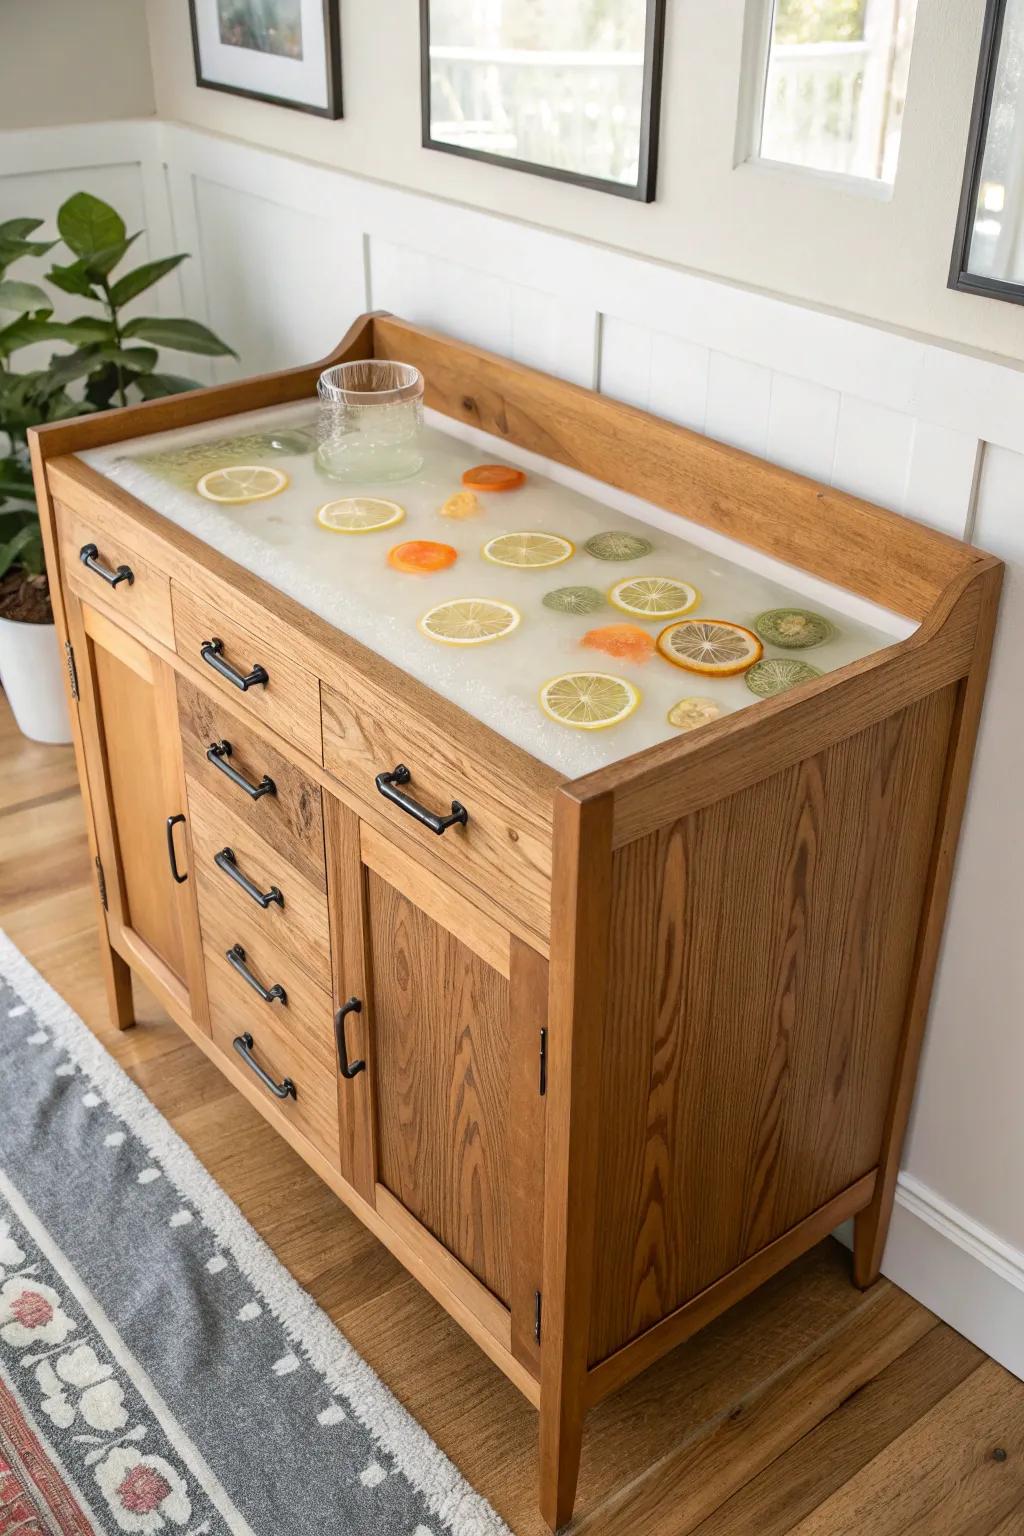
This one’s my wow move: I’ve poured a shallow clear resin layer into the dry sink’s top well with embedded citrus slices (sealed first) so it looks like a frozen-in-time garnish moment. It’s absolutely not subtle, but as a dry sink bar idea it becomes the piece everyone walks over to touch and talk about.
Try these:
- Clear Epoxy Resin Kit: Create that stunning, durable glass-like finish for your bar top by using a high-quality, clear pour.
- Dried Citrus Slices: Add vibrant color and visual interest to your resin pour with these pre-dried, decorative fruit garnishes.
- Resin Mixing Tools & Spreader: Ensure a smooth, bubble-free application and even distribution of your resin layer with proper mixing tools.


