
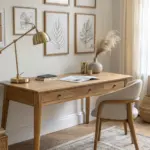
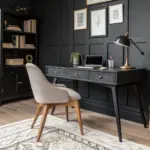
An art desk can go from inspiring to stressful fast when supplies start piling up. These ideas are all about keeping your tools easy to grab while making your creative corner feel cozy, intentional, and totally you.
Turn a Drop-Down Door Into a Hidden Supply Wall
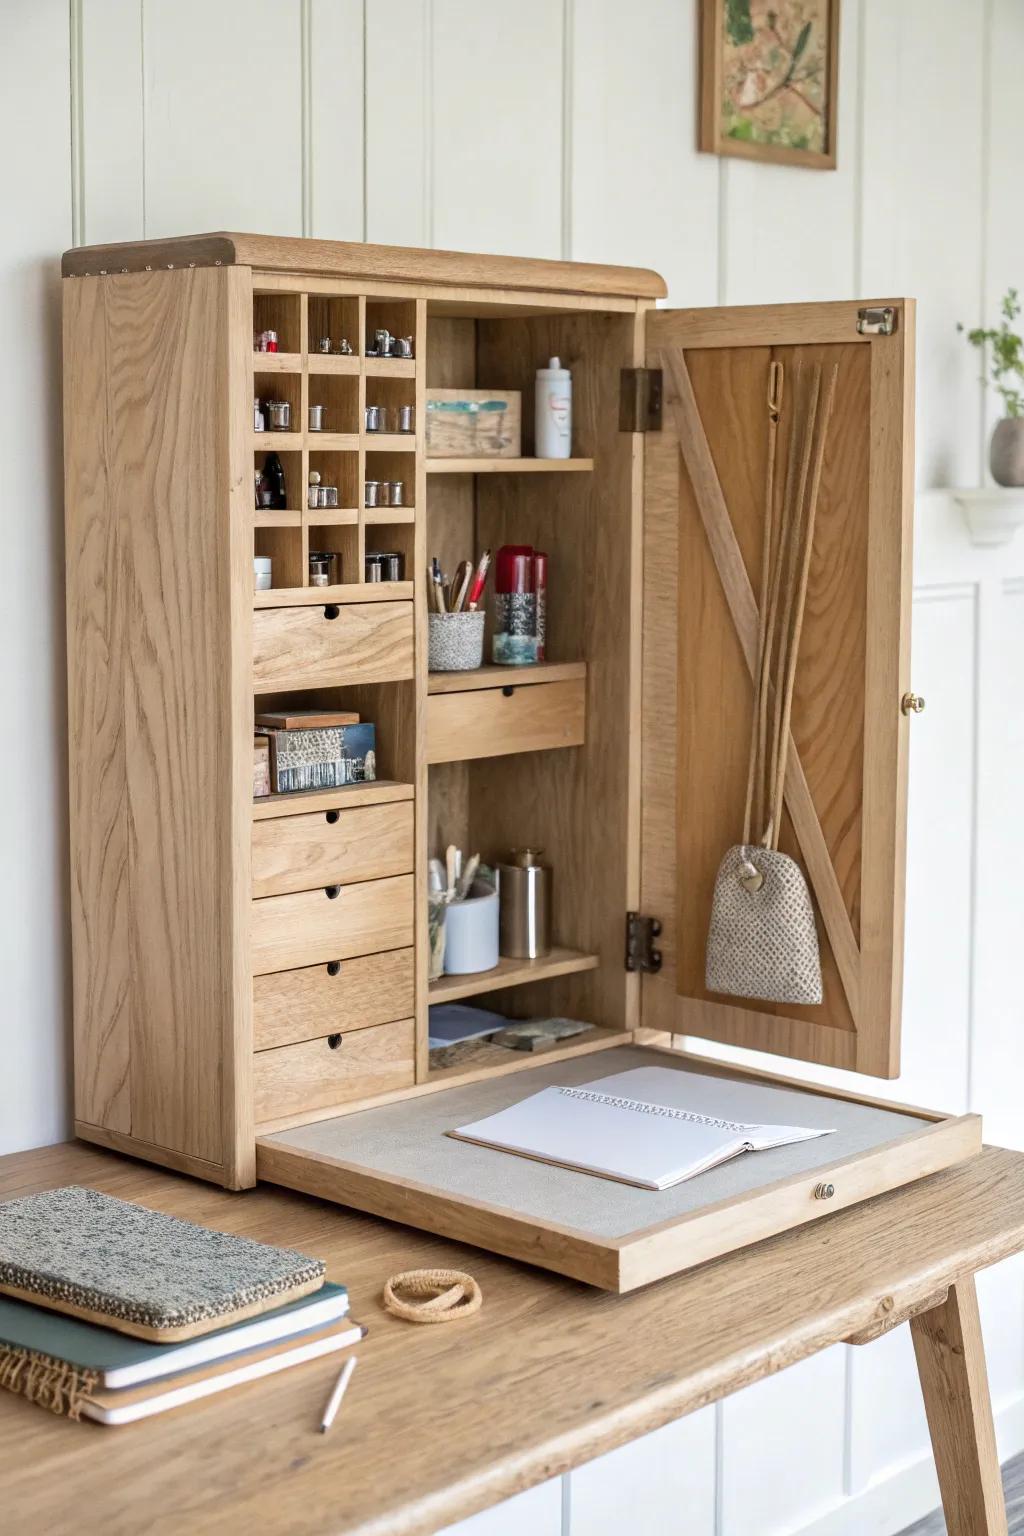
One of my favorite “wow” upgrades was building a shallow cabinet with a fold-down front that becomes a mini work surface, with storage inside the door. I stash my messiest little supplies in there, and my art desk looks clean in seconds.
Products that could assist:
- Wall-Mounted Drop-Leaf Desk: Maximize your small space with this fold-out desk that hides clutter and provides an instant workspace.
- Small Wooden Storage Cubbies: Organize tiny art supplies like beads or nibs efficiently by inserting these modular organizers into shelves.
- Hanging Mesh Pouch Set: Utilize vertical space on cabinet doors to store loose items securely with these versatile hanging bags.


Zone Your Desktop by Task
I keep my art desk organized by setting up work zones—drawing tools on the left, paint on the right, and a clean “making space” in the middle. The moment I started doing this, I stopped shuffling piles around just to start a project.
A few relevant products:
- Wooden Desktop Organizer: Keep essential drawing tools contained in one specific zone to maintain a clutter-free and focused creative workspace.
- Minimalist Desk Pad: Define your central “making space” clearly while protecting your desk surface from stray pencil marks or scratches.
- Concrete Pen Holder: Separate different media types effectively by using distinct, stylish containers for your secondary tools or brushes.


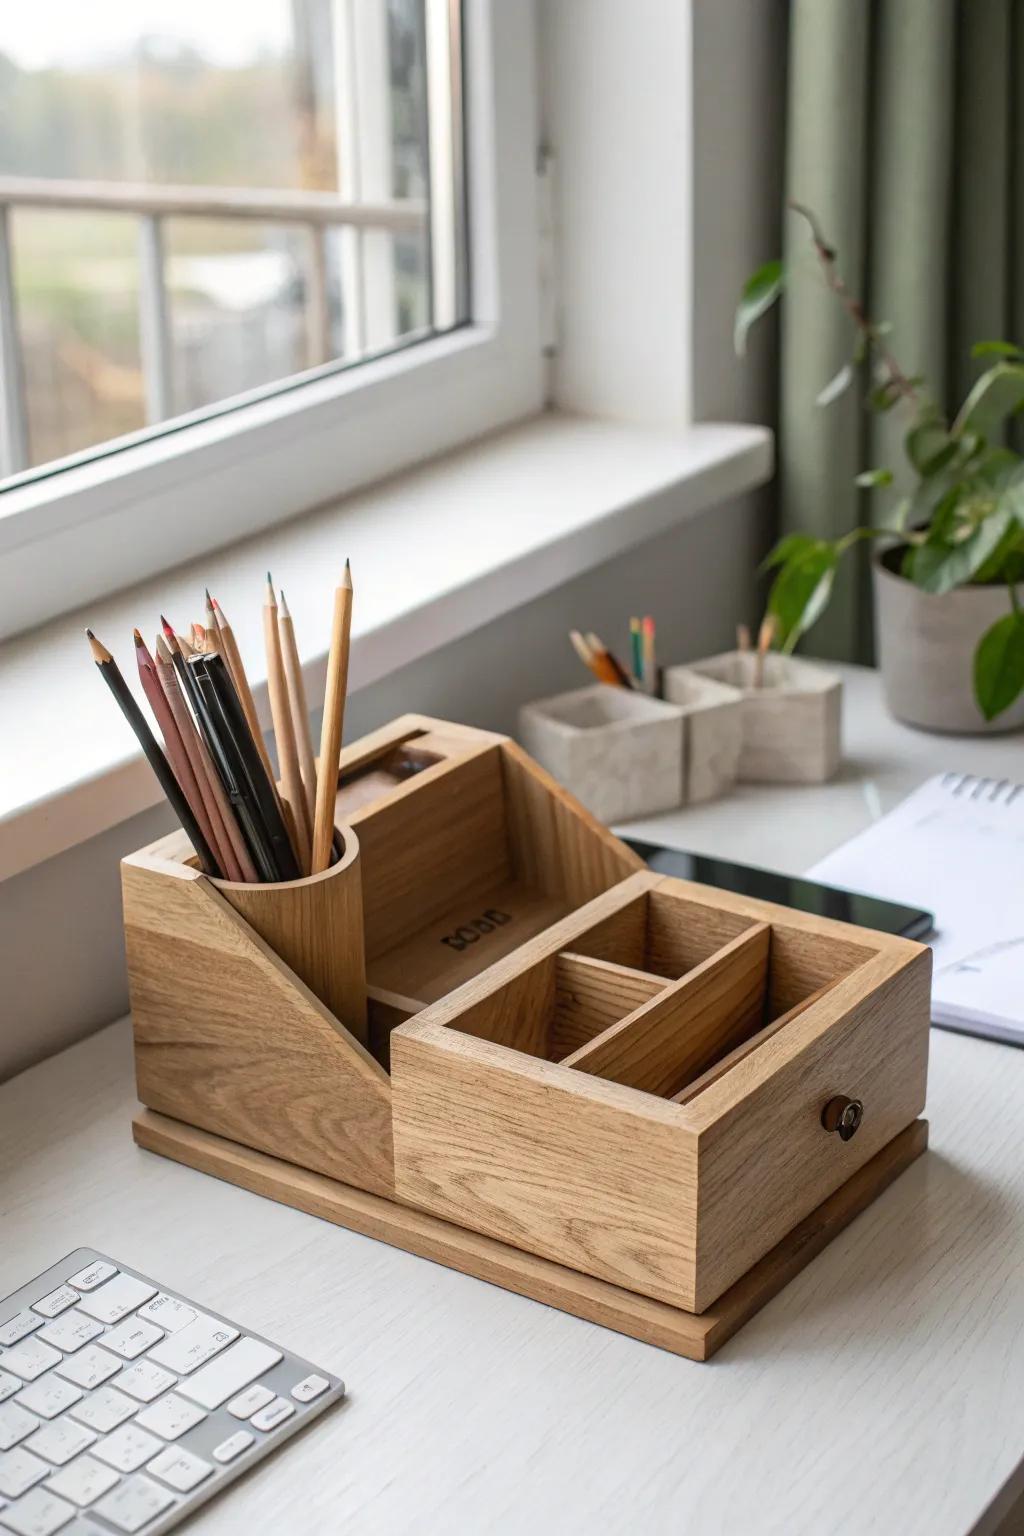
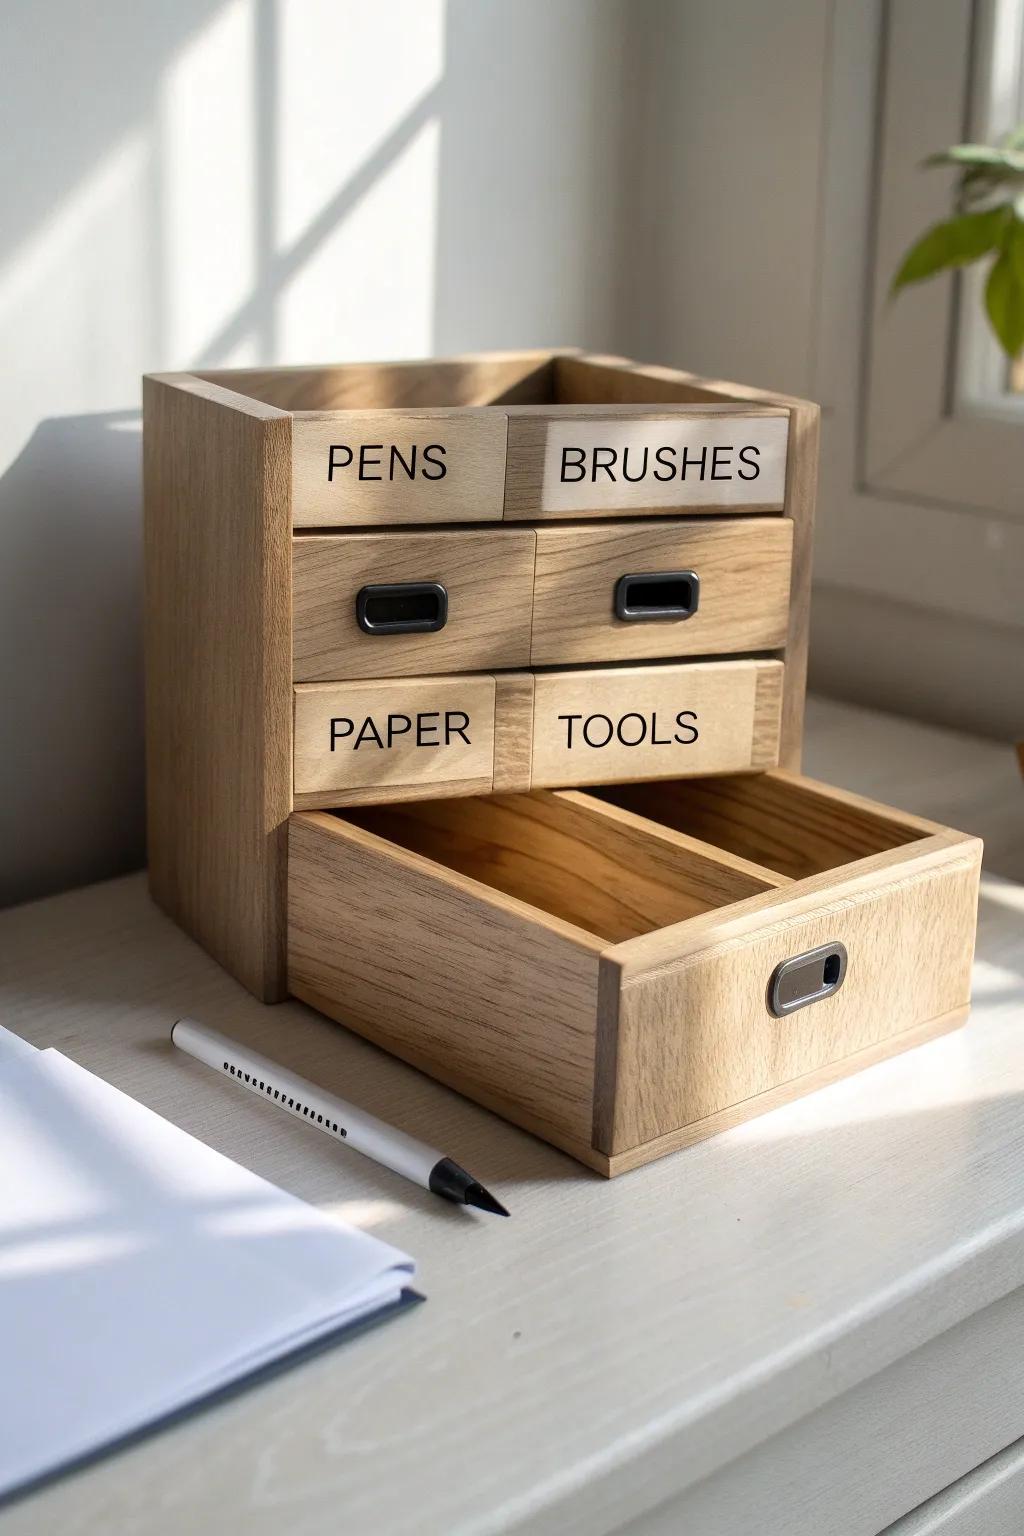
Add a Simple Wooden Desktop Caddy
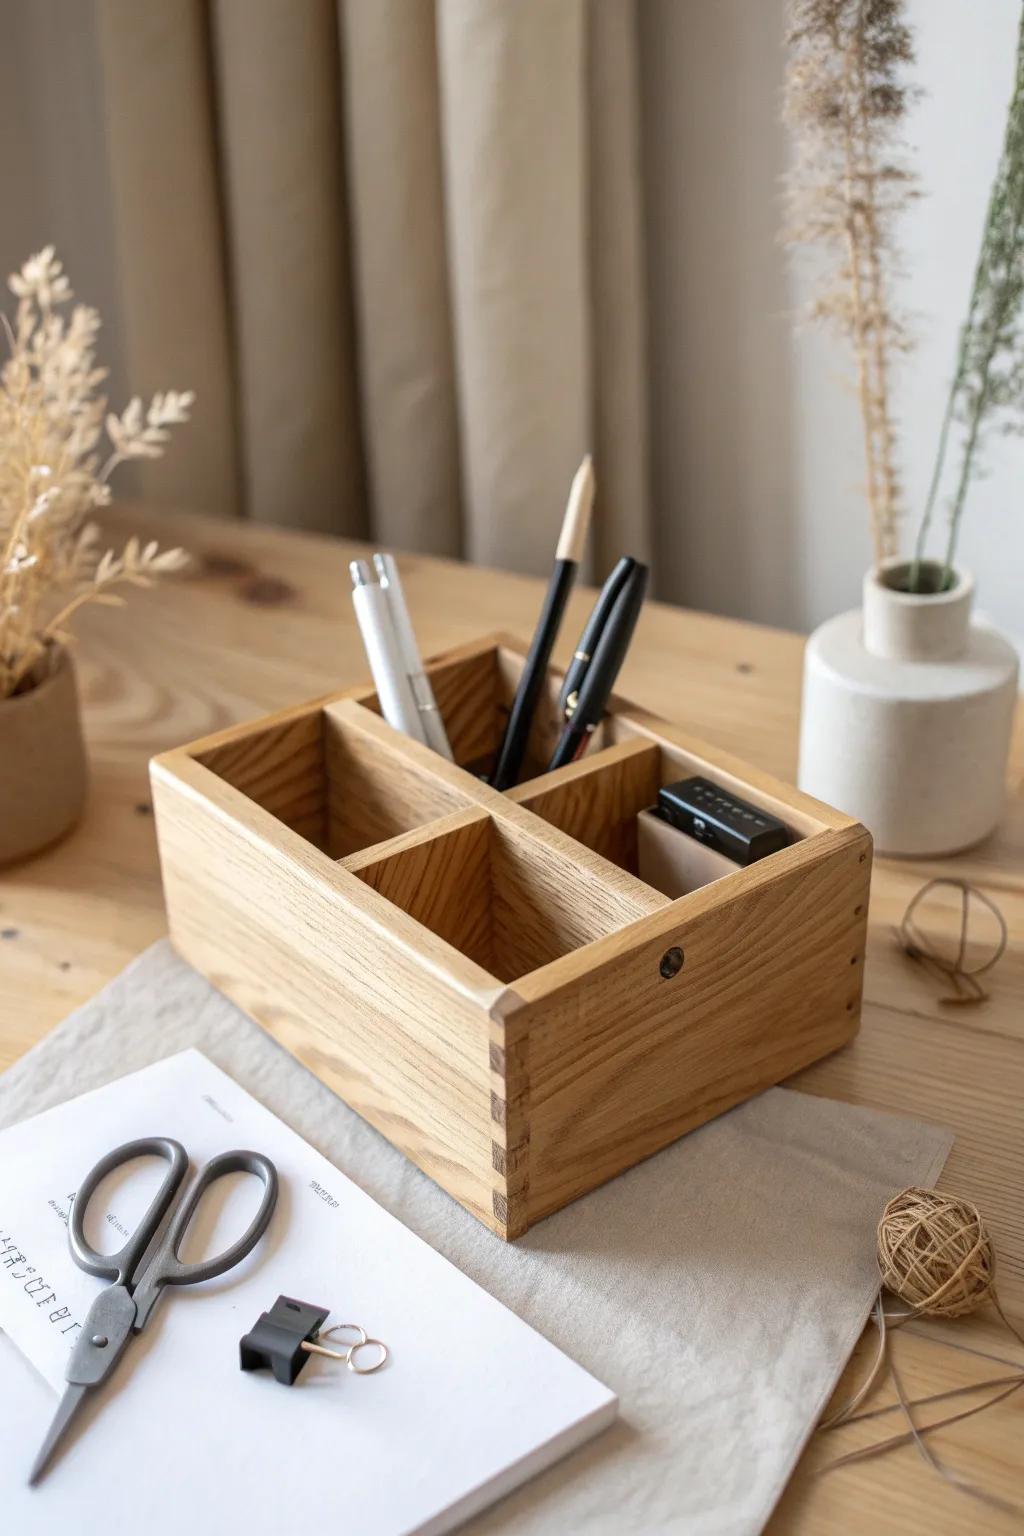
I built a little wooden desk caddy with a few compartments, and it instantly corralled my most-used pens, scissors, and glue. Keeping the daily-grab tools upright and visible has saved me so much time.
A few suggestions:
- Wooden Desk Organizer Box: Keep your essential writing tools tidy and accessible with a natural wooden organizer featuring multiple compartments.
- Minimalist Wood Pencil Holder: Display your favorite art supplies elegantly using a simple, sturdy wooden holder that fits any desk decor.
- Multi-Slot Desktop Storage Crate: Sort small office accessories and stationery items easily with a divided wooden crate designed for desktop use.


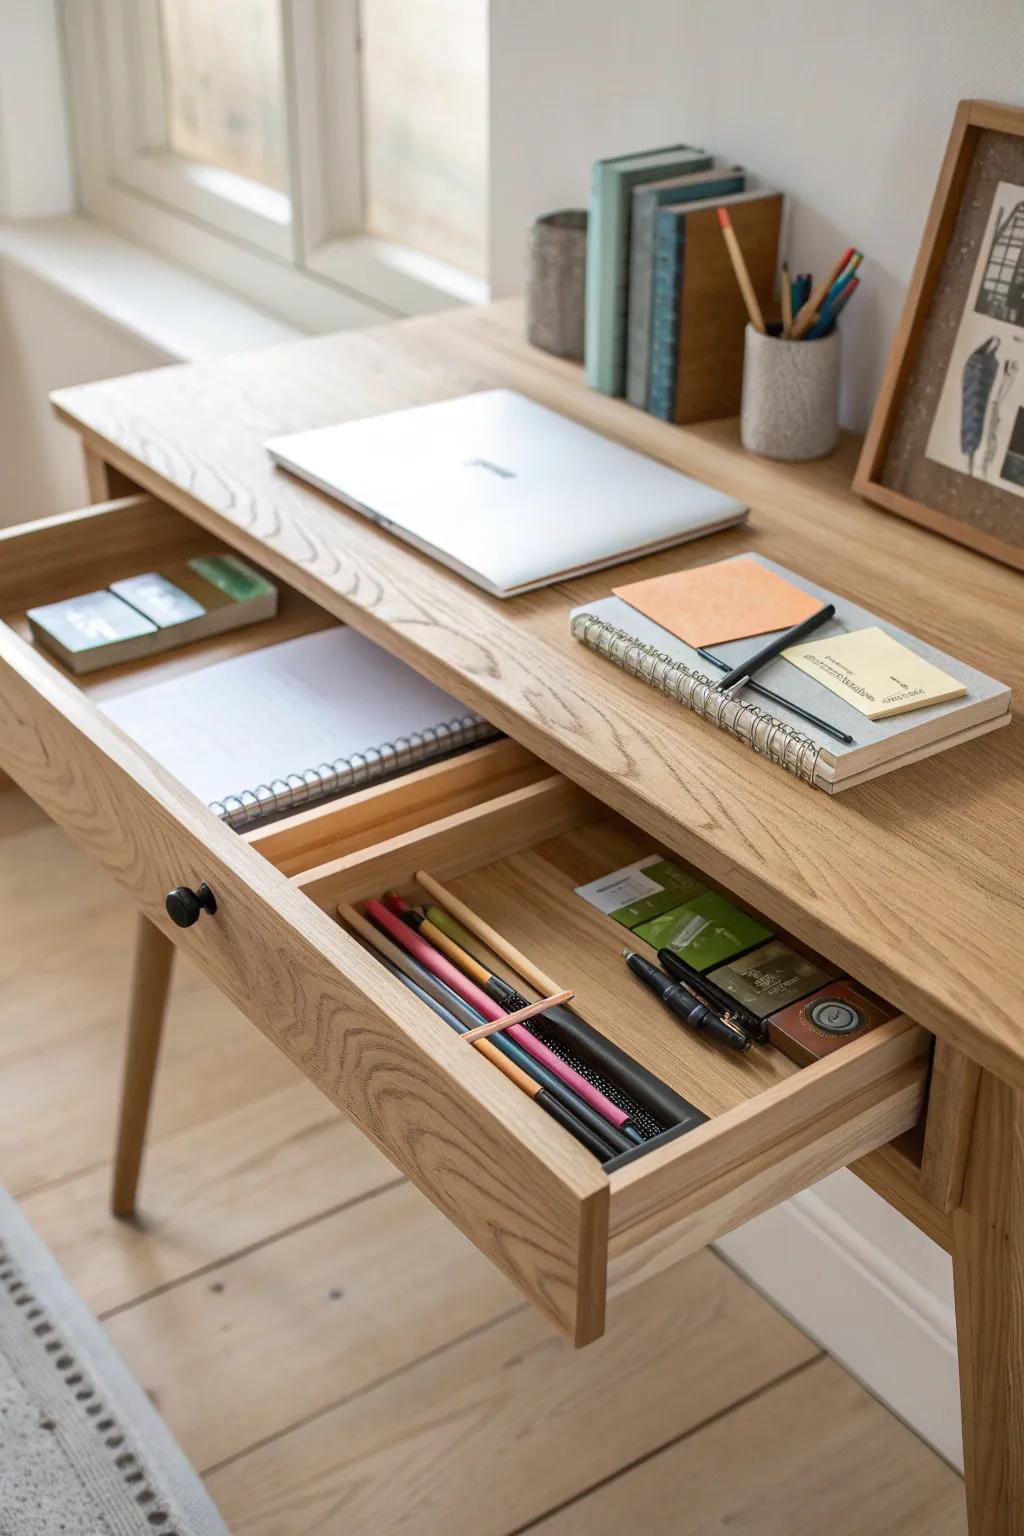
Use Drawer Dividers for Tiny Supplies
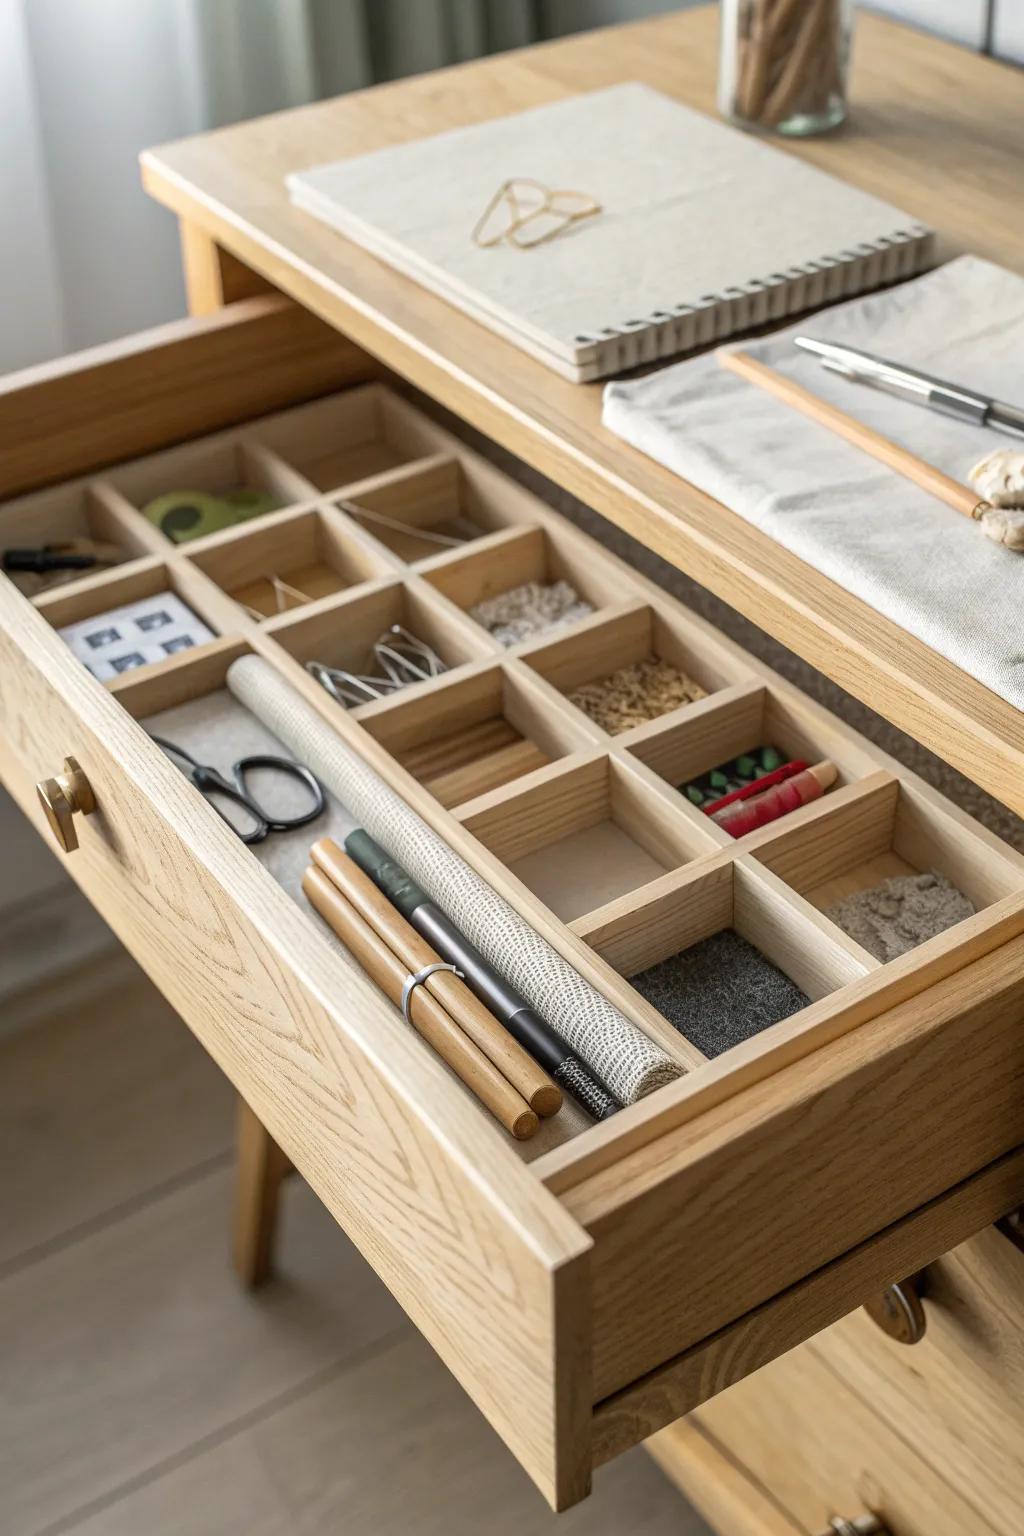
The day I added drawer dividers was the day I stopped buying duplicates of things I already owned. I like making dividers from scrap plywood because I can size each pocket exactly for erasers, blades, clips, and sharpeners.
Items that may come in handy:
- Adjustable Wooden Drawer Organizer: Create designated spots for every eraser and clip to keep your art supplies visible and tidy.
- Grid Tray Insert for Drawers: Instantly neatly categorize tiny items like beads and nibs with a drop-in multi-compartment tray.
- Interlocking Desk Organizer Bins: Customize your storage layout to fit items perfectly by mixing and matching these modular containers.
Mount a Pegboard Above Your Art Desk
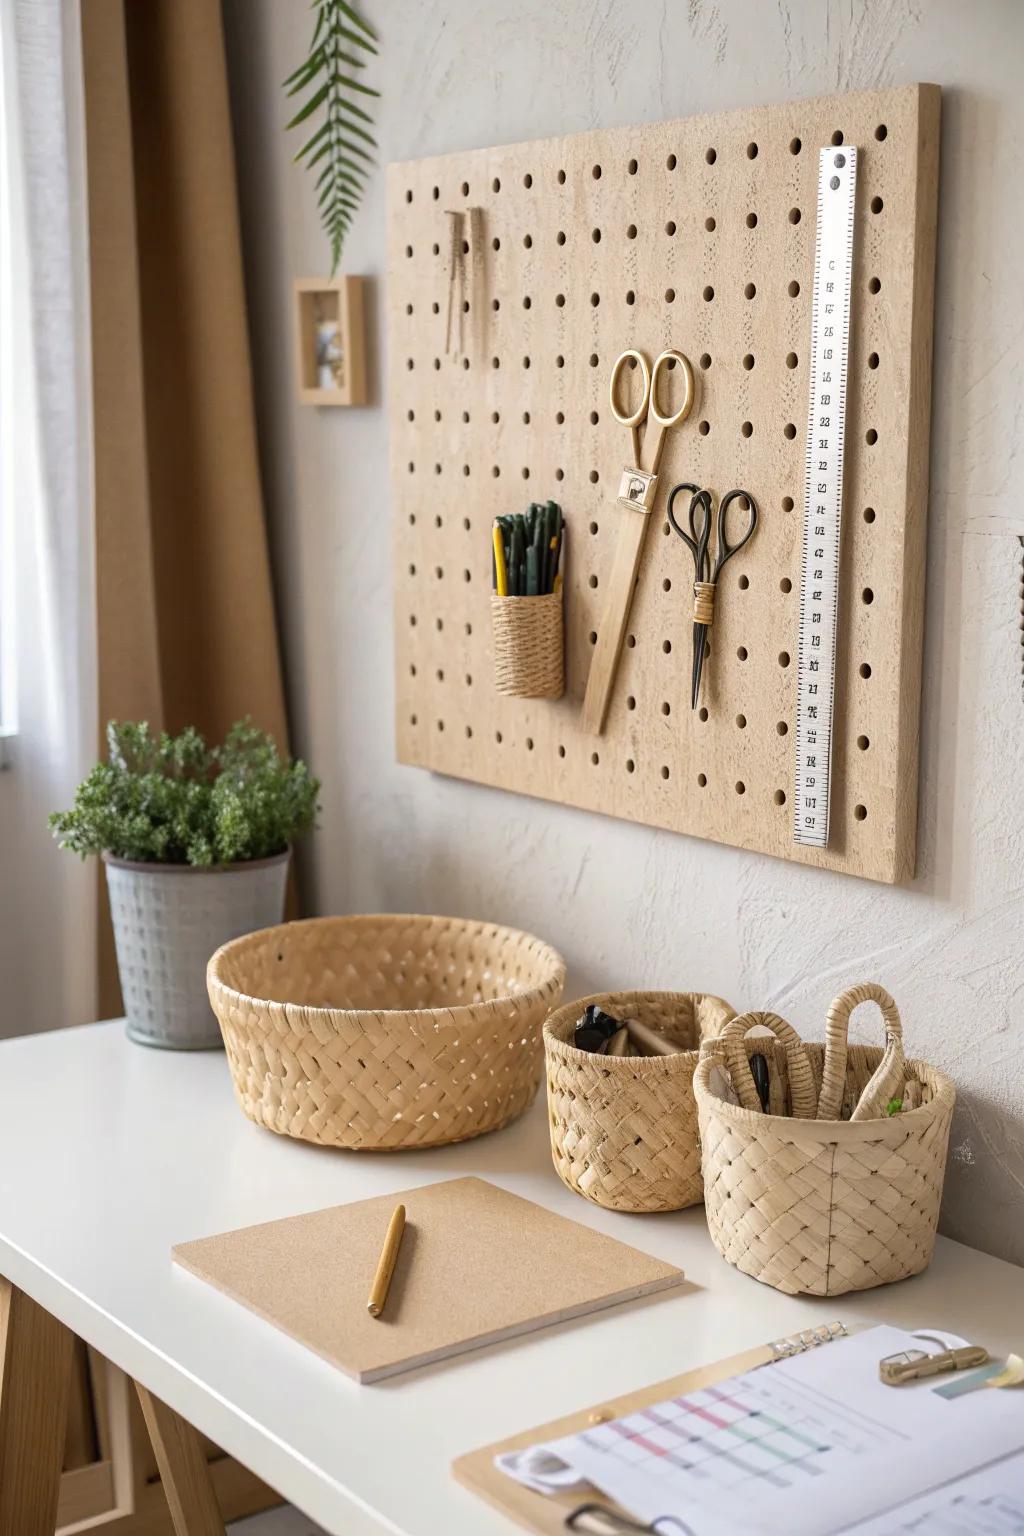
A pegboard wall is my go-to move when the desk surface starts disappearing under tools. I hang rulers, snips, and little baskets up there so I can reach everything without digging through a bin.
Some ideas to consider:
- Wooden Pegboard Panel: Create vertical storage instantly by mounting a versatile wooden board to keep your essential tools accessible.
- Woven Storage Baskets: Organize smaller supplies on your desk surface with these textured, natural baskets that add warmth and function.
- Vintage Style Scissors: Upgrade your toolkit with durable scissors that offer precise cutting while doubling as beautiful pegboard decor.
Create a Brush and Pencil Jar Row
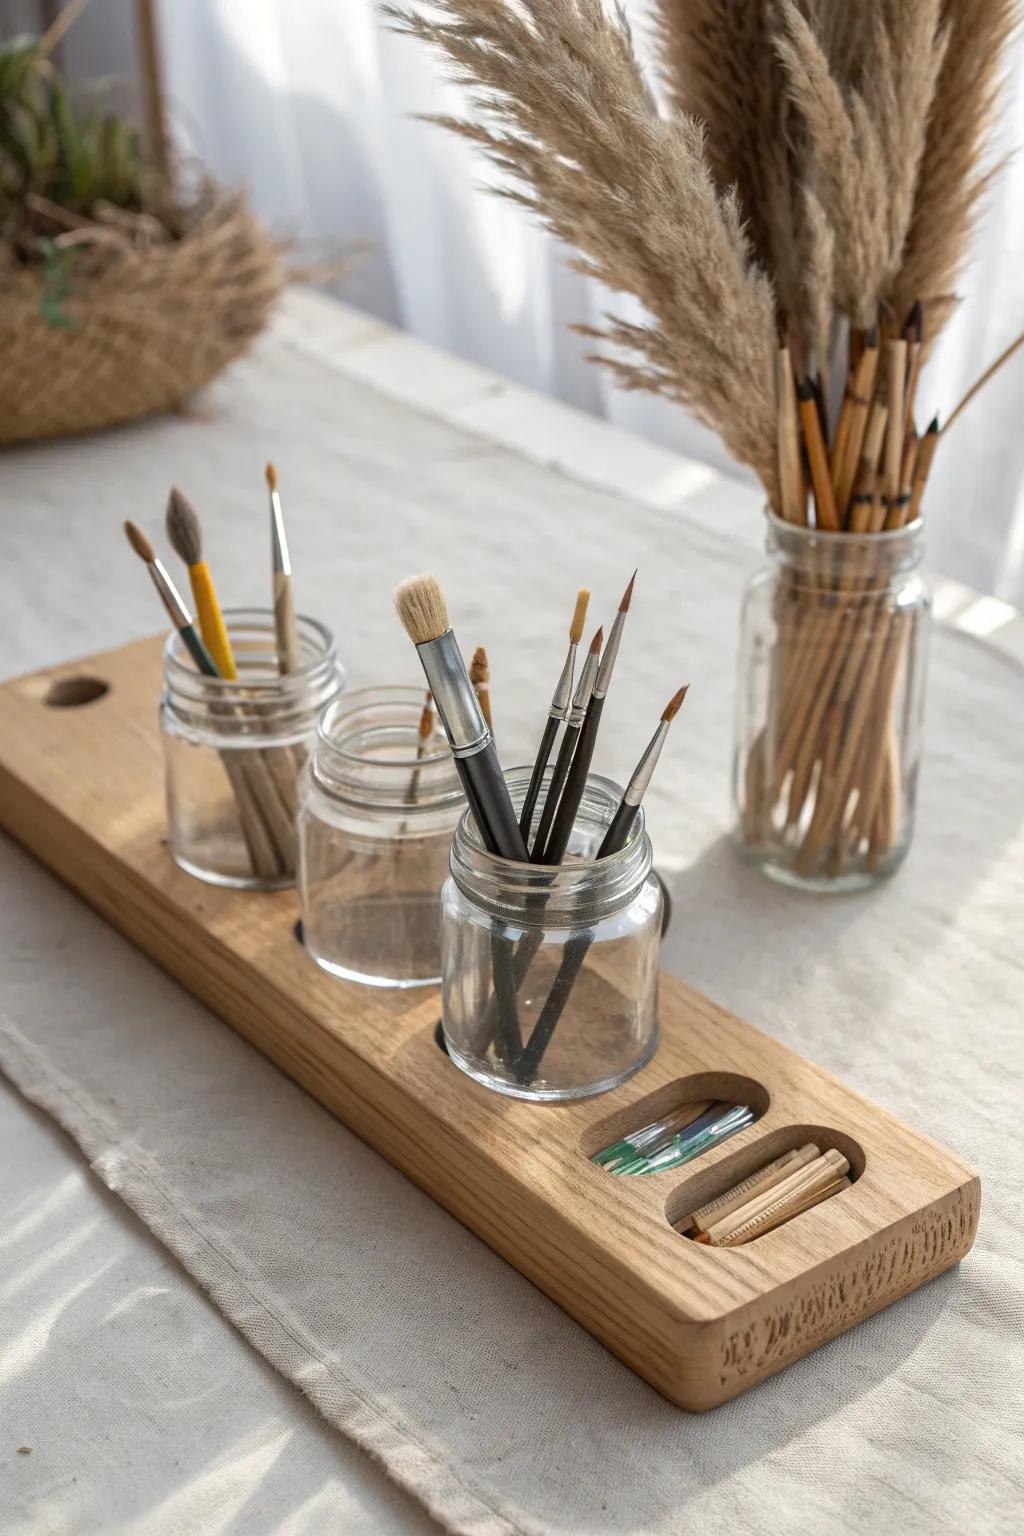
I line up a few sturdy glass jars on a narrow board, and suddenly every brush and pencil has a home. I’ve learned to sort them by type (wash, detail, graphite) so I’m not grabbing the wrong tool mid-stroke.
Give these a look:
- Small Glass Mason Jars: Organize your brushes neatly with these clear jars, making it easy to spot the right tool instantly.
- Narrow Wood Serving Board: Create a dedicated base for your jars using a sturdy wooden tray to effectively group your supplies together.
- Artist Paint Brush Set: Fill your new organizers with a fresh set of versatile brushes suitable for various painting techniques.

Install a Skinny Shelf for Paint Bottles
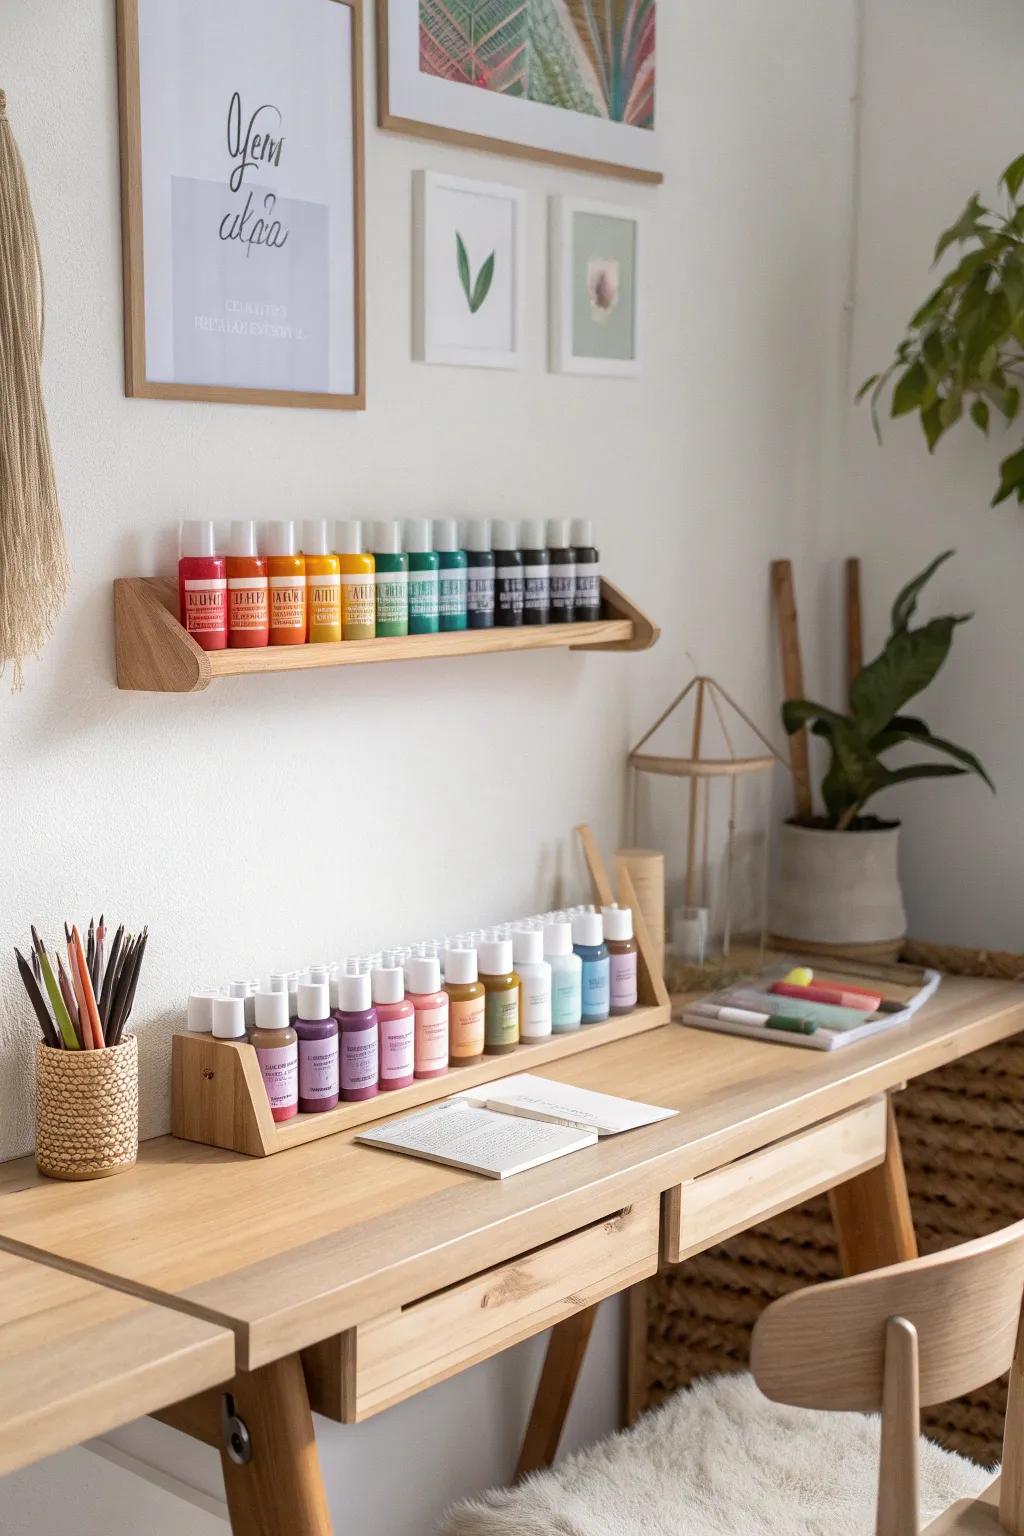
A slim picture-ledge shelf above the desk keeps paint bottles visible without eating up workspace. I arrange mine by color, and it genuinely makes me want to sit down and create.
These products might be useful:
- Wooden Picture Ledge Shelf: Display your colorful paint collection neatly with a floating ledge that keeps supplies accessible yet out of the way.
- Desk Organizer Rack for Paint: Keep frequently used paints right at your fingertips with a tiered wooden rack designed specifically for bottle storage.
- Acrylic Paint Bottle Set: Fill your new shelves with a vibrant spectrum of acrylic paints to inspire your next creative art project.
Stand Papers Upright in Vertical Files
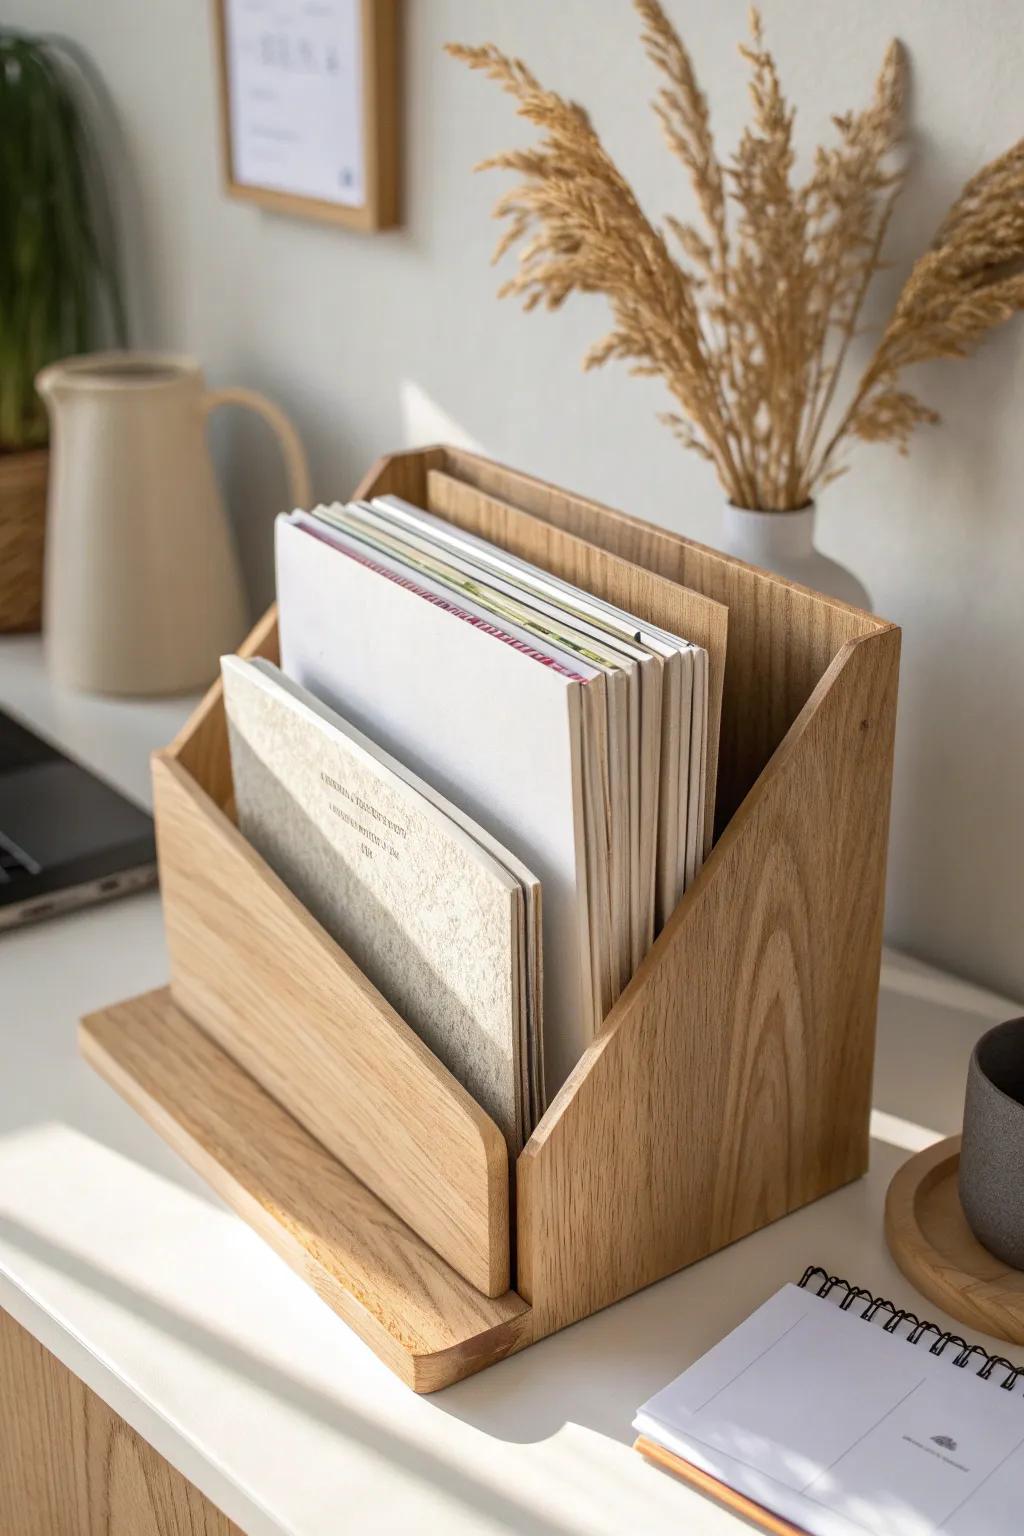
I use vertical file holders to keep sketchbooks, pads, and loose paper from becoming a messy stack. Once I started storing paper upright, I stopped creasing corners every time I grabbed something.
Check if these fit your needs:
- Wooden Desktop File Organizer: Keep your sketchbooks and documents neatly arranged upright with this warm, sturdy wooden storage solution.
- Clear Acrylic Vertical Sorter: Showcase your beautiful paper supplies while keeping them accessible and vertical with a sleek, transparent holder.
- Adjustable Wire Rack Holder: Sort varied sizes of pads and loose papers effortlessly using these flexible, lightweight metal wire racks.
Tuck Flat Work Into a DIY Flat File
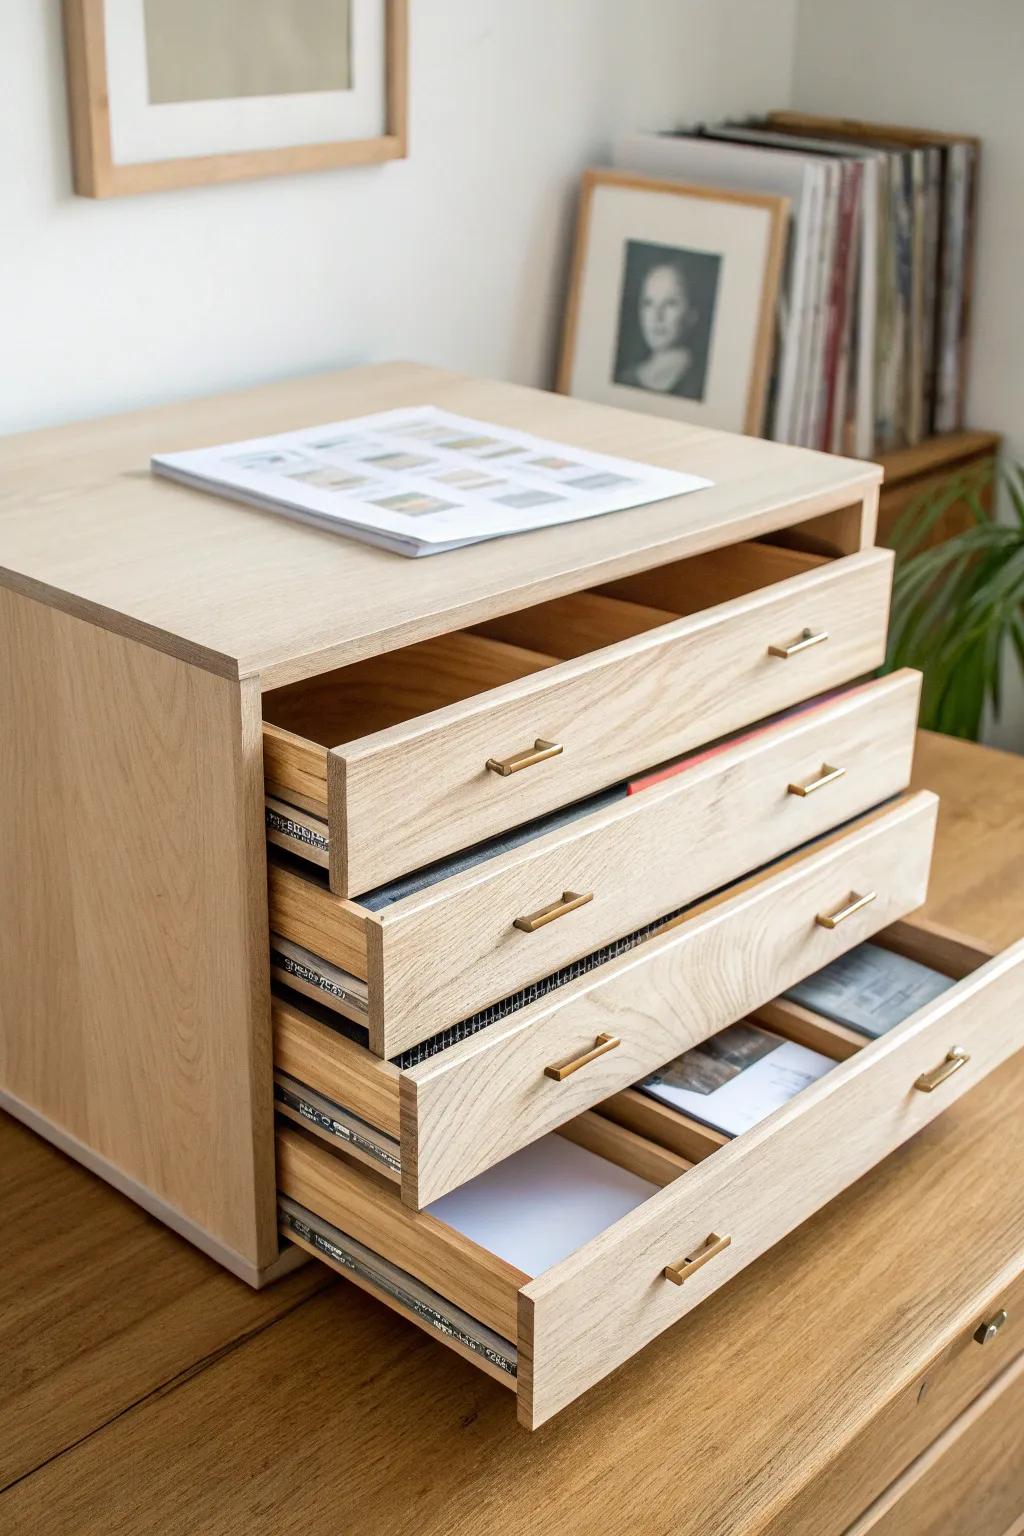
For prints and delicate sheets, I made a shallow flat file drawer from plywood offcuts, and it keeps everything crisp and dust-free. I used to roll work “just for now,” and I regretted it every single time.
Possibly helpful picks:
- Wooden Desktop Drawer Organizer: Organize your prints and papers easily by adding a stylish wooden drawer unit to your current workspace setup.
- Brass Cabinet Pull Handles: Upgrade your DIY projects or existing drawers with sleek brass hardware for a polished, professional studio look.
- Archival Storage Boxes: Protect delicate artwork from dust and light damage with acid-free storage solutions perfect for flat filing.
Slide Storage Under the Desk
I added under-desk bins and a low pull-out tray, and it’s perfect for stuff I want close but not visible. It’s my favorite way to keep bulky supplies from creeping back onto the tabletop.
Maybe worth checking out:
- Under Desk Storage Drawer: Instantly add a hidden compartment to your workspace for pens and small tools to keep surfaces clear.
- Rolling Low-Profile Cart: Roll bulky art supplies right under your desk with a compact cart that fits tight spaces perfectly.
- Stackable Storage Bins: Keep paper and larger materials organized below your work surface with sturdy, stackable bins for easy access.
Keep a Rolling Cart for Active Projects
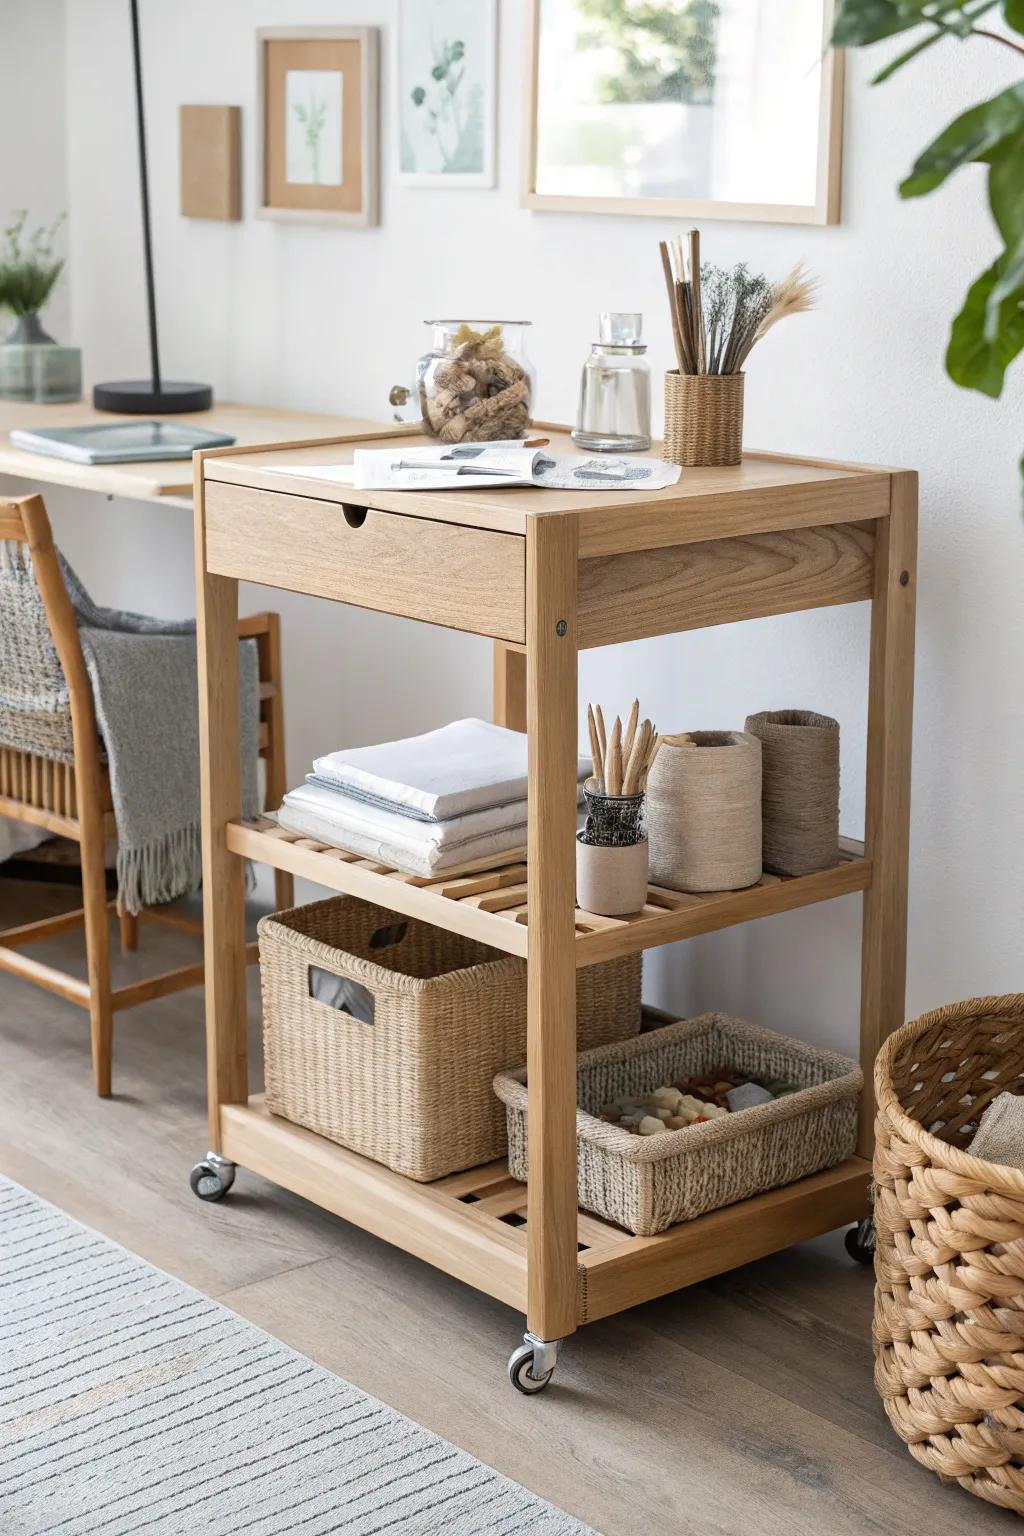
A rolling supply cart is my secret weapon when I’m bouncing between painting, cutting, and sanding. I load it with the current project’s materials, then roll it away so my art desk resets fast.
Consider these options:
- Wooden Rolling Kitchen Cart or Trolley: Choose a sturdy wooden cart with shelves and drawers to keep your active project materials organized and mobile.
- Woven Storage Baskets: Use natural woven baskets to corral loose supplies and add texture while keeping shelves looking neat and tidy.
- Glass Storage Jars or Canisters: Store smaller items like buttons or beads in clear glass jars for easy visibility and a classic aesthetic.
Label Everything in a Calm, Minimal Way
I’m not fancy about it—just consistent labels so I can find things on autopilot. When I started labeling drawers and bins, my cleanup time got cut in half.
Try these:
- Clear Label Maker with Custom Fonts: Design custom, minimal labels effortlessly to keep your drawers organized and ensure supplies always return home.
- Wooden Desktop Drawer Organizer: Store your art supplies in style with this compact unit, perfect for adding your own clear labels.
- Transparent Clear Label Tape: Create a seamless look on wooden surfaces with clear tape that lets the natural texture show through.
Use a Two-Tier Tray for Daily Tools
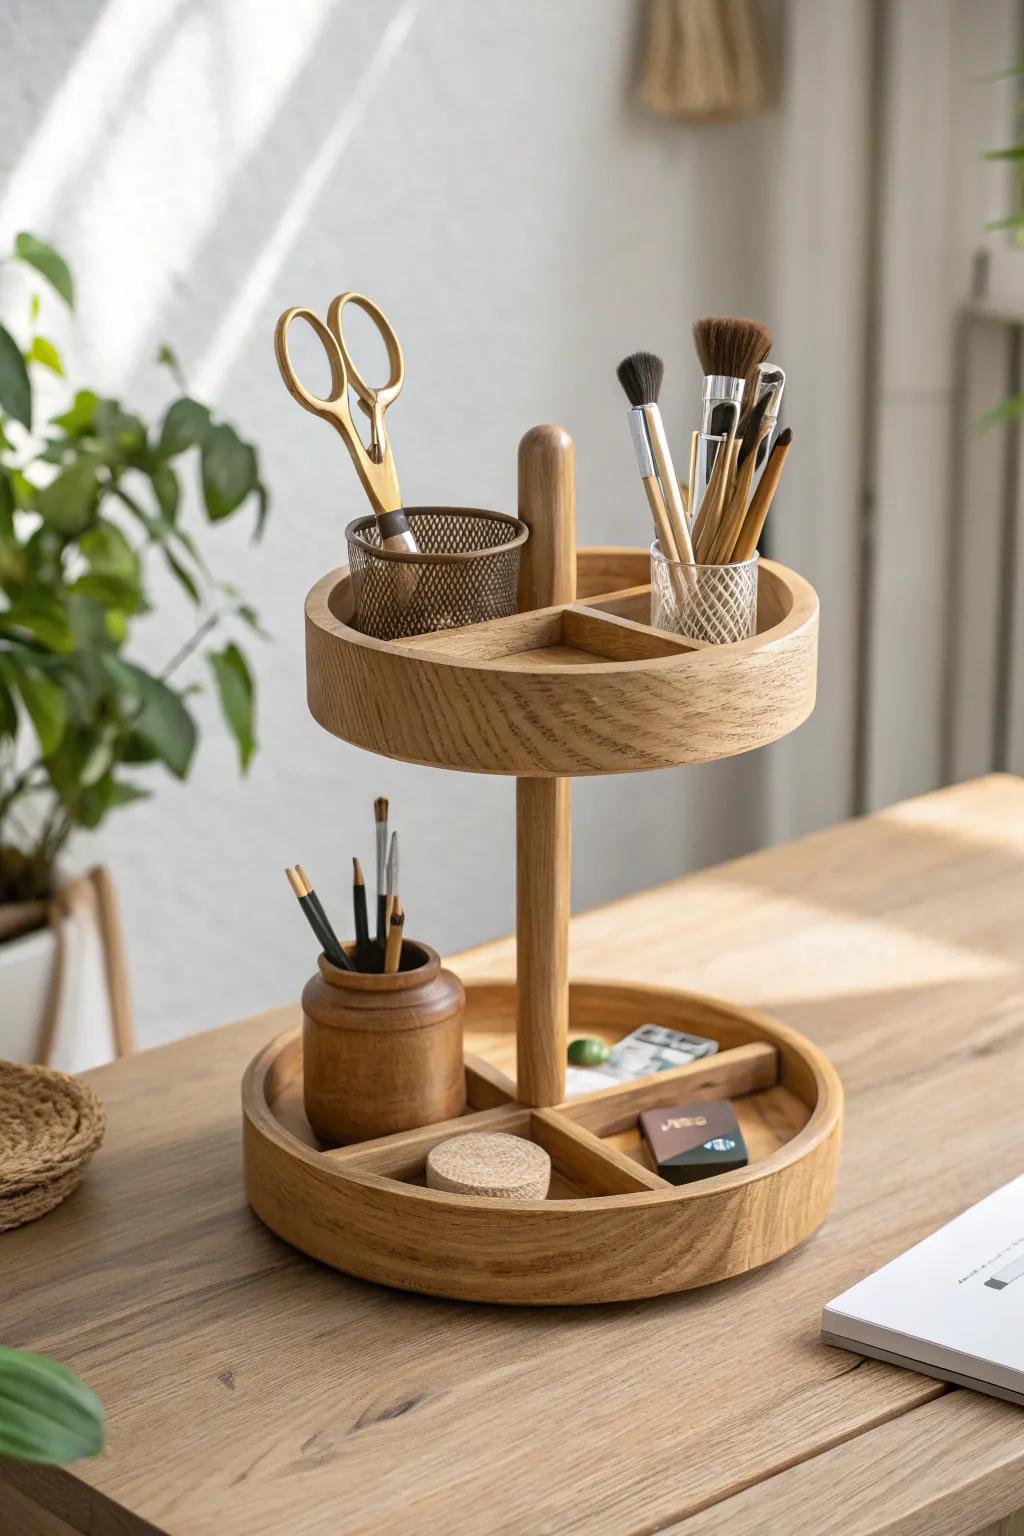
I keep my most-used items on a small tiered organizer tray so they’re contained but still right on the desk. It’s been a lifesaver for keeping tiny tools from spreading out like glitter.
A few things you might like:
- Wooden 2-Tier Lazy Susan Organizer: Keep your daily essentials accessible and tidy with a rotating wooden tray perfect for brushes and scissors.
- Mesh Wire Cup Holder Inserts: Use small mesh cups within your tray to separate pens from brushes and prevent them from tipping over.
- Small Wooden Storage Pot: Add a small wooden pot to your organizer to hold shorter items like pencils or blending stumps securely.
Build a Charging and Cable Corner
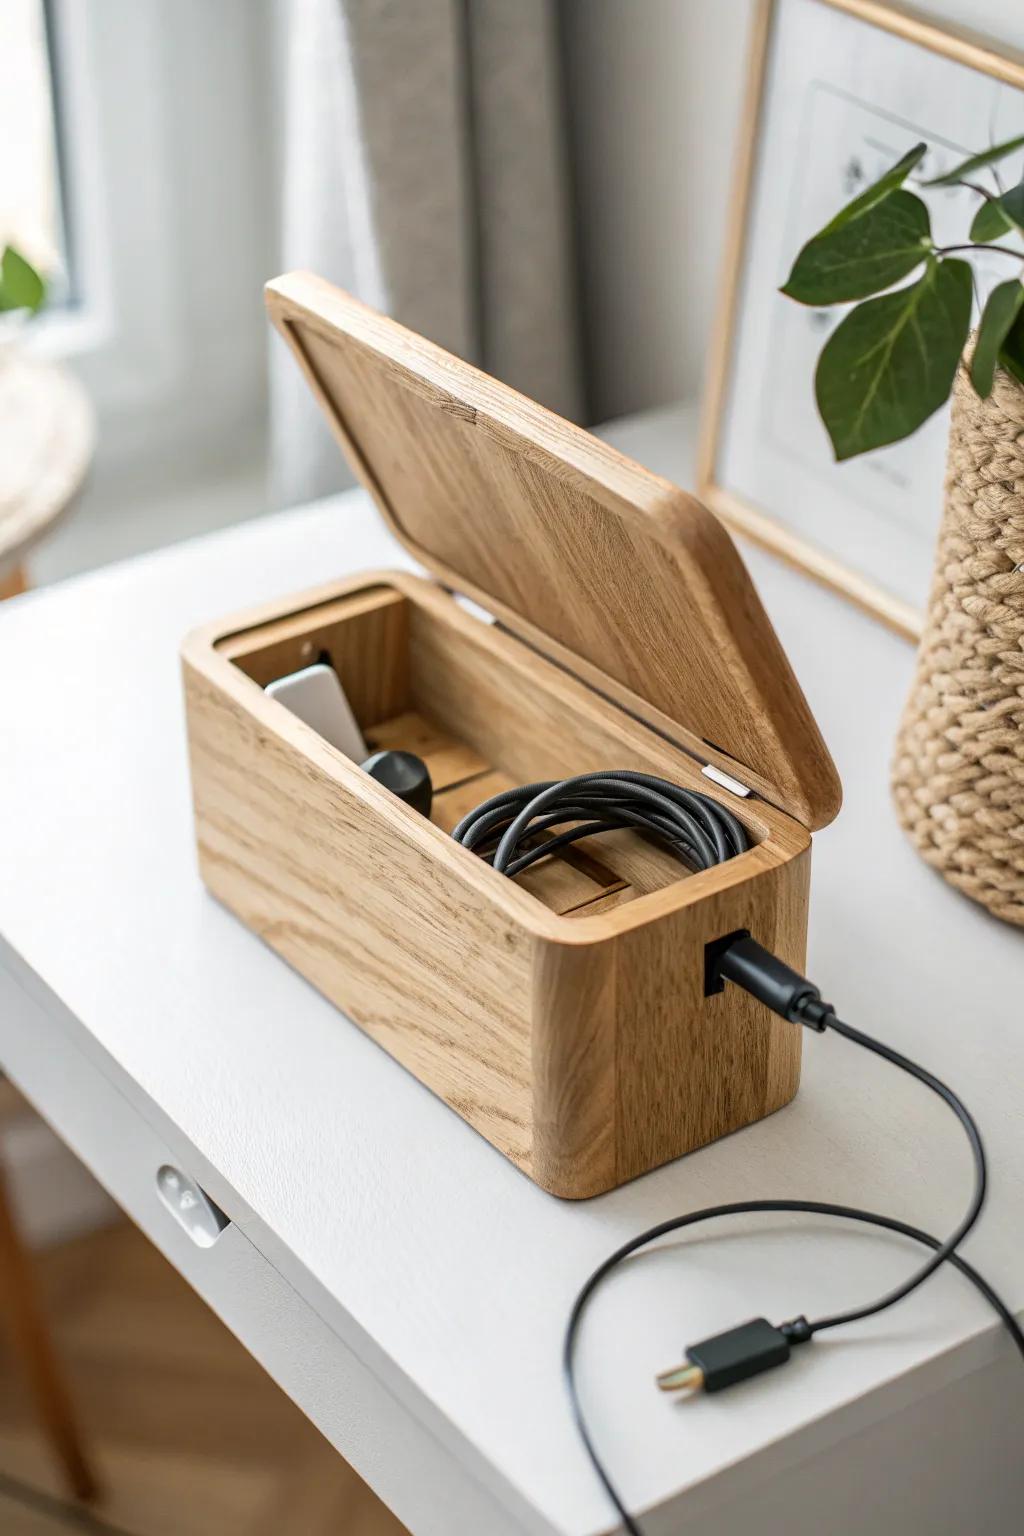
Since my art desk pulls double duty, I made a little cable management nook with clips and a wood box to hide cords. It keeps my tablet and lamp setup tidy so the creative mess stays where it belongs.
Some handy options:
- Wooden Cable Management Box: Conceal power strips and messy cords inside a stylish wooden box to instantly declutter your creative workspace.
- Adhesive Desktop Cable Clips: Secure charging cables exactly where you need them and prevent slipping with these simple, effective wire holders.
- Short USB Charging Cables: Replace tangled long wires with shorter cords designed to fit neatly inside your organizer box without bulk.
Store Rulers and Mats in a Side Slot
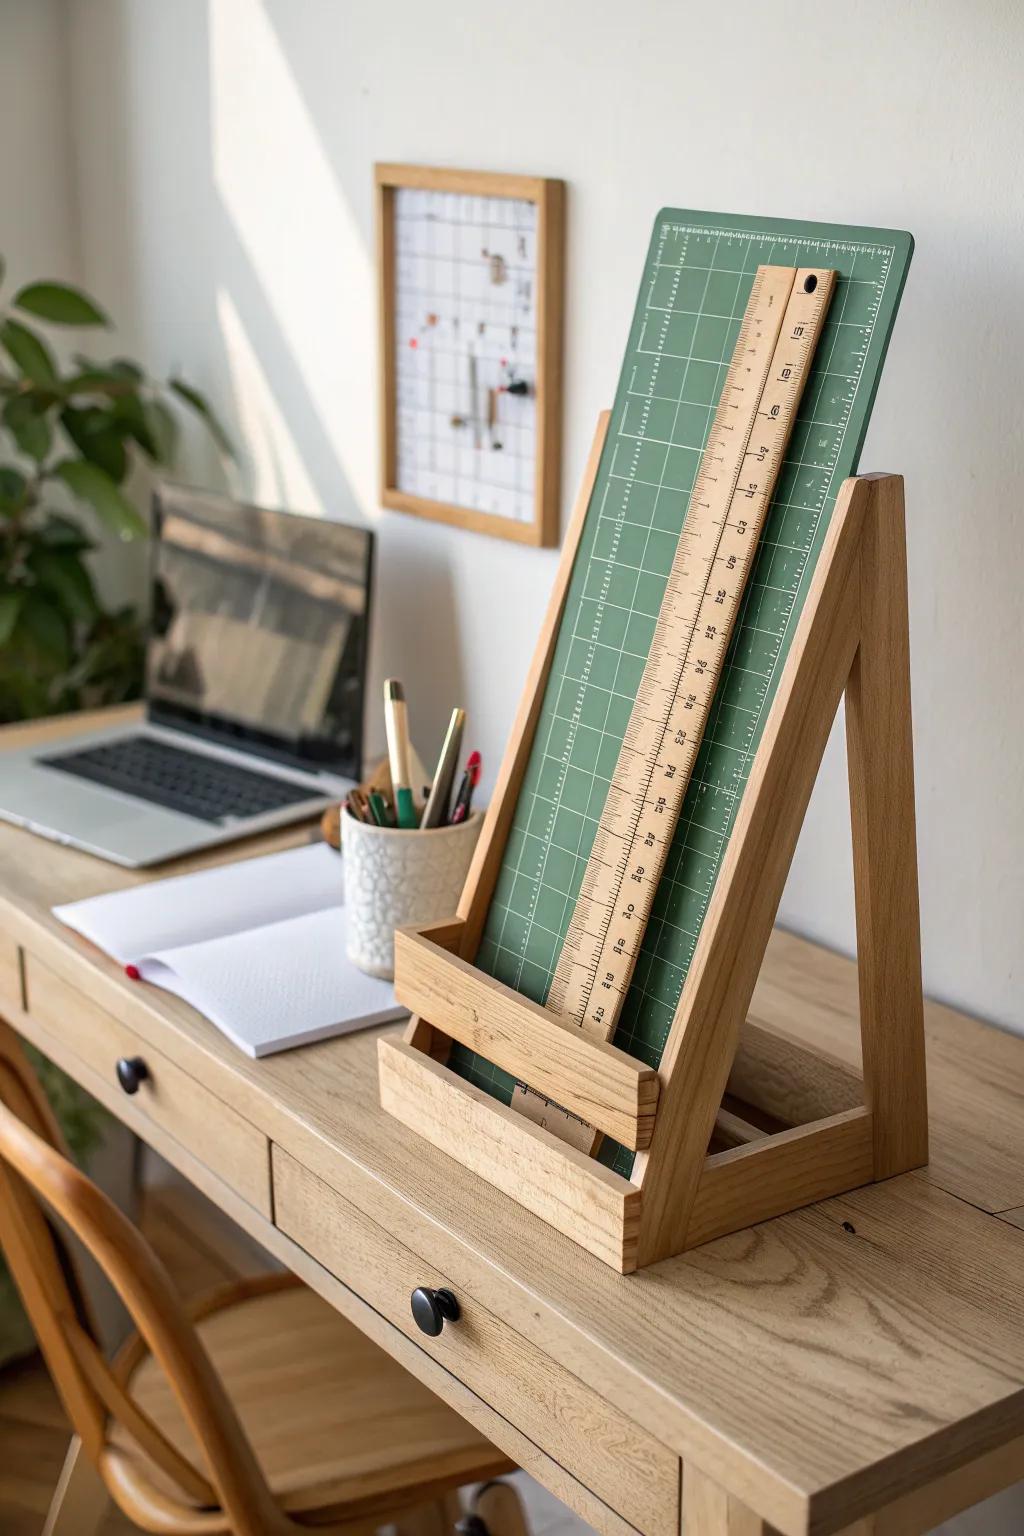
I screwed together a slim vertical slot rack beside my art desk to hold cutting mats, rulers, and boards. Before that, they were always leaning somewhere awkward and getting nicked up.
Useful items to consider:
- Desktop Vertical File Organizer: Keep your workspace tidy by vertically storing cutting mats and boards with a sturdy, upright desktop organizer.
- Self-Healing Cutting Mat: Protect your desk surface and ensure precise cuts with a durable, high-quality self-healing craft mat.
- Wooden Drafting Ruler: Upgrade your measuring tools with a classic wooden ruler that adds functionality and warmth to your desk setup.
Make a Magnetic Strip Tool Rail
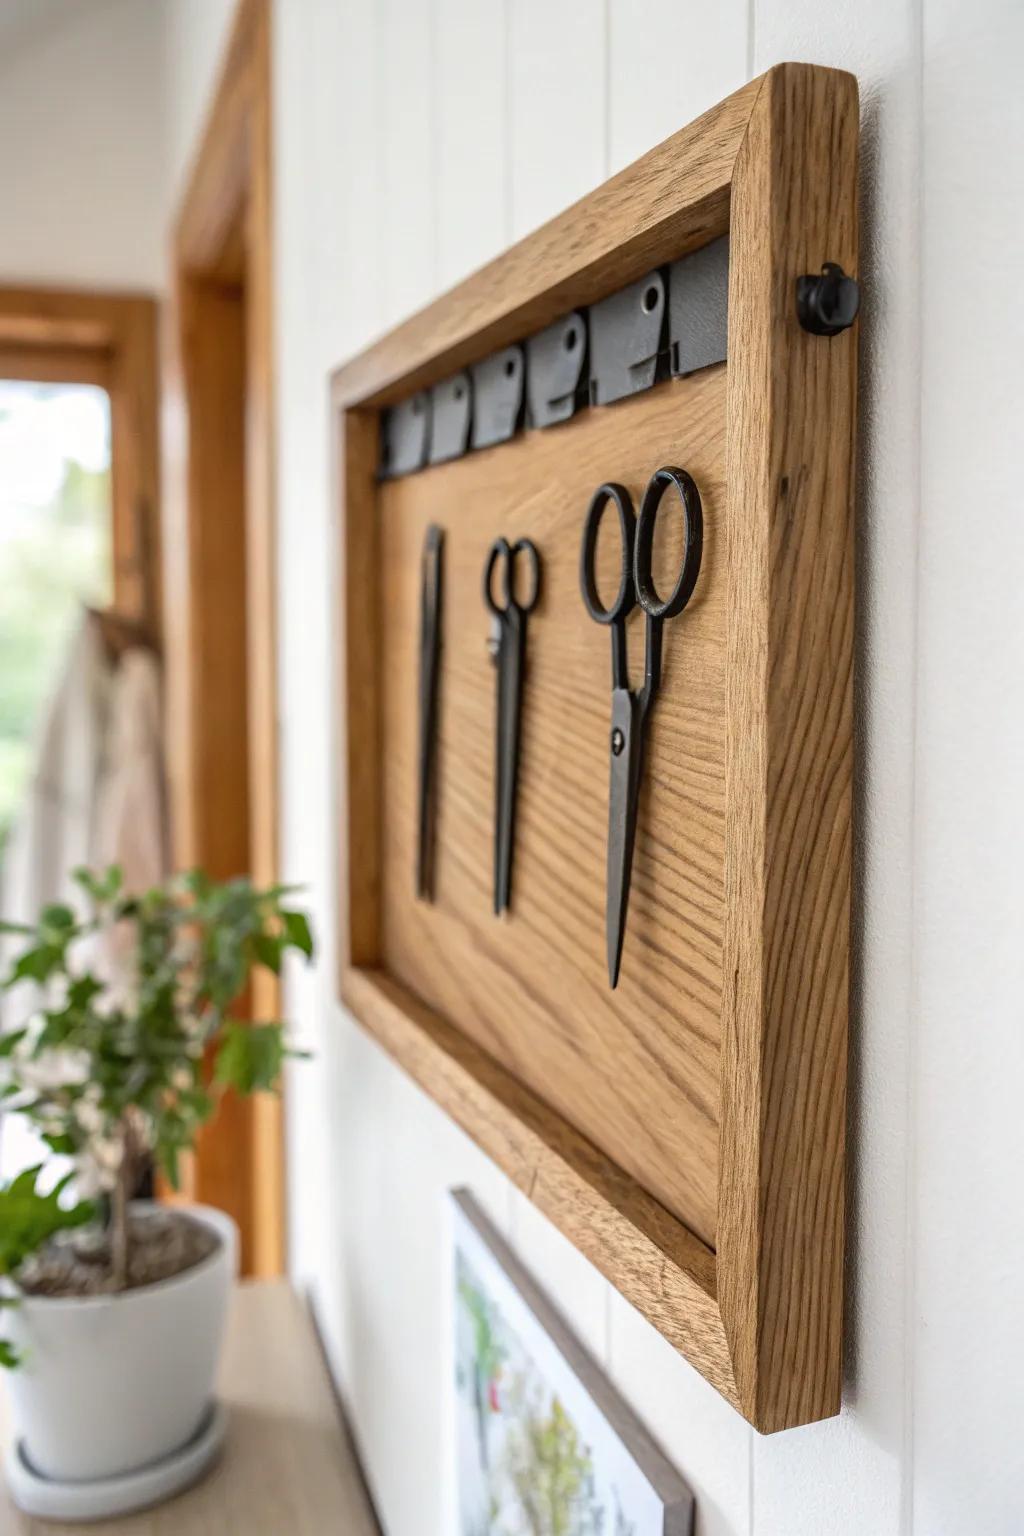
I framed a magnetic tool strip with a bit of reclaimed wood so it looks intentional, not like a garage wall. It’s weirdly satisfying seeing metal tools lined up, and I never lose my little snips anymore.
You might give these a try:
- Heavy Duty Magnetic Tool Holder Strip: Securely hold your metal art supplies and tools by installing this strong magnetic strip inside a decorative frame.
- Unfinished Wood Frame: Create a custom look for your organizer by selecting a simple wood frame to surround your magnetic strip.
- Black Precision Scissors Set: Equip your new magnetic rail with a matching set of metal scissors perfect for detail work and crafting.


