
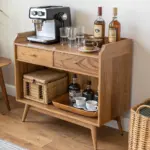
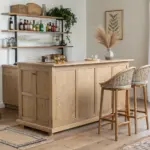
A great bar counter top is the kind of detail that makes everyone naturally drift over and stay awhile.
Epoxy River Channel Center
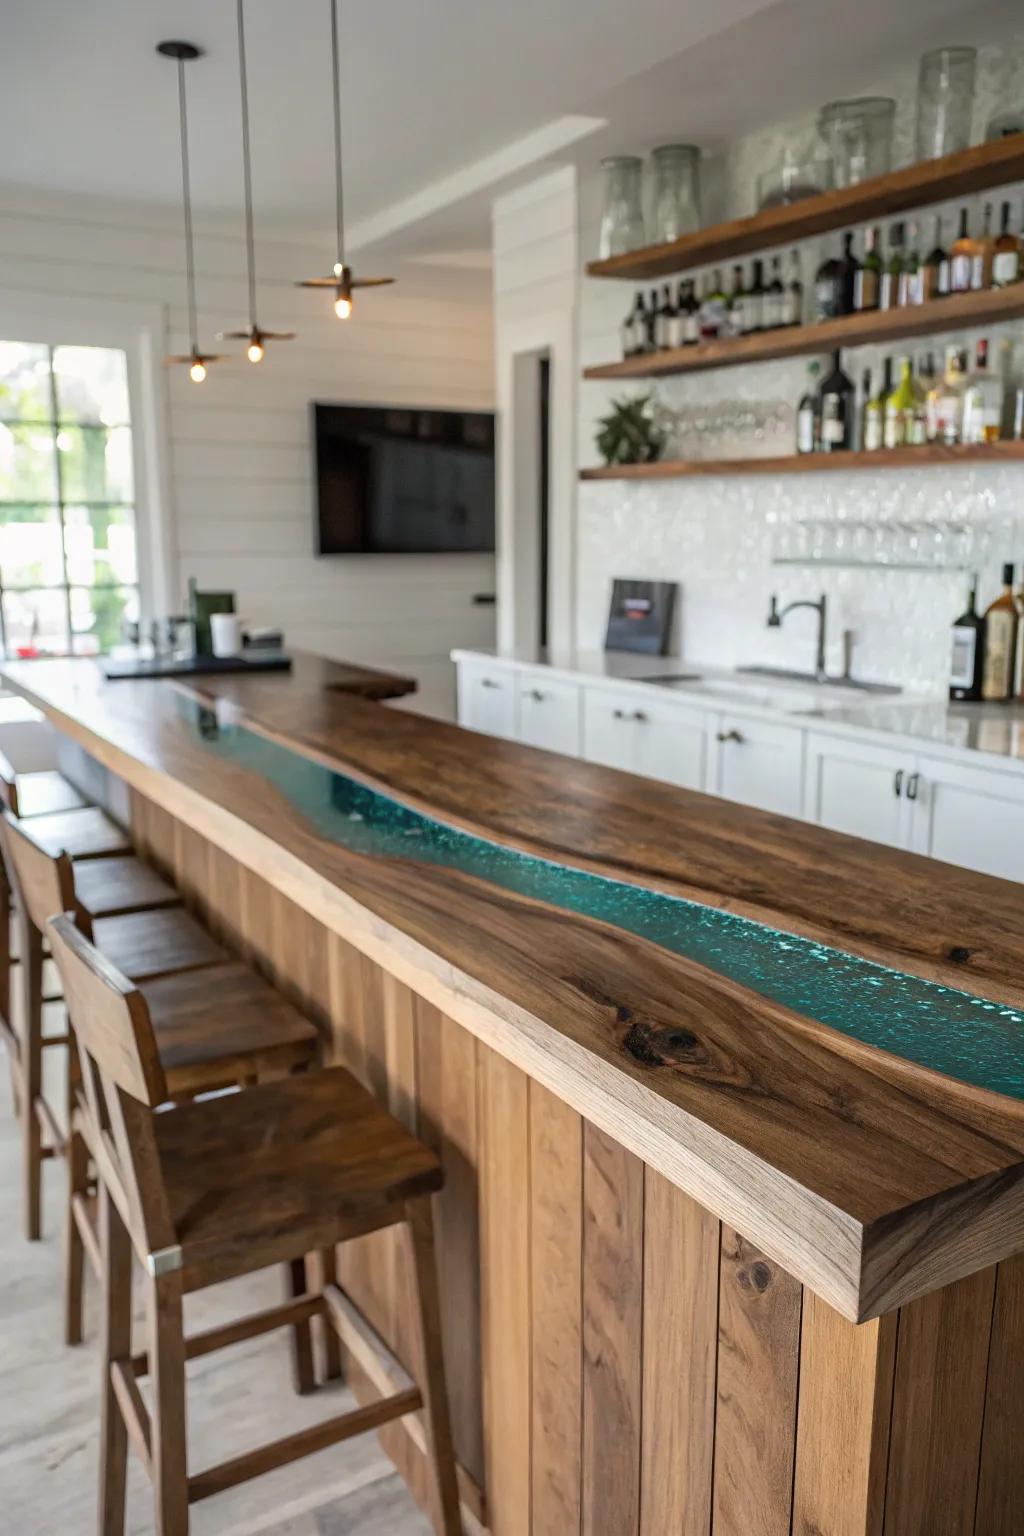
A river bar counter top is pure drama—wood on both sides with a glossy resin channel down the middle. I’ve poured a tinted river before, and the depth you get under lights is honestly mesmerizing.
Check if these fit your needs:
- Deep Pour Epoxy Resilience Kit: Create deep, crystal-clear river channels with this specialized resin designed for thick pours and minimal bubbles.
- Live Edge Wooden Slabs: Select unique, raw wood pieces to frame your river channel and provide that stunning natural contrast.
- Teal Mica Powder Pigment: Add this vibrant pigment to your resin mix to achieve that mesmerizing, deep-water turquoise glow.
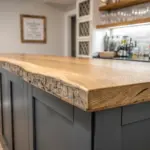
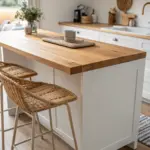
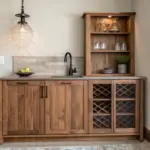
Classic Butcher Block Top
When I want that cozy, gathered-around feel, I go straight to a butcher block bar counter top—it’s warm, simple, and always works. I’ve sealed mine with a tough topcoat, and it’s been a champ through countless drink nights and snack spreads.
Some handy options:
- Butcher Block Countertop Slab: Transform your bar area instantly with a sturdy, beautiful wooden slab perfect for DIY installation.
- Food-Safe Wood Sealer/Finish: Protect your new wooden surface from spills and stains with a durable, easy-to-apply protective finish.
- Counter-Height Bar Stools: Complete the look and create a comfortable gathering spot with stools designed for counter-height seating.

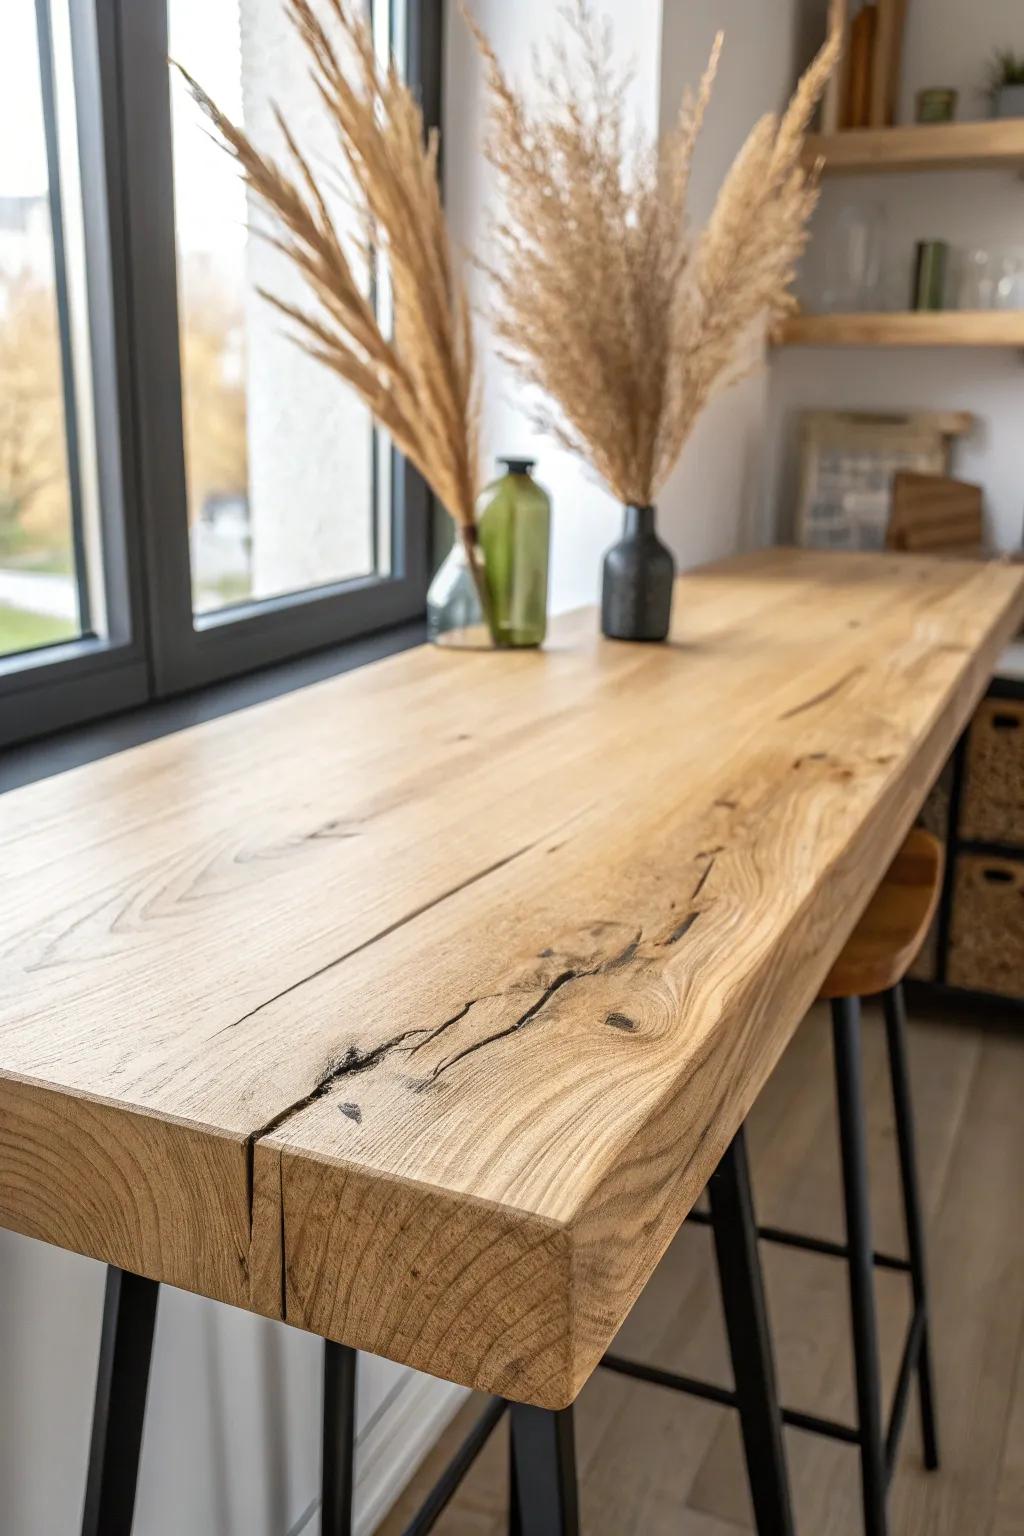
Live Edge Slab Statement
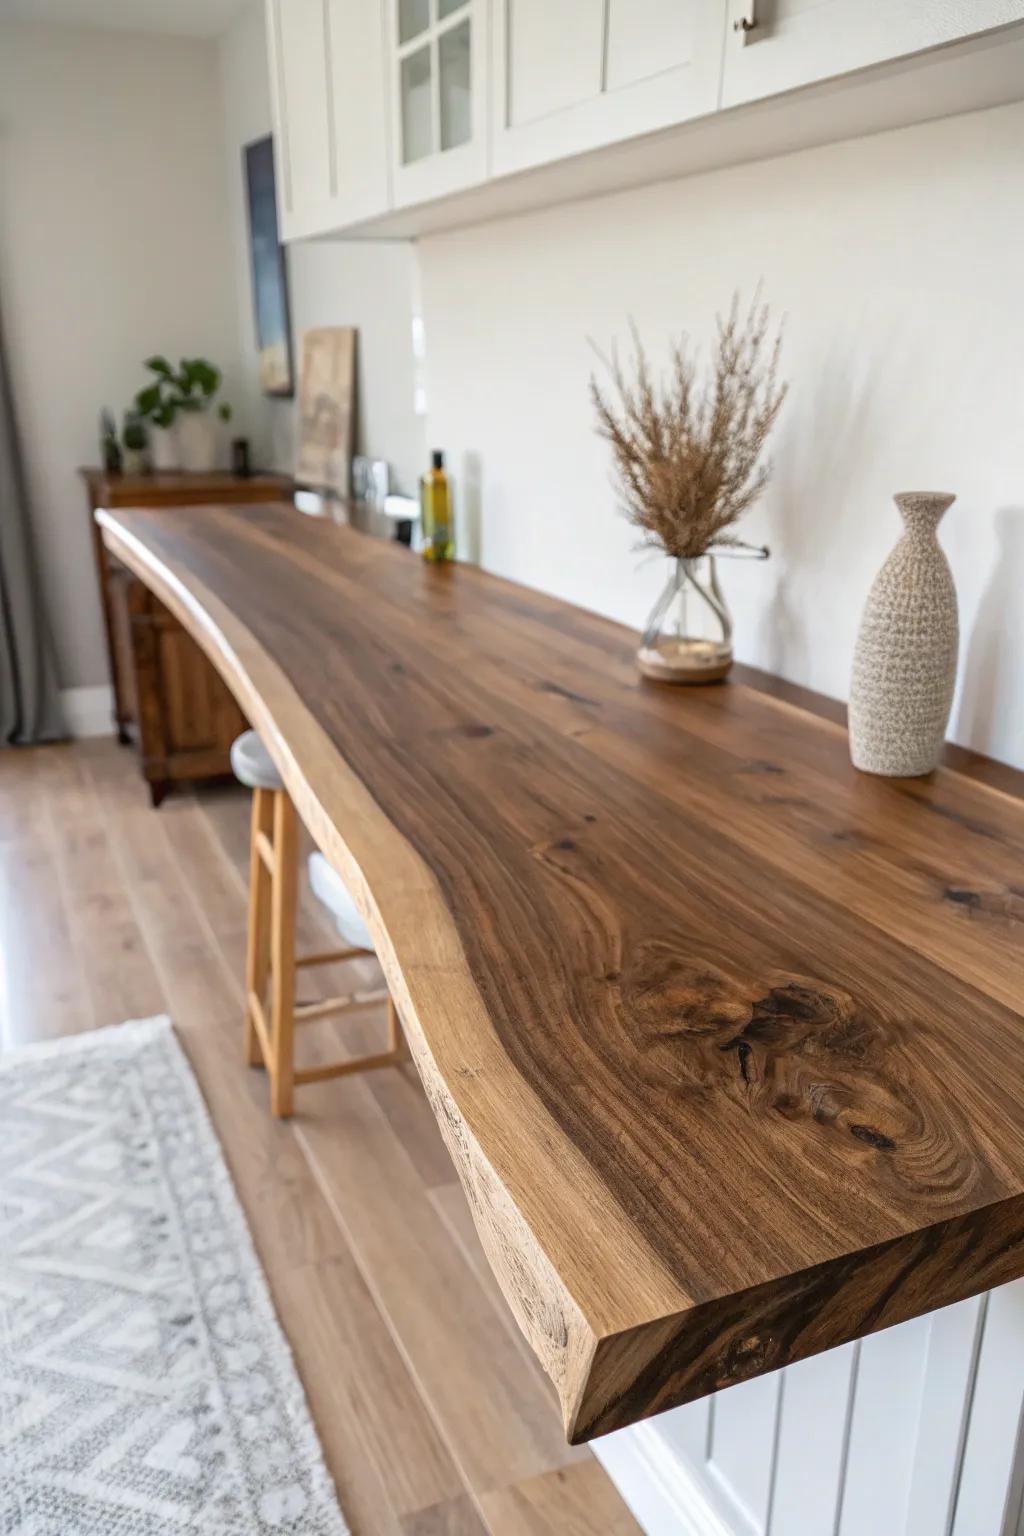
A thick live edge bar counter top instantly turns the bar into the main character, and I love letting the natural curve face the seating side. I’ve built these from slab offcuts, and every knot and ripple becomes a conversation starter.
Check these products out:
- Live Edge Wood Slab: Find a unique, natural wood slab to serve as the stunning focal point for your new custom bar setup.
- Food Safe Wood Oil Finish: Protect your beautiful wood slab and enhance its natural grain with a durable, high-quality oil finish.
- Heavy Duty Countertop Brackets: Securely support your heavy slab counter with low-profile, sturdy steel brackets that remain hidden from view.
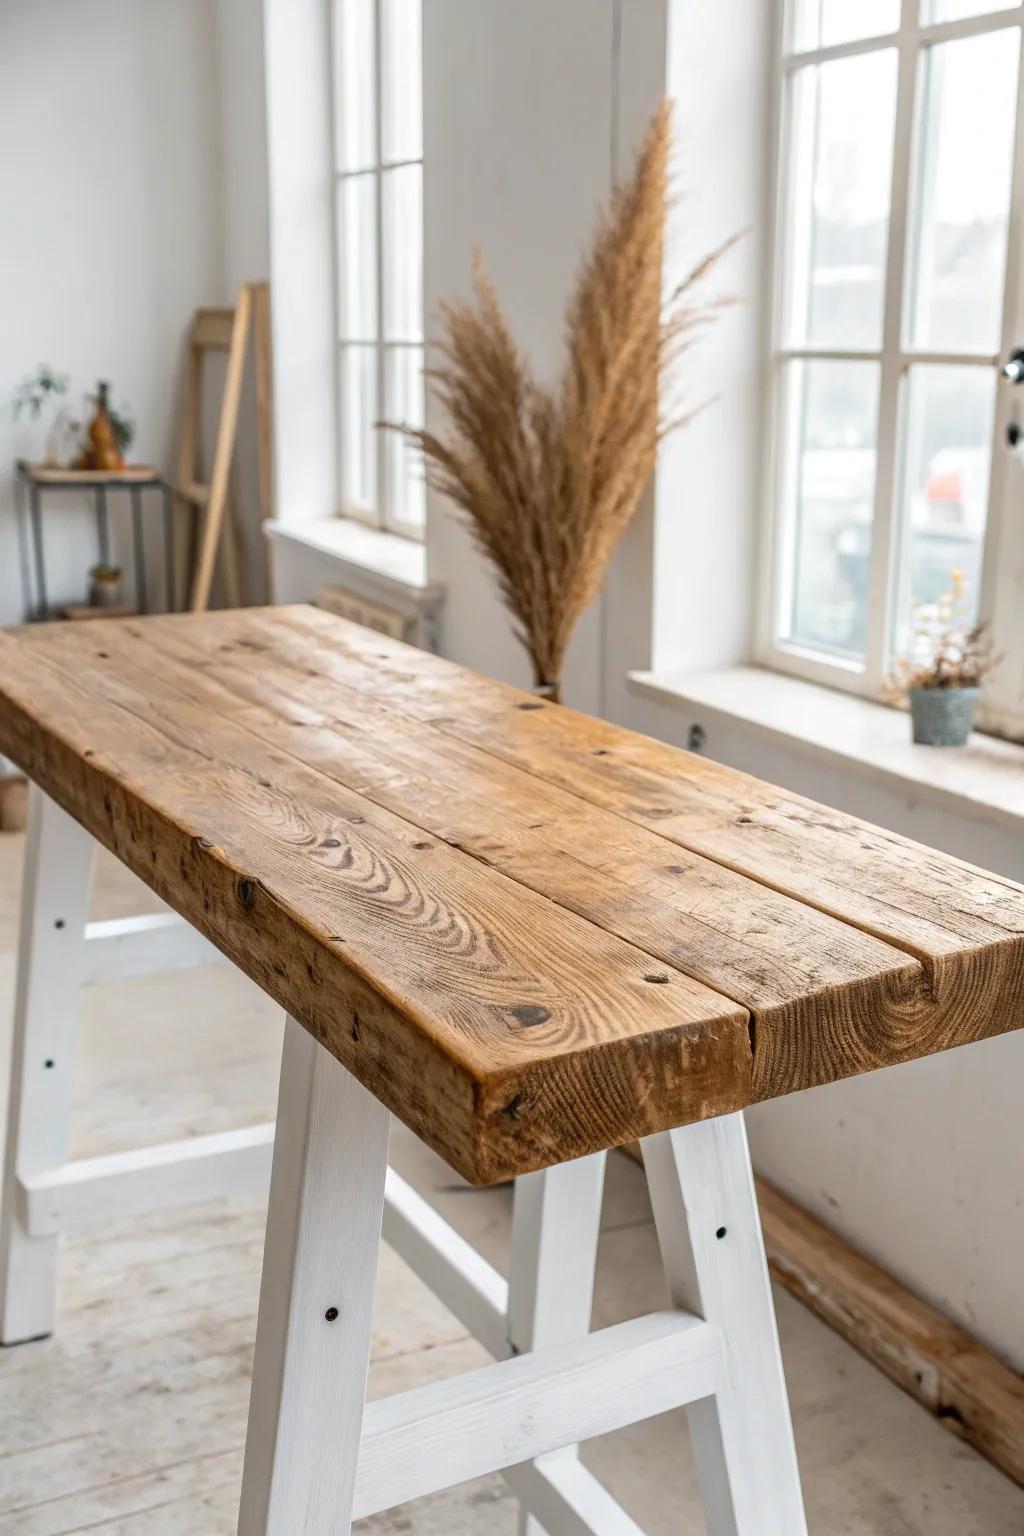
Reclaimed Wood Plank Top
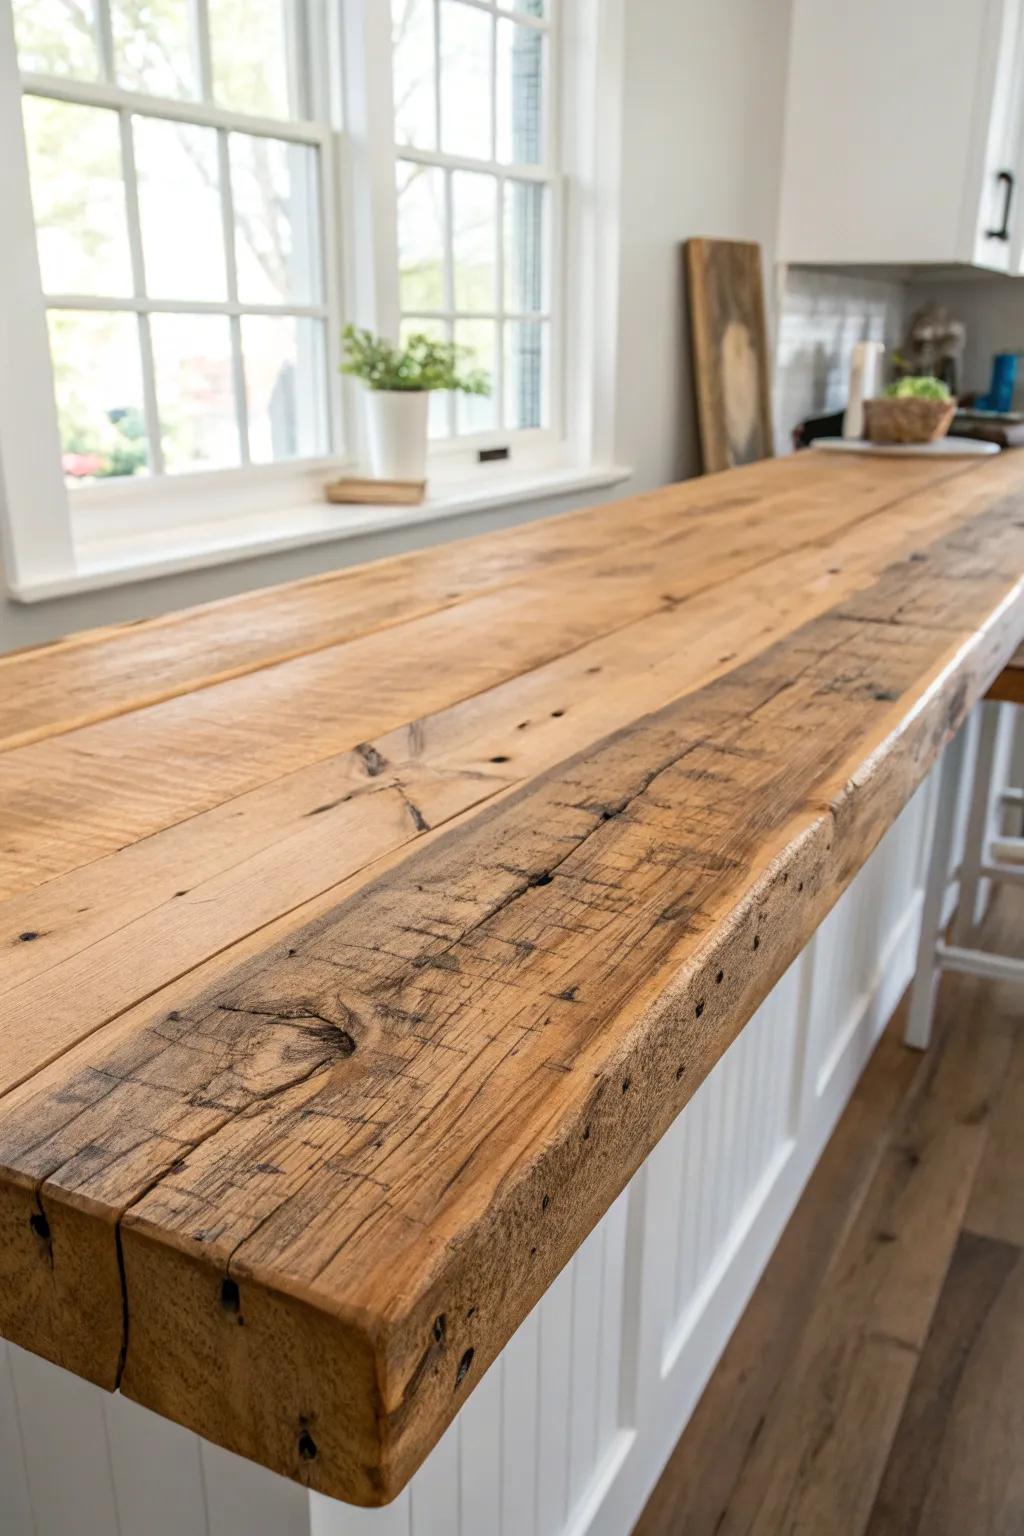
For a relaxed rustic vibe, I’ve had amazing results using reclaimed wood boards to build a chunky bar counter top with visible nail holes and saw marks. I usually fill the deepest gaps smooth, but I keep the character because that’s the whole point.
Might be a good match:
- Clear Epoxy Resin Kit: Fill deep nail holes and gaps smoothly without losing character by pouring clear, durable epoxy into the wood’s imperfections.
- Matte Polyurethane Wood Finish: Protect your reclaimed wood surface from spills and stains while maintaining that natural, non-glossy rustic appearance.
- Heavy Duty Floating Shelf Brackets: Support the weight of chunky reclaimed planks securely with hidden brackets that create a clean, floating countertop look.
Waterfall Edge Design
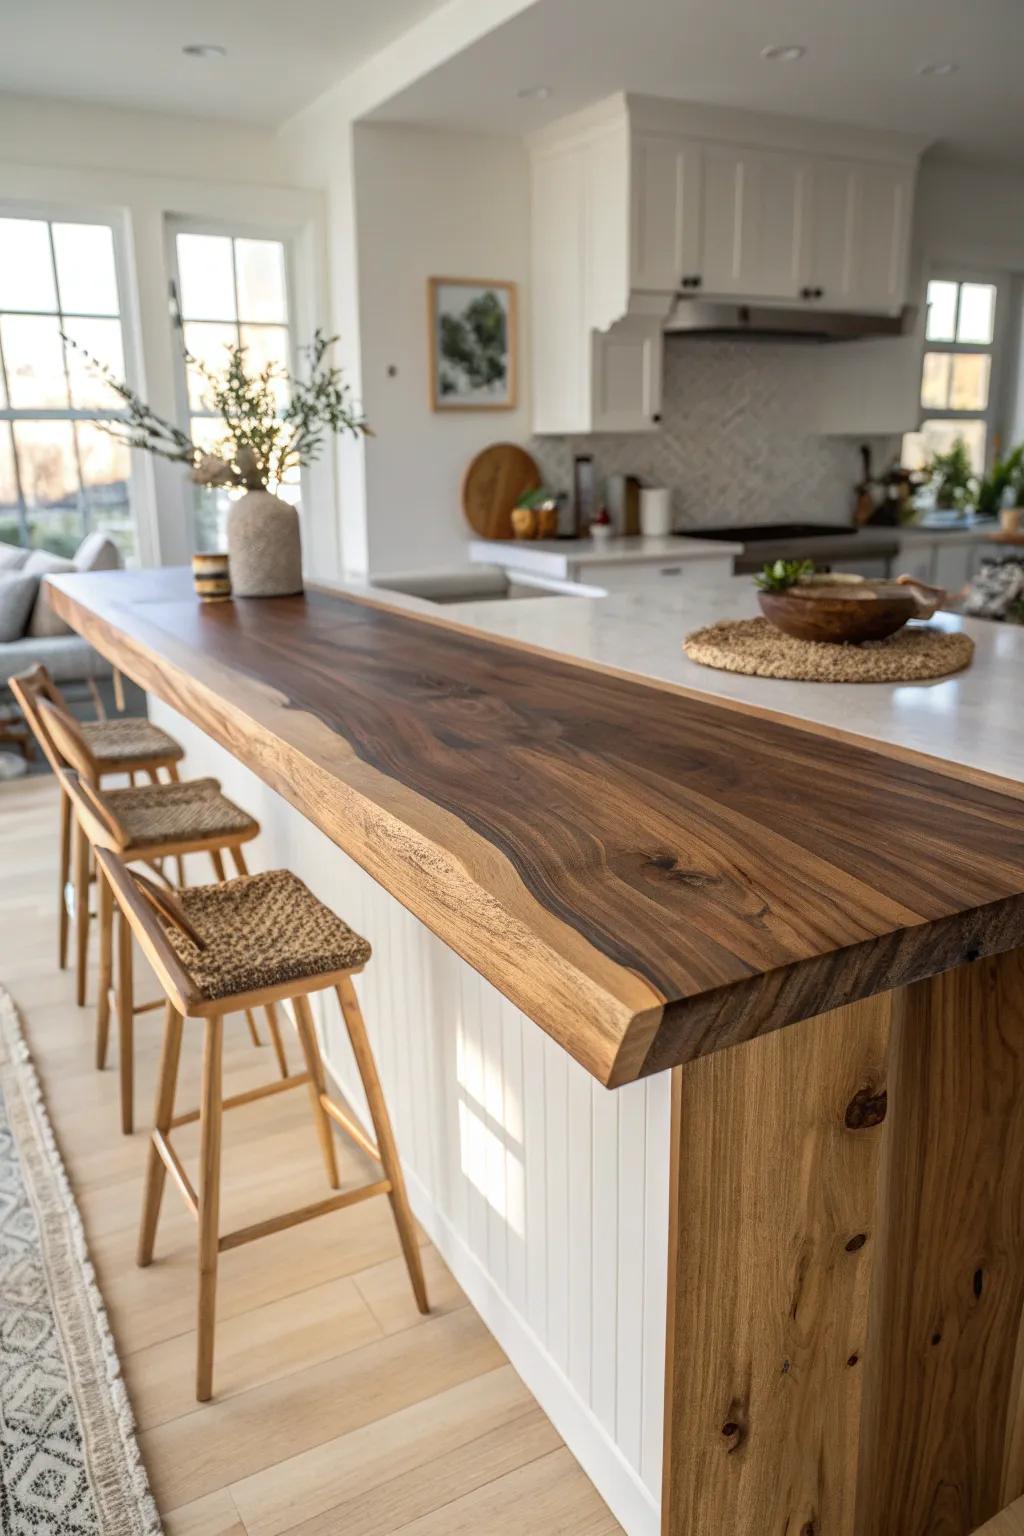
A waterfall edge bar top looks clean and high-end because the grain flows right down the sides like a wrapped present. The first time I did one, I was shocked how much more “custom” the whole bar felt with that one detail.
Some ideas to consider:
- Live Edge Wood Slab: Create a stunning focal point by selecting a unique, natural wood slab for your custom countertop project.
- Epoxy Resin Kit: Use clear epoxy to seal your wood surface, fill natural voids, and ensure a durable, water-resistant finish.
- Heavy Duty Invisble Bracket: Support your heavy waterfall countertop securely with hidden brackets that maintain a clean, floating aesthetic.
Two-Tier Serving Ledge

If you actually host a lot, a two-tier bar counter top is super practical—lower for prep, higher for sipping and hiding the mess. I’ve built this layout for friends, and it always keeps the bar looking pulled together even mid-party.
May just do the trick:
- Countertop Support Brackets: Ensure your elevated serving ledge is stable and secure with heavy-duty steel support brackets.
- Wooden Bar Stools: Complete your new seating area with comfortable, sturdy stools that complement your wooden counter finish.
- Wood Conditioner & Sealer: Protect your beautiful wood countertops from spills and stains while enhancing the natural grain.
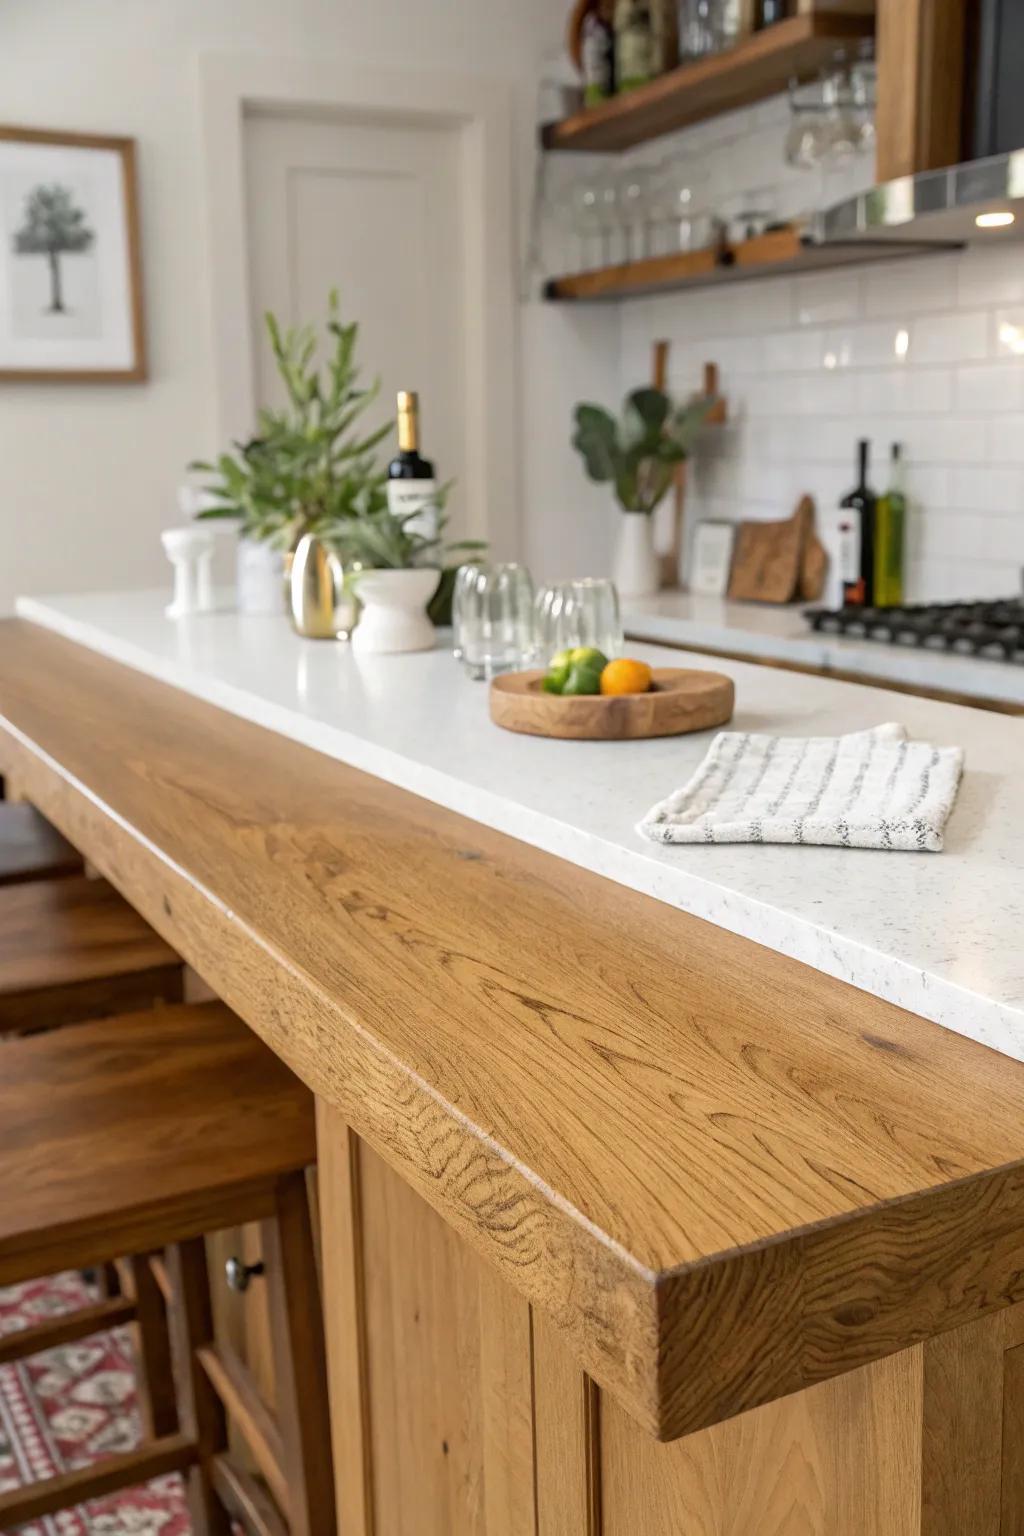
Thick Edge for a Chunky Look

When I want “old tavern” vibes without extra fuss, I add a built-up front to create a thick edge bar top that looks like a 3-inch slab. I’ve done this with layered wood and a nice round-over, and it feels so good under your forearms.
Products that could assist:
- Butcher Block Countertop Slab (Unfinished): Start your project with a solid foundation by selecting a sturdy, stainable wood slab for your bar top.
- Wood Glue for Joinery: Securely bond your built-up edge pieces together to create that seamless, chunky slab appearance you desire.
- Router with Round-Over Bit Set: Create a smooth, comfortable edge under your arms by rounding over the sharp corners of your new countertop.
Dark Stain, Matte Finish
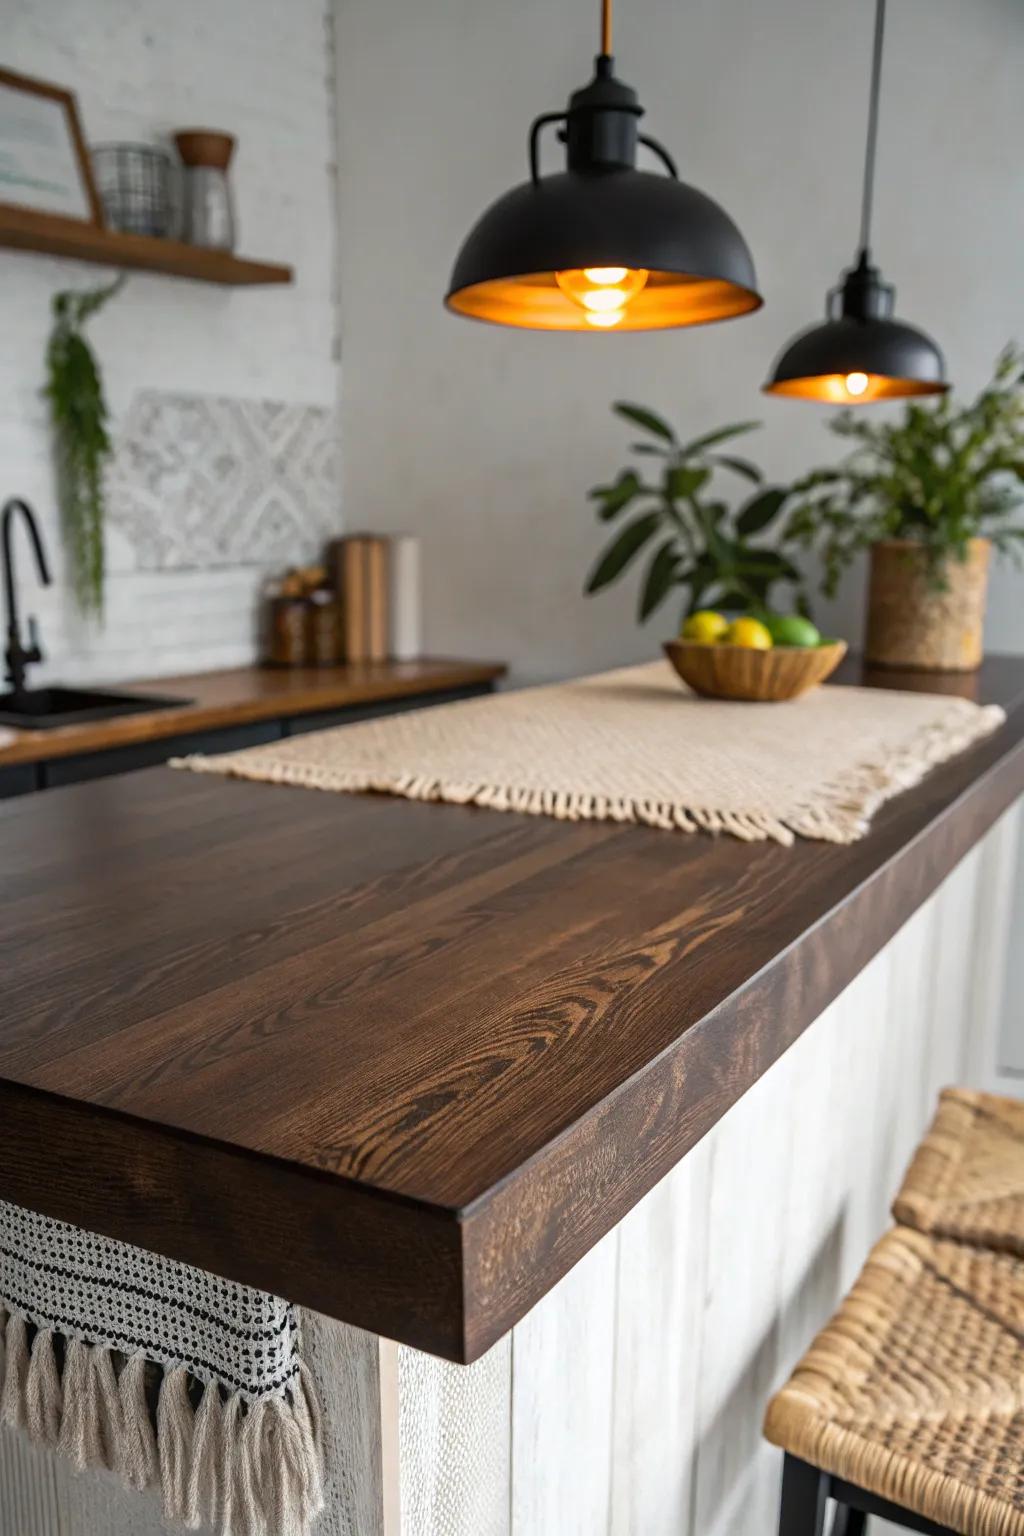
A deep espresso stain on a wood bar counter top brings instant mood, especially with warm lighting above it. I’ve used a matte topcoat on mine, and it hides little scuffs way better than glossy finishes.
Useful items to consider:
- Dark Wood Stain: Deepen the color of your bar top with a rich espresso tone to create a sophisticated, moody atmosphere.
- Matte Polyurethane Finish: Seal your counter with a durable matte topcoat that minimizes glare and helps hide minor daily scratches.
- Woven Table Runner: Add texture and protect your new finish with a natural woven runner similar to the one pictured.
Chevron or Herringbone Inlay
If you want a “wait, how did you make that?” moment, a herringbone inlay bar top delivers without needing fancy materials. I’ve pieced these together from scrap strips, and the pattern makes even simple wood feel designer.
Consider these options:
- Wait to be seated, miter saw: Make the precise angled cuts required for herringbone patterns faster and cleaner than cutting by hand.
- Strong wood glue: Ensure your intricate pattern stays perfectly bonded and secure on the substrate for lasting durability.
- Food-safe countertop oil finish: Protect your beautiful woodwork from spills while enhancing the natural grain and contrast of different woods.
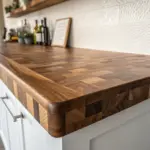
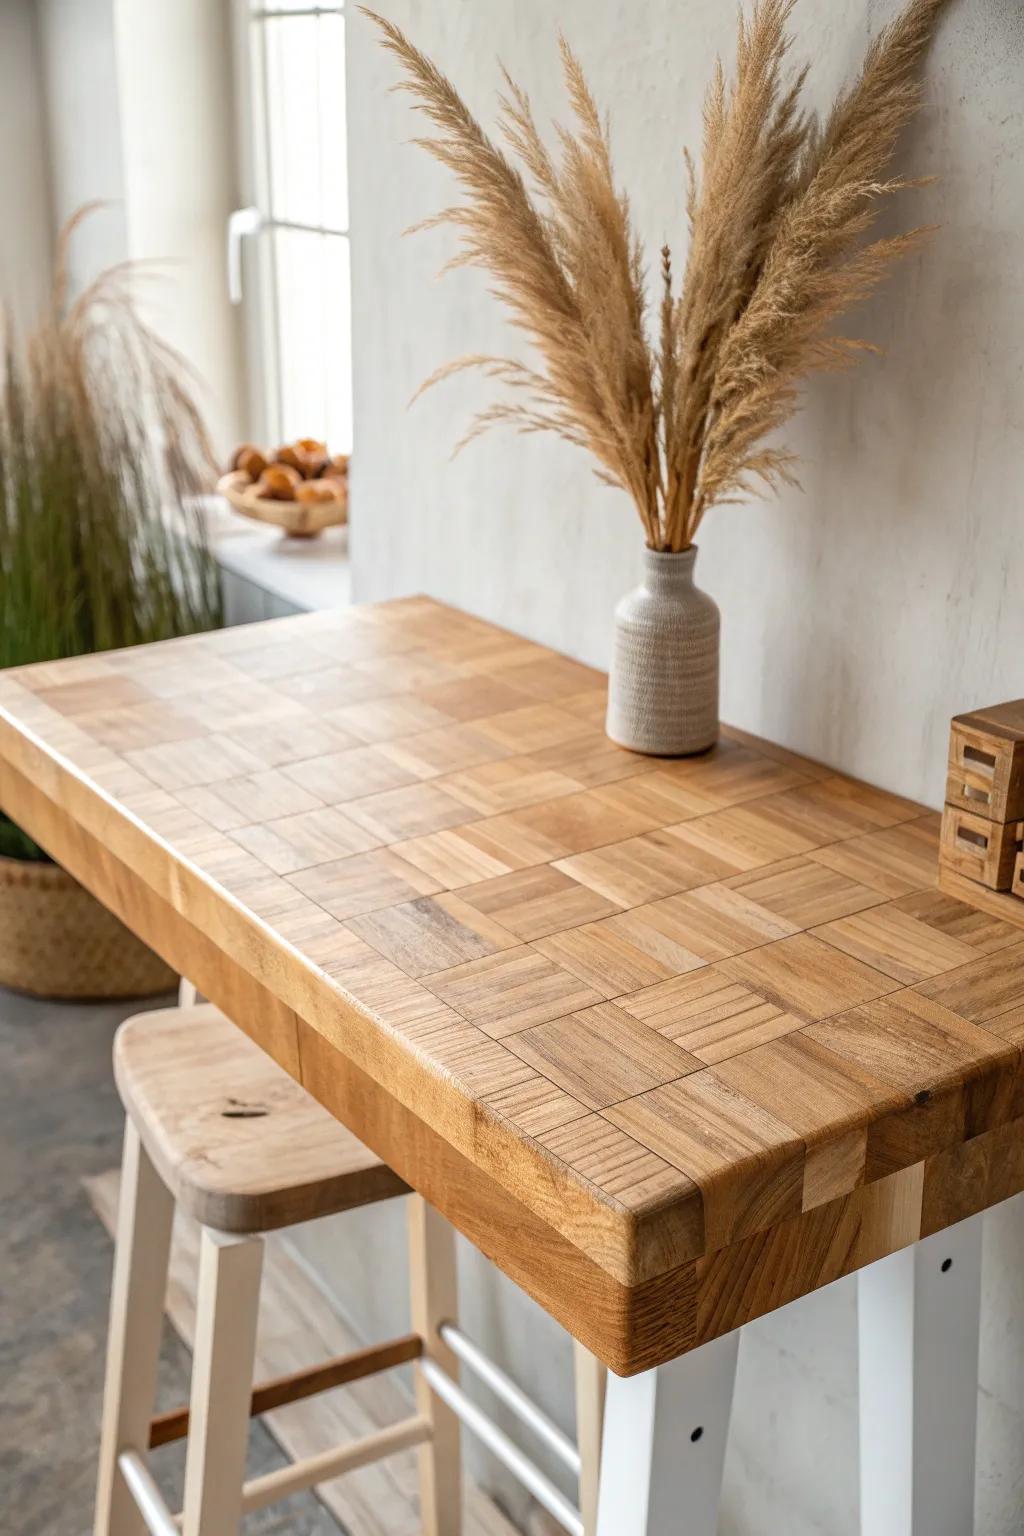
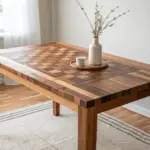
End-Grain Block Surface
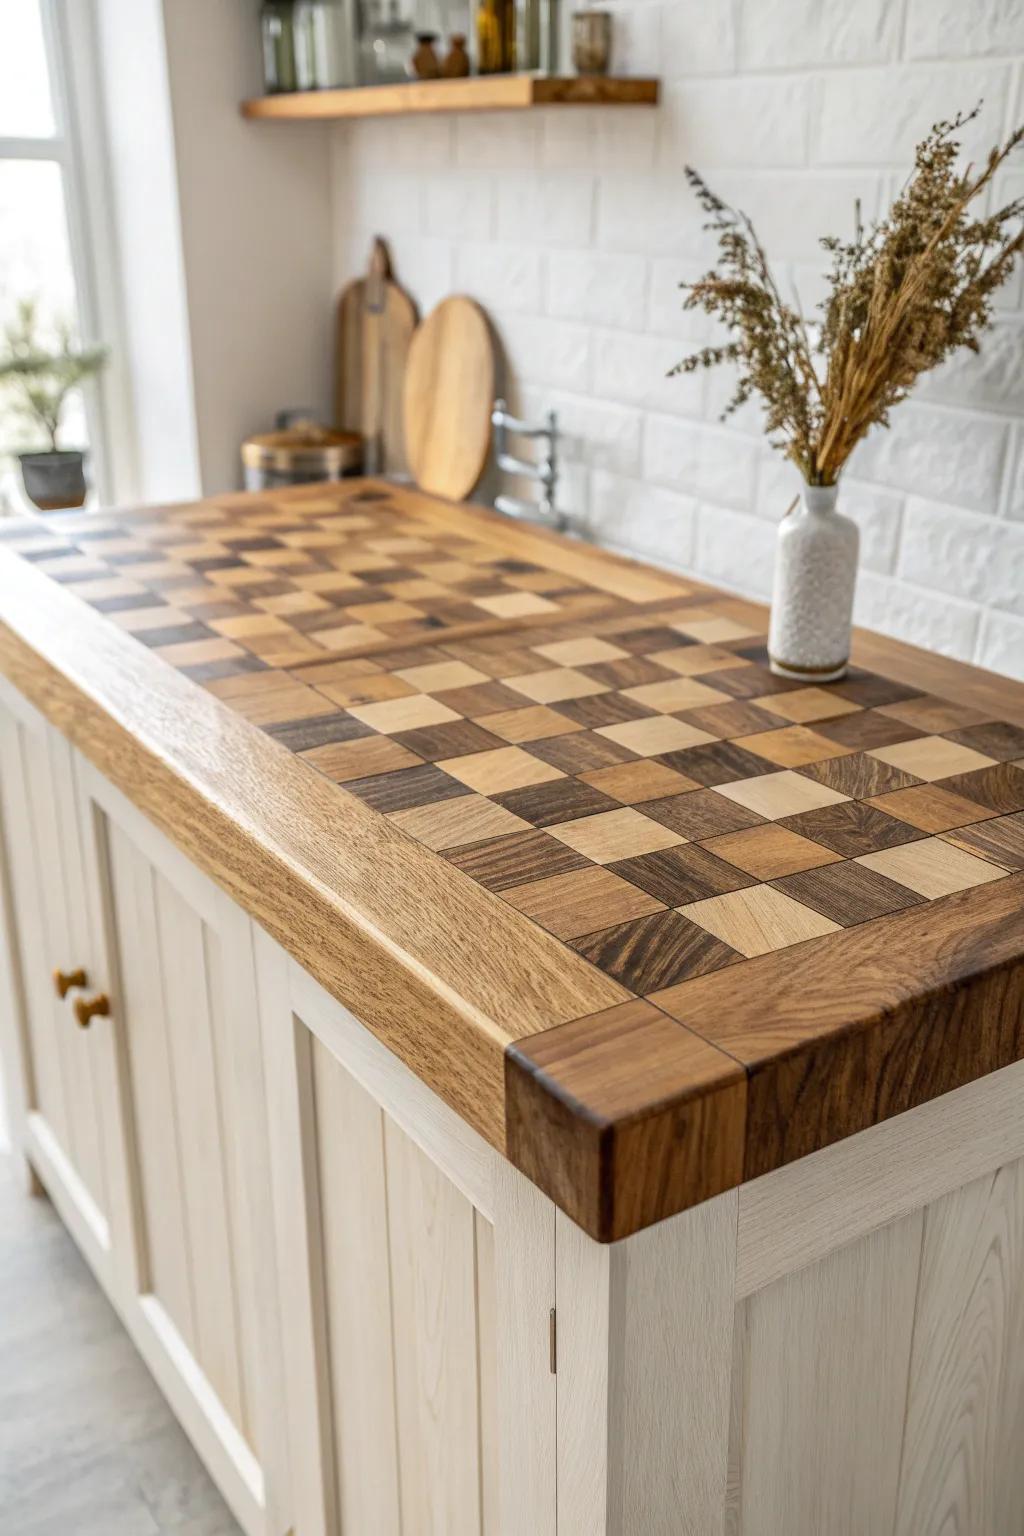
An end-grain bar counter top has that rich checkerboard look and feels super sturdy under a clear finish. I’ve made one from leftover hardwood chunks, and it’s still one of my favorite “use every scrap” builds.
You might give these a try:
- Mixed Hardwood Blocks or Turning Blanks: Source high-quality exotic or domestic wood squares to create that stunning checkerboard pattern for your counter.
- Food-Grade Mineral Oil & Wood Conditioner: Protect your end-grain surface and enhance the wood’s natural rich tones with this essential finishing oil.
- Heavy-Duty Wood Glue: Ensure your bar top lasts a lifetime by bonding every wooden block securely with professional-strength adhesive.
Epoxy-Filled Knots and Cracks
I love leaning into the imperfections by filling checks with black epoxy or clear epoxy resin for a bold bar counter top detail. I’ve done this on a cracked slab, and it turned “problem spots” into the coolest feature.
Possibly helpful picks:
- General Purpose Deep Pour Epoxy Resin Kit: Create durable, crystal-clear or tinted fills in deep cracks; start your custom repair project today.
- Black Liquid Resin Pigment Dye: Achieve that bold, opaque black look in your wood cracks by mixing this potent dye effectively.
- Tyvek Tape for Epoxy Mold Sealing: Seal off the bottom of cracks and edges securely to prevent messy leaks during your pour.
Whitewashed Farmhouse Finish
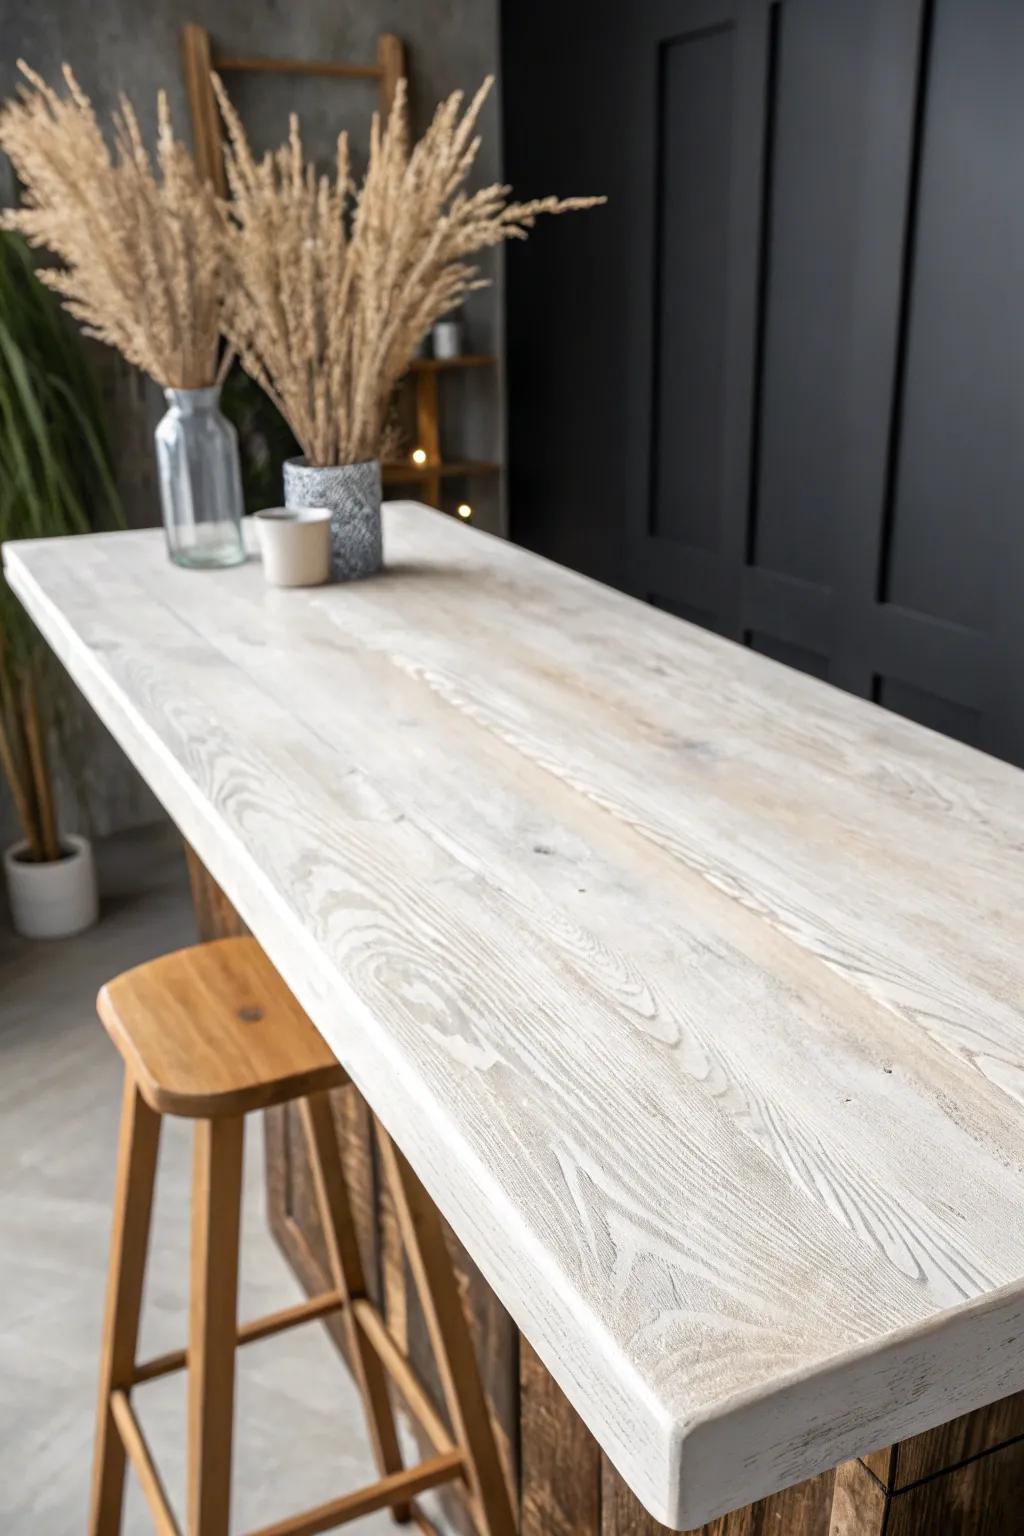
For bright, airy spaces, a whitewashed wood bar top keeps the grain visible while softening the color. I’ve tested a few wash mixes on scrap first, and that little step saved me from going too opaque.
These products might be useful:
- Whitewash Wood Pickling Stain: Achieve that airy, coastal look by applying a specialized pickling stain that highlights wood grain beautifully without creating opacity.
- Matte Polyurethane Topcoat: Protect your newly whitewashed surface from spills and wear while maintaining a natural, low-sheen finish essential for farmhouse styles.
- Fine Grit Sanding Sponges: Prep your surface perfectly or distress edges gently after painting to create an authentic, time-worn vintage aesthetic.
Hand-Scraped, Timeworn Texture
A distressed bar counter top feels instantly lived-in, especially if you soften edges and add a few intentional dings. I’ve done this on pine, and it forgives every new mark because it already looks perfectly imperfect.
Try these:
- Wood Distressing Tools and Picks: Create authentic-looking dents and dings on your wood surface to achieve that perfectly imperfect, lived-in aesthetic.
- Antique Wood Stain: Apply a rich, warm stain to highlight the wood grain and give new lumber an aged appearance.
- Matte Polyurethane Finish: Seal your distressed countertop with a durable matte finish that protects the wood without adding unnatural shine.
Wood Top With Stone Prep Strip
One of my favorite combos is a wood bar counter top with a narrow stone insert behind it for mixing and citrus work. I’ve built this split-surface setup, and it’s the best of both worlds—warm seating side, wipe-clean prep side.
A few things you might like:
- Butcher Block Countertop Slab: Add warmth to your bar seating area with a sturdy, stainable wood surface ready for custom installation.
- Stone or Quartz Slab Remnant: Create a durable, wipe-clean prep zone behind your wood bar perfect for handling citrus and drinks.
- Round Wood Pedestal Bowl: Style your finished countertop with a small wooden bowl to hold fresh citrus or bar essentials elegantly.
Concrete Look With a Wood Rail
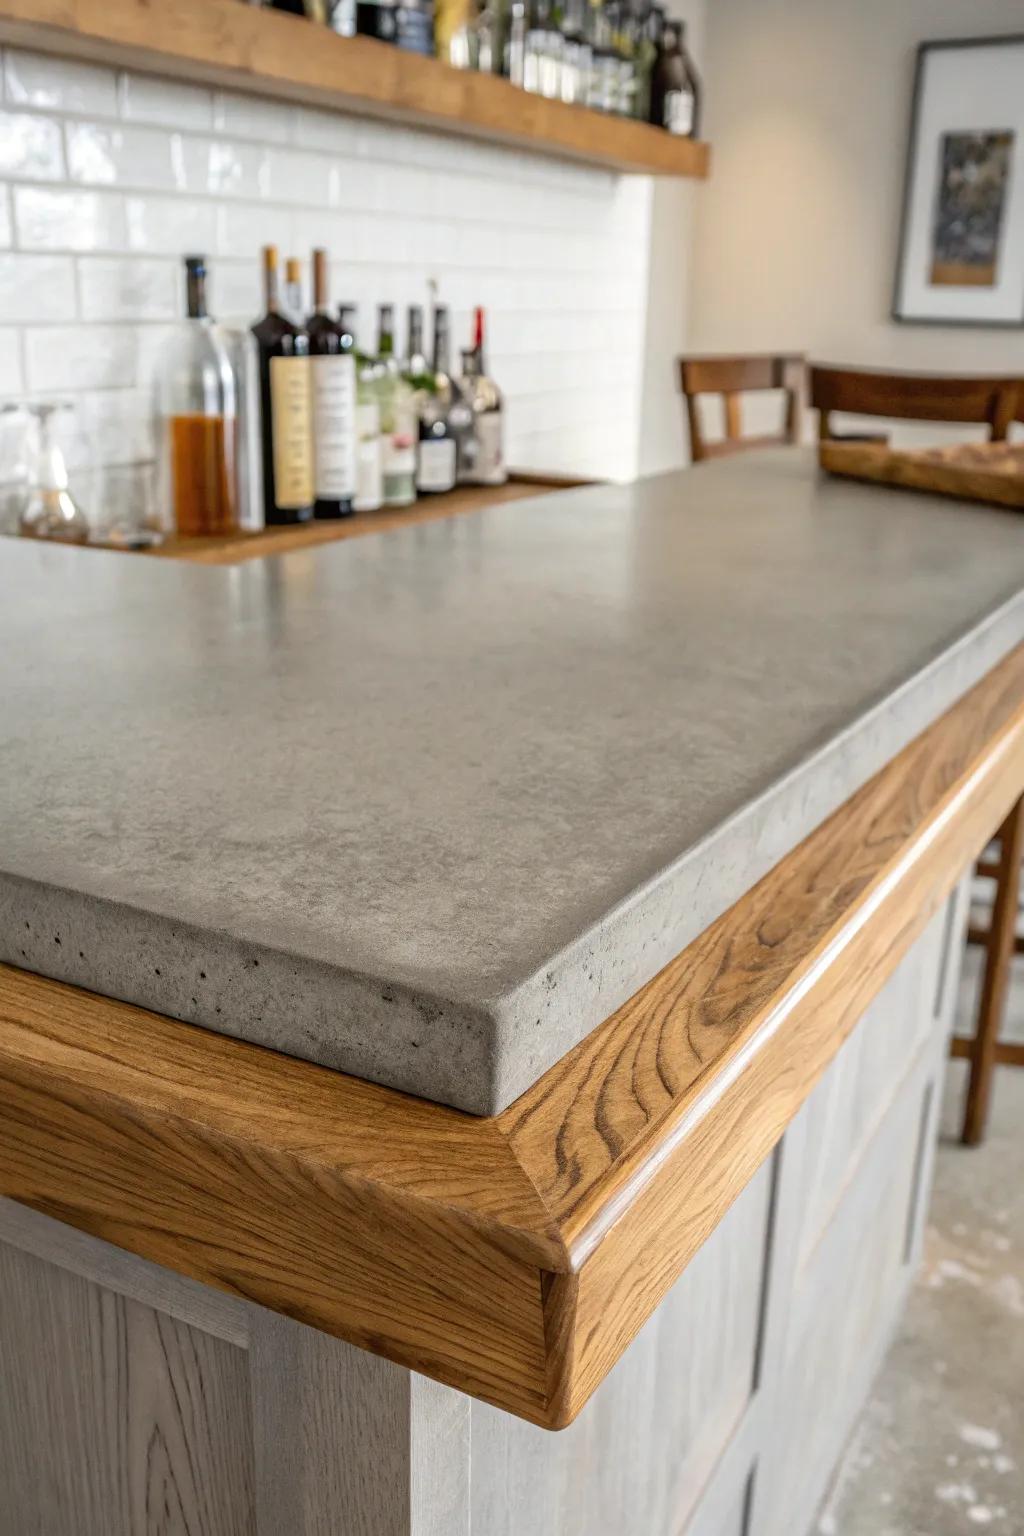
A concrete bar counter top brings that modern-industrial vibe, but I always like adding a wood drink rail so it still feels friendly. I’ve helped cast a top like this, and sealing it well made cleanup way easier than people expect.
A few suggestions:
- DIY Concrete Countertop Mix: Create your own industrial-style surface at home; a quality mix helps ensure strength and smoother finishing results.
- Food-Safe Concrete Sealer: Protect your new surface from stains and scratches with a reliable sealer designed specifically for kitchen counters.
- Natural Hardwood Lumber Board: Add warmth to the bar edge with solid wood boards, ready to be cut and finished to size.
Tile Inset Framed in Wood
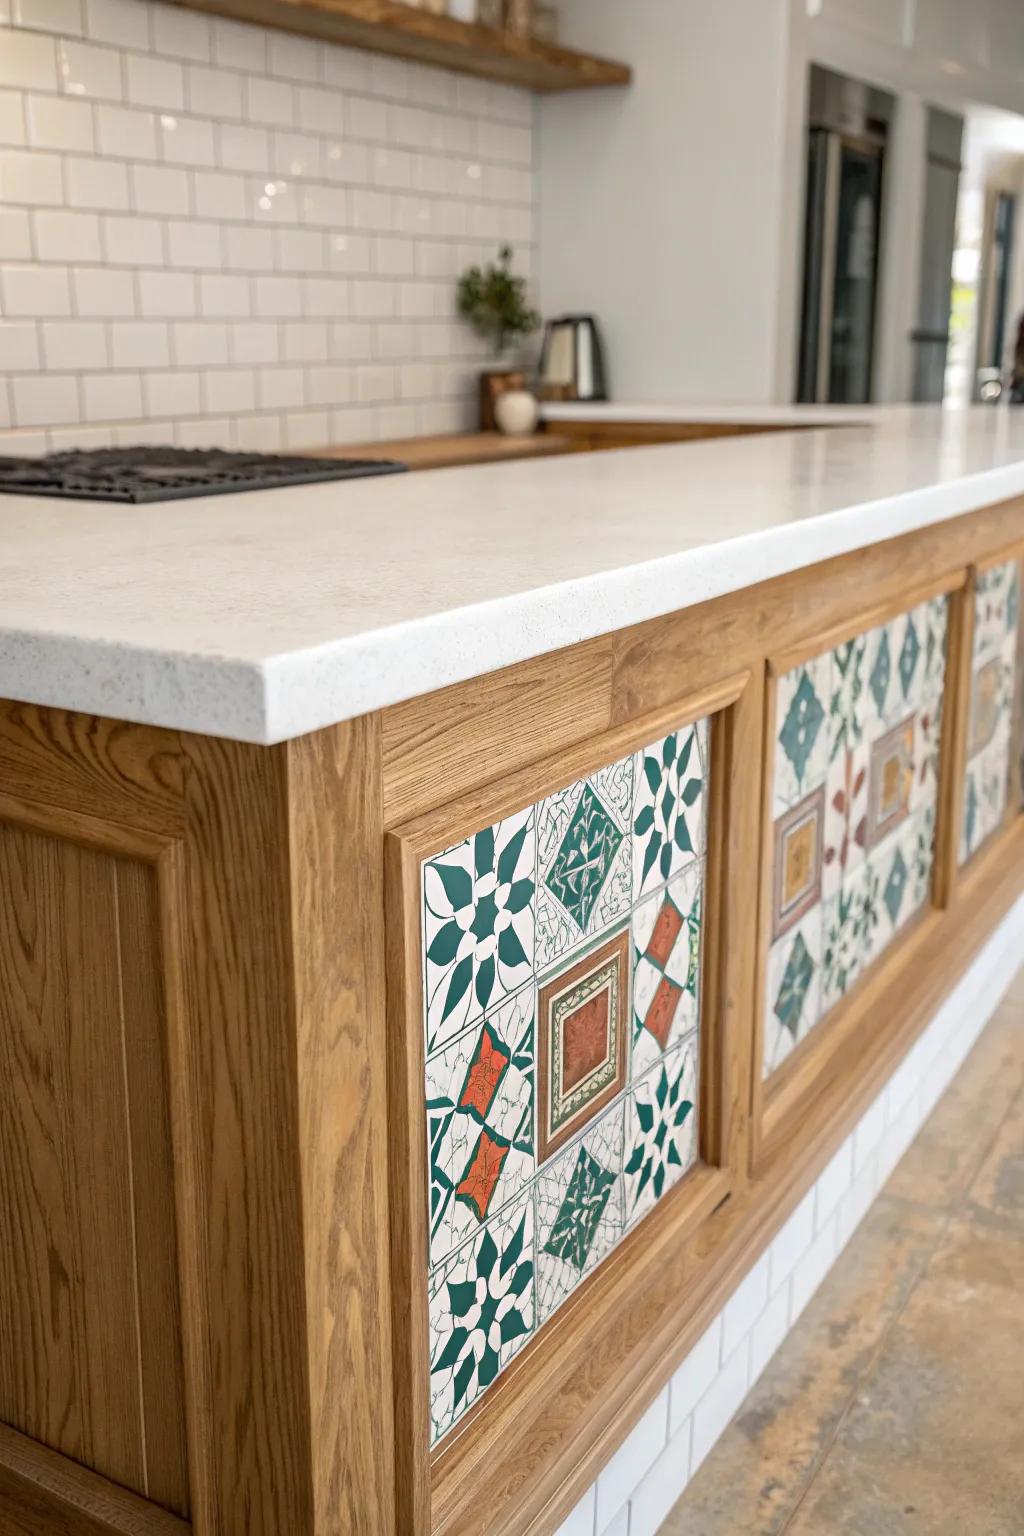
If you want color without committing to an all-tile surface, try a tile inset bar top bordered by wood like a picture frame. I’ve done this with small patterned tiles, and it’s such a fun way to tie in backsplash colors.
Give these a look:
- Patterned Ceramic Decorative Tiles: Choose vibrant, vintage-inspired tiles to create a stunning focal point and add character to your bar design.
- Wood Molding or Trim: Frame your tile inset neatly with high-quality wood molding to create a polished, professional-looking border edge.
- Tile Adhesive and Grout Kit: Ensure your new inset stays secure and looks finished with the right adhesive and durable grout supplies.
Metal-Wrapped Edge Detail
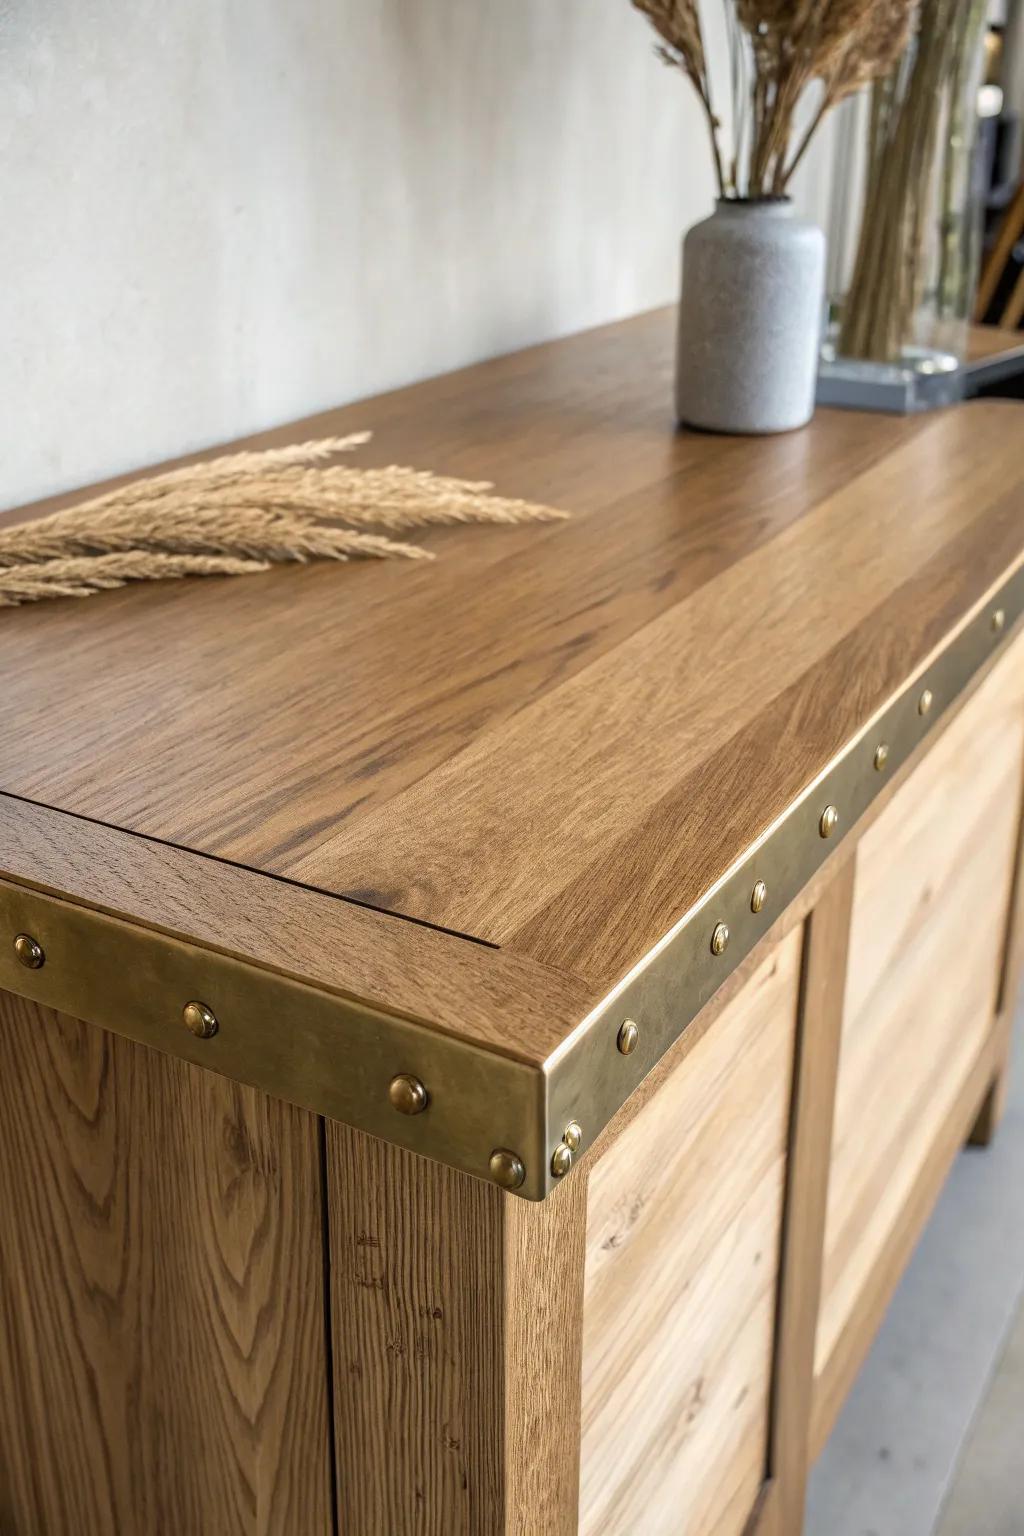
A thin metal edge band on a wood bar counter top gives you that crisp, tailored line and protects the corners from dings. I’ve added sheet metal to the front edge before, and it instantly made the whole top feel more “built-in.”
Possibly handy products:
- Brass Angle Trim: Protect your bar corners and add a stylish, golden rivet-style finish with durable brass angle edging.
- Decorative Upholstery Tacks: Secure metal trim easily and create an industrial look with these classic decorative brass upholstery nails.
- Solid Oak Countertop: Build a robust foundation for your bar project using a sturdy solid wood butcher block countertop.


