
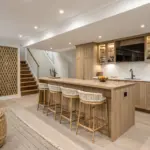
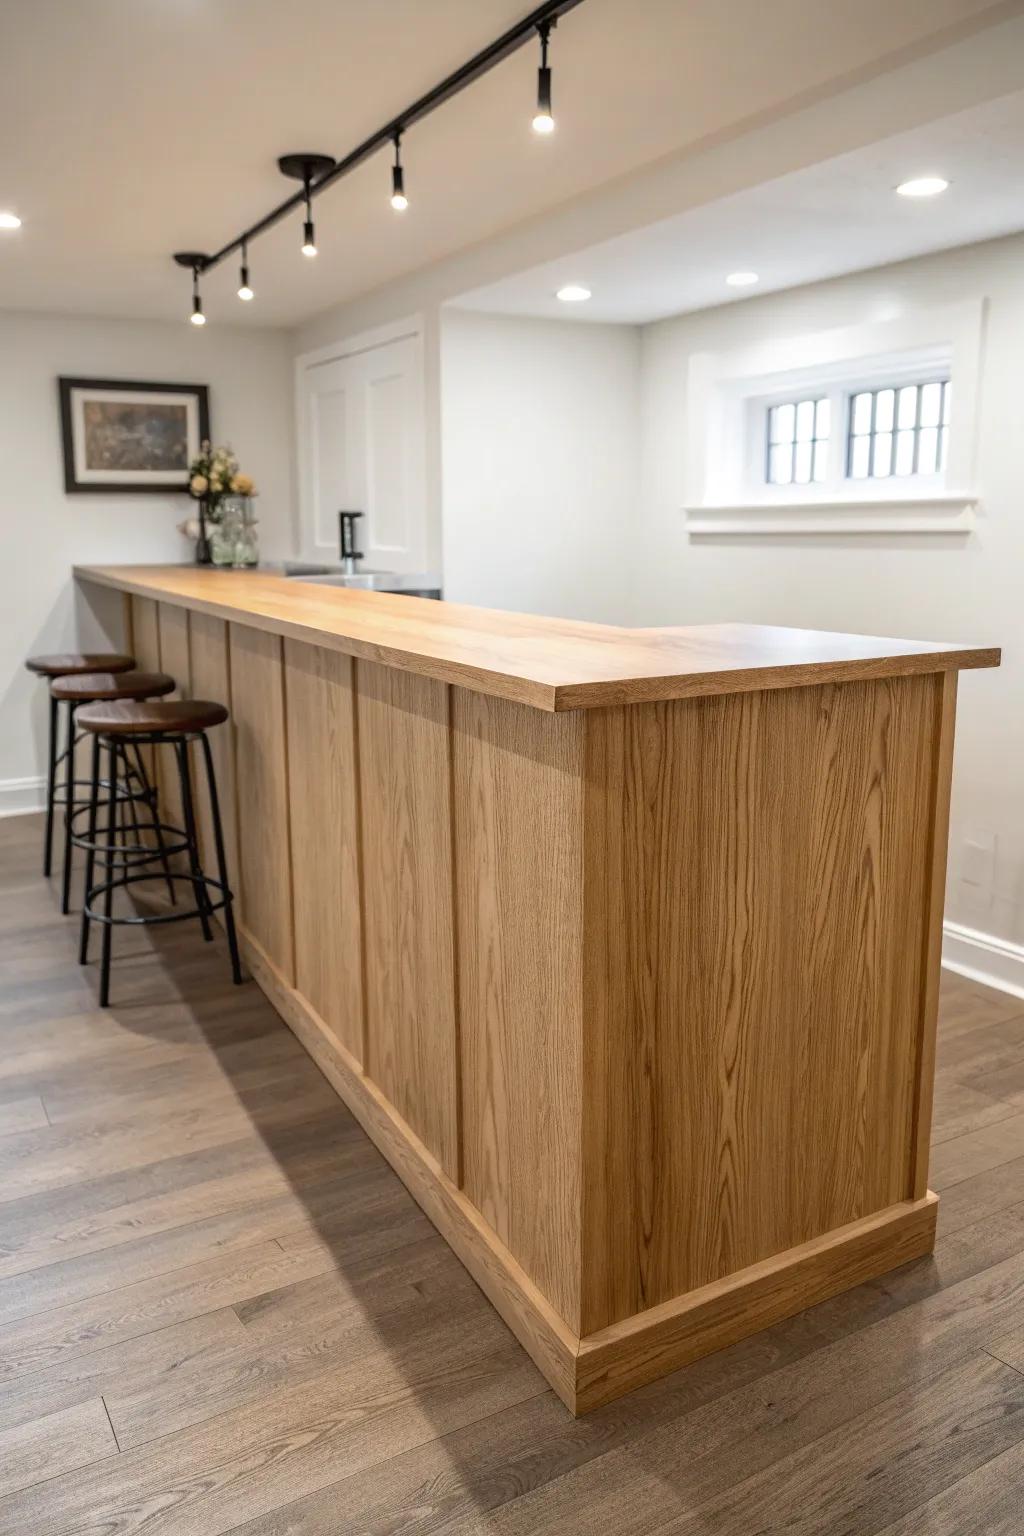
A great basement bar top does more than hold drinks—it sets the whole mood of your hangout space. I’ve built enough bar tops in my shop to know the best ones balance tough-as-nails durability with a finish you can’t stop staring at.
Epoxy River Wood Bar Top
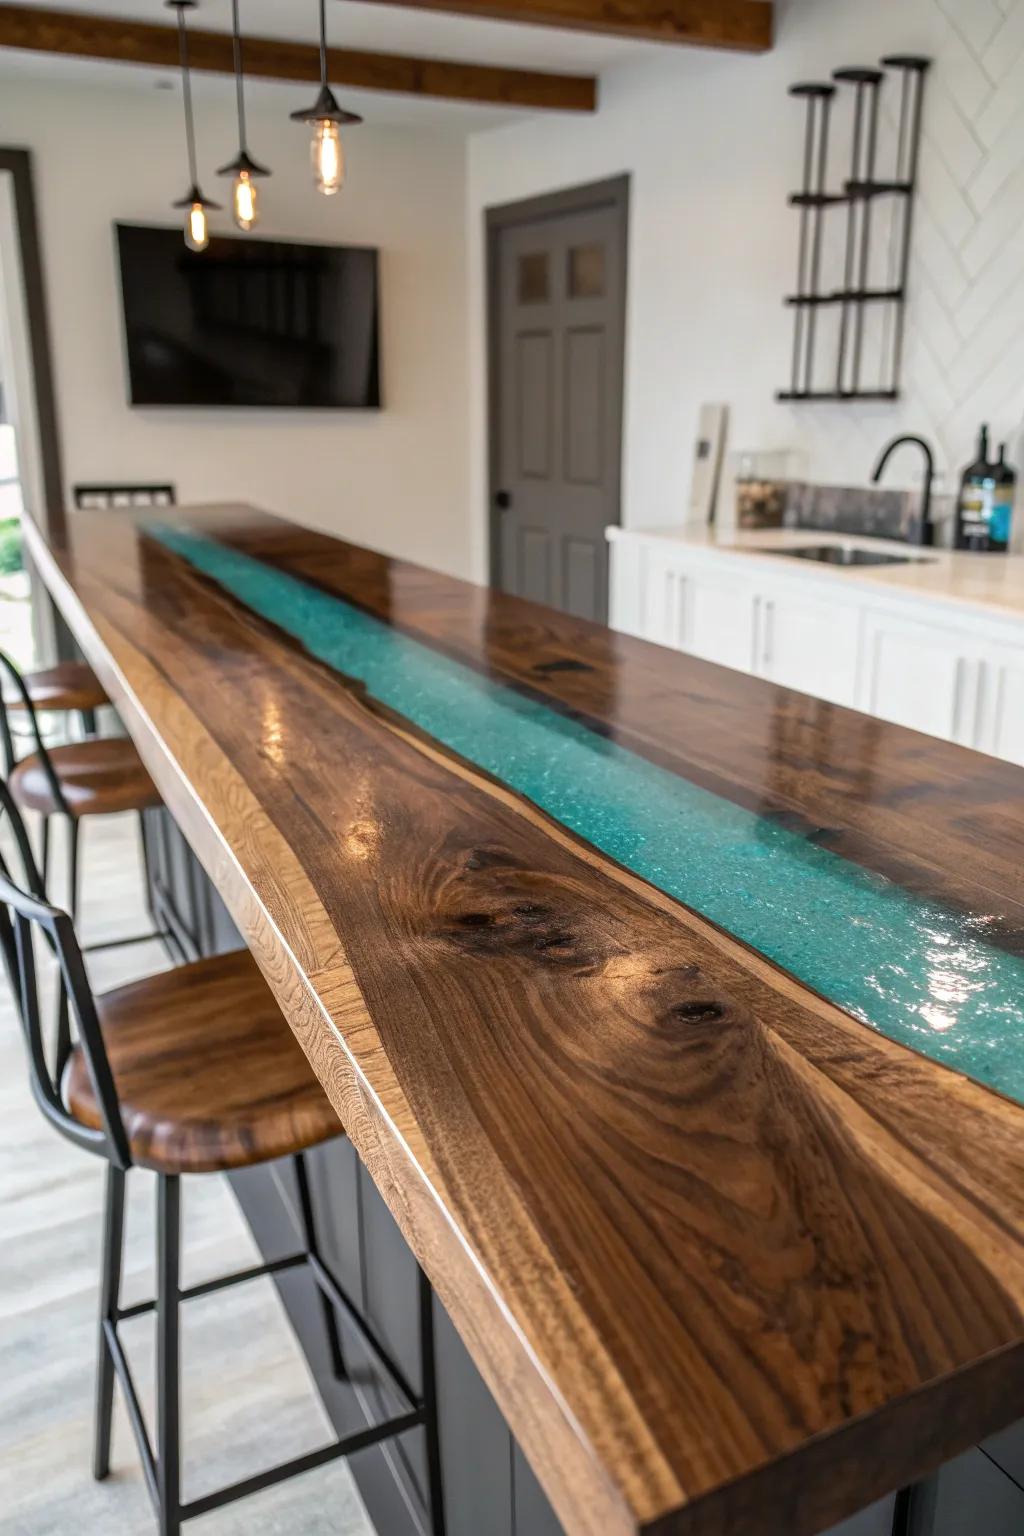
A river epoxy bar top brings that glossy depth that makes a basement bar feel like a destination. I’ve poured rivers with smoky pigments and kept the wood grain bold, and guests always assume it’s way harder than it actually is.
Explore these options:
- Deep Pour Epoxy Resin Kit: Choose a specialized deep pour resin that cures crystal clear to create that stunning river effect effortlessly.
- Metallic Mica Powder Pigments: Add vibrant metallic mica powder to your clear resin to achieve that mesmerizing, swirling water look.
- Live Edge Walnut Slabs: Start your project with raw, kiln-dried live edge slabs that provide the perfect rustic foundation.
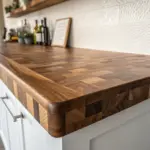
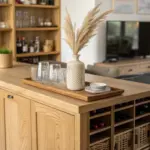
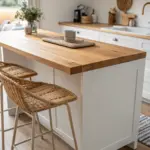
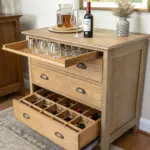
Classic Butcher Block Bar Top
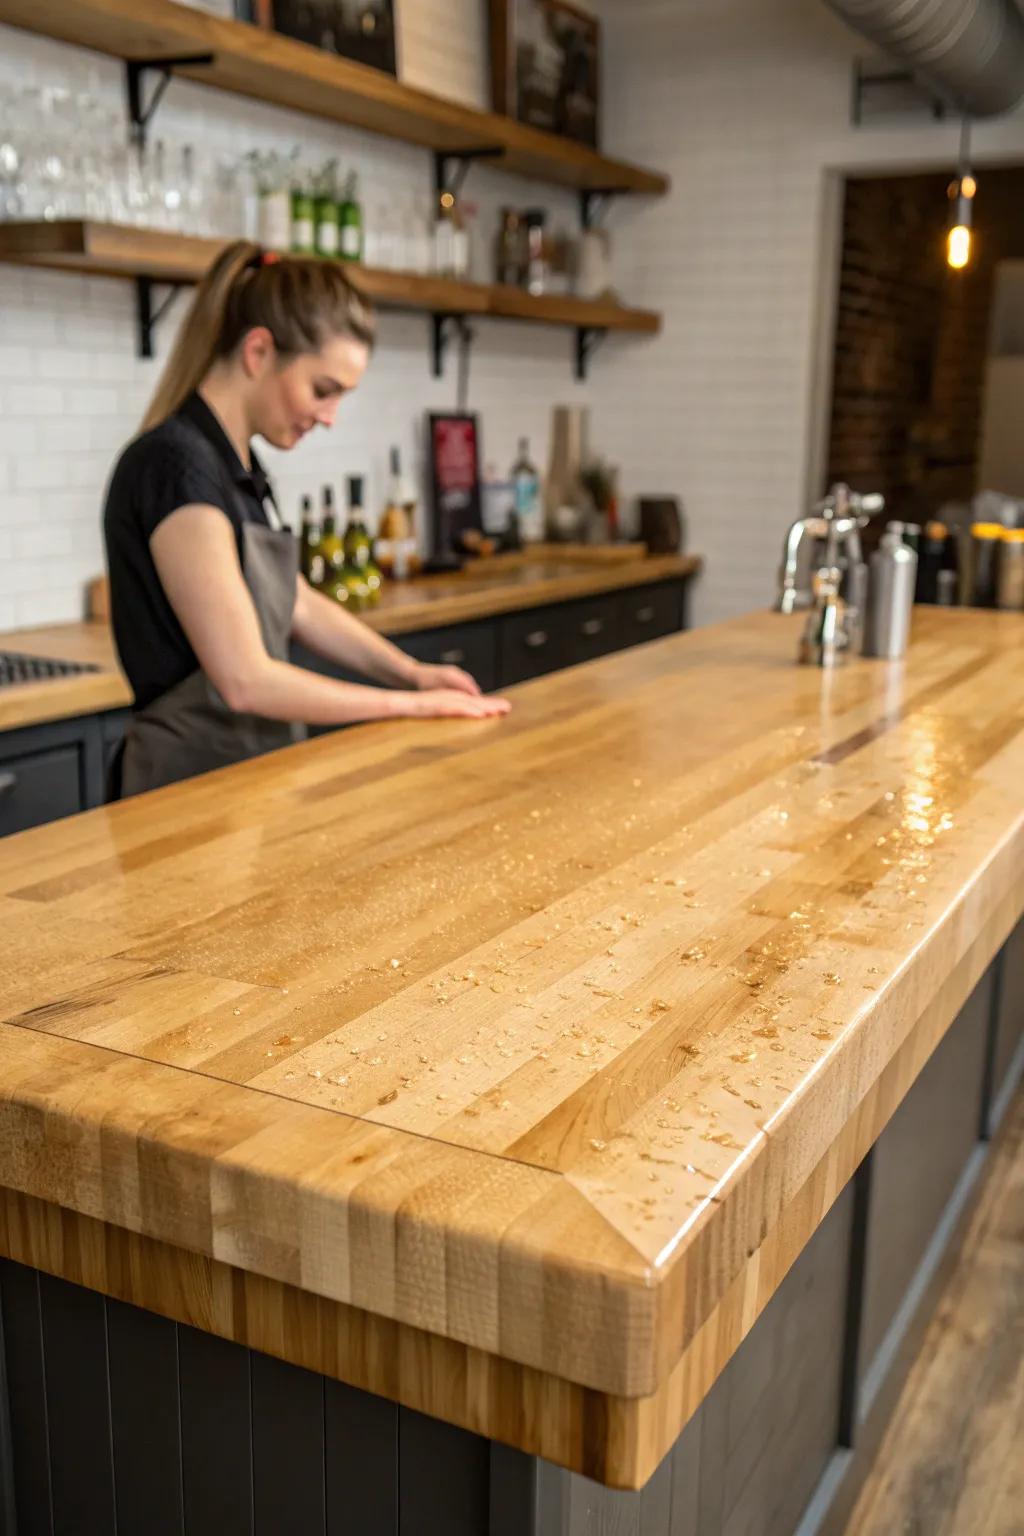
When I want that instantly cozy look, I build a butcher block bar top and seal it like crazy so it shrugs off spills. In my own basement projects, it’s the top people automatically reach out to touch because it feels so warm and real.
Useful items to consider:
- Butcher Block Countertop Slab: Create a warm, custom bar surface by choosing a solid wood slab ready for your perfect finish.
- Food-Grade Wood Sealer: Protect your wood bar top from spills and moisture with a durable, water-resistant oil or finish.
- Heavy-Duty Shelf Brackets: Support your new solid wood countertop securely with sturdy iron brackets that complement the rustic aesthetic.
Reclaimed Wood Plank Bar Top
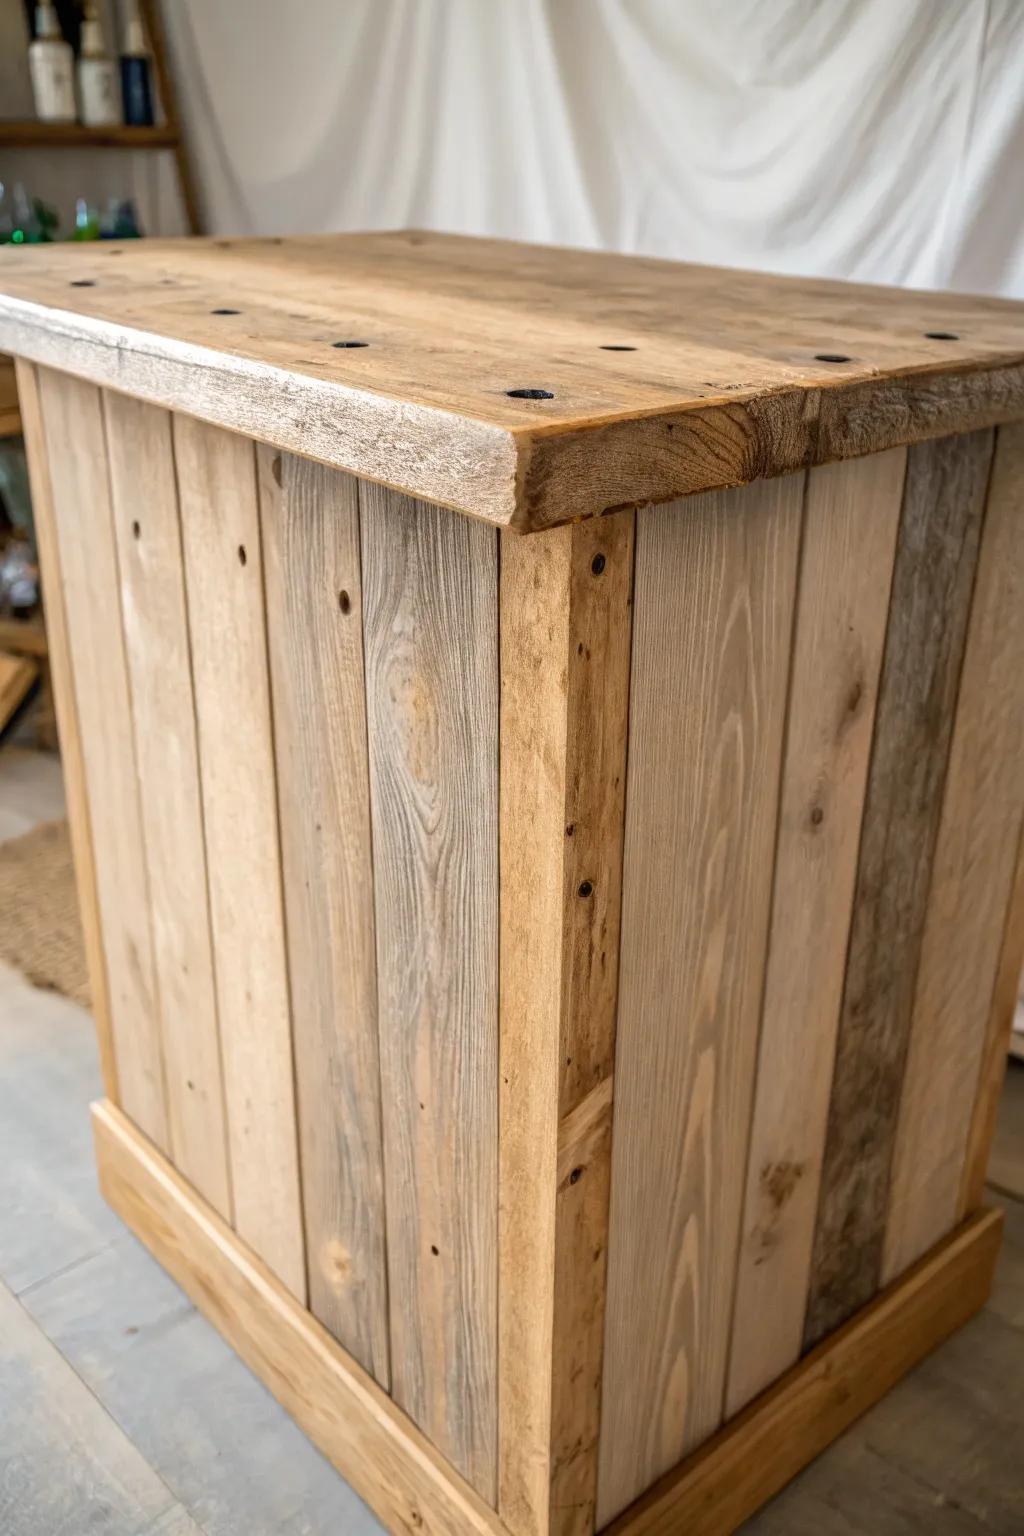
For a basement that feels collected over time, I like a reclaimed wood bar top made from planks with nail holes and weathered grain. I’ve pulled boards from old projects, milled them clean, and the patina still reads through in the best way.
Try these:
- Reclaimed Wood Planks or Paneling: Instantly add rustic character to your bar structure by installing these weathered, authentic wood planks easily.
- Matte Polyurethane Top Coat: Protect your newly built vintage bar surface while maintaining a natural, low-sheen finish specifically designed for wood.
- Wood Conditioner and Stain: Enhance the natural grain and unify the color of disparate plank boards with this essential wood treatment.
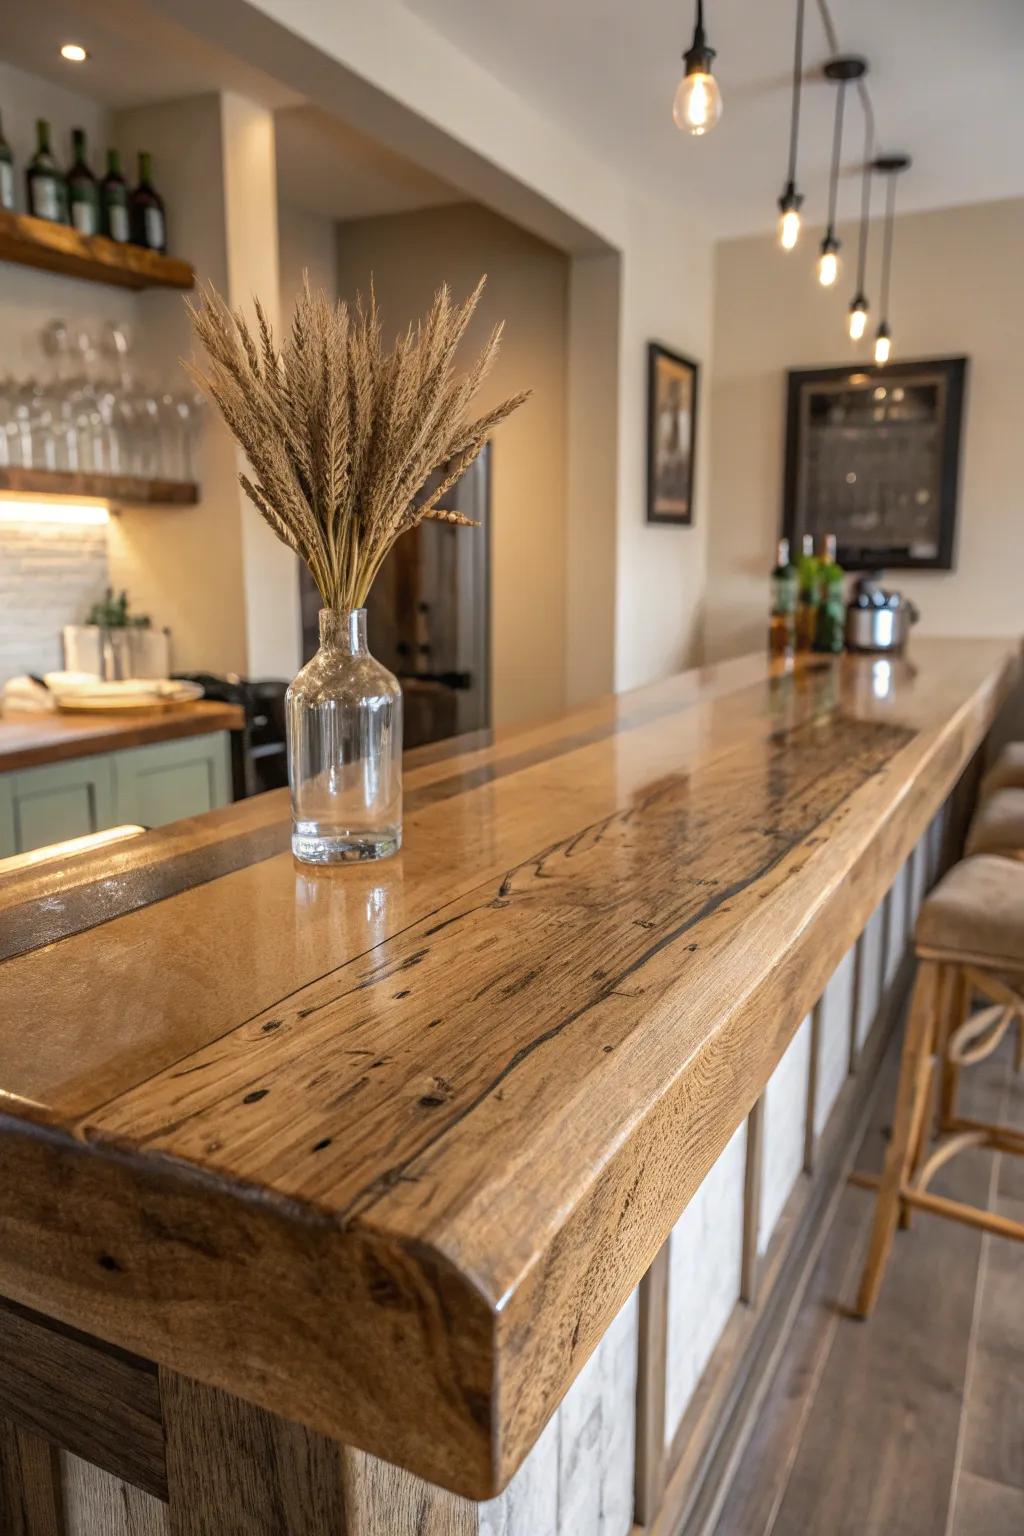
Rich Dark-Stained Wood Bar Top

A deep, moody stain on a wood bar top makes basements feel intentional and a little speakeasy-ish. I’ve done this with simple hardwood and a satin finish, and it hides little dings while still showing off the grain.
May just do the trick:
- Dark Wood Stain: Transform ordinary lumber into a rich, moody surface with deep penetrating stains suitable for indoor woodworking projects.
- Satin Polyurethane Finish: Protect your newly stained bar top with a durable satin clear coat that resists spills and scratches.
- Industrial Bar Stool: Complete the speakeasy vibe with sturdy wood and metal stools that perfectly complement dark bar counters.
Bright White Stone-Look Bar Top
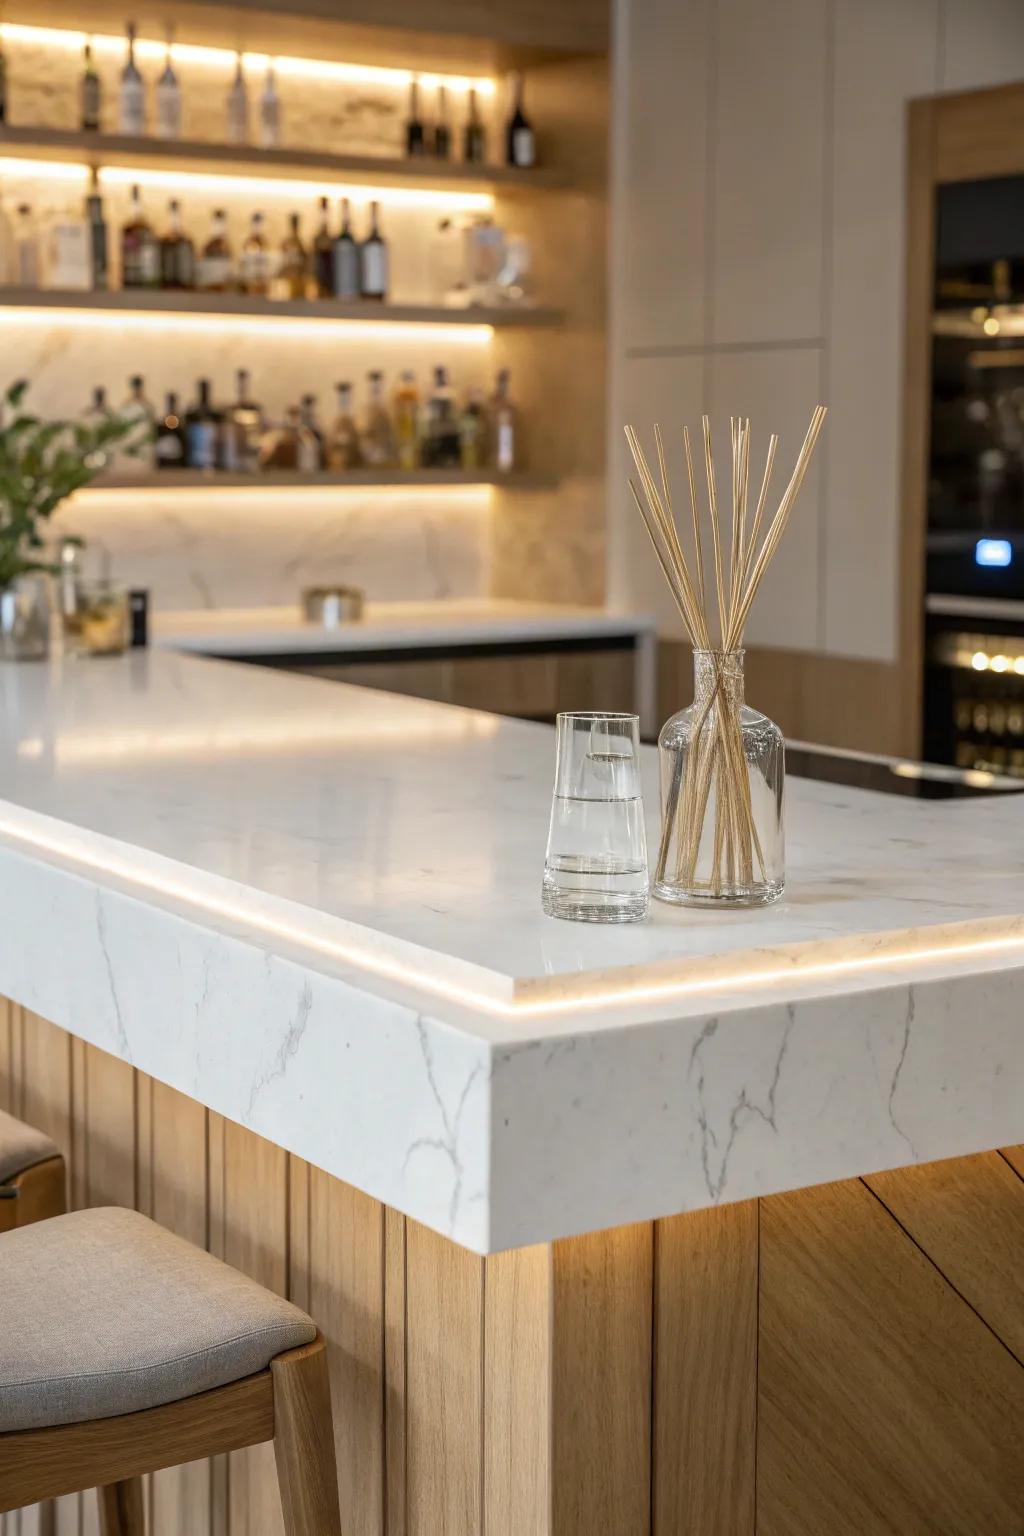
If your basement runs dim, a white bar top with a stone-like pattern bounces light around like nothing else. I’ve paired that bright top with warm wood cabinets, and it instantly makes the bar feel cleaner and bigger.
These products might be useful:
- Marble Contact Paper: Transform your existing counters quickly with adhesive film that mimics the look of real stone for less.
- Reed Diffuser Set: Add a touch of elegance and subtle fragrance to your bar area with a minimalist glass diffuser.
- LED Strip Lighting: Install under-counter strip lights to create that warm, ambient glow seen in professional bar designs.
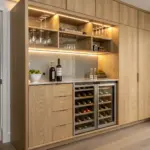
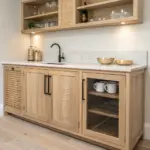
Two-Tier Bar Top for Seating
A two-tier basement bar top is a classic for a reason: prep mess stays lower and guests get a raised ledge to lean on. I’ve built these for tight basements, and the split levels make the whole setup feel more “real bar” than “counter in a corner.”
Some ideas to consider:
- LED Under Cabinet Strip Lights: Add warmth to your bar’s tiers by installing subtle strip lighting under the upper overhang.
- Butcher Block Countertop Slab: Use a solid wood butcher block to create a durable, attractive surface for your bar top.
- Heavy Duty Countertop Brackets: Support your raised bar ledge securely with concealed or decorative heavy-duty steel support brackets.
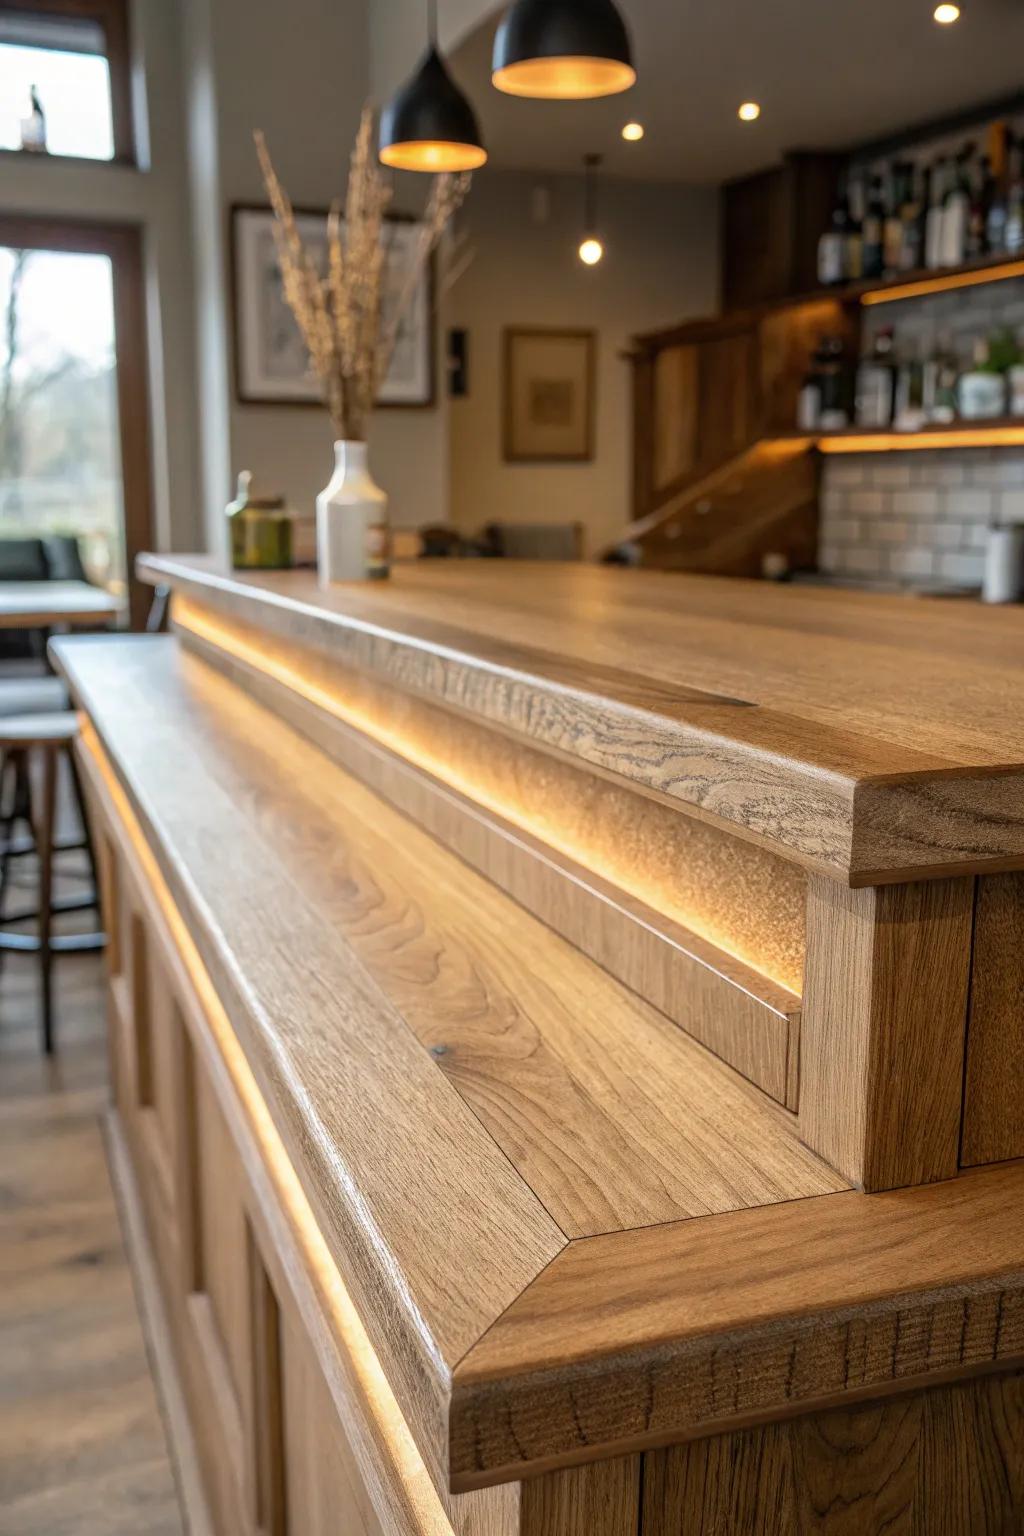
Built-In Bar Rail Edge
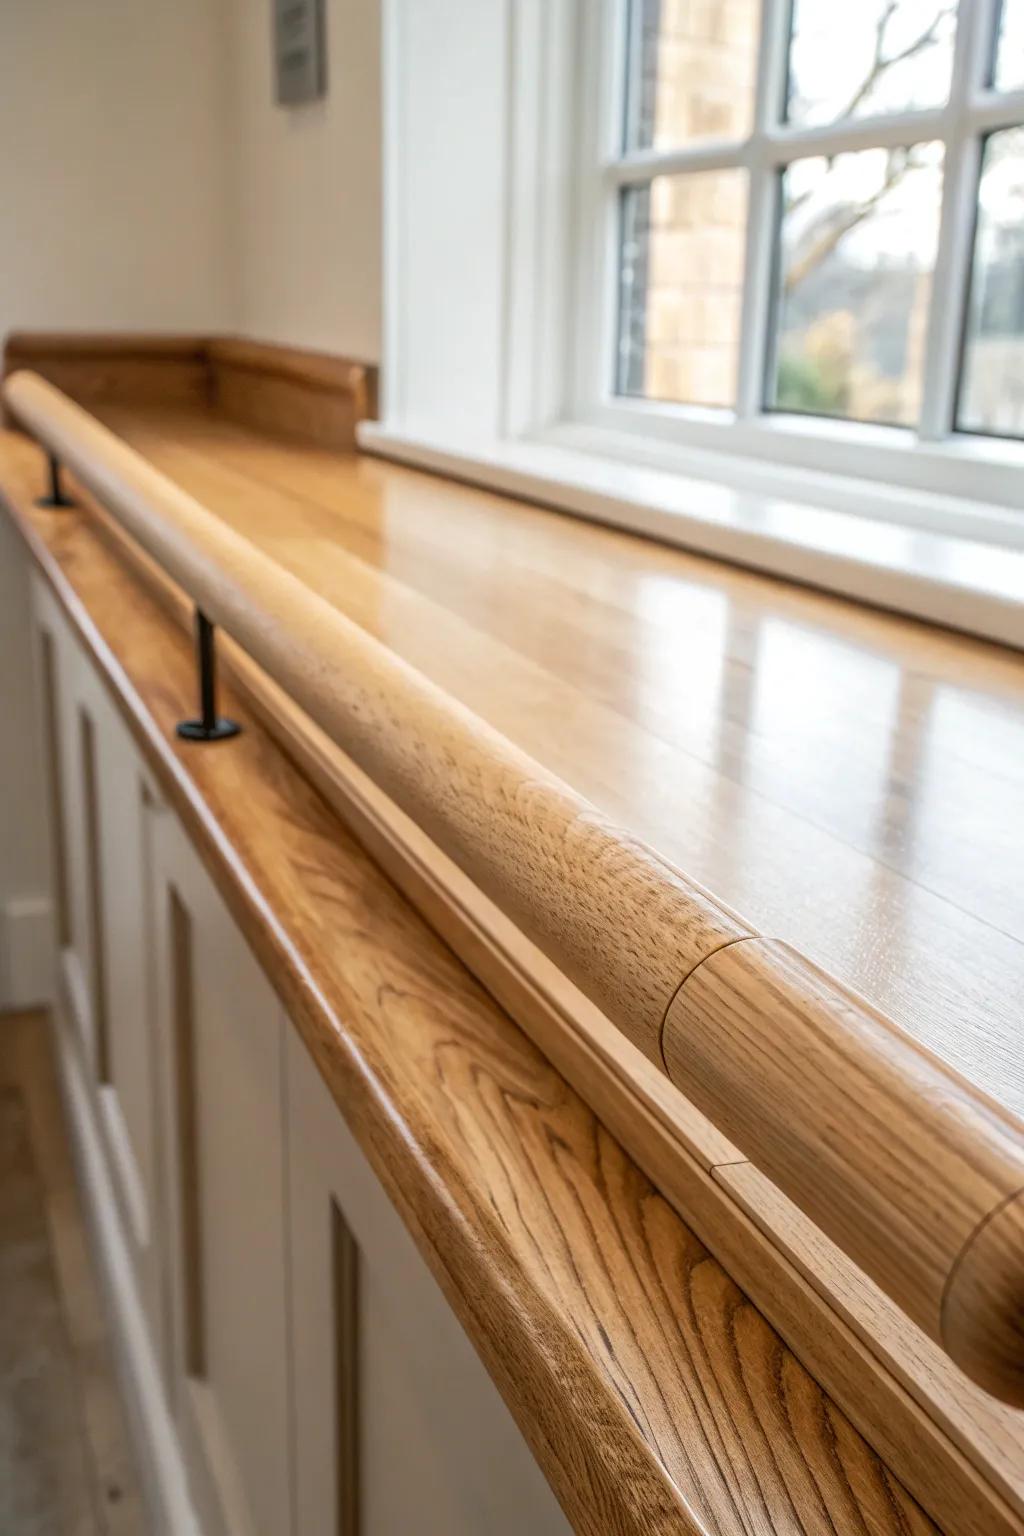
Adding a bar rail is one of those small upgrades that makes a basement bar top feel legit and comfortable for elbows. I’ve routed my own rails, and it’s wild how that one detail changes the vibe from DIY to custom.
Might be a good match:
- Wooden Handrail Dowel: Choose a smooth wooden rail to create a comfortable, custom edge for leaning and relaxing at your bar.
- Metal Rail Support Brackets: Secure your wooden rail firmly with these stylish brackets to add a professional, finished look to your project.
- Wood Finish and Sealant: Protect your new bar rail from spills and wear while enhancing the natural wood grain beautifully.
Drink Rail to Catch Condensation
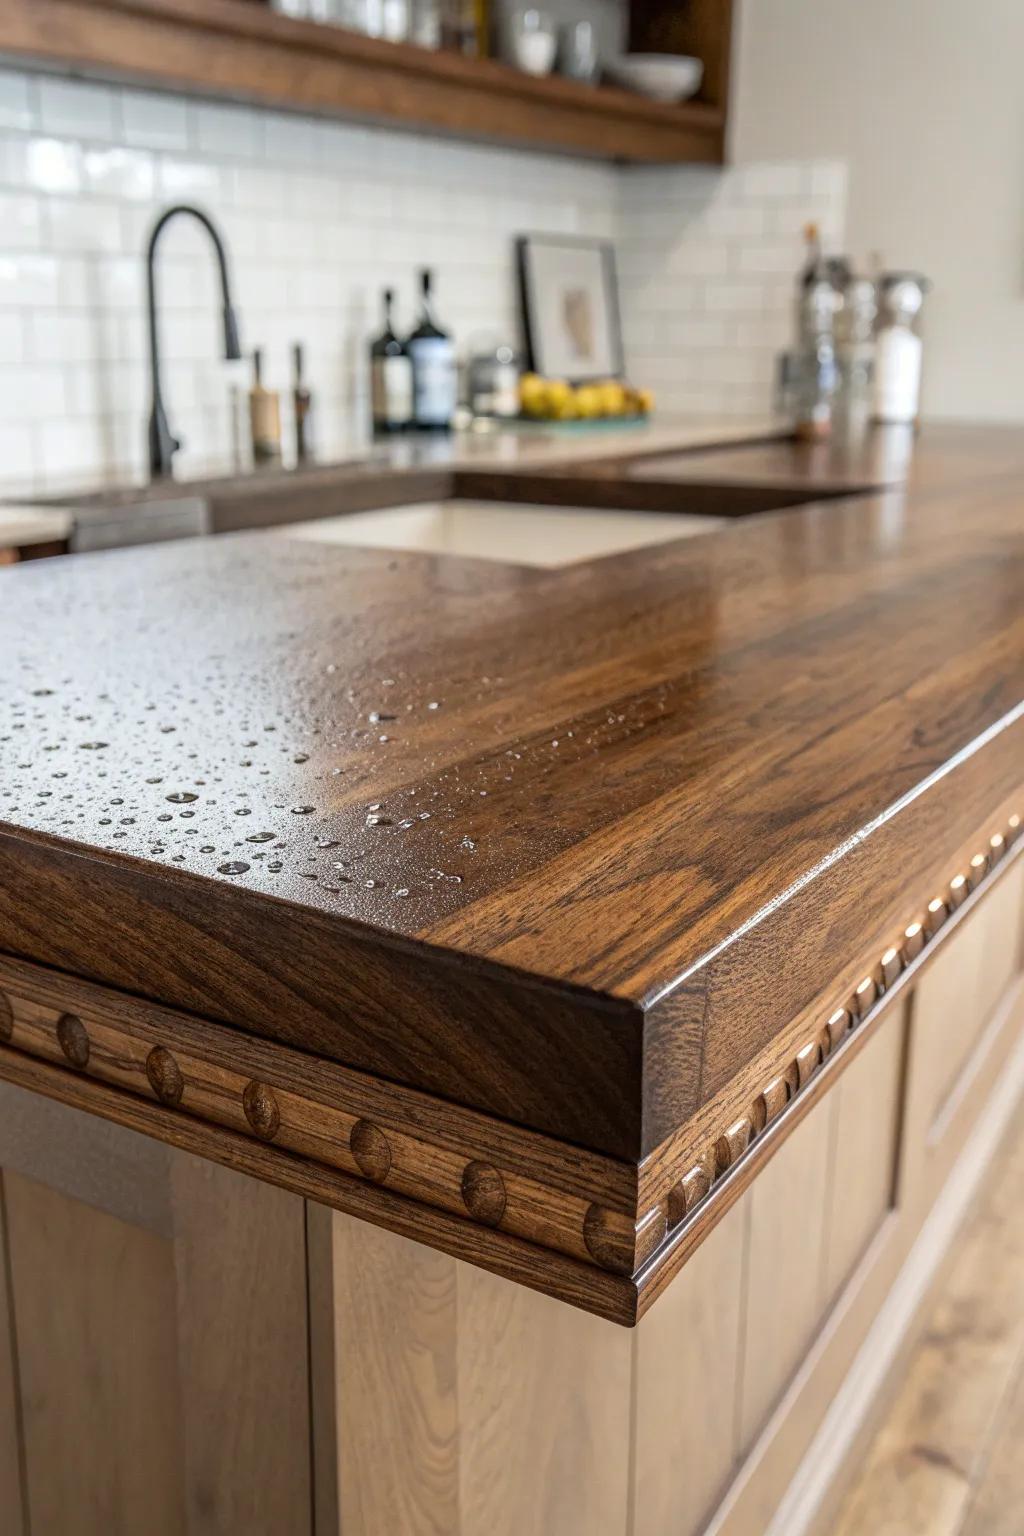
A shallow drink rail groove around the edge of your basement bar top helps corral drips and keeps puddles from creeping into seams. I started adding drink rails after one too many “sweaty glass” nights, and it’s been a game-changer for easy cleanup.
Products that could assist:
- Router Bit for Fluting or Juice Grooves: Carve precise drink rails into your wooden bar top using this tool to easily manage liquid spills.
- Food-Safe Wood Oil Finish: Protect your new drink rail groove from water damage and staining by applying a durable, water-resistant oil.
- Rubber Bar Service Mat: Place these inside or alongside your rail to catch heavy condensation and make cleaning glasses even faster.
Waterfall Edge Bar Top
A waterfall edge bar top (where the top material wraps down the sides) looks clean and high-end, even in a basement. I’ve done waterfall edges with both wood and stone-look panels, and it makes the bar feel like a built-in piece of architecture.
A few relevant products:
- Butcher Block Countertop: Create a seamless waterfall effect by using matching butcher block slabs for both the top and sides.
- Wood Stain and Sealer: Protect your wood surfaces and enhance the grain to ensure a professional, cohesive finish across all planes.
- Heavy-Duty L-Brackets: Ensure your waterfall edge and bar overhang are structurally sound and secure with concealed heavy-duty supports.
Poured Concrete-Style Bar Top
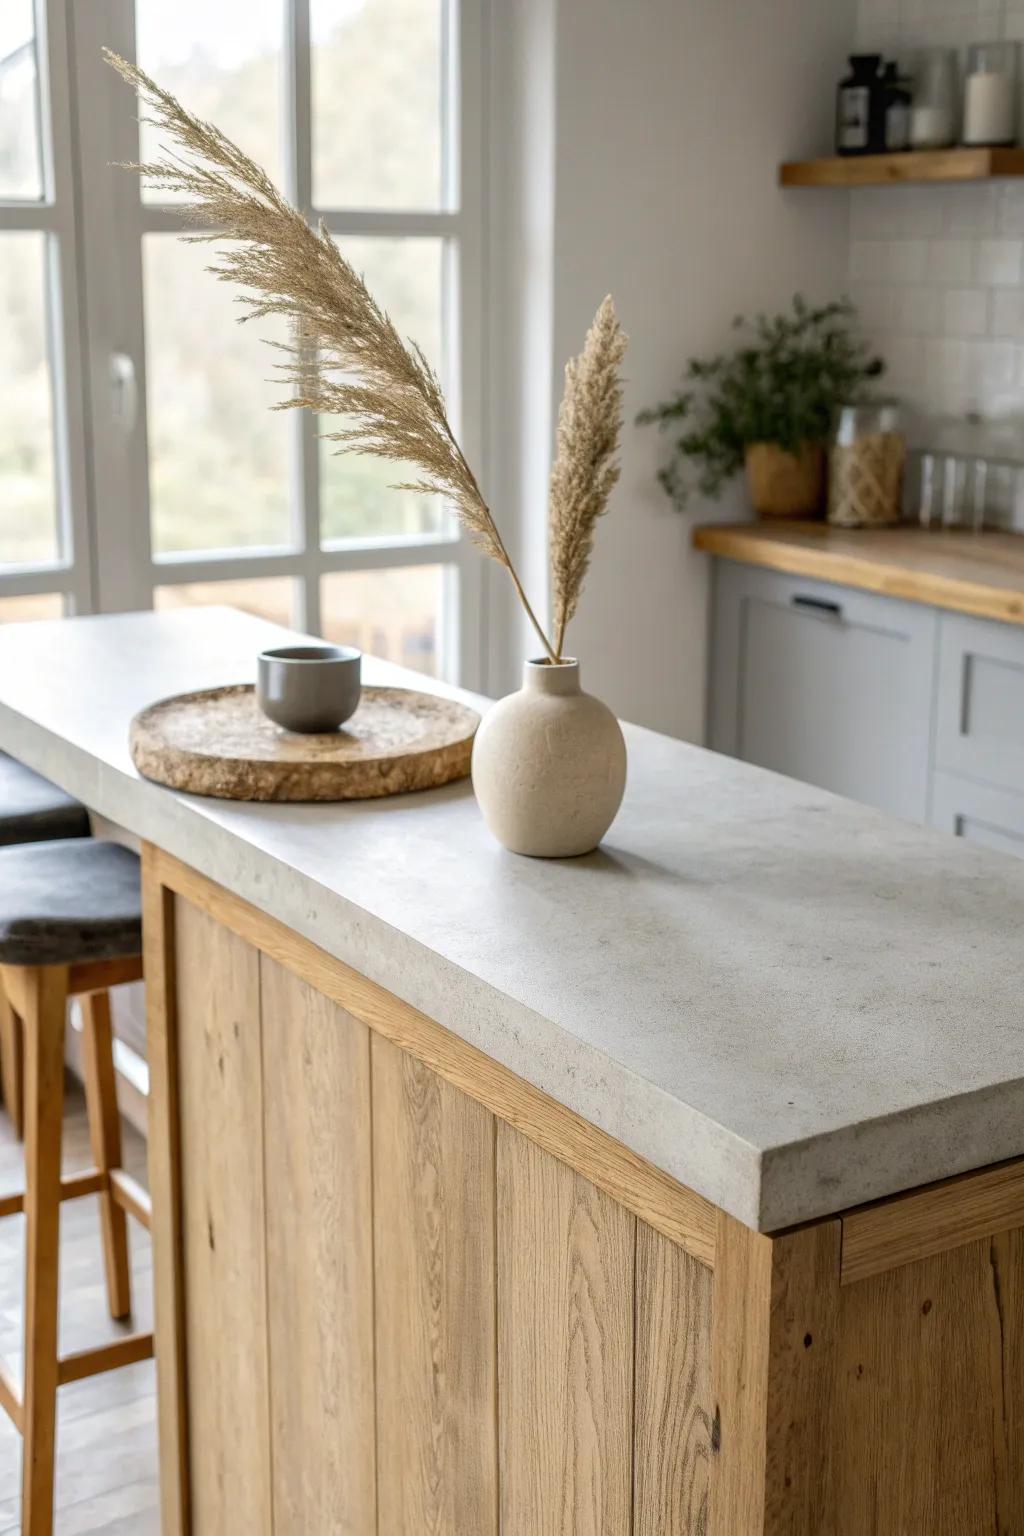
A concrete bar top is perfect if you love that modern-industrial look and don’t mind a little weight and muscle during install. I’ve cast concrete tops in my shop and softened the edges, and the subtle variations always look intentional, not messy.
Give these a look:
- Concrete Countertop Sealer: Protect your newly poured surface from stains and water damage by applying a durable, high-quality seal.
- Oval Ceramic or Stone Vase: Recreate the styled look in the photo with a neutral, textured vase for holding decorative dried grasses.
- Round Wooden Serving Tray: Warm up the cool concrete tones by adding a natural wood tray for serving drinks or decor.
Tile-Inset Wood Bar Top
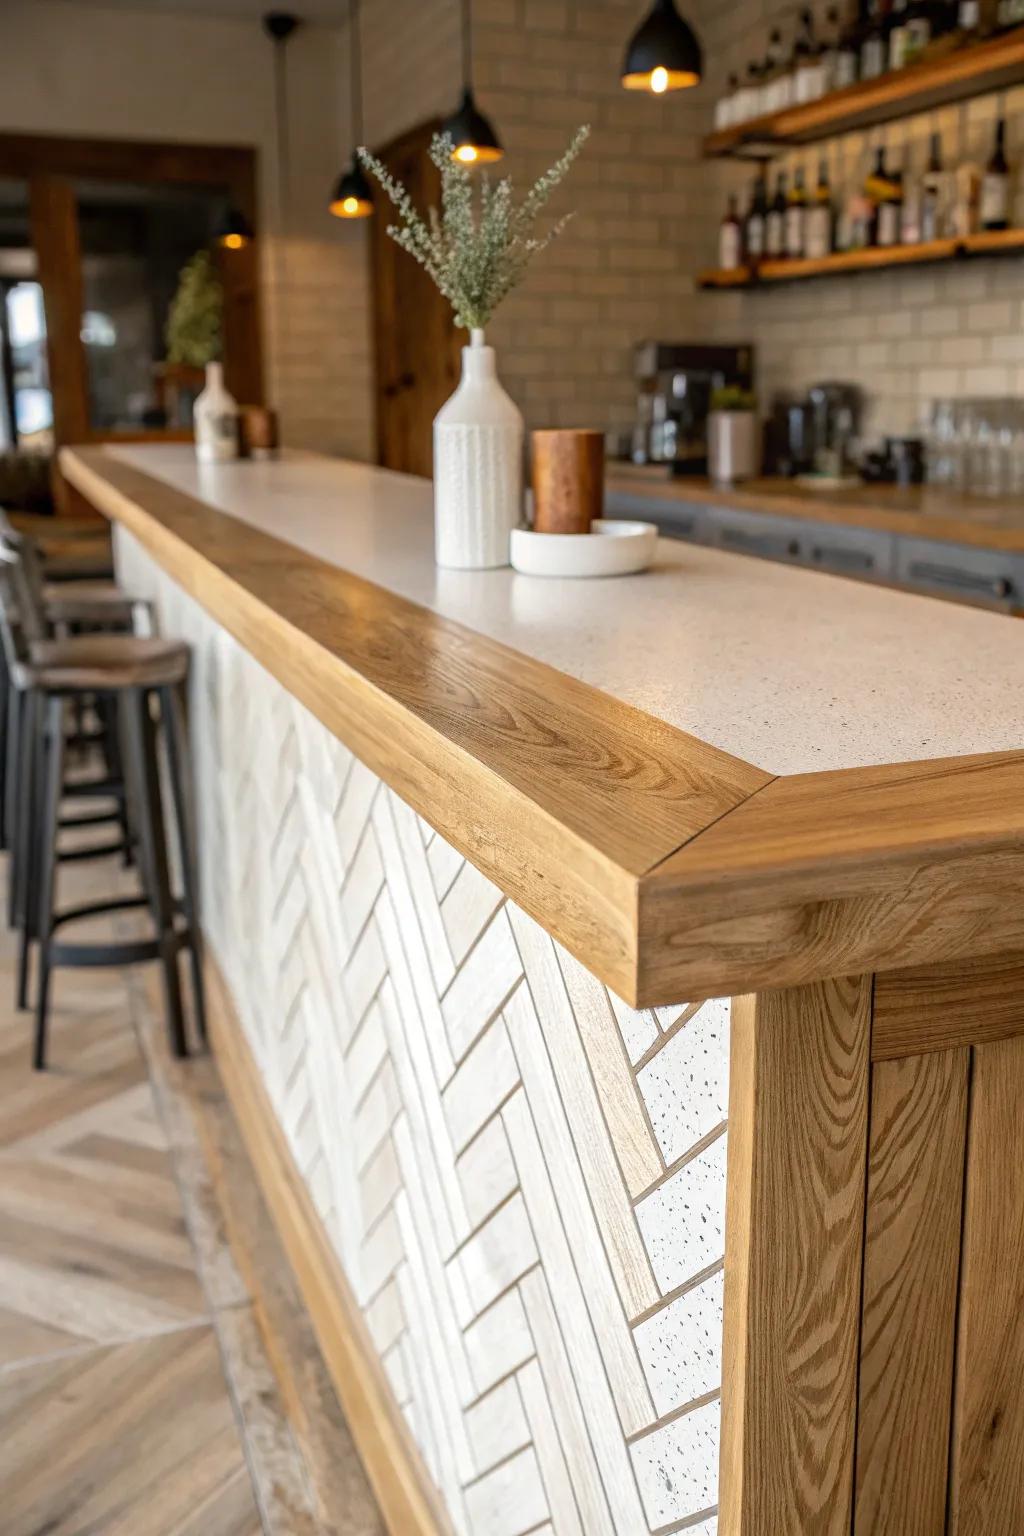
Try a tile-inset bar top by framing a tile field inside a wood border—great for tying into basement floors or a backsplash. I’ve done this when clients want pattern without committing to a full tile counter, and it photographs so well under pendant lights.
A few choices to try:
- White Herringbone Mosaic Tiles: Recreate the sleek look of this bar front with durable mosaic sheets perfect for flat surfaces.
- Unfinished Oak Lumber Board: Frame your tile inset beautifully using sturdy hardwood boards that can be stained to match your decor.
- Industrial Pendant Light Fixture: Illuminate your custom bar top and highlight the texture of the tile with warm, focused overhead lighting.
Crystal-Clear Epoxy Coat Over Wood
If you love wood but need maximum protection, a thick epoxy-coated bar top is basically armor. I’ve used a flood coat over rustic planks, and it locks in character while wiping clean after a messy party.
Possibly helpful picks:
- Tabletop & Bar Epoxy Resin Kit: Protect your wood investment with a glossy, durable finish that resists scratches and makes cleaning up spills effortless.
- Reusable Mixing Buckets & Spatulas: Ensure your pour goes smoothly by mixing precise ratios with these essential, sturdy calibrated containers and stirrers.
- Handheld Heat Gun: Eliminate stubborn surface bubbles after pouring to achieve that professional, glass-like transparency for your bar top project.
End-Grain Block Bar Top
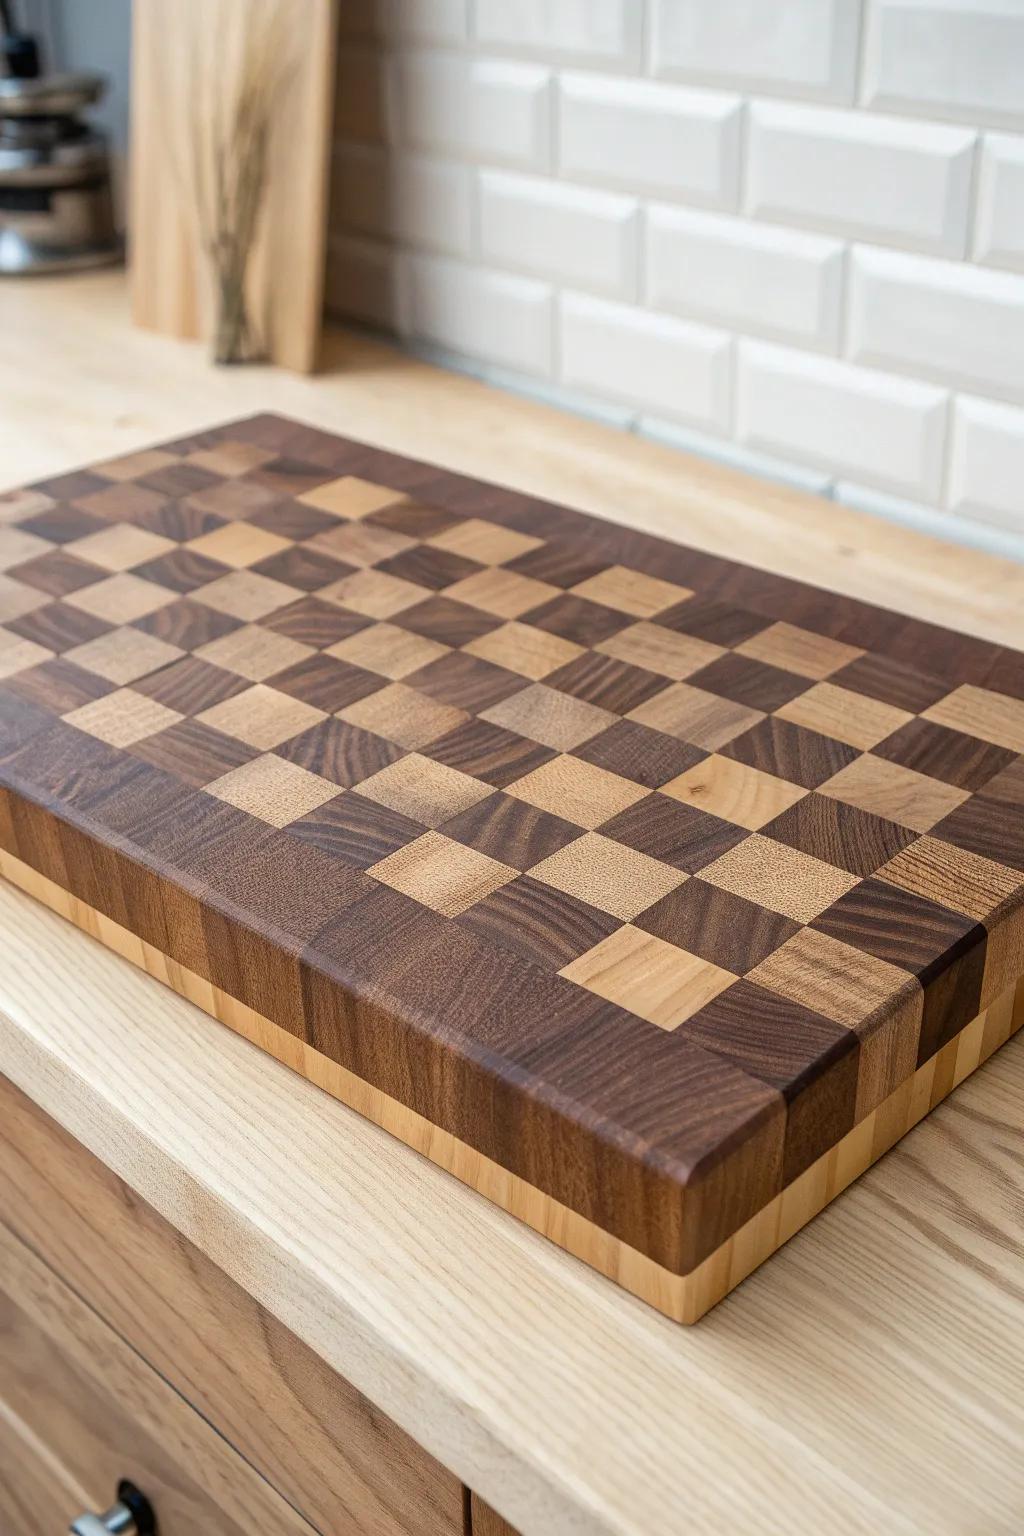
An end-grain bar top looks like a checkerboard of wood fibers and handles wear like a champ when it’s properly sealed. I’ve built one from cutoffs in my workshop, and it’s my favorite way to make “scrap wood” look expensive.
You might like:
- Food-Grade Mineral Oil: Protect your wood surface by applying regular coats of oil to prevent drying, cracking, and water damage.
- heavy-duty wood glue: Ensure a permanent bond between your wooden blocks with water-resistant glue designed specifically for woodworking projects.
- Orbital Sander & Sandpaper: Achieve a perfectly smooth, professional finish on your end-grain top by sanding down rough edges efficiently.
Herringbone Plank Bar Top
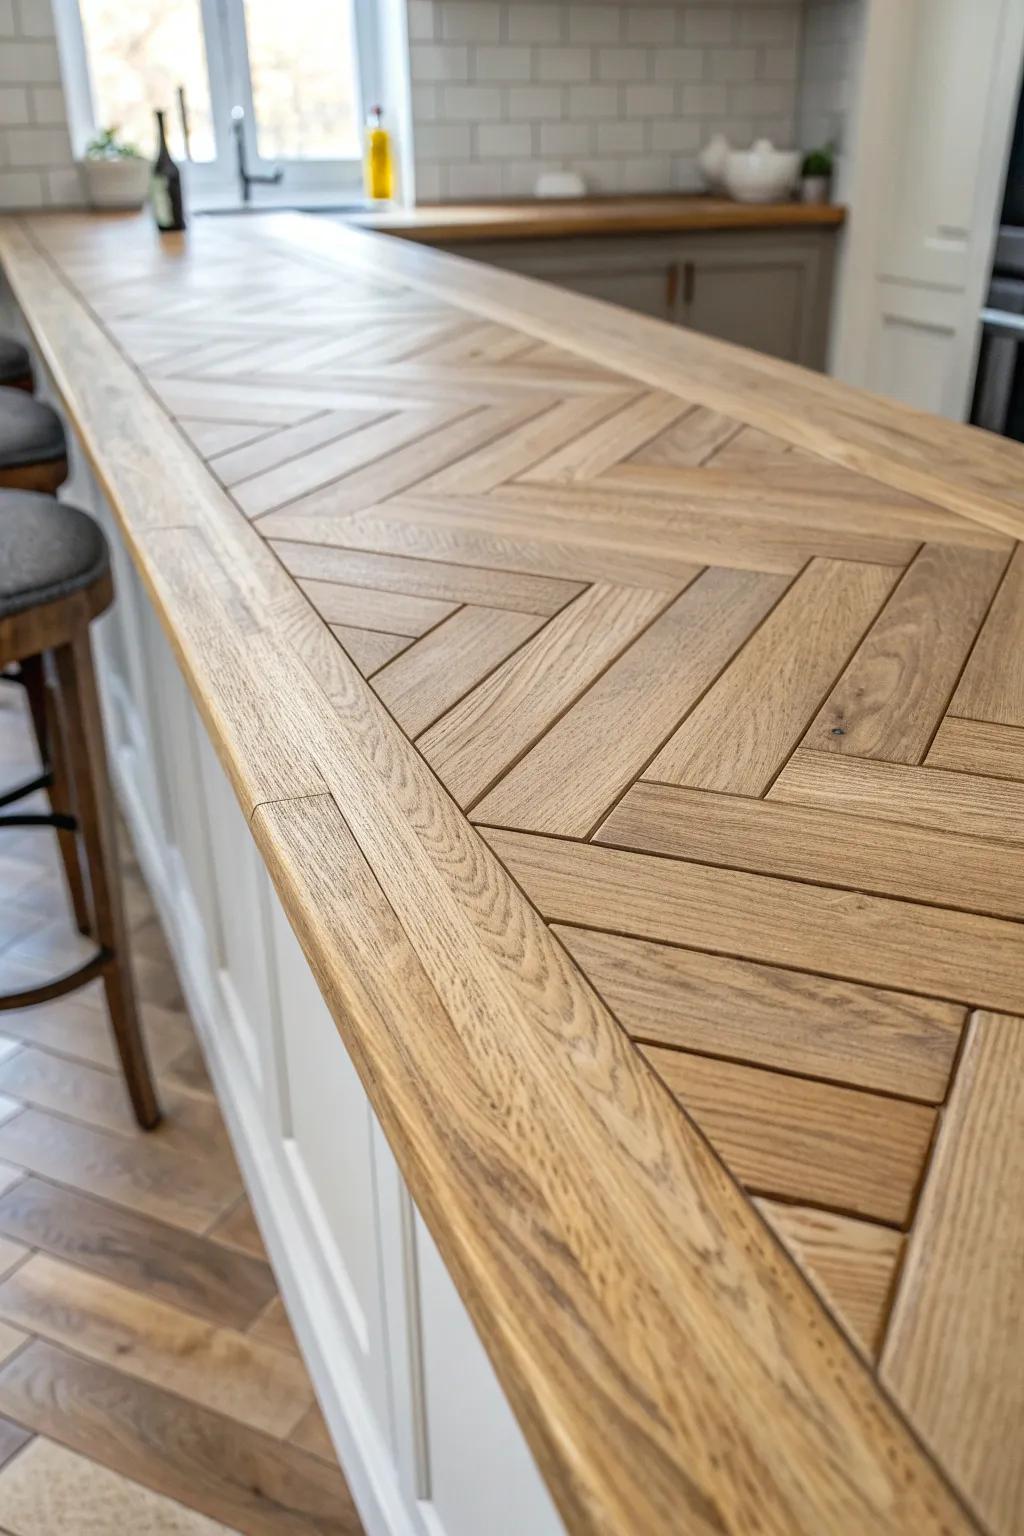
A herringbone bar top adds instant movement and makes a simple basement bar feel styled. I’ve laid herringbone with thin hardwood strips, and the pattern hides seams while giving you that boutique look.
Consider these options:
- Engineered Wood Planks: Create your intricate pattern easily with pre-cut planks that offer a stable, uniform surface for your bar.
- Woodworking Glue & Adhesive: Ensure your herringbone design stays permanently in place with a high-strength wood glue suitable for interior projects.
- Matte Polyurethane Finish: Protect your new bar top from spills while maintaining that natural, low-sheen look seen in professional designs.
Whitewashed Farmhouse Bar Top
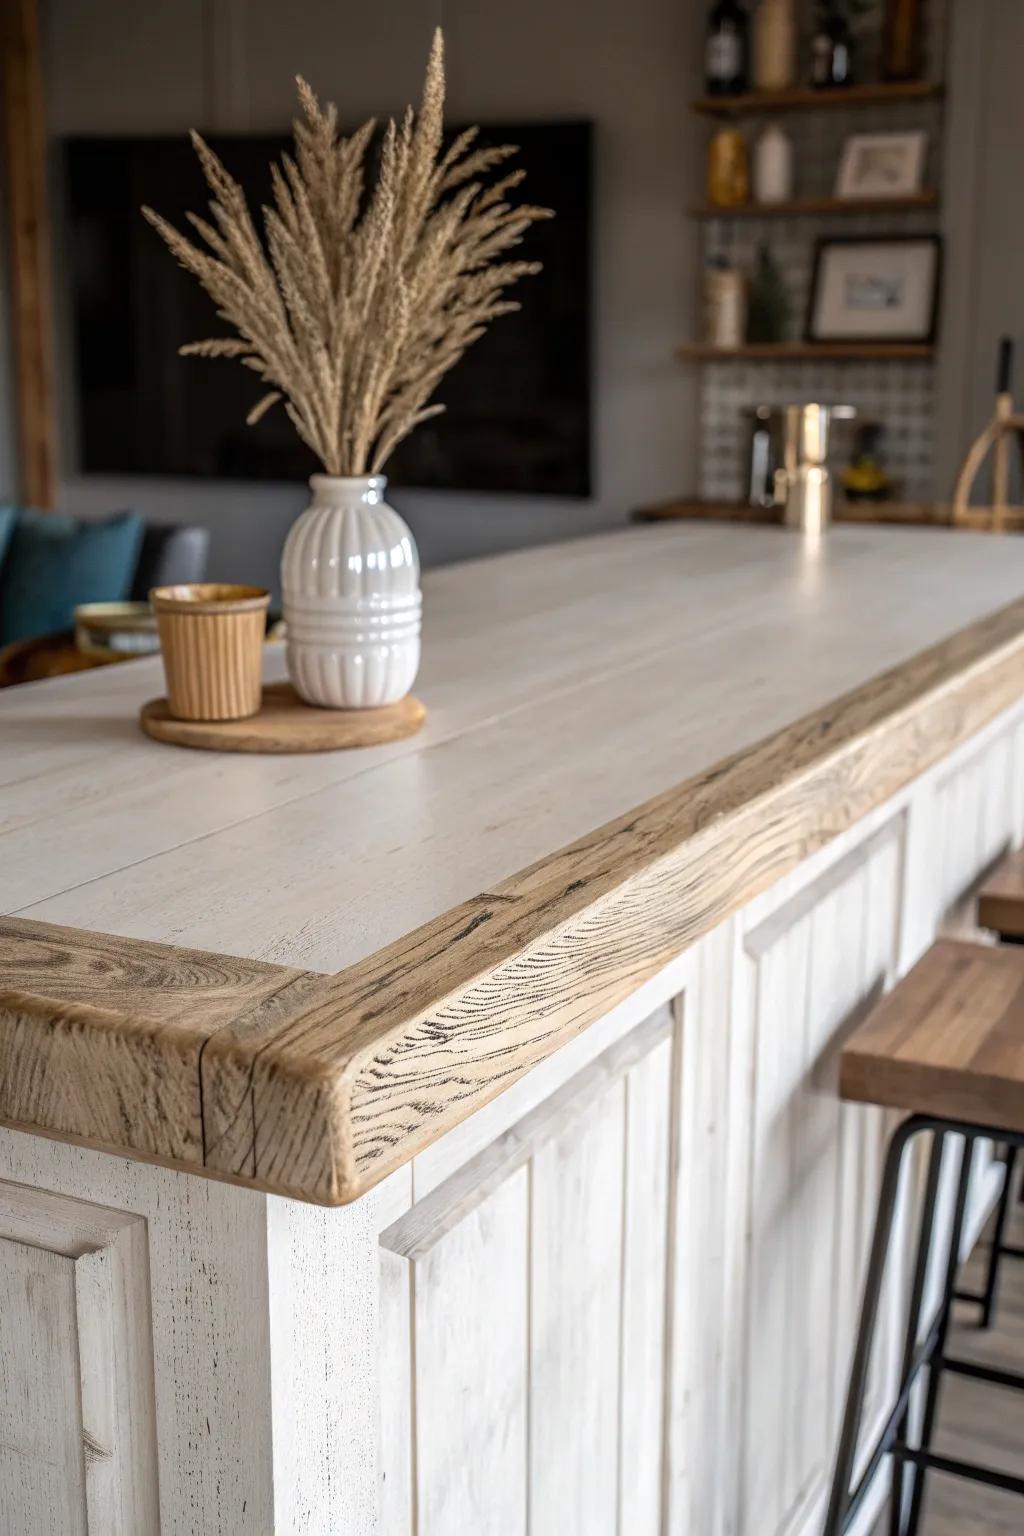
A soft whitewashed bar top keeps the room light but still lets the wood grain peek through for that farmhouse feel. I’ve used this finish in basements with little natural light, and it keeps everything from feeling too cave-like.
You might give these a try:
- Whitewash Wood Stain: Update your wooden surfaces easily; apply this stain to achieve that bright, classic farmhouse look on counters.
- Matte Polyurethane Sealer: Protect your newly finished bar top from spills and rings without adding unwanted shine to the wood.
- White Ceramic Farmhouse Vase: Complete the aesthetic by adding a textured white vase for holding dried grasses or simple seasonal stems.
Charred Wood Bar Top
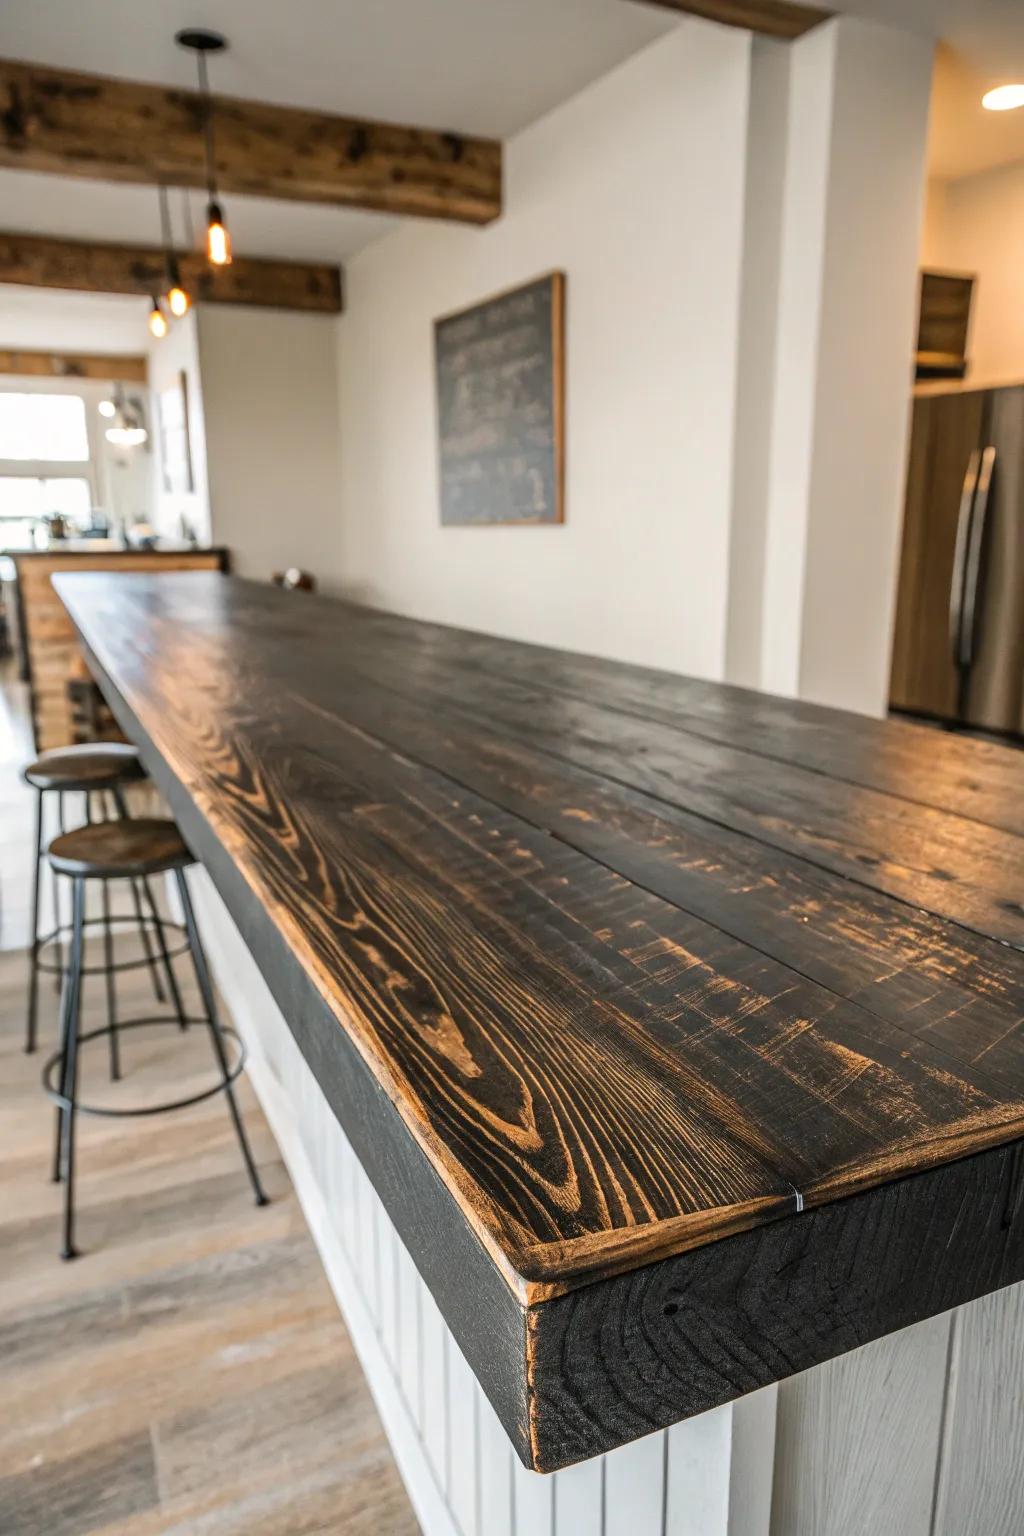
A charred wood bar top brings dramatic texture and hides everyday scuffs better than you’d expect once it’s sealed smooth. I’ve torched boards in my shop, brushed the grain, and the final look is bold without being loud.
Some handy options:
- High-Output Propane Torch: Achieve the dramatic charred effect easily with a powerful torch designed to evenly scorch wood grain surfaces.
- Wire Brush Drill Attachment: Remove heavy char and reveal the beautiful unique grain patterns quickly by attaching this to your power drill.
- Matte Polyurethane Sealer: Protect your finished surface from spills while maintaining that rustic, charred look with a durable, clear finish.
Metal Inlay Stripe Bar Top
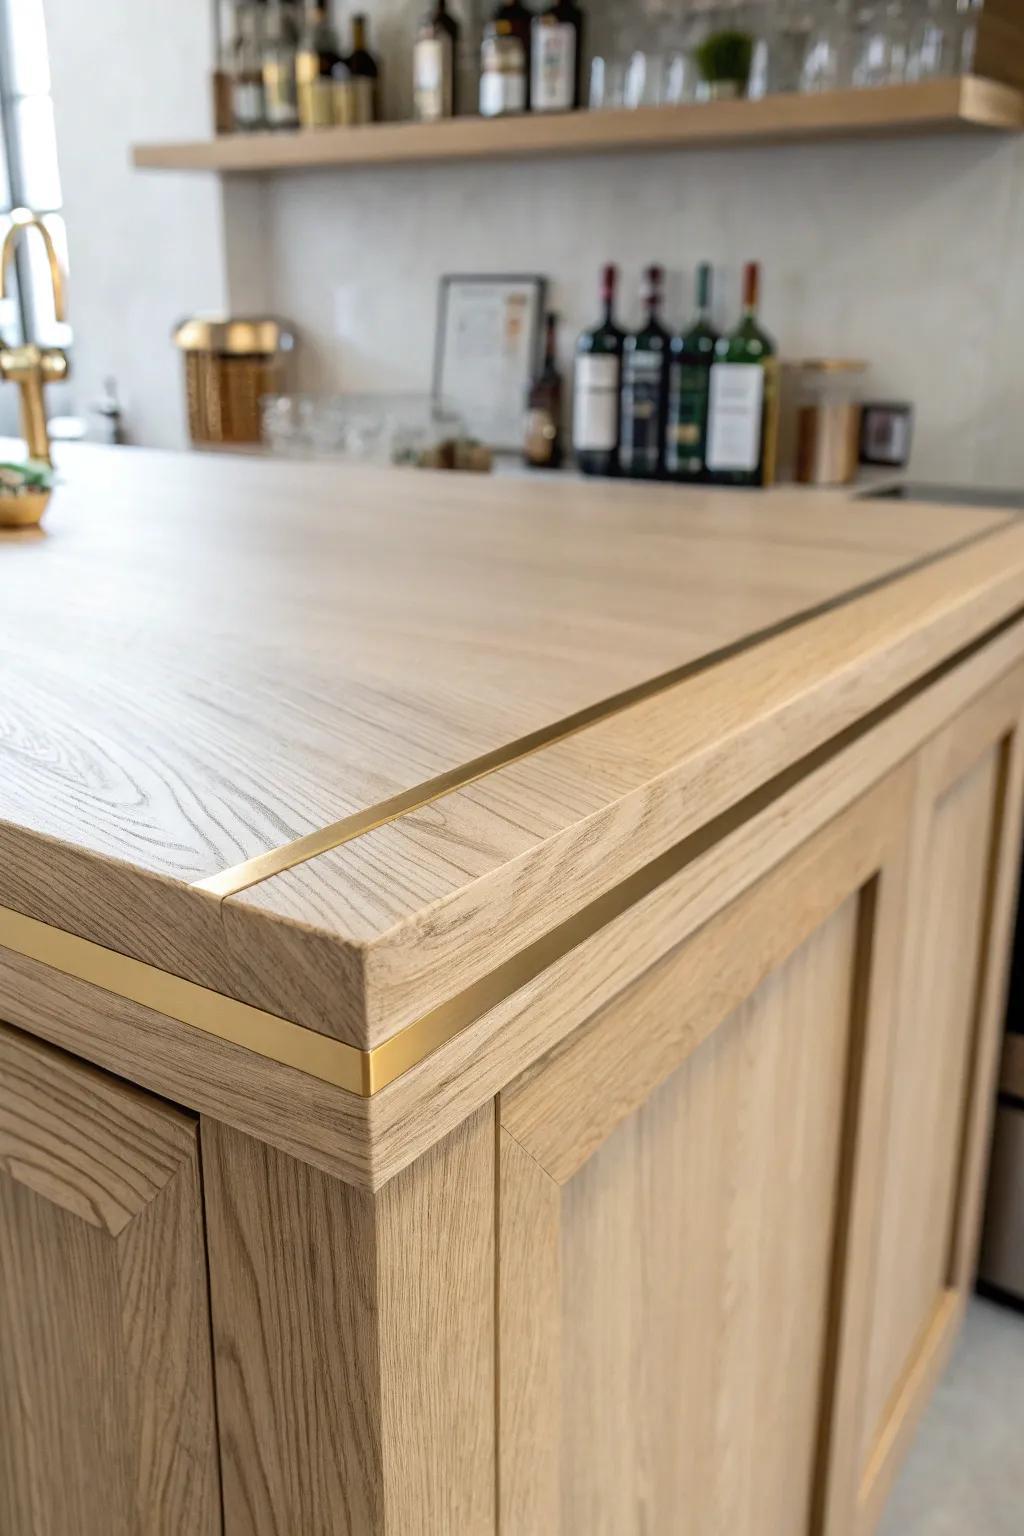
For a clean modern twist, add a metal inlay line (or two) right into the basement bar top surface. I’ve embedded thin metal strips into wood, and that tiny flash of shine makes the whole bar feel custom-made.
A few things you might like:
- Brass Flat Bar Strips: Add a luxurious touch to your bar top by inlaying these durable, shiny metal strips effortlessly.
- Palm Router Tool: Carve precise channels for your metal inlay with this compact tool, ensuring a perfectly flush finish.
- Clear Epoxy Adhesive: Secure your metal strips permanently into the wood channels for a seamless, professional-looking bar surface.
Leather-Wrapped Edge Bar Top
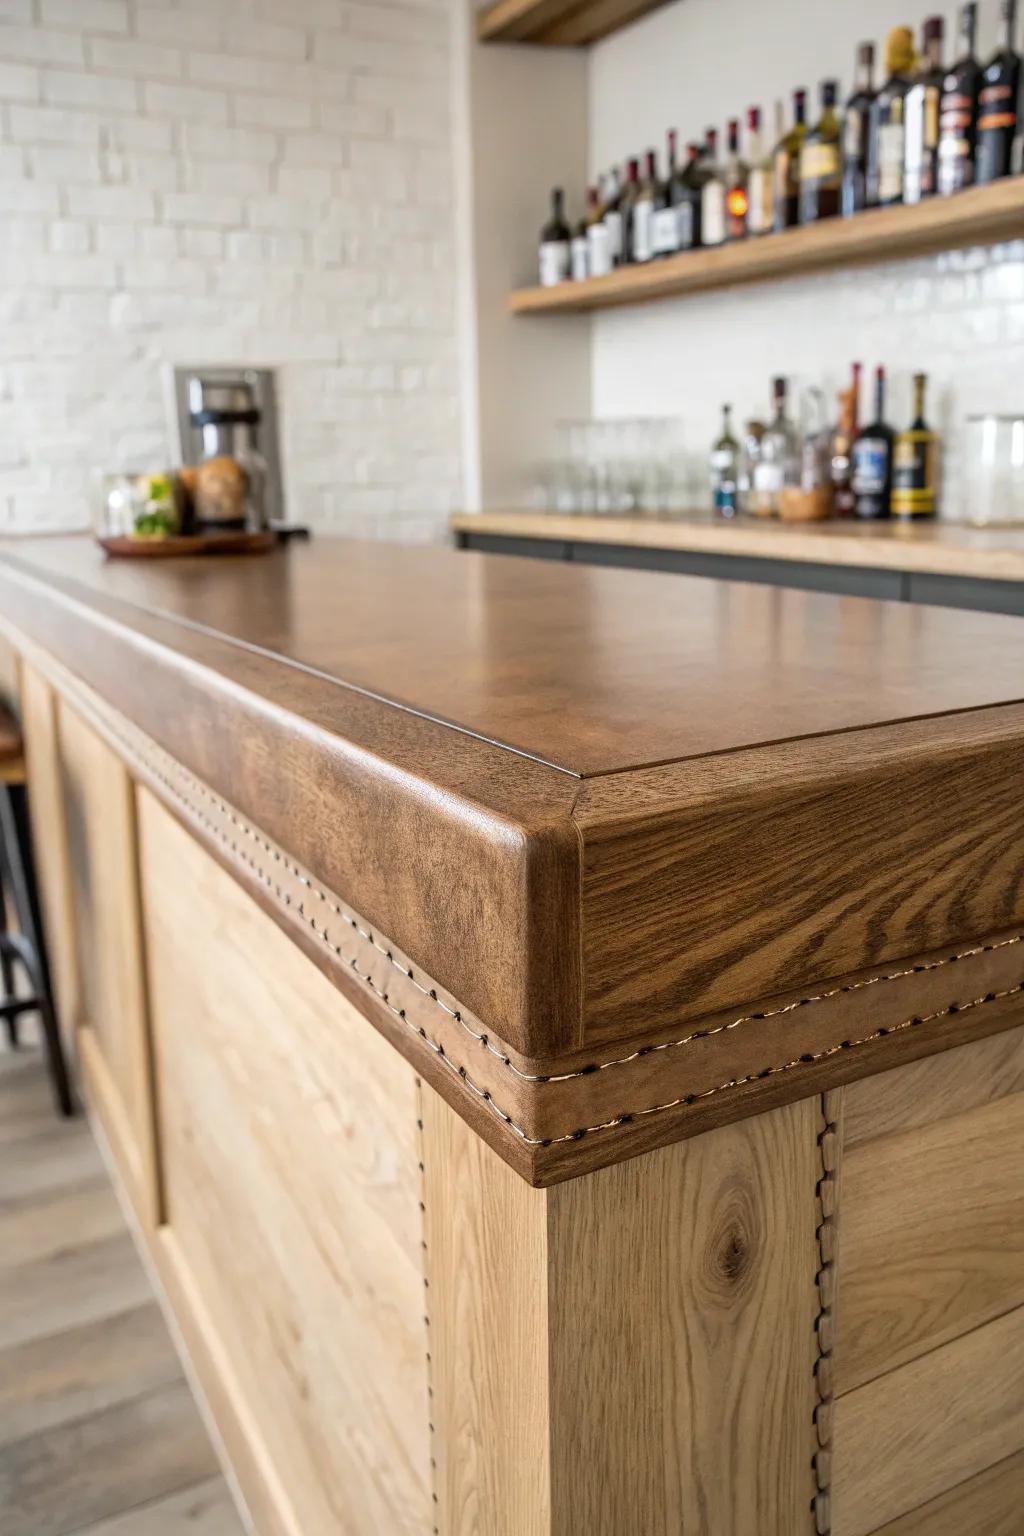
Wrapping the front edge of a basement bar top in leather (or a leather-like material) adds this unexpected, old-club comfort. I’ve tried it on a bar rail once, and the soft edge instantly made stools feel more inviting for long hangs.
These products might help:
- Faux Leather Upholstery Fabric: Wrap your bar edges with durable faux leather to create a soft, sophisticated touch area for guests.
- Decorative Upholstery Tack Strips: Secure your leather edging stylishly and easily with these tack strips that mimic the vintage nailhead look.
- Leather Sewing Kit: Use heavy-duty needles and waxed thread to add authentic stitching details to your custom leather edge wrap.
Bottle Cap Mosaic Under Clear Epoxy
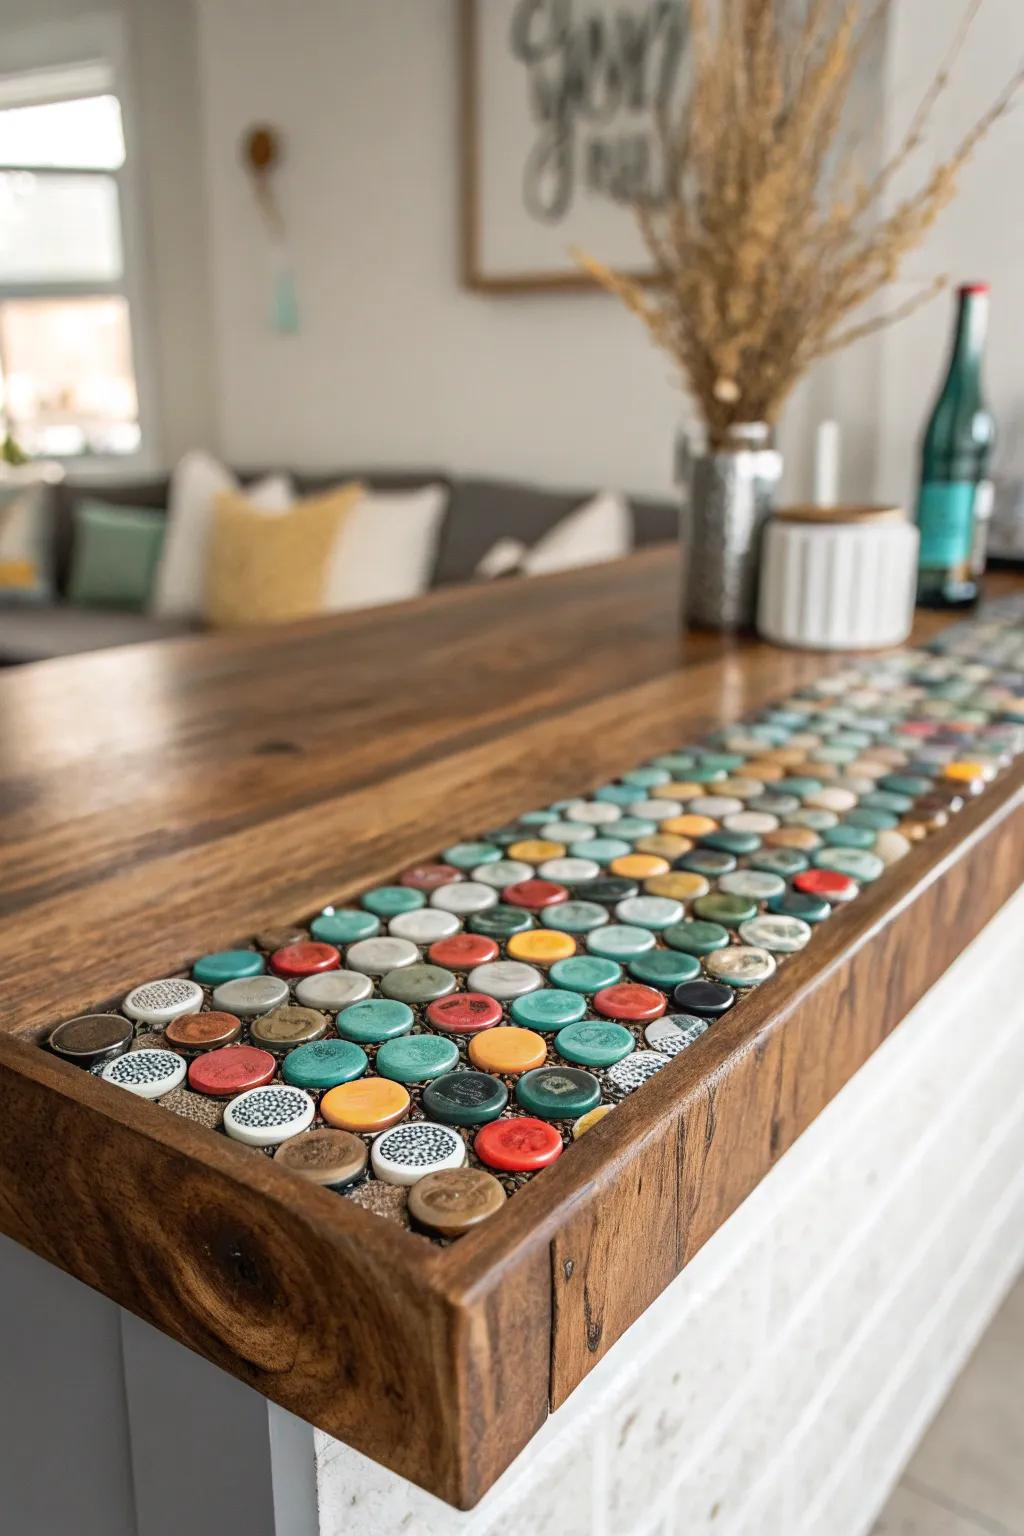
A bottle cap bar top is pure conversation starter—set the caps in a layout you like, then lock it in under a clear epoxy coat. I helped a friend build one for their basement, and people spent half the night spotting their favorites like it was a scavenger hunt.
A few suggestions:
- Clear Table Top Epoxy Resin Kit: Create a glass-like, durable finish effectively sealing your bottle caps with this self-leveling resin kit.
- Assorted Vintage Bottle Caps: Fill gaps in your collection quickly with a bulk pack of colorful, unused decorative bottle caps.
- Heavy Duty Industrial Adhesive: Secure every cap firmly in place before pouring resin to prevent floating or shifting during curing.
Topographic Map Inlay Bar Top
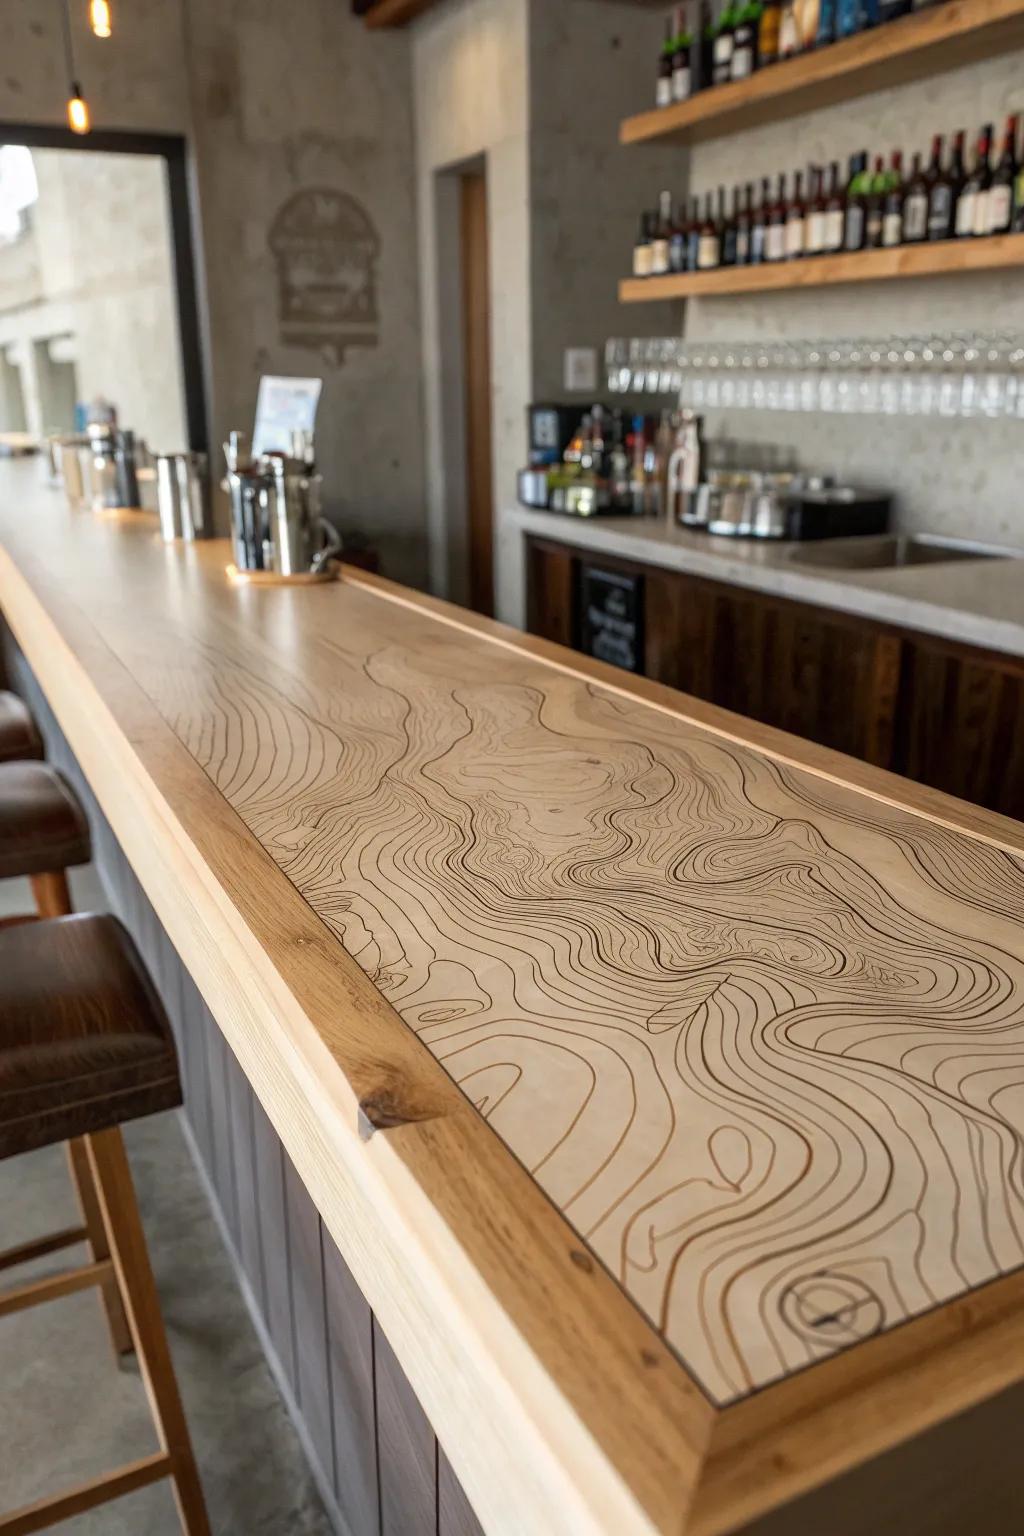
For a true one-of-one look, inlay a topographic map bar top design using contrasting wood tones, then seal it glass-smooth. I’ve done map-style inlays on smaller projects, and scaling it up to a basement bar top creates that jaw-drop centerpiece effect.
Items that may come in handy:
- Table Top Epoxy Resin Kit: Protect your intricate map inlay with a durable, glass-like finish that resists spills and scratches effectively.
- Wood Burning Kit / Pyrography Pen: Etch detailed topographic lines directly into your wood surface with precision using this versatile heating tool.
- Unfinished Live Edge Slab or Butcher Block: Start your project with a solid, high-quality wood base perfect for engraving and custom staining.


