
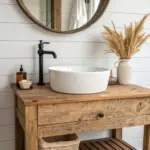
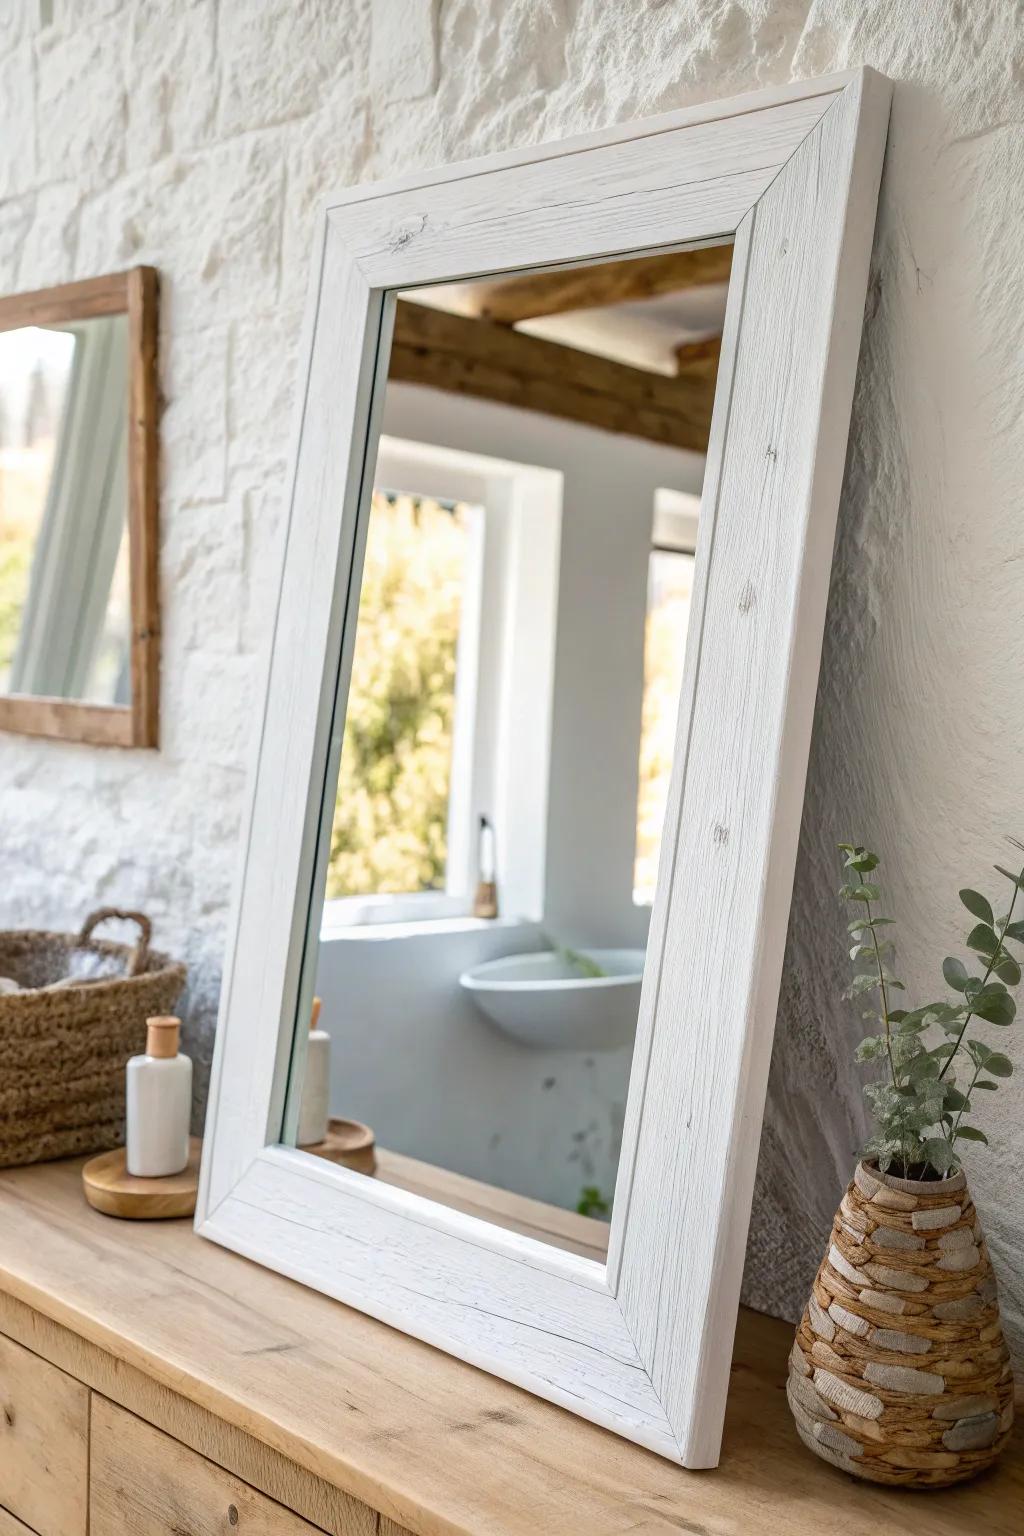
A plain bathroom mirror can make the whole space feel a little unfinished, even if everything else is cute. I love adding a bathroom mirror border because it’s one of those quick wins that makes your vanity look custom without touching the glass.
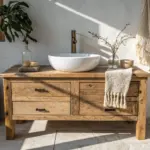
Wide Plank Farmhouse Frame
A chunky, wide plank frame gives that cozy farmhouse aesthetic in a big way, especially on a wall-to-wall mirror. I’ve stained mine warm and let the wood grain steal the show.
May just do the trick:
- Reclaimed Wood Planks: Transform your plain mirror instantly by adhering these rustic, real wood planks directly over the existing glass.
- Matte Polyurethane Wood Finish: Protect your new wooden frame from bathroom humidity while enhancing the natural grain with a durable matte seal.
- Heavy-Duty Construction Adhesive: Ensure your custom frame stays securely permanently mounted to your mirror or wall with this strong bonding agent.
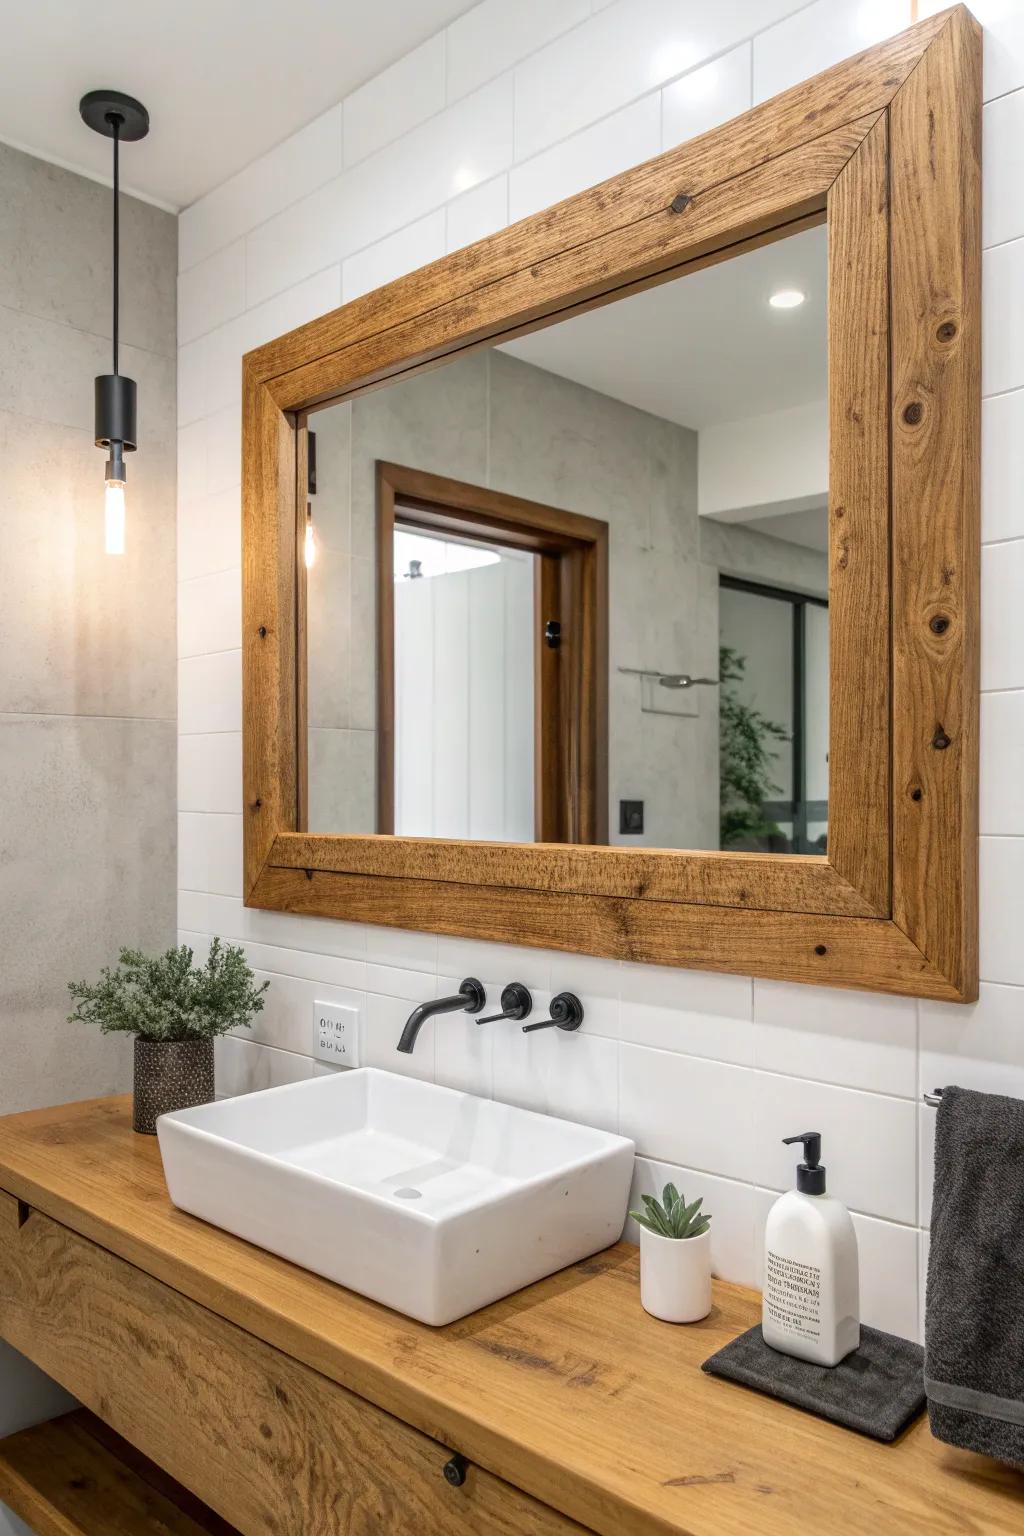
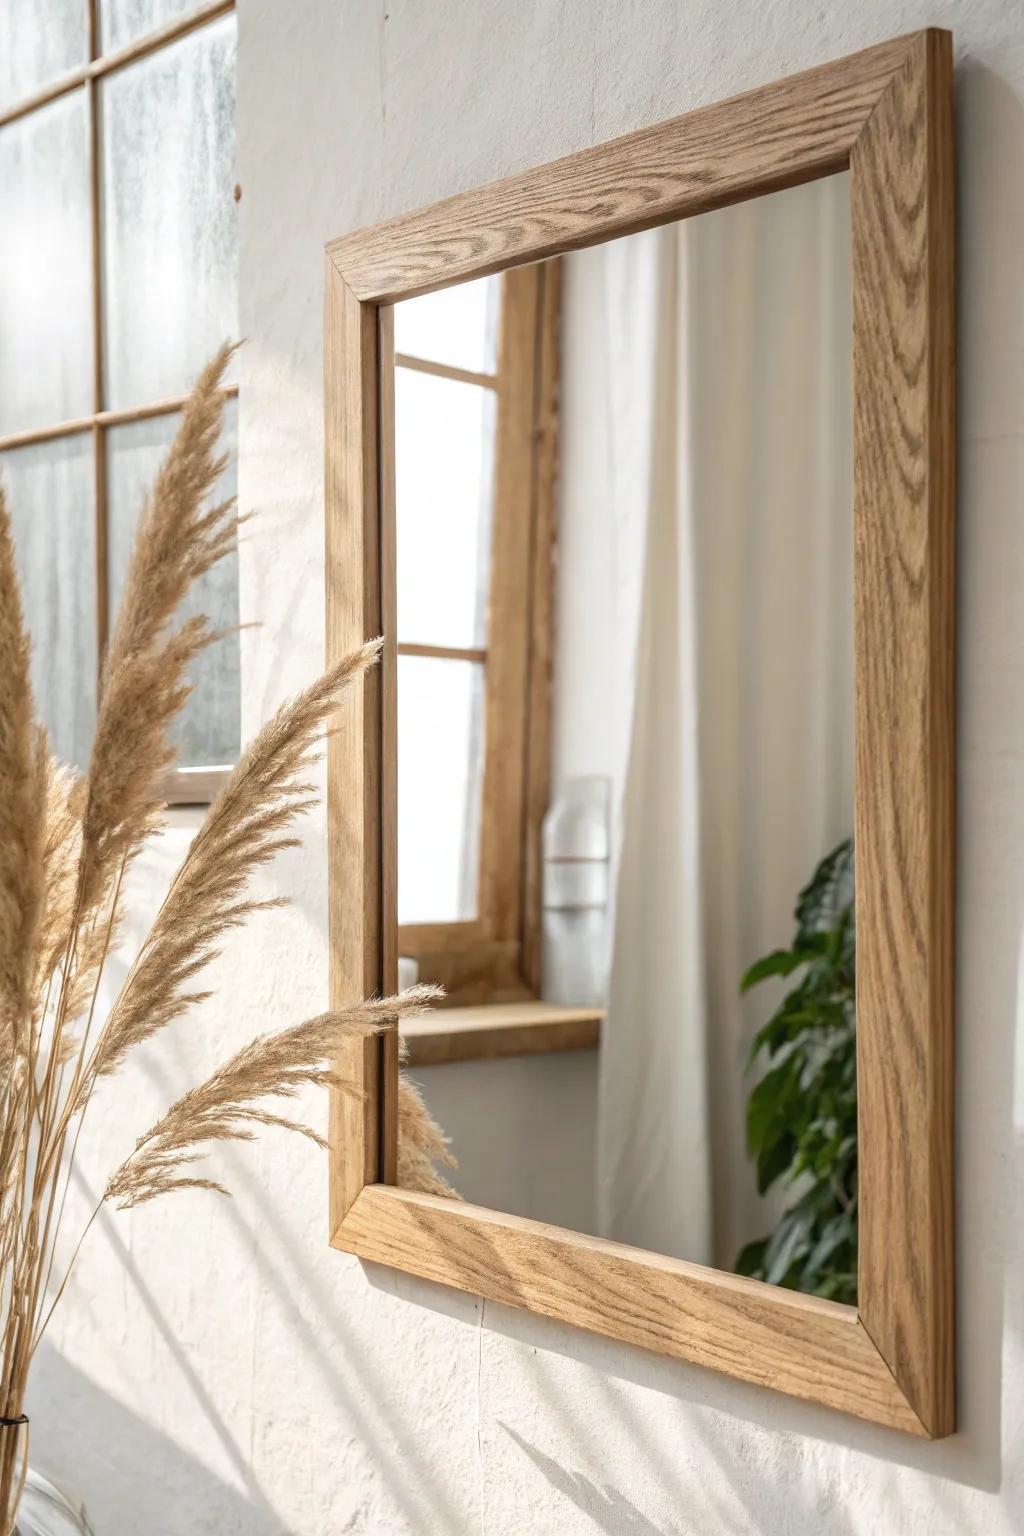
Classic Wood Frame Over the Glass
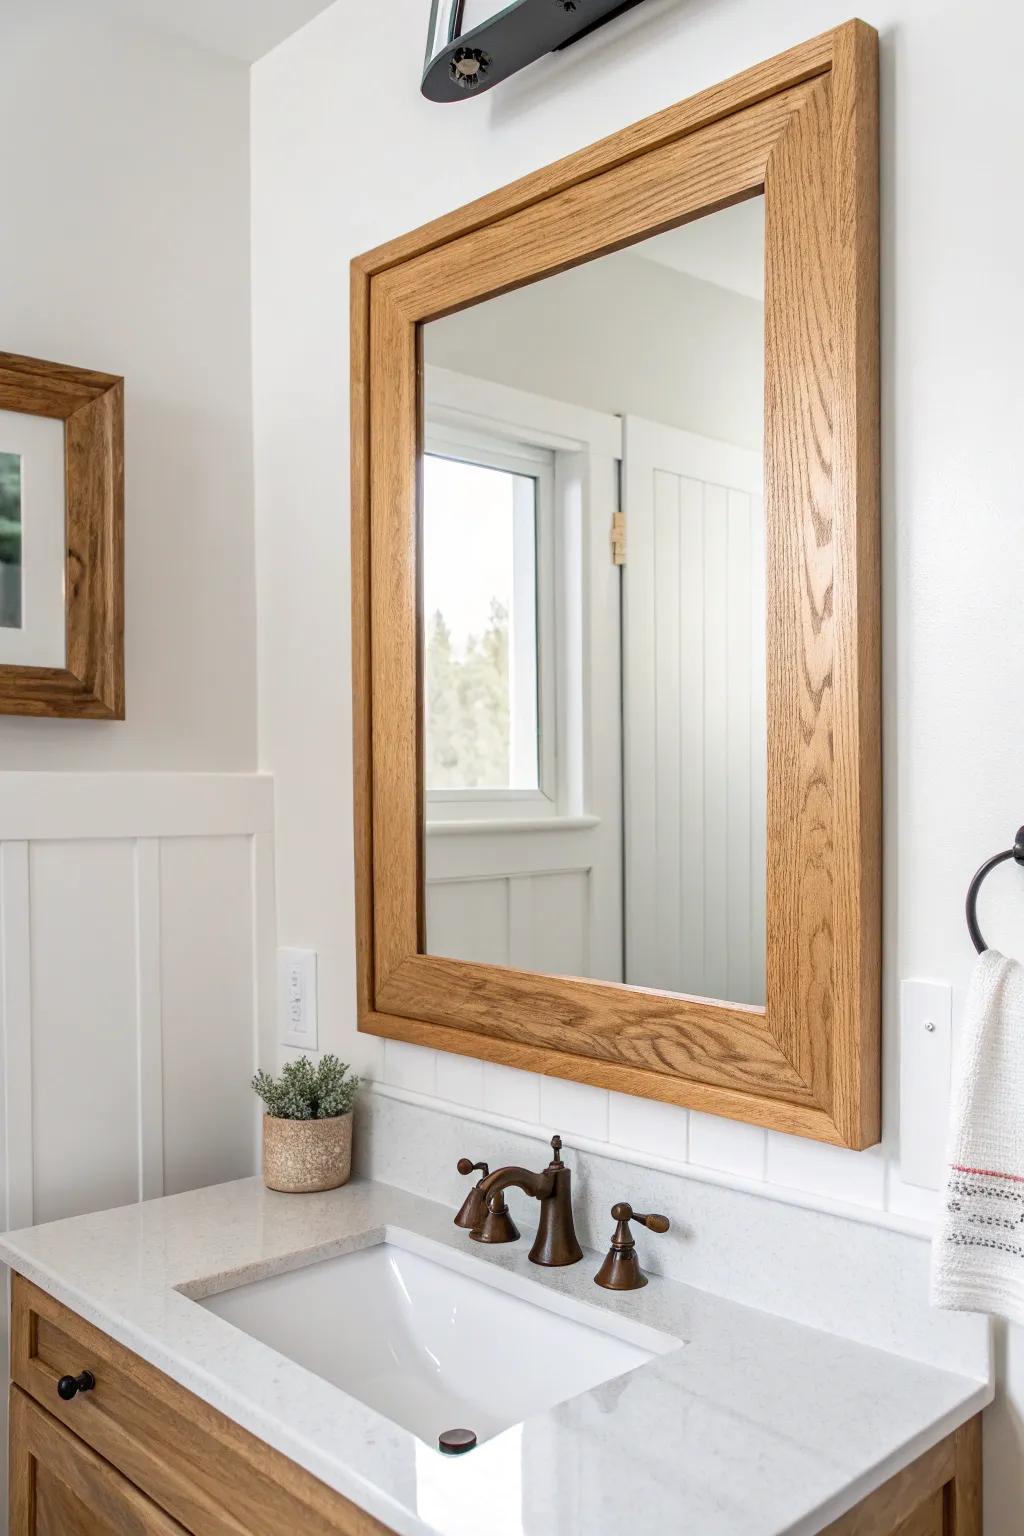
My go-to is a simple DIY frame built from straight boards that attaches right onto a builder-grade mirror. I’ve done this in rentals and it instantly reads “custom” without removing the mirror.
Might be a good match:
- DIY Mirror Frame Kit: Update your bathroom instantly with peel-and-stick framing kits designed to adhere directly onto existing builder-grade mirrors.
- Heavy-Duty Construction Adhesive: Secure your custom wood boards firmly to the mirror glass using a strong adhesive formulated for mounting.
- Unfinished Oak Lumber Boards: Create a timeless, custom look by selecting high-quality wood boards to stain or seal for your bathroom.

Mitered Casing Trim Border

When I want a clean, traditional look, I cut casing trim with crisp mitered corners and paint it to match the vanity. I’ve learned to dry-fit everything first so the corners land perfectly even if the mirror isn’t.
You might like:
- Miter Shears for Angled Cuts: Achieve crisp, precise forty-five-degree cuts on your trim molding without needing a bulky electric saw setup.
- Paintable Molding Trim: Select a durable, smooth molding material that accepts primer and paint easily for a custom finish.
- Construction Adhesive for Mirrors: Securely mount your new custom frame directly to the mirror glass without damaging the reflective backing.
Simple Square-Edge Poplar Border
For a modern farmhouse vibe, I use square-edge poplar strips and keep the profile nice and flat as a mirror border. I’ve sealed mine really well, and it’s held up beautifully to steamy showers.
Maybe worth checking out:
- Square Edge Poplar Board Lumber: Create your custom frame easily with these smooth, straight boards that are ready for your finish.
- Water-Based Clear Satin Polyurethane: Protect your new wooden frame from bathroom humidity while maintaining a natural, clear matte appearance.
- Heavy Duty Mirror Mastic Adhesive: Secure your homemade wood frame directly to the mirror glass safely and permanently with specialized adhesive.
Reclaimed Barn Wood Border
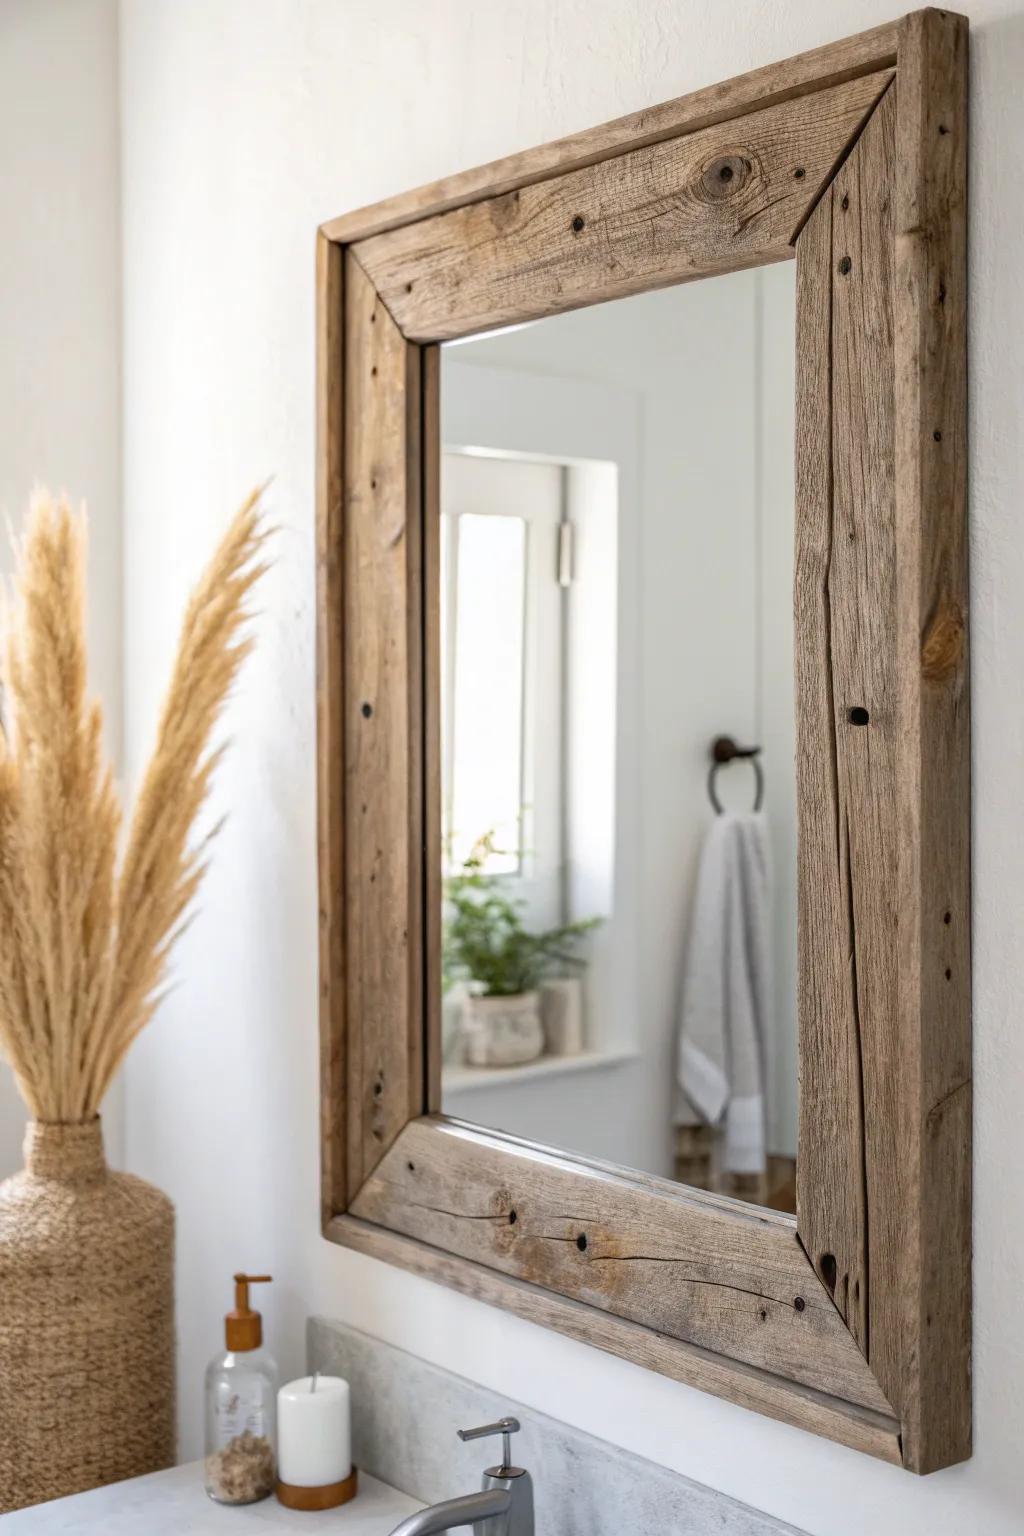
If you want instant character, a reclaimed wood mirror border with nail holes and saw marks is pure magic. I’ve built a few from salvaged boards, and every little flaw makes the mirror look more intentional.
Consider these options:
- Reclaimed Wood Planks: Source authentic salvaged boards to build a rustic frame with genuine character, knots, and unique grain patterns.
- Clear Matte Wood Sealer: Protect the raw wood from bathroom humidity while preserving its natural, rugged look without adding unwanted shine.
- Mirror Mounting Mastic: Ensure your custom frame stays securely attached to the mirror glass or wall with heavy-duty construction adhesive.
Distressed Painted Rustic Frame
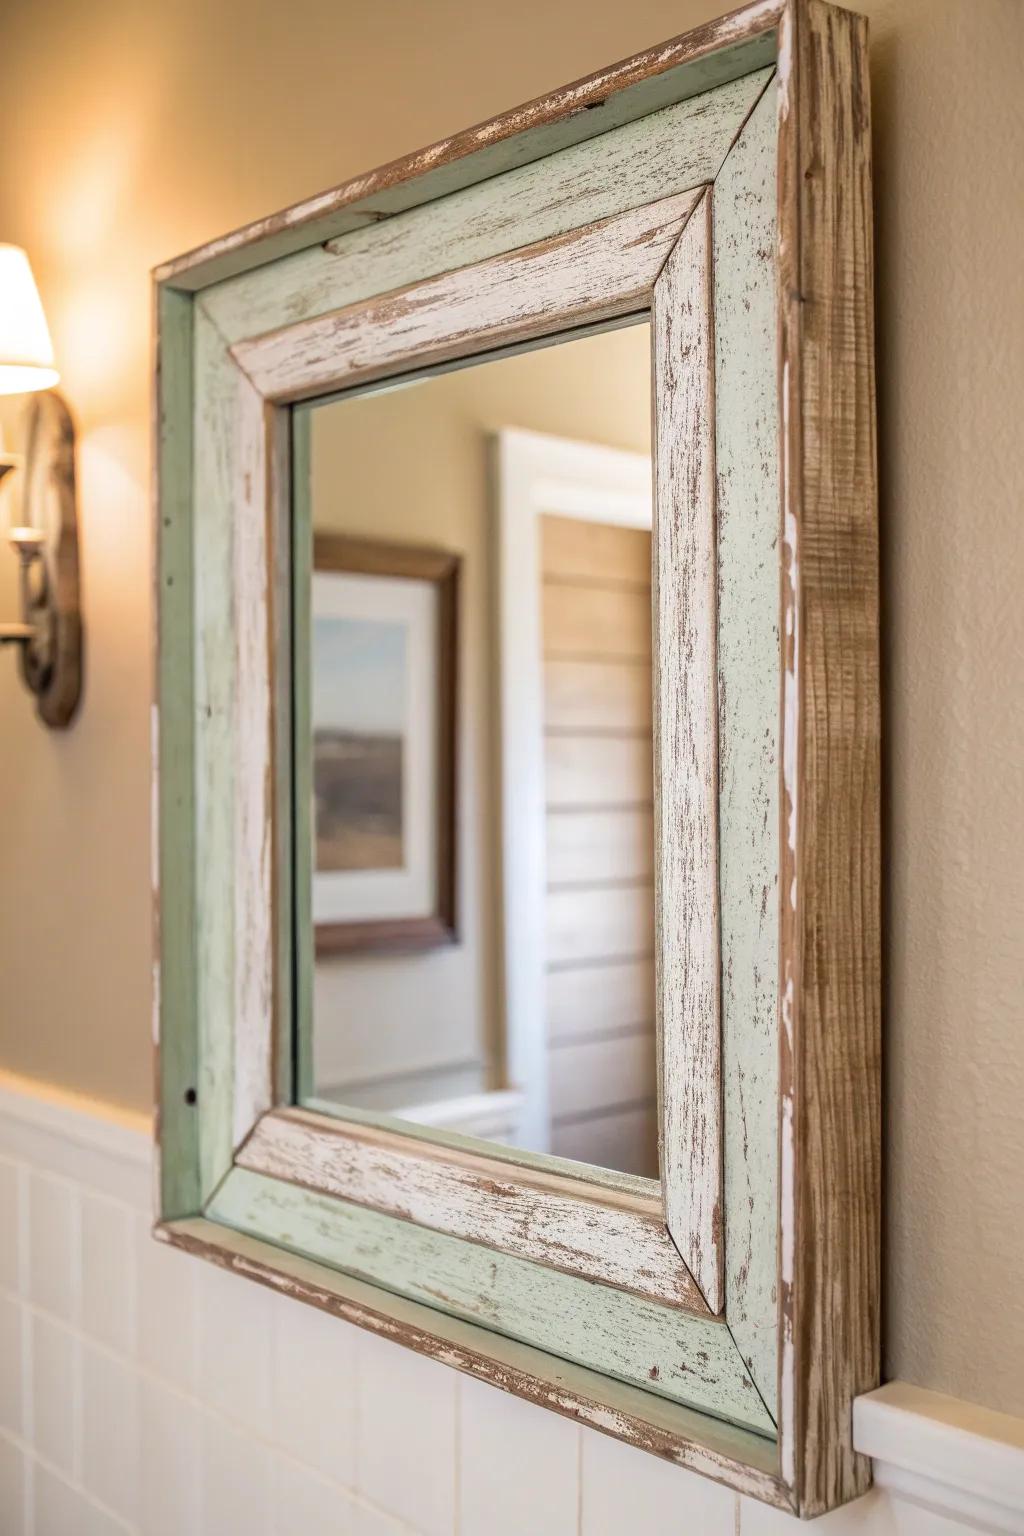
A lightly sanded, distressed finish around the mirror feels relaxed and lived-in. I’ve layered paint and then rubbed back edges with sandpaper, and it always turns out charmingly imperfect.
A few choices to try:
- Chalk Style Furniture Paint: Apply a matte, chalky finish easily to create that vintage, farmhouse base layer on your mirror frame.
- Coarse & Fine Grit Sandpaper: Use varied grit levels to gently rub away topcoats, revealing the natural wood grain underneath for authentic distressing.
- Completing Finishing Wax: Seal your distressed paint job with a clear or dark wax to protect the finish and enhance durability.

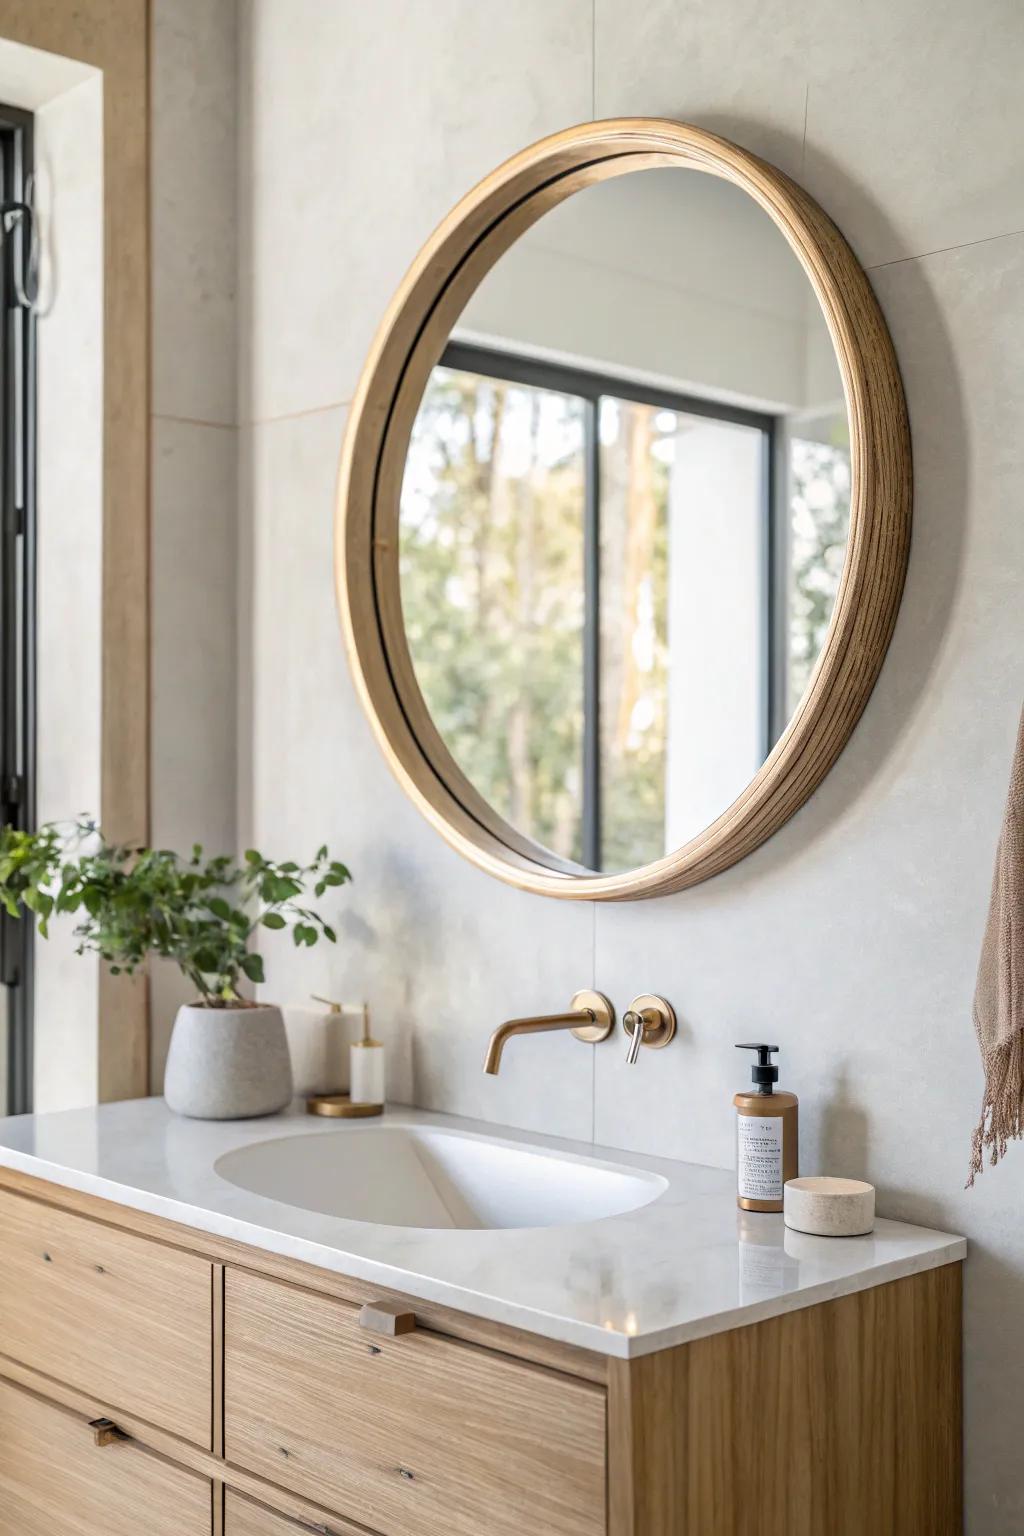
Sleek Matte Black Border
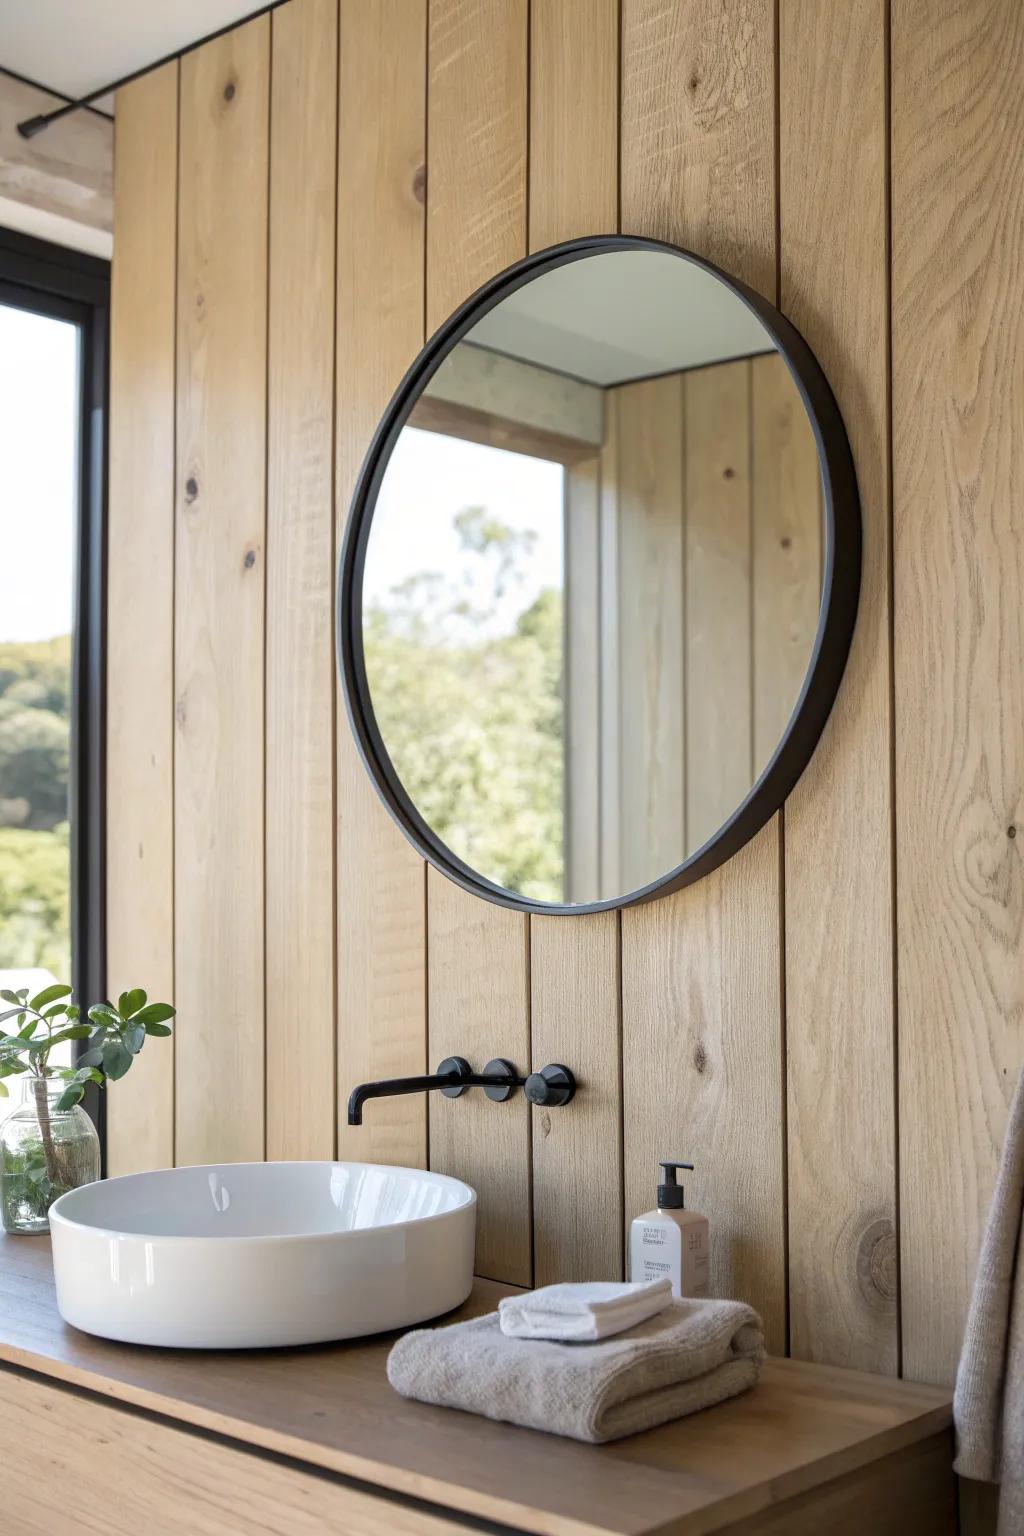
A thin, matte black border makes a bathroom mirror feel crisp and architectural. I’ve used this trick when the lighting and faucet are dark, and it ties everything together fast.
Useful items to consider:
- Round Matte Black Wall Mirror: Instantly upgrade your vanity by hanging a circular mirror with a thin, modern black frame.
- Matte Black Wall Mount Faucet: Create a cohesive look by pairing your dark mirror frame with a matching architectural faucet.
- Matte Black Soap Dispenser: Add a subtle, unifying touch to your countertop with a sleek, coordinating soap dispenser.
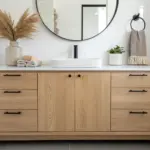
Bright White Clean-Line Frame
A white border is my favorite way to make a small bathroom feel bigger and brighter. I’ve done a super simple painted wood frame here, and it looks like it came with the house.
Some ideas to consider:
- DIY Mirror Framing Kit: Transform your plain bathroom mirror instantly with this custom-fit frame kit to achieve that polished, built-in look.
- White Wood Trim Molding: Create your own custom border size and style using versatile wood molding painted in crisp, bright white.
- Matte White Wood Paint: Refresh an existing wooden frame or plain lumber with high-quality paint to get that clean, bright finish.
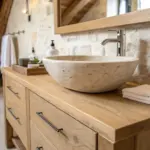
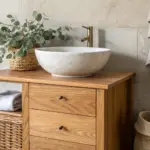
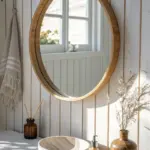
Warm Natural Oak Look Border
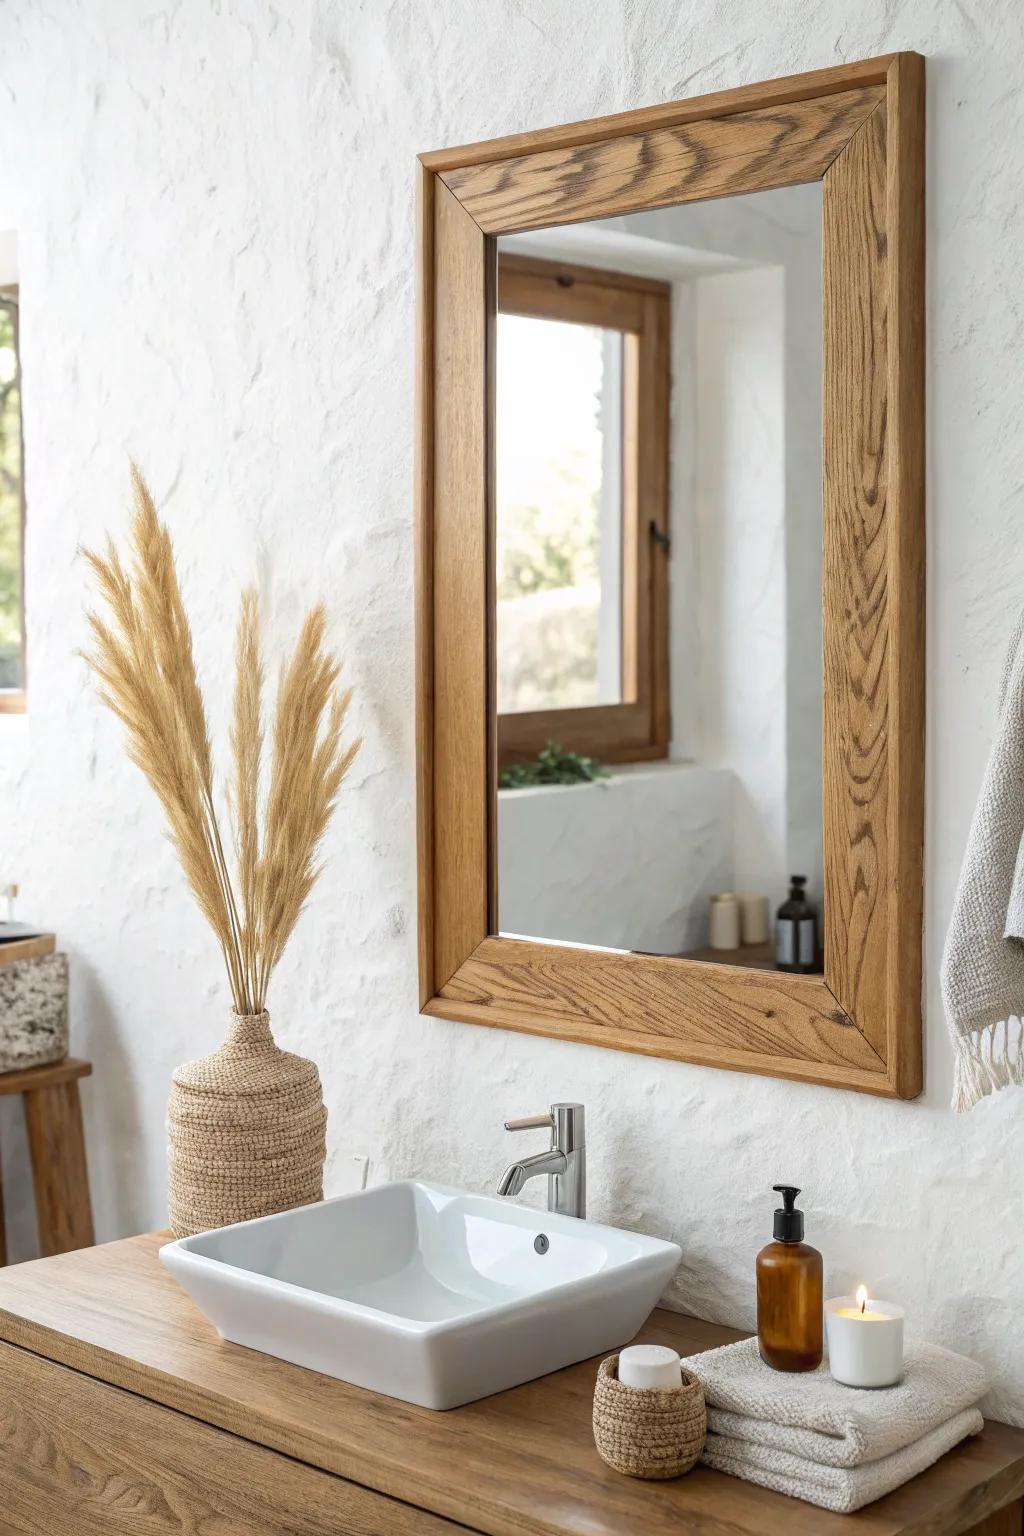
A light, natural wood tone gives you that airy, spa feel without going cold or sterile. I’ve finished my wood mirror border with a low-sheen topcoat so it still looks natural but wipes clean easily.
A few relevant products:
- Clear Matte Polyurethane Finish: Protect your DIY wood frame from humidity and splashes while maintaining that natural, shine-free look.
- Unfinished Oak Wood Trim: Create the perfect custom border size with natural oak lumber ready for your personal touch.
- Pampas Grass Decor: Complete the natural spa aesthetic by filling a vase with these fluffy, dried decorative stems.
Soft Metallic Painted Border
If you want glam without going overboard, paint a simple frame in a soft metallic finish. I’ve brushed metallic paint over a sealed base coat, and it gives the mirror a subtle “expensive” edge.
Some handy options:
- Soft Gold Metallic Paint: Create a sophisticated, warm glow on your existing frame with this easy-to-apply metallic finish paint.
- High-Quality Paint Brush Set: Ensure a smooth, streak-free application of your metallic paint with brushes designed for detailed woodwork.
- Paint Primer and Sealer: Prepare your surface properly to ensure the metallic finish adheres well and lasts for years.
Beadboard-Inspired Frame Detail
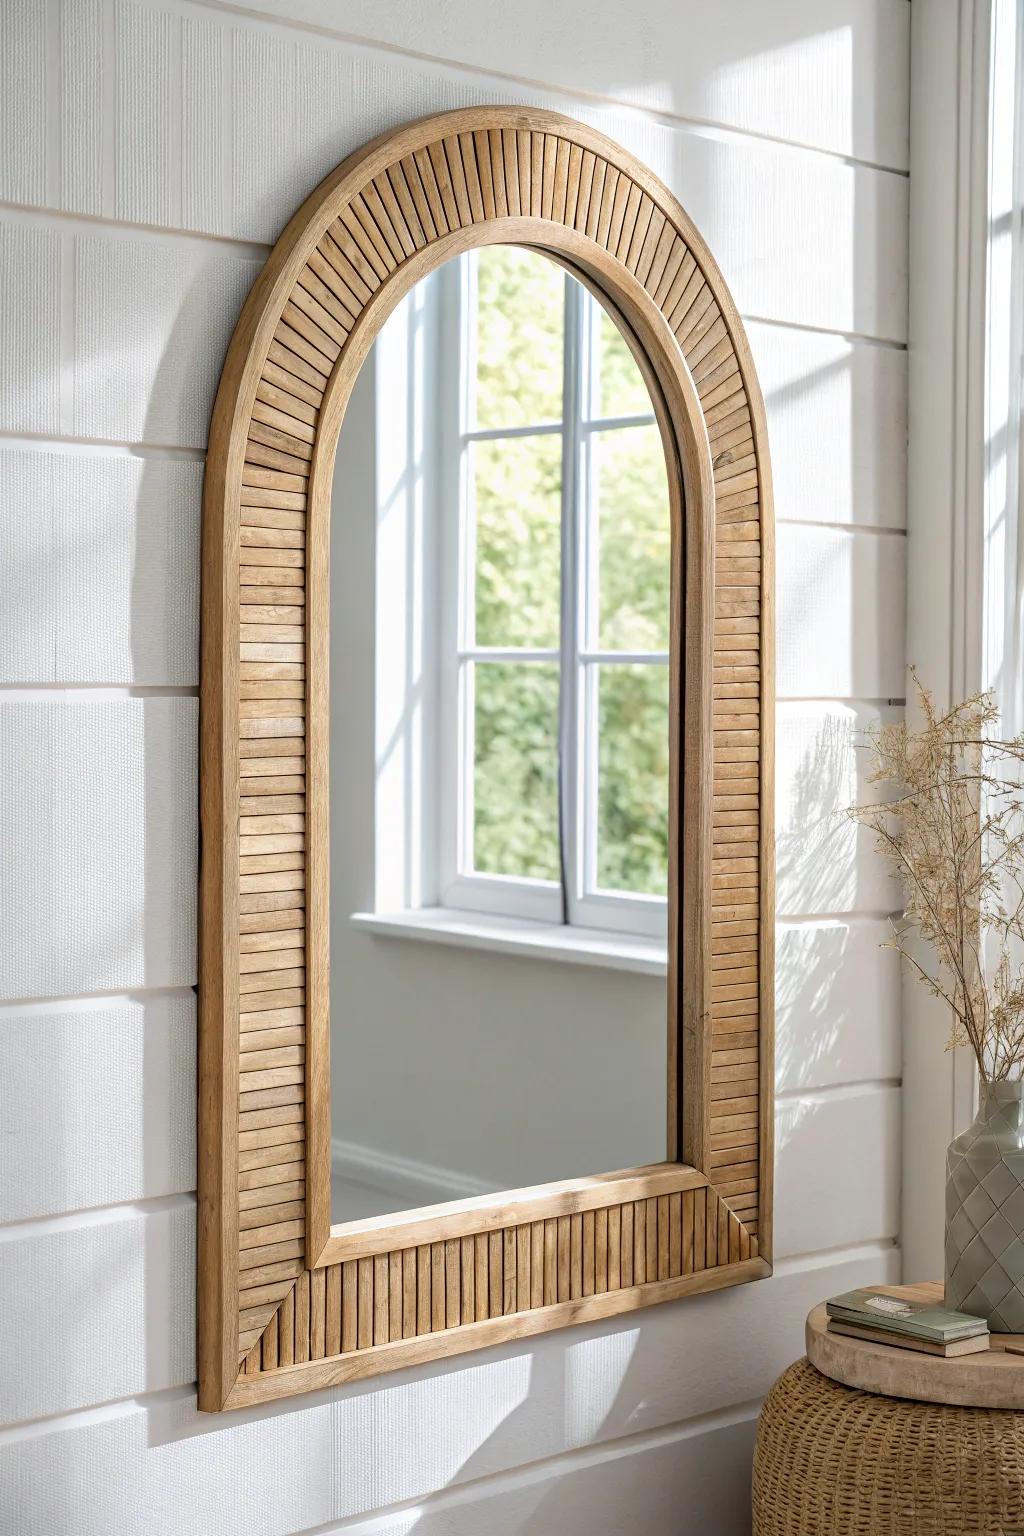
Adding beadboard texture as the mirror border feels sweet and classic, especially in cottage-style baths. I’ve used thin grooved panels inset into a frame, and it looks like custom millwork.
These products might be useful:
- Arch Wall Mirror with Wood Frame: Instantly achieve the cottage look by hanging a pre-made arched mirror featuring grooved wood detailing.
- Unfinished Or Decorative Wood Slats: Create your own custom frame texture by adhering these thin wood strips to an existing flat mirror border.
- Beadboard Wallpaper Border or Contact Paper: Apply this textured adhesive film to a plain frame for a quick, convincing faux-wood finish upgrade.
Shiplap Picture-Frame Border
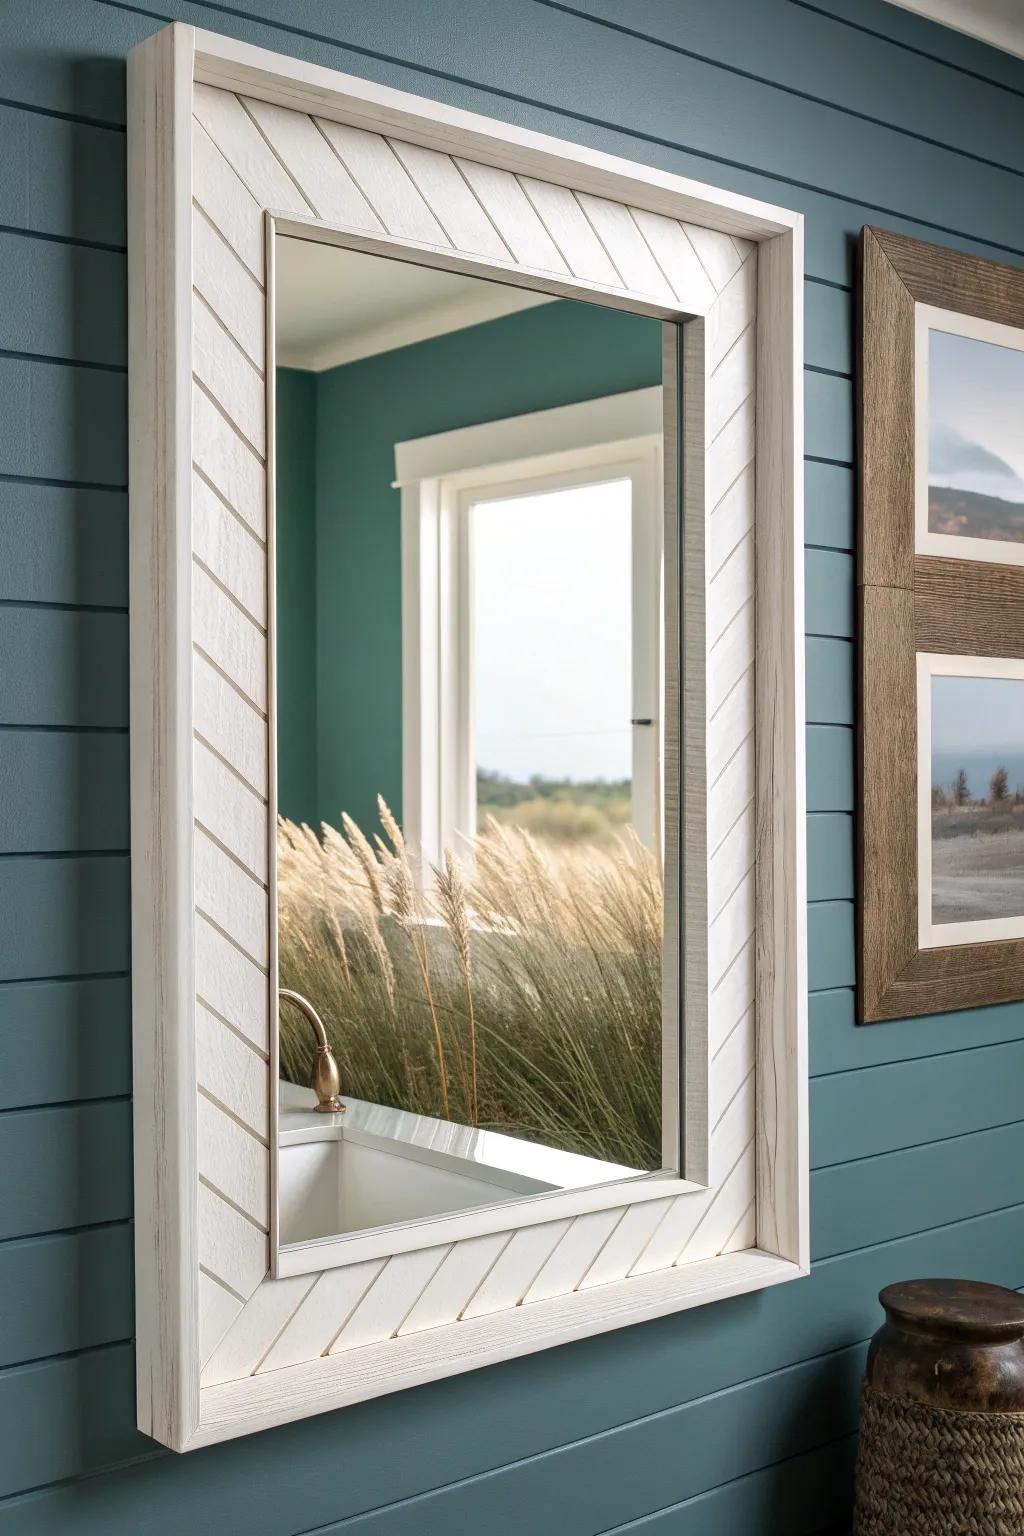
A shiplap-style border gives a bathroom mirror that cozy, layered wall detail without doing the whole room. I’ve built mine as a shallow frame so it sits neatly on the glass and doesn’t feel bulky.
A few things you might like:
- Peel and Stick Wood Planking: Transform your plain mirror easily using lightweight adhesive wood strips that mimic the shiplap look instantly.
- Mirror Framing Kit: Update your bathroom vanity quickly with a pre-cut framing kit designed to adhere directly onto existing mirrors.
- Construction Adhesive: Secure your custom wood frame pieces firmly to the mirror glass for a durable, long-lasting hold.
Corner Bracket Industrial Border
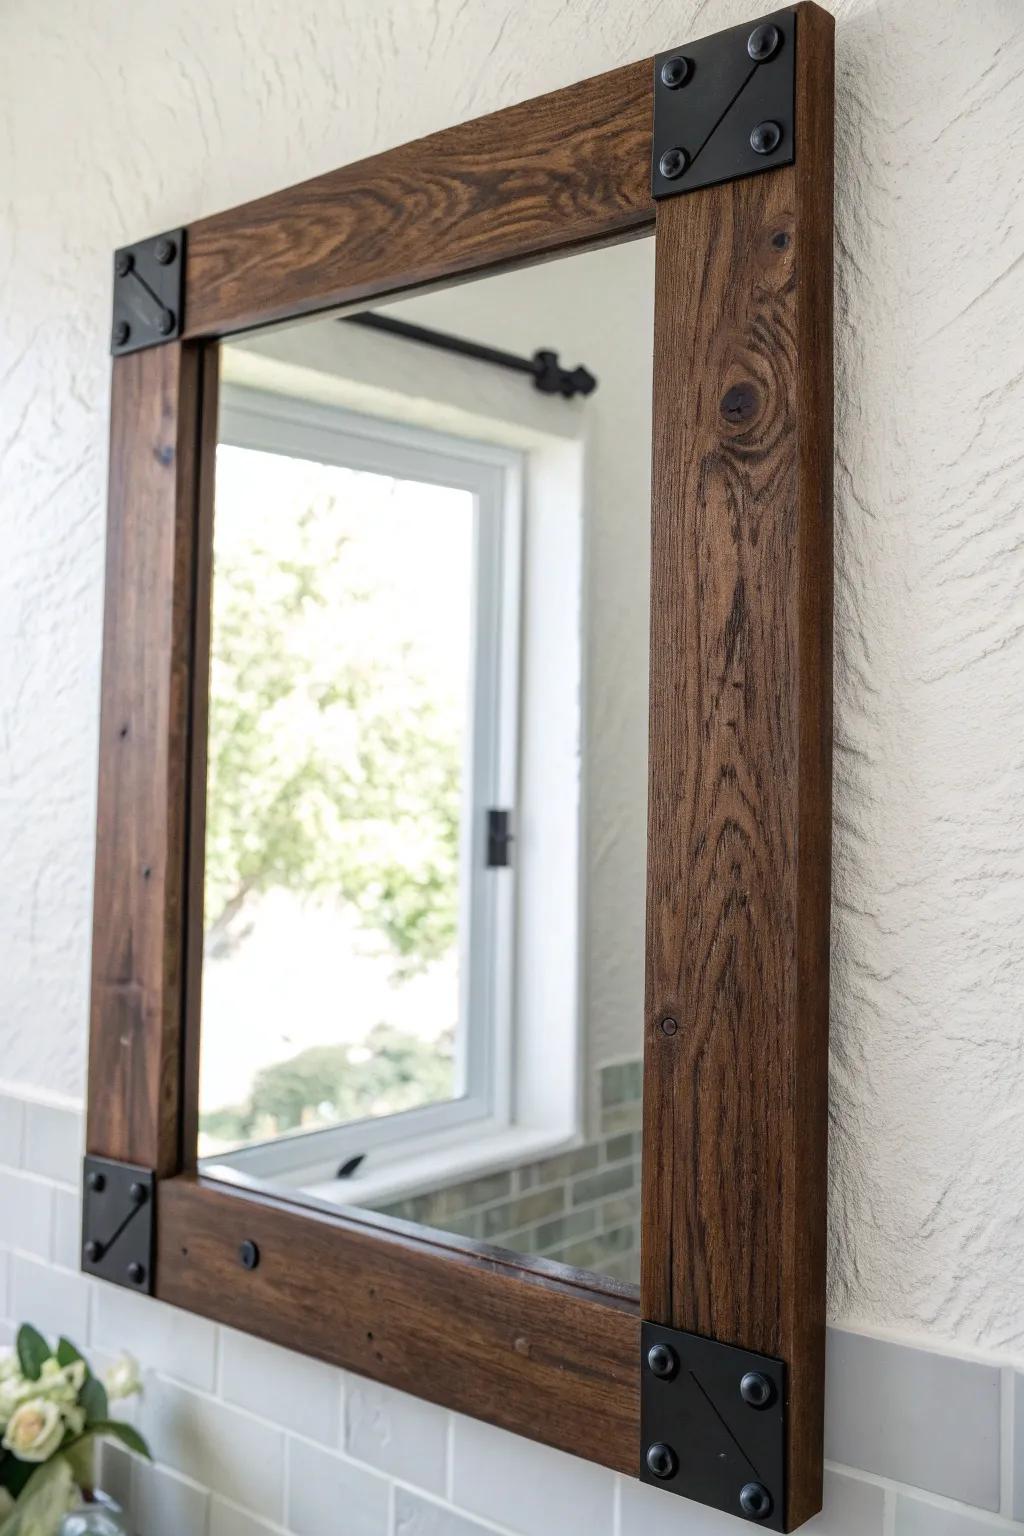
Metal corner brackets on a wood frame add a bold industrial touch while still being warm and rustic. I’ve done this on a dark-stained border, and the corners instantly look like intentional hardware.
A few suggestions:
- Black Flat L-Shape Corner Braces: Secure your mirror frame corners instantly while adding that bold industrial hardware look with these durable metal brackets.
- Dark Walnut Wood Stain: Give your raw wood frame a rich, warm finish that contrasts perfectly with black metal hardware accents.
- Reclaimed Wood Planks: Build the base of your rustic mirror frame using these weathered boards for authentic texture and charm.
Rope-Wrapped Coastal Border
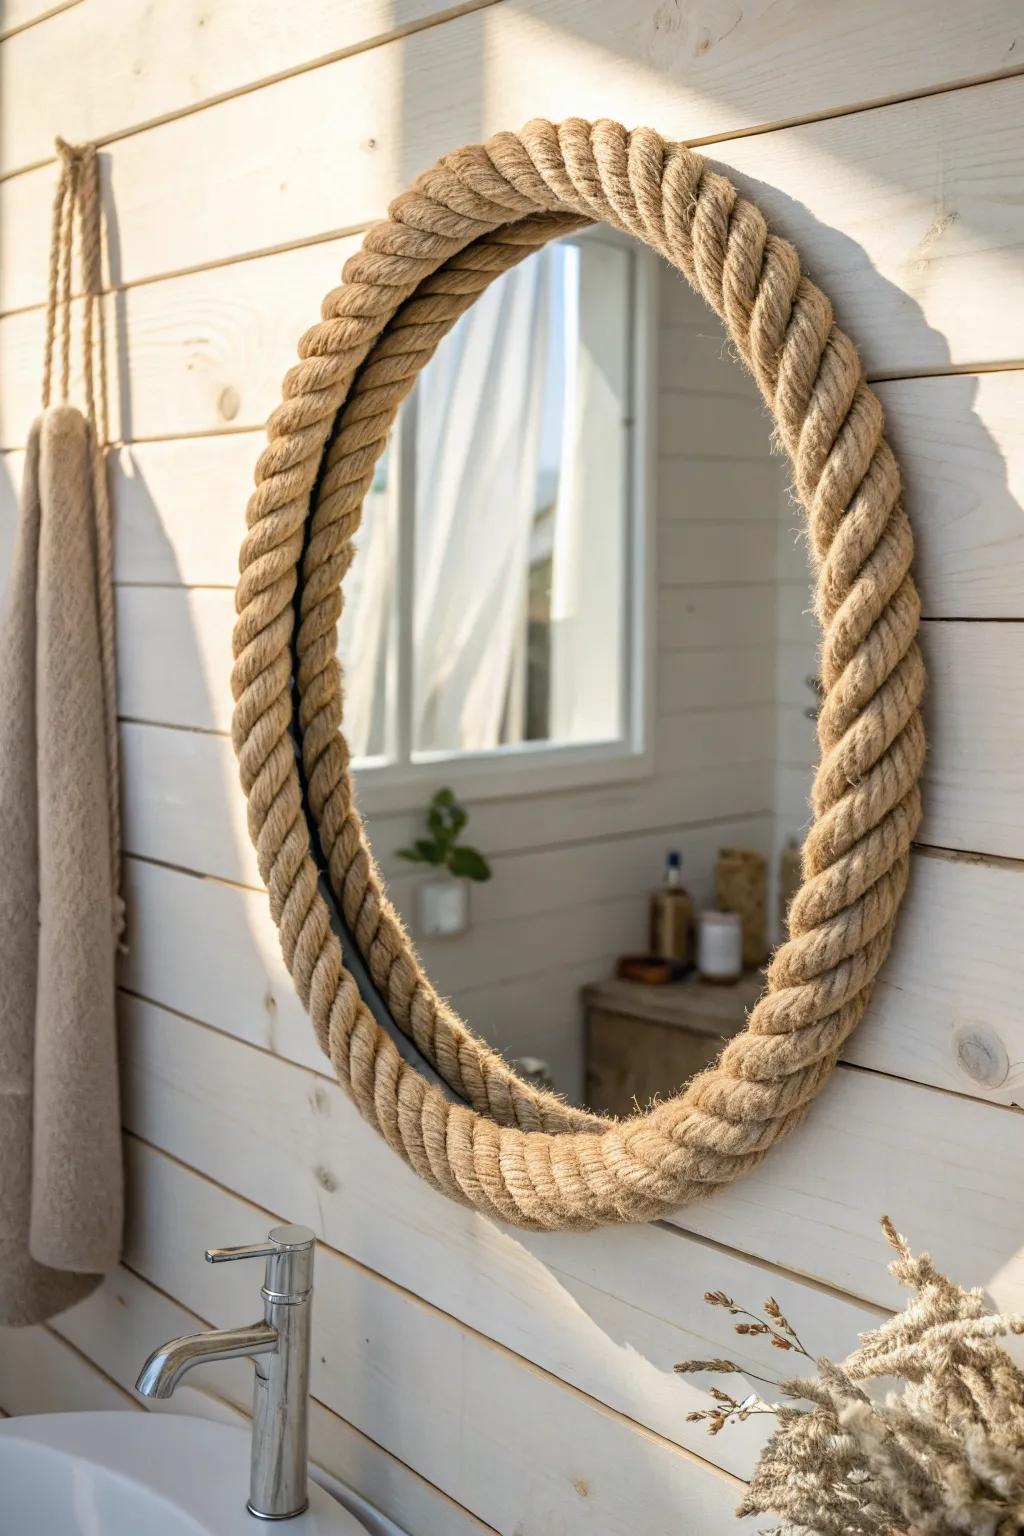
Wrapping the mirror edge with thick rope creates a beachy, textured mirror border that’s surprisingly easy. I’ve sealed the rope after wrapping so it stays tidy and doesn’t fuzz up in humidity.
You might give these a try:
- Thick Twisted Manila or Jute Rope: Choose a thick, durable natural rope to create substantial texture and that classic nautical look around your mirror.
- Heavy-Duty Hot Glue Gun: Secure the heavy rope firmly in place with a high-temp glue gun designed for tougher DIY bonding jobs.
- Clear Spray Sealant/Mod Podge: Protect your rope from bathroom humidity and prevent fraying by applying a light coat of clear sealant.
Driftwood Mosaic Mirror Border
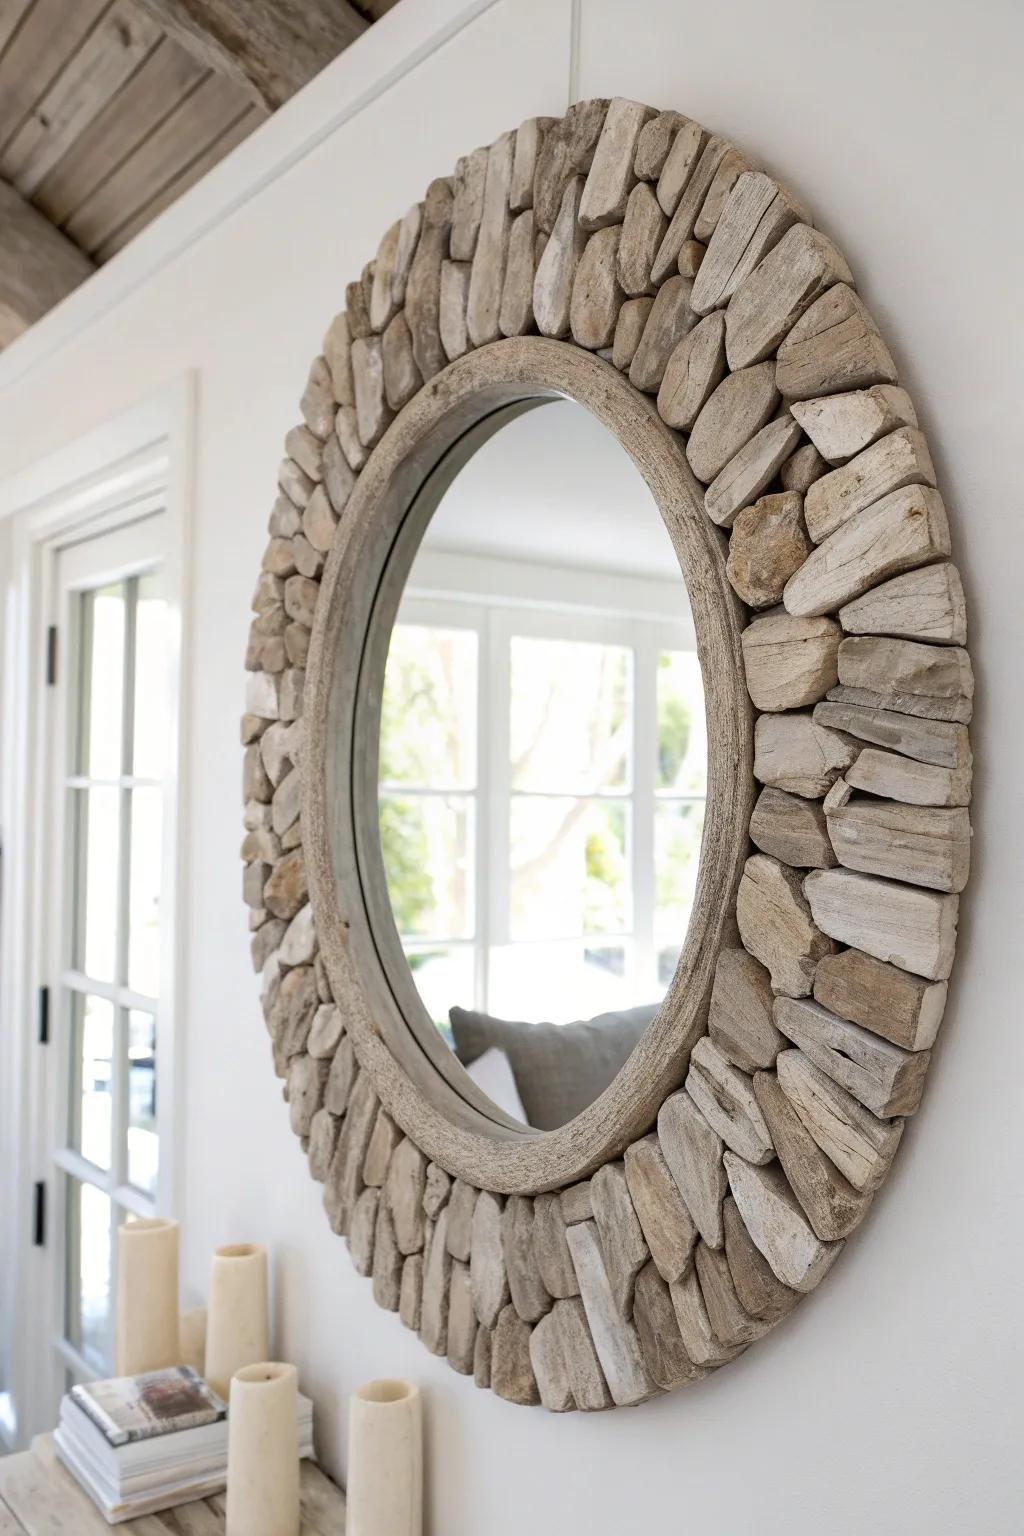
For a real statement, I glue small driftwood pieces around the mirror in an irregular, sculptural border. I’ve done this with a “no two pieces the same” approach, and it turns the mirror into wall art.
These products might help:
- Natural Driftwood Pieces Bulk Pack: Source authentic, weathered wood pieces to create your unique mosaic border and add rustic coastal charm.
- Heavy Duty Construction Adhesive: Ensure your wooden mosaic stays securely attached to the frame with a strong, reliable bonding agent.
- Round Frameless Wall Mirror: Start your project with a simple, high-quality base mirror ready for your custom wooden border application.
Tile-Inlay Border on a Wood Frame

Inlaying a strip of tile into a wooden border gives you the best of both worlds: warm wood plus a wipeable accent. I’ve routed a shallow channel for the tile so the bathroom mirror border stays flush and clean-looking.
Possibly handy products:
- Decorative Mosaic Tiles: Choose patterned ceramic or glass tiles to create your unique inset border. Find a style that matches your decor.
- Wood Router Tool: Carve the perfect shallow channel into your wooden frame with a reliable router. Essential for achieving a flush finish.
- Tile Adhesive & Grout: Secure your tiles firmly into the wood channel and finish the look with water-resistant grout for durability.
Cane Webbing Panel Border
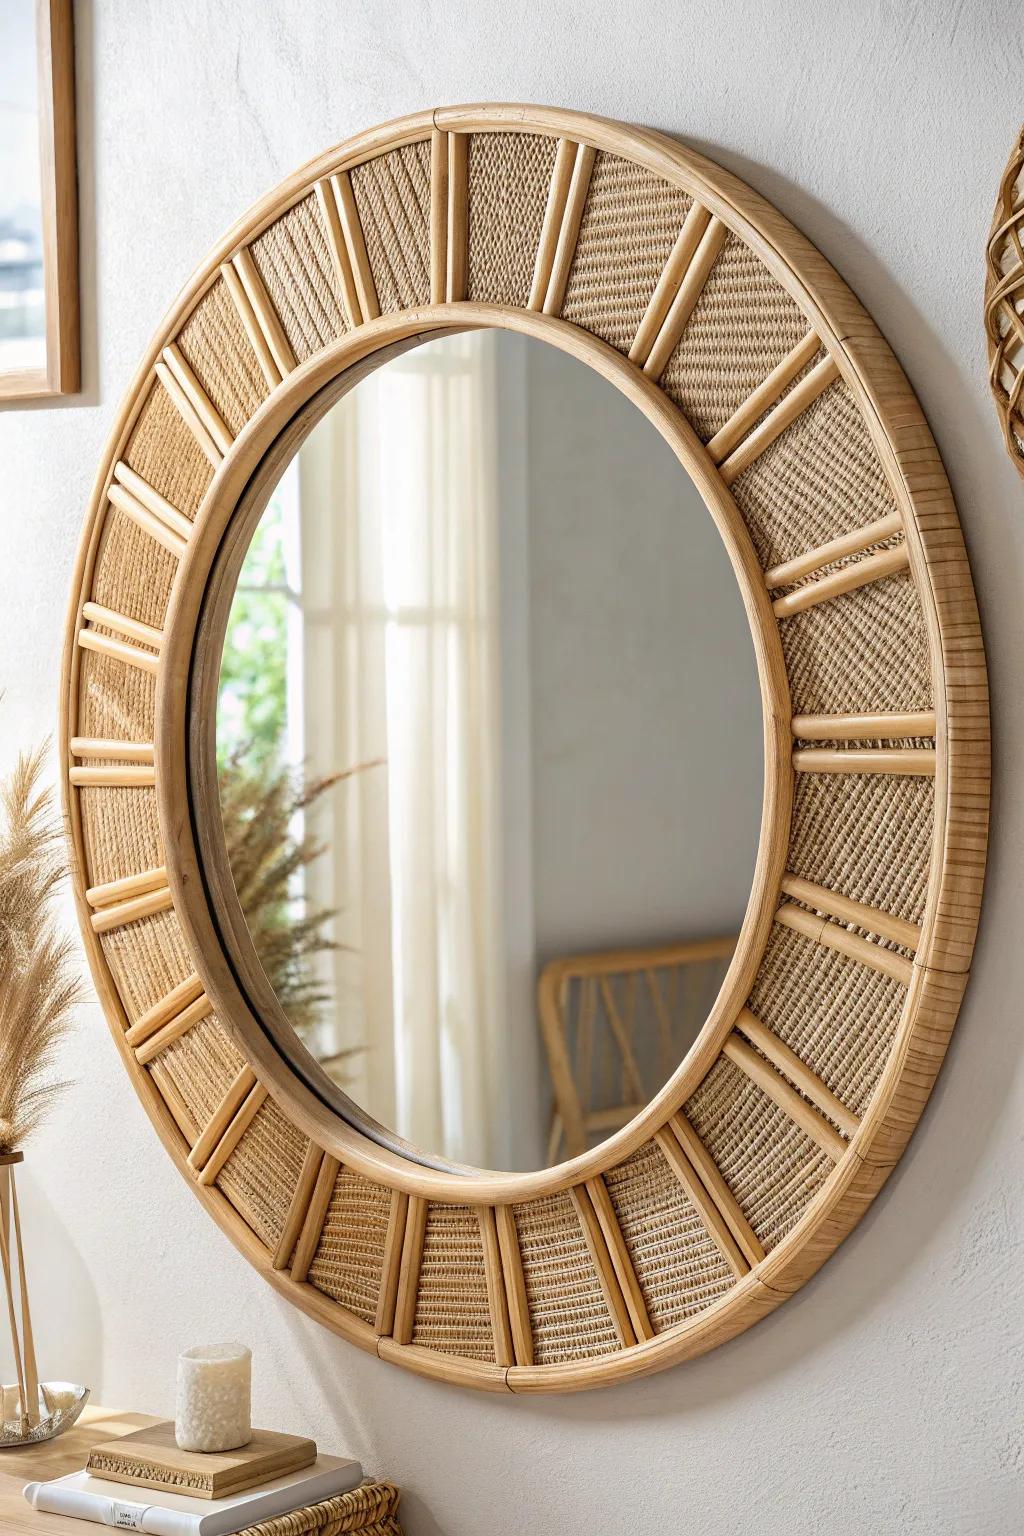
Cane webbing adds texture without feeling heavy, and it looks amazing paired with light wood. I’ve framed cane panels as the mirror border and sealed them well, and they still look crisp months later.
Check if these fit your needs:
- Natural Rattan Cane Webbing Roll: Choose this classic woven material to create the textured panels that form the foundation of your mirror frame.
- Half-Round Wood Moulding Trim: Use these wooden dowels or trim pieces to create the structured dividers between your cane webbing sections.
- Clear Polyurethane Wood Sealant: Protect your natural cane from bathroom humidity and moisture by applying a durable, clear matte sealant.
Herringbone Wood Strip Border
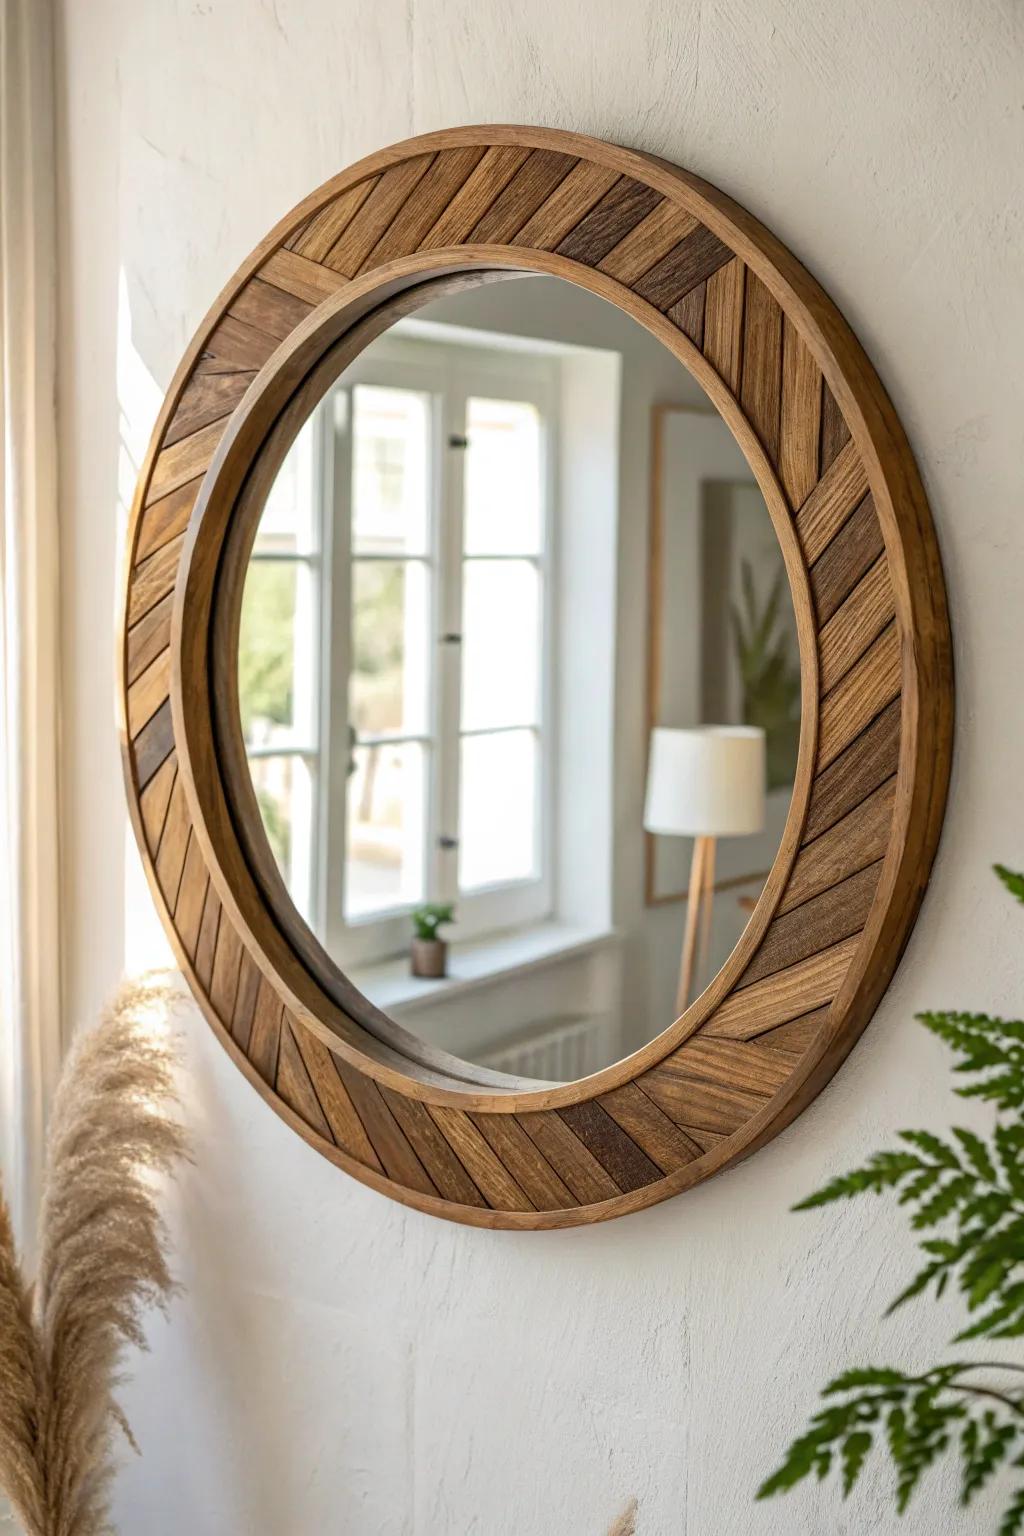
A herringbone pattern around the mirror is a total showpiece, especially with contrasting stains. I’ve made this by cutting thin strips and building the border on the bench first, then mounting it to the mirror.
Items that may come in handy:
- Thin Wood Craft Strips: Buy these thin wood strips to easily create your own custom herringbone pattern without needing heavy machinery.
- Assorted Wood Stain Kit: Use varied stain colors to achieve the beautiful contrasting tones that make the herringbone design pop.
- Heavy-Duty Construction Adhesive: Secure your new wooden border firmly to the mirror glass or backing with this strong, reliable adhesive.
Live-Edge Slab Mirror Border
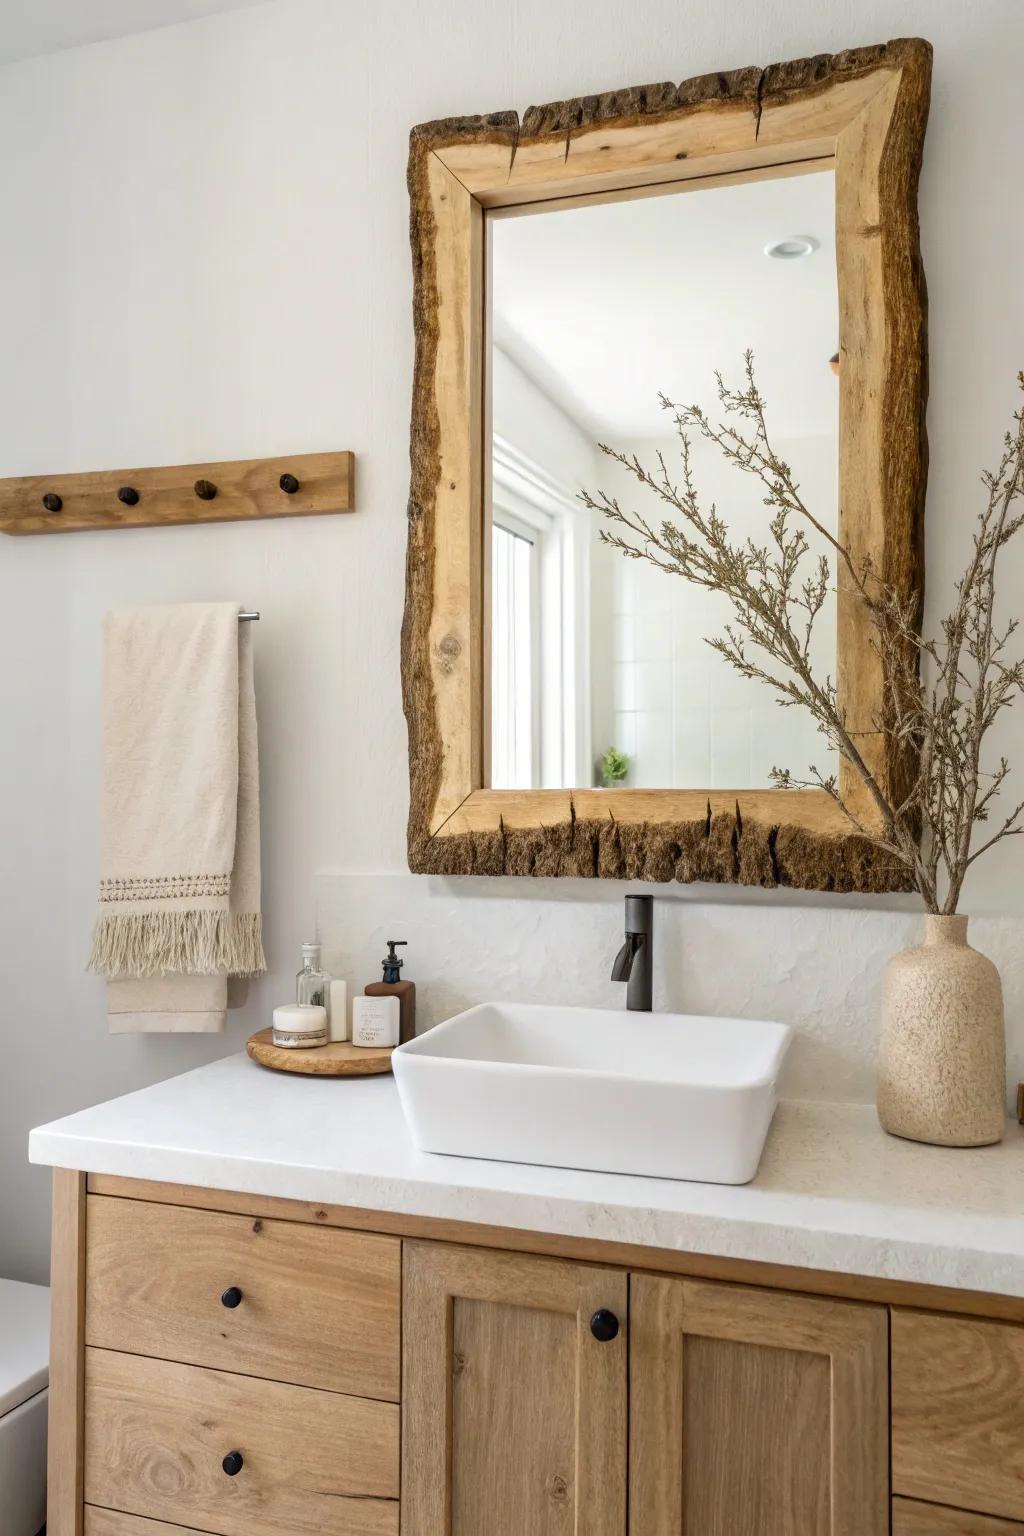
Live-edge pieces as the sides of a mirror border give you that organic, one-of-a-kind look. I’ve used slim live-edge offcuts, and the natural curve makes the mirror feel softer and more handmade.
Products that could assist:
- Live Edge Wooden Framed Mirror: Add instant rustic charm to your bathroom with a pre-framed mirror featuring unique natural wood edges.
- Unfinished Live Edge Lumber Slabs: Create a custom DIY frame for your existing mirror using these unique, natural wood pieces.
- Heavy Duty Mirror Hanging Hardware: Secure your substantial wooden mirror safely to the wall with reliable, high-capacity mounting cleats.
Charred Wood Moody Border
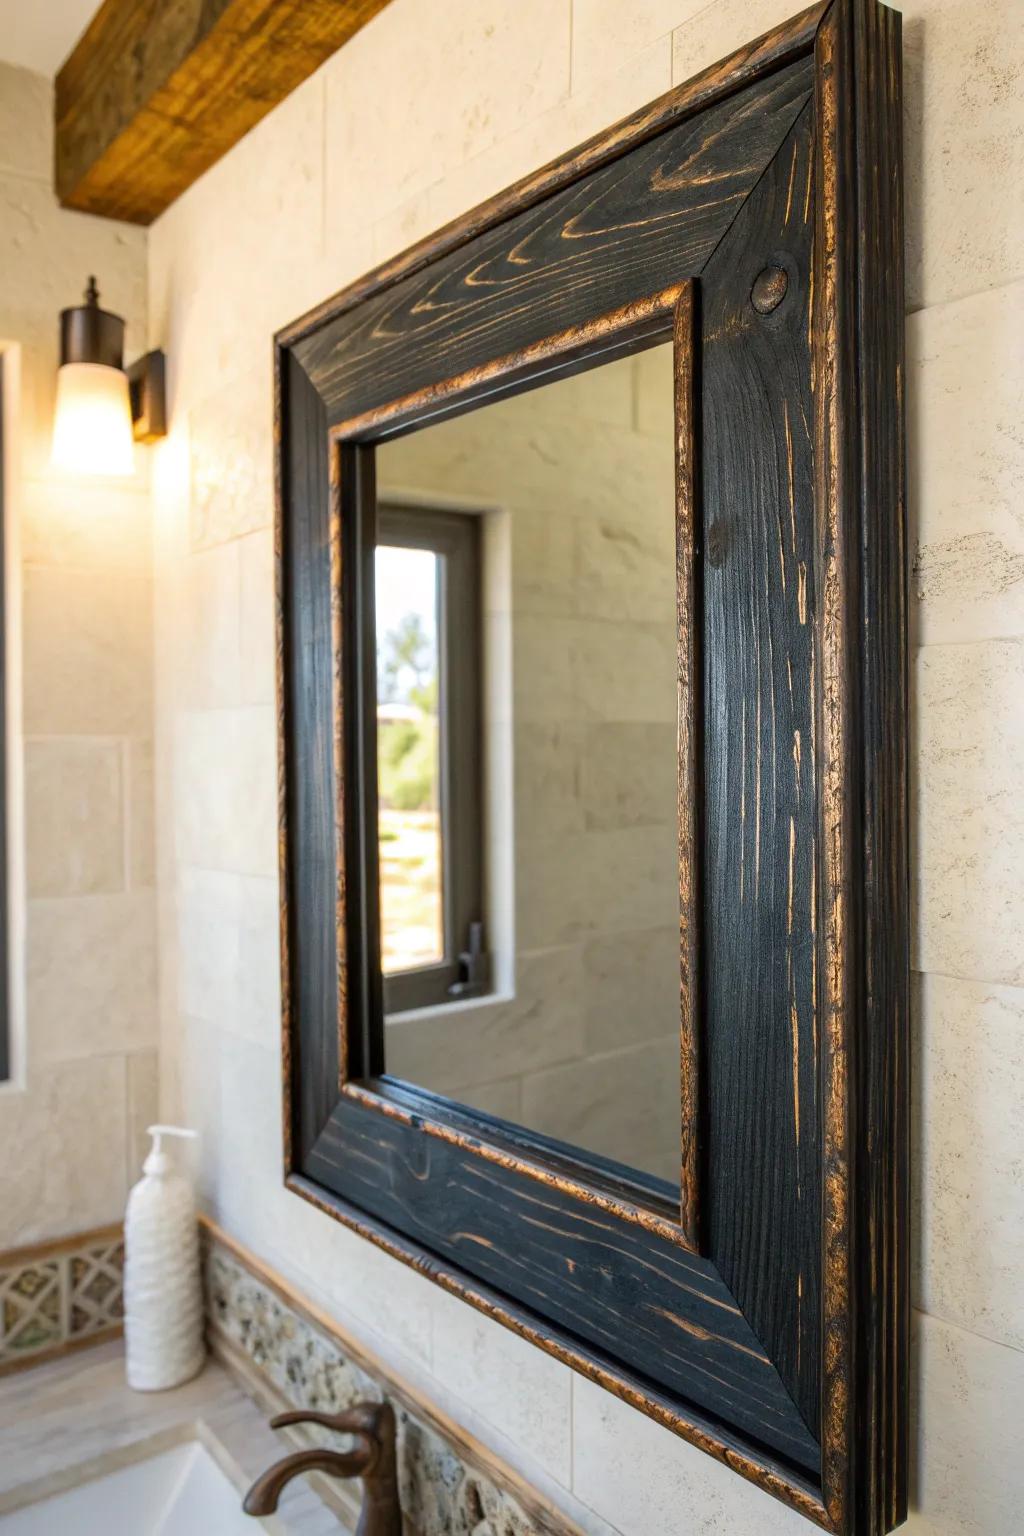
A charred wood finish around a bathroom mirror brings serious drama while still feeling earthy. I’ve sealed the charred surface thoroughly so it doesn’t rub off, and the texture is just unreal in good lighting.
Check these products out:
- Matte Black Wood Stain: Achieve that deep, charred aesthetic effortlessly by applying this dark stain to your raw wood frame.
- Clear Polyurethane Sealer: Protect your finish from bathroom humidity and prevent blackened residue transfer with this essential protective topcoat.
- Metallic Gilding Wax: Add subtle, high-end drama by highlighting the wood grain edges with this easy-to-apply metallic gold wax.
Backlit Floating Border Frame
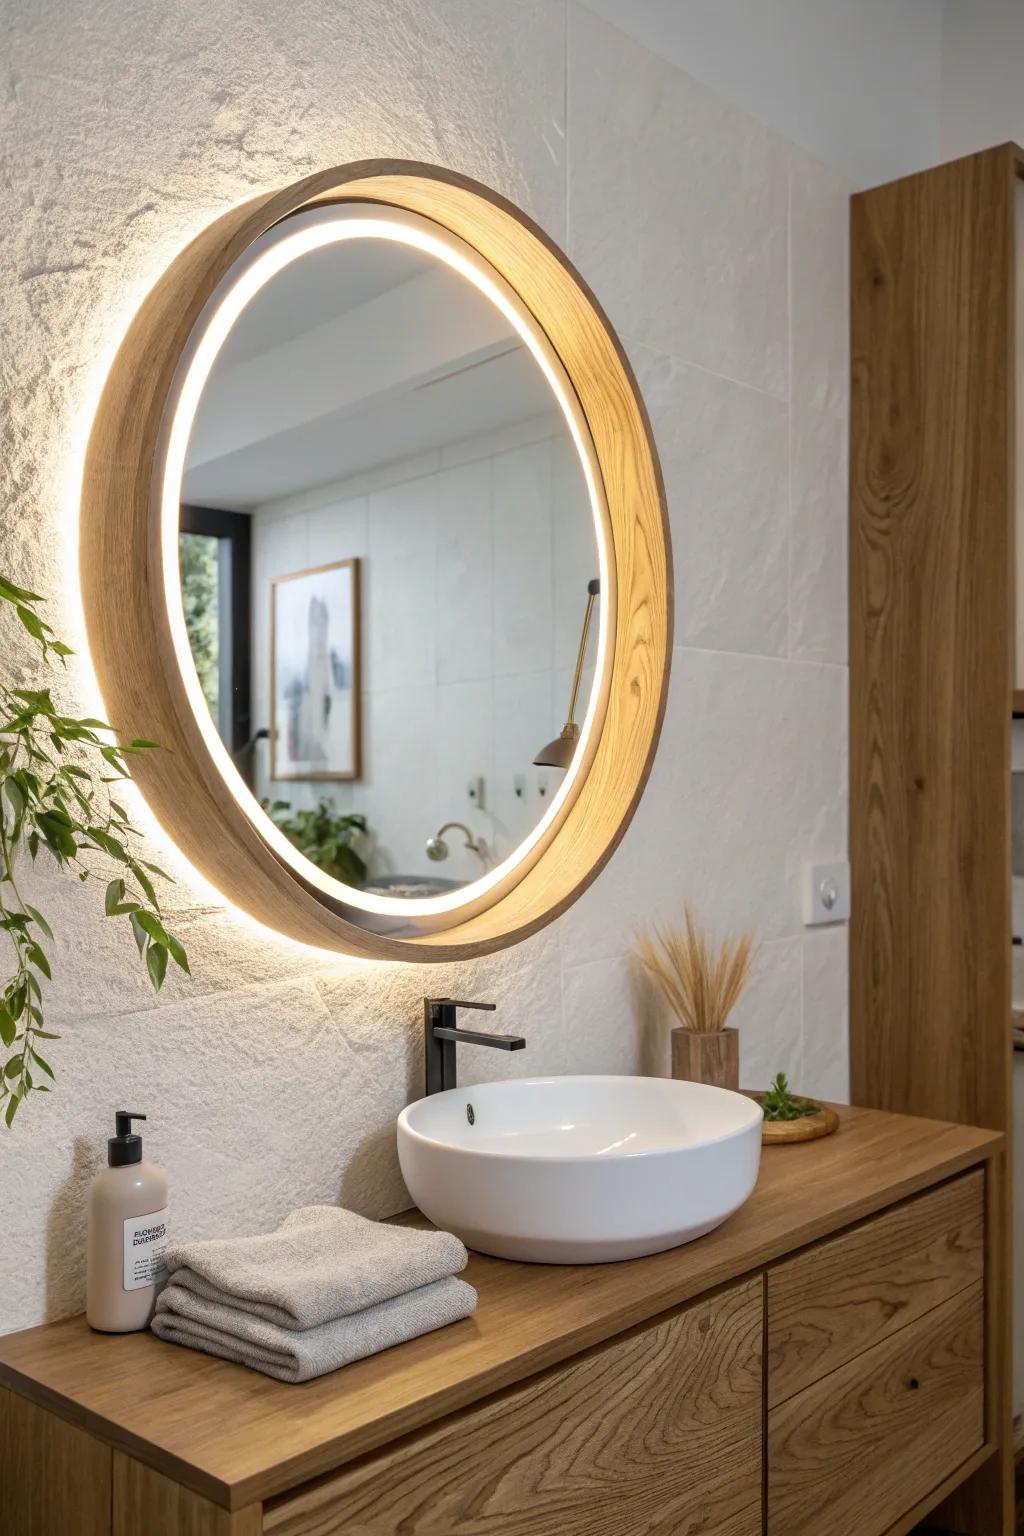
A floating wood border with a hidden light gap behind it creates that high-end, hotel look without replacing the mirror. I’ve built a spacer behind the frame to leave a slim reveal, and it makes the whole vanity glow.
Possibly helpful picks:
- Flexible LED Strip Lights: Add a soft, warm glow behind your mirror frame to create a luxurious, spa-like ambiance instantly.
- Round Wood Mirror Frame: Upgrade your plain glass with a floating wooden surround to achieve that natural, modern aesthetic easily.
- Heavy Duty Mounting Tape: Secure your custom floating frame spacer safely to the wall or mirror without needing complex tools.


