
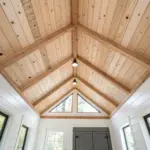
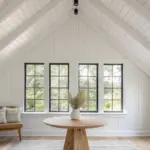
A board and batten ceiling is one of my favorite ways to make a plain room feel finished, without tearing everything apart.
Bedroom Grid Aligned to the Bed
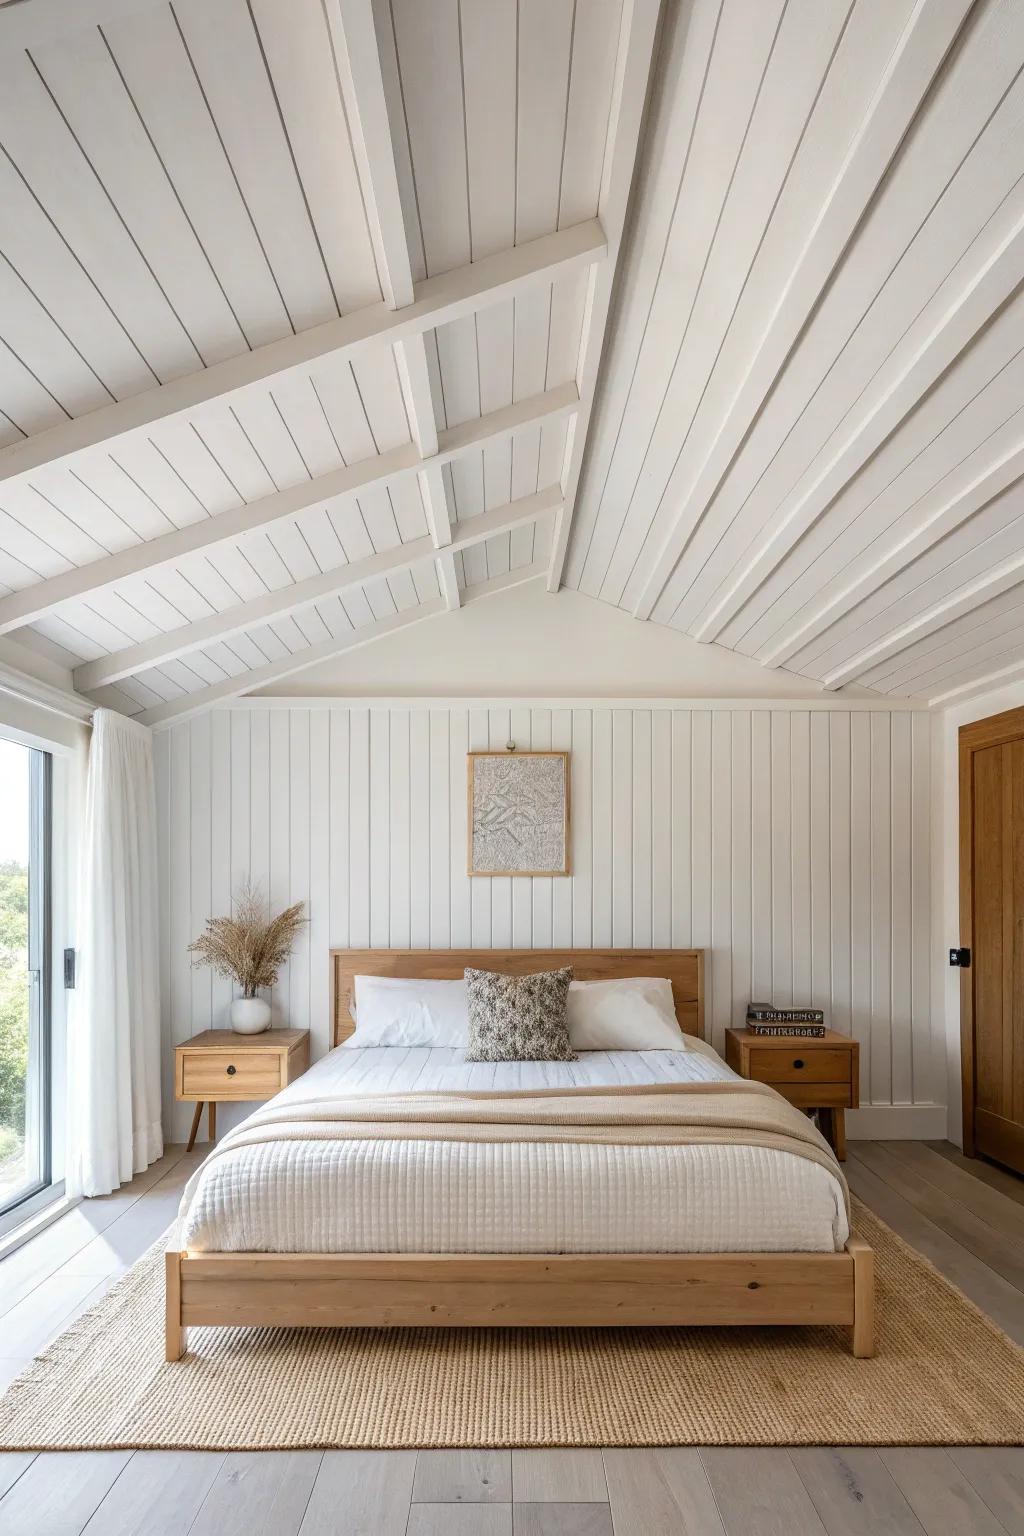
I like lining up the ceiling grid so a panel centers over the bed, because it makes the room feel balanced the second you walk in. The first time I tried it, the board and batten ceiling became the easiest “design cheat” I’d ever used.
A few relevant products:
- Faux Wood Beams: Add architectural interest to your ceiling instantly by installing lightweight faux beams that mimic real timber.
- Shiplap Ceiling Planks: Create a clean, textured foundation for your grid layout using easy-to-install interlocking wood or MDF planks.
- Laser Level Tool: Ensure your ceiling grid aligns perfectly with your bed frame by using a precise self-leveling laser.


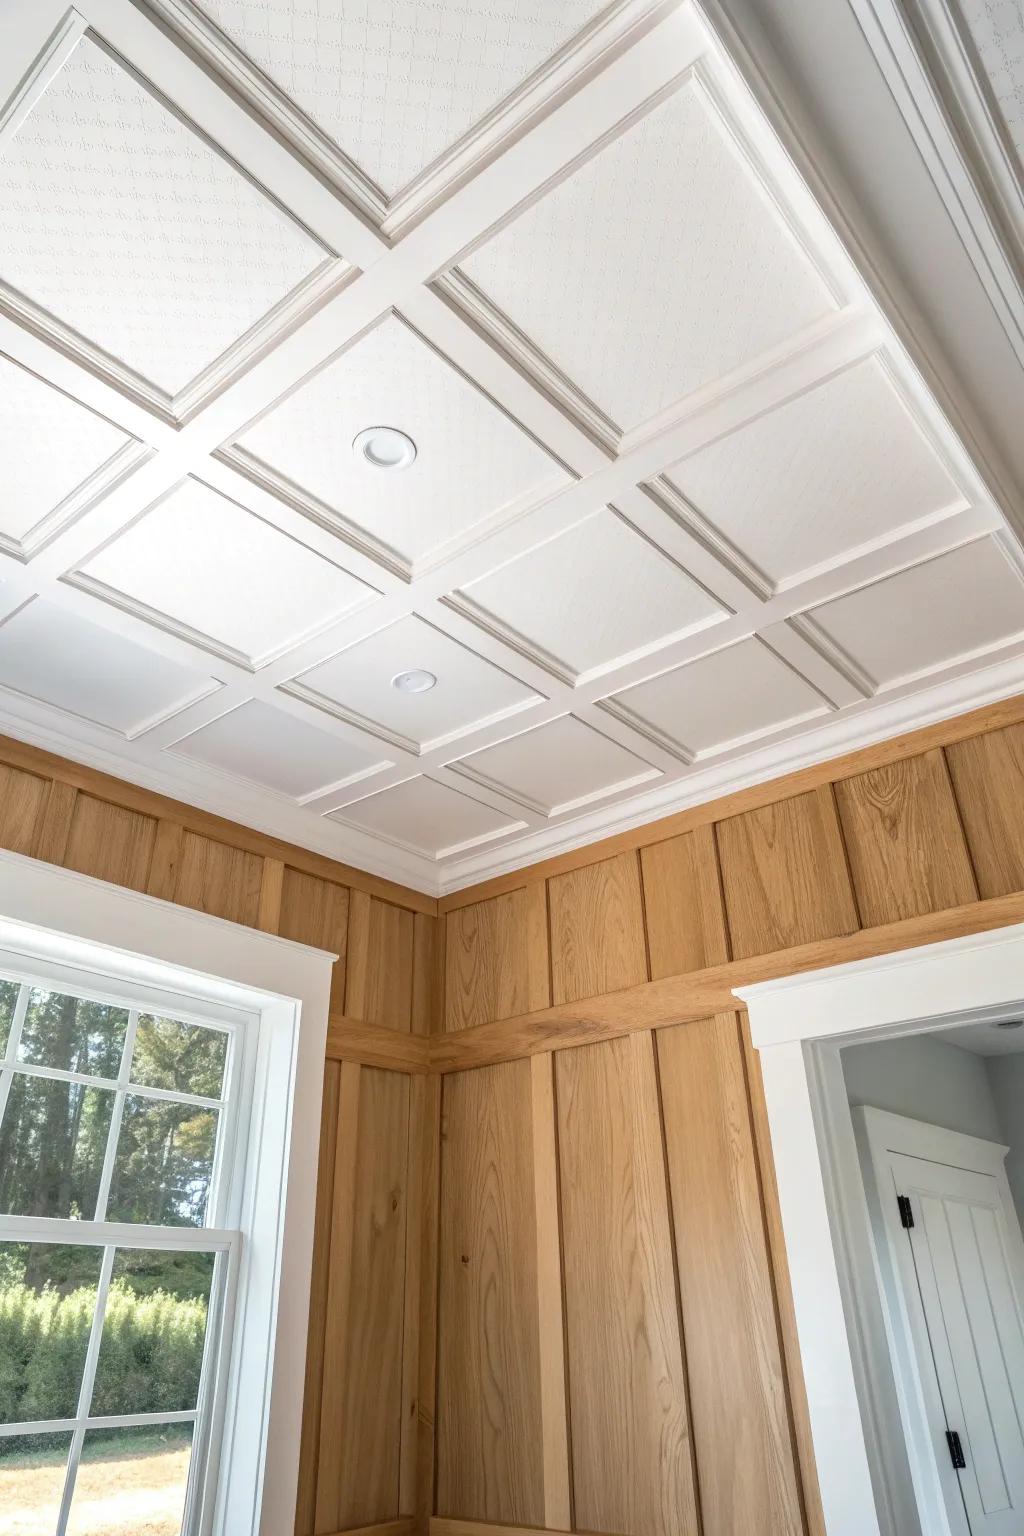
Classic White Grid Ceiling
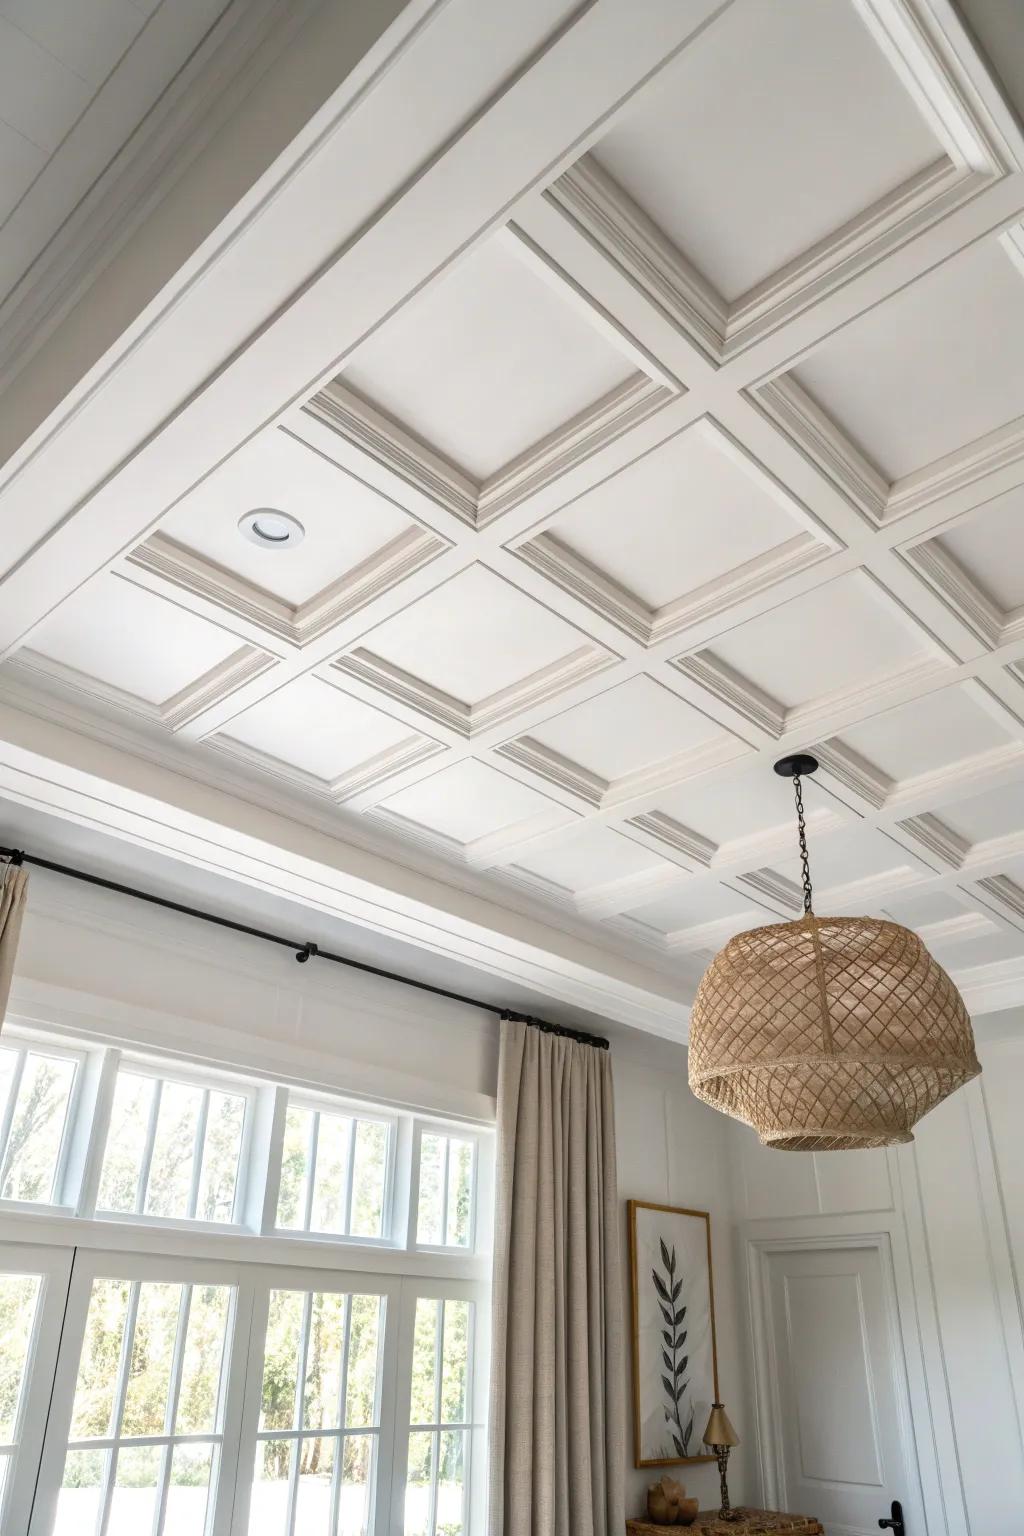
When I want that timeless, high-end look on a normal budget, I build a simple coffer-style grid with evenly spaced battens and paint it all one crisp color. I’ve done this in living rooms and it instantly makes the ceiling feel taller and more “architectural.”
Maybe worth checking out:
- Primed Pine or Poplar Boards: Create the structural grid for your ceiling makeover using these sturdy, paint-ready wooden boards for clean lines.
- Decorative Crown Molding: Add depth inside each grid square with molding strips to achieve that sophisticated, custom-built architectural appearance.
- Semi-Gloss Interior White Paint: Finish your new ceiling with durable white paint that reflects light and makes the room feel taller.
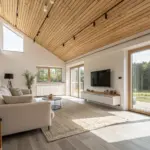
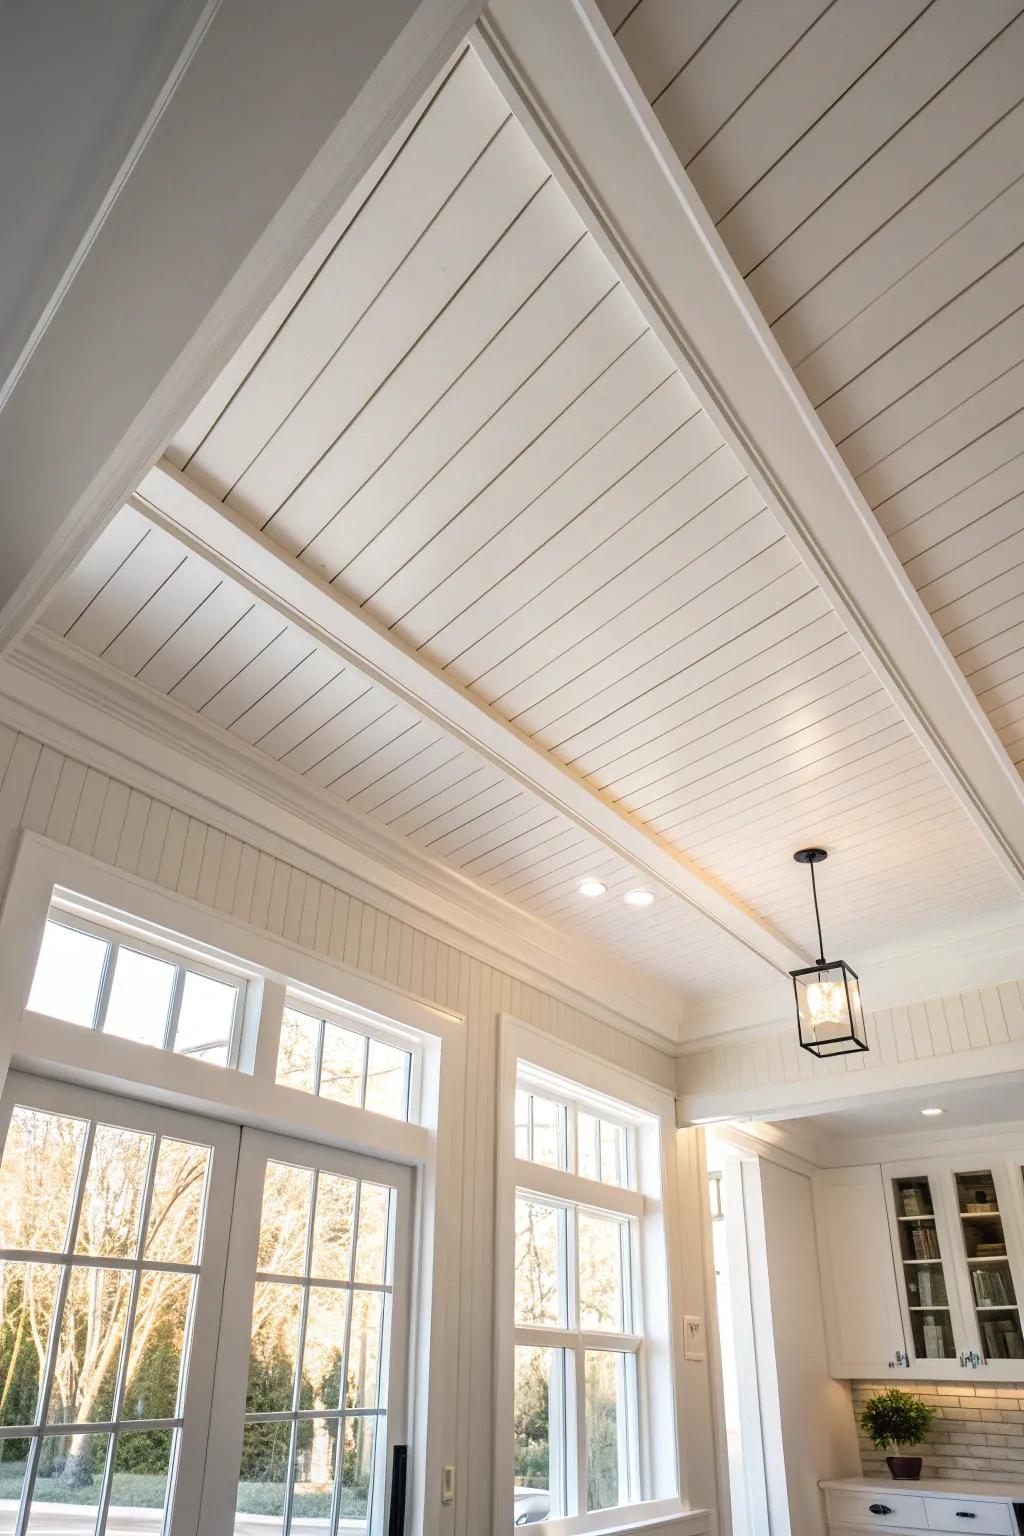
Long Linear Battens for Farmhouse Vibes
If you like a cleaner look, I’ve had great results running parallel battens the long direction of the room for a subtle farmhouse ceiling texture. It’s one of the fastest layouts I’ve installed, and it makes small rooms feel stretched and calmer.
These products might be useful:
- Tongue and Groove Wood Planking: Create that seamless, linear farmhouse look instantly by installing these interlocking wood planks on your ceiling.
- Clear Matte Wood Finish: Protect your new wood ceiling while maintaining its natural, light oak color with a quality water-based sealer.
- Brad Nailer Kit: Speed up your ceiling installation significantly and ensure a secure, professional hold with this essential power tool.
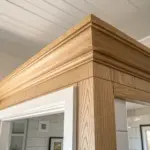

Perimeter Frame With Inner Grid
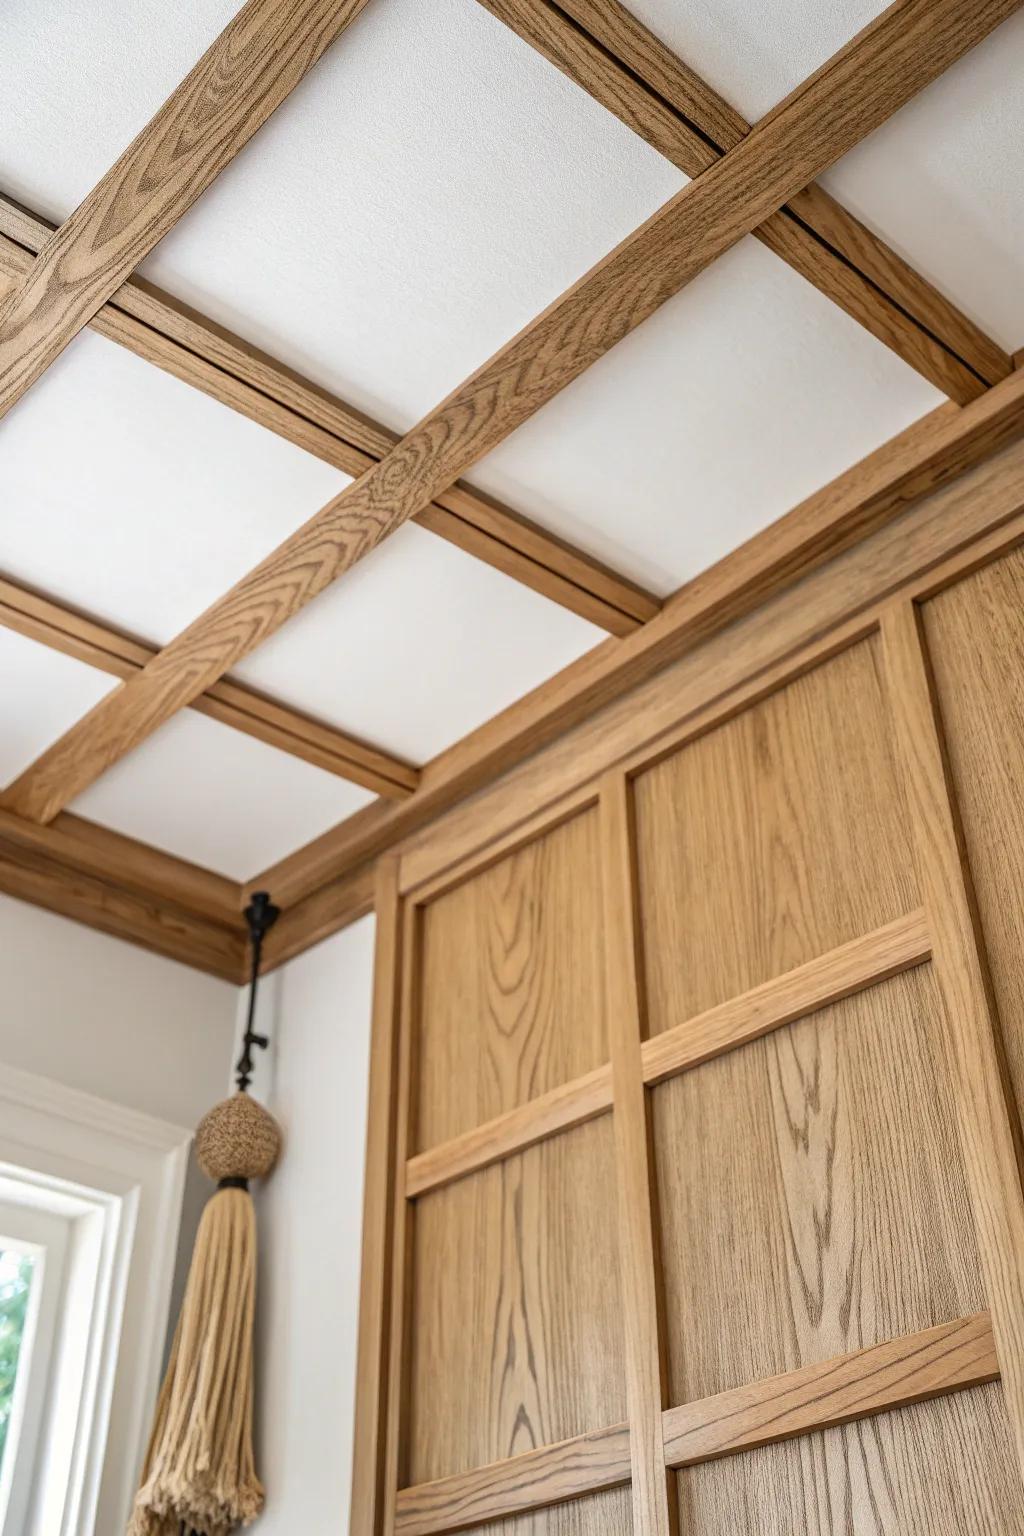
I love adding a clean picture-frame border around the ceiling first, then building the grid inside it so everything looks intentional. I’ve used this trick to hide slightly wavy edges, and it makes the whole layout feel custom.
May just do the trick:
- Brad Nailer Kit: Secure your perimeter boards and inner grid pieces cleanly and efficiently with this essential tool for finish carpentry.
- Laser Level Tool: Ensure your perimeter frame is perfectly straight and your grid squares align accurately for a professional-looking ceiling installation.
- Construction Adhesive: Reinforce your ceiling boards by adding a strong hold that reduces sagging and squeaking over time.
Centered Feature Box for a Light Fixture
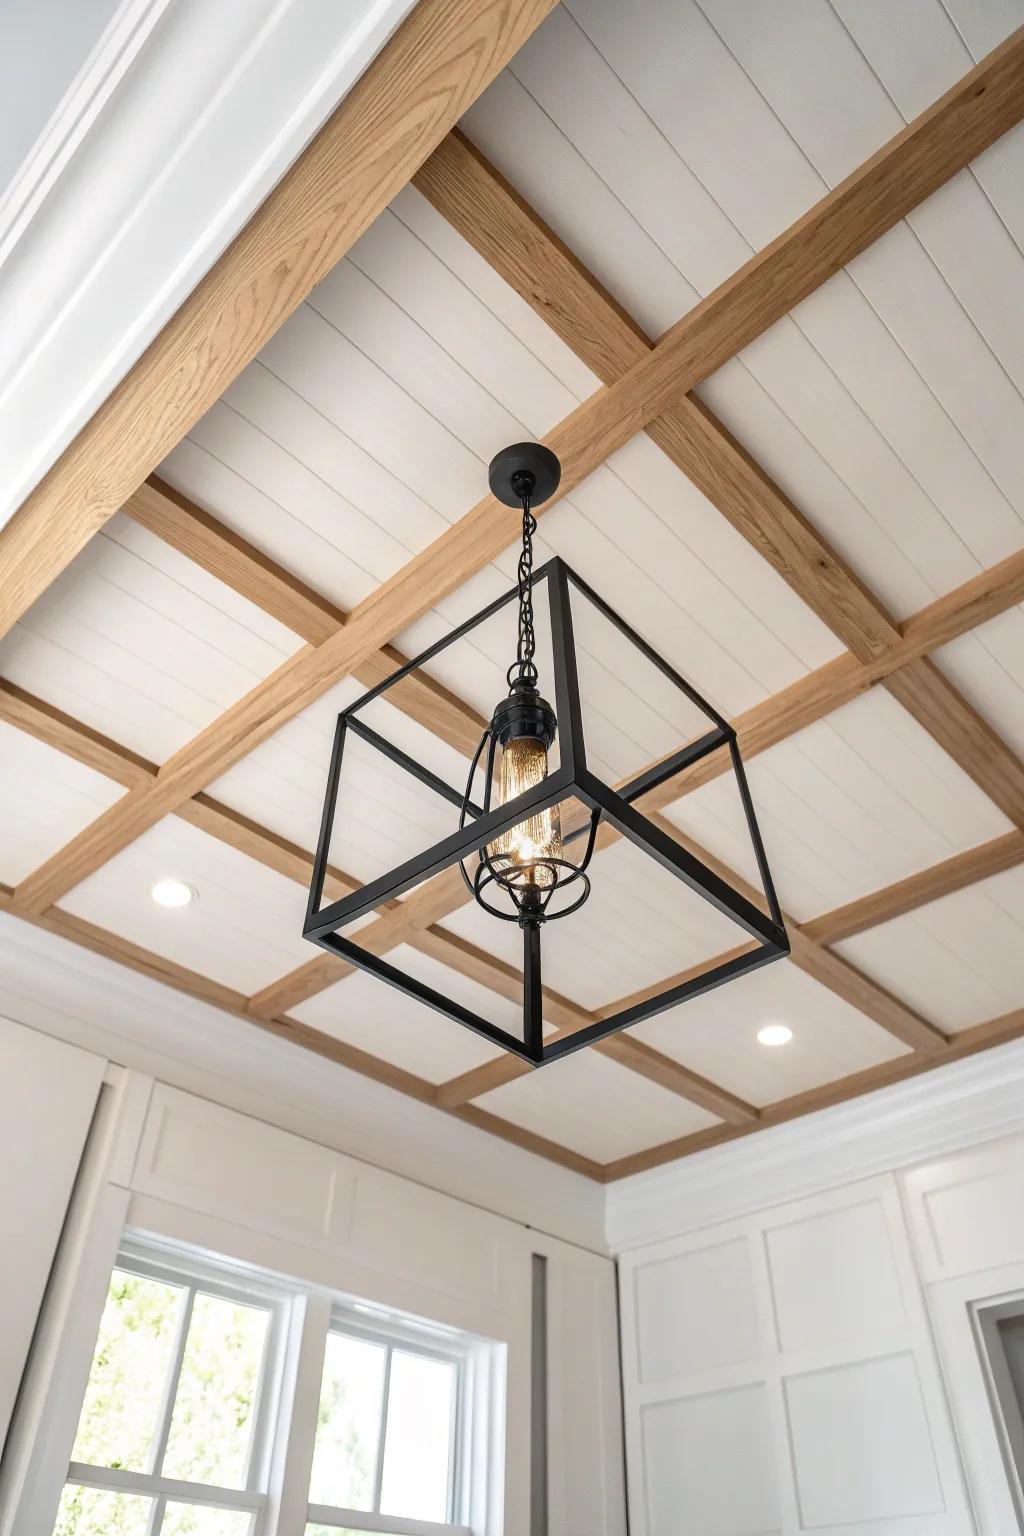
One of my go-to moves is building a centered batten box and letting the rest of the ceiling stay simpler so the light fixture feels perfectly “anchored.” I’ve done this in bedrooms, and it makes the whole space feel designed around the bed.
Items that may come in handy:
- Industrial Cube Pendant Light: Anchor your ceiling design with a geometric fixture that perfectly complements square batten layouts and modern farmhouse styles.
- Solid Oak Lumber Boards: Create the structural grid and feature box using high-quality hardwood boards to achieve that authentic, warm wood tone.
- Nickel Gap Shiplap Paneling: Install these pre-primed or natural wood planks inside your grid to add texture and classic white contrast.
Natural Wood Boards With Painted Battens
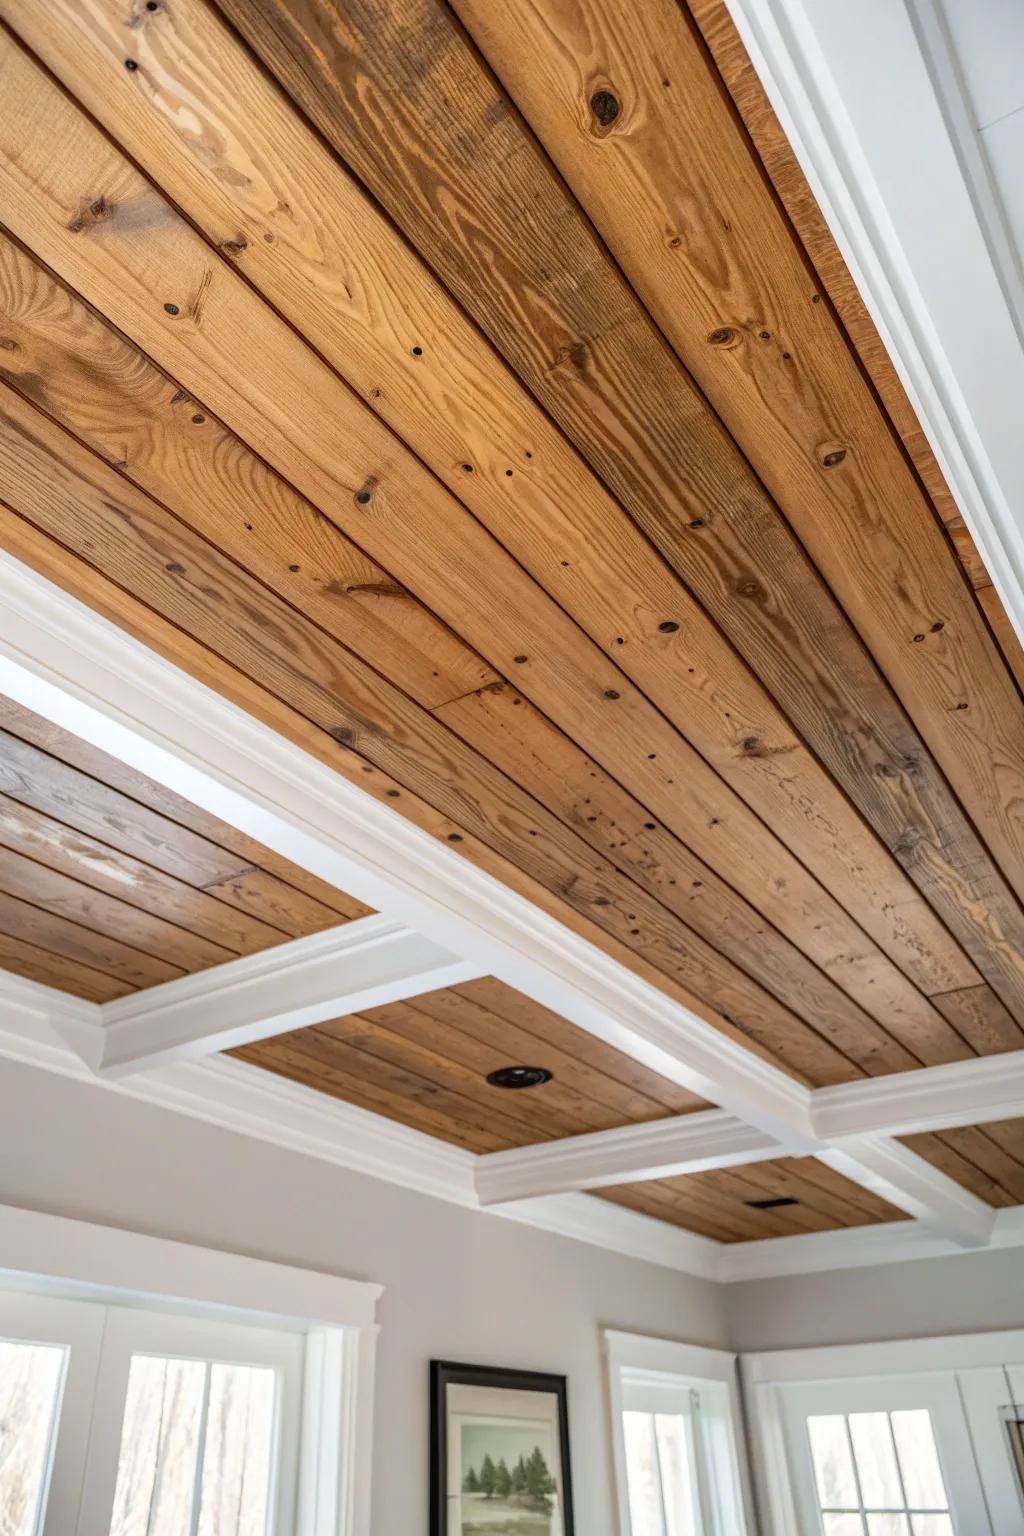
Keeping the boards in a warm wood tone and painting the battens gives you that cozy “cabin-meets-farmhouse” mix while still reading as board and batten. I’ve done it with reclaimed boards, and the grain variation is the whole point.
Useful items to consider:
- Tongue and Groove Pine Pattern Boards: Instantly add warmth to your ceiling with these interlocking boards that highlight natural grain variation.
- Interior Wood Stain (Warm Tone): Use a quality wood stain to enhance the grain and achieve that perfect cozy cabin richness.
- Primed MDF or Wood Boards for Beams/Battens: Create the structural grid look easily with pre-primed boards ready for your favorite white trim paint.


Painted Boards With Stained Battens
Flipping the contrast—painted boards with stained wood battens—creates clean panels with bold lines that pop. I tried this in a dining area once, and the battens acted like built-in “beams” without the heavy look.
Consider these options:
- Matte White Ceiling Paint: Refresh your ceiling boards with a clean, matte finish to maximize contrast against the warm wood battens.
- Dark Walnut Wood Stain: Apply a rich, deep stain to your wooden battens to create bold, architectural lines overhead.
- Recessed LED Ceiling Lights: Install modern recessed lighting within the panels to highlight the texture and depth of your new ceiling.
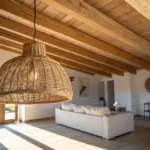
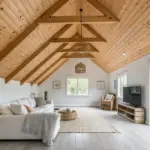
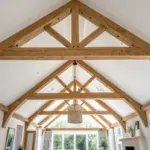
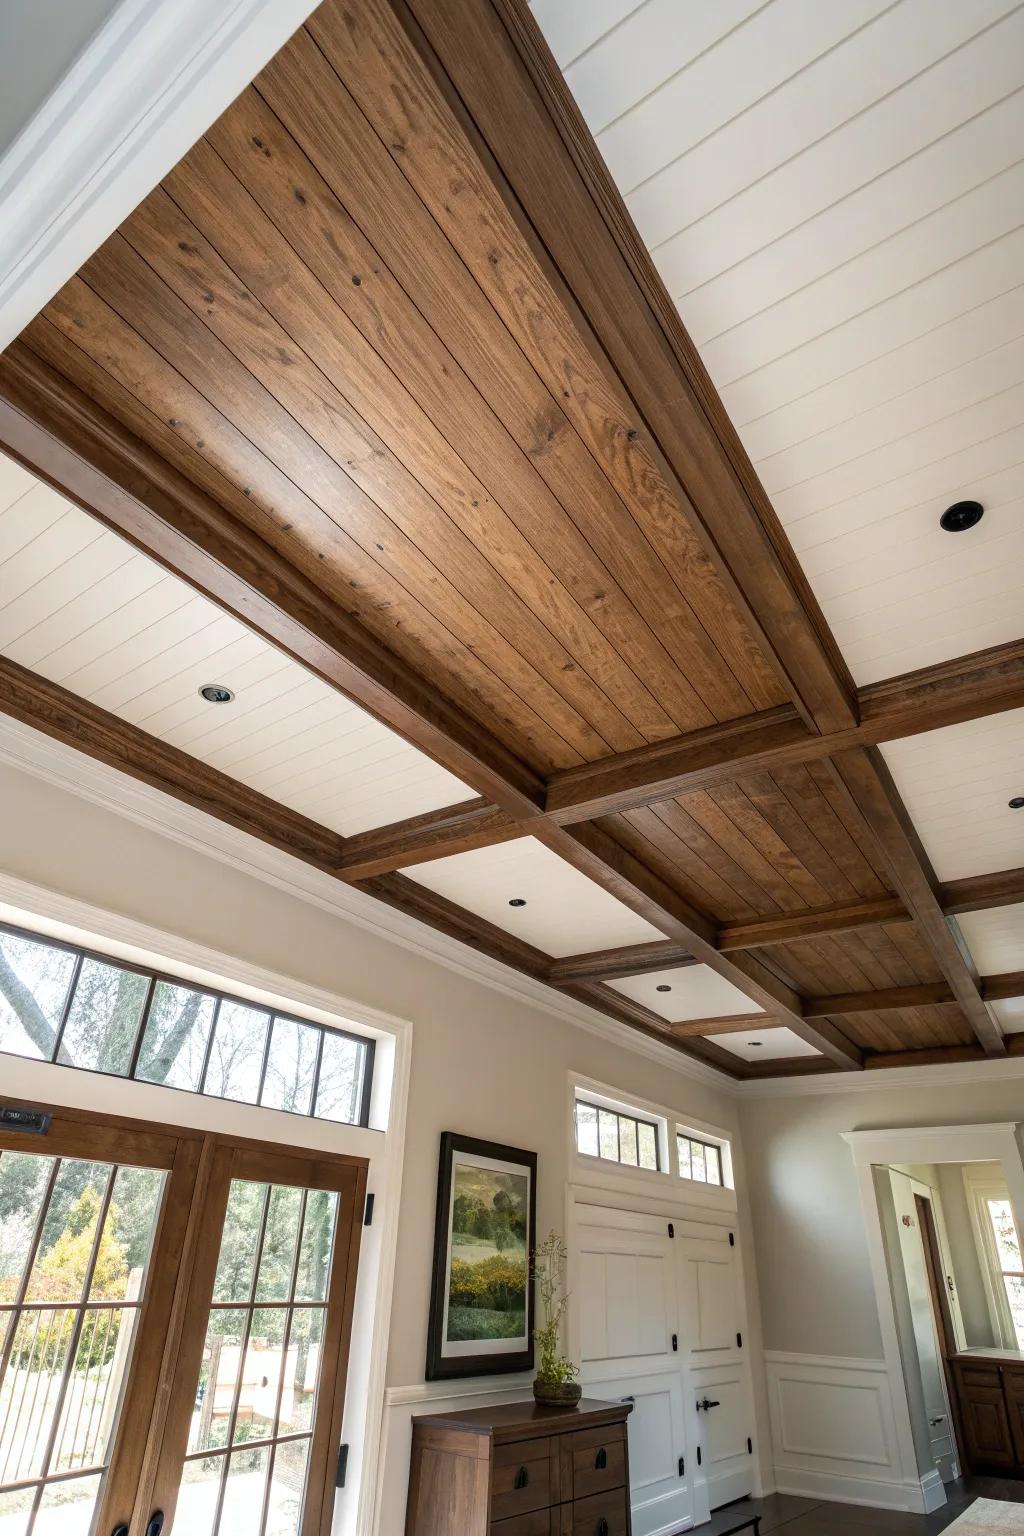
Faux Beam Crosses Over the Grid

Layering a few thicker faux beams on top of a board-and-batten grid is my favorite way to get that rustic great-room vibe. I’ve installed this combo in an open space, and it made the ceiling feel like it belonged in an old farmhouse.
A few choices to try:
- Faux Wood Ceiling Beams: Instantly add rustic charm to your ceiling grid without the heavy weight of solid timber installation.
- Paintable Beadboard Paneling: Create the classic white textured base layer of your ceiling grid before adding the contrasting beams.
- Construction Adhesive for Beams: Ensure a secure, long-lasting hold when mounting lightweight faux beams directly to your ceiling surface.
Skinny Battens for a Modern Look
If you want modern without losing warmth, I’ve had awesome results using thin battens and tighter spacing to create a refined, tailored pattern. It reads less “country” and more “clean-lined,” especially with a smooth paint finish.
You might give these a try:
- Primed Pine or PVC Lattice Molding: Create that sleek, modern grid pattern on your ceiling effectively using these thin, paint-ready molding strips.
- Pneumatic Brad Nailer Kit: Speed up your installation significantly and ensure a clean, professional finish with this essential power tool.
- Interior Semi-Gloss Enamel Paint: Achieve that tailored, light-reflecting modern finish mentioned above by applying a durable, high-quality white enamel.
Wide Panels for Quiet Minimalism
Bigger panels with fewer battens give you a board and batten ceiling that feels calm and modern, not busy. I did this in a small living space and it kept the detail subtle while still looking expensive.
You might like:
- White Shiplap or Beadboard Panels: Instantly create that clean, minimalist texture on your ceiling by installing these durable, easy-to-fit wall and ceiling planks.
- Faux Wood Beam: Add rustic warmth and contrast to your white ceiling panels without the heavy weight of structural timber beams.
- Recessed Lighting Kit: Illuminate your new ceiling design with sleek, discreet lighting that enhances the modern feel of the wide panels.
Small Powder Room Micro-Grid
Tiny rooms are where I get brave—an extra-detailed micro-grid board and batten ceiling feels like a jewelry-box moment. I’ve built one in a small bath, and people literally look up and ask how it was done.
Some handy options:
- Primed Pine or PVC Lattice Molding: Establish the intricate grid structure easily with pre-primed lattice strips ready for precise cutting and painting.
- Recessed LED Gimbal Light Kit: Illuminate your new ceiling grid with adjustable, slim LED lights that fit perfectly into centered squares.
- Paintable Textured Wallpaper: Add depth inside the grid squares by applying a subtle textured wallpaper before installing the molding.
Chevron Batten Layout on Flat Ceilings
For a real wow moment, I’ve laid battens in a chevron pattern over a flat ceiling so the “boards and battens” feel graphic and bold. It takes more measuring, but every time I’ve done it, the ceiling steals the show in the best way.
Give these a look:
- Real Wood Veneer Paneling: Achieve the natural, textured look seen here by applying thin, easy-to-cut wood veneer planks to your ceiling surface.
- Laser Level Tool: Ensure your sophisticated chevron pattern matches up perfectly at every angle with a reliable self-leveling laser alignment tool.
- Pneumatic Brad Nailer Kit: Secure your ceiling battens quickly and cleanly without visible hammer marks using an efficient brad nailer kit.
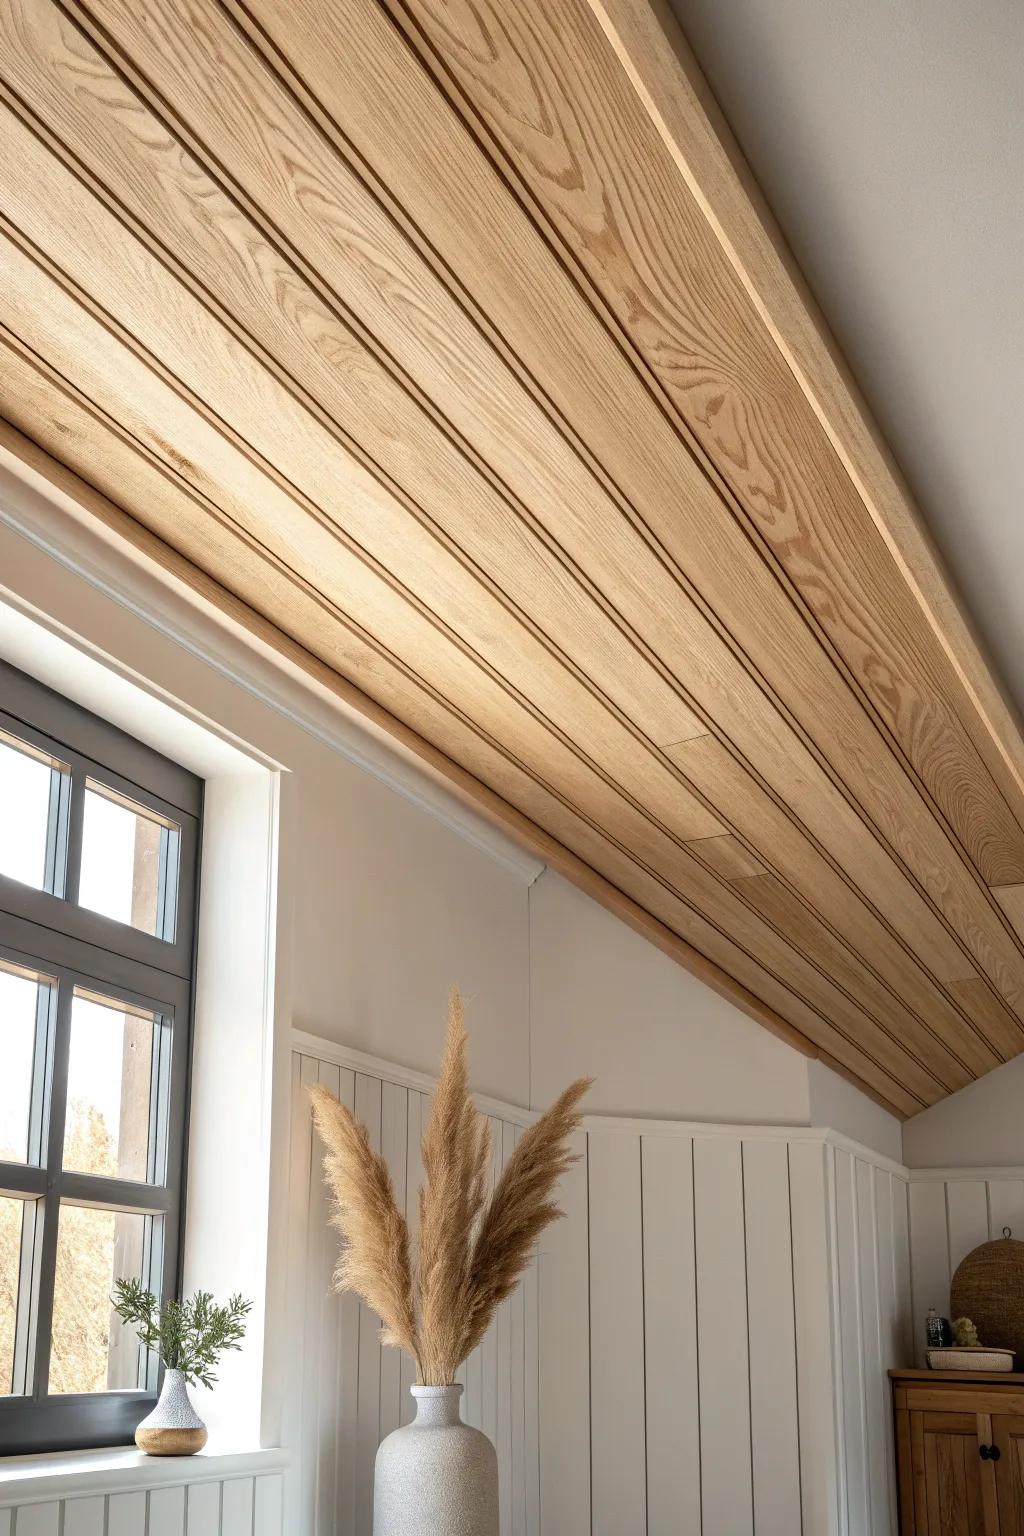
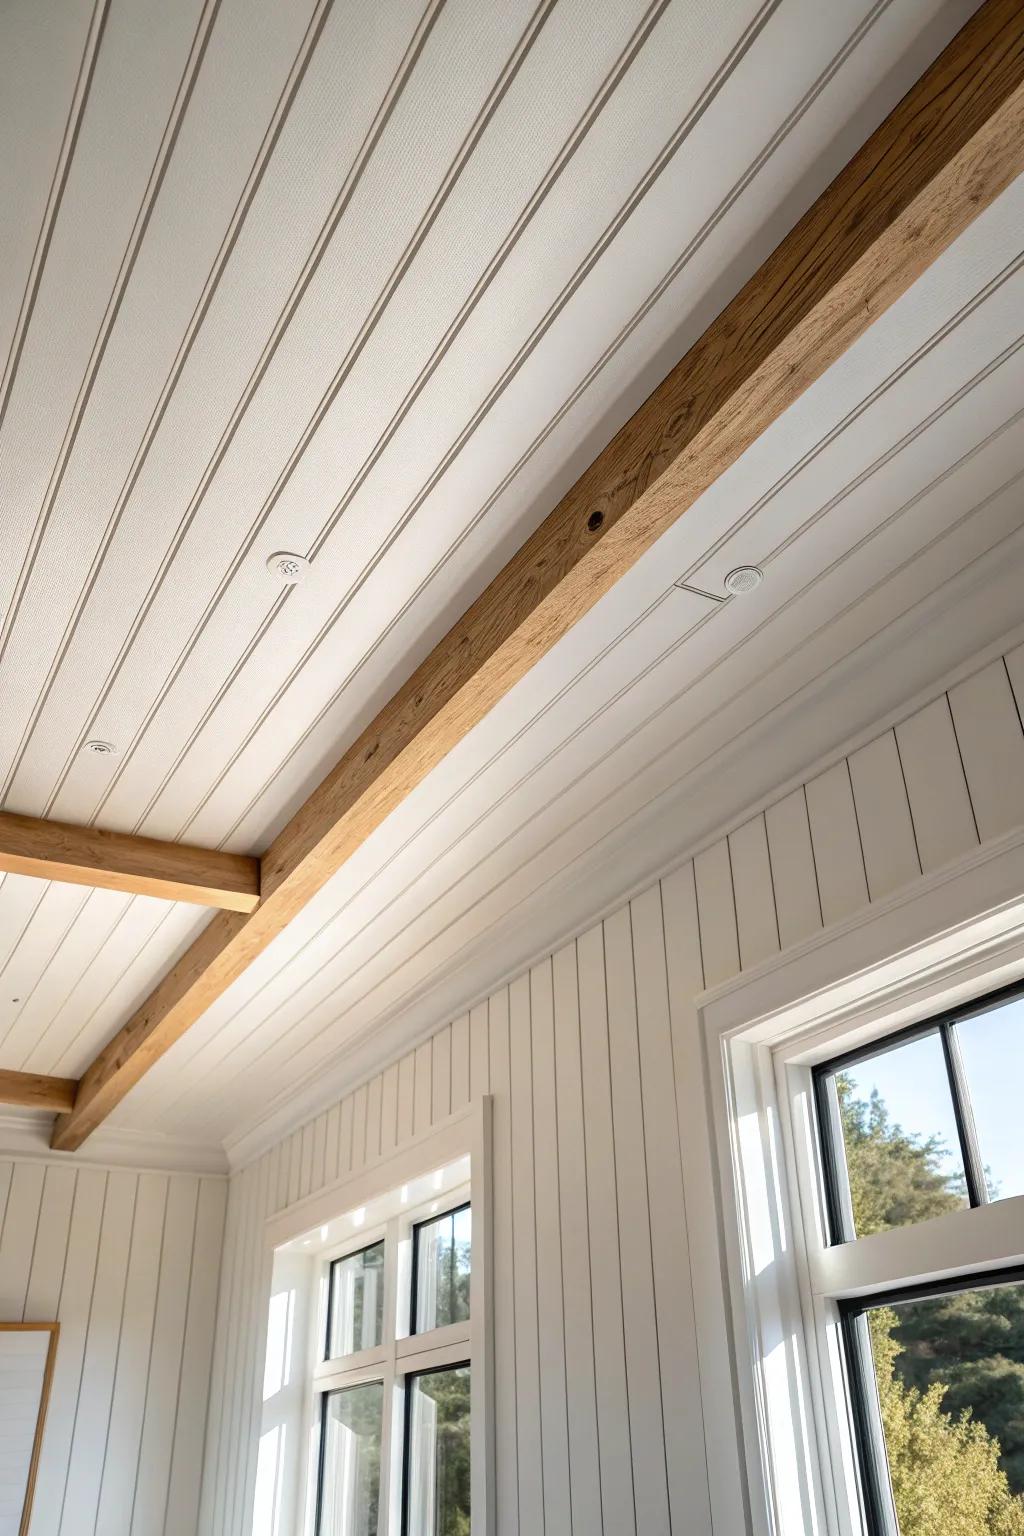
Backlit Battens With Hidden Glow Lines

I’ve routed a shallow channel behind select battens so the board and batten ceiling gets thin, hidden glow lines that feel cozy at night. It’s unexpected but still classic, and it makes the grid look like it’s floating.
A few suggestions:
- Flexible Warm White LED Strip Lights: Create that cozy, hidden glow by installing these flexible, dimmable LED strips into your routed batten channels.
- Aluminum LED Channel Diffusers: Soften the light output and eliminate harsh hotspots by housing your strips in these sleek aluminum channels.
- Compact Low Voltage LED Driver: Power your new ceiling lighting safely and reliably with a slim transformer easily hidden within ceiling voids.


