
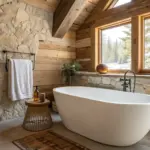
A good chair rail molding can make a plain wall feel instantly finished, like you finally put the right frame around the room. I’ve used it in everything from dining rooms to tight hallways, and it’s my favorite way to add that cozy architectural detail without a full remodel.
Chair Rail as a Display Ledge
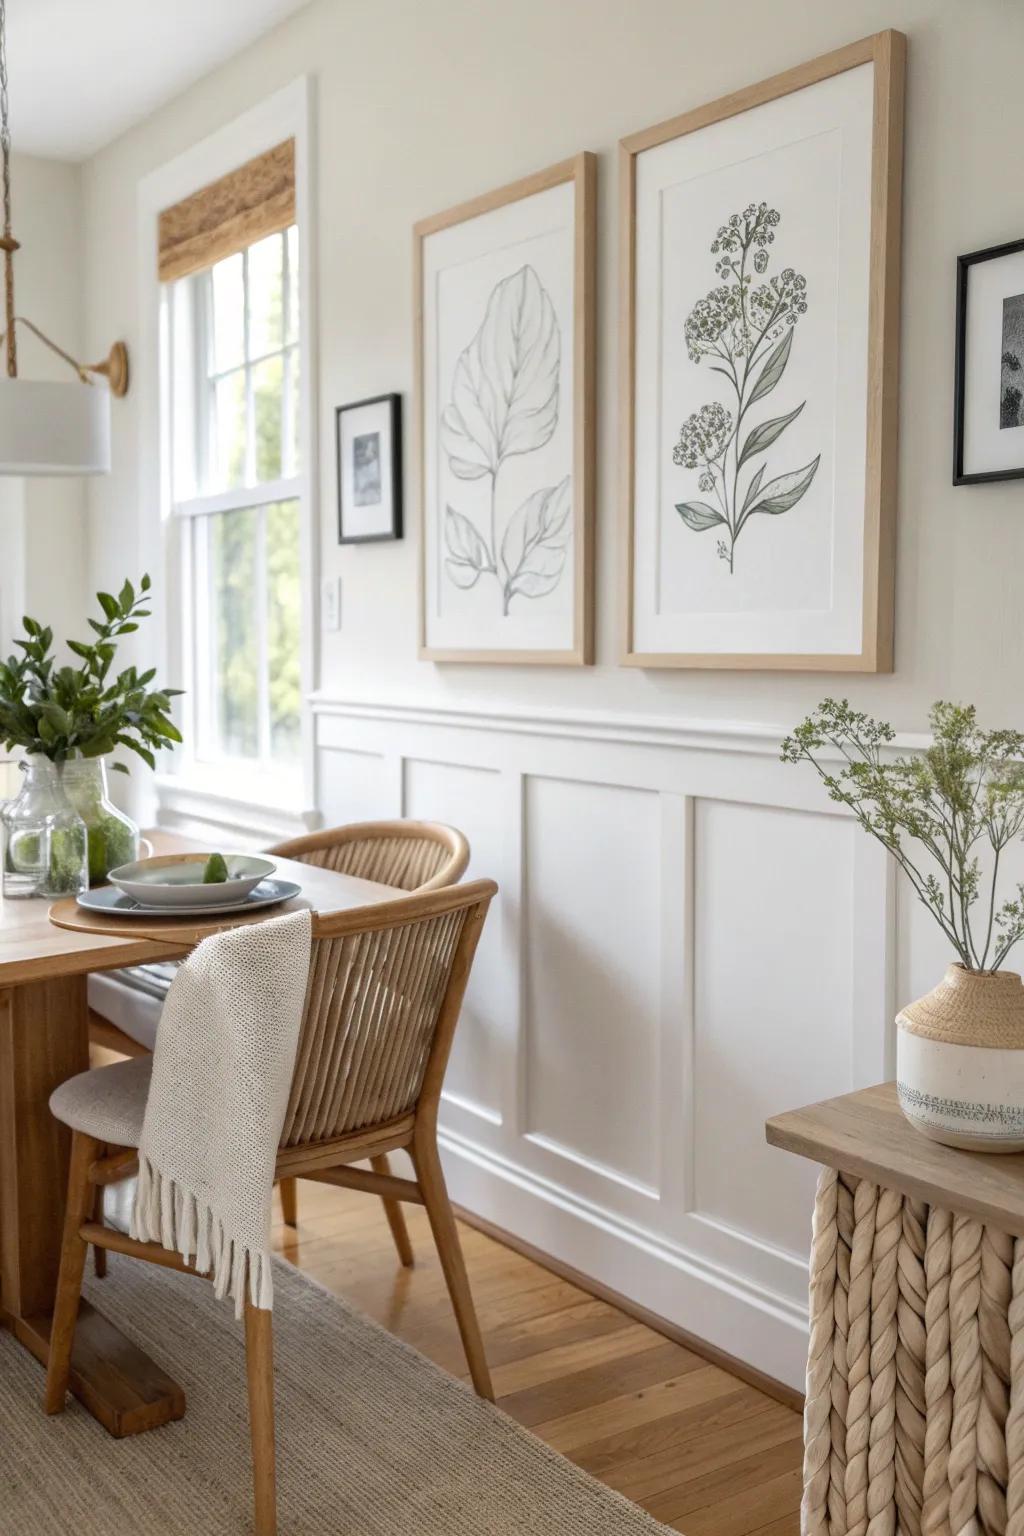
Turn your chair rail molding into a mini ledge by topping it with a narrow board so you can lean framed art or seasonal decor. I built one in a dining room and loved being able to swap prints without more nail holes.
Give these a look:
- Narrow Floating Picture Ledge Shelf: Create a seamless display surface by installing this shallow ledge directly above your existing molding for artwork.
- Minimalist Wood Gallery Frames: Style your new ledge with these natural wood frames that perfectly complement light, airy dining room spaces.
- Rechargeable Wireless Picture Light: Highlight your leaned artwork elegantly without needing to drill holes or hire an electrician for complicated wiring.

Classic Painted Chair Rail
When I want a clean, timeless look, I install simple chair rail molding and paint it the same crisp color as the trim. I’ve done this in dining spaces and it always makes the whole room feel more “put together” with minimal fuss.
Items that may come in handy:
- Primed Chair Rail Molding: Choose simple, pre-primed molding strips to create your clean border line ready for painting immediately.
- Wall Molding Panel Kit: Create the elegant box frames below your chair rail easily with pre-cut kits for professional results.
- High-Density Paint Roller Set: Achieve a smooth, brush-mark-free finish on your trim work with these foam rollers designed for cabinetry.

Warm Stained Wood Rail
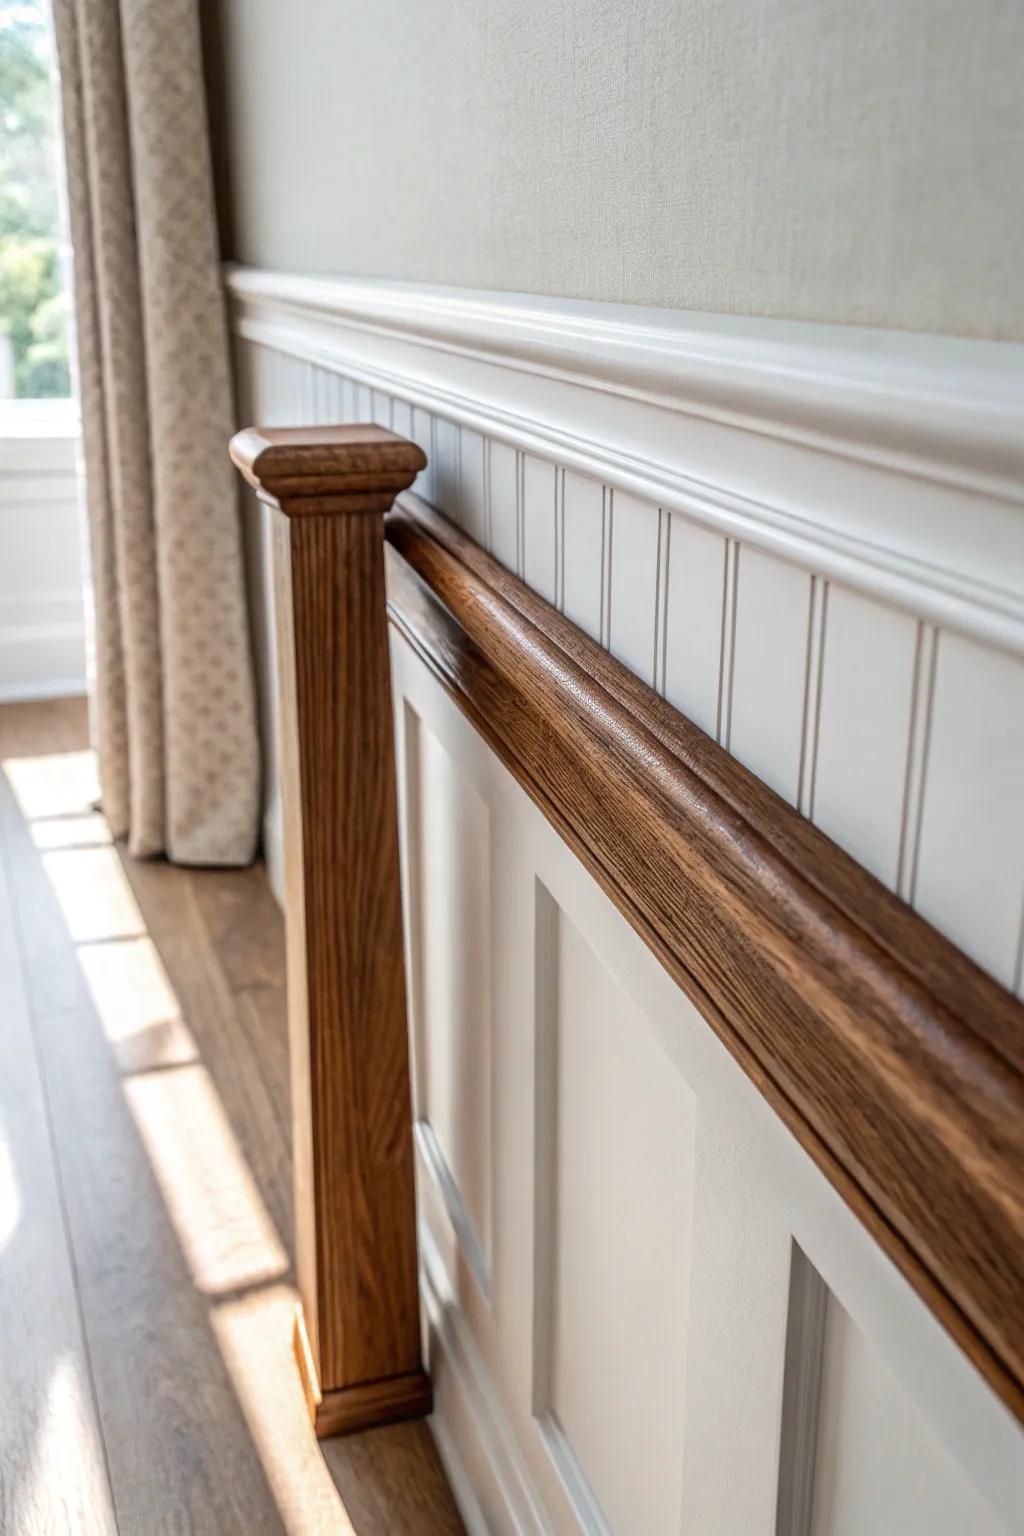
A stained wood chair rail brings instant warmth, especially with light walls and natural floors. In my shop, I like testing stain on offcuts first because the grain can totally change the vibe once it’s on the wall.
Explore these options:
- Unfinished Oak Handrail Molding: Choose unfinished solid wood to create a custom base for your stain that perfectly matches your home’s unique style.
- Oil-Based Wood Stain (Medium Tone): Apply a penetrating oil-based stain to bring out natural grain patterns and add rich warmth to unfinished wood trim.
- Foam Brushes for Staining: Ensure a smooth, streak-free application of your chosen stain on molding with these simple, disposable foam applicator tools.

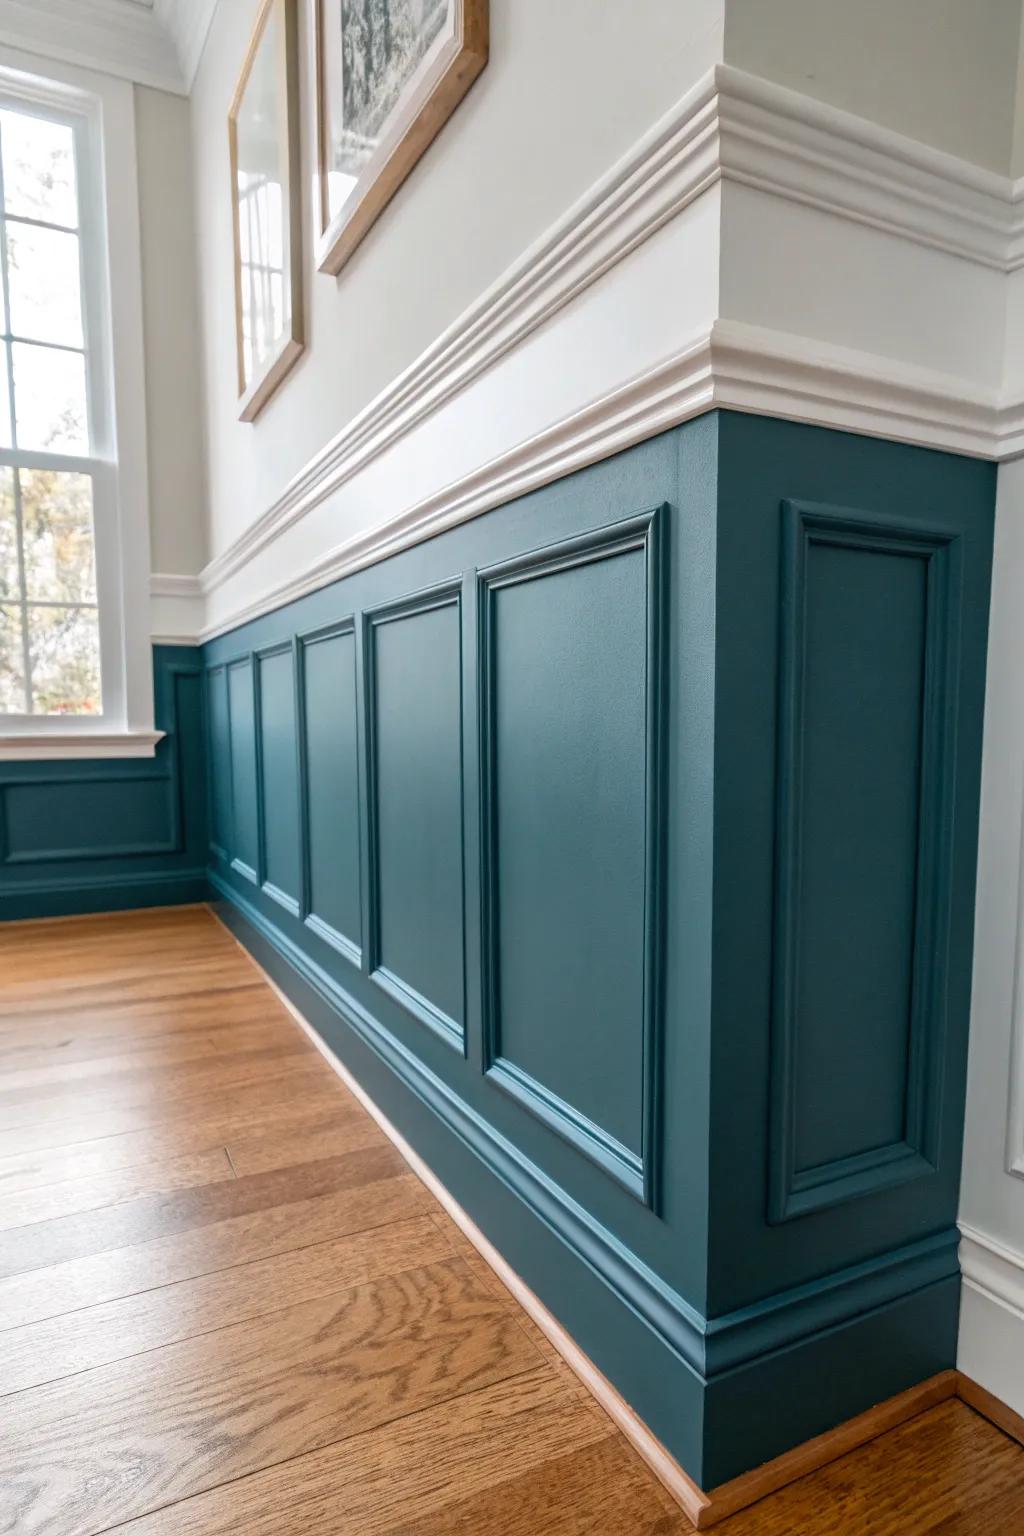
Crisp Two-Tone Wall Split
The classic move is two-tone walls with the chair rail as the dividing line—light below, bolder above. I’ve used this in a hallway and it made the space feel taller and more intentional overnight.
Possibly handy products:
- Chair Rail Molding Kit: Instantly upgrade your room’s architecture; choose a classic profile to create that professional separation between paint colors.
- Interior Paint (Deep Green): Create a dramatic contrast above your chair rail with a rich, bold shade that adds depth and character.
- Wainscoting or Wall Paneling: Add texture to the lower wall section; paneling creates a durable, elegant base for your two-tone design.
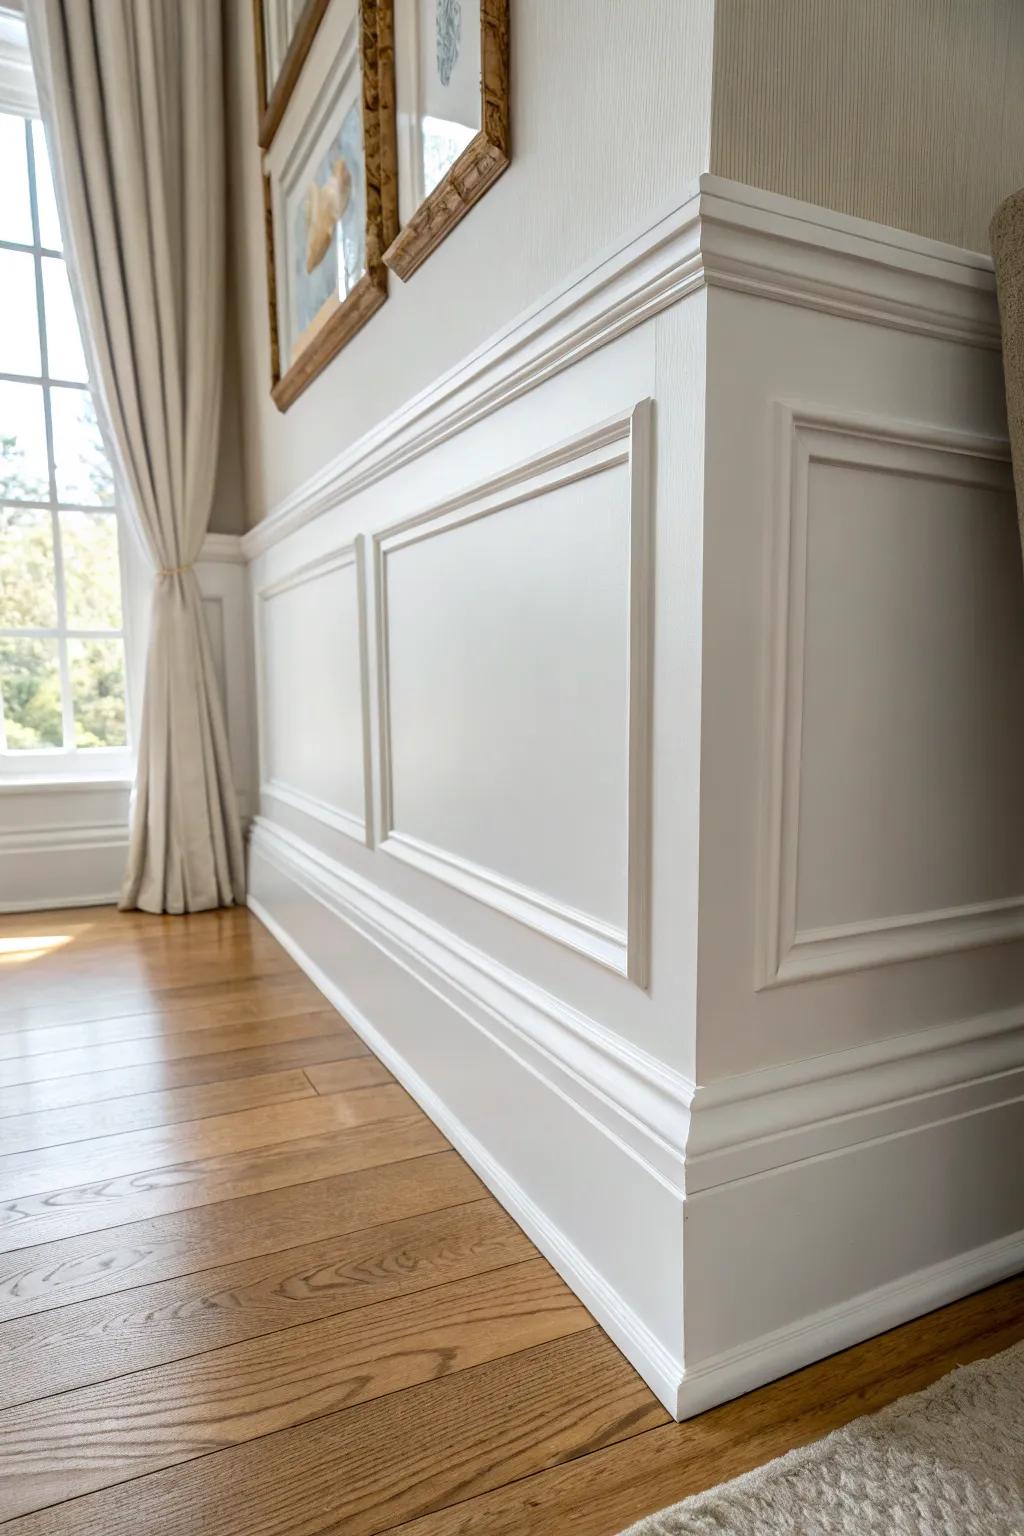
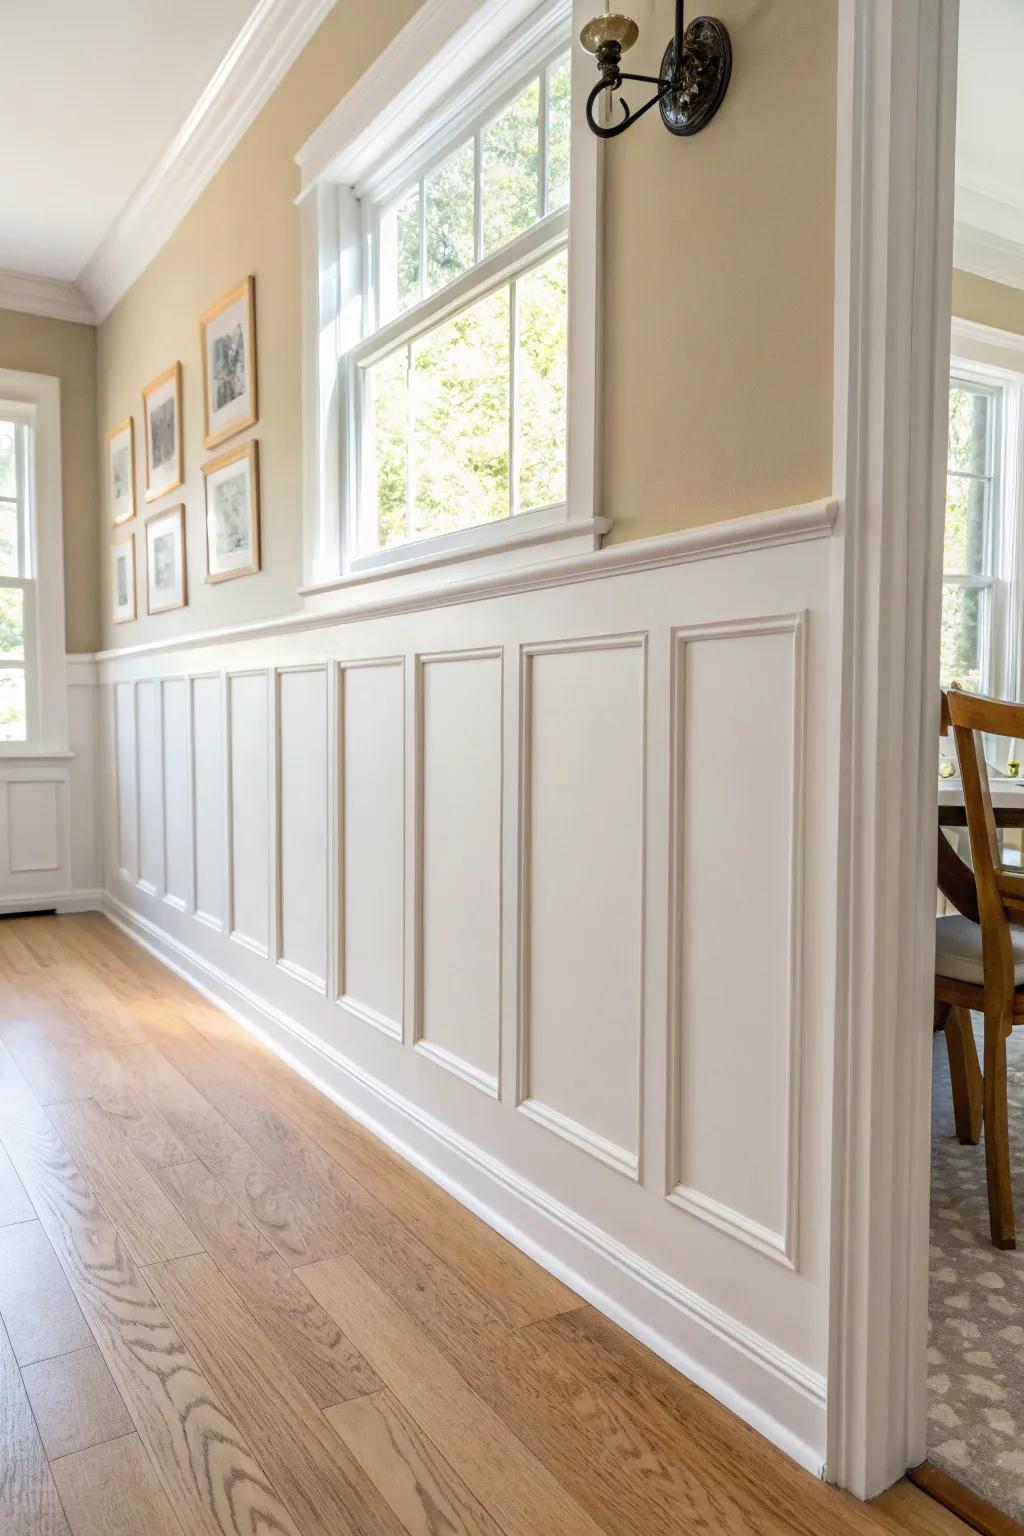
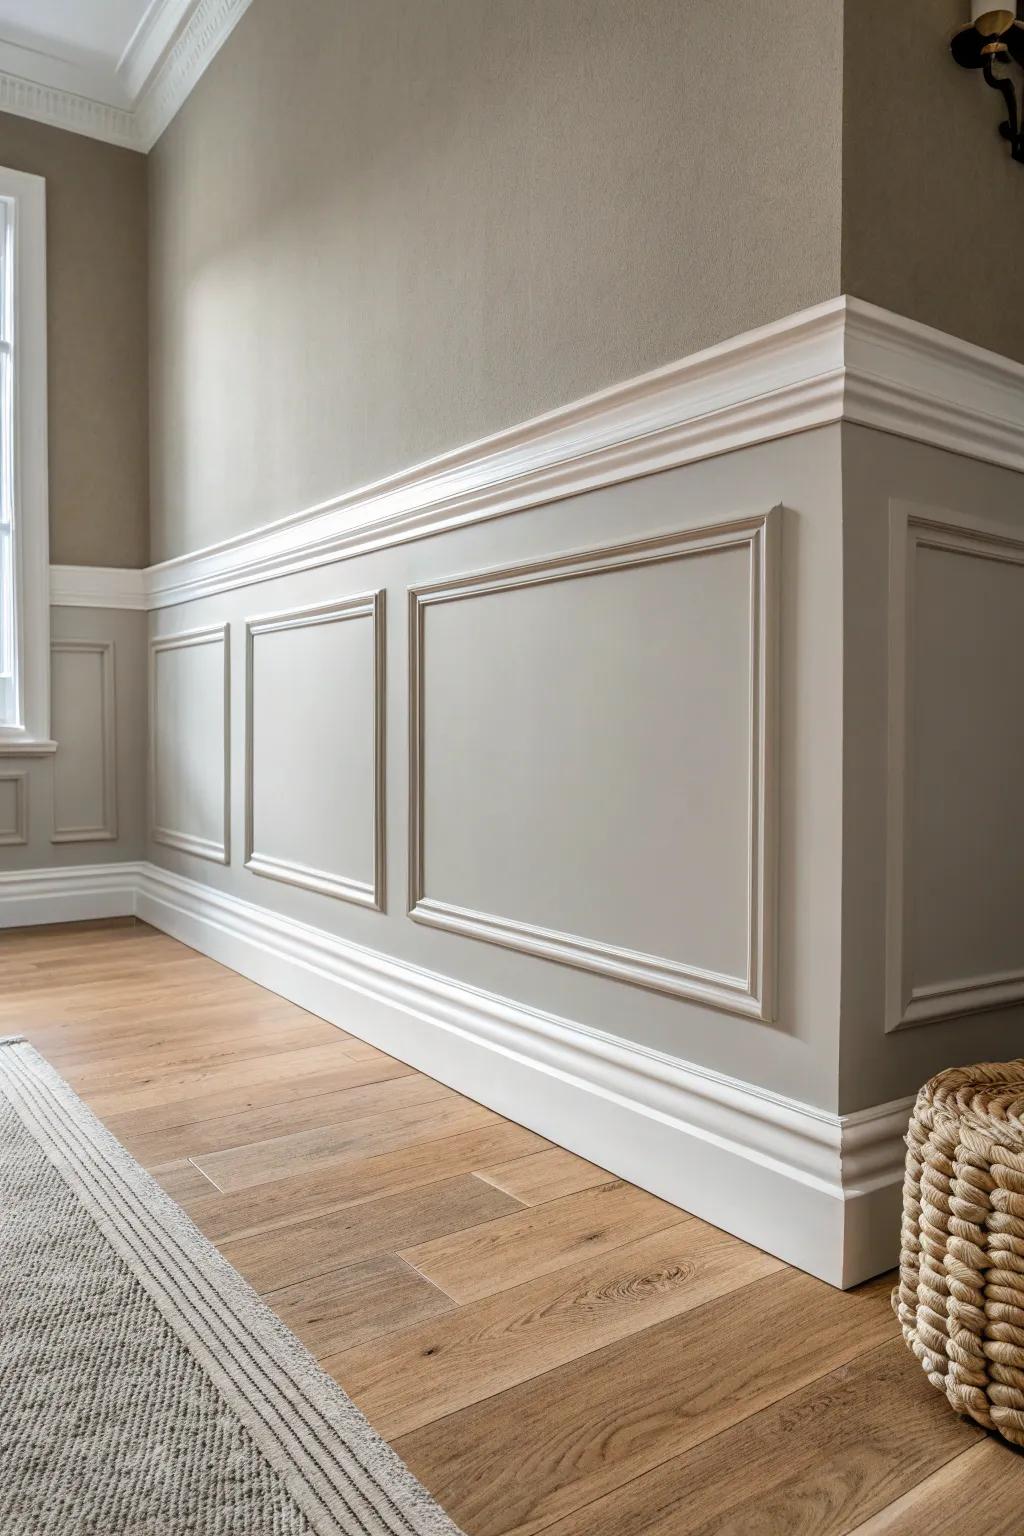
Picture Frame Molding Below
Adding picture frame molding under the chair rail molding gives you instant “custom home” energy without complicated carpentry. I love laying it out with painter’s tape first so I can eyeball the spacing before I commit to nails.
May just do the trick:
- Pre-Primed Wall Molding Trim: Create the classic box shapes easily with ready-to-paint trim that adds instant depth and architectural interest.
- Laser Level Line Tool: Ensure your frames are perfectly straight and evenly spaced without the frustration of manual measuring tapes.
- Cordless Brad Nailer Kit: Secure your molding quickly and cleanly without dragging heavy air compressors or hoses around your room.
Beadboard Wainscoting Cap
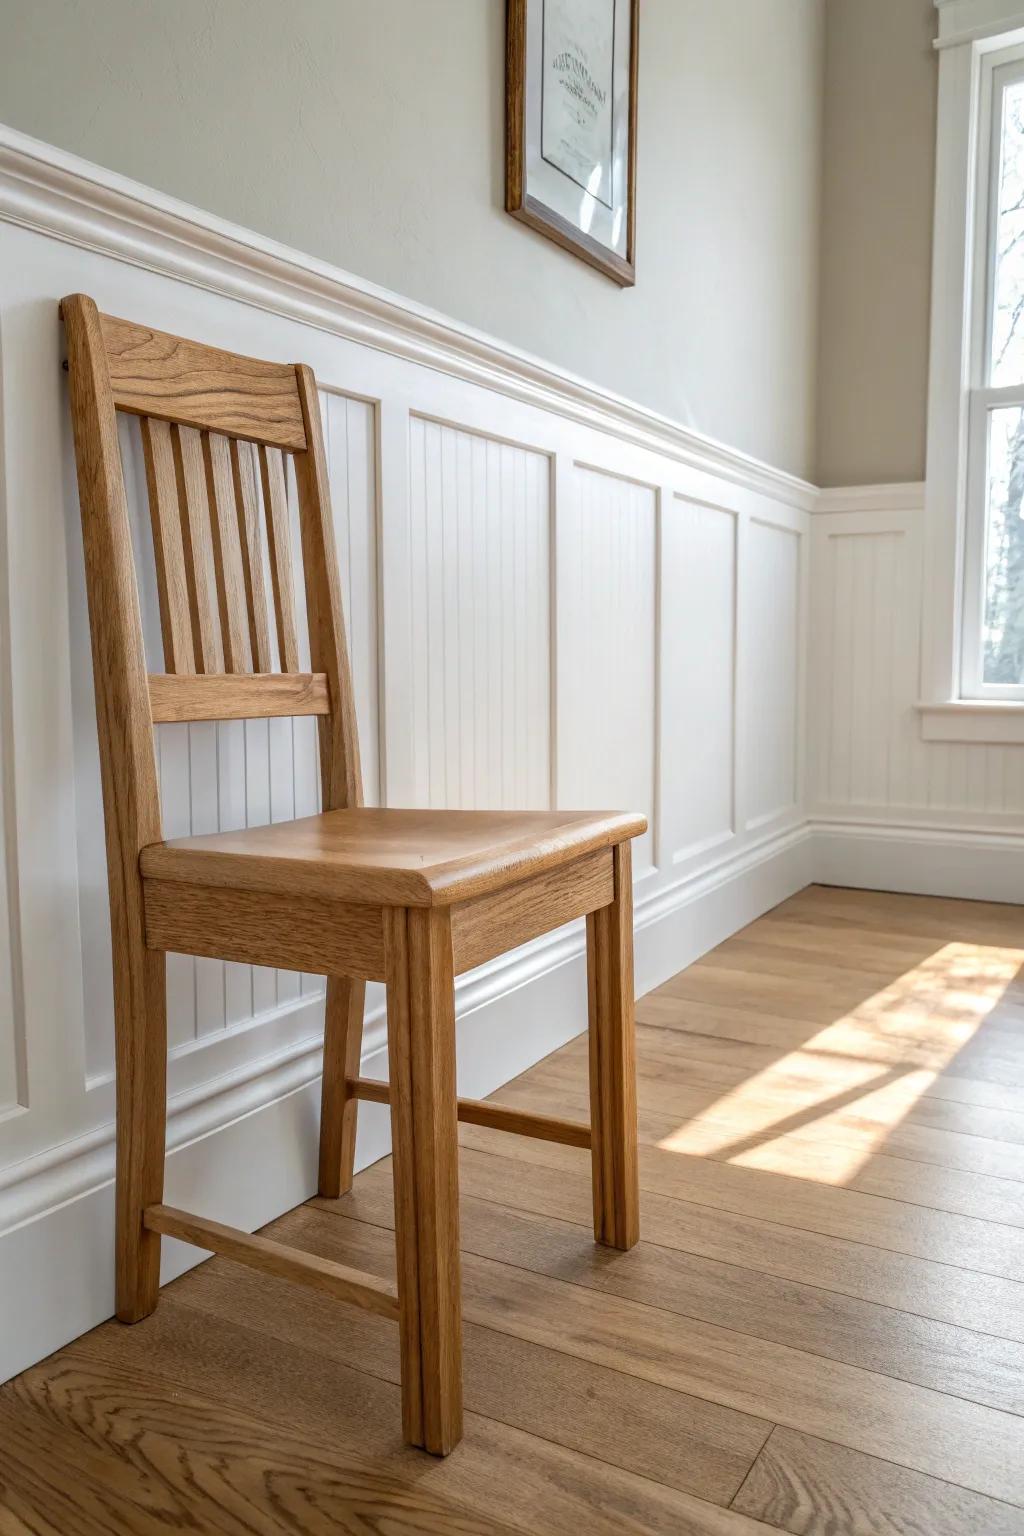
A chair rail makes the perfect cap for beadboard wainscoting, especially in entryways and breakfast nooks. I’ve installed beadboard panels more times than I can count, and that top rail is what makes it feel polished.
A few relevant products:
- Chair Rail Molding: Top your wainscoting with a crisp chair rail molding to create a finished, sophisticated transition on your walls.
- Beadboard Paneling Kit: Install classic beadboard panels quickly to add instant cottage charm and texture to your entryway or hallway.
- Brad Nailer Kit: Secure your molding and panels effortlessly with a reliable brad nailer, ensuring a professional-looking, secure installation.
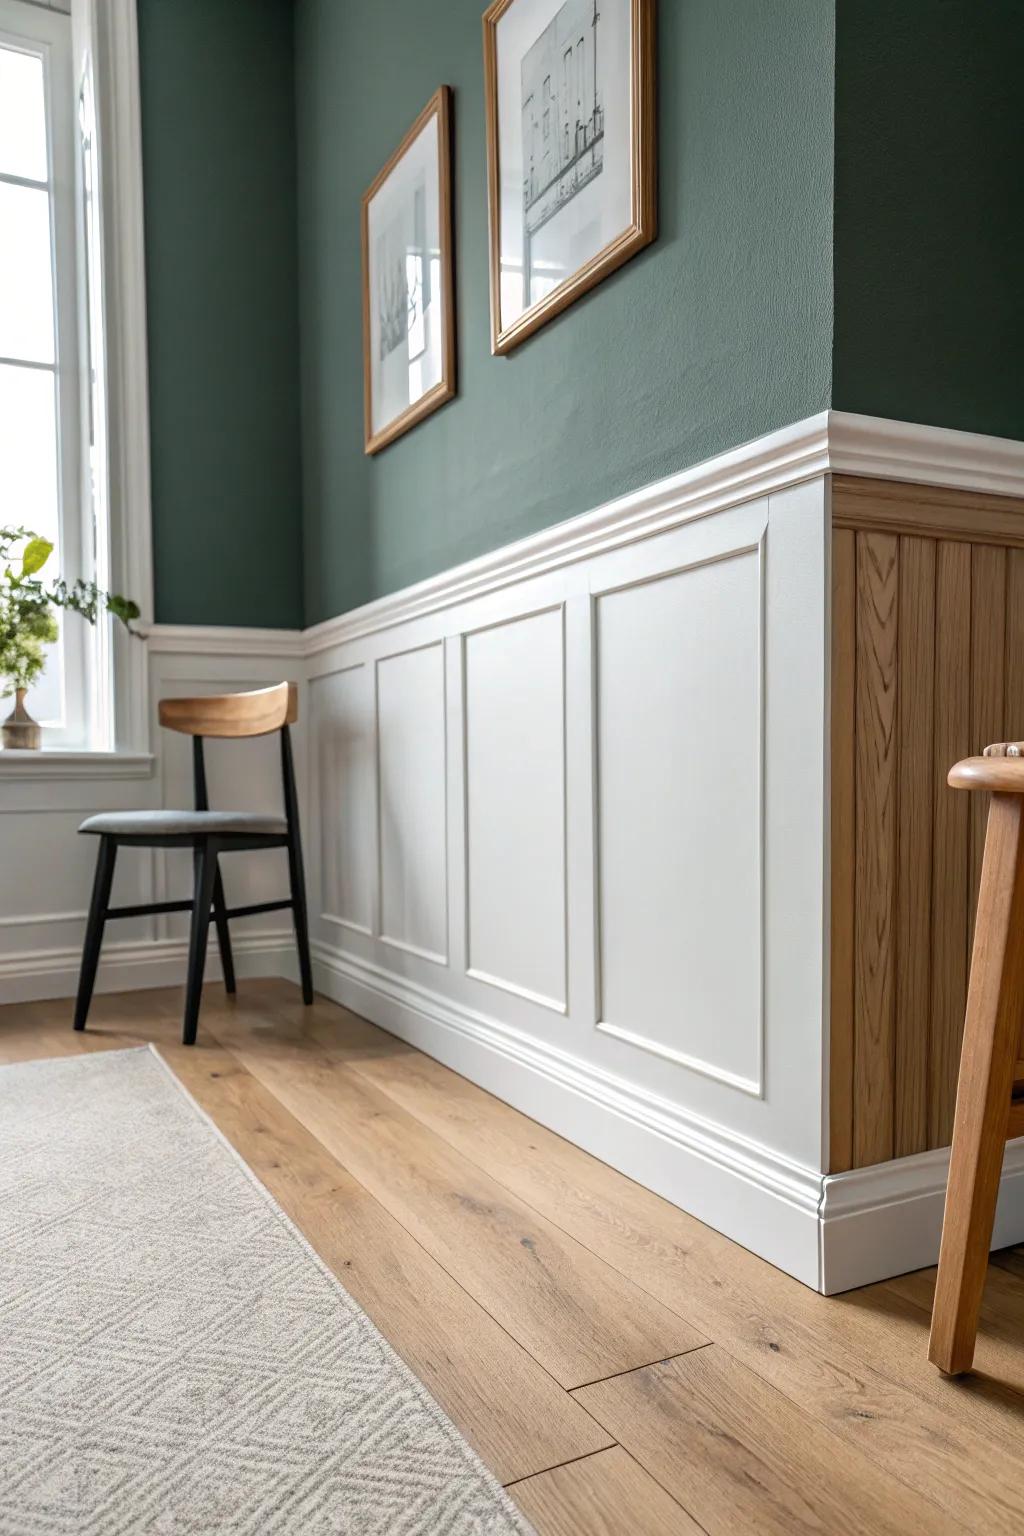
Raised Panel Traditional Look
If you’re craving a formal feel, pair chair rail molding with raised panel wainscoting below. I did this in a dining room makeover once, and it instantly leveled up the whole space even with simple furniture.
These products might be useful:
- Ready-to-Assemble Wainscoting Kit: Transform your walls easily with pre-cut panels that simplify installation and create an immediate, elegant look.
- Primed Chair Rail Molding: Finish the top edge of your wainscoting cleanly with durable molding ready for your choice of paint.
- Paintable Construction Adhesive: Secure your new panels and molding firmly to the wall for a long-lasting, professional-grade hold.
Shiplap or T&G Below the Rail
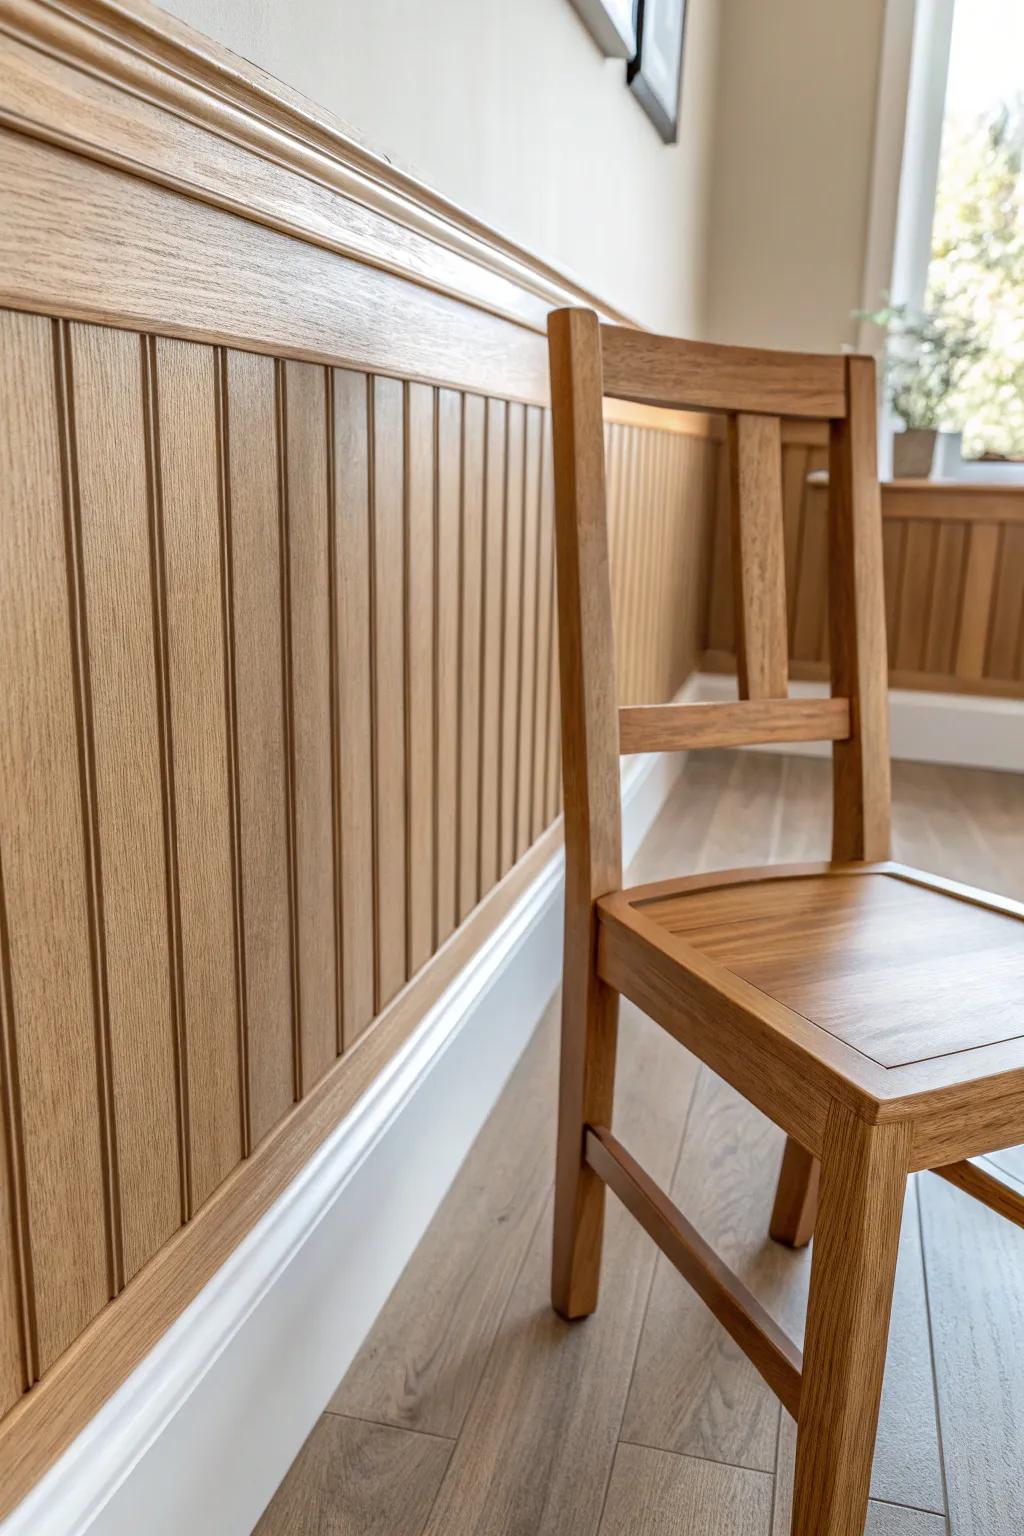
For a relaxed farmhouse style, I run shiplap or tongue-and-groove under the chair rail molding. I’ve found it hides scuffs really well, which is gold in high-traffic rooms.
Useful items to consider:
- Beadboard Paneling Kits: Transform your walls easily with pre-cut paneling kits that add instant texture and classic farmhouse charm.
- Solid Wood Chair Rail Molding: Define your wainscoting project with sturdy wood molding that protects walls and creates a polished transition.
- Brad Nailer Kit: Secure your paneling and trim efficiently with a reliable nail gun designed for detailed woodworking projects.
Monochrome Rail and Wall
Painting the chair rail molding the exact same color as the wall gives a subtle shadow-line effect that I’m honestly obsessed with. I tried it in a small living room and it added depth without chopping the wall visually.
A few things you might like:
- Chair Rail Moulding Kit: Instantly create architectural depth by installing these classic molding strips along your walls before painting them monochrome.
- Self-Adhesive Wall Trim: Skip the nails and professionally frame your room with this easy-to-apply trim that is ready for custom paint.
- Pre-Cut Picture Frame Wainscoting: Add the shadow-box look seen in the photo effortlessly with these pre-sized frames designed for quick installation.


