
Wood slices have that instant rustic charm, and they’re one of my favorite materials to turn into quick, satisfying projects. I’m sharing my go-to crafts with wood slices that I’ve actually made in my shop—starting with the classics and ending with a few “how is that even wood?” ideas.
Wood Slice Wreath With Mixed Sizes
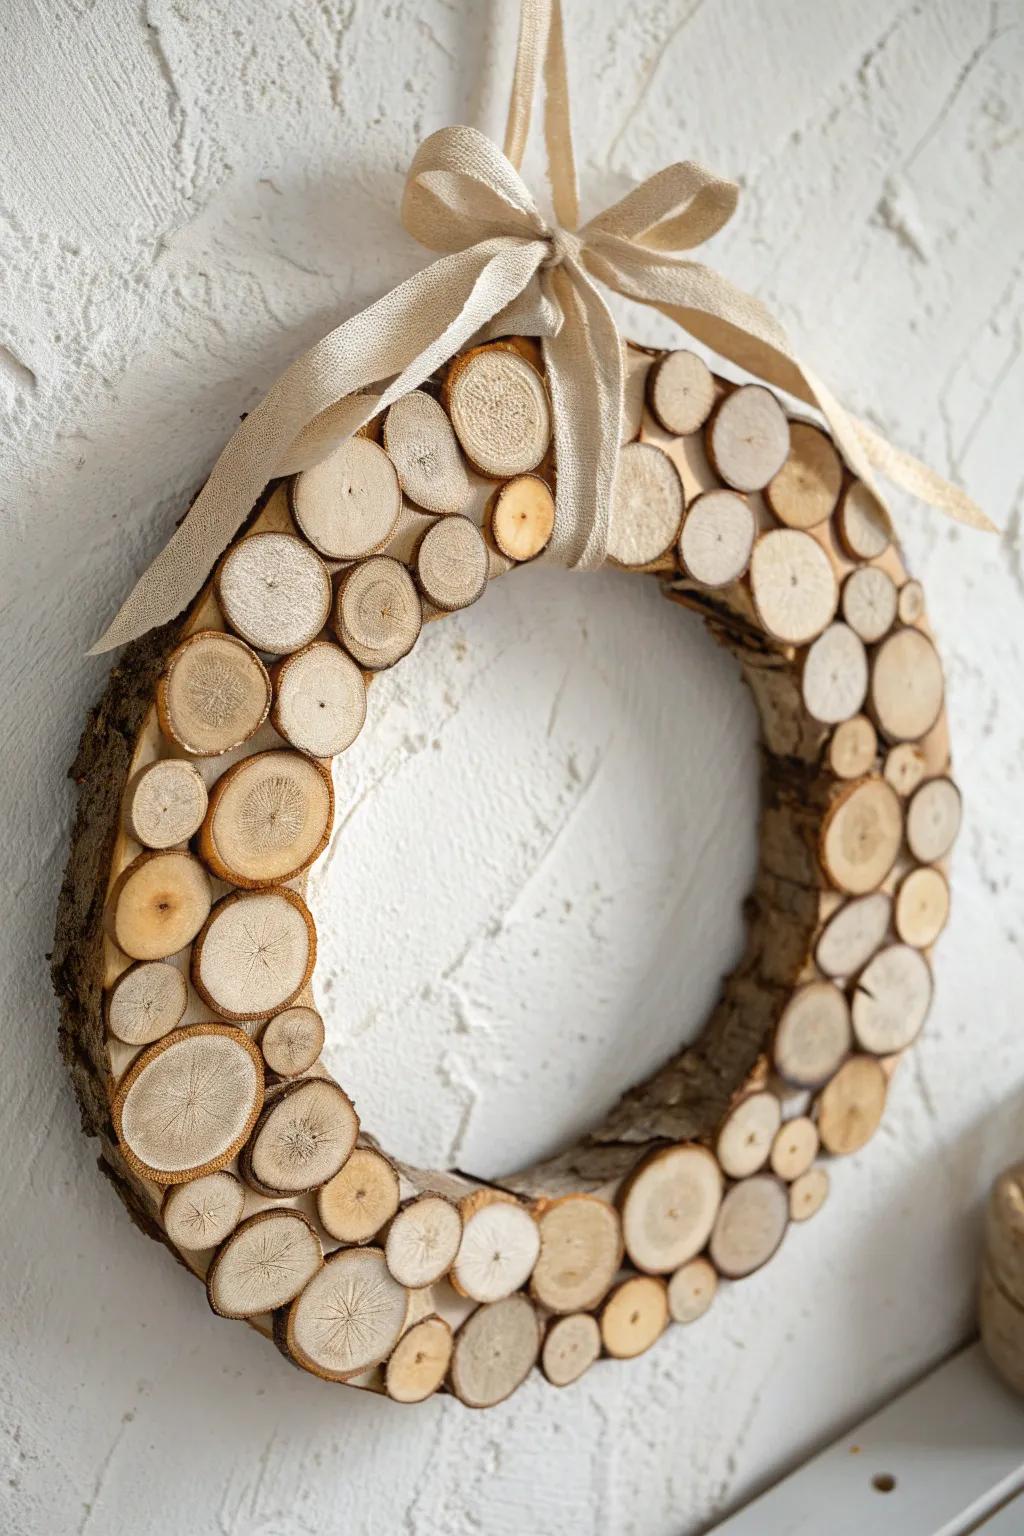
Gluing small rounds into a circle creates a textured wood slice wreath that looks amazing on a plain door or above a mantel. I’ve layered mine with a few darker slices for contrast, and it gives that “found in a forest cabin” vibe.
A few choices to try:
- Mixed Size Wood Slices: Grab a variety of small, pre-dried wood slices to easily create the textured layers for your wreath.
- Foam or Wood Wreath Form: Start your project with a sturdy base to securely glue and arrange your wood rounds.
- Heavy Duty Hot Glue Gun: Ensure your wooden pieces stay permanently attached to the frame with a reliable, high-temperature glue gun.
Simple Wood Slice Coasters
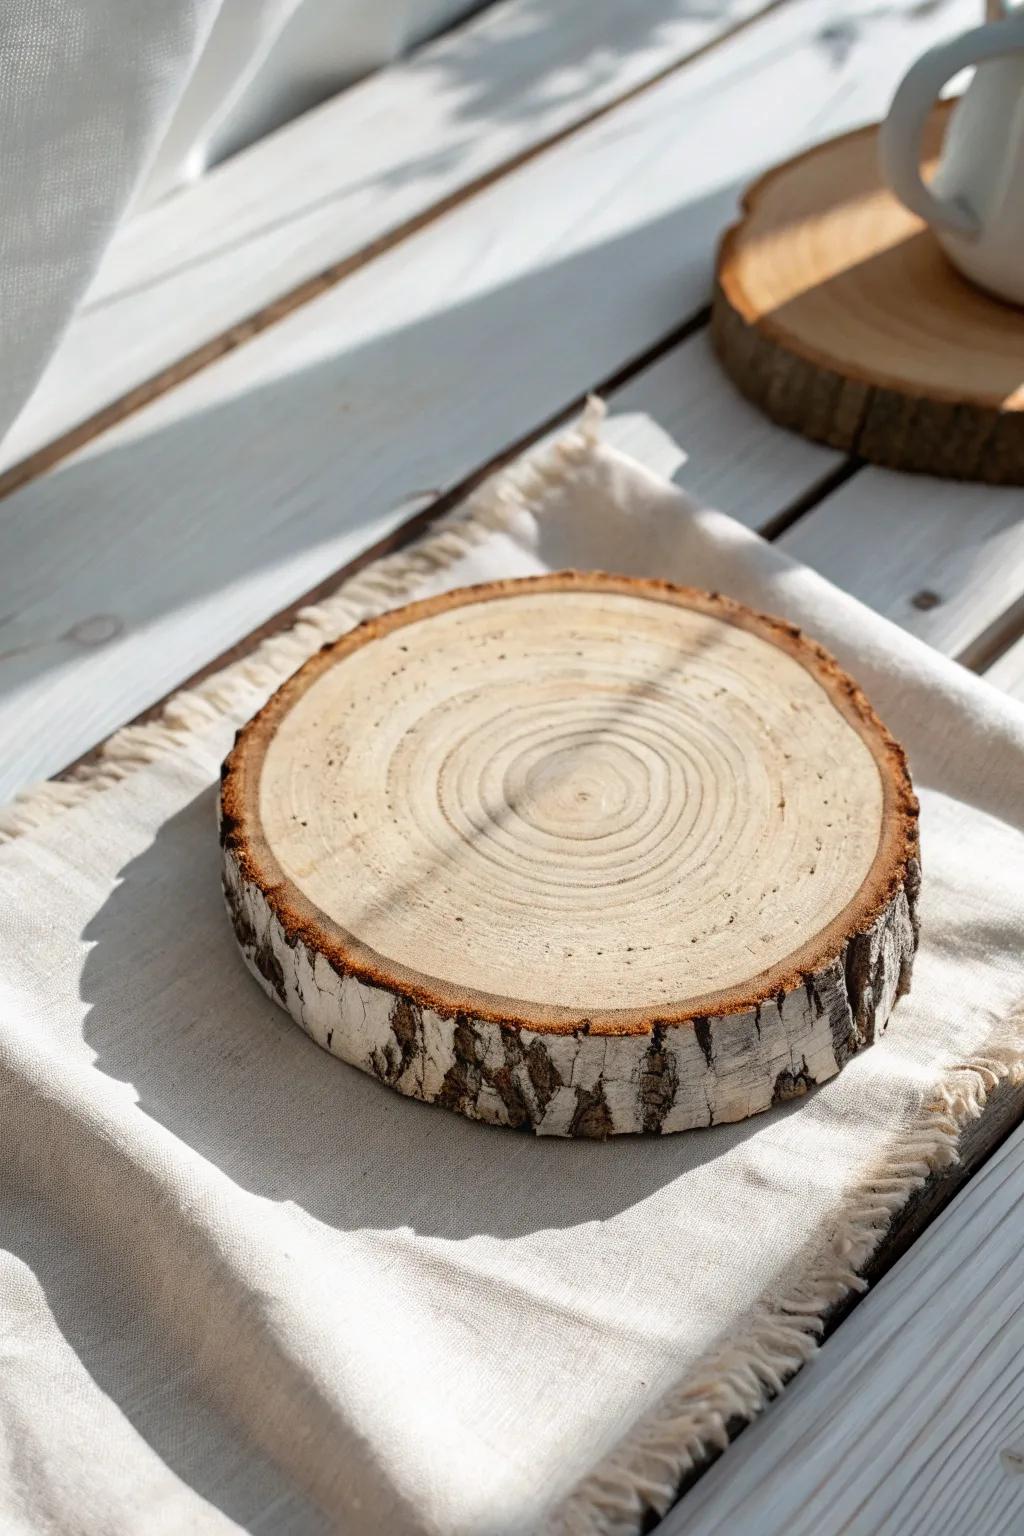
I love making wood slice coasters because you can keep them natural or add a tiny burned-in border for a clean, rustic look. In my workshop, I always finish them with a water-resistant topcoat, and they end up being the gift everyone asks me to make again.
Possibly helpful picks:
- Pre-Drilled Natural Wood Slices: Start your coaster project instantly with ready-to-use wood rounds; perfect for painting, burning, or sealing right away.
- Wood Burning Pyrography Kit: Create that custom burned-in border or personalized design easily with a beginner-friendly wood burning tool set.
- Water-Based Polyurethane Sealer: Protect your finished coasters from moisture rings and stains with a durable, clear, water-resistant protective finish.

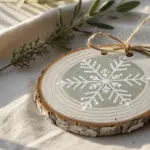
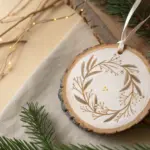
Wood Slice Ornaments With Twine

When I need an easy win, I turn small rounds into wood slice ornaments and hang them with twine for that cozy cabin vibe. I’ve painted simple stars and trees on mine, but honestly the prettiest ones are just sanded smooth with the grain showing.
Might be a good match:
- Pre-Drilled Wood Slices with Bark: Start your project easily with ready-to-use wood rounds that already feature drilled holes for quick hanging.
- Natural Jute Twine Spool: Achieve that rustic, cozy cabin aesthetic by using sturdy natural fiber twine for all your ornament loops.
- Fine Grit Sanding Sponges: Prepare your wood surface perfectly for paint or display by smoothing out rough grain with flexible sanding blocks.


Personalized Place Card Holders
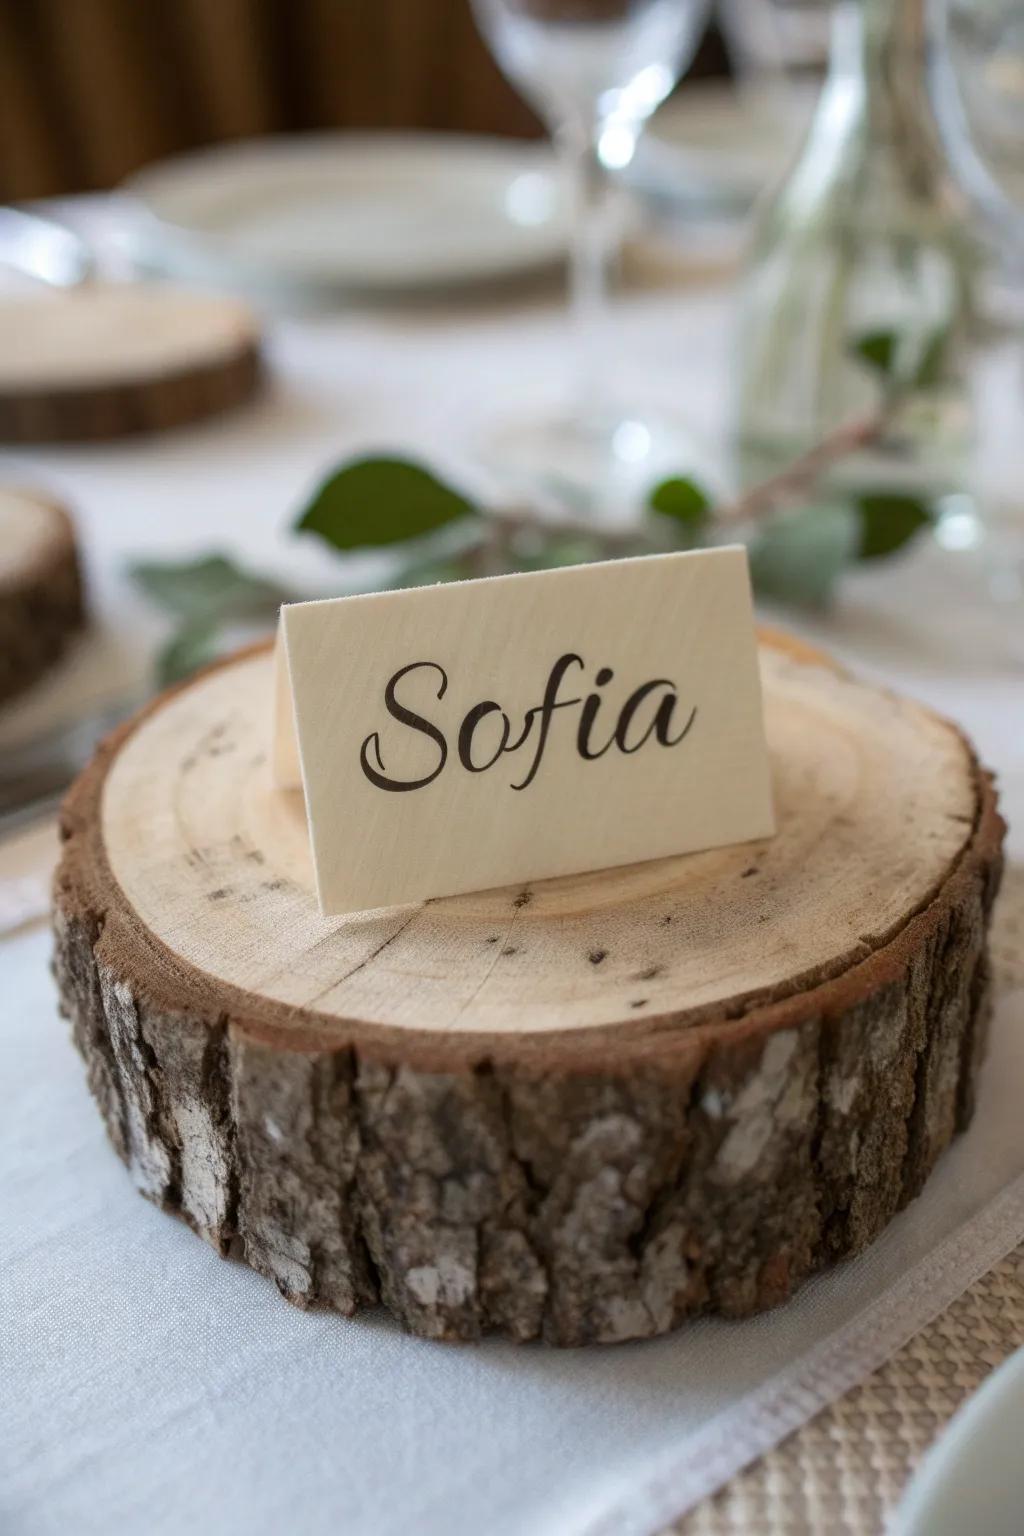
A single slit cut into a thicker round makes adorable wood slice place card holders, and they look so intentional on a table. I’ve made sets for dinners using mismatched slices, and the imperfect bark edges are what makes them feel special.
Useful items to consider:
- Unfinished Natural Wood Slices (3-4 inch): Choose these rustic bases to create the perfect foundation for your personalized display, highlighting natural textures.
- Small Coping Saw or Hand Saw: Use a precise hand saw to easily cut the essential slit needed to hold your place cards securely.
- Blank Place Cards or Cardstock: Select sturdy cardstock to hand-letter names, adding that final customized touch to your charming rustic table setting.
Rustic Wood Slice Chargers
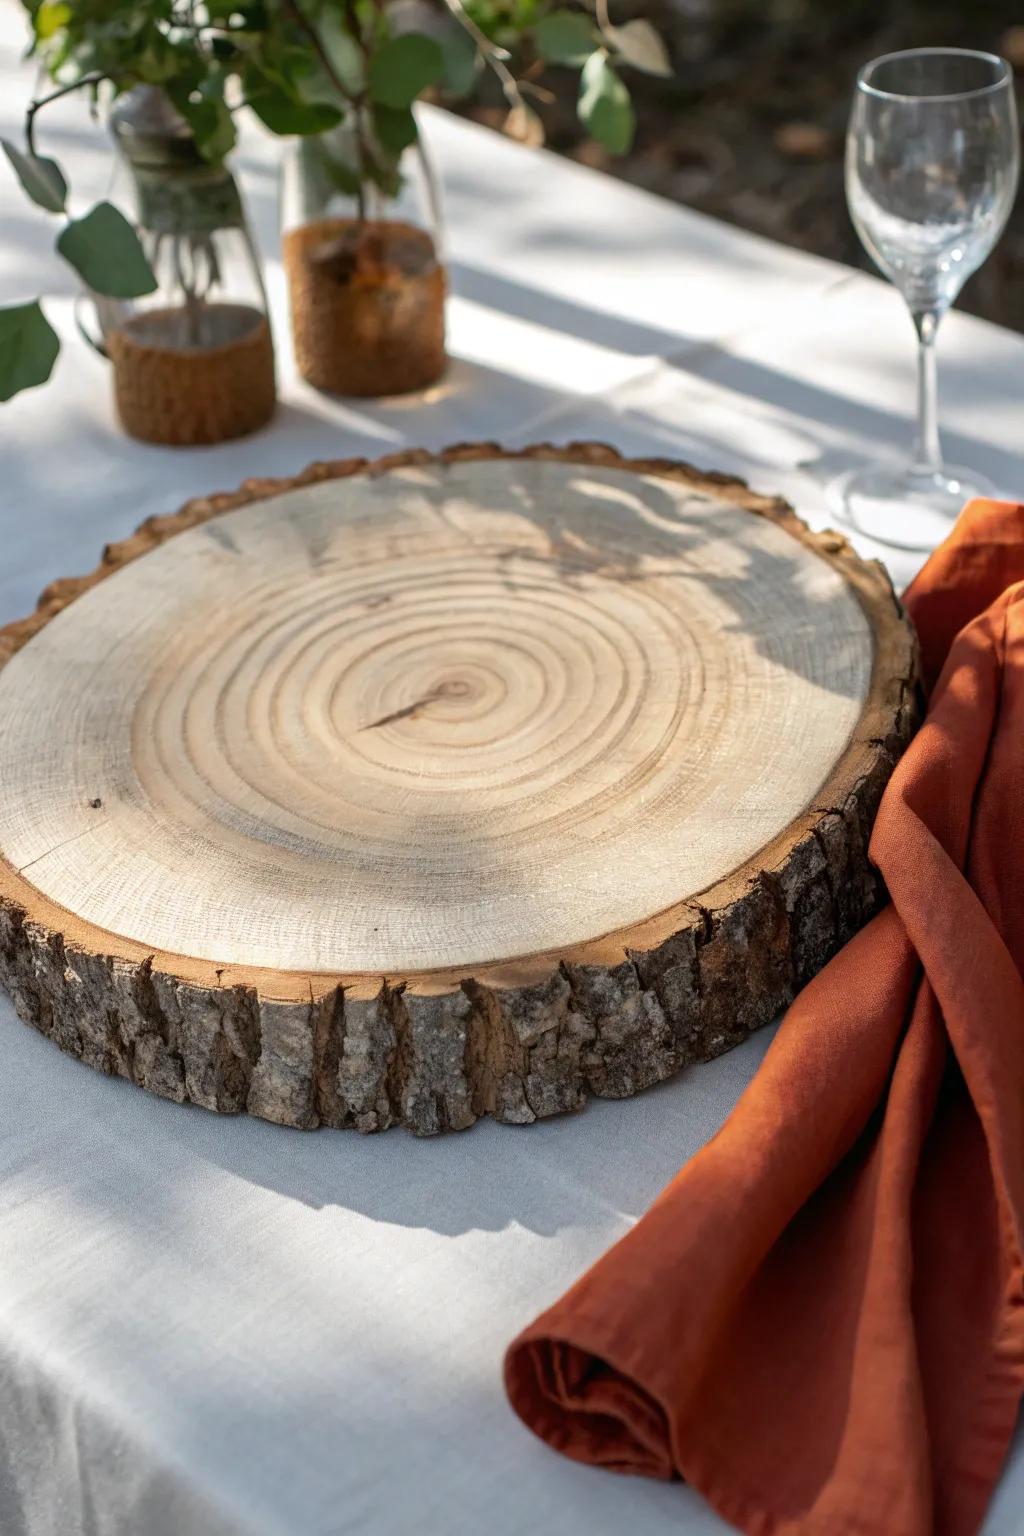
For gatherings, I use larger rounds as wood slice chargers under plates, and they instantly warm up the whole tablescape. The first time I tried it, I kept the finish matte so they looked natural instead of shiny and “crafty.”
May just do the trick:
- Large Wood Slices (11-13 inches): Secure ideal bases for your chargers by choosing pre-dried wood rounds sized perfectly for dinner plates.
- Matte Clear Wood Finish: Protect your chargers from food stains while maintaining that non-glossy, natural look mentioned in the project.
- Fine Grit Sandpaper Assortment: Smooth out rough surfaces before sealing to ensure plates sit level without damaging the rustic bark edges.
Mini Wood Slice Magnets
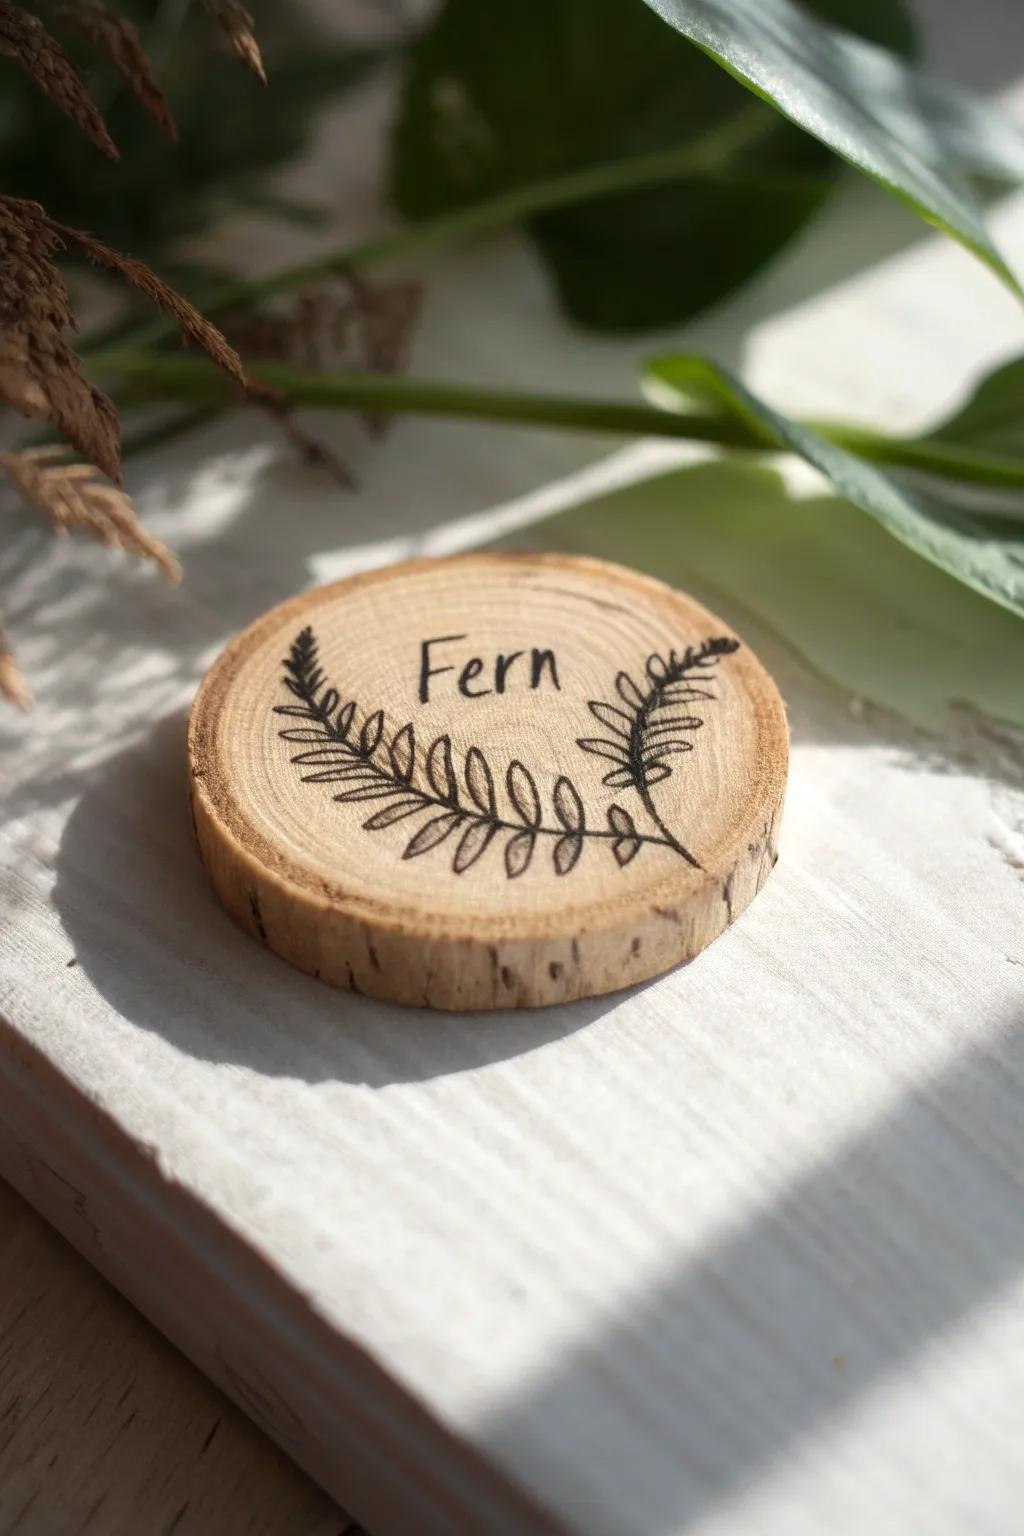
Mini rounds make the cutest wood slice magnets, especially with a simple initial, tiny landscape, or little botanical sketch. I’ve made these from offcuts after bigger projects, and they’re my favorite “use every scrap” win.
Items that may come in handy:
- Small Round Wood Slices: Grab these pre-cut natural rounds to ensure uniform shapes for your magnet designs without needing a saw.
- Wood Burning Pyrography Kit: Create permanent, rustic designs like the fern shown here by using this beginner-friendly heated tool.
- Strong Circle Magnets: Turn your finished wood coins into functional decor by gluing these powerful adhesive magnets to the back.

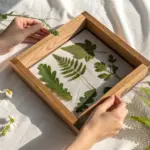
Photo Transfer Keepsake Slices
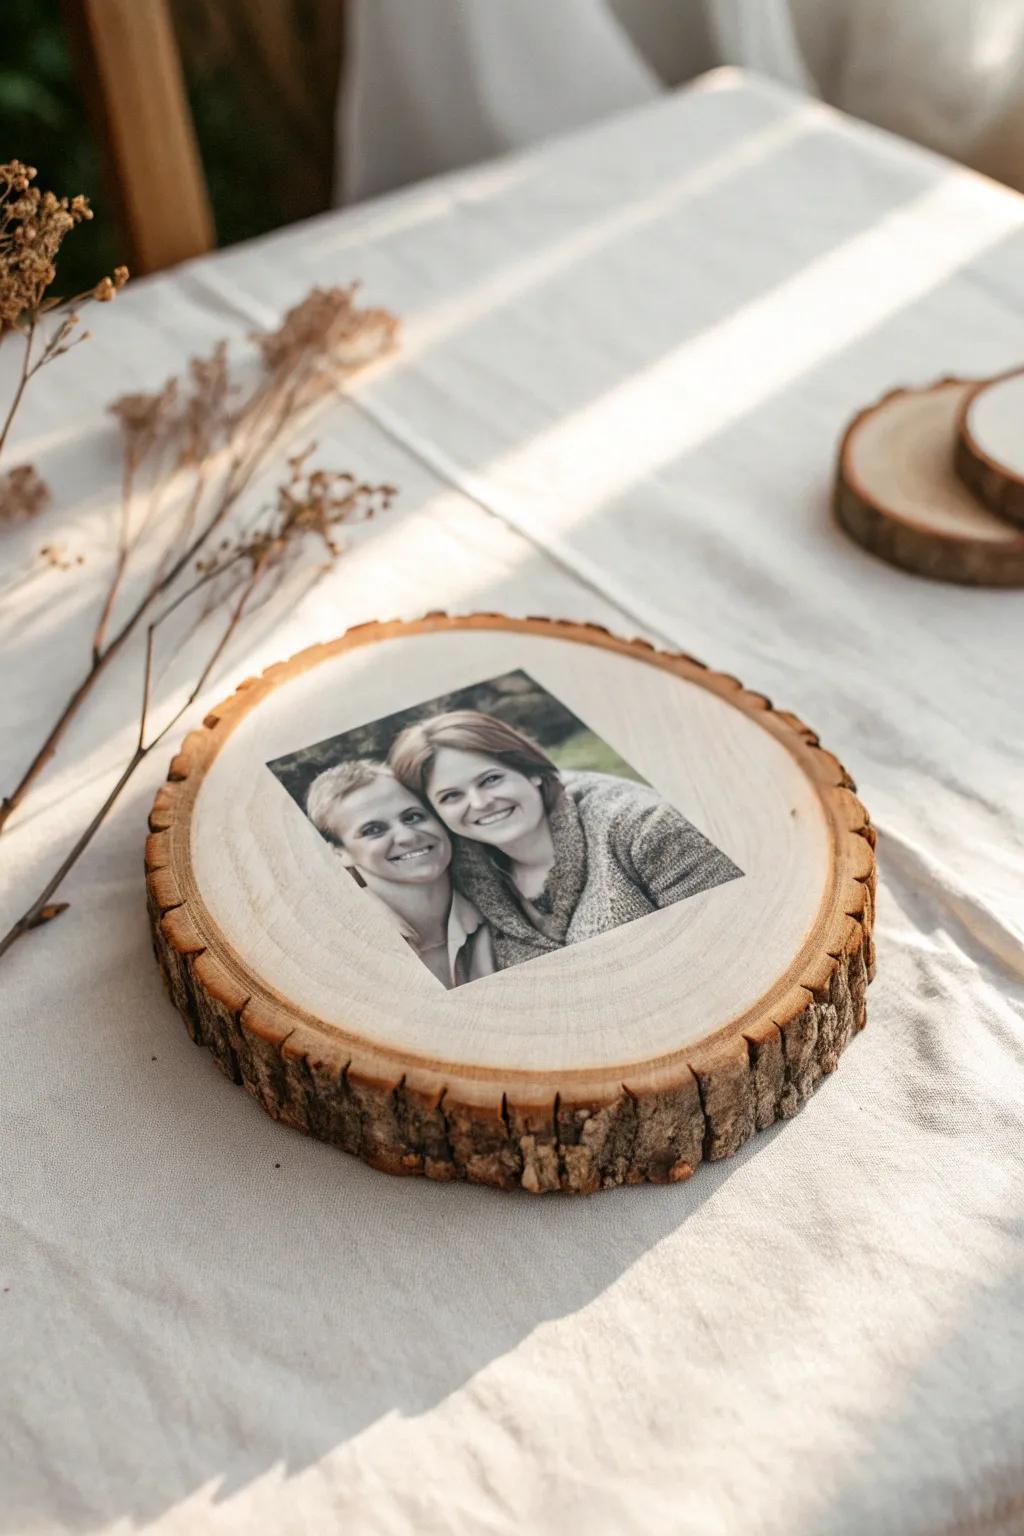
Turning a round into a wood slice photo transfer is one of those projects that feels like magic when the image appears in the grain. I’ve made them for family milestones, and the soft, slightly weathered look always beats a glossy print.
You might like:
- Unfinished Natural Wood Slices: Start your project with smooth, pre-sanded wood rounds perfect for transferring photos to create rustic keepsakes.
- Photo Transfer Gel Medium: Use this essential medium to seamlessly transfer your printed images directly onto wood surfaces for lasting results.
- Foam Brush Set: Apply your transfer medium evenly and smoothly with these disposable brushes to ensure a clean photo application.
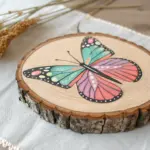
Wood Slice Wall Art Rounds
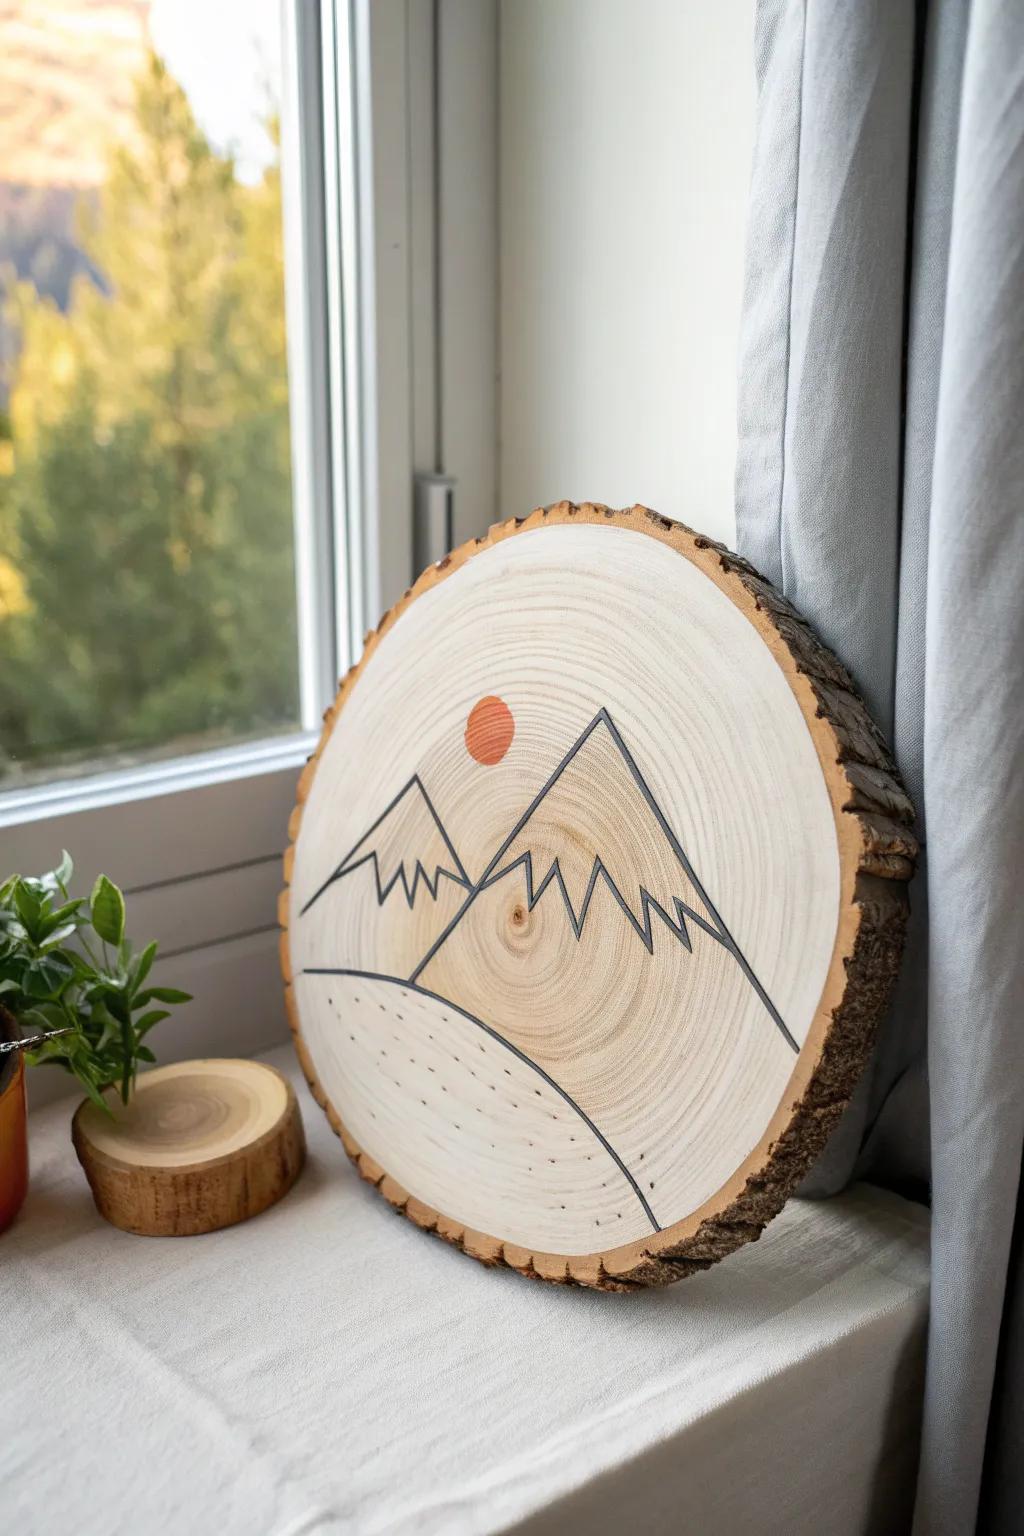
I like painting simple mountain lines or minimalist florals on wood slice wall art, then hanging them as a little cluster. In my studio, I mix different diameters so it feels collected over time instead of matchy-matchy.
Products that could assist:
- Large Natural Wood Slices (Unfinished): Start your art project with a sturdy, smooth base perfect for painting mountain scenes or minimalist designs.
- Fine Point Acrylic Paint Pens: Draw clean, precise lines for your mountain outlines and details with these easy-to-control paint markers.
- Sawtooth Picture Hangers: Securely display your finished wood slice art on the wall with this simple and reliable hanging hardware.
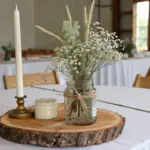
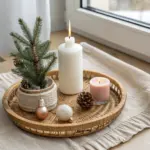
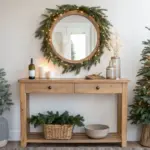
Wood Slice Candle Display Base

A wide round makes a perfect wood slice centerpiece base for candles, little vases, and seasonal accents. I’ve styled mine with dried greenery and kept the bark edge intact, and it always looks like a fancy store display with almost no effort.
Check these products out:
- Large Wood Slices with Bark Edge: Create the perfect rustic foundation for your centerpieces by selecting large, natural wood rounds with raw bark edges.
- Unscented White Pillar Candles: Add a classic warm glow to your display with simple, long-burning white pillar candles that suit any decor.
- Dried Eucalyptus and Bunny Tails Bundle: Finish your arrangement with a mix of dried greenery and soft textures for an effortlessly styled, natural look.
Wood Slice Pumpkin and Snowman Reversible
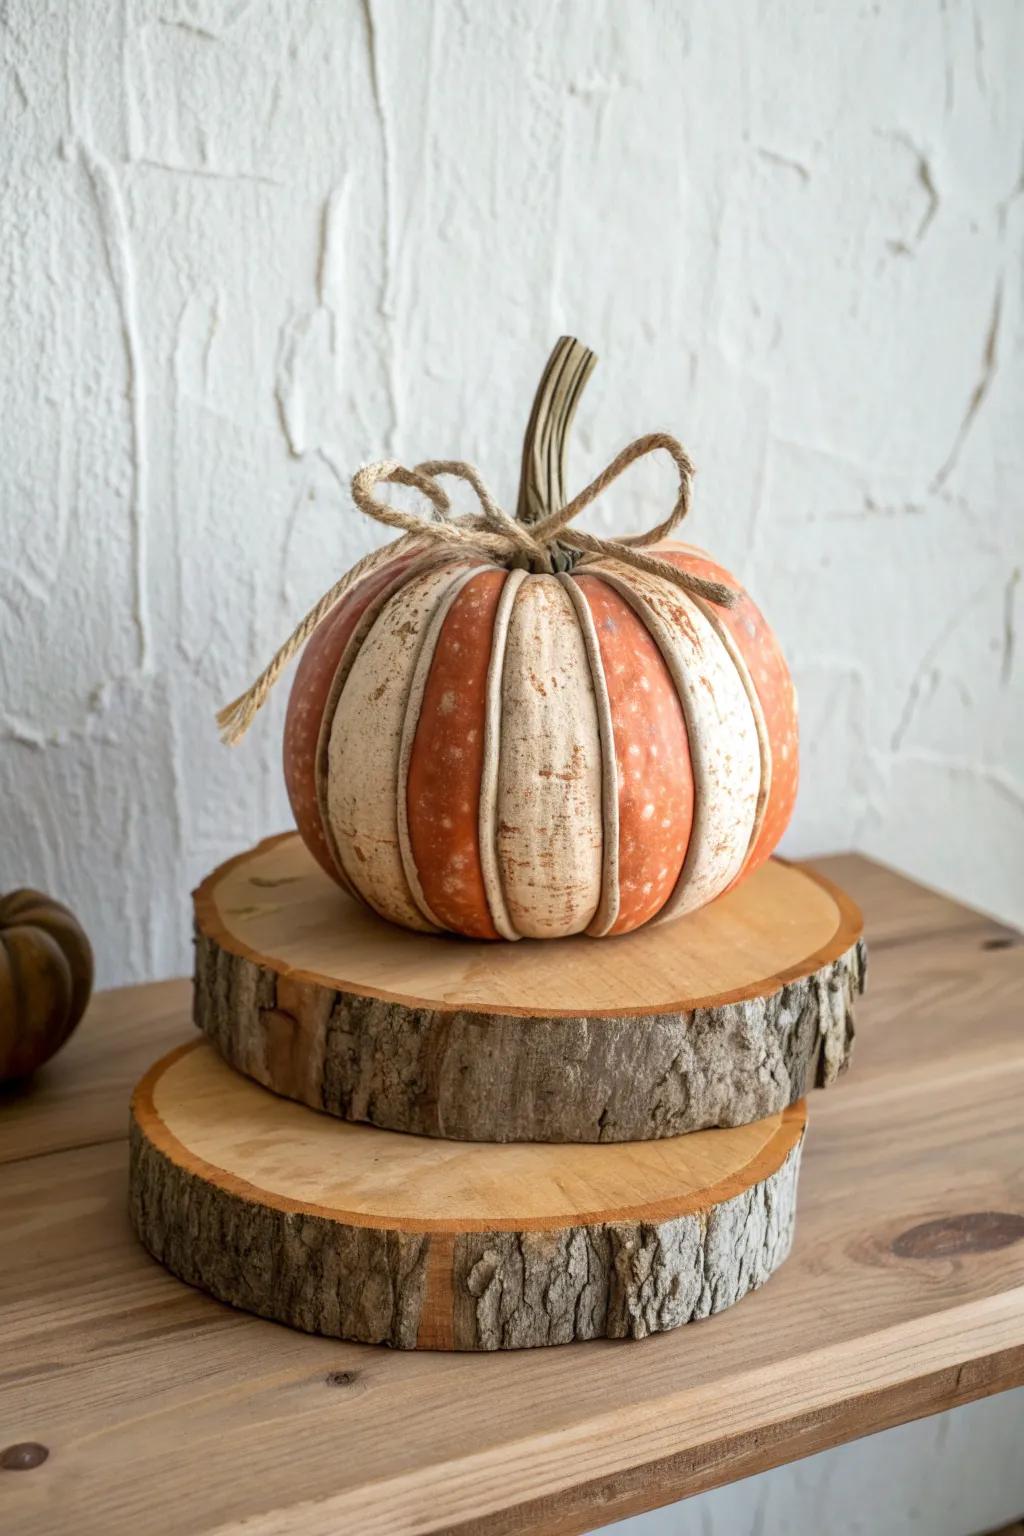
This is a classic in my fall-to-winter lineup: a stacked wood slice pumpkin on one side and a wood slice snowman on the other. I made one for my entryway and love flipping it around instead of storing a whole second decoration.
These products might be useful:
- Round Wood Slices with Bark (Large): Choose sturdy wood slices to create the base and body of your reversible seasonal decoration.
- Acrylic Craft Paint Set: Use vibrant orange and classic white paints to bring your pumpkin and snowman characters to life.
- Jute Twine or Burlap Ribbon: Add a rustic finishing touch to your pumpkin stem or snowman scarf with natural twine.
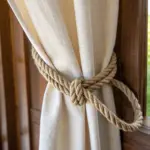
Wood Slice Napkin Rings
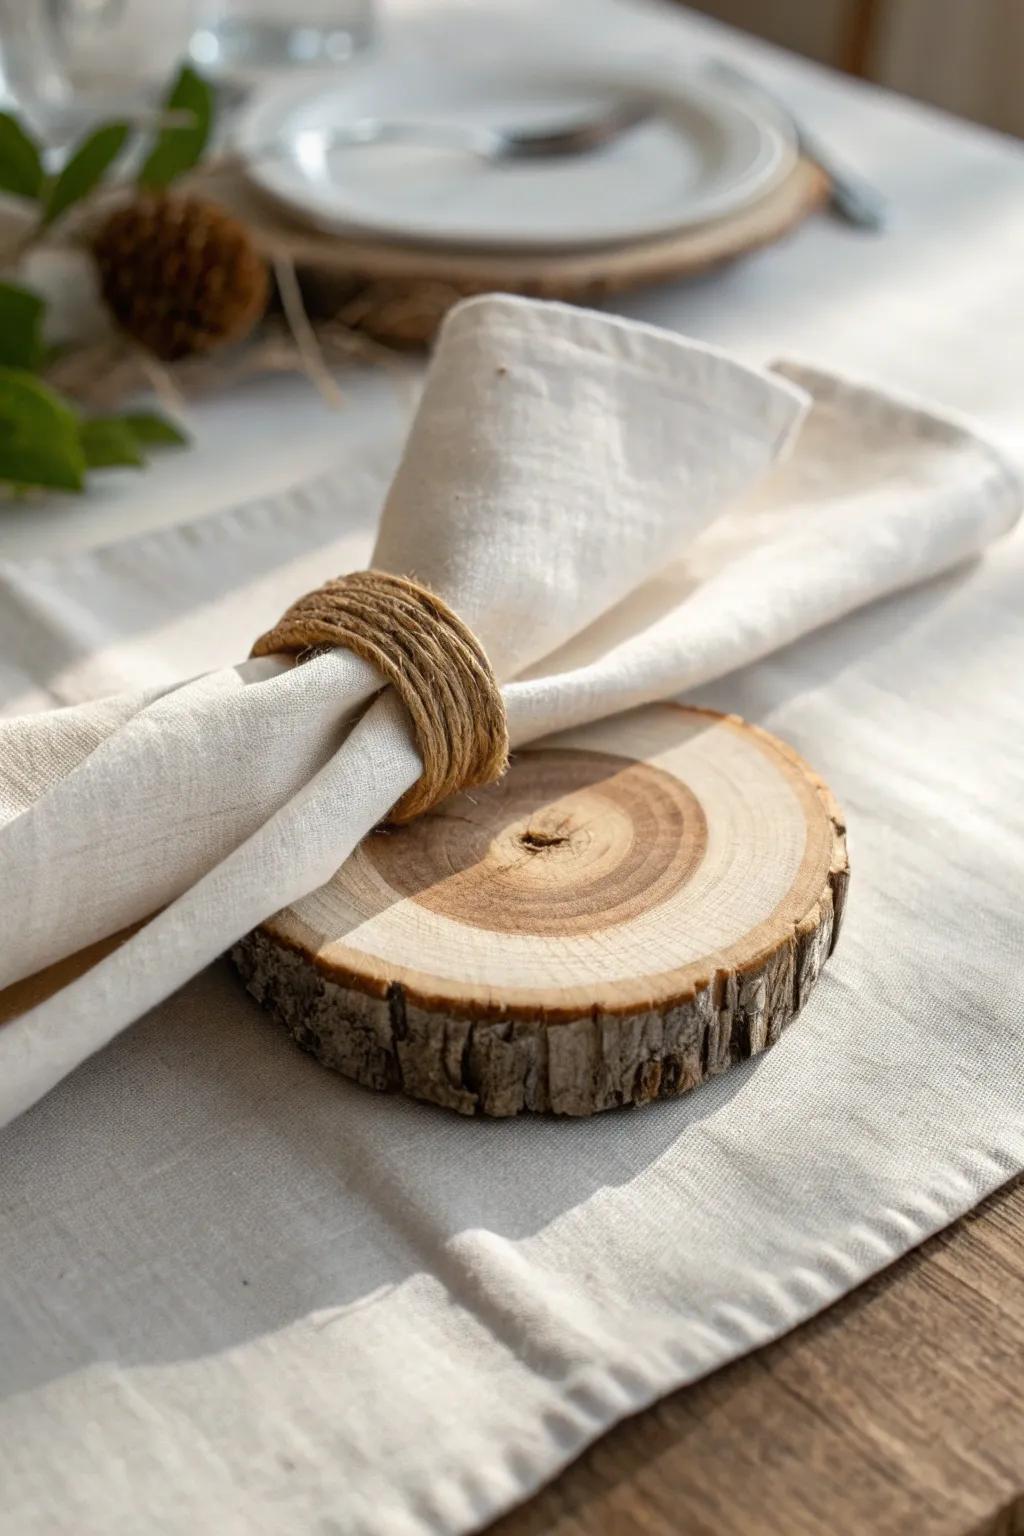
I’ve made wood slice napkin rings by attaching a simple loop to the back, and they instantly make even paper napkins feel intentional. The trick I use is choosing slices with similar thickness so the set looks clean on the table.
Maybe worth checking out:
- Small Pre-Drilled Wood Slices Bulk: Choose these uniform wood rounds to create the focal point for your rustic napkin ring set.
- Natural Jute Twine or Rope: Wrap this durable twine around the napkin or glue it to the wood for a textured loop.
- Heavy Duty Hot Glue Gun Kit: Securely attach your wood slices to the napkin loops or rings with this essential crafting tool.
Wood Slice Desk Calendar Stand
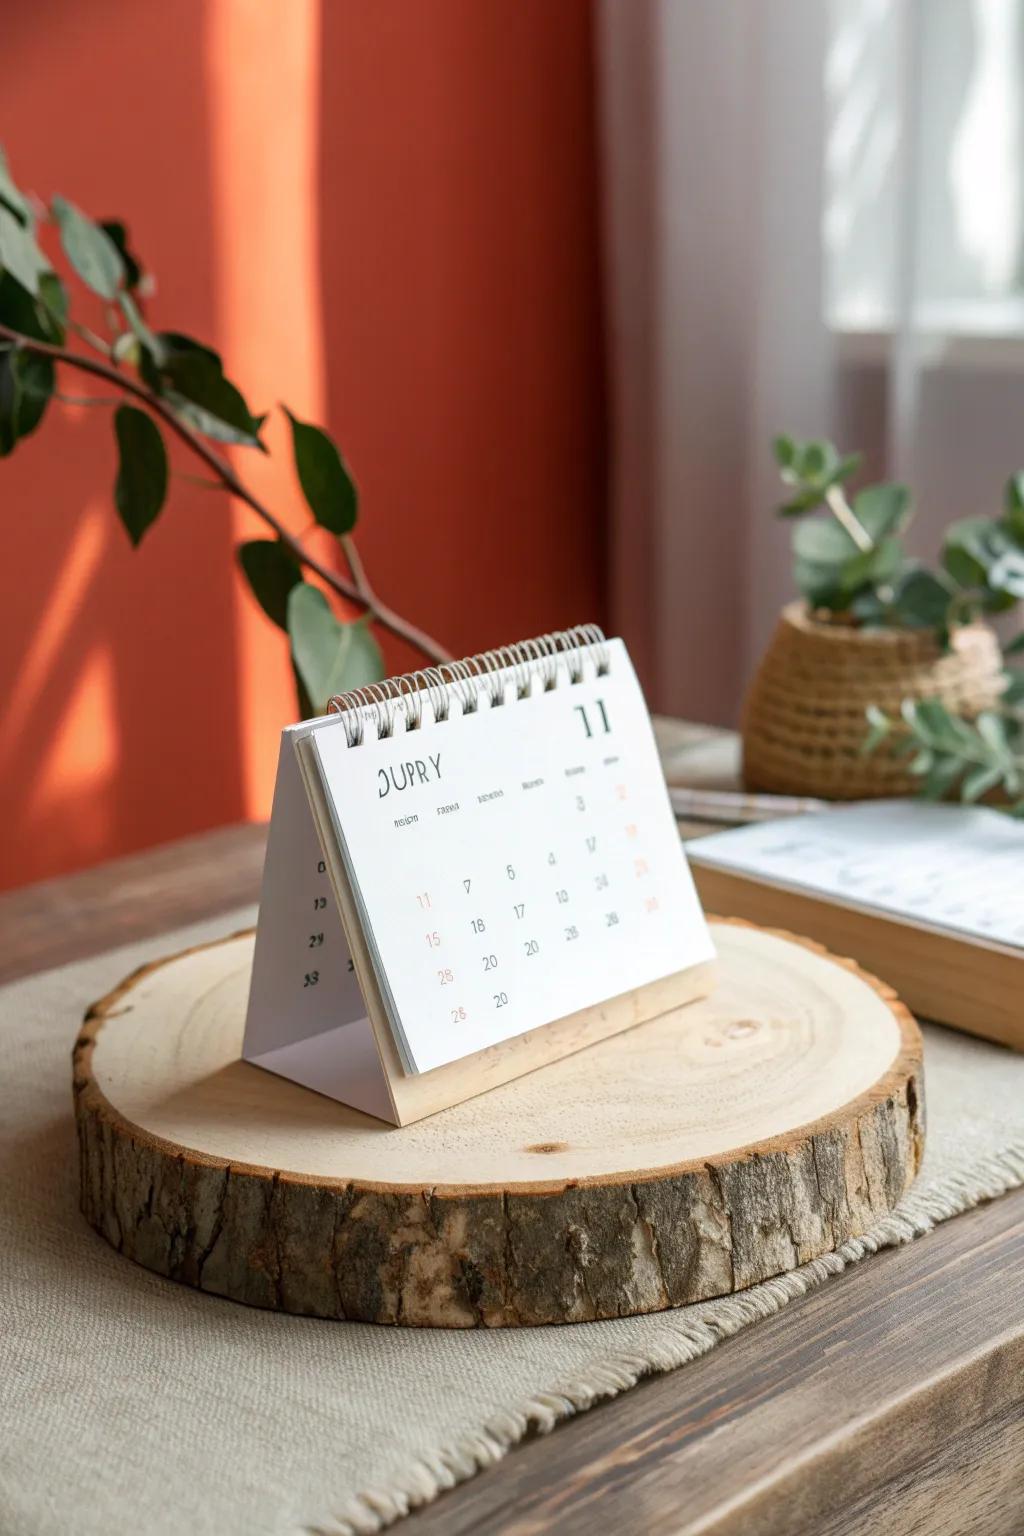
Cut a shallow groove and you’ve got a sturdy wood slice calendar holder for a desk or kitchen counter. I keep one by my workbench for notes and sketches, and it’s way prettier than taped paper flopping around.
Consider these options:
- Large Wood Slices with Bark: Choose a thick, sturdy wood slice to serve as the perfect rustic base for your custom calendar stand.
- Mini Desk Calendar Refills: Pick up a simple, compact calendar or note cards to place inside the groove of your wood slice.
- Wood Carving Knife Set: Use these tools to carefully carve the precise groove needed to hold your calendar upright and secure.
Wood Slice House Number Plaque
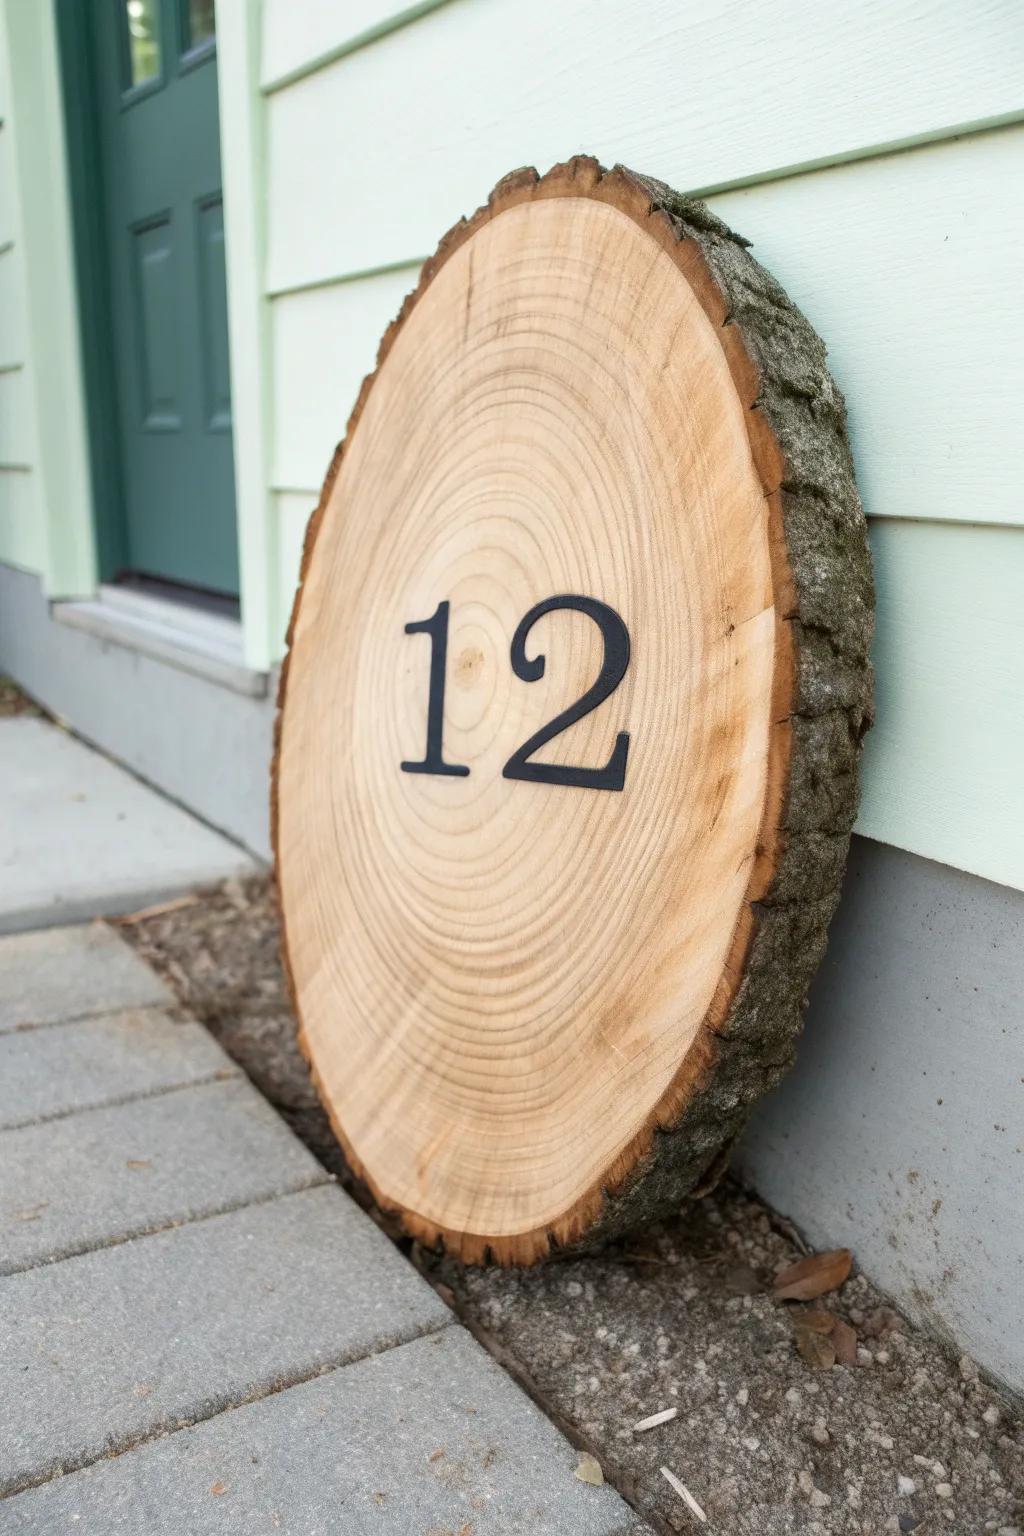
A big round becomes a bold wood slice house number sign, especially if you highlight the grain with a light stain. I made one for a friend and sealed it well, and it’s held up beautifully while still looking natural.
Try these:
- Large Wood Slices with Bark (Oval or Round): Start your project with a sturdy, pre-dried wood slice that provides a rustic canvas for your home address.
- Floating Modern House Numbers (Black): Create high contrast and easy visibility by attaching these mounted metal numbers directly to the wood surface.
- Exterior Wood Sealer or Varnish: Protect your finished sign from rain and sun damage to ensure the wood grain stays beautiful longer.
Wood Slice Mirror Frame
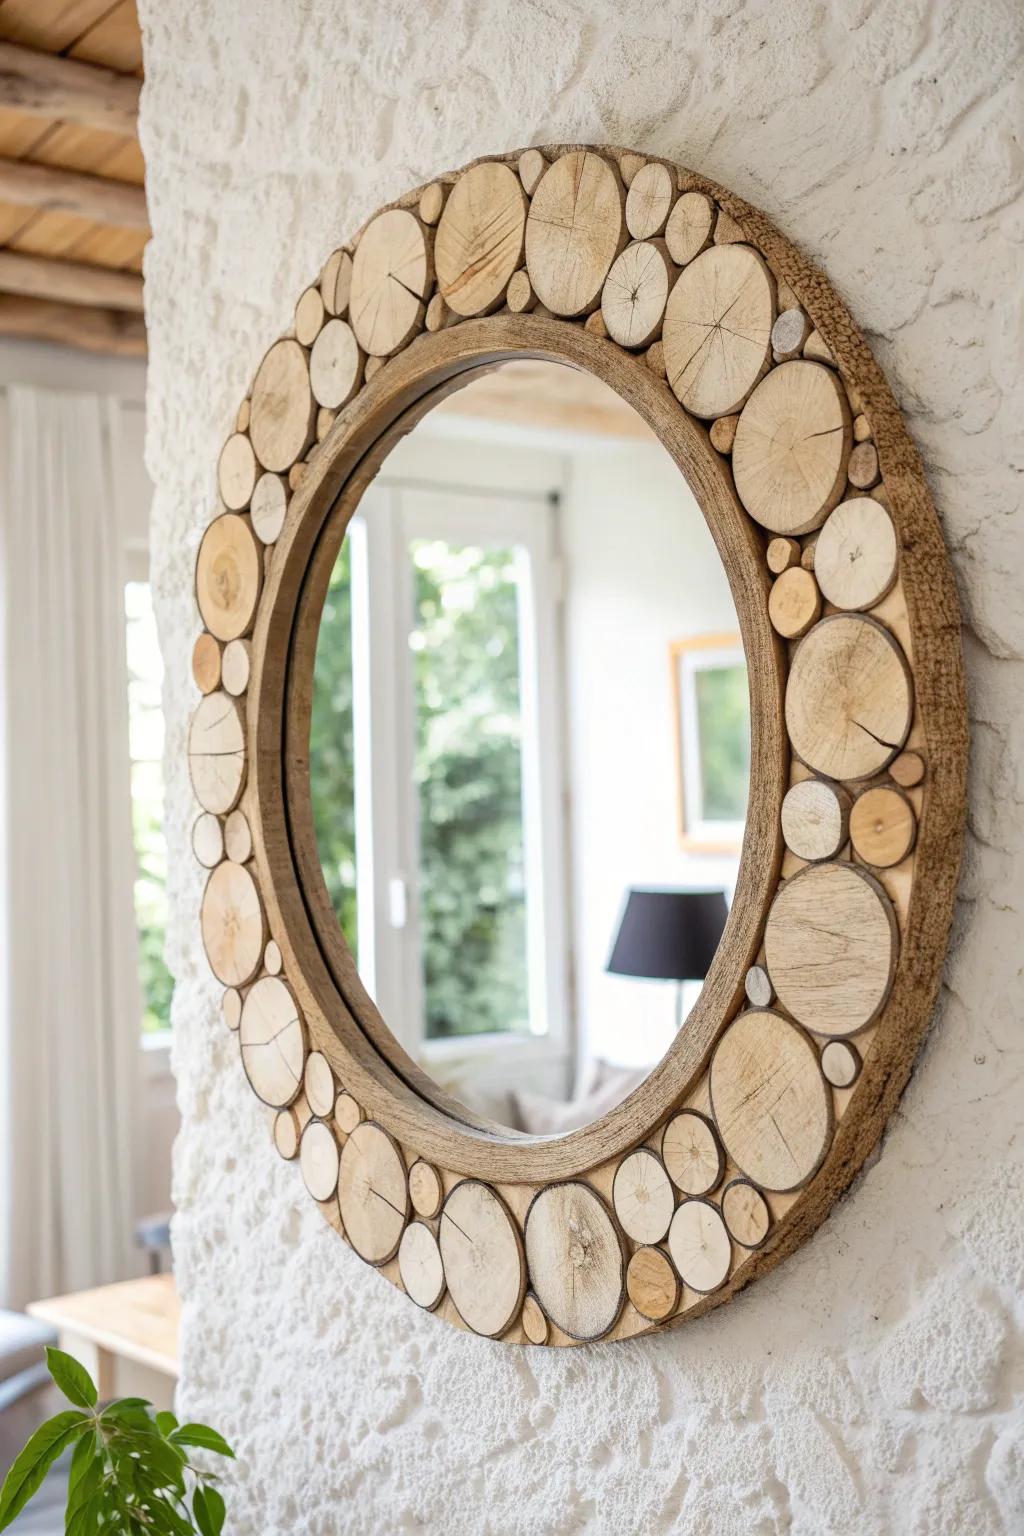
Framing a mirror with small rounds gives you a high-impact wood slice mirror that feels rustic but still polished. I’ve done this with a mix of slice sizes, and that uneven texture is what makes people stop and stare.
You might give these a try:
- Assorted Small Wood Slices: Grab a variety pack of small natural wood rounds to create that textured, organic layered look effortlessly.
- Round Frameless Mirror: Start your project with a simple, sturdy round mirror base perfect for adhering your decorative wood pieces.
- Heavy-Duty Construction Adhesive: Ensure your wood slices stay securely attached to the frame with a strong, reliable bonding adhesive.
Textured Wood Slice Vase Wrap
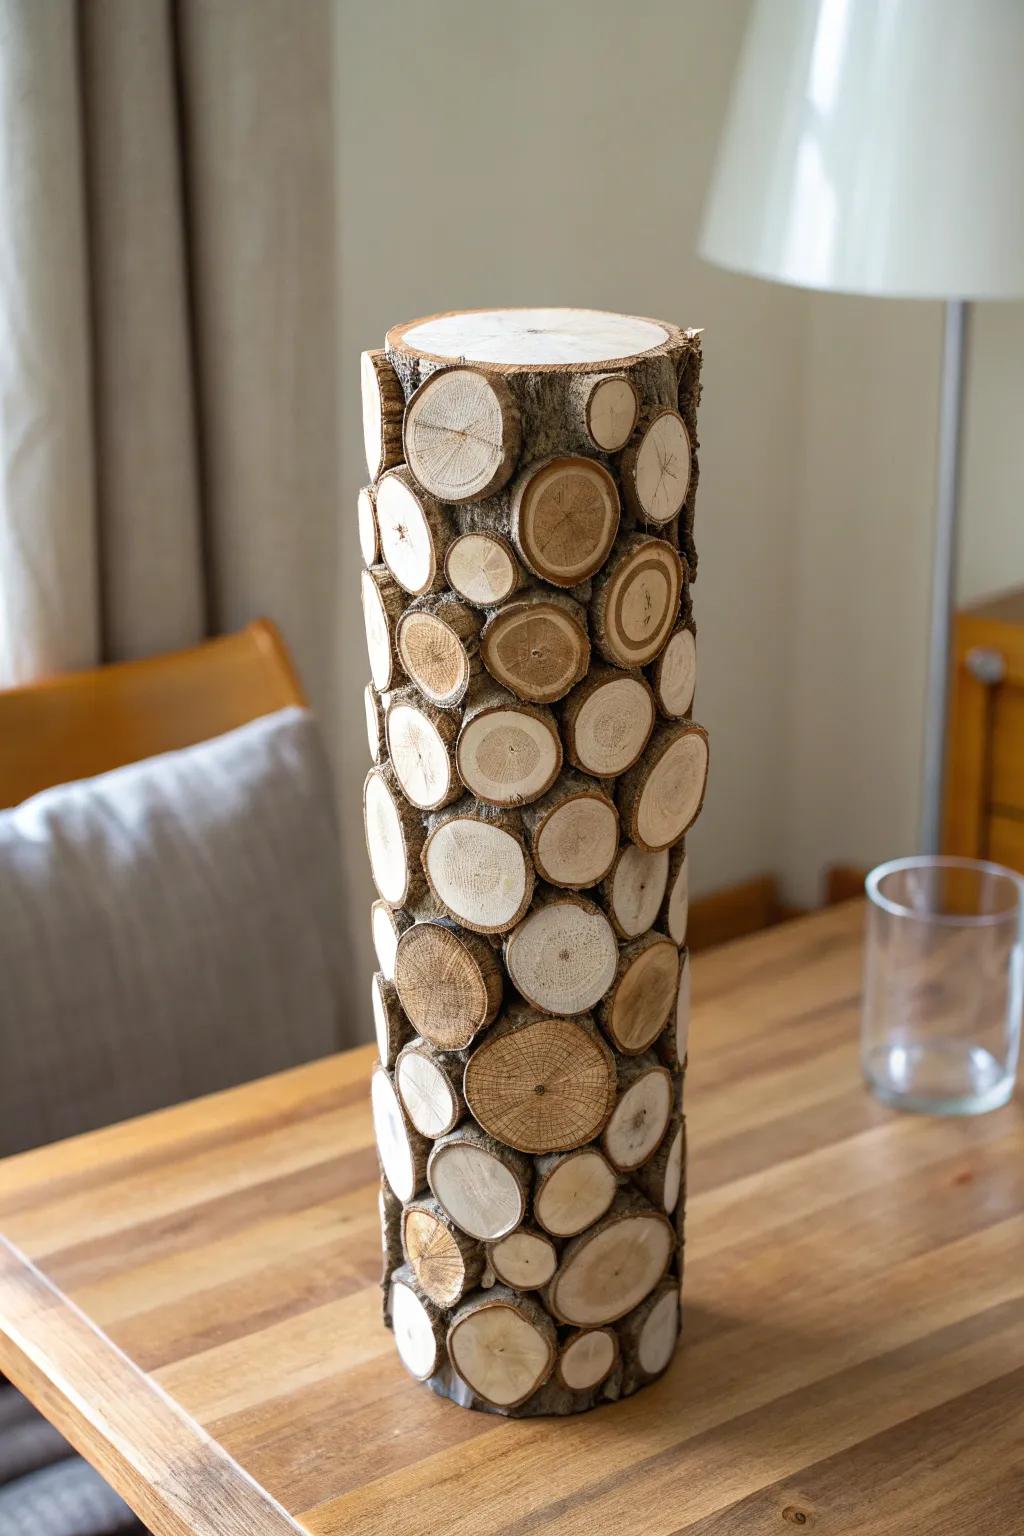
One of my favorite “wow” projects is gluing mini rounds all around a container to create a wood slice vase with tons of texture. I tried it with mixed bark-on slices, and the finished piece looked like a tiny log cabin for flowers.
A few helpful options:
- Assorted Wood Slices: Grab a variety pack of wood slices in mixed sizes to easily create that layered, textured look.
- Clear Cylinder Vase: Use a sturdy glass or acrylic cylinder as your base structure to glue the wood rounds onto.
- Heavy-Duty Hot Glue Gun: Ensure your wood pieces stay securely attached to the smooth vase surface with high-temp adhesive.
Resin Inlay Wood Slice Wall Clock
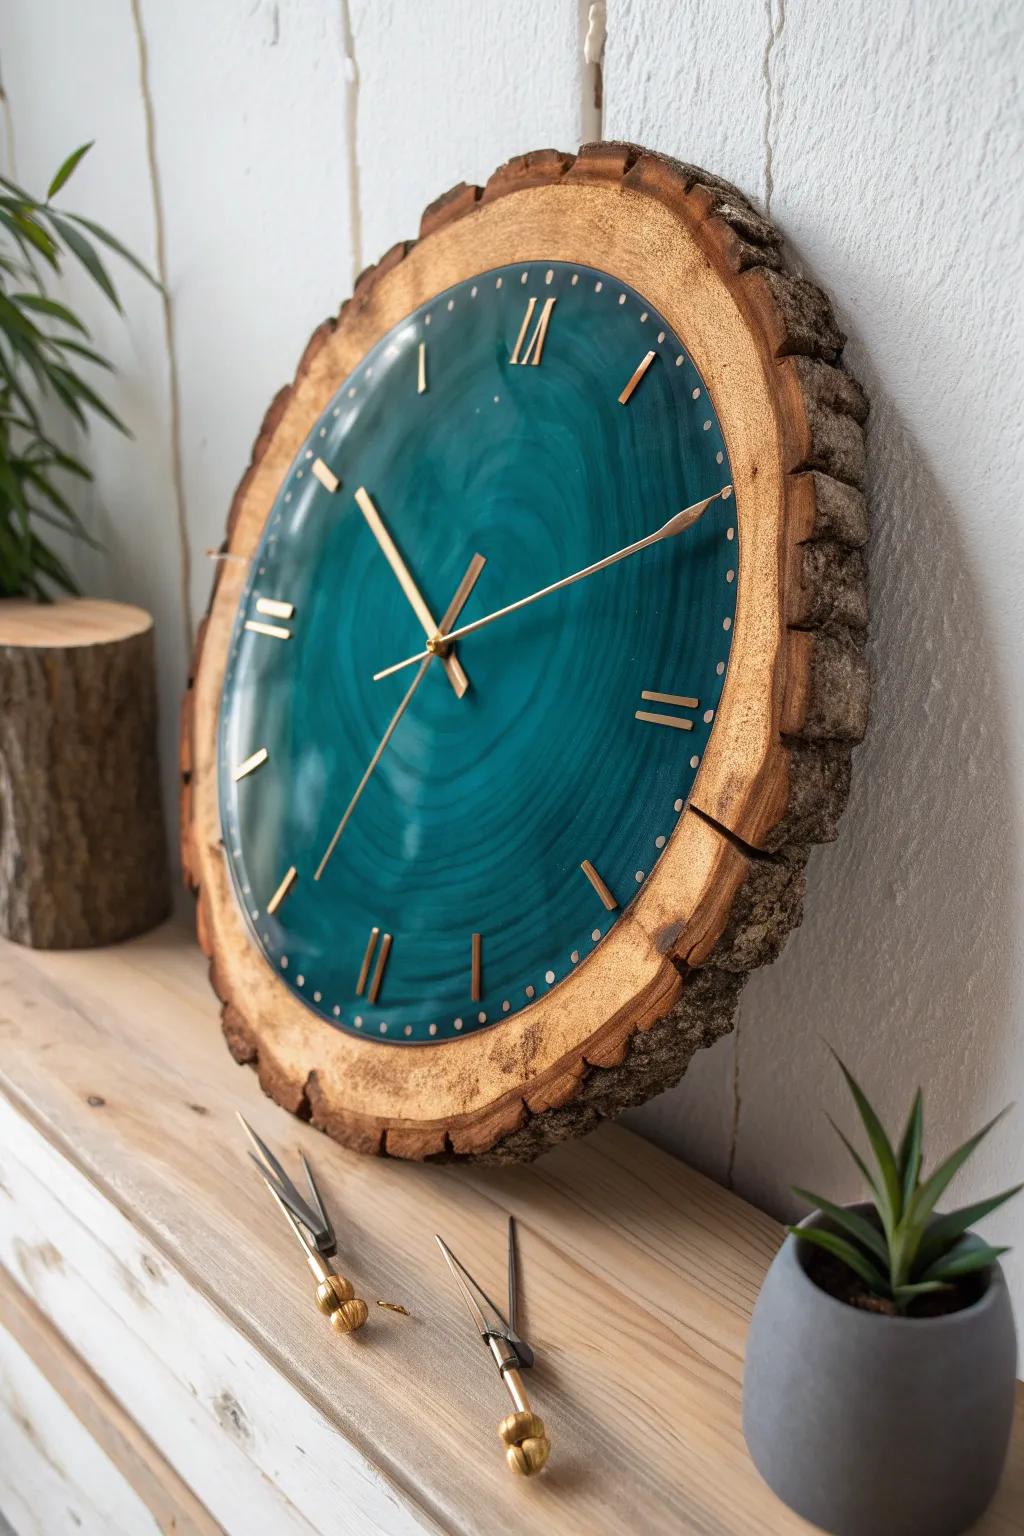
For a real statement piece, I’ve cut a channel across a large round and poured a resin inlay before turning it into a wood slice clock. The mix of raw grain and glossy inlay is such a fun contrast, and it looks way more advanced than it actually is.
Give these a look:
- Deep Pour Epoxy Resin Kit: Create that stunning glossy inlay with a crystal-clear resin kit designed for deep pours and durability.
- Mica Powder Pigments: Add vibrant color and shimmering swirls to your resin mix for a truly unique, custom clock face.
- High-Torque Clock Mechanism Kit: Bring your project to life with reliable hands and a movement mechanism capable of turning larger dials.


