
Crown molding is one of those finishing touches that instantly makes a room feel taller, cleaner, and more “done.” I’ve added it in everything from tiny hallways to big living rooms, and it never fails to give that satisfying, polished edge where wall meets ceiling.
Monochrome Crown That Blends In
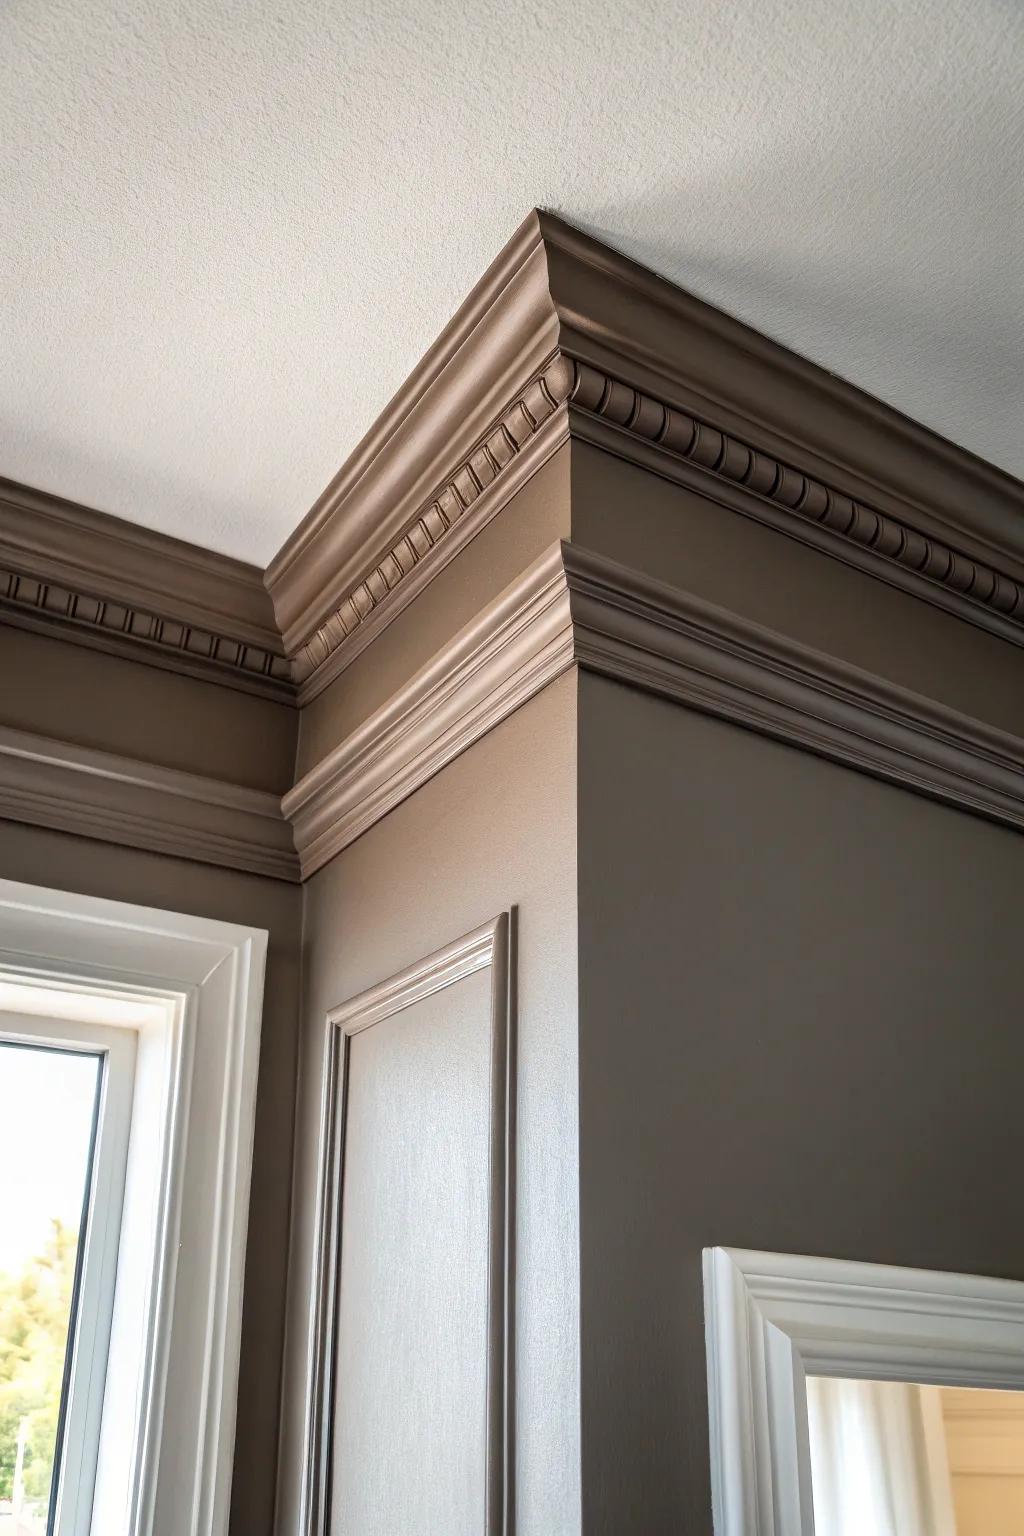
Painting crown molding the same color as the wall or ceiling gives a quiet, modern kind of drama. I tried this in a darker room, and the texture showed up as subtle shadow instead of bright contrast—so good.
Check if these fit your needs:
- Primed Dentil Crown Molding: Choose paintable molding with intricate dentil details to add classic texture that stands out when color-drenched.
- Matte Interior Wall Paint: Select a high-quality matte paint to create a seamless, unified look between your walls and new trim.
- Angled Sash Paint Brush: Use a professional angled brush to ensure crisp lines and smooth coverage on complex molding profiles.


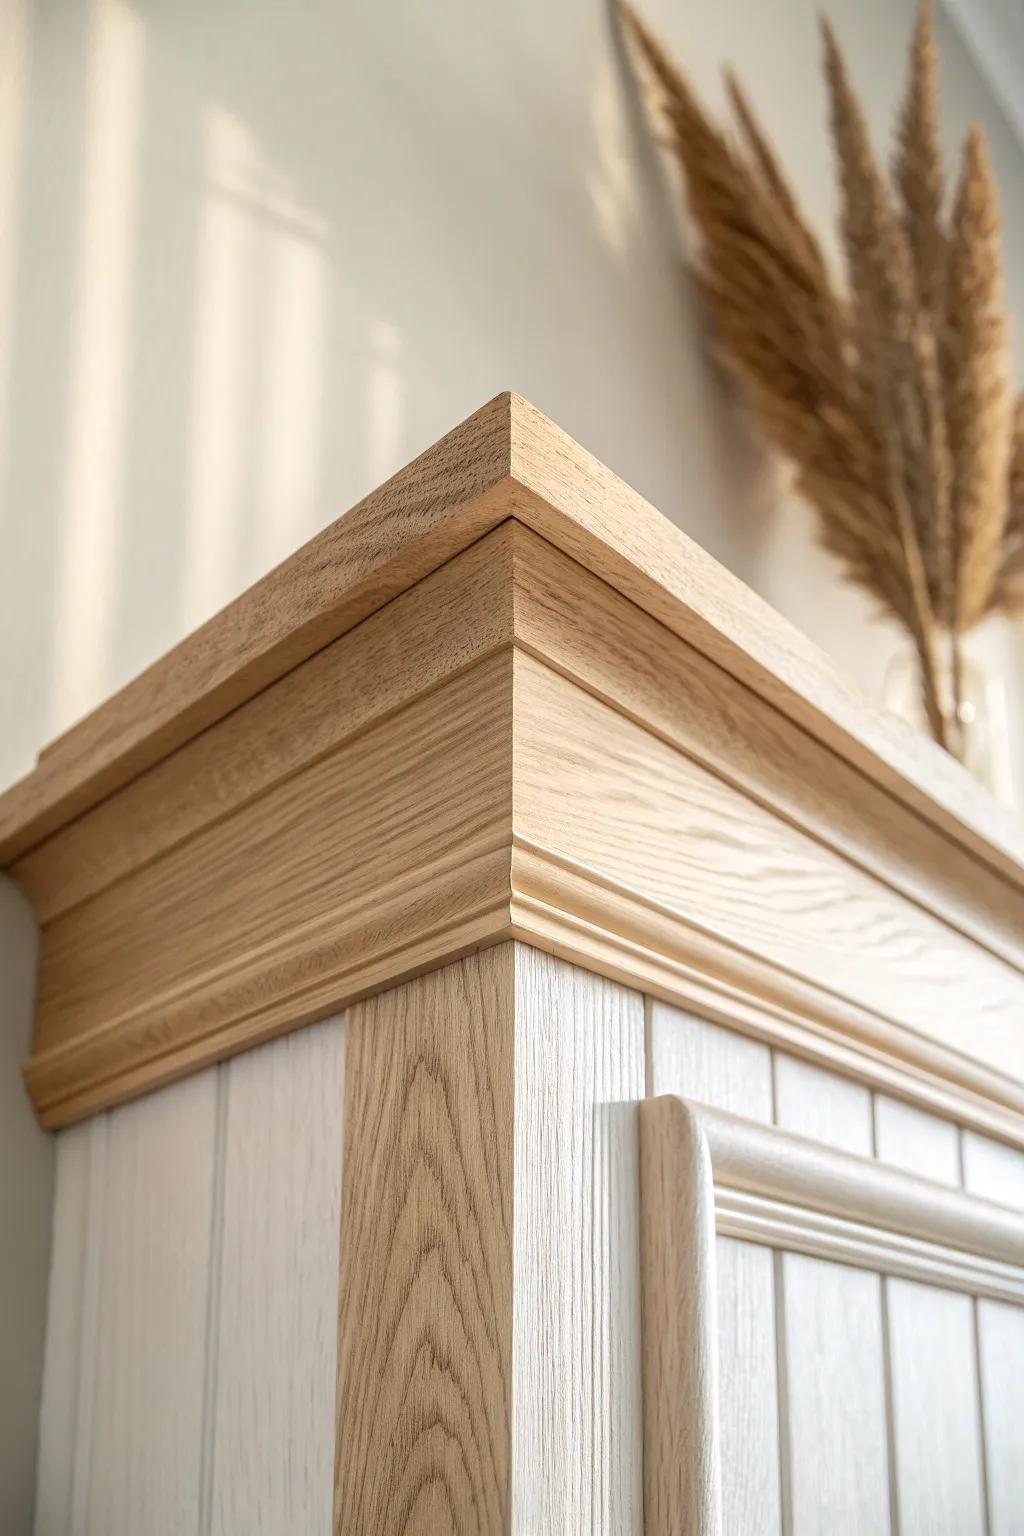
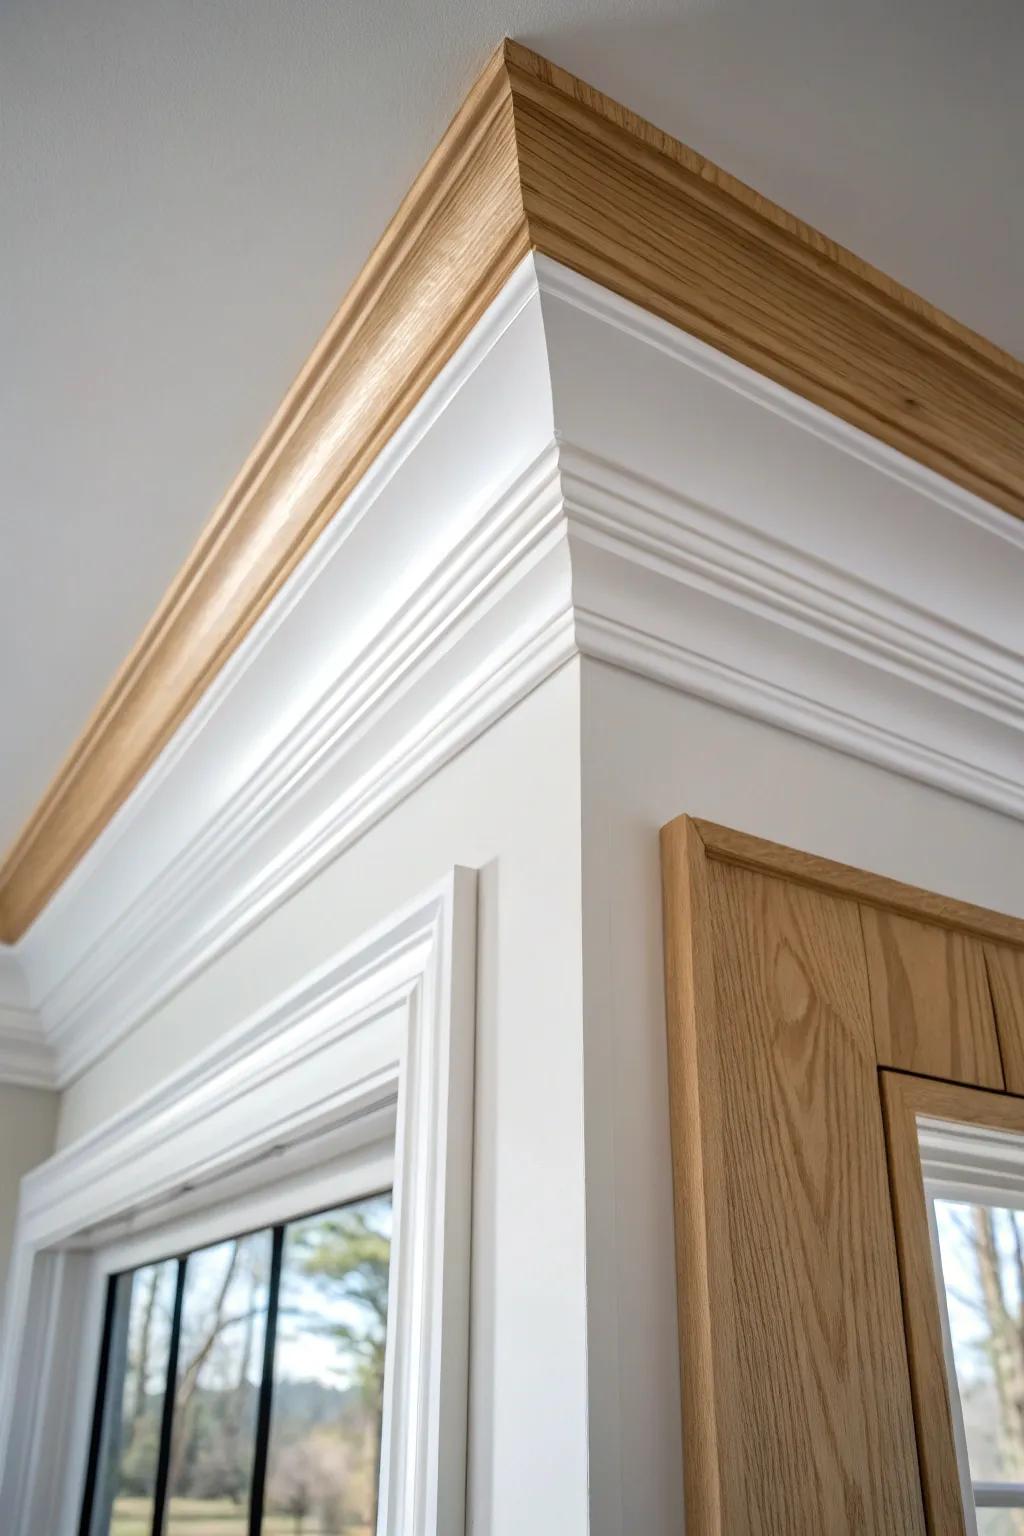
Classic White Crown Molding
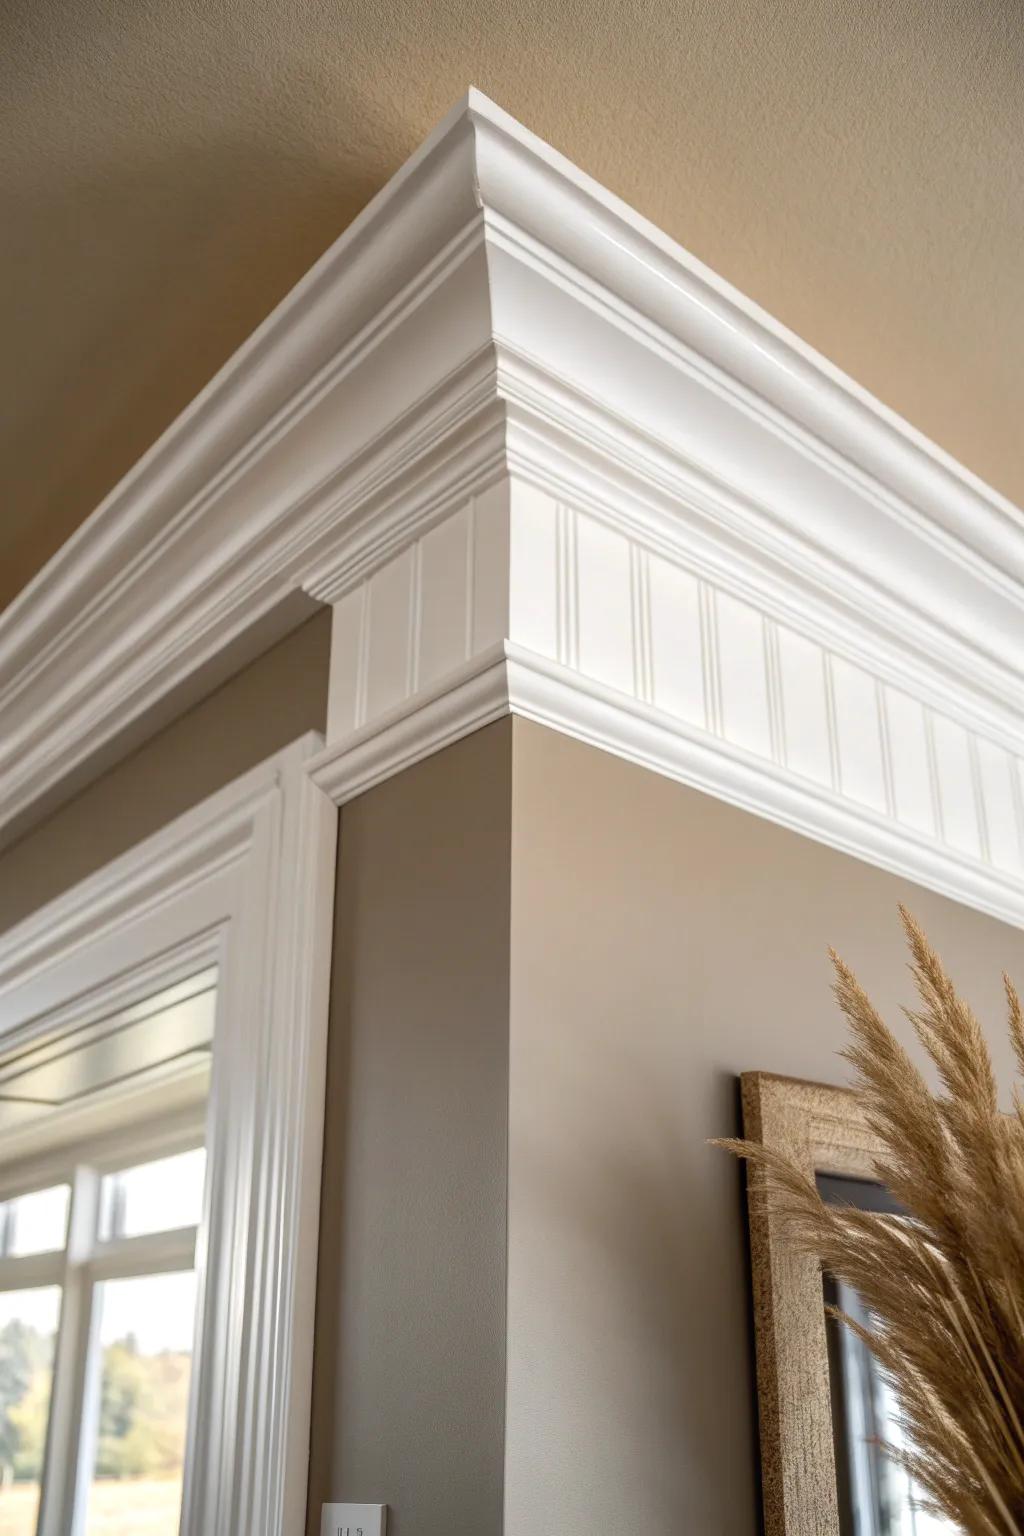
When I want a sure-win upgrade, I go with classic crown molding painted a crisp white to sharpen the ceiling line. I’ve used this in older rooms with uneven corners, and it still makes everything look more intentional.
Might be a good match:
- Primed Polyurethane Crown Molding: Transform your room’s aesthetic quickly with lightweight, pre-primed molding that is easy to cut and install yourself.
- Beadboard Wallpaper or Paneling: Create the distinctive vertical groove detail shown in the image by applying this texture beneath your main molding.
- Paintable Caulk for Trim: Ensure a professional, seamless finish by filling gaps and uneven corners before applying your final coat of paint.


High-Contrast Wall Color Break

Pair bright white crown molding with a deeper wall color to make the room feel taller and more tailored. I’ve done this with moody greens and blues, and that bold line at the top makes paint colors look extra rich.
Items that may come in handy:
- Architectural Crown Molding: Add elegance to your space with durable crown molding that arrives ready for installation and painting.
- Deep Teal Interior Paint: Create a dramatic backdrop for your trim by selecting a high-quality, moody paint color.
- Semi-Gloss White Trim Paint: Ensure your molding pops against dark walls with a crisp, durable white semi-gloss finish.

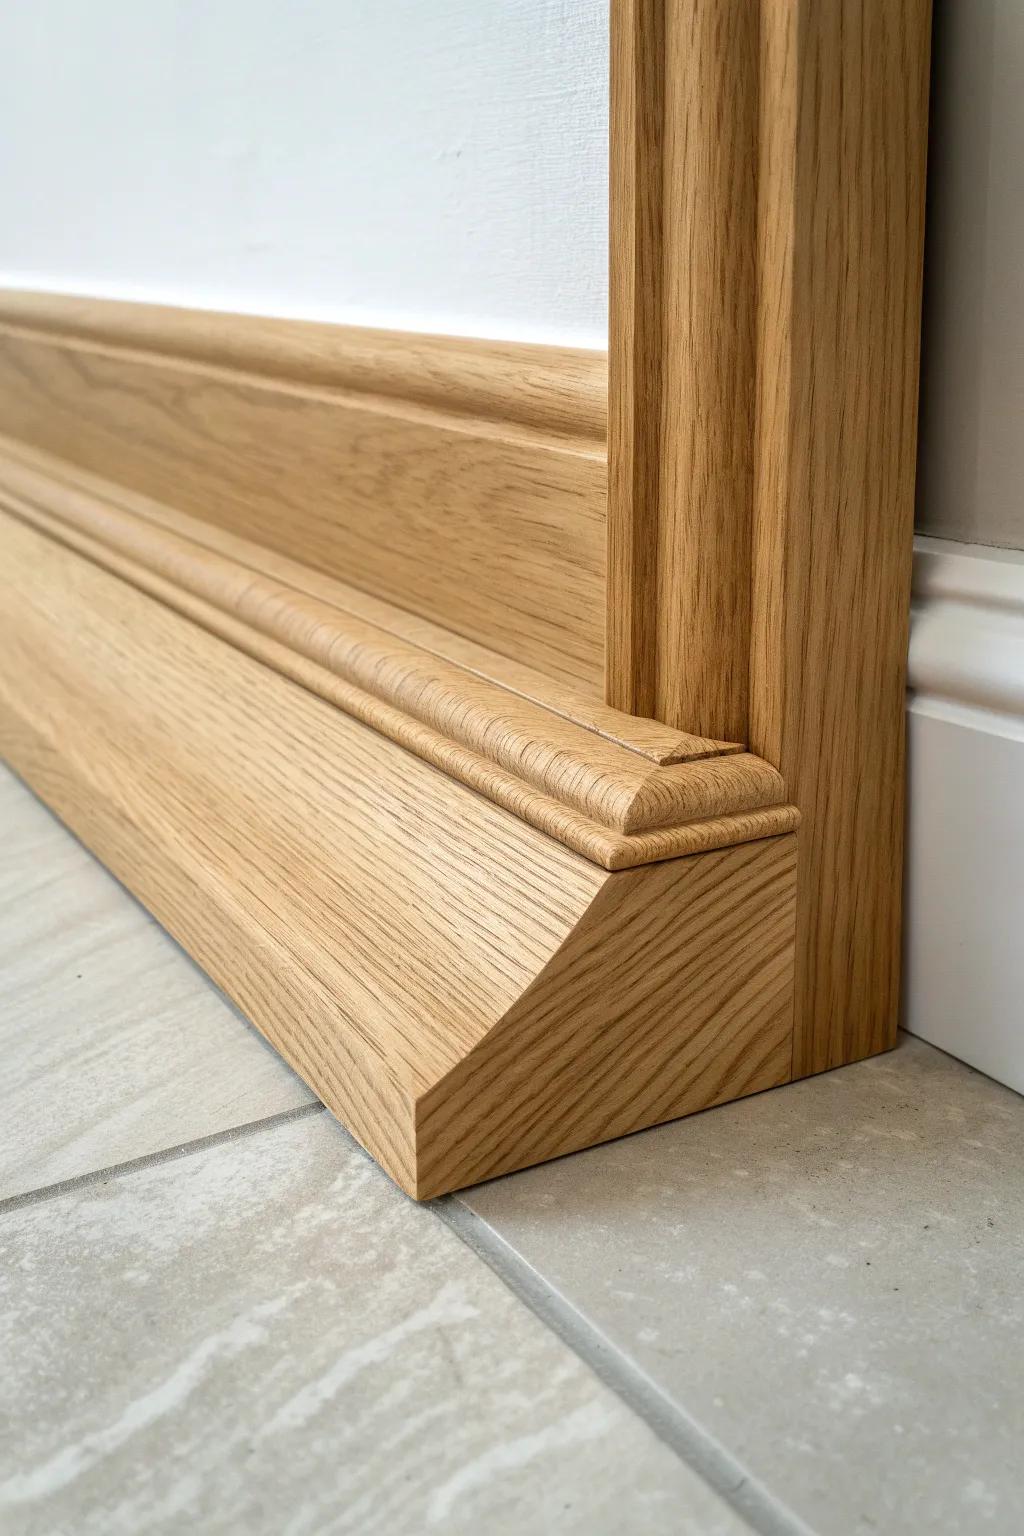
Simple Cove for a Clean Look
A smooth cove-style crown molding is my go-to when you want detail without fuss. I’ve installed it in more modern spaces, and it gives a soft transition that still feels fresh and uncluttered.
These products might help:
- Solid Oak Crown Molding: Upgrade your carpentry projects with real wood molding that can be stained to match your natural decor.
- White Cove Molding: Choose pre-primed or finished cove molding to easily create a soft, modern transition between wall and ceiling.
- Wood Finishing Wax or Stain: Enhance the natural grain of your wooden molding features with a quality finish for a professional look.
Extra-Wide Crown for Tall Ceilings
If your ceilings are high, don’t be shy—oversized crown molding holds its own and makes the whole room feel more grand. I learned this the hard way after trying a skimpy profile once, then swapping it for a wider one that finally looked “right.”
You might give these a try:
- Wide Profile Wood Crown Molding: Choose unfinished wide wood molding to add instant architectural weight and elegance to your high ceilings.
- Miter Saw with Laser Guide: Ensure clean, precise corner cuts on your wide molding for a seamless, professional-looking installation finish.
- Construction Adhesive and Caulk Gun: Secure your heavier molding pieces firmly in place before nailing to guarantee a long-lasting, gap-free fit.
Stacked Crown for Custom Depth
Layering pieces into stacked crown molding gives you that built-in, high-end look without needing a super ornate single profile. I’ve stacked a simple crown over a flat trim board, and the shadow lines alone make it look custom-milled.
Some handy options:
- Primed Architectural Crown Molding: Start your stacked look with a classic white primed crown molding ready for paint and easy installation.
- Flat MDF Baseboard Trim: Use flat trim boards underneath your crown molding to extend the height and create dramatic depth easily.
- Brad Nailer Kit: Secure your multiple layers of trim precisely and efficiently with a reliable brad nailer tool set.

Flat Stock Modern Crown Combo
For a sharp, modern vibe, I like making “crown” from flat stock crown molding—one flat piece on the wall and one on the ceiling. I’ve used this approach in a small bedroom, and it was way easier to cut while still looking architecturally cool.
Maybe worth checking out:
- Primed Pine Flat Casing Boards: Create the base of your modern molding stack by mounting these versatile flat boards against your ceiling.
- White Cove Molding Trim: Add a subtle curve between your flat stock layers to soften the transition and add dimension.
- Brad Nailer Kit: Secure your new molding pieces quickly and cleanly without leaving large holes to fill later.
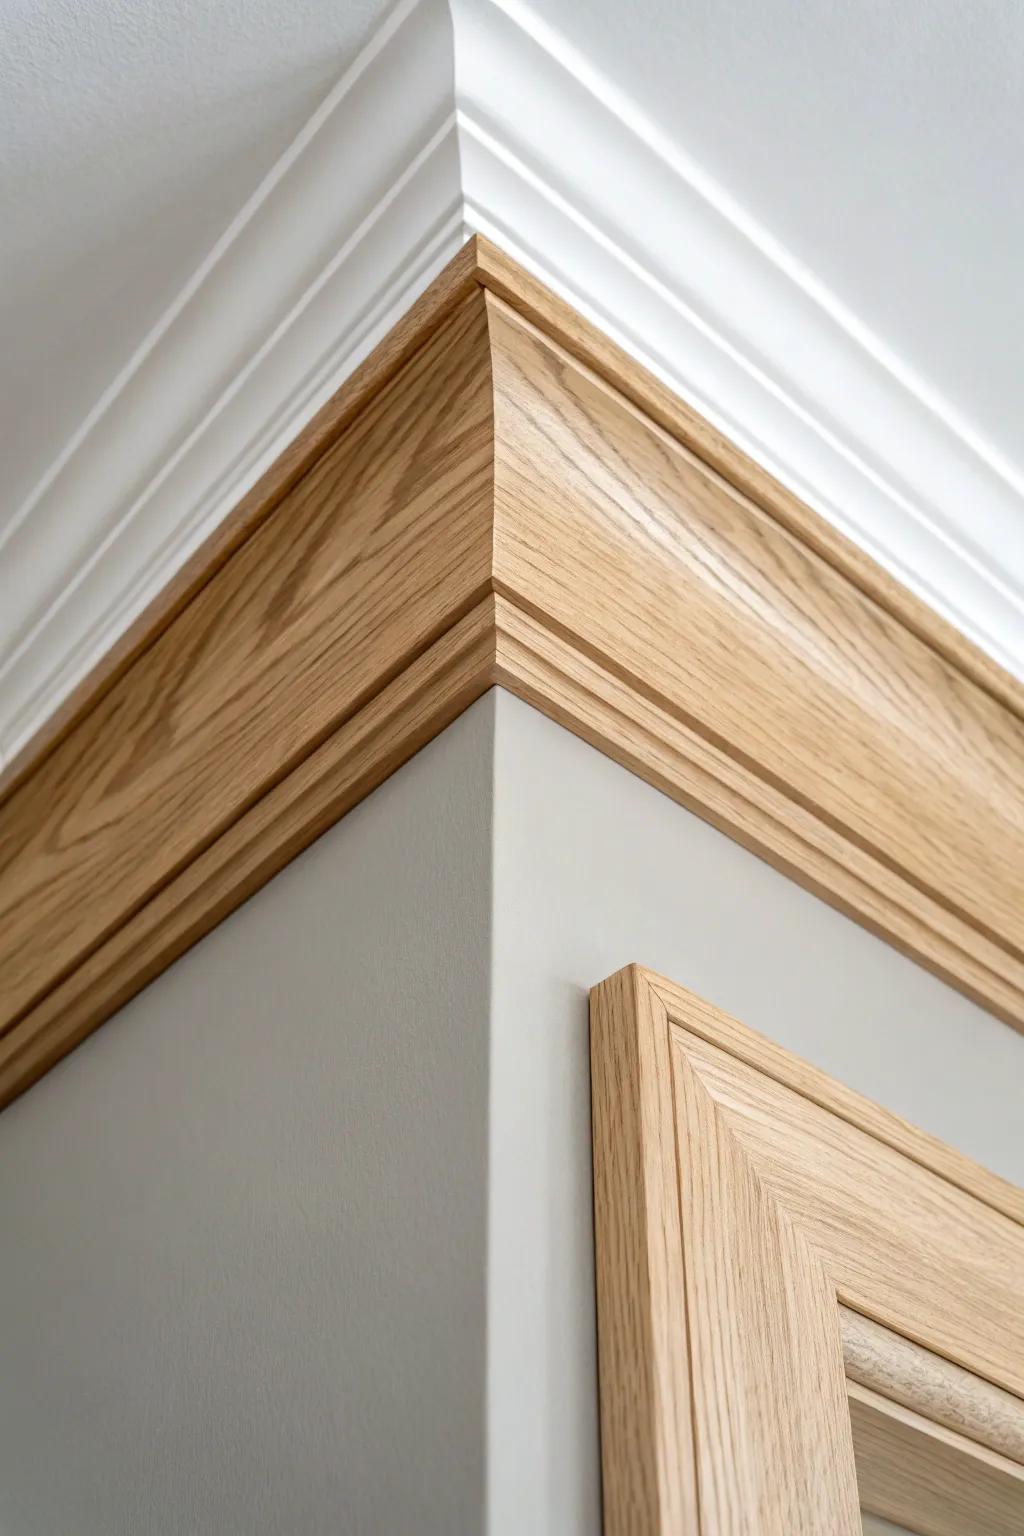
Crown Molding With Shiplap or Beadboard
Adding crown molding where beadboard or shiplap meets the ceiling hides seams and makes the whole treatment feel finished. I’ve trimmed out tongue-and-groove ceilings this way, and the clean edge instantly upgrades that cozy farmhouse look.
Some ideas to consider:
- Solid Wood Crown Molding: Add a classic finishing touch to your shiplap ceiling or walls with high-quality, stainable wood molding.
- Brad Nailer Kit: Secure your new trim and molding effortlessly with a reliable nailer designed for precision finish work.
- Wood Stain and Sealer: Protect your wood trim and enhance its natural grain patterns with a durable, rich interior stain.
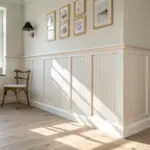
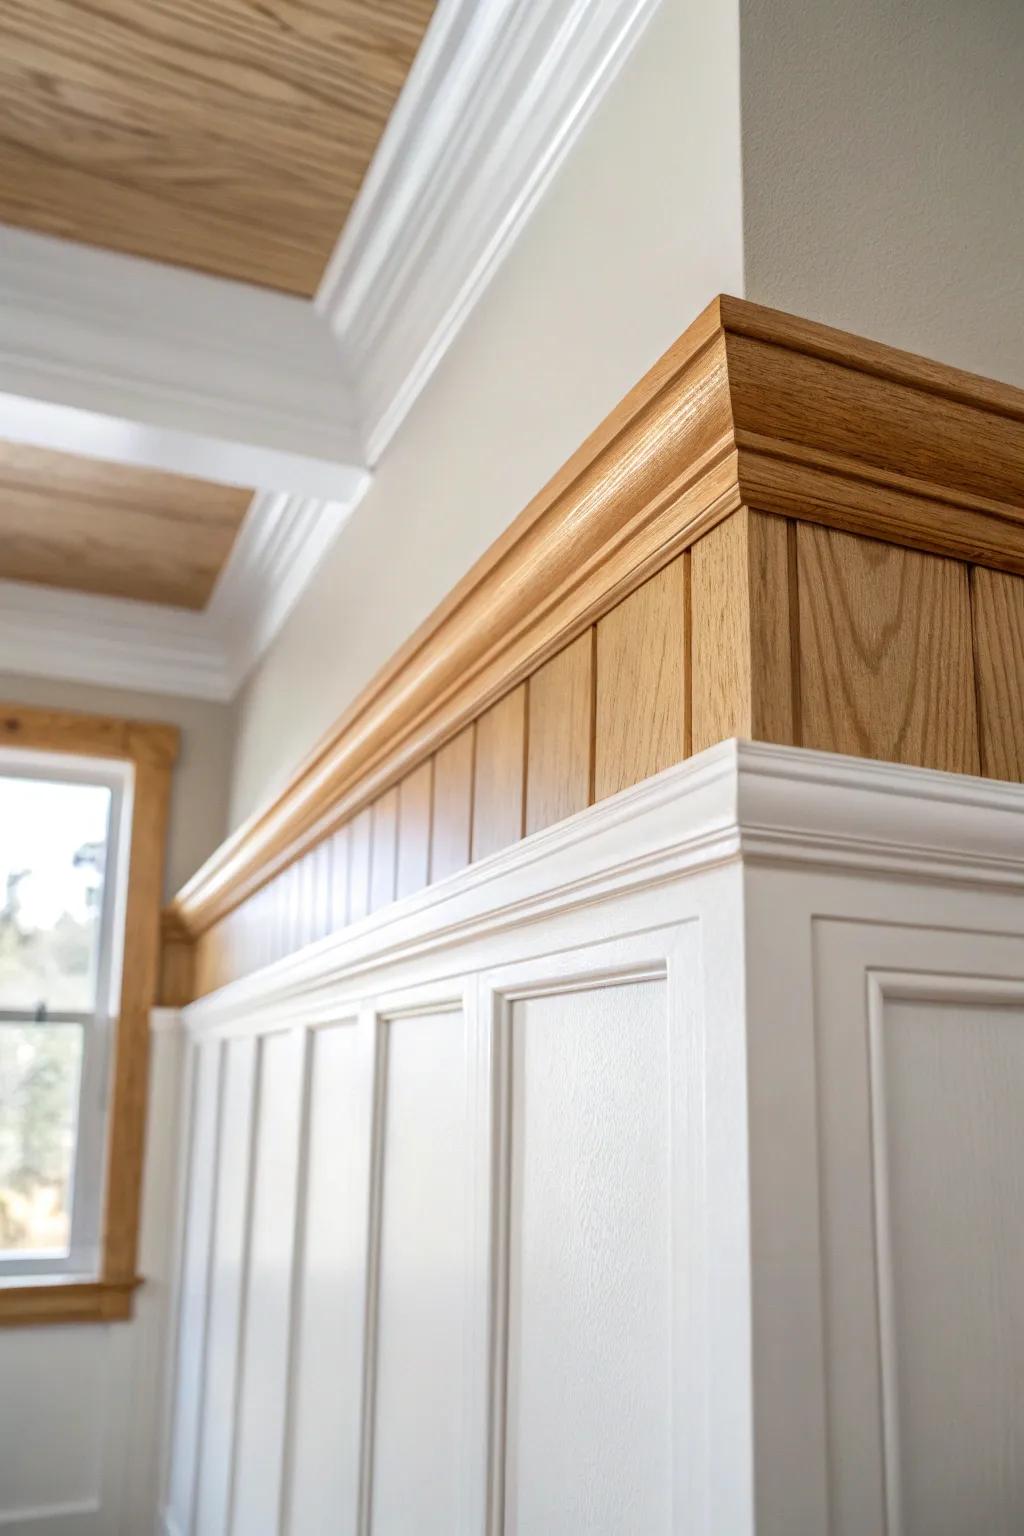
Crown Molding Above Wainscoting
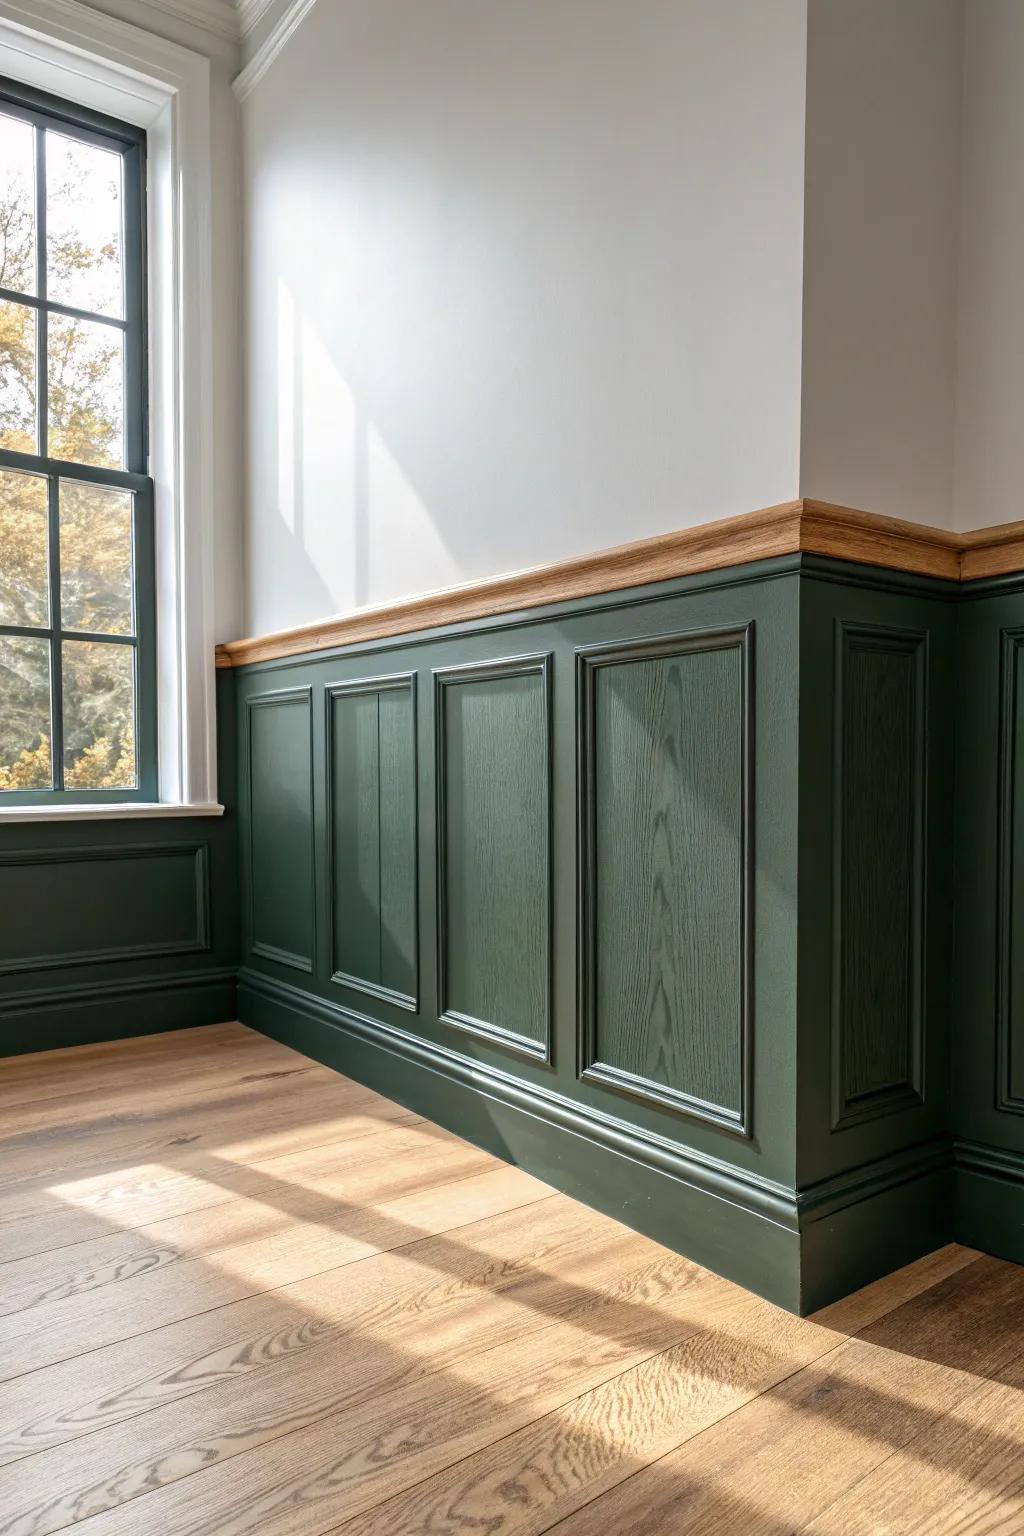
I love the “full-room trim” effect—crown molding up top with wainscoting below makes walls feel dressed, not bare. I’ve matched the profiles loosely (not perfectly), and it still reads as a thoughtful, cohesive set.
Try these:
- Primed Crown Molding: Instantly elevate your room’s height and elegance by framing your ceiling with simple, paint-ready molding profiles.
- Wainscoting Paneling Kits: Add architectural depth to plain walls using easy-to-install panel kits that create a classic, sophisticated foundation.
- Chair Rail Molding: Create a clean transition between your wainscoting and upper wall with durable, stylish trims.
Tray Ceiling Perimeter Crown

On tray ceilings, crown molding on the upper and lower edges creates layers that feel super intentional. I’ve done this in dining spaces, and it frames the ceiling like a picture—especially when there’s a statement light fixture.
Useful items to consider:
- Real Wood Crown Molding: Add natural warmth to your tray ceiling with stainable wood trim that highlights rich grain patterns.
- Rope or Dentil Trim Insert: Enhance your molding layers with decorative rope or dentil accents for that detailed, custom-carpentry look.
- Miter Saw for Precision Cuts: Ensure perfect corners on your layered ceiling project by using a reliable saw for accurate angles.
Coffered Ceiling Grid in Crown
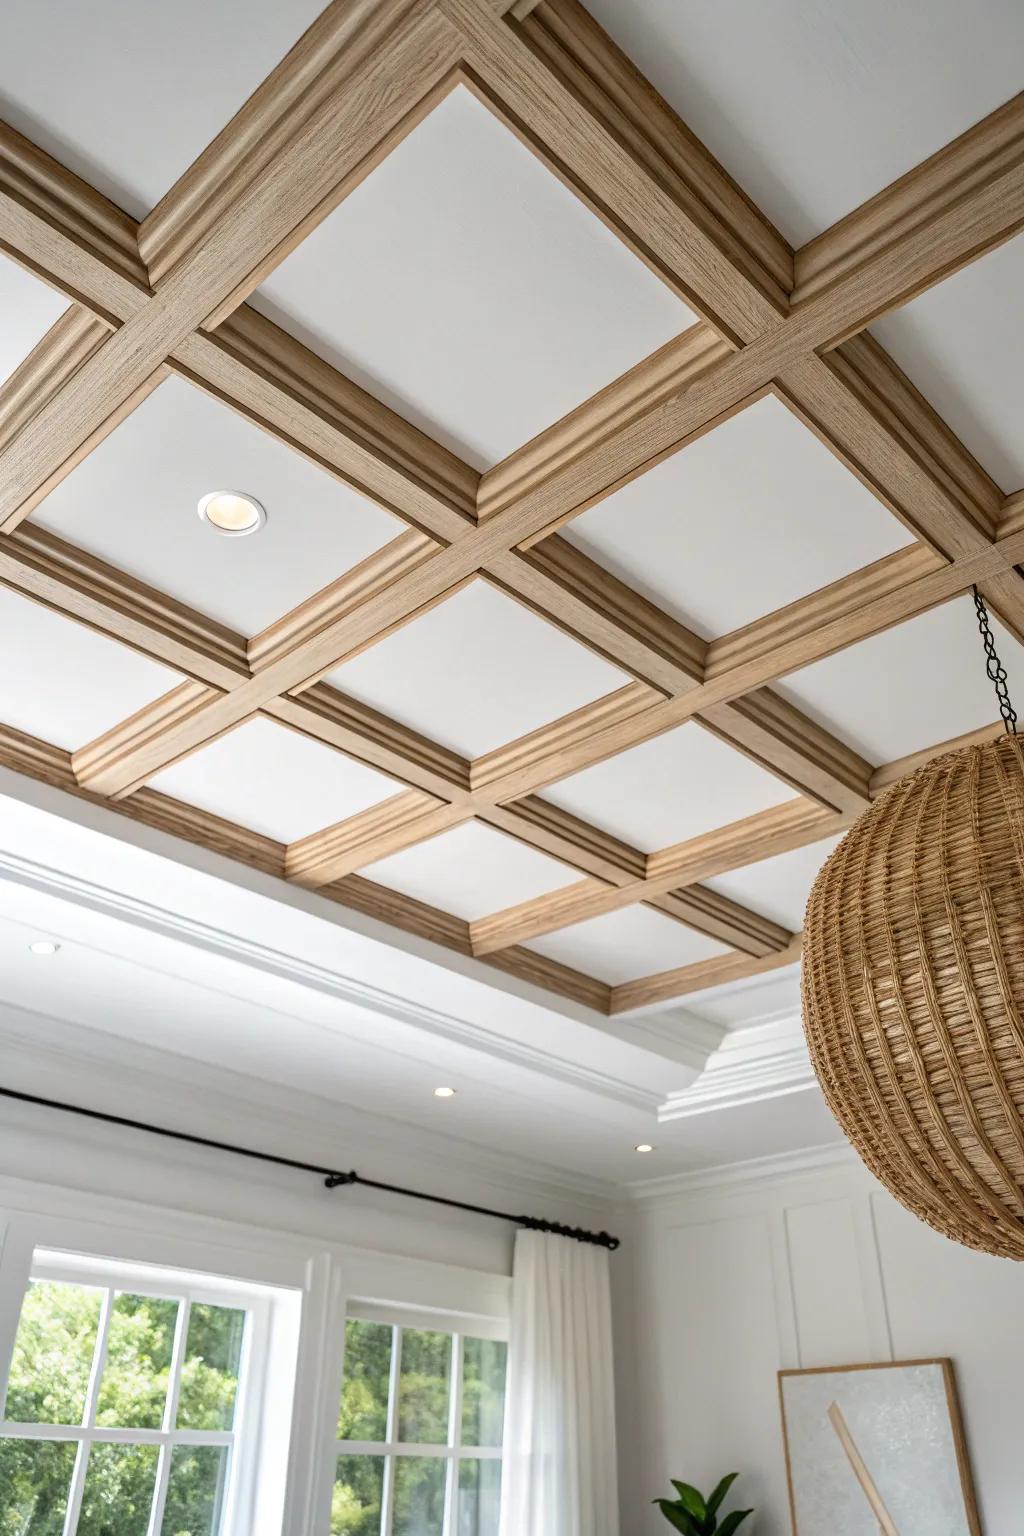
A coffered ceiling made with crown molding strips is a total showpiece, even on a flat ceiling. I’ve laid out a simple grid with a laser line first, and that planning step made the final crown pattern look crisp instead of chaotic.
May just do the trick:
- Self-Leveling Laser Level: Ensure your ceiling grid is perfectly straight and symmetrical by using this essential tool for precise layout planning.
- Unfinished Wood Crown Molding: Create the structural look of beams with molding that can be stained to match your desired aesthetic.
- Pneumatic Brad Nailer Kit: Secure your molding strips efficiently and cleanly without damaging the wood surface, perfect for overhead installation work.
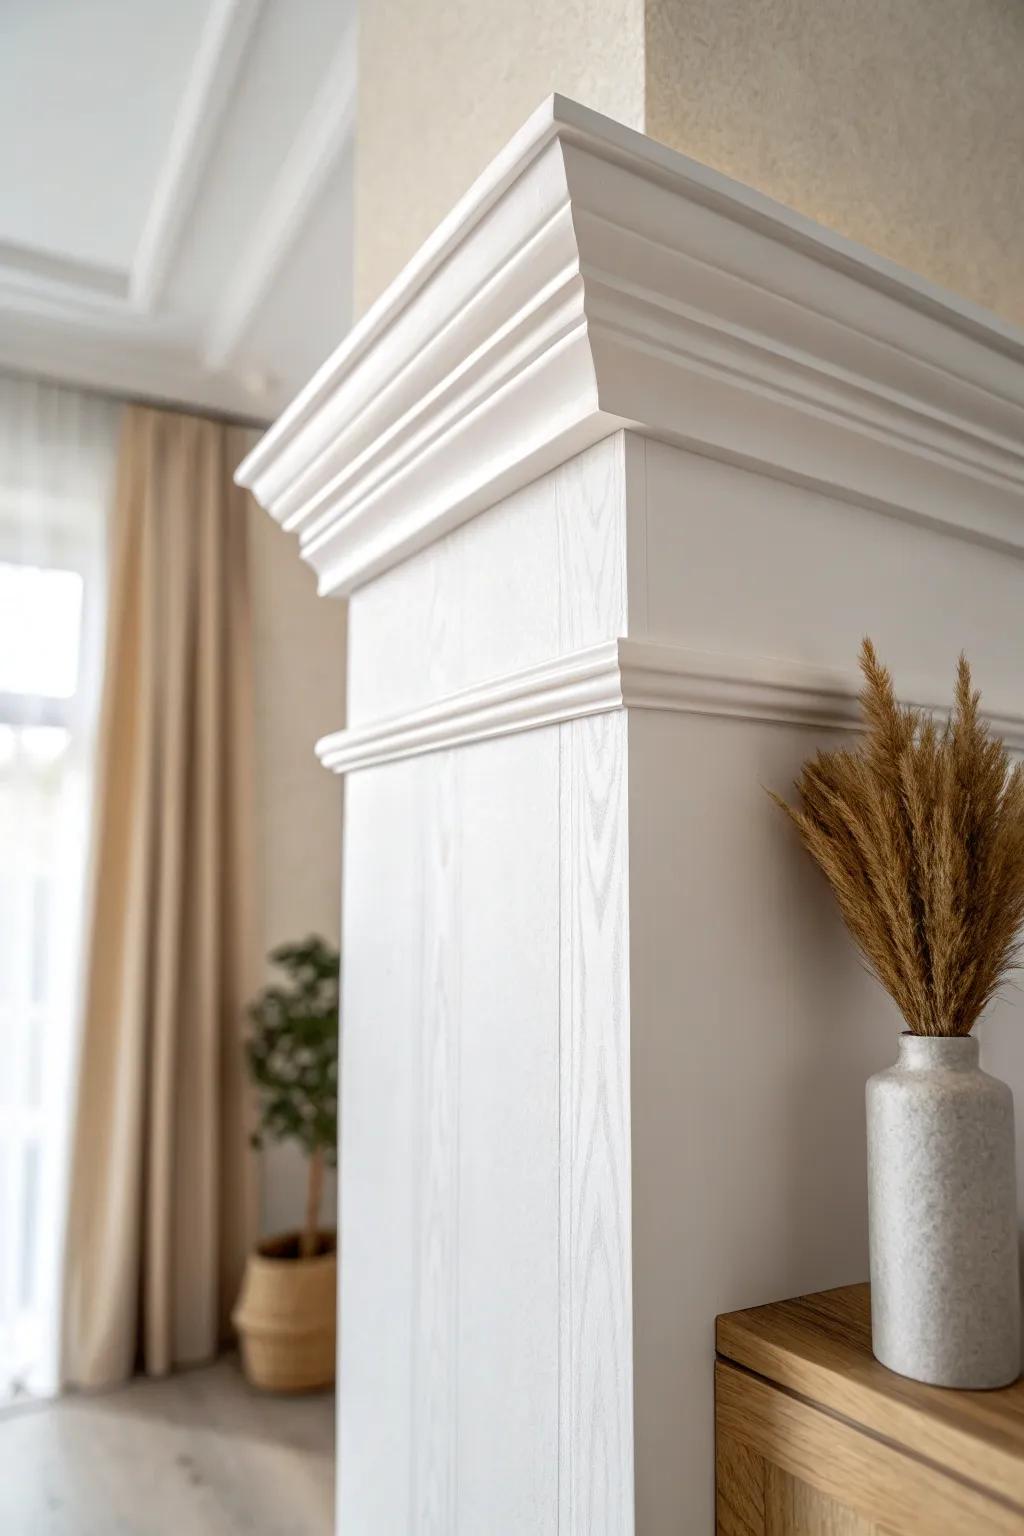
Fireplace Wall Crown Continuation
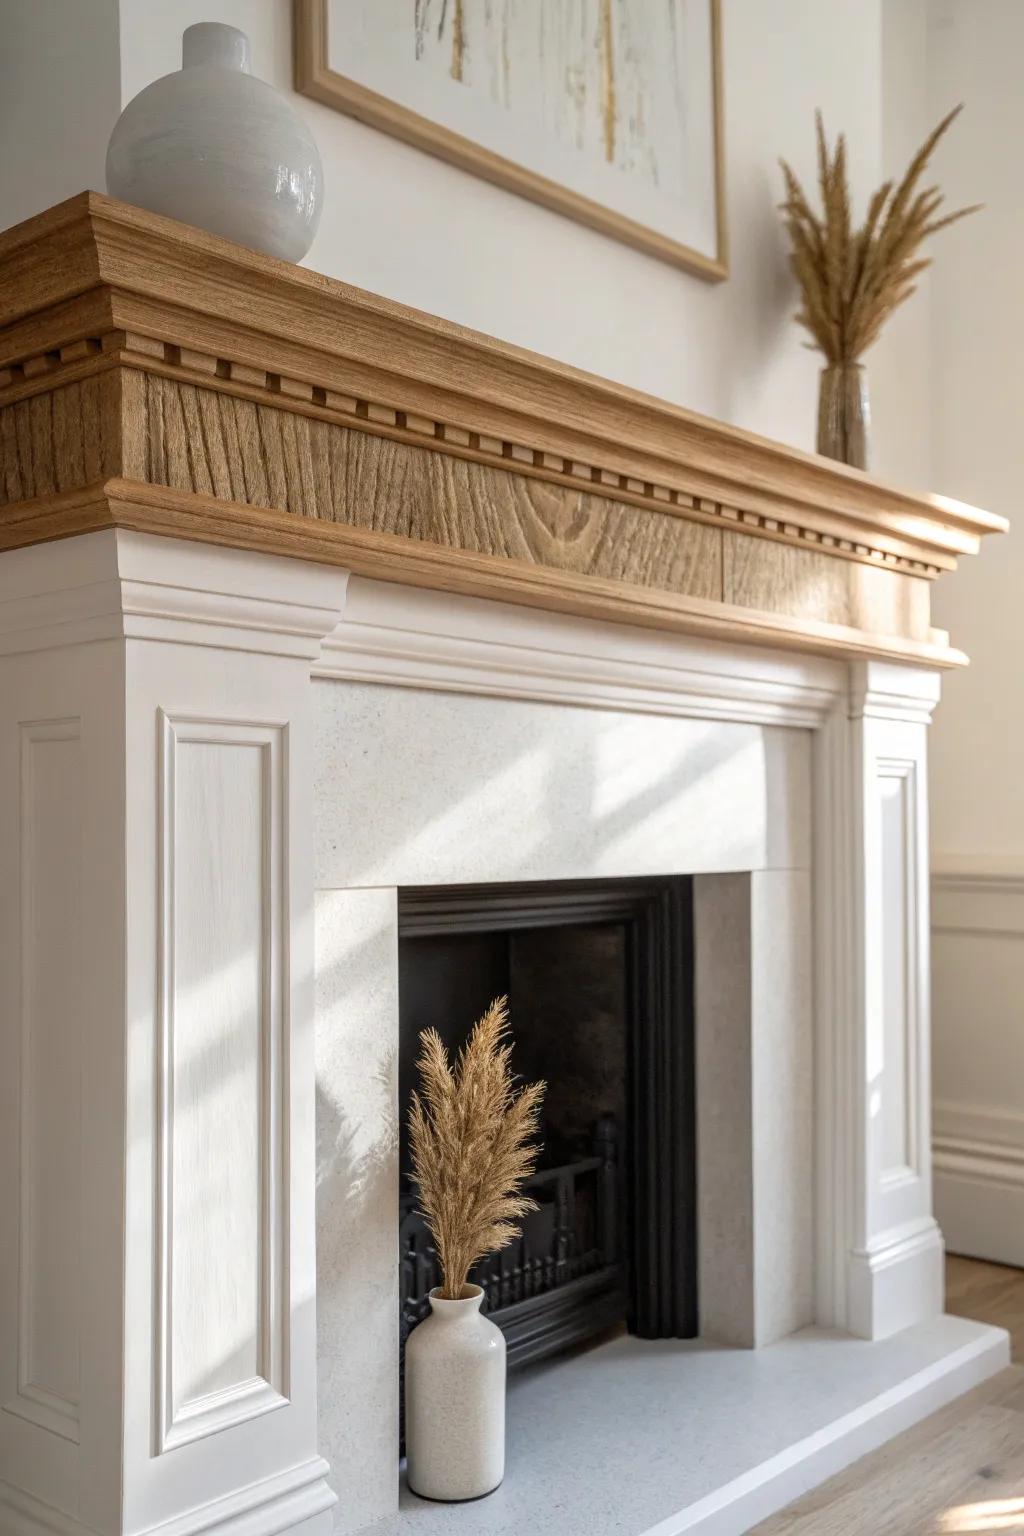
Carrying crown molding across a fireplace wall ties the whole room together, especially when there’s other millwork nearby. I’ve used crown to “finish” a feature wall, and it makes the fireplace feel even more like the room’s anchor.
Possibly handy products:
- Primed Crown Moulding: Extend your room’s elegance across the fireplace wall with paintable moulding that creates a seamless, built-in look.
- Floating Wood Mantel Shelf: Add warmth and contrast similar to the image by installing a natural wood shelf above your fireplace surround.
- Architectural Corbel Set: Enhance the millwork detail under your mantel or crown moulding to add structural depth and classic sophistication.
Continuous Crown Through Open Spaces
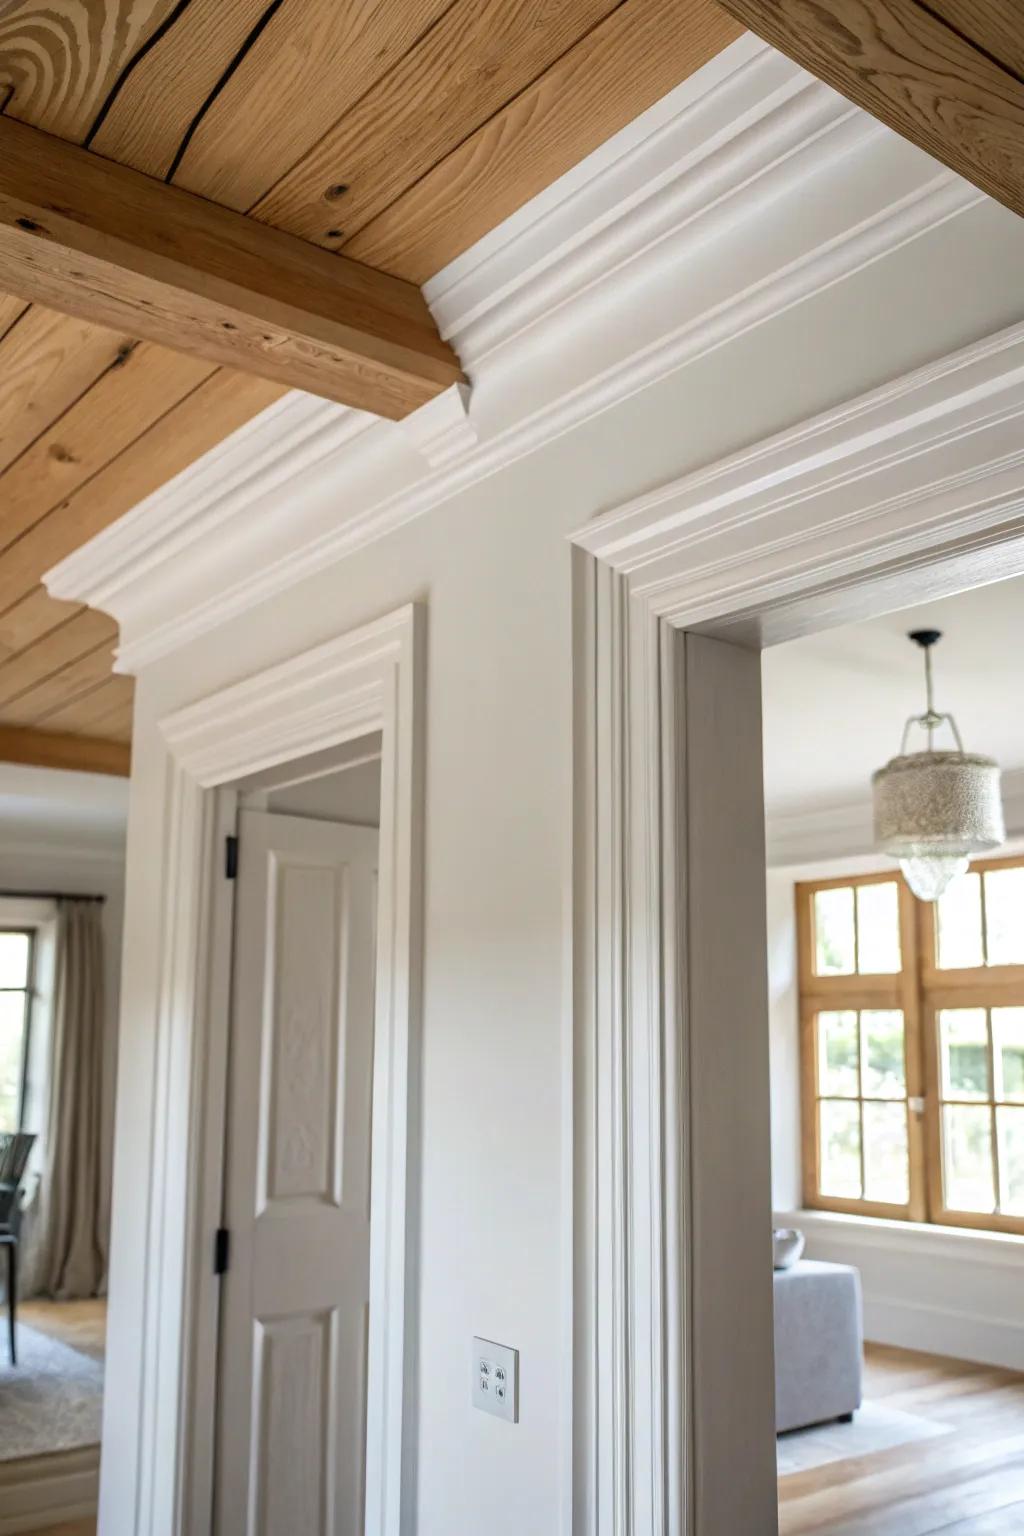
In open layouts, running crown molding continuously helps different zones feel connected instead of chopped up. I’ve done this through a living-to-dining transition, and it created a smooth flow even with different wall colors.
Products that could assist:
- Primed Polyurethane Crown Molding: Create a seamless transition between rooms with lightweight, easy-to-install molding that mimics traditional wood details.
- Miter Saw with Laser Guide: Ensure your corners and joints match perfectly for a professional, continuous look throughout your open space.
- Caulk and Caulking Gun Kit: Seal gaps and hide nail holes effortlessly to achieve that smooth, unified finish along your ceiling line.
Resin-Inlaid Crown for a Wow Detail
For something seriously unexpected, I’ve routed a slim channel into crown molding and filled it with tinted resin for a subtle inlay line. It’s a small detail, but when light hits that glossy stripe near the ceiling, people always ask how it was done.
Consider these options:
- Clear Epoxy Resin Kit: Create that glossy, eye-catching inlay stripe by filling your routed channels with this durable, crystal-clear casting resin.
- Mica Powder Pigment Set: Add vibrant color or metallic shimmer to your resin inlay to perfectly match or accent your room decor.
- Straight Router Bit: Carve precise, clean channels into your wood molding to prepare the perfect groove for your resin pour.


