
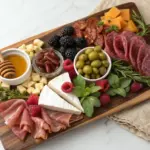
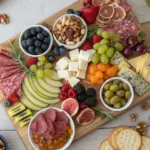
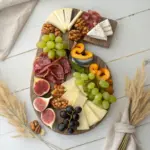
A decorative charcuterie board is basically edible art, and your wooden board is the prettiest little canvas you own.
Classic Wreath Ring
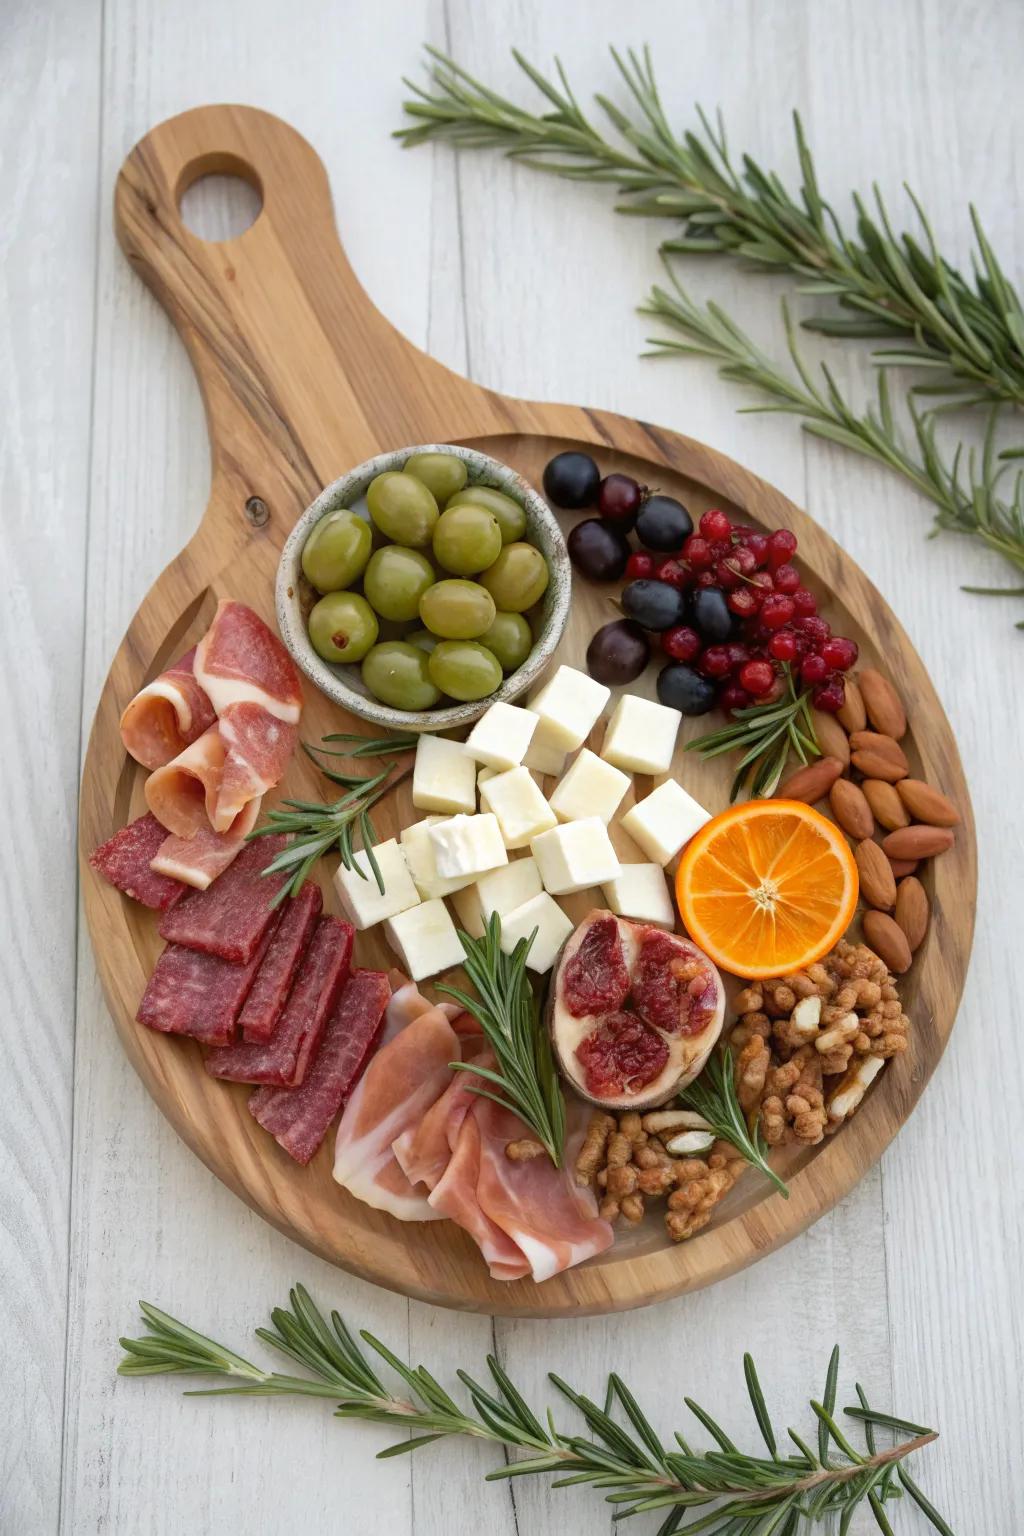
My most-requested decorative charcuterie board is a wreath shape—I make a circular ring of goodies and tuck rosemary sprigs all around for that fresh, festive look. I’ve learned the magic is leaving a clean open center so the wreath reads instantly from across the table.
Some handy options:
- Round Wooden Serving Board with Handle: Choose a round wooden board with a handle to perfectly frame your festive wreath arrangement effortlessly.
- Small Ceramic Dip Bowls: Use small ceramic bowls to contain olives or spreads, keeping your wreath structure neat and organized.
- Cheese Knife and Spreader Set: Equip your guests with stylish cheese knives to easily serve cubes and spread soft cheeses smoothly.
Salami Rose Clusters
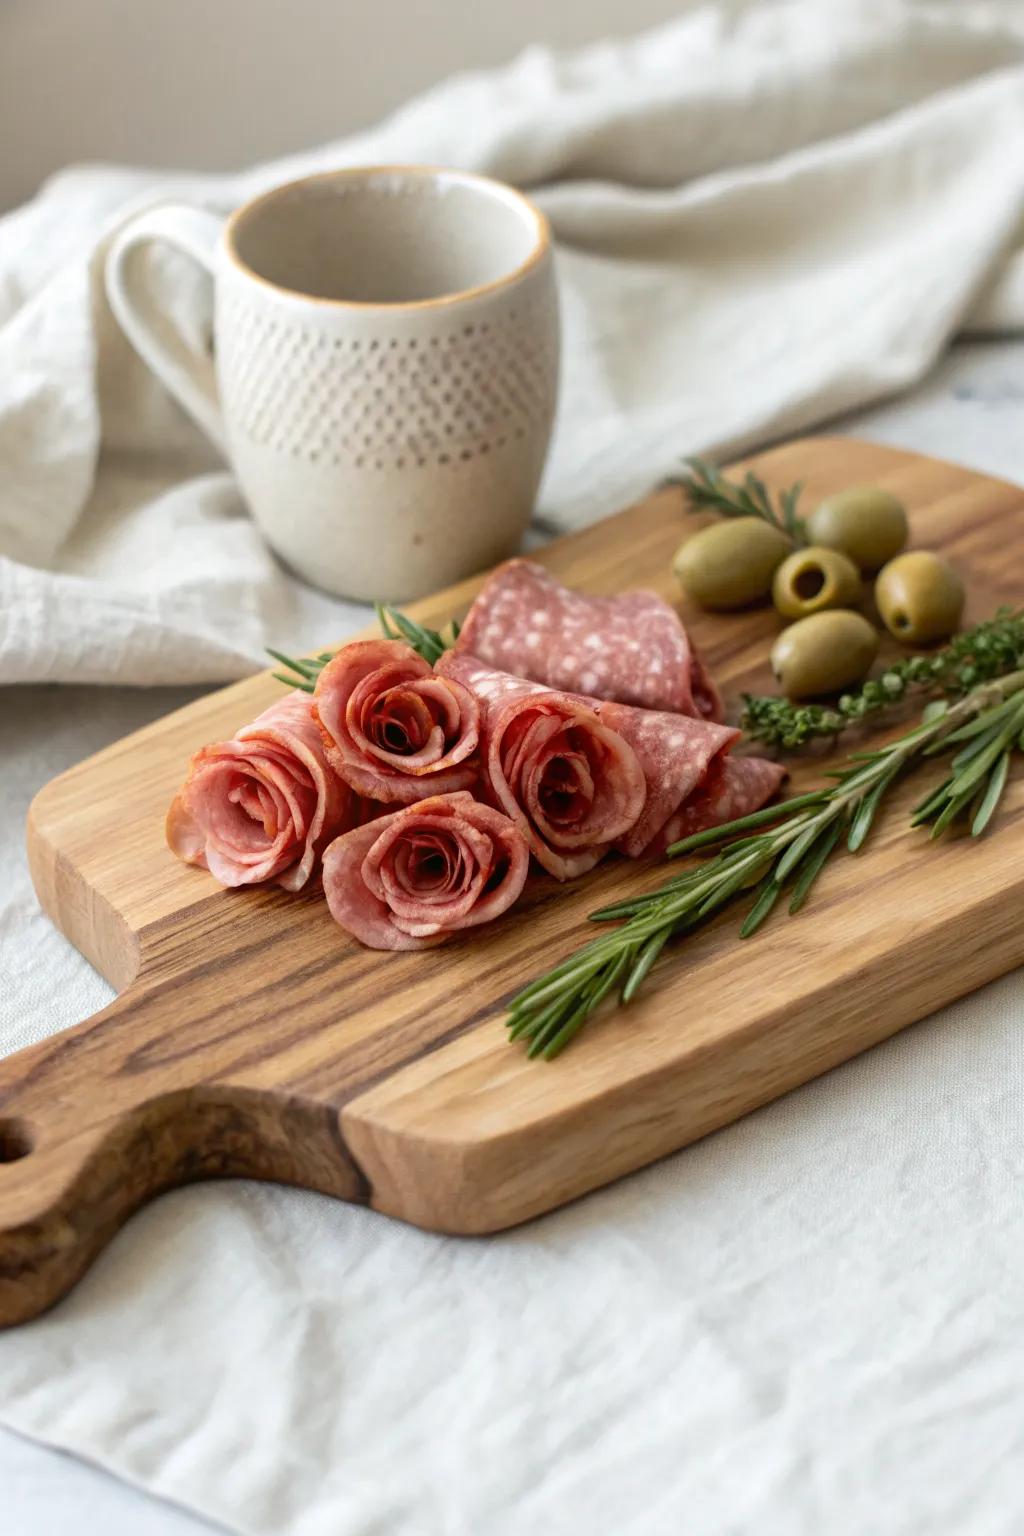
When I want instant “wow,” I add salami roses in a few spots like floral anchors, and suddenly the whole charcuterie board feels styled. I’ve made them so many times that my hands do it on autopilot while I’m chatting with friends in the kitchen.
Check these products out:
- Olive Wood Serving Board: Showcase your artistic salami roses on a stunning natural wood board that adds rustic elegance to any gathering.
- Decorative Cocktail Picks: Secure your intricate salami folds and olive garnishes easily while adding a touch of style to the presentation.
- Small Glass Ramekins or Wine Glasses: Use the rim of a small glass to easily fold and shape perfect salami roses in seconds.
Three-Color Contrast Layout
If I’m decorating fast, I plan my color contrast like a palette—reds, greens, and neutrals spaced evenly across the charcuterie board. I’ve found repeating the same pops of color in three different places keeps the board from looking like a random snack pile.
A few choices to try:
- Long Wooden Paddle Serving Board: Choose a long, handled wooden board to create a beautiful, warm neutral foundation for your colorful ingredients.
- Small Ceramic Dip Bowls: Use small ceramic bowls to hold juicy fruits or dips, adding both structure and contrast to your layout.
- Green Linen Napkins: Add a soft touch of green fabric nearby to instantly complete your three-color palette with minimal effort.


Little Bowl Anchors
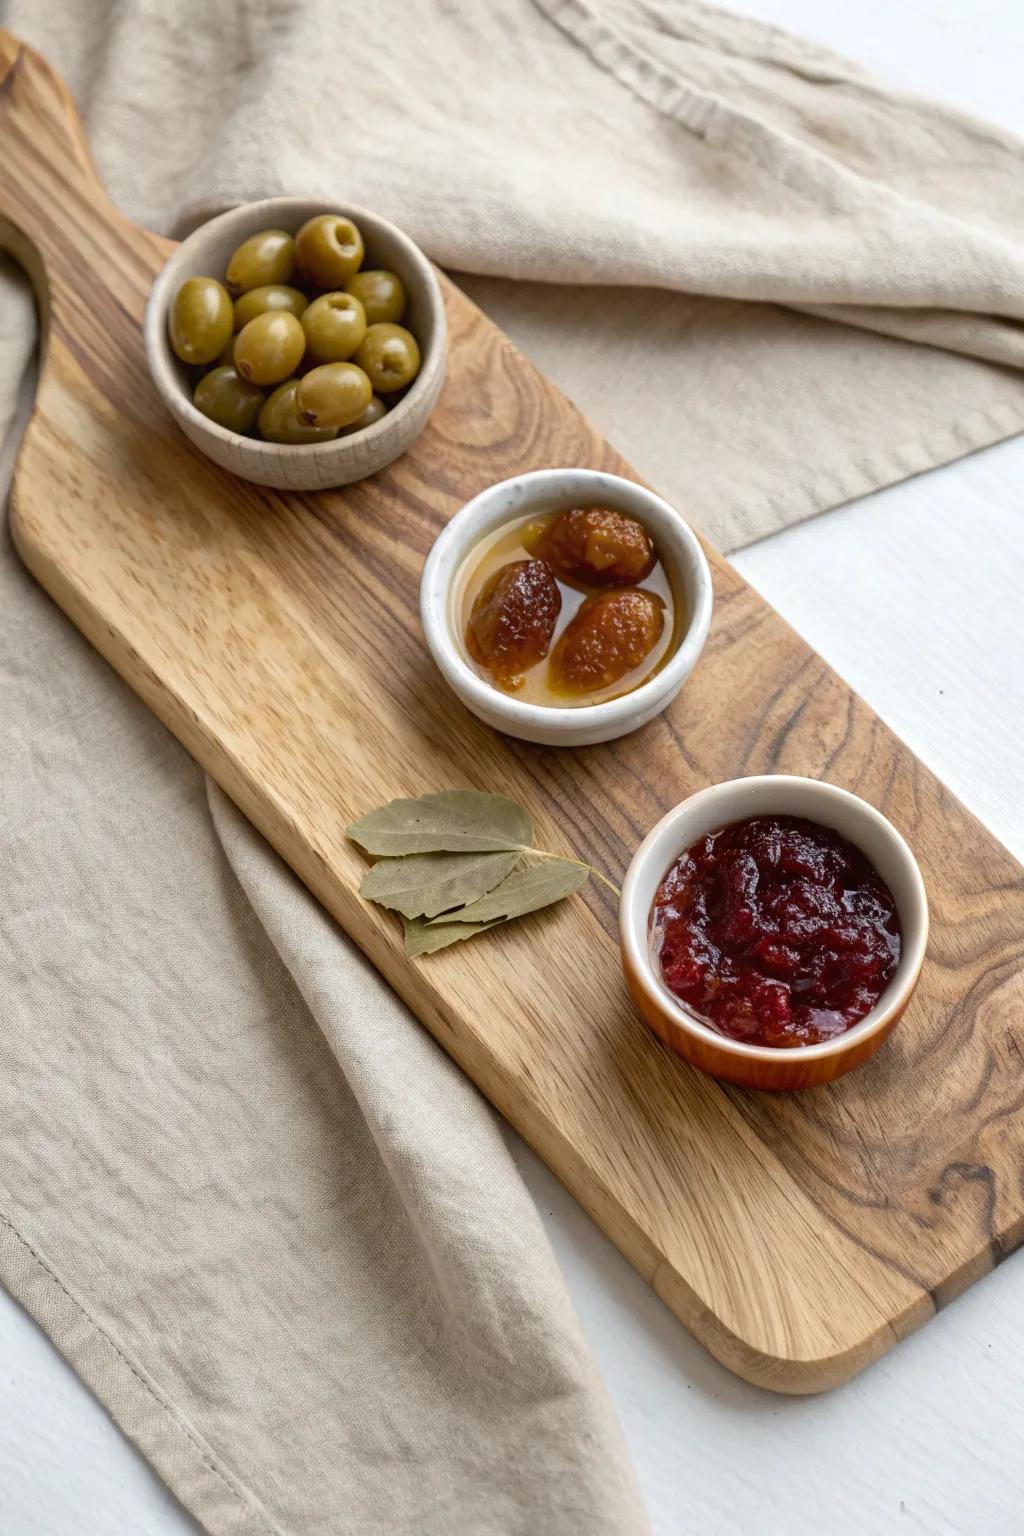
A few little bowls (for olives, jam, or honey) make a charcuterie board look designed because they create structure and height. I always place them first, since I’ve learned the hard way that everything else is easier once your “anchors” are set.
Some ideas to consider:
- Set of Small Ceramic Dip Bowls: Create instant structure on your board by using these versatile bowls for organizing jams, honey, or dips effortlessly.
- Olive Wood Serving Board with Handle: Anchor your entire display with a beautiful, natural wood board that provides the perfect canvas for your arrangement.
- Miniature Wooden or Gold Spoons: Complete your bowl setup with tiny serving utensils that make scooping olives and spreading jams easy for guests.
Cheese Fan and Fold
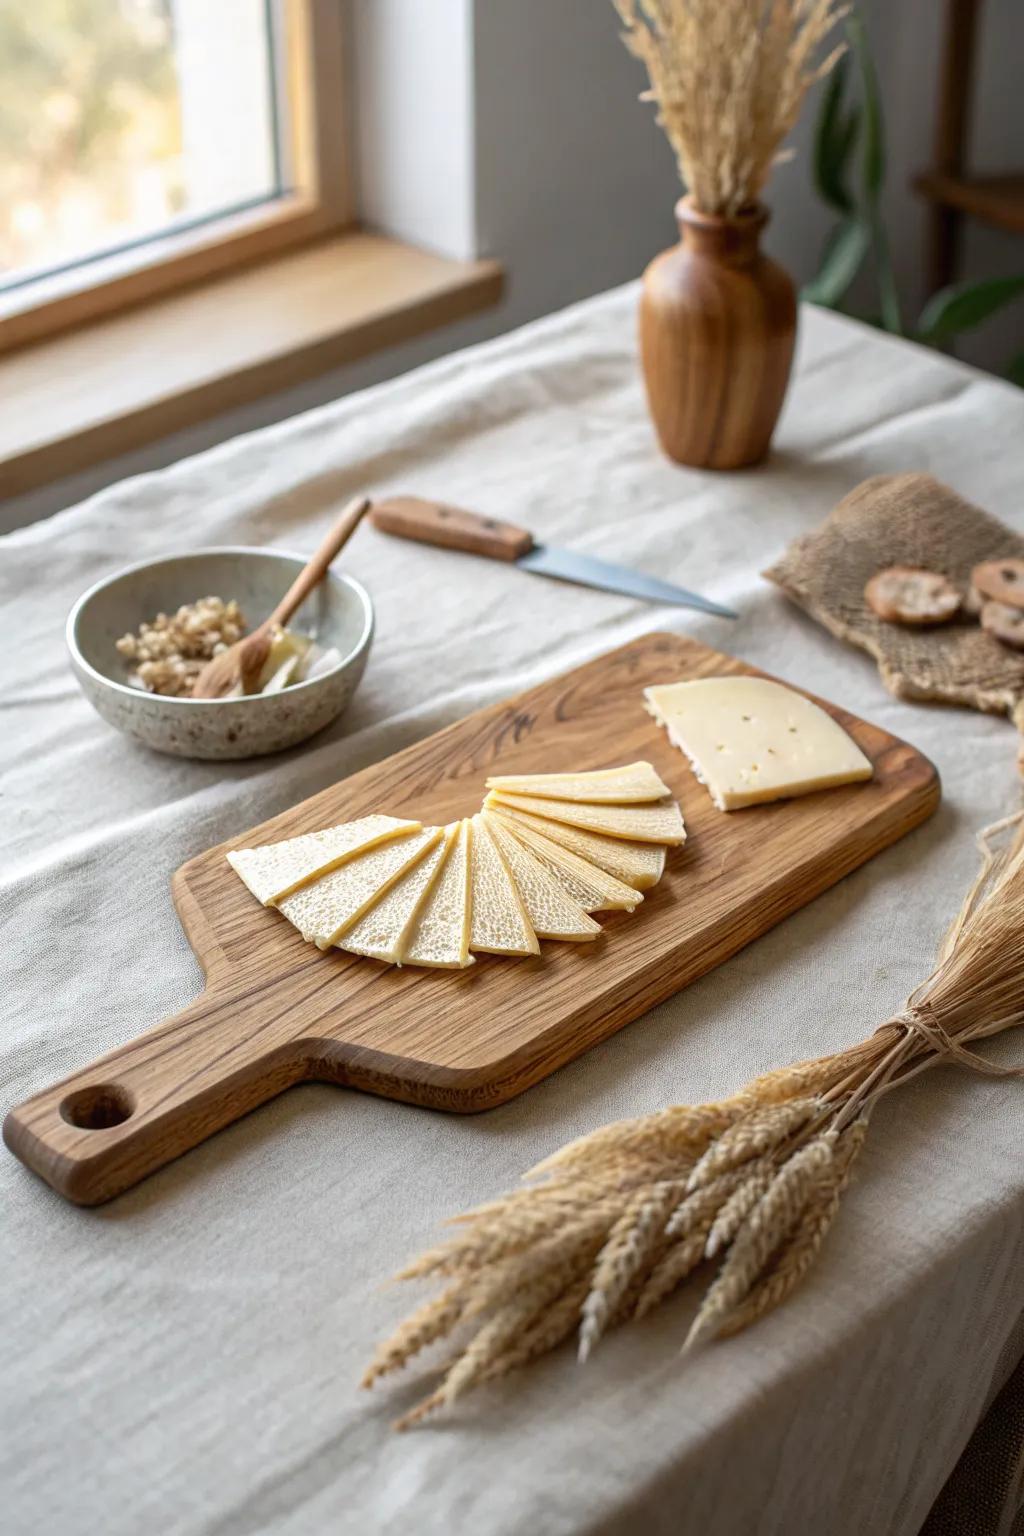
Instead of cubes, I do a cheese fan with thin slices or a gentle fold-and-stack so it looks like fabric draping across the charcuterie board. I started doing this after hosting a workshop night, and it’s still the quickest way I know to make cheese look fancy.
You might give these a try:
- Wooden Serving Paddle Board: Showcase your cheese arrangements beautifully on a natural wood surface that adds rustic elegance to any gathering.
- Cheese Knife Slicer: Achieve consistent, thin slices perfect for fanning or folding with a specialized knife designed for semi-hard cheeses.
- Dried Wheat Decor Bundle: Add a touch of natural texture and warmth to your table setting with these preserved decorative stems.
Cracker Cascades
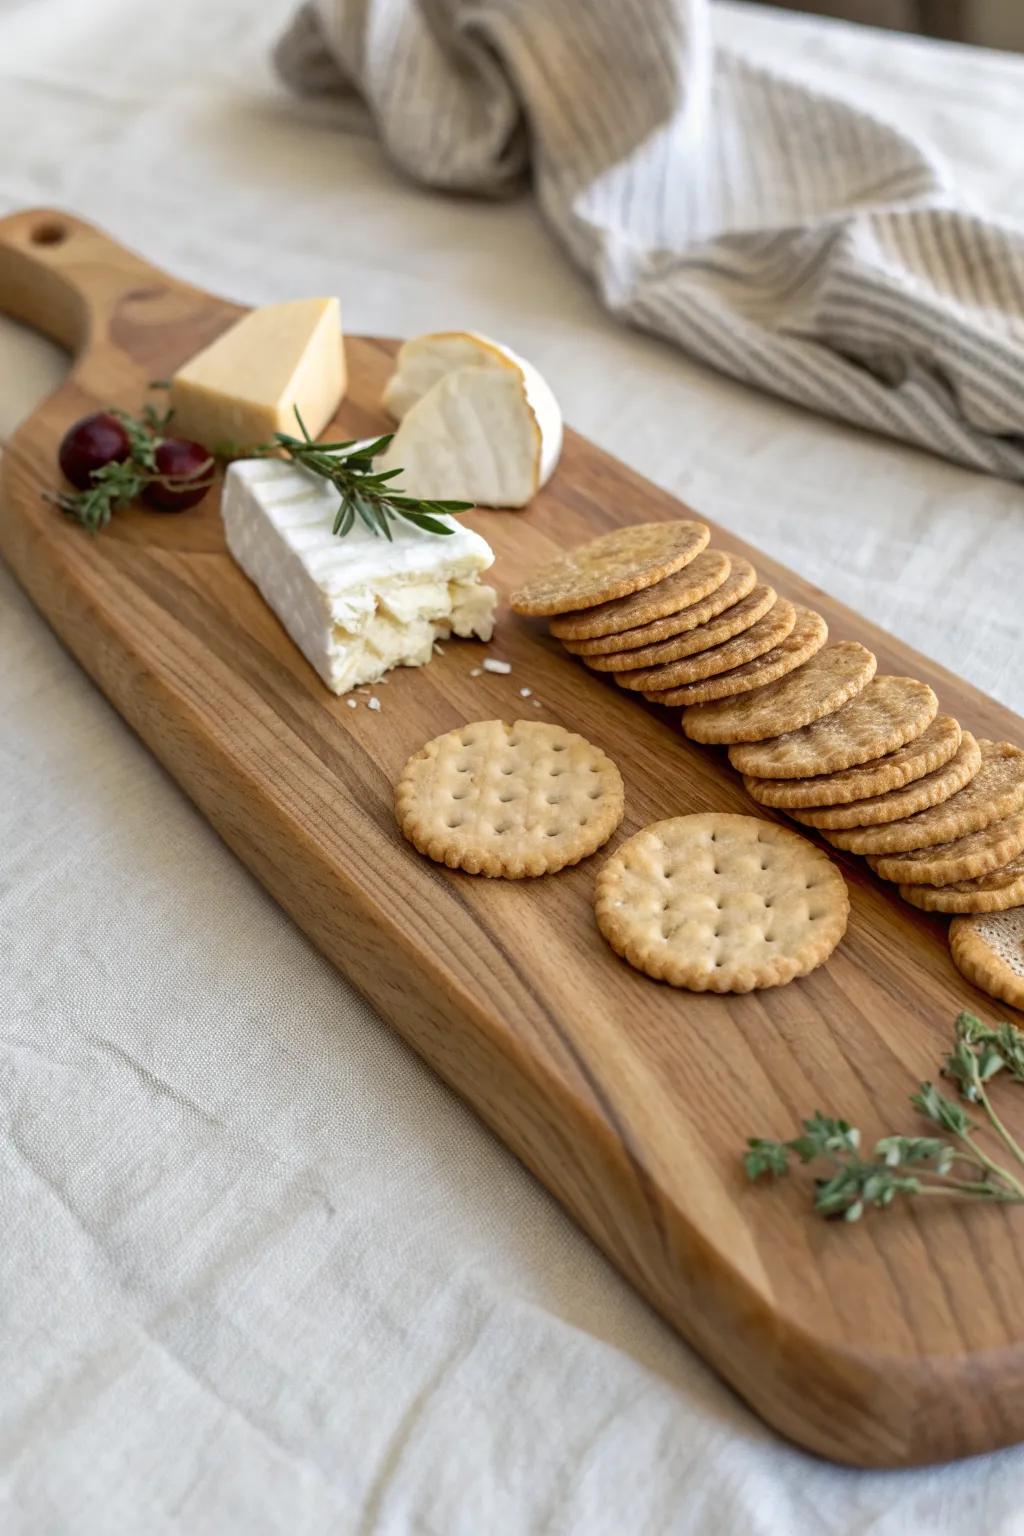
I stack crackers into a cracker cascade—little leaning rows that flow around cheeses like shingles on a tiny roof. I’ve noticed this trick makes the board feel full without overcrowding the center, which is perfect when you want that abundant look.
A few suggestions:
- Long Wooden Serving Board: Choose an elongated board to provide sufficient runway for your neat cracker rows and savory pairings.
- Assorted Cracker Box: Find variety in texture and shape to create visually interesting stacks that complement your different cheeses.
- Small Herb Scissors: Snip fresh sprigs precisely to garnish your cracker lines, adding a pop of green and aroma.

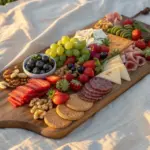
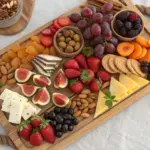
Seasonal Harvest Gradient
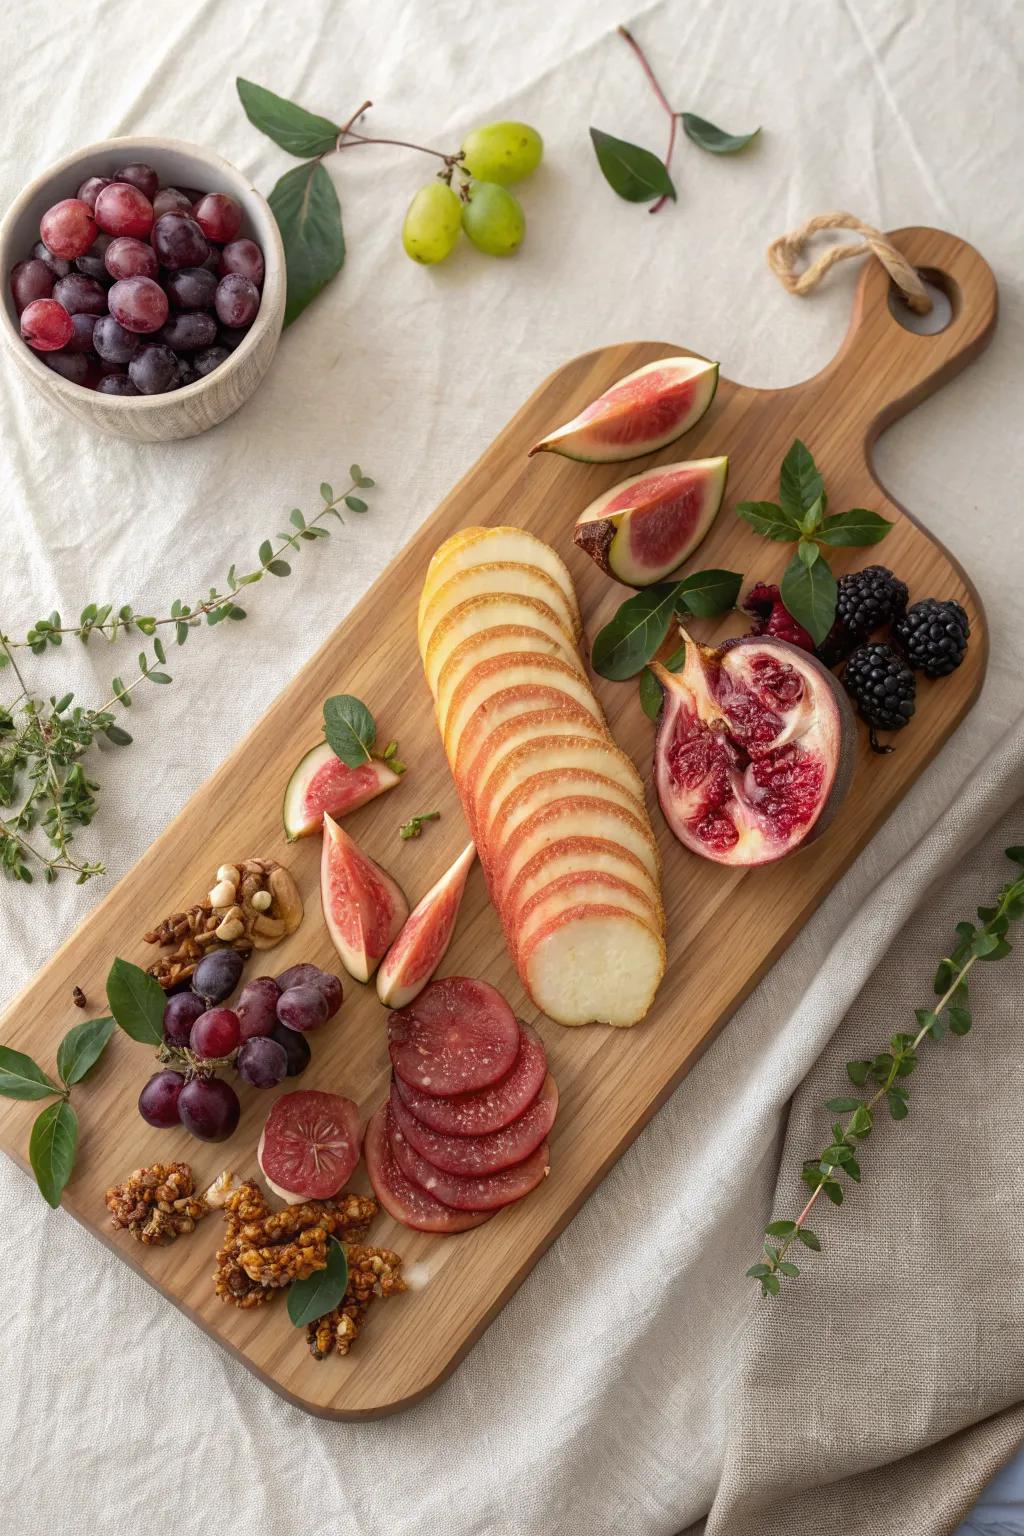
I’ll line up seasonal fruit from light to dark—think pale pears to deep grapes—so the charcuterie board reads like an ombré stripe. I tried it one fall for a cozy get-together, and people kept snapping photos before they grabbed a single cracker.
Check if these fit your needs:
- Large Wooden Serving Board with Handle: Choose a spacious board to easily arrange your fruit gradient and create a stunning centerpiece for guests.
- Small Ceramic Dip Bowls: Use these versatile bowls to corral loose berries or grapes, adding structure to your colorful fruit display.
- Cheese Knife and Slicer Set: Prepare your harvest fruits precisely with the right tools to ensure neat slices for your gradient arrangement.
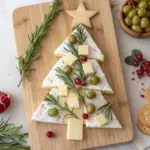
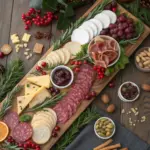
Holiday Tree Triangle
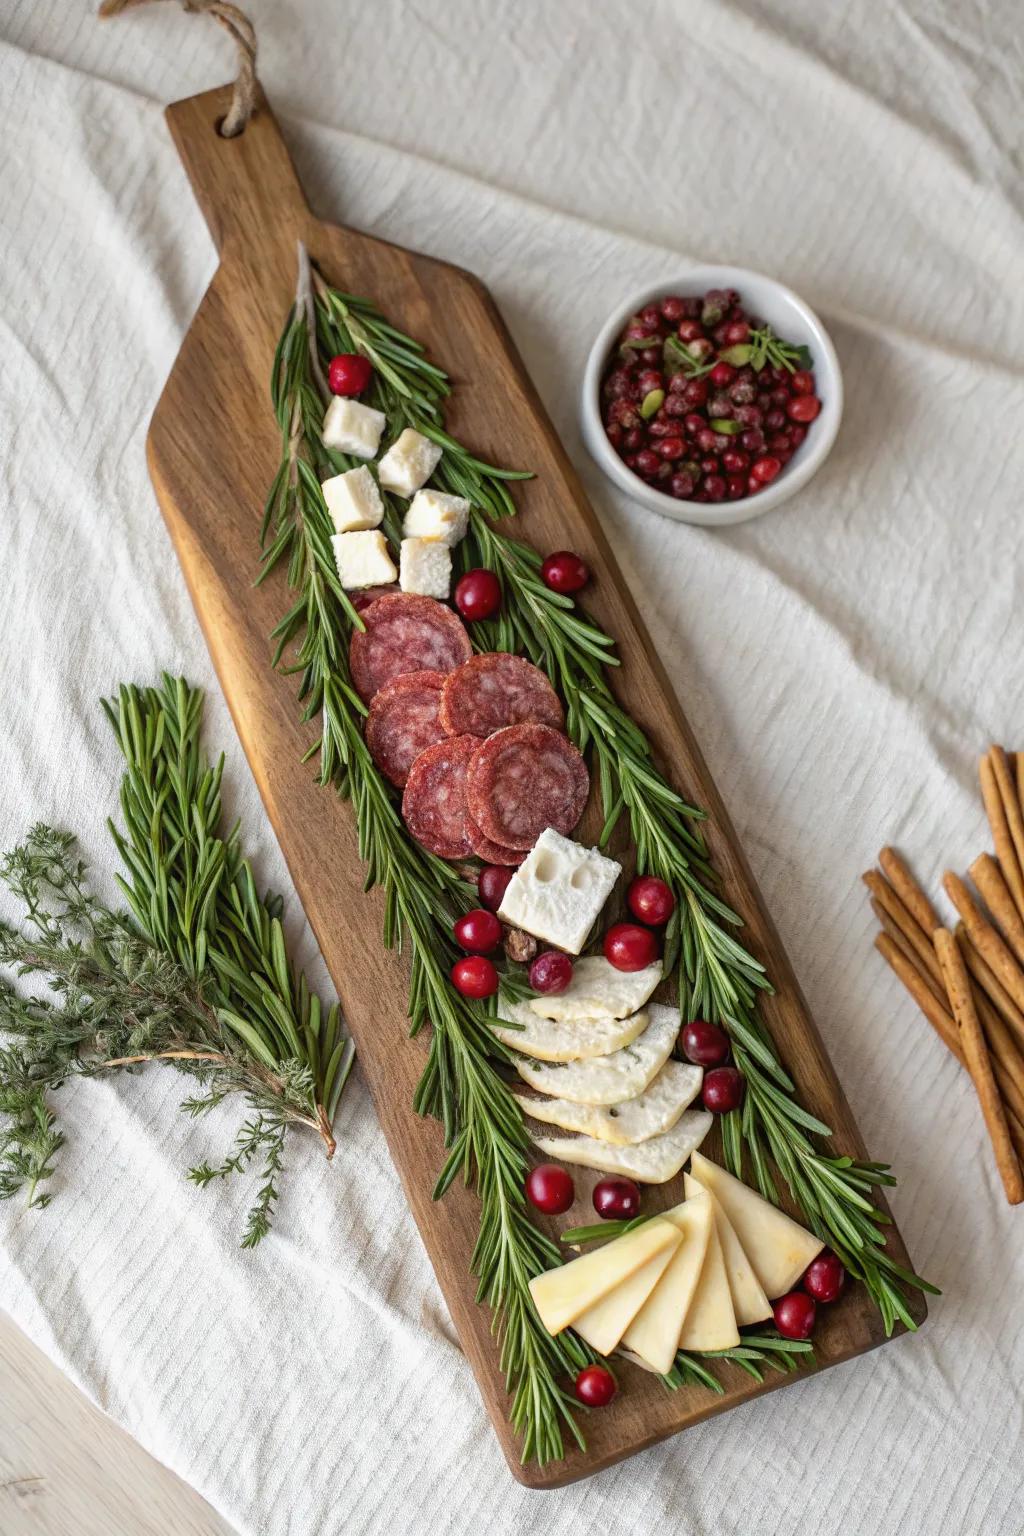
A triangle layout makes an easy tree-shaped charcuterie board, especially when you layer greens (herbs), reds (berries), and creamy cheeses. I’ve built this one on a long board with the “trunk” as breadsticks, and it always disappears first.
Might be a good match:
- Long Wooden Serving Board with Handle: Create the perfect canvas for your holiday tree shape with a sturdy, elongated serving paddle that guests will love.
- White Ceramic Ramekins: Keep juicy berries, olives, or dips neatly contained alongside your arrangement with these perfectly sized, versatile dipping bowls.
- Crunchy Italian Breadsticks: Form a delicious and functional tree trunk for your edible centerpiece using these crisp, classic snacking sticks.
Heart-Shaped Date Night Board
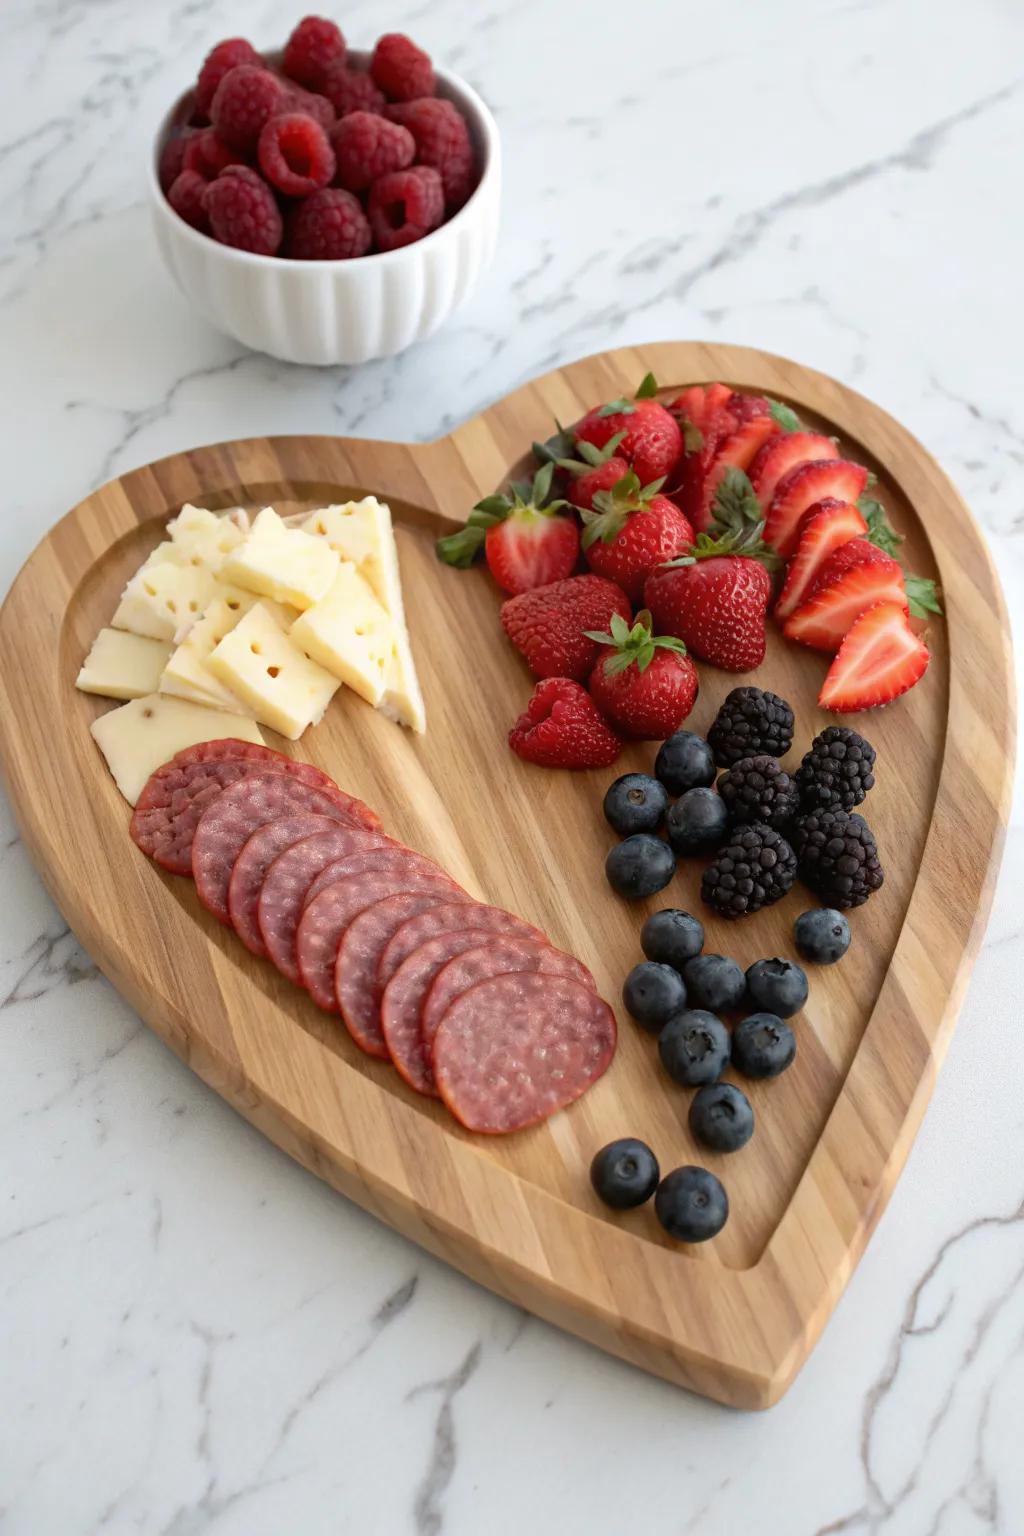
For a sweet little moment, I arrange everything into a heart shape and use berries to sharpen the outline on the charcuterie board. I’ve made this for cozy at-home celebrations, and the heart silhouette is surprisingly easy as long as you start with the border first.
Explore these options:
- Wooden Heart-Shaped Serving Platter: Recreate this romantic look instantly with a dedicated heart-shaped wooden board for effortless styling and beautiful presentation.
- Ceramic Ramekin Set: Use small white ceramic bowls like this to contain juicy berries or dips while adding elegant contrast.
- Cheese Knife and Spreader Set: Ensure easy serving of your cheeses and spreads with a matching set of small, specialized serving utensils.
Rainbow Row Charcuterie

I build a rainbow layout by grouping ingredients by color—red fruit, orange dried slices, green olives, and so on—across the charcuterie board. The first time I did it, I realized the trick is keeping each color in two textures (fresh + dried) so it looks layered, not flat.
A few relevant products:
- Long Rectangular Charcuterie Board: Provide ample space for your linear color gradient with a long, sturdy wooden serving plank.
- Small Wooden Dip Bowls: Keep round ingredients like olives or dips contained cleanly within your rows using small, natural bowls.
- Dried Fruit Assortment: Add necessary texture and vibrant colors to your rainbow rows with high-quality dried fruit slices.
Garden Path and “Vines”
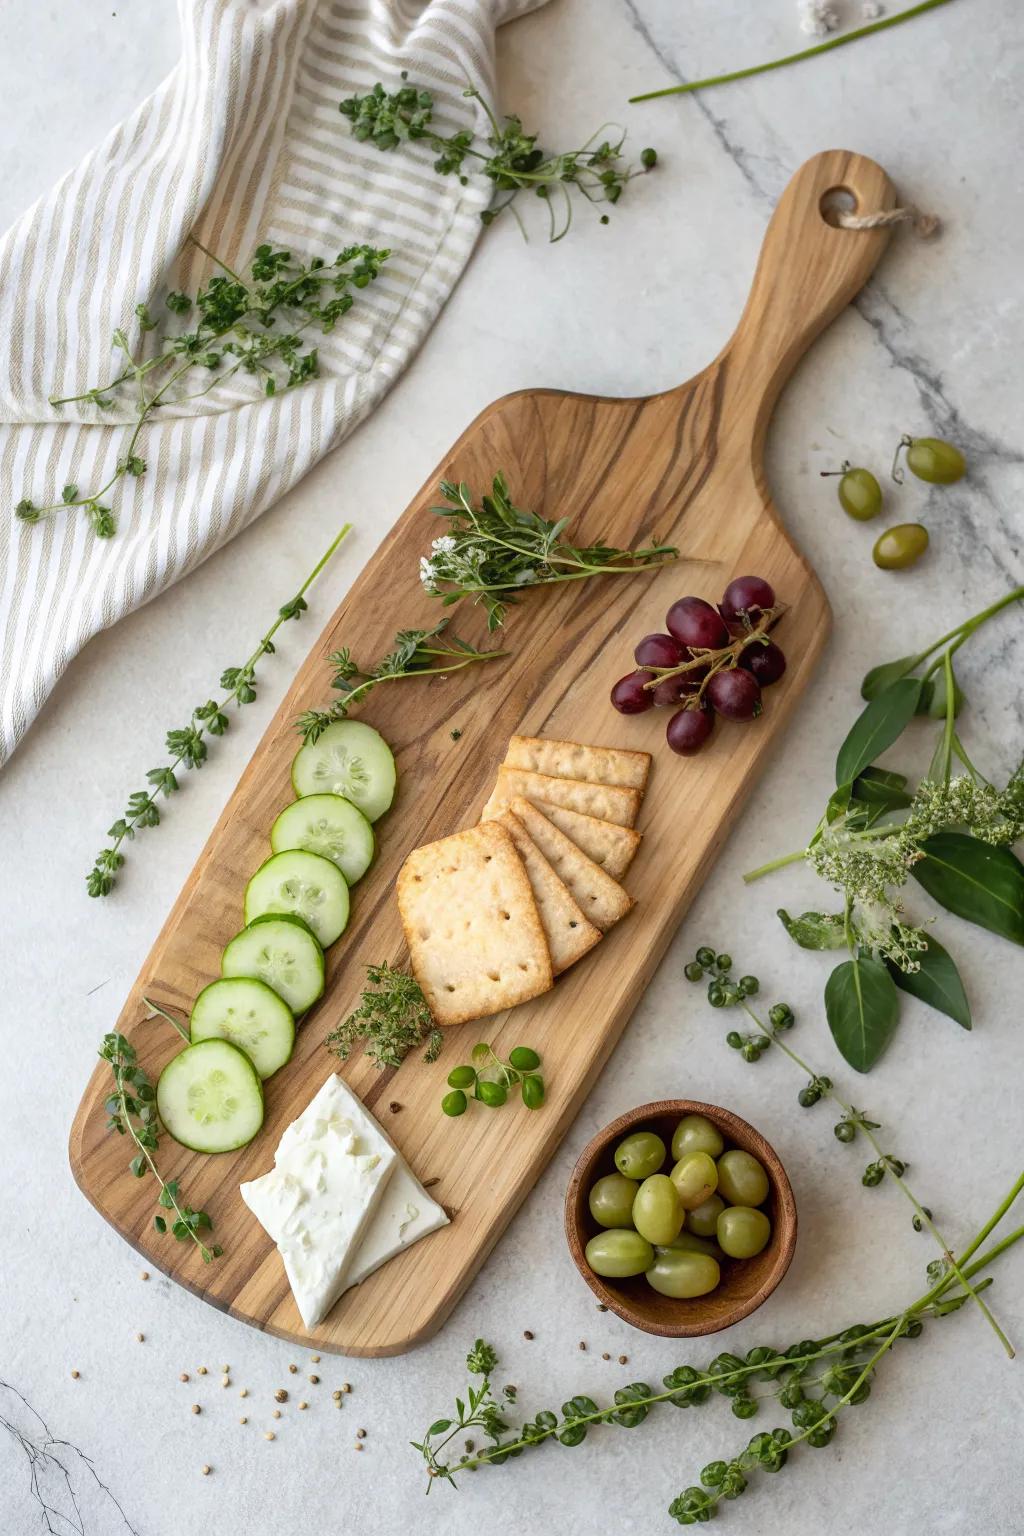
I like making a garden-style charcuterie board with cucumber “paths” and herb “vines” that weave between cheeses and bowls. I started doing this when my workshop table was covered in greenery scraps, and now it’s my go-to for spring gatherings.
Items that may come in handy:
- Olive Wood Serving Board with Handle: Create the perfect rustic foundation for your garden scene with a beautiful, durable natural wood serving paddle.
- Small Wooden Condiment Bowls: Nestle these small, earthy bowls among your edible vines to hold olives, nuts, or extra grapes.
- Specialized Cheese Knife Set: Slice your cucumber pathways and cut soft cheeses cleanly with a dedicated set of serving tools.
Stained-Glass Mosaic Pattern
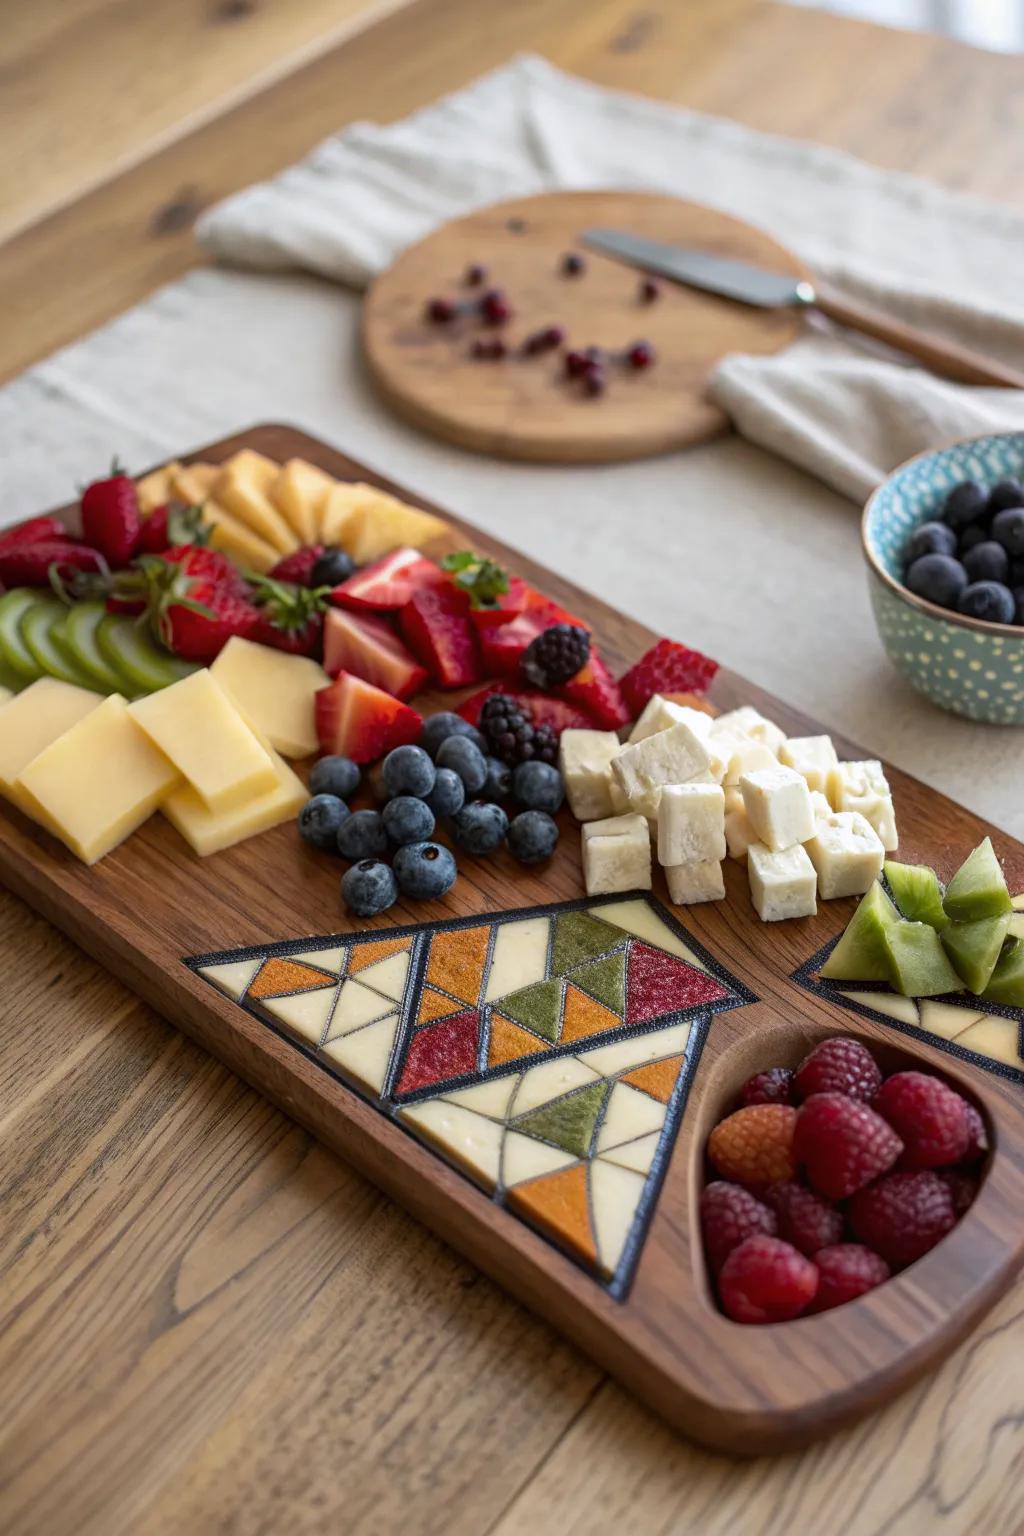
This one’s a showstopper: I create a stained-glass pattern using angular cheese pieces and bright produce, with thin cracker lines like “leading” between sections. I tried it once just for fun, and it turned my charcuterie board into something that looked almost too pretty to eat.
Try these:
- Rectangle Wooden Charcuterie Board: Choose a sturdy, spacious rectangular board as your canvas to layout intricate geometric food designs easily.
- Sharp Paring Knife Set: Get precise, clean cuts on hard cheeses and fruits to create the perfect angular mosaic shapes.
- Small Geometric Cookie Cutters: Use these cutters to quickly stamp out uniform triangles and diamonds from cheese or melon slices.
Geode Center Cut
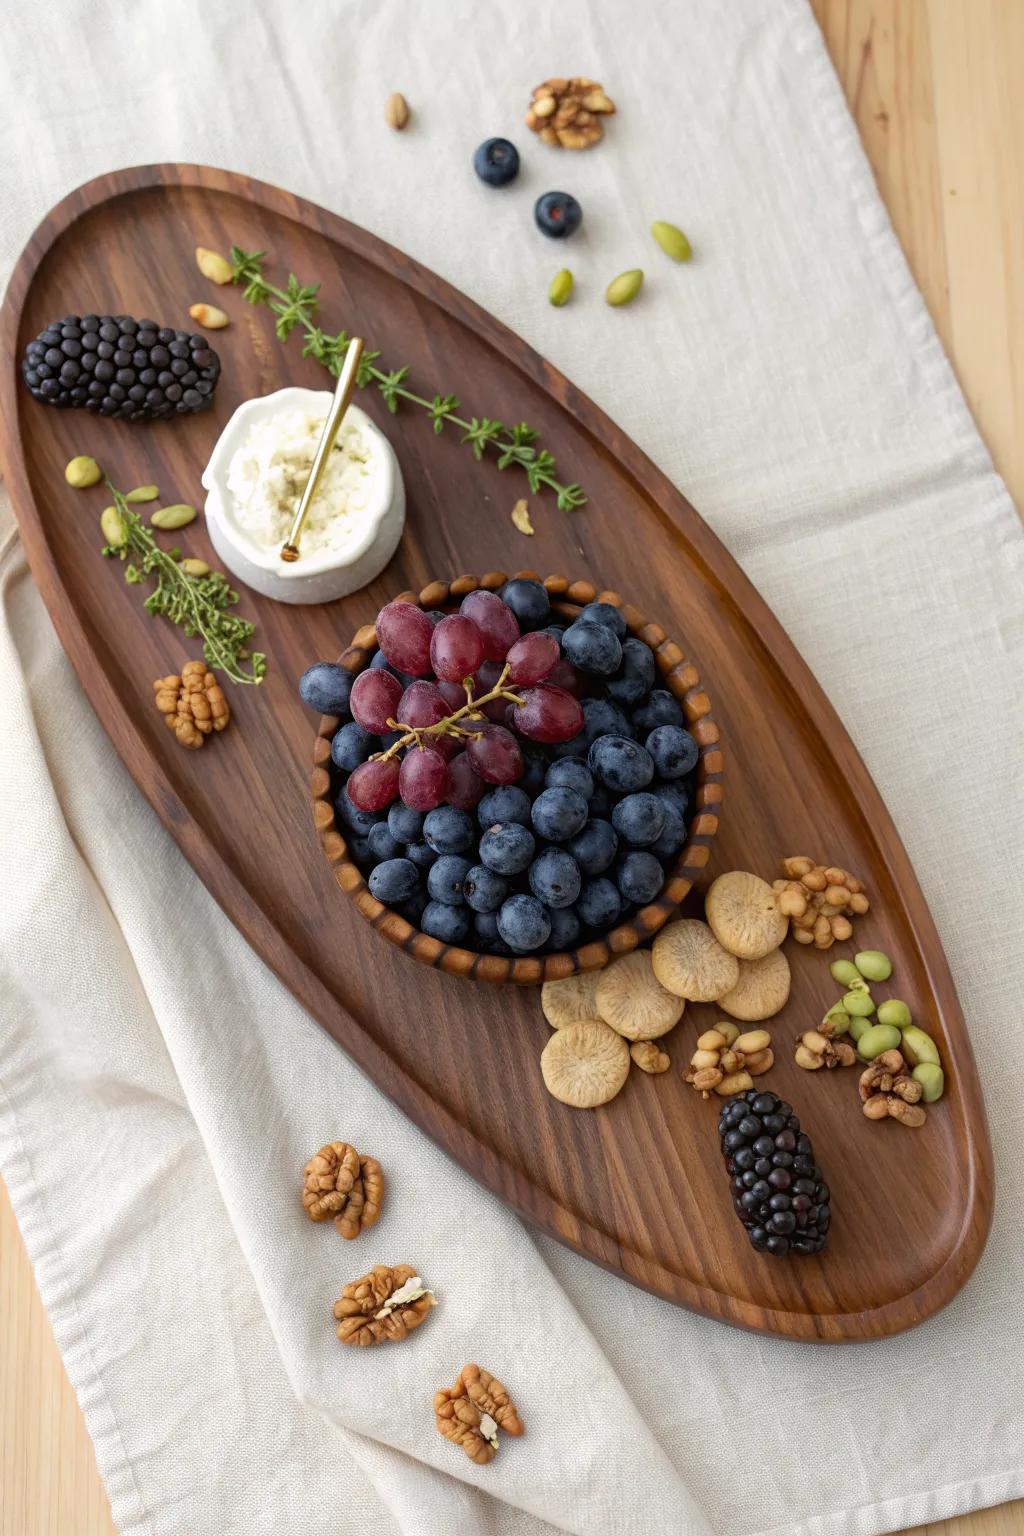
I make a geode-style charcuterie board by clustering grapes or berries in the center like “crystals,” then ringing them with cheeses and nuts for that layered rock look. The first time I did it, I couldn’t stop adjusting the layers—just like fussing over a perfect wood finish.
These products might be useful:
- Oval Wooden Serving Platter: Start your arrangement with a dark wood platter to provide a rich, natural background for your geode design.
- Mini Ceramic Dip Bowls: Use small, textured white bowls to hold soft cheeses or dips, adding contrast and structure to your layers.
- Gold Cocktail Picks or Spoons: Add a touch of elegance and metallic shine to your board with small gold utensils for serving.
Topographic Map Lines
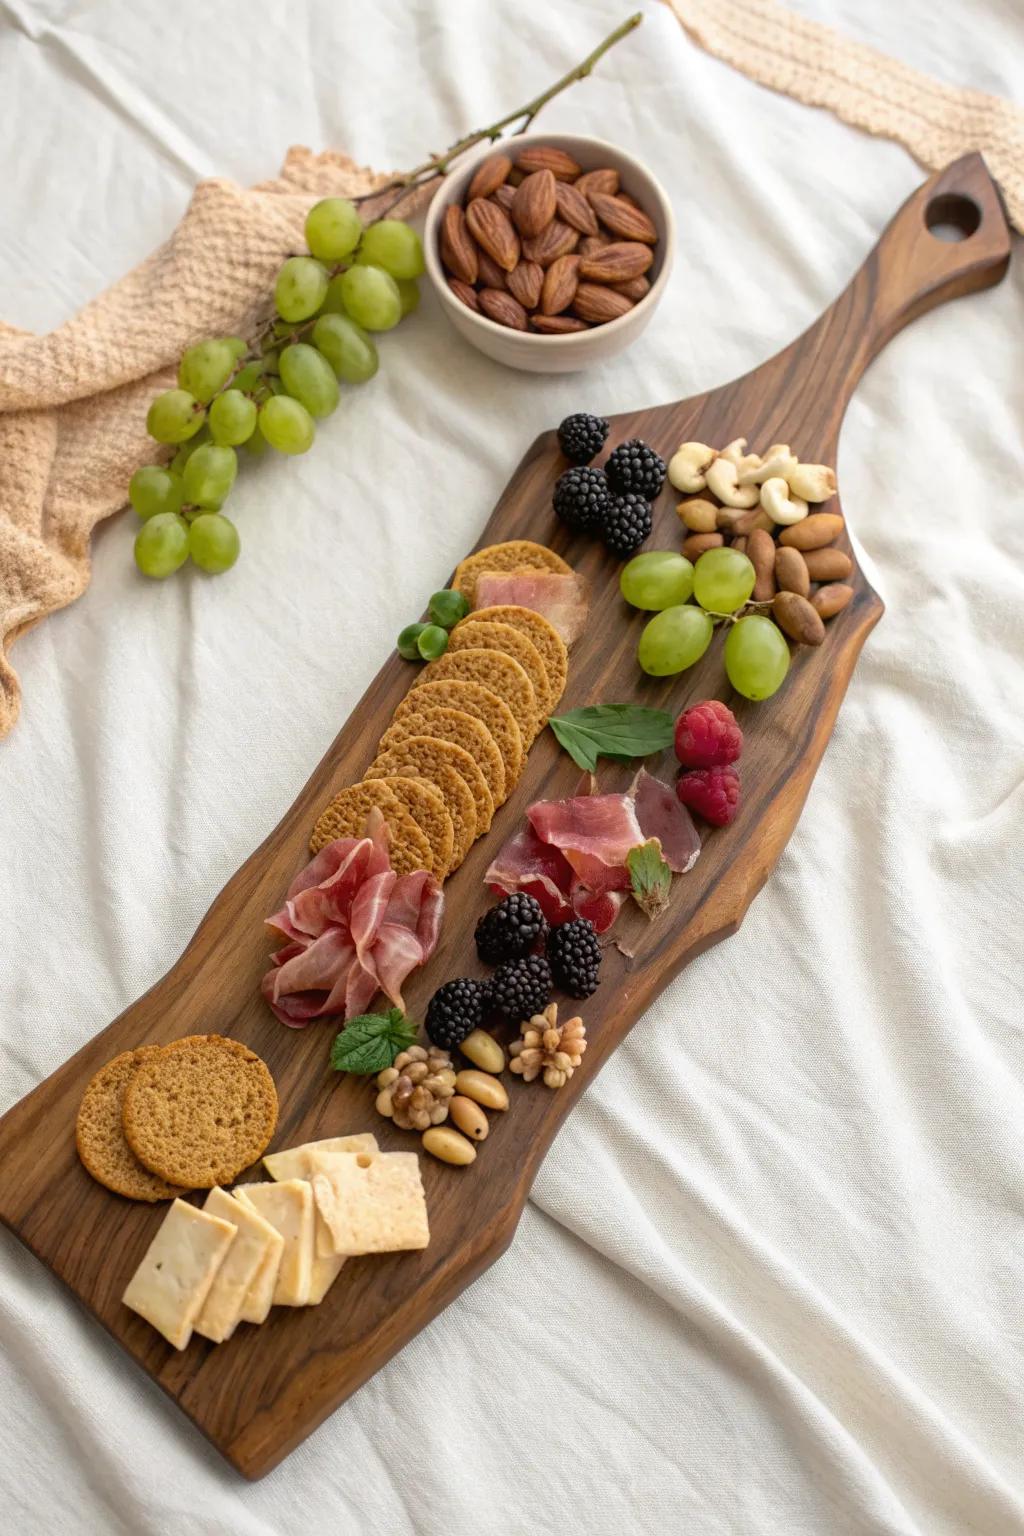
For a totally unexpected vibe, I lay meats and crackers in curving topographic lines, like a map, and fill the “contours” with nuts and fruit. I’ve used this idea on long boards, and it’s oddly satisfying watching the charcuterie board look more detailed with every little line.
May just do the trick:
- Long Dark Wood Serving Board: Choose an elongated board to create ample space for your flowing topographic food lines and contours.
- Small Ceramic Dip Bowls: Use small, neutral bowls to hold loose nuts or olives while breaking up your curving lines.
- Artisan Cracker Variety Pack: Select round and textured crackers to easily form the winding shapes required for your map design.


