
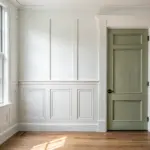
A little doorway molding can turn a plain builder-basic opening into something that feels custom and intentional. These are the trim upgrades I’ve built in my own shop and in clients’ homes when we want that “how did it always look this good?” effect.
Picture-Frame Outer Molding
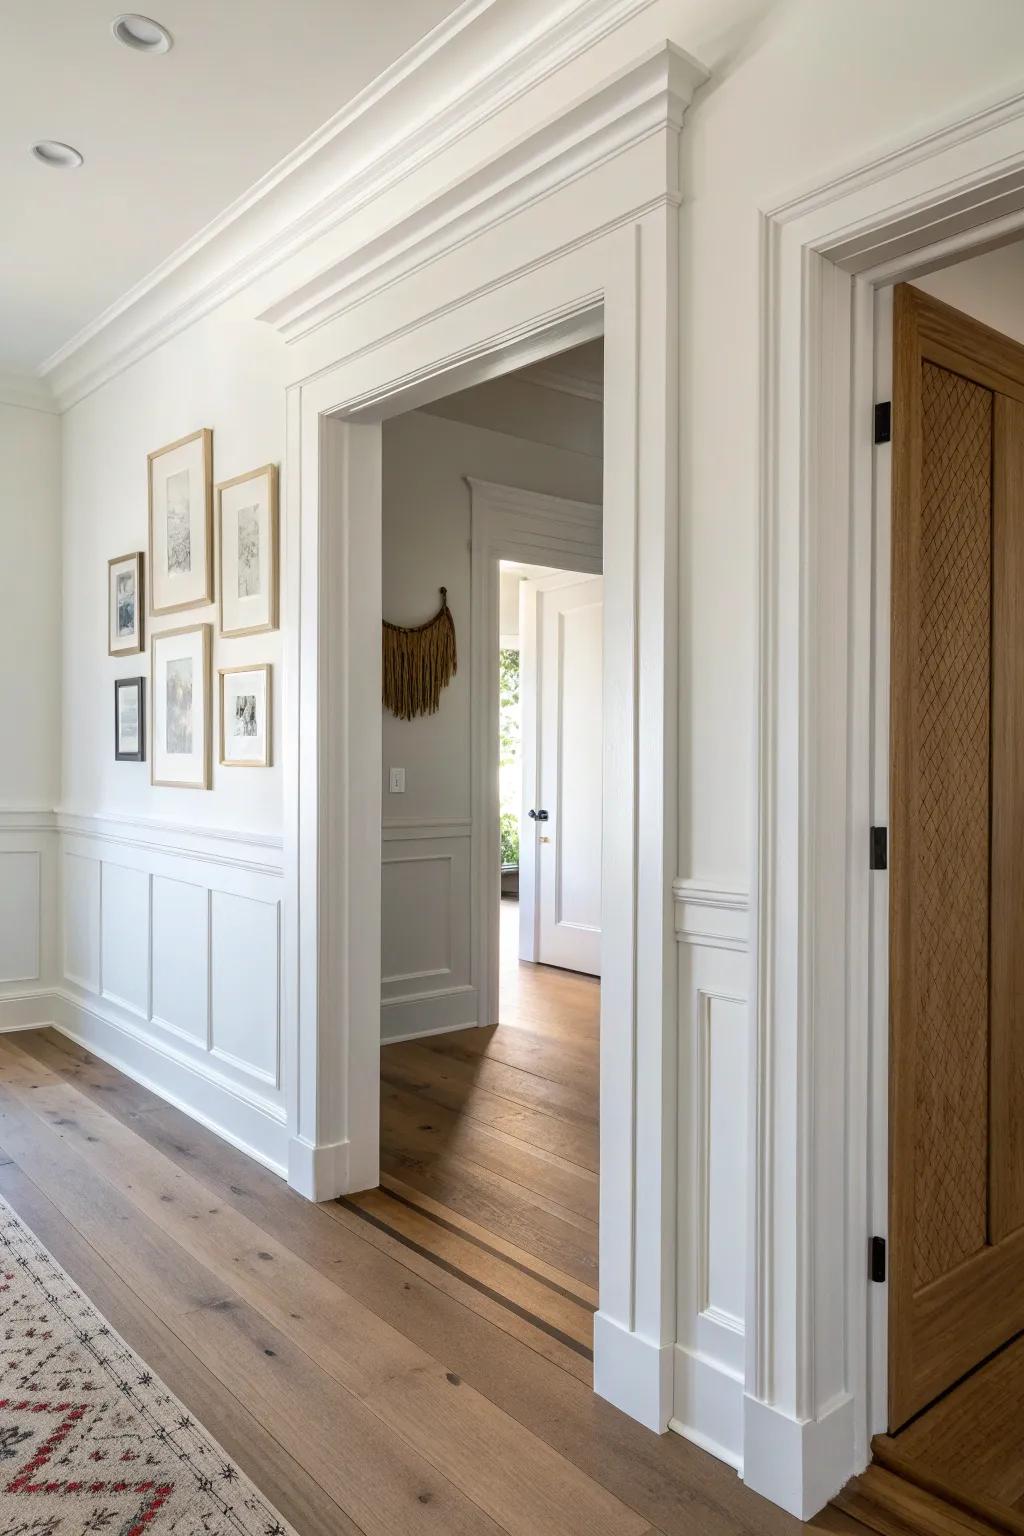
Add a second, larger rectangle of doorway molding around the main casing to create a “framed” architectural look. I tried this on a plain entry, and the extra perimeter detail made it feel like the doorway belonged in an older home.
Explore these options:
- Primed Pine Finger-Jointed Casing: Use this smooth, ready-to-paint molding to create sturdy, classic outer frames that elevate plain doorways quickly.
- Decorative Crown or Architrave Header: Install a decorative header piece atop your door frame to add instant height and architectural grandeur.
- Brad Nailer Kit: Secure your new molding layers cleanly and efficiently without damaging the wood surface using this essential tool.

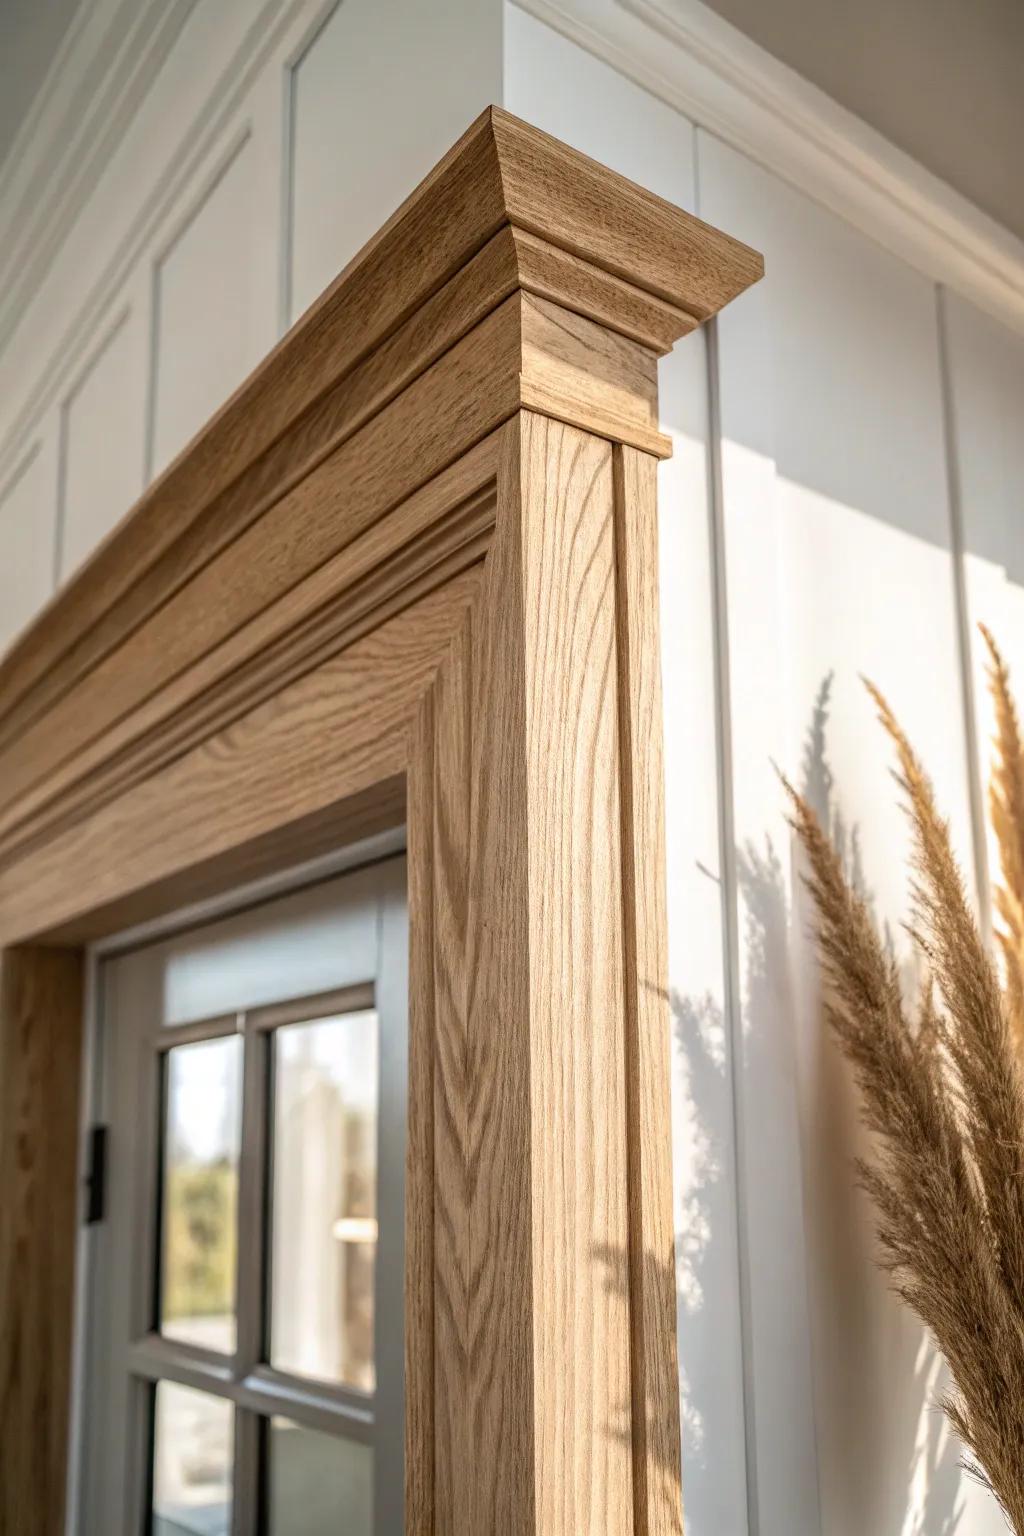
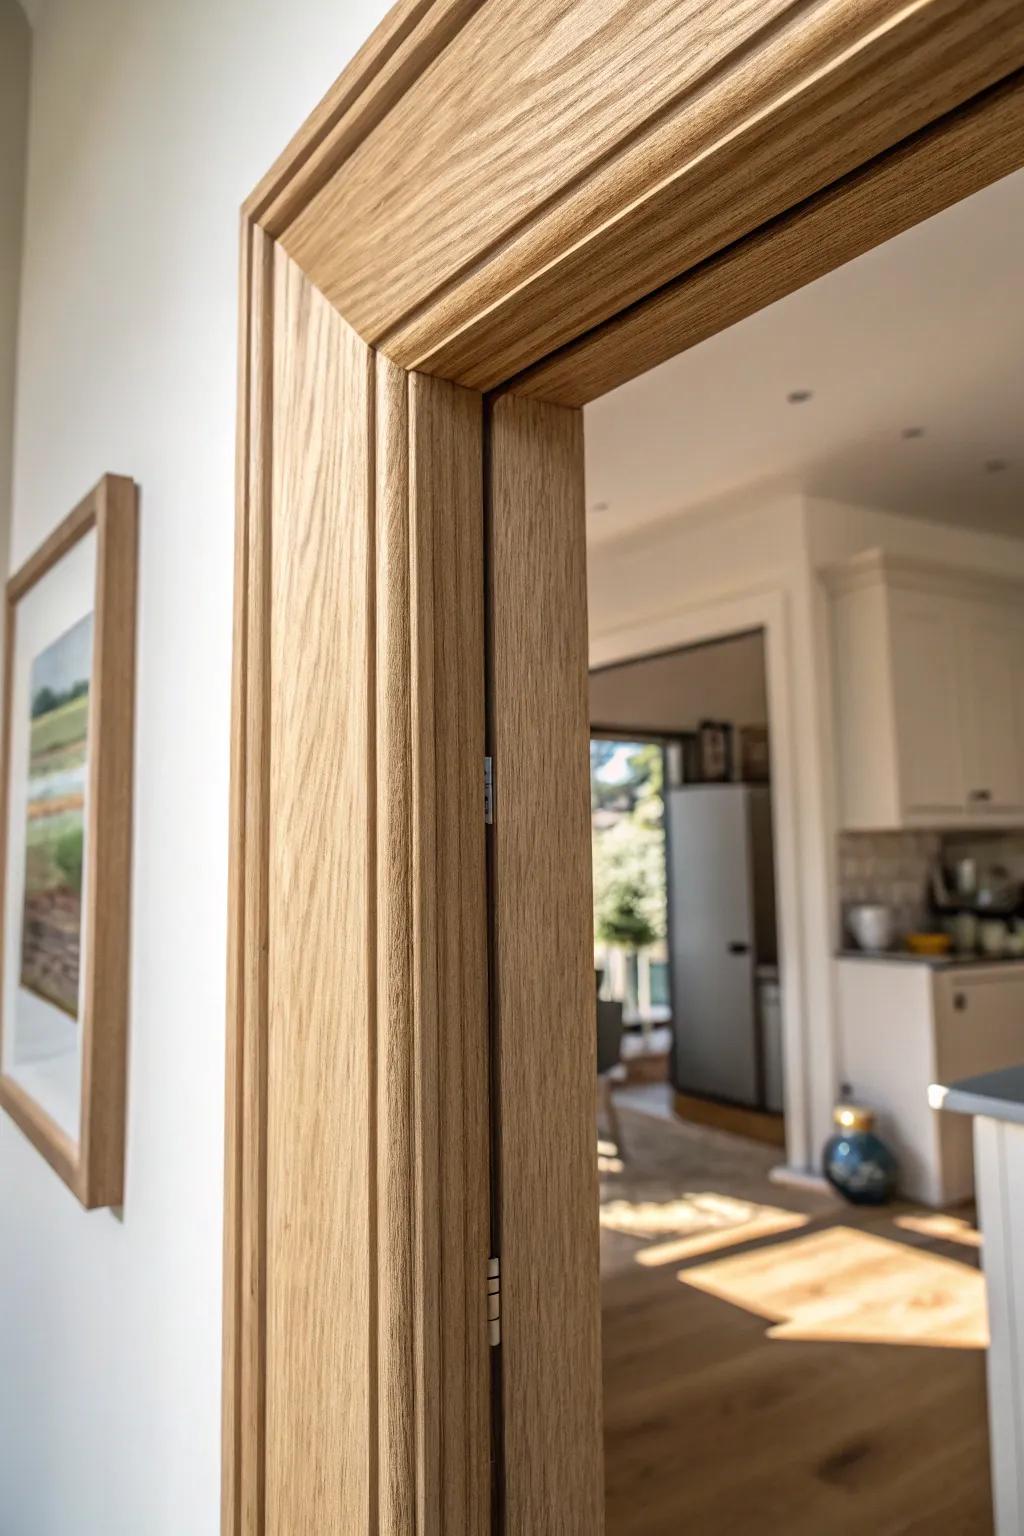
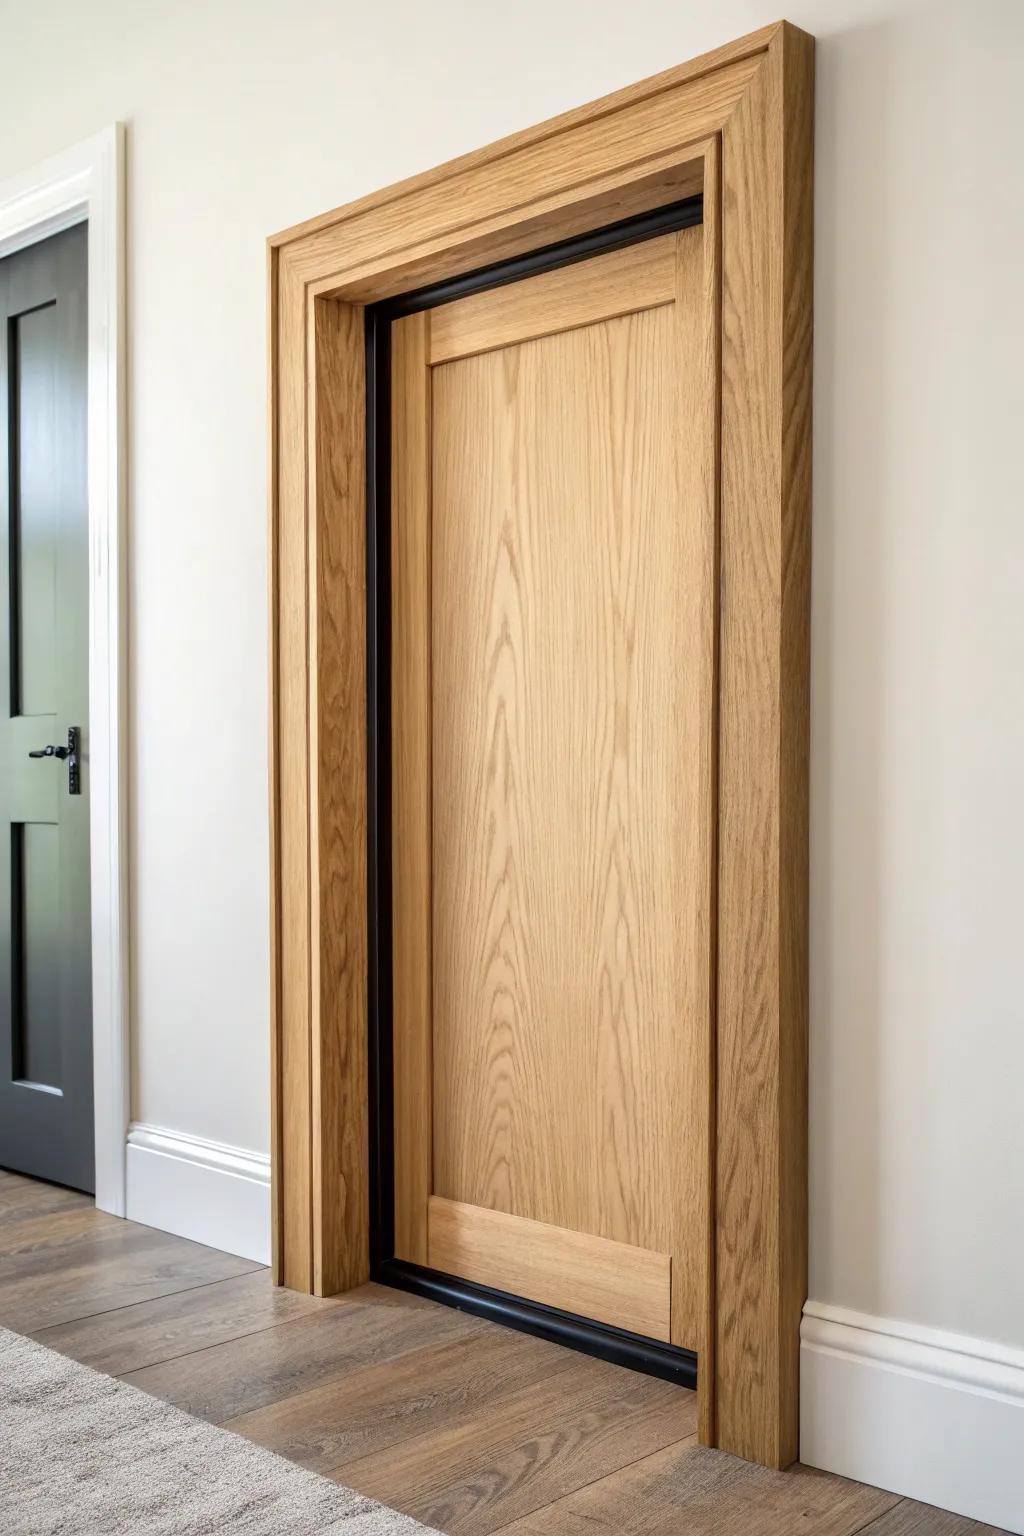
Classic Craftsman Flat Stock
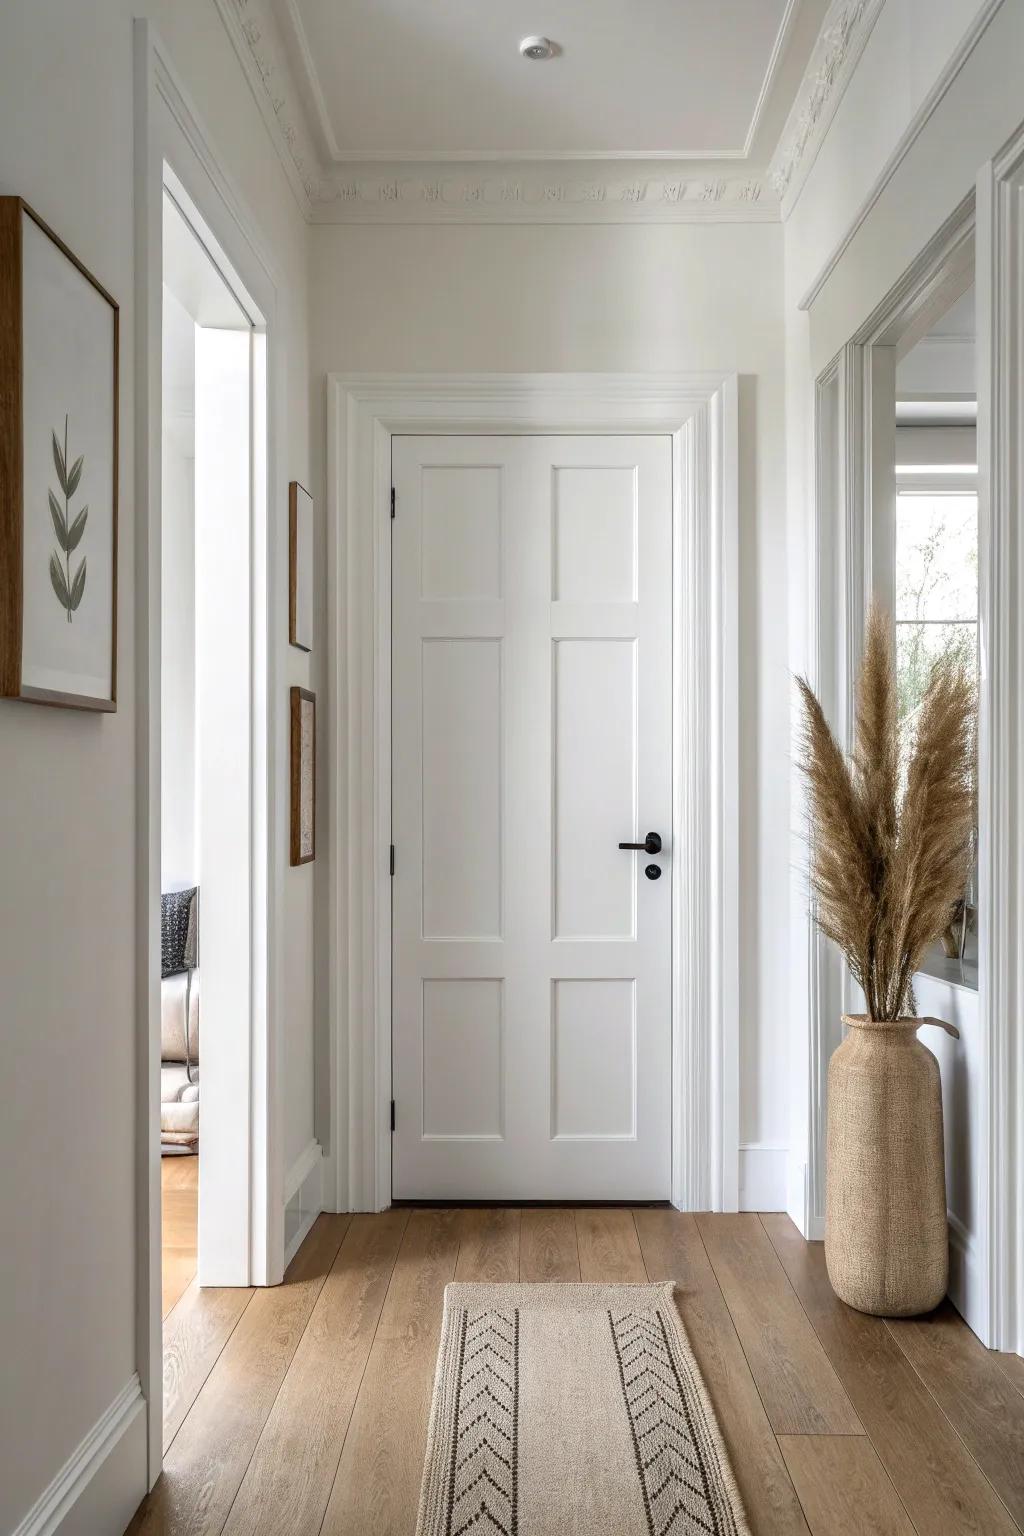
My go-to craftsman doorway molding is simple flat boards for the legs with a wider top piece, because it instantly adds clean structure without looking fussy. I’ve built this with straight cuts and crisp edges, and it makes even a basic hallway doorway feel like real architecture.
Products that could assist:
- Primed MDF or Pine Boards: Create the structural flat stock look by choosing smooth, primed boards ready for your custom installation.
- Compound Miter Saw: Ensure those critical straight cuts and crisp edges are perfectly square with a reliable power saw.
- Brad Nailer Kit: Secure your new molding efficiently and cleanly for a professional finish with a trusted brad nailer.

Farmhouse Header With Overhang
That chunky farmhouse doorway molding look comes from a header that overhangs the side casings a bit, like a tiny “lintel” moment. I’ve done this in open-concept transitions, and the little overhang adds so much confidence to the doorway.
May just do the trick:
- Oak Wood Crown Molding: Create that elegant top cap for your header by adding crown molding to finish the overhanging edge beautifully.
- Red Oak Lumber Boards: Build the sturdy base of your chunky header and side casings using distinct, high-quality hardwood boards.
- Wood Stain and Sealer: Protect your new craftsmanship and bring out the natural grain patterns with a quality penetrating wood stain.


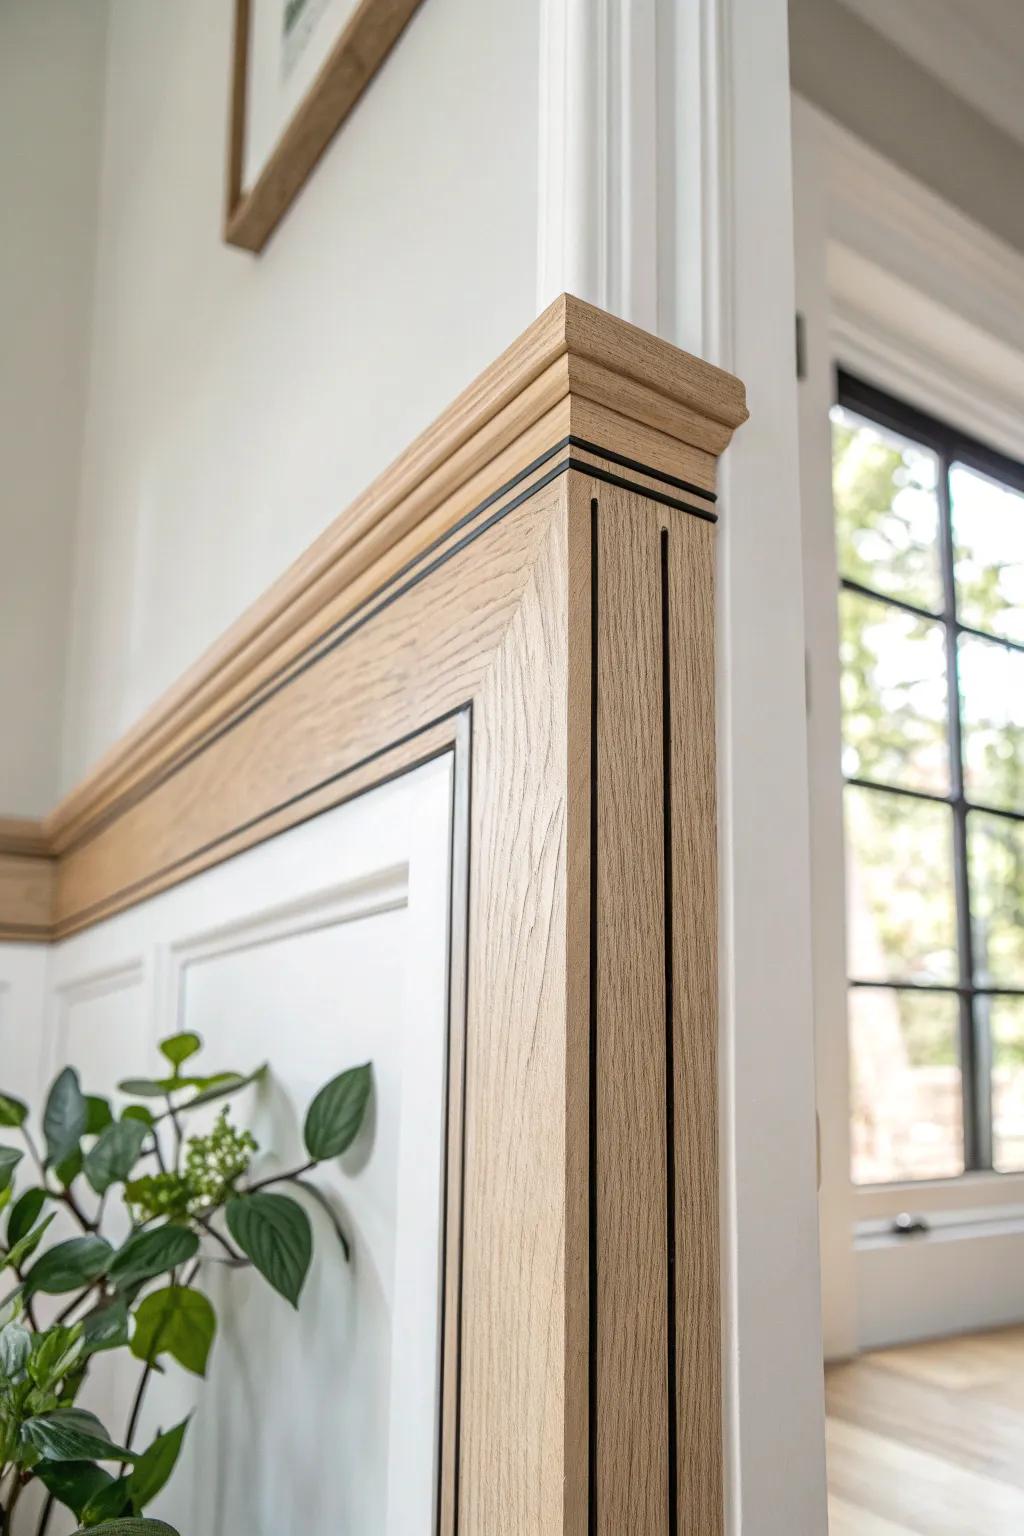
Layered Trim for Shadow Lines
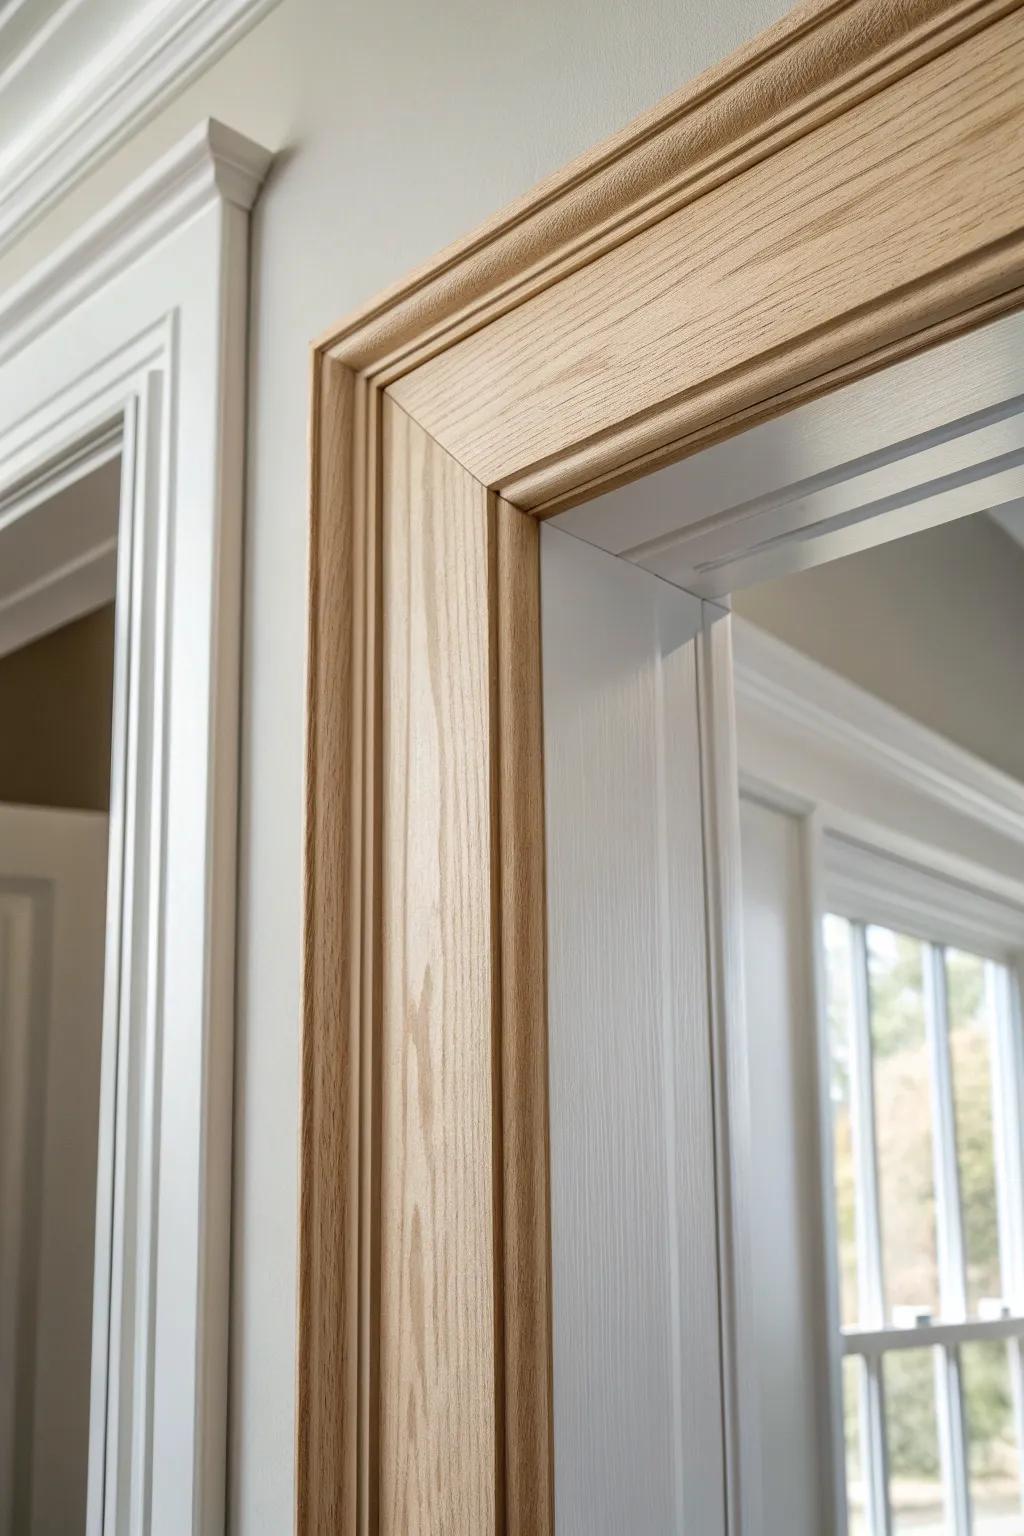
If you want your doorway molding to look expensive fast, add a thin fillet strip or backband layer to create depth and crisp shadows. I love this trick because it’s beginner-friendly, and I’ve watched it make plain trim look custom in one afternoon.
Check if these fit your needs:
- Decorative Wood Backband Molding: Add instant depth to your existing basic casing by attaching this L-shaped trim to the outer edge effectively.
- Unfinished Oak Panel Molding: Layer this simple, thin wood strip onto flat trim to create custom shadow lines and elegant detail.
- Brad Nailer Kit: Secure your delicate trim pieces cleanly and precisely without splitting the thin wood using this essential tool.
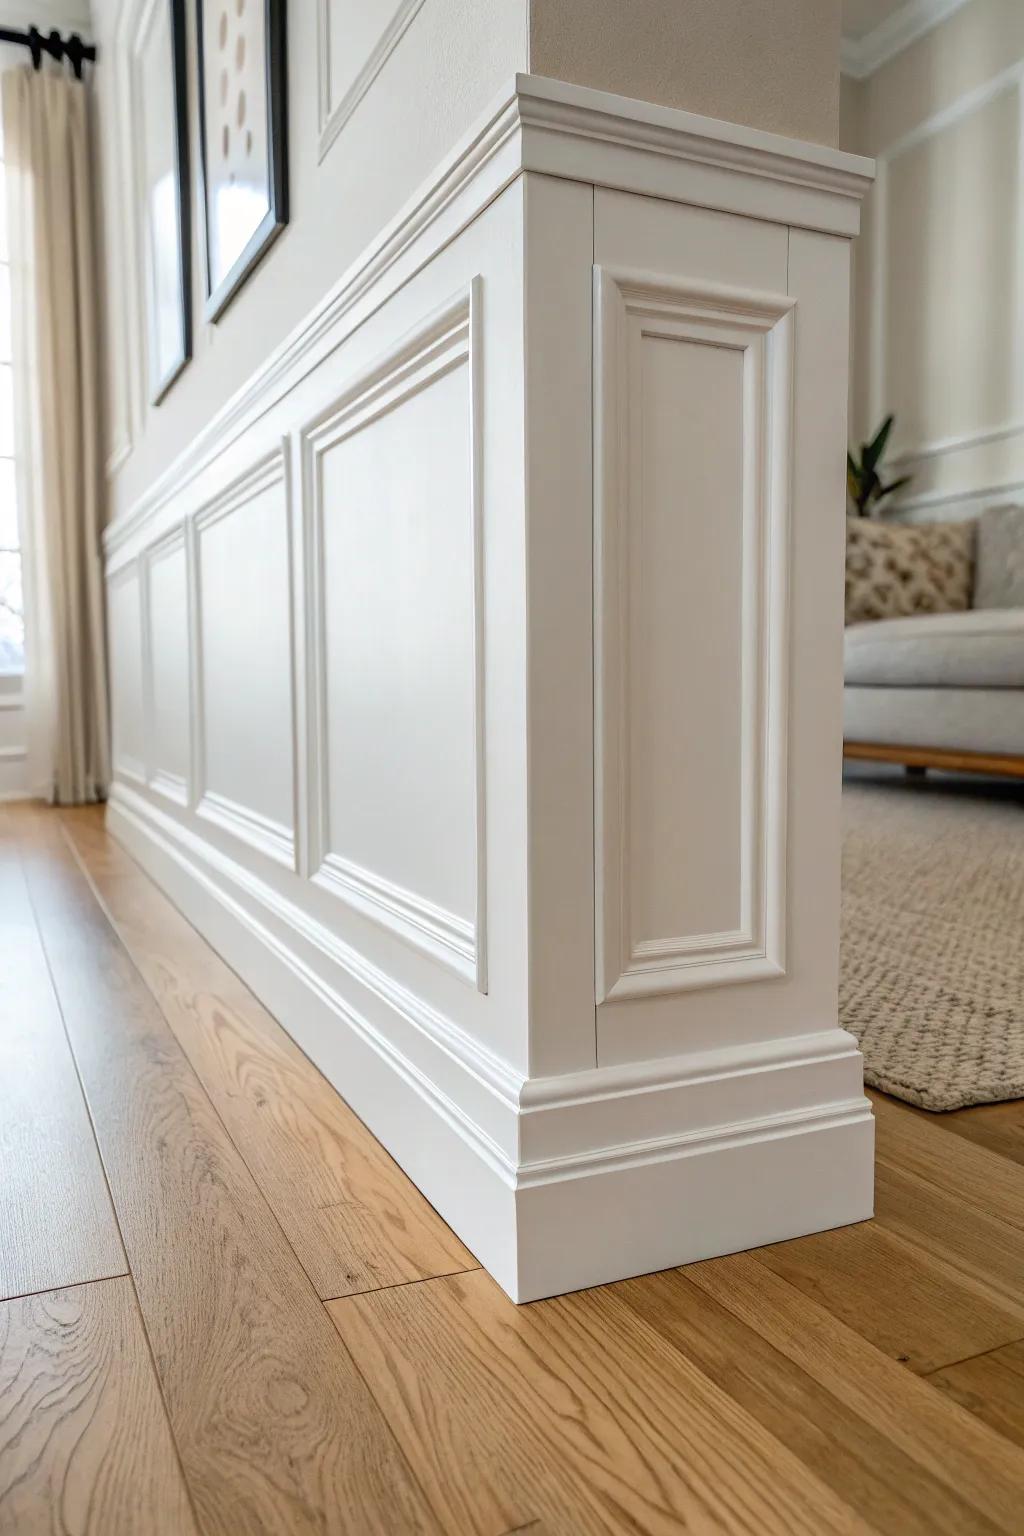
Plinth Blocks for a Clean Base
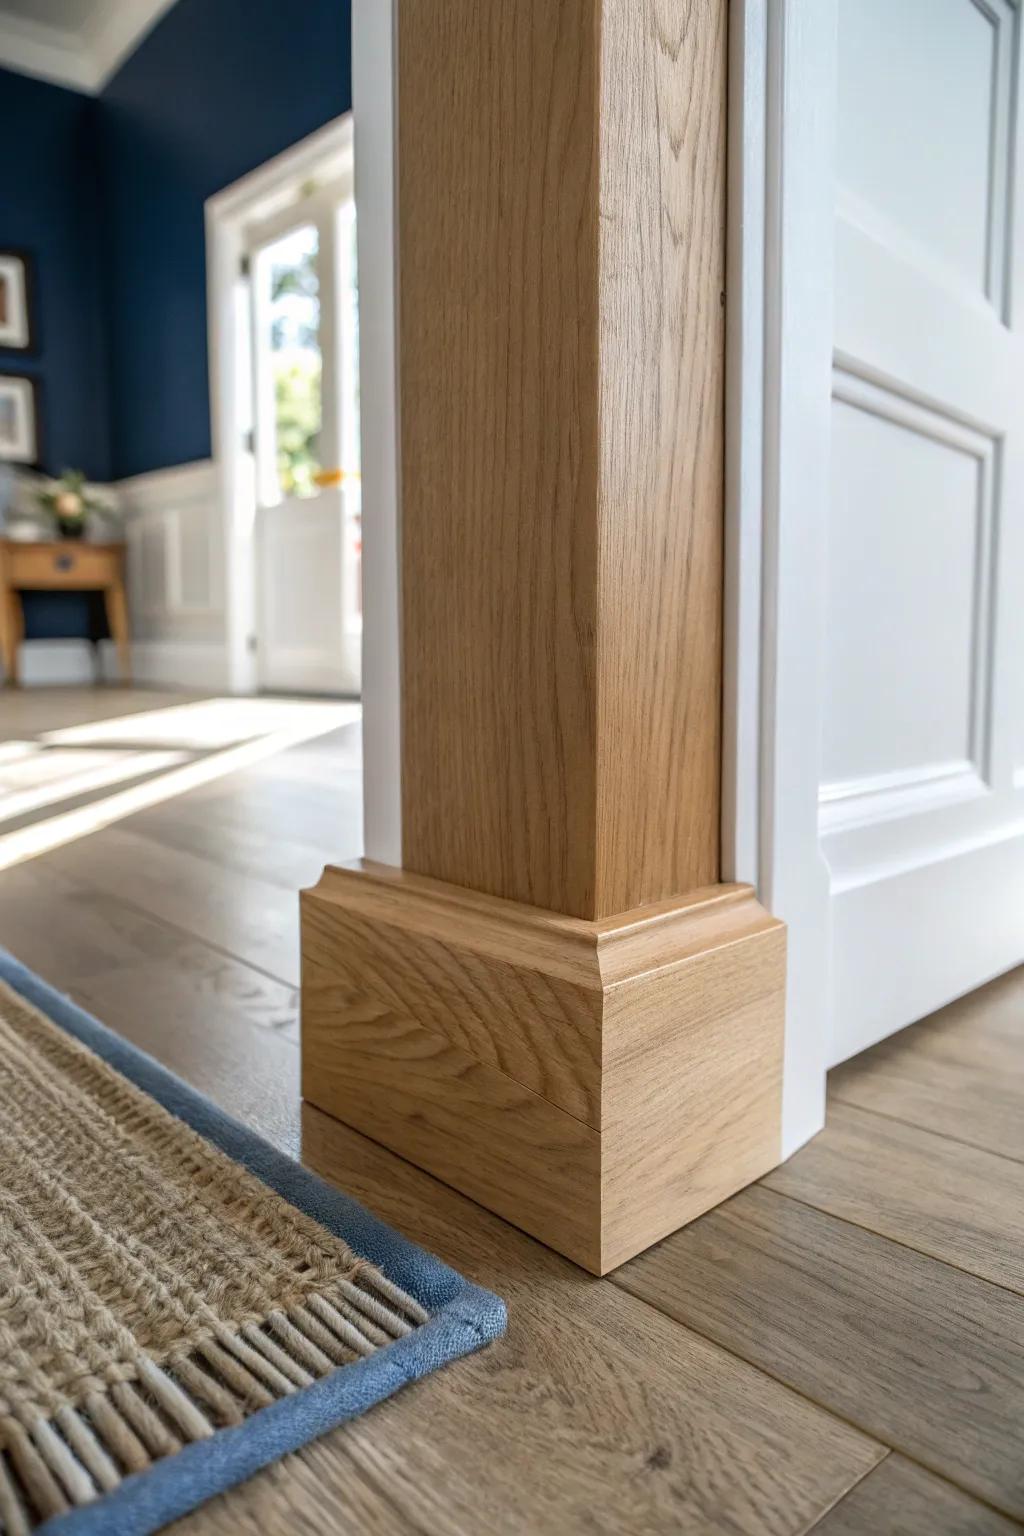
Adding plinth blocks at the bottom of your doorway casing makes the whole opening feel grounded and intentional. I use them constantly because they hide small floor/baseboard quirks and make my installs look way more polished.
Try these:
- Solid Wood Plinth Blocks: Upgrade your hallways by installing these solid wood blocks at the base of doorway casings for a classic, finished look.
- Wood Stain or Natural Finish: Enhance and protect your new woodwork with a quality stain or finish that matches your existing flooring and trim.
- Construction Adhesive: Ensure a secure, lasting installation for your new molding projects with a reliable, heavy-duty construction adhesive.
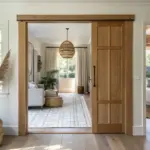
Cased Opening for Pass-Throughs
Don’t save doorway molding just for doors—trim out a cased opening between rooms to make the transition feel finished. I’ve done this between a kitchen and living space, and it instantly made the opening feel larger and more intentional.
Possibly helpful picks:
- Solid Oak Door Casing Set: Frame your pass-through with natural solid oak molding to create a sophisticated, intentional transition between living spaces.
- Wood Finish Stain and Sealer: Protect your new natural wood trim and enhance the grain patterns with a quality penetrating stain and sealer.
- Pneumatic Brad Nailer Kit: Ensure professional-looking results by using a brad nailer to secure your trim cleanly and efficiently without hammering marks.

Extra-Wide Casing to “Enlarge” the Opening
Going wider with your doorway casing can create the illusion of a grander doorway without moving a single stud. I’ve done this in darker hallways, and the bigger trim visually brightened and “opened up” the whole passage.
Some handy options:
- Wide Unfinished Wood Casing Molding: Select wide, natural wood molding to instantly add visual weight and grandeur to any standard doorway frame.
- Miter Saw for Precise Angles: Ensure crisp, professional corners on your wide casing installation by using a reliable miter saw for cuts.
- Wood Filler for Seamless Joints: Achieve a smooth, uniform look by filling nail holes and corner gaps before applying your final finish.
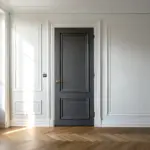
Color-Contrast Trim That Frames the Doorway

Painting the doorway molding a contrasting color (or doing stained wood with painted walls) turns the frame into a real feature. I’ve done deep trim against lighter walls, and it made every doorway feel like a curated moment instead of an afterthought.
Possibly handy products:
- Matte Interior Trim Paint: Transform your molding with rich, contrasting colors to create a bold architectural statement in any room.
- Angled Sash Paint Brush: Achieve crisp, clean lines along intricate molding profiles with a precision brush designed for detailed trim work.
- Painter’s Tape for Delicate Surfaces: Protect your surrounding walls and ensure sharp edges on your frames without damaging existing paint or finishes.
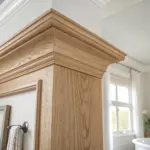
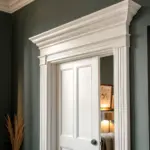
Crown-Topped Header for a Dressier Look

A small run of crown molding or a cap profile on the header makes doorway molding feel taller and more finished. I’ve added this when ceilings felt extra high, and the doorway instantly looked more balanced.
A few things you might like:
- Wood Crown Molding: Add height and elegance to your doorway header by installing this classic trim piece for a polished finish.
- Dentil Molding Trim: Incorporate traditional architectural detail beneath the crown to replicate the sophisticated look shown in the inspiration image.
- Door Casing Router Bits: Create your own custom matching headers and side casings with precision tools for a completely seamless installation.
Trim Wrap Into Wainscoting or Chair Rail
Let your doorway molding tie into wainscoting or a chair rail so the whole wall reads as one continuous design. I’ve built this connection in dining spaces, and it’s one of those details people notice even if they can’t explain why.
Might be a good match:
- Pre-made Wainscoting Wall Panels: Create a unified wall design instantly by installing these ready-to-paint panels that seamlessly match your trim.
- Decorative Chair Rail Molding: Define the transition between your wall and wainscoting with elegant molding that ties the room together.
- Digital Angle Finder & Protractor: Ensure perfect, tight-fitting corners where your door trim meets the wainscoting with this essential measuring tool.
Arched Opening With Simple Square Casing
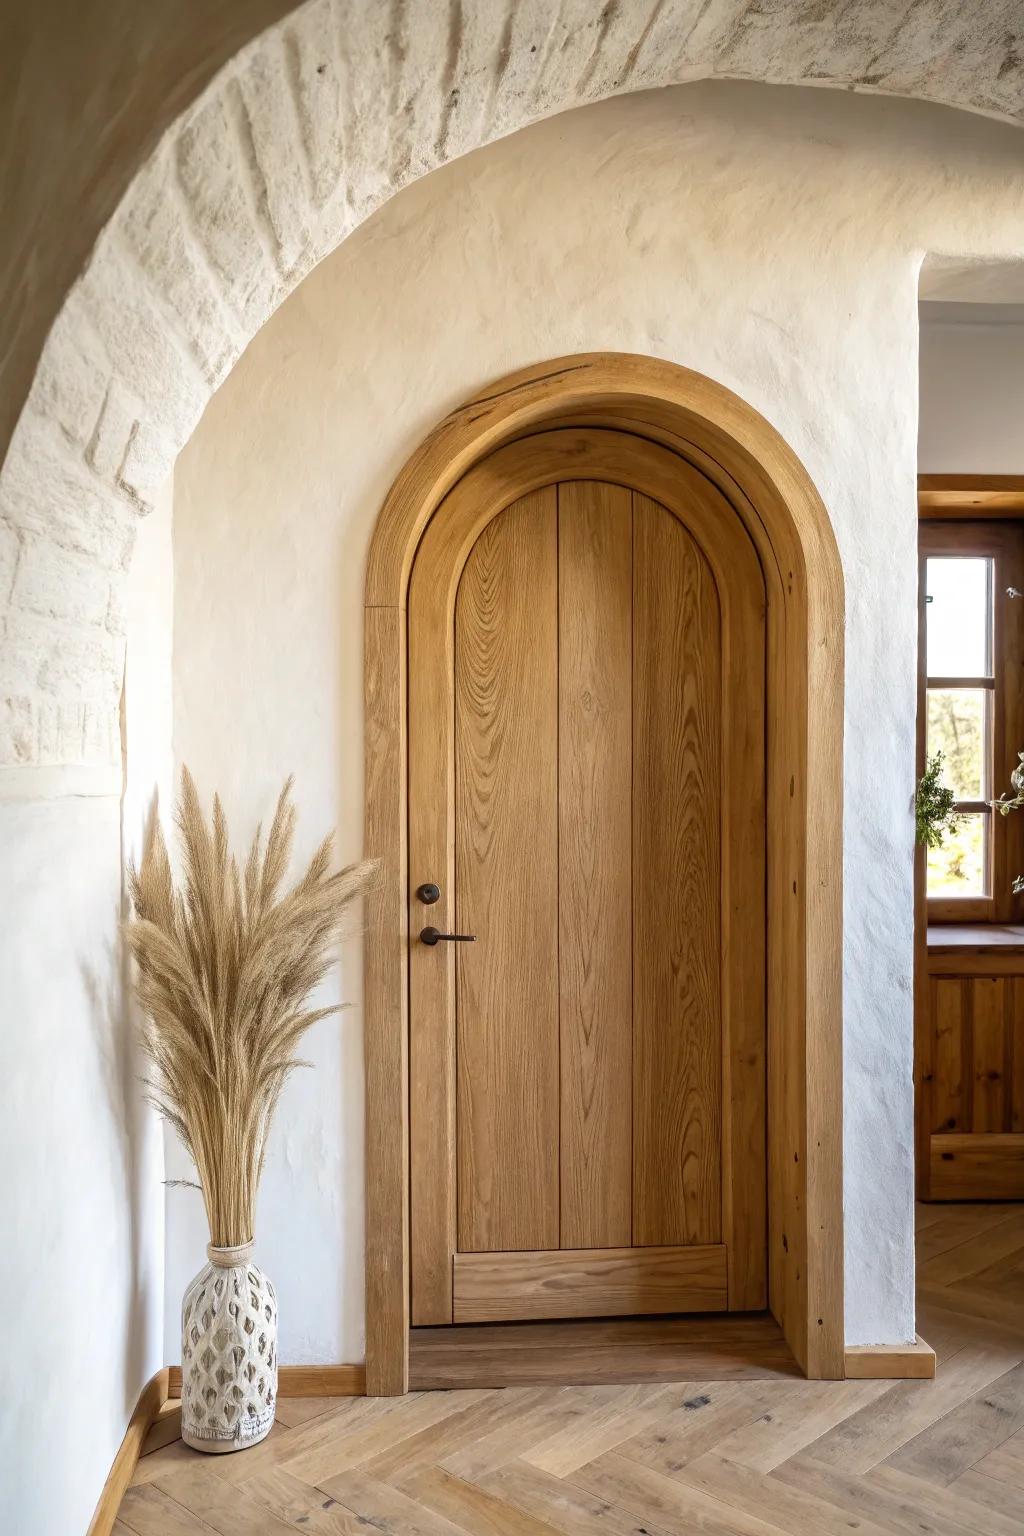
For an arched doorway, I like keeping the doorway molding clean and simple so the curve stays the star. I’ve trimmed arches with square stock and careful sanding, and it looks modern while still feeling warm.
A few suggestions:
- Flexible Wood Molding Trim: Use flexible trim to easily follow the curve of your arch without needing complex cuts or steam bending.
- Detailed Contour Sanding Grips: Achieve a perfectly smooth finish on curved wood surfaces by using specialized grips for manual sanding control.
- Beeswax Wood Finish and Polish: Bring out the natural grain and warmth of your timber casing with this classic, protective wood treatment.
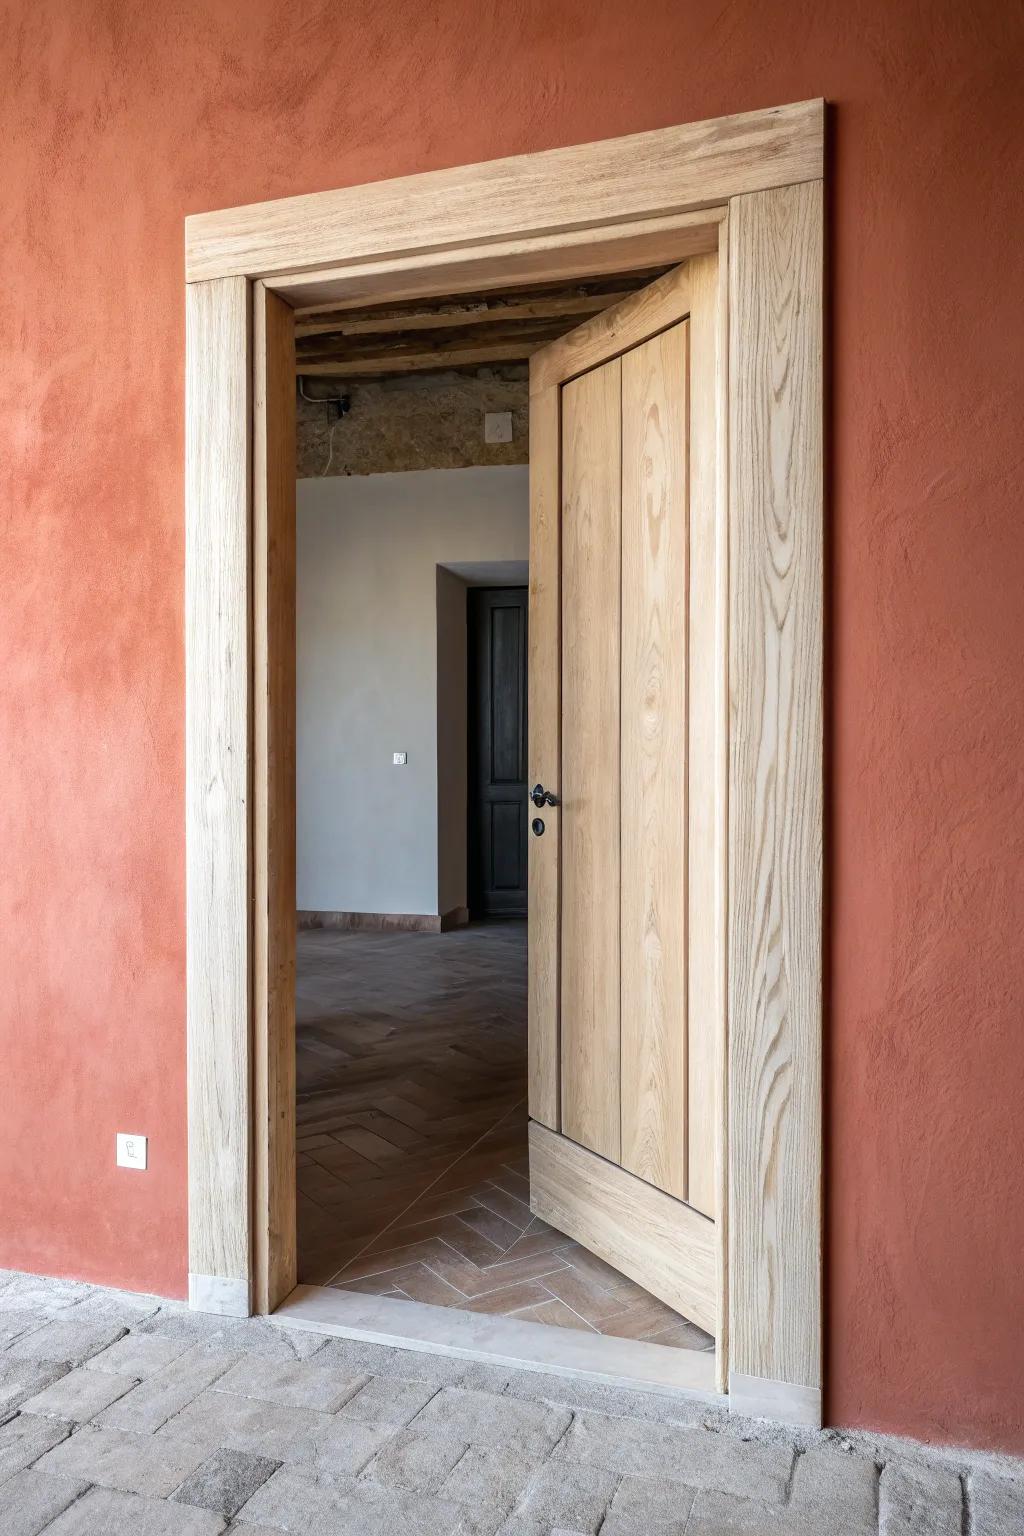
Reclaimed Wood Doorway Casing
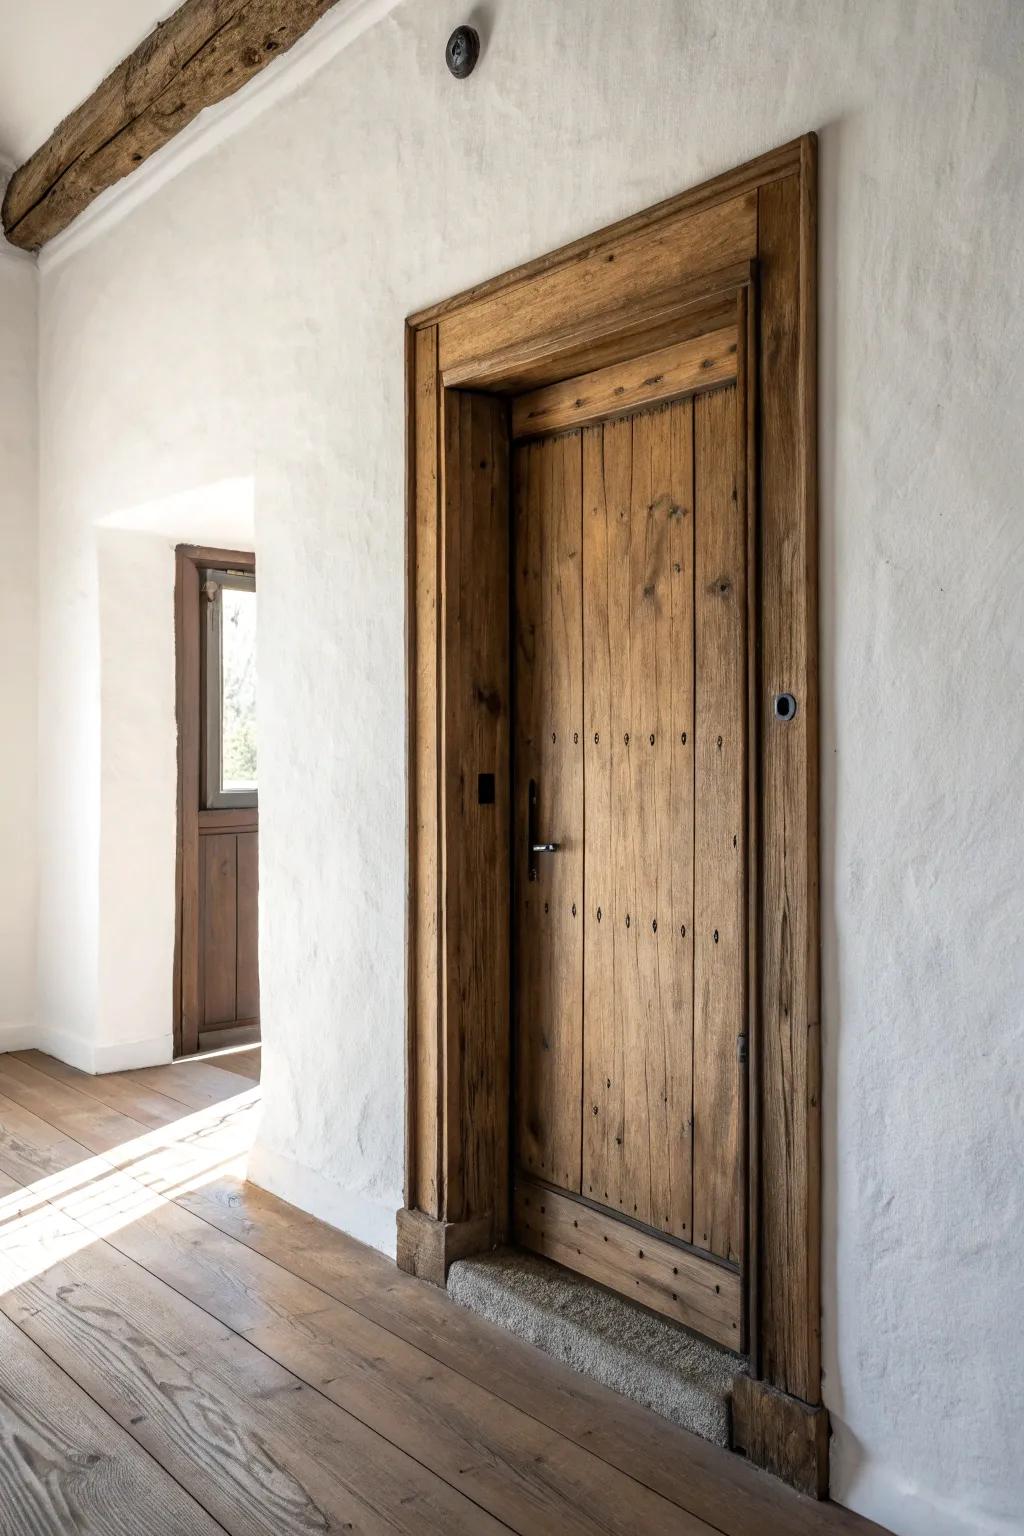
Using reclaimed wood for doorway molding adds instant character—knots, nail holes, and all. I’ve milled old boards in my shop and sealed them matte, and that weathered texture makes a new space feel lived-in in the best way.
Consider these options:
- Reclaimed Barn Wood Planks: Create authentic rustic molding with these weathered boards, adding instant character and warmth to your doorways.
- Matte Polyurethane Wood Sealer: Protect your wood while preserving its natural, dry look with a low-sheen finish that enhances durability.
- Iron Door Pull Handle: Complete the farmhouse aesthetic by installing a sturdy, industrial-style black iron pull on your wooden door.
Charred Accent Inlay on the Molding
Cut a shallow groove and add a slim charred wood strip to your doorway molding for a bold, graphic line. I tested this on a workshop doorway, and that dark inlay made the trim look like high-end custom millwork.
A few helpful options:
- Compact Router Tool: Create precise grooves for your inlay effortlessly with a manageable, handheld router designed for detailed trim work.
- Thin Strip Rip Guide: Ensure your custom accent strips are perfectly uniform and thin enough to fit your routed grooves safely.
- Propane Torch Head: Achieve that custom charred finish on your wood strips quickly and safely before installing them into molding.
Metal-Edge Backband for Industrial Contrast
Pair warm wood with a thin metal edge or strap-style backband to give your doorway molding a modern-industrial twist. I’ve mixed wood and metal like this before, and the contrast makes the doorway feel like a statement piece.
These products might help:
- Matte Black Metal Molding Trim: Add a modern edge to your wooden frames easily with this peel-and-stick or screw-on trim accent.
- Industrial Style Aluminum C-Channel: Create a robust metal border around your door casing to achieve that custom industrial-chic aesthetic.
- Flat Bar Steel Strapping: Install flat metal strapping along your existing wood trim for a subtle yet striking mixed-material contrast.
Hidden LED Glow Under the Header
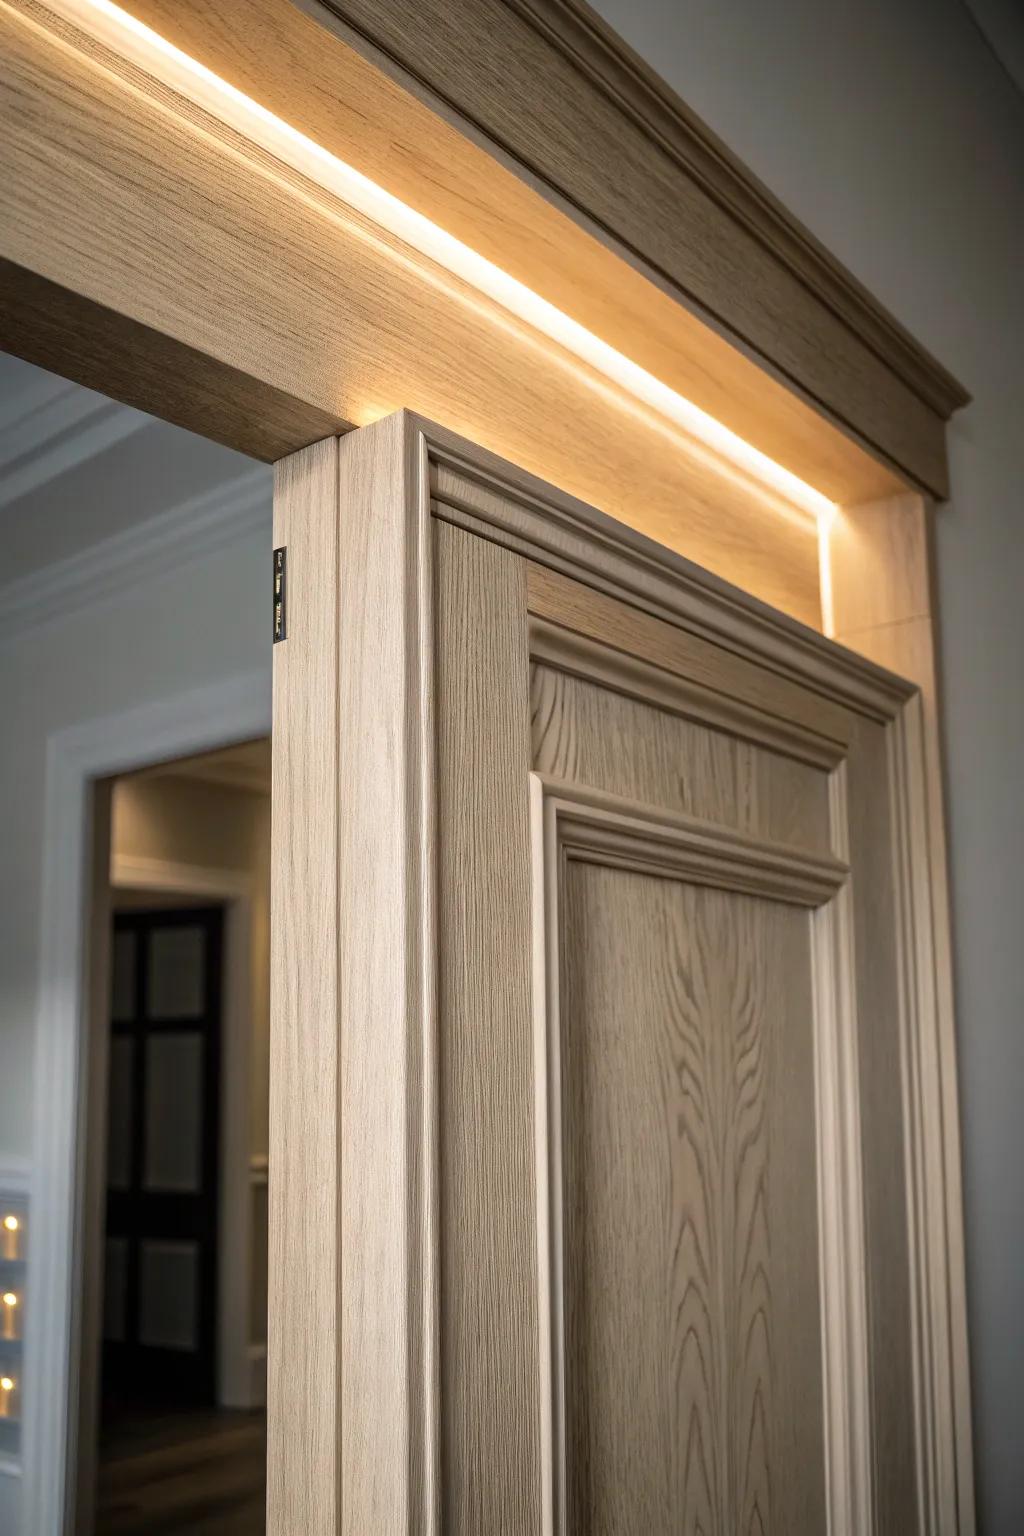
Route a small channel along the underside of the header so your doorway molding gets a subtle, hidden glow at night. I added this to a dark passage, and it turned a basic doorway into a cozy “wow” feature without adding visual clutter.
A few relevant products:
- Warm White COB LED Strip Lights: Choose these seamless LED strips for a smooth, uniform glow that eliminates visible dots for a clean look.
- Aluminum LED Channel Diffuser System: Install your lights inside these channels to protect the strips and diffuse the glow for a professional finish.
- Compact Low Voltage LED Power Supply: Safely power your new lighting setup with a slim driver easy to hide within walls or ceilings.


