
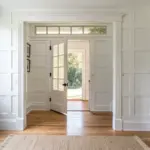
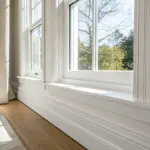
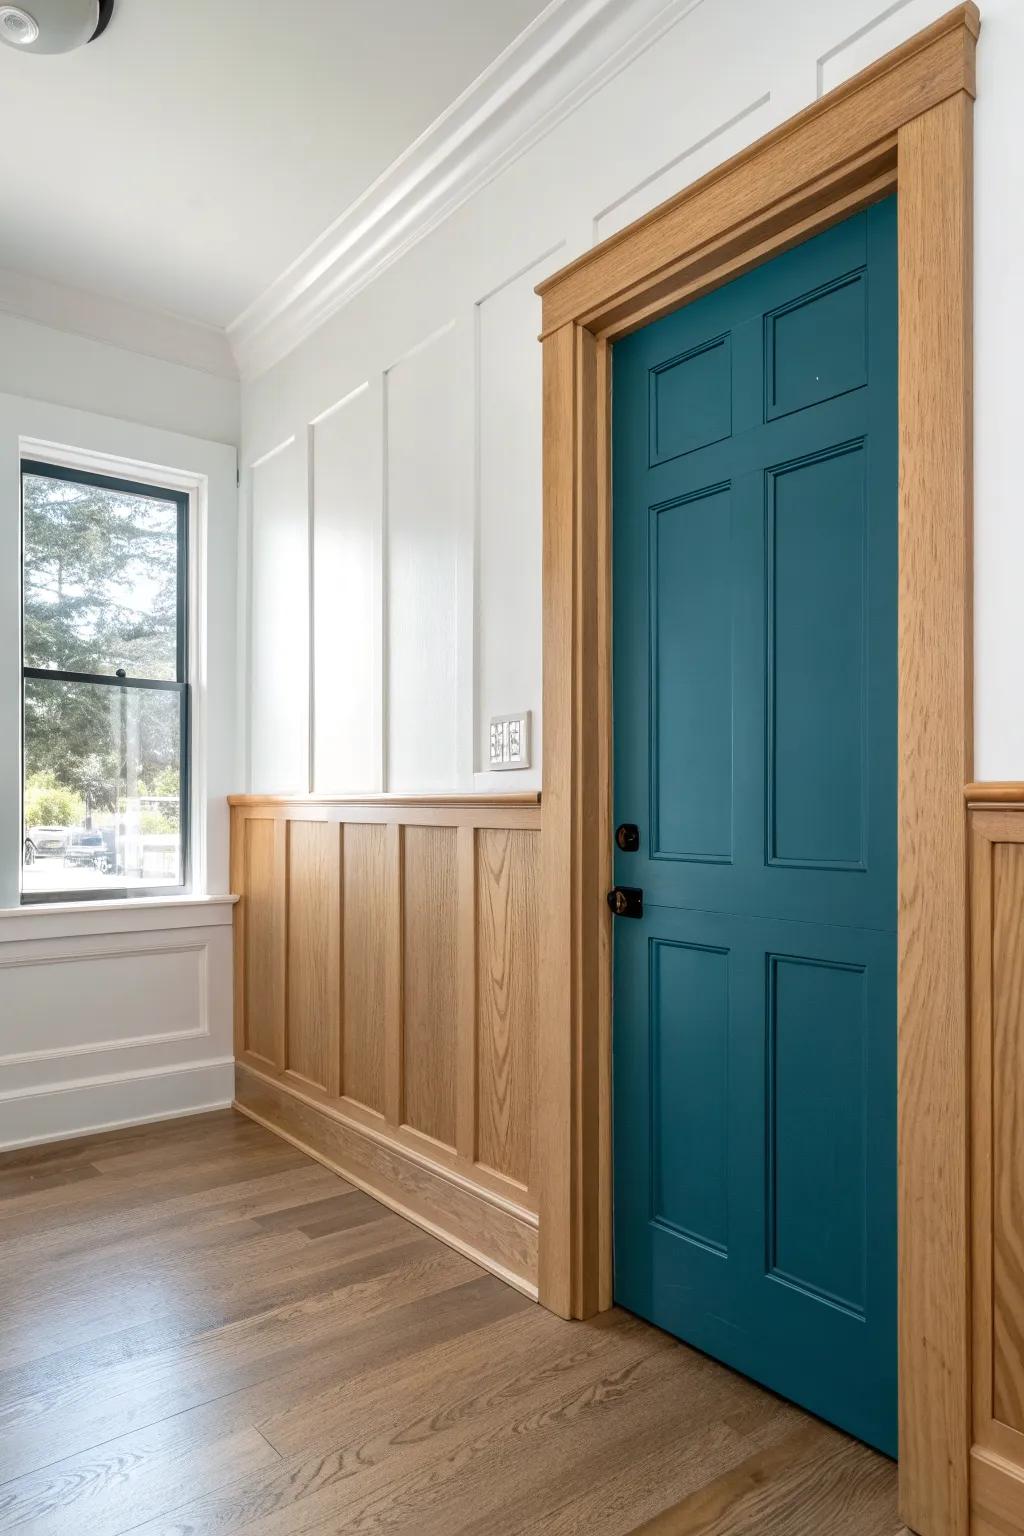
Doorways are the unsung heroes of a home—change the moulding, and the whole space suddenly feels more “finished.”
Simple Trim on an Arched Doorway
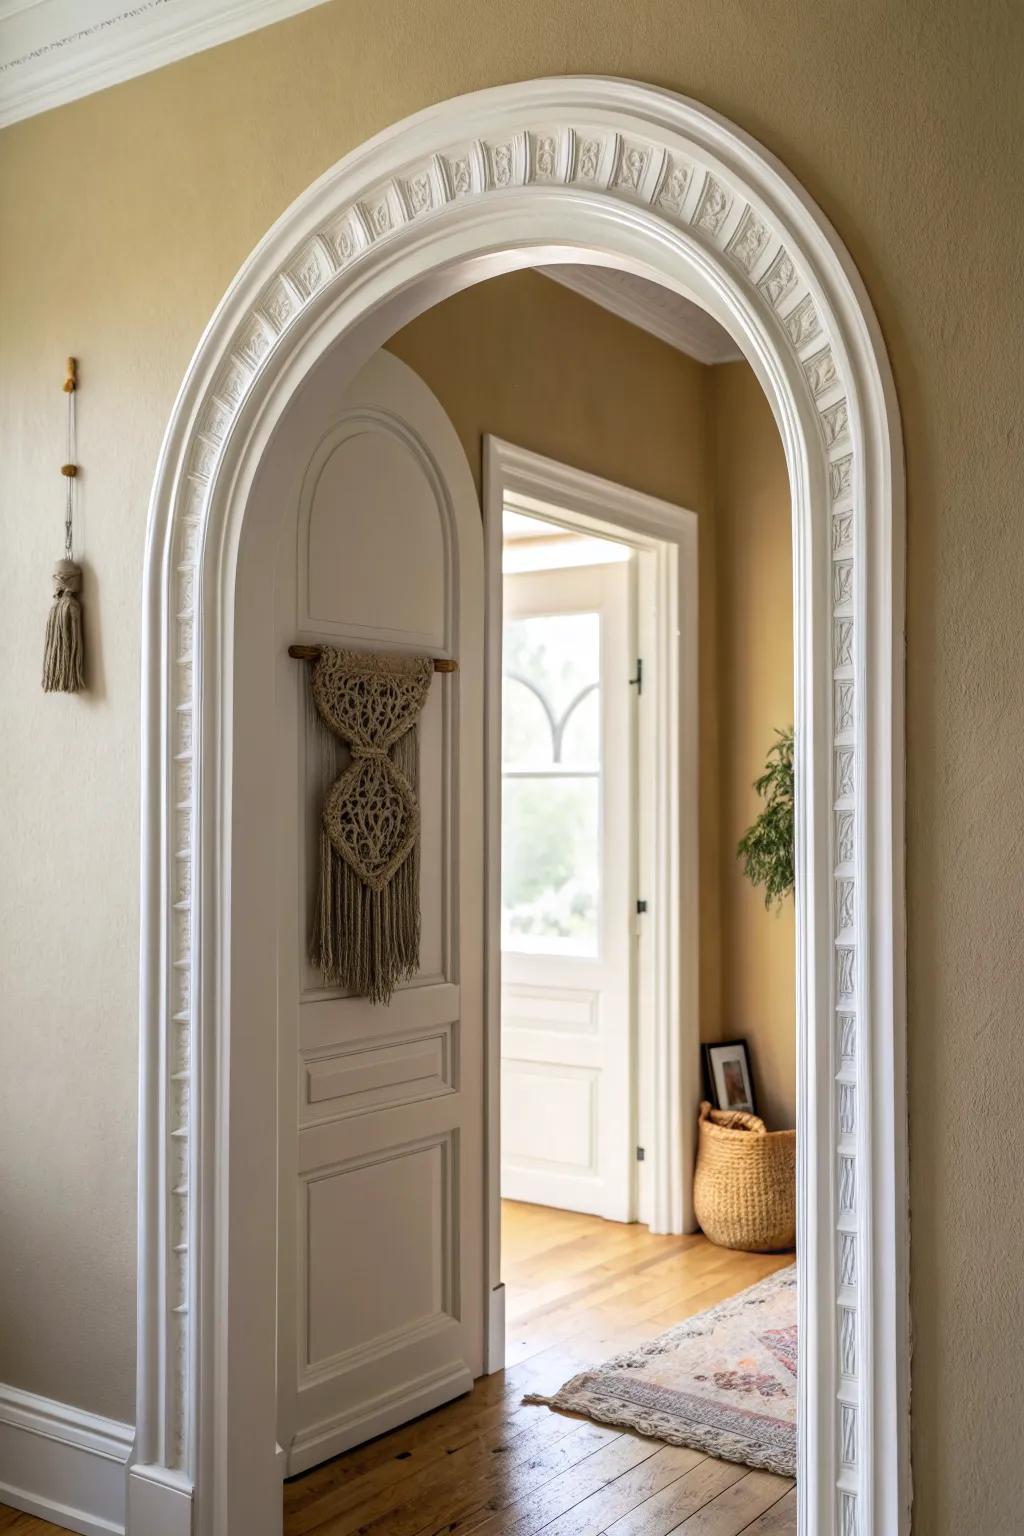
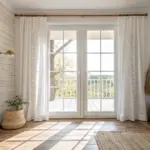
With an arched doorway, I’ve learned the moulding looks best when you keep it simple and let the curve be the star. I usually choose clean, paintable stock so the arched doorway trim feels elegant instead of overworked.
Give these a look:
- Flexible Doorway Arch Trim: Create a smooth, elegant curve effortlessly with flexible moulding designed specifically for arched openings and radius work.
- Sanding Sponge Block Set: Prep your trim for a flawless finish by smoothing out joints and curves with these adaptable sanding blocks.
- Paintable Caulk for Moulding: Seal gaps instantly between your new arched trim and the wall for a seamless, professional-looking architectural detail.
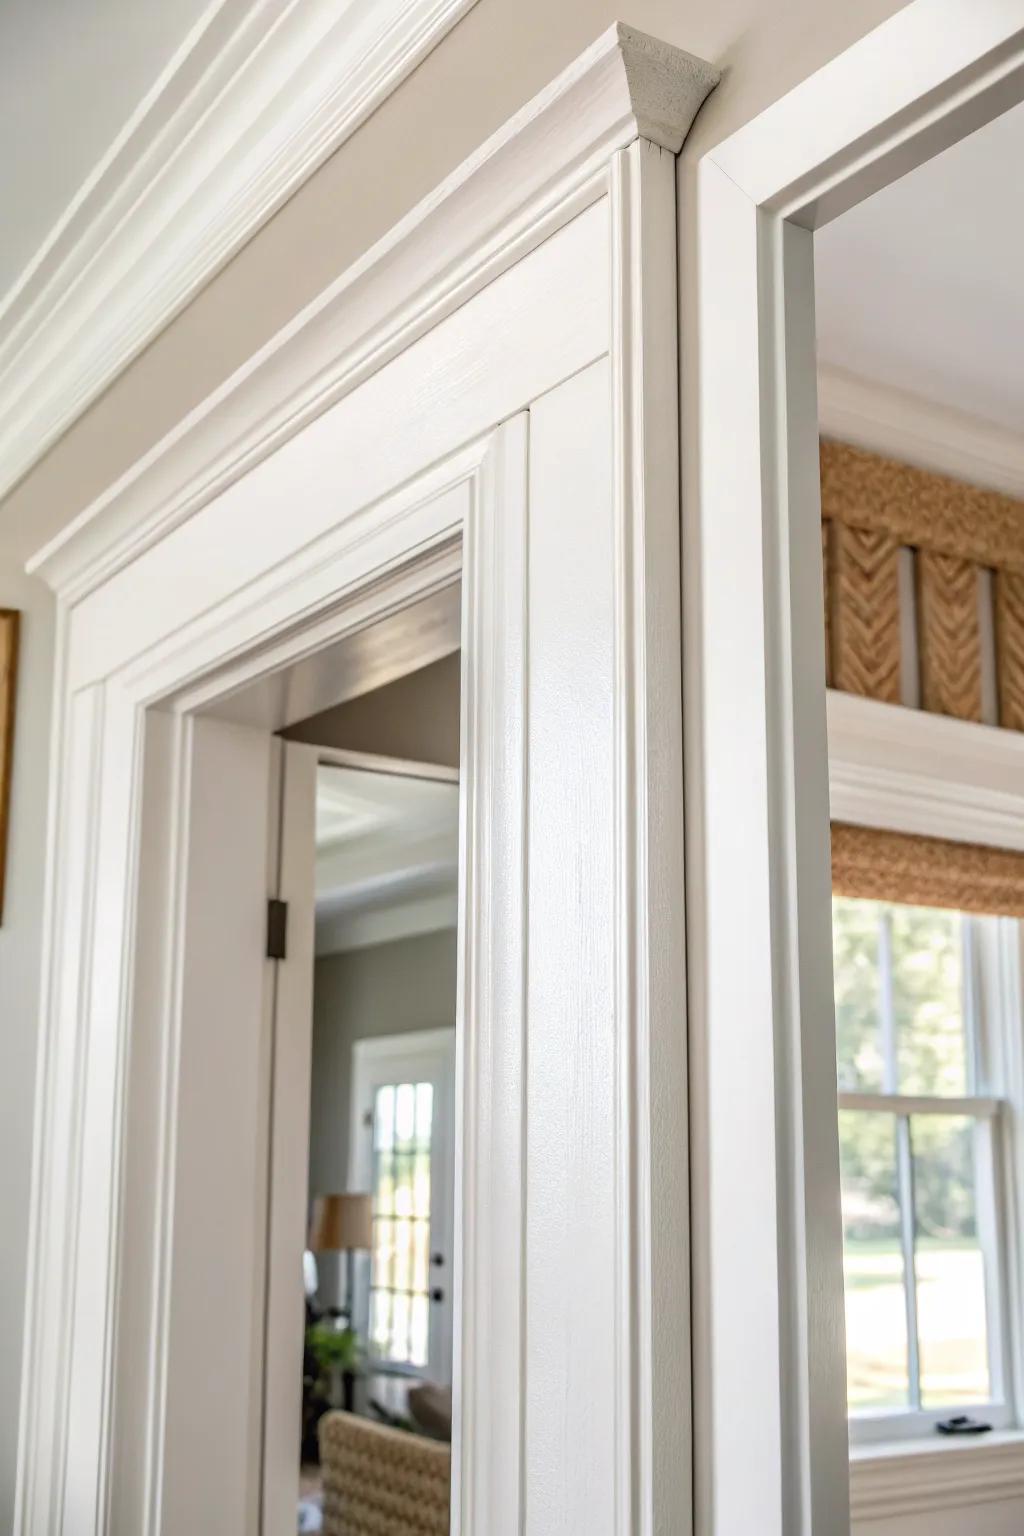
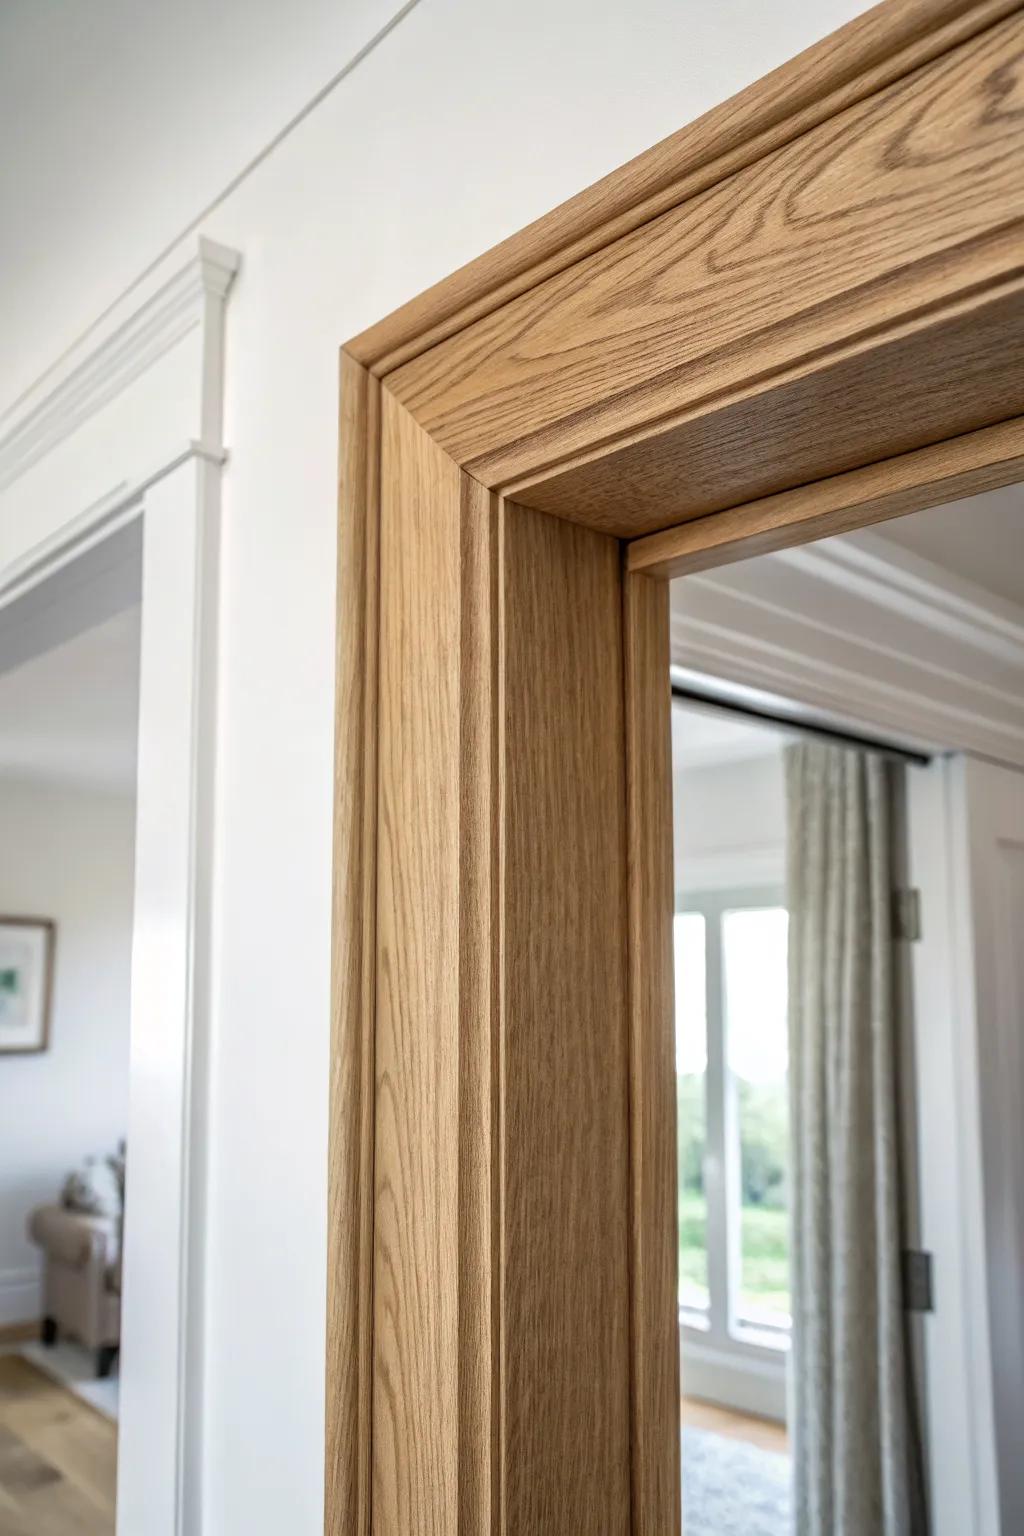
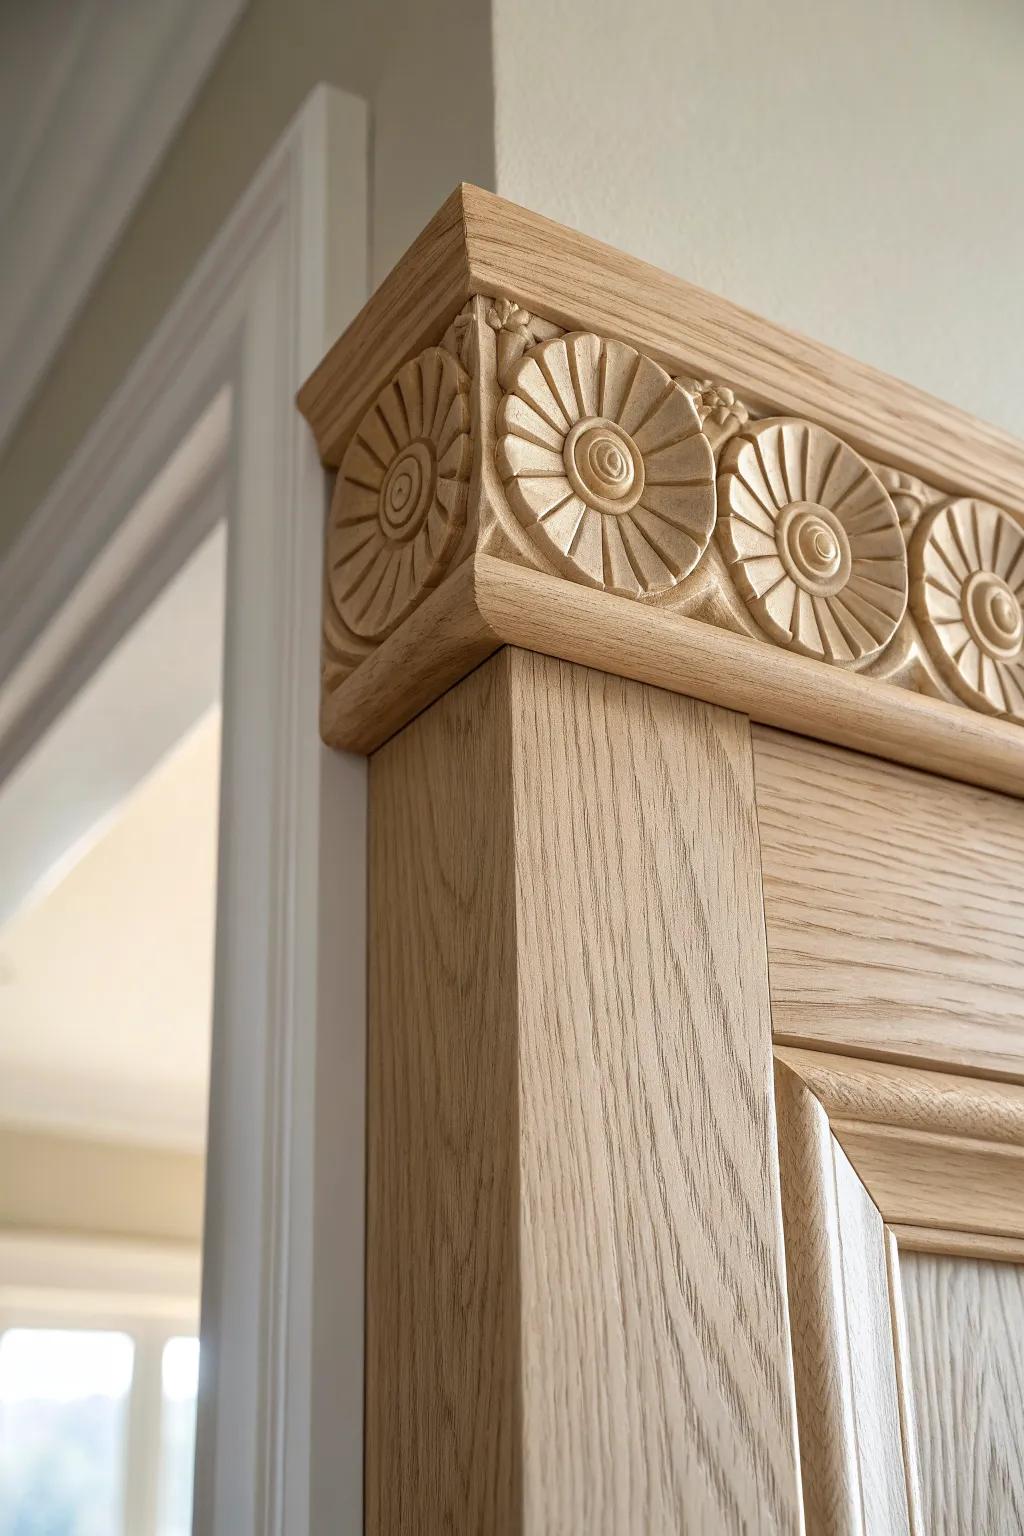
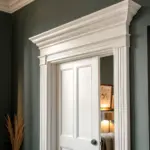
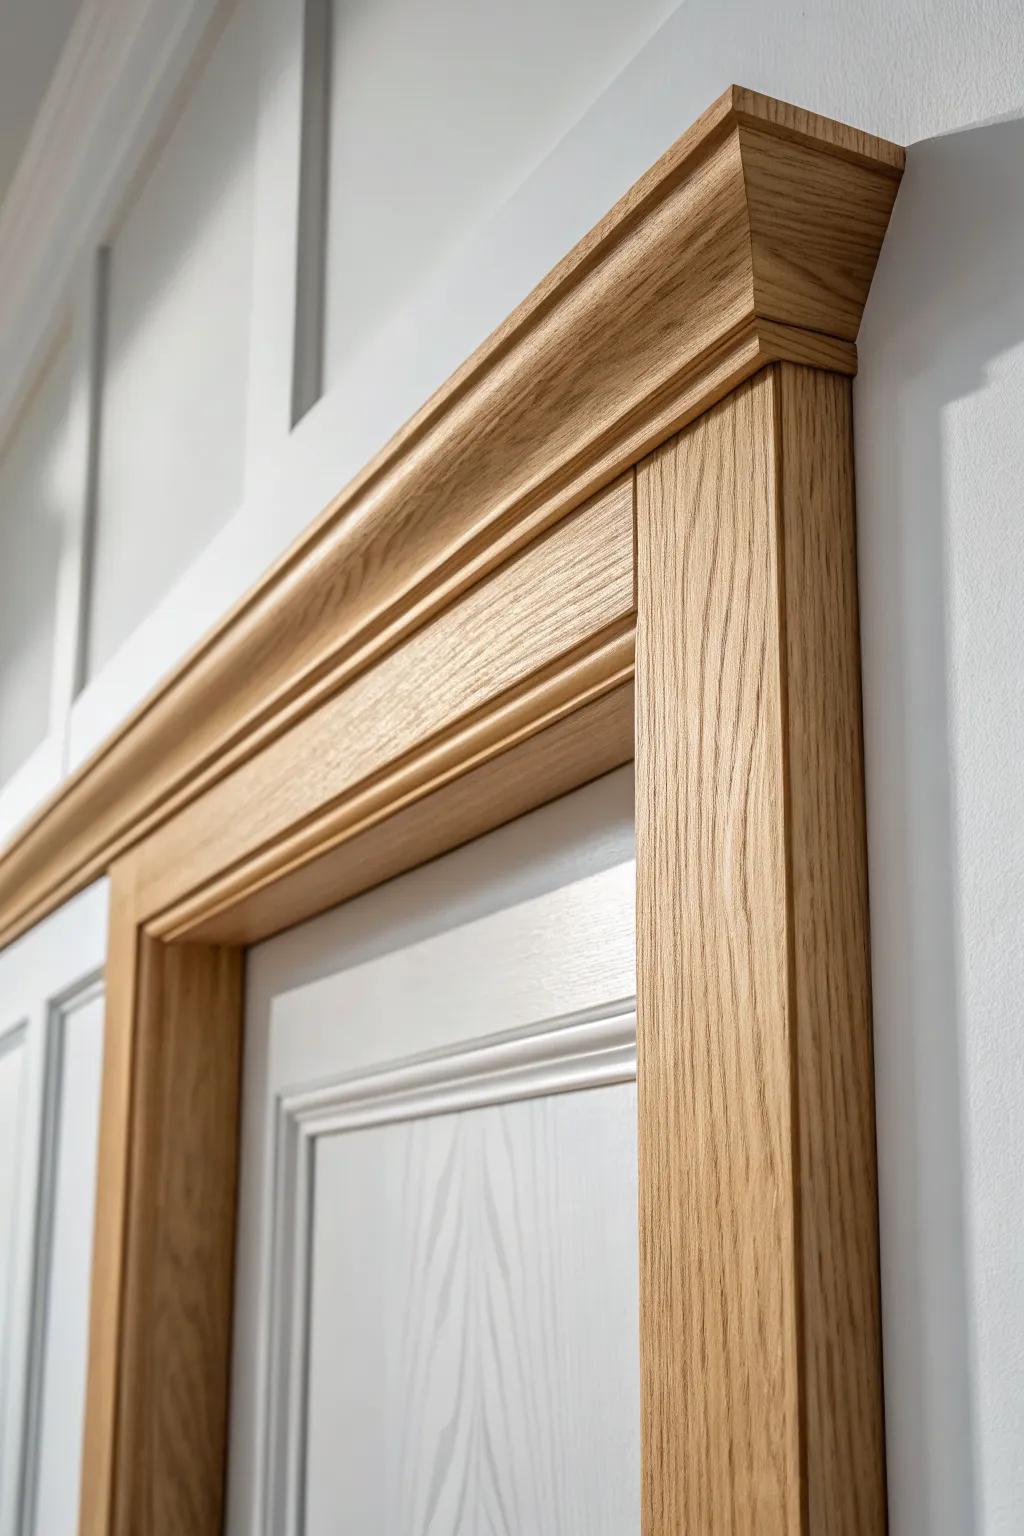
Classic Craftsman Casing
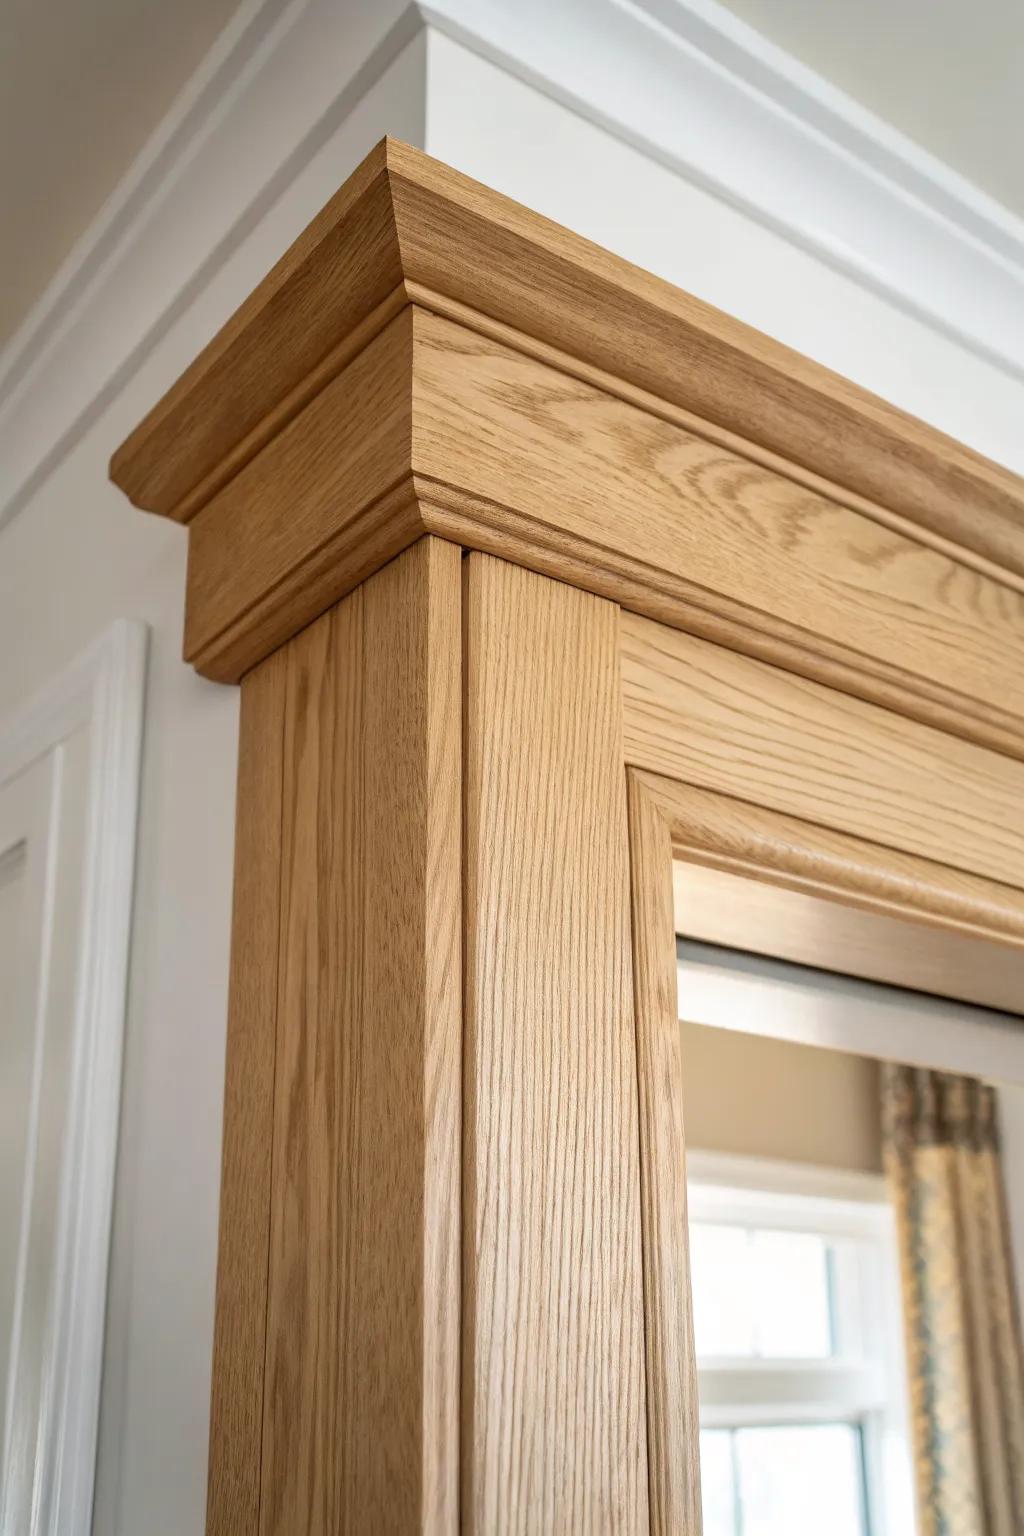
When I want that instantly upgraded look, I build Craftsman-style doorway moulding with simple flat stock sides and a thicker, squared-off header. It’s my go-to because the clean lines make even a basic doorway feel architectural.
Useful items to consider:
- Red Oak Lumber Boards: Source high-quality hardwood boards to create durable flat stock sides and sturdy headers for your custom doorway casing.
- Wood Crown Moulding: Add an elegant finishing touch to the top of your header to replicate the sophisticated cornice detail shown.
- Brad Nailer Kit: Secure your trim pieces cleanly and efficiently without splitting the wood using this essential finish carpentry tool.


Wide Modern Farmhouse Trim
I’ve used extra-wide doorway casing in older homes to make openings feel more substantial and less “builder basic.” Painted in crisp white trim, it gives that cozy farmhouse vibe without needing fancy profiles.
These products might help:
- Primed MDF Casing Boards: Create substantial door frames easily using these primed boards, ready for paint to match your modern farmhouse style.
- Decorative Architrave Header: Add height and elegance above your doorway with a pre-assembled header piece that instantly elevates basic openings.
- Semi-Gloss White Trim Paint: Achieve that crisp, professional finish on your new moulding with durable, easy-to-clean paint designed specifically for trim.
Boxed Header “Hat” Detail
A boxed header is where I’ve seen the biggest wow-per-minute payoff—just let the top piece extend past the side casings like a little “hat.” I like adding a small cap moulding on top because it creates that layered depth people notice right away.
Items that may come in handy:
- General Purpose Wood Filler (Stainable): Perfect your mitered joints by filling gaps seamlessly before staining for that professional, flawless finish.
- Oak Board Lumber (1×4 or 1×6): Create the main structure of your boxed header using durable, high-quality wood ready for custom cutting.
- Small Decorative Cove or Cap Moulding: Add the final detailed layer to your header ‘hat’ to create elegant depth and traditional shadow lines.
Rosette Corner Blocks
When I’m not in the mood to chase perfect miters, I’ll use rosette blocks at the top corners of the doorway moulding. I’ve done this in quick weekend makeovers, and it adds that vintage touch while making installation way more forgiving.
Check if these fit your needs:
- Wood Rosette Corner Blocks: Instantly add vintage charm and skip difficult miter cuts by installing these classic wooden accent blocks.
- Decorative Wood Carved Onlay: Create a custom look by gluing these ornate carved wood details onto your existing flat moulding headers.
- Hardwood Fluted Casing: Pair your new corner blocks with classic fluted casing to complete the traditional doorway aesthetic effortlessly.
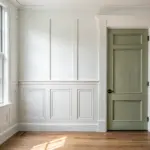
Walls and Trim Same Color
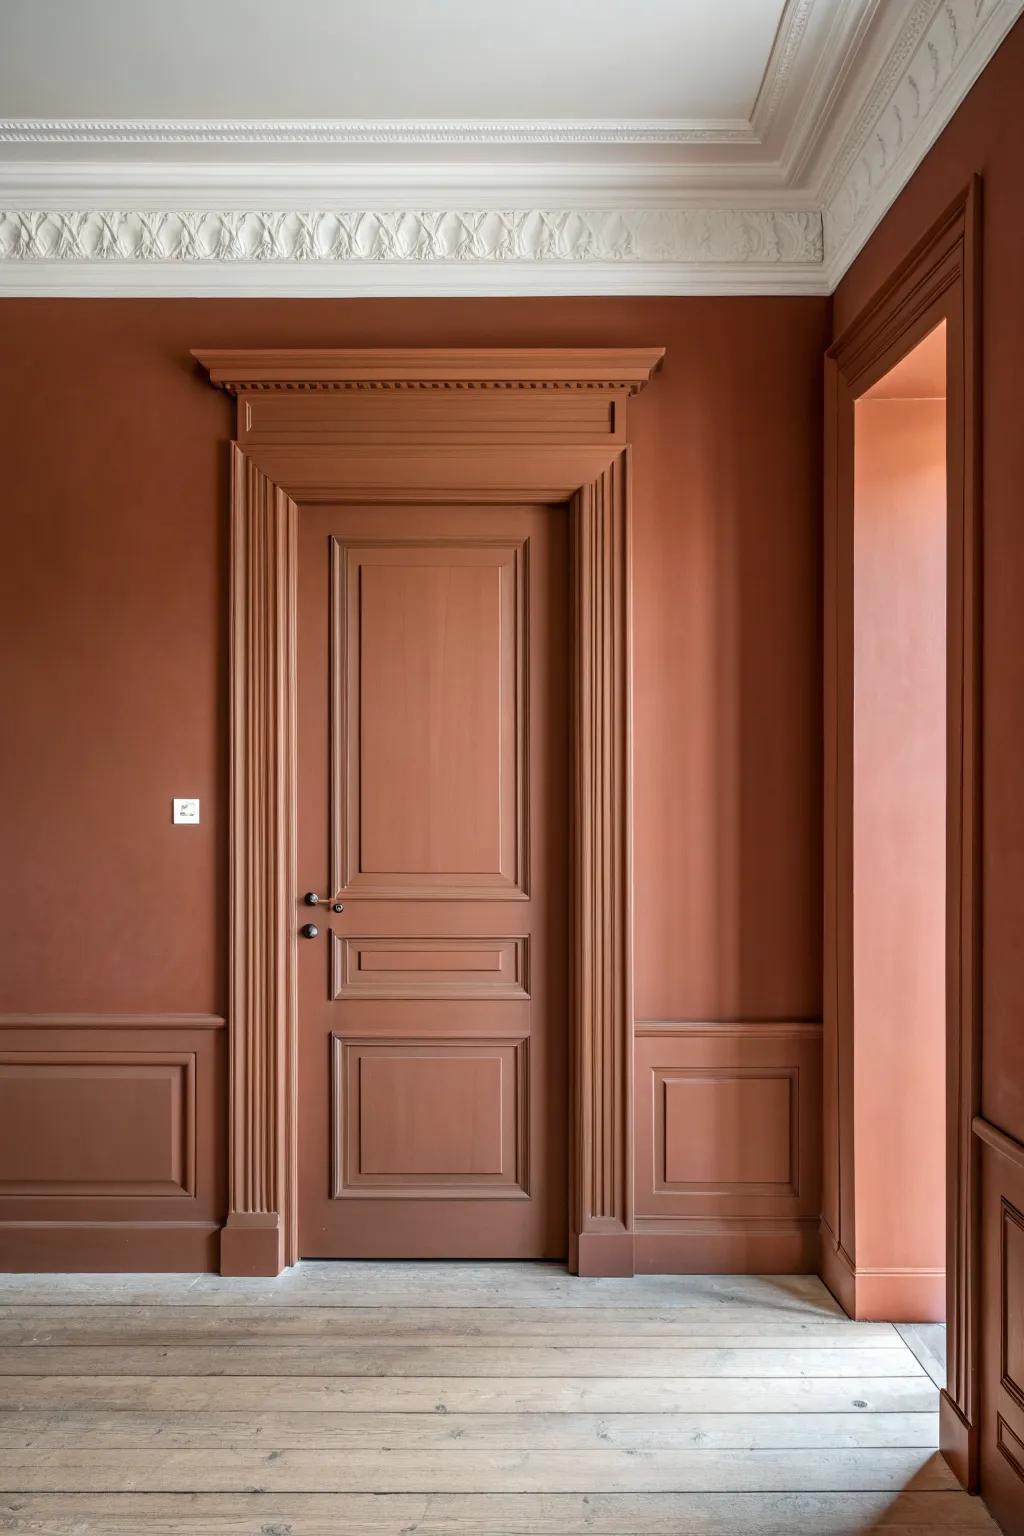
Painting doorway moulding the same color as the walls is one of those trends I tried once and immediately loved. In my experience, color-matched trim makes small hallways feel calmer and a little more high-end.
May just do the trick:
- Pre-Primed Door & Window Casing: Create a sophisticated framework for your color-drenching project with these ready-to-paint moulding profiles for a custom look.
- Matte Interior Paint Sample Swatches: Test various deep, rich shades directly on your trim and walls to ensure a perfect monochromatic match.
- Professional Angle Sash Paint Brush: Achieve crisp lines and smooth coverage on intricate moulding details with a high-quality, angled brush.


High-Contrast Doorway Frame
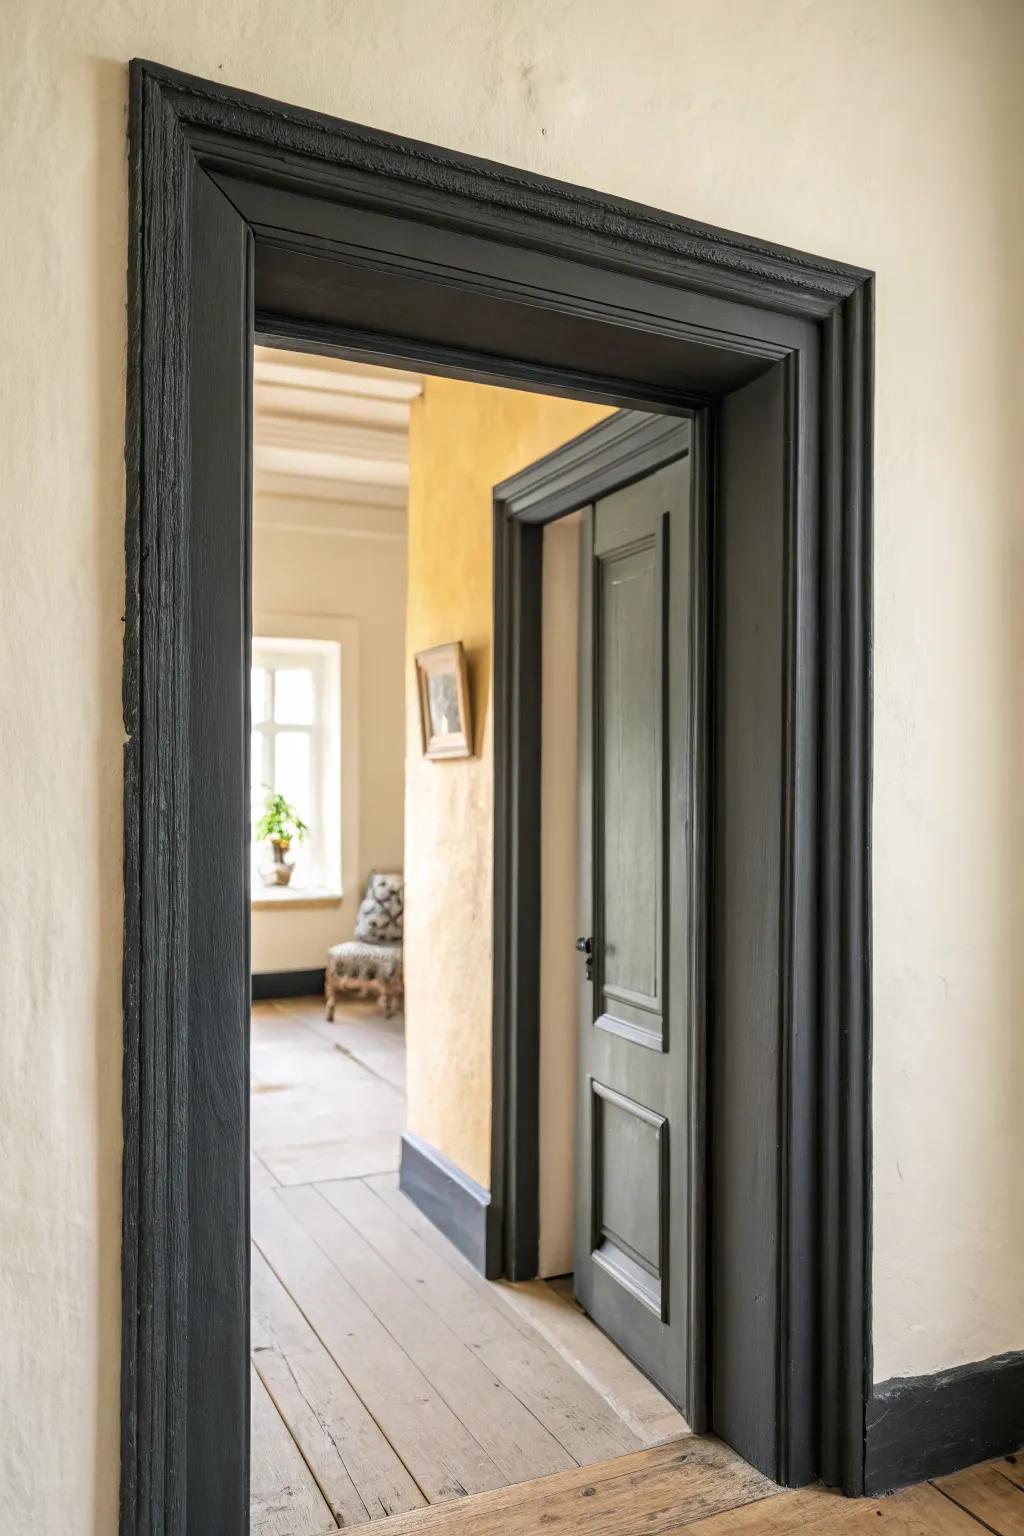
I’ve painted doorway trim a darker shade than the walls to make openings pop like bold outlines between rooms. The trick I’ve learned is keeping the profile simple so the high-contrast moulding feels graphic, not busy.
A few helpful options:
- Matte Black or Charcoal Interior Paint: Create bold outlines by applying a high-quality, dark hue to your existing trim for instant drama.
- Angled Sash Paint Brush: Ensure crisp, clean lines between the dark trim and light walls with a professional-grade cutting tool.
- Painter’s Tape for Delicate Surfaces: Protect your lighter walls from dark splatters and achieve sharp, graphic edges without messy bleed-through.
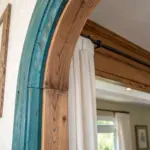
Reclaimed Wood Doorway Moulding
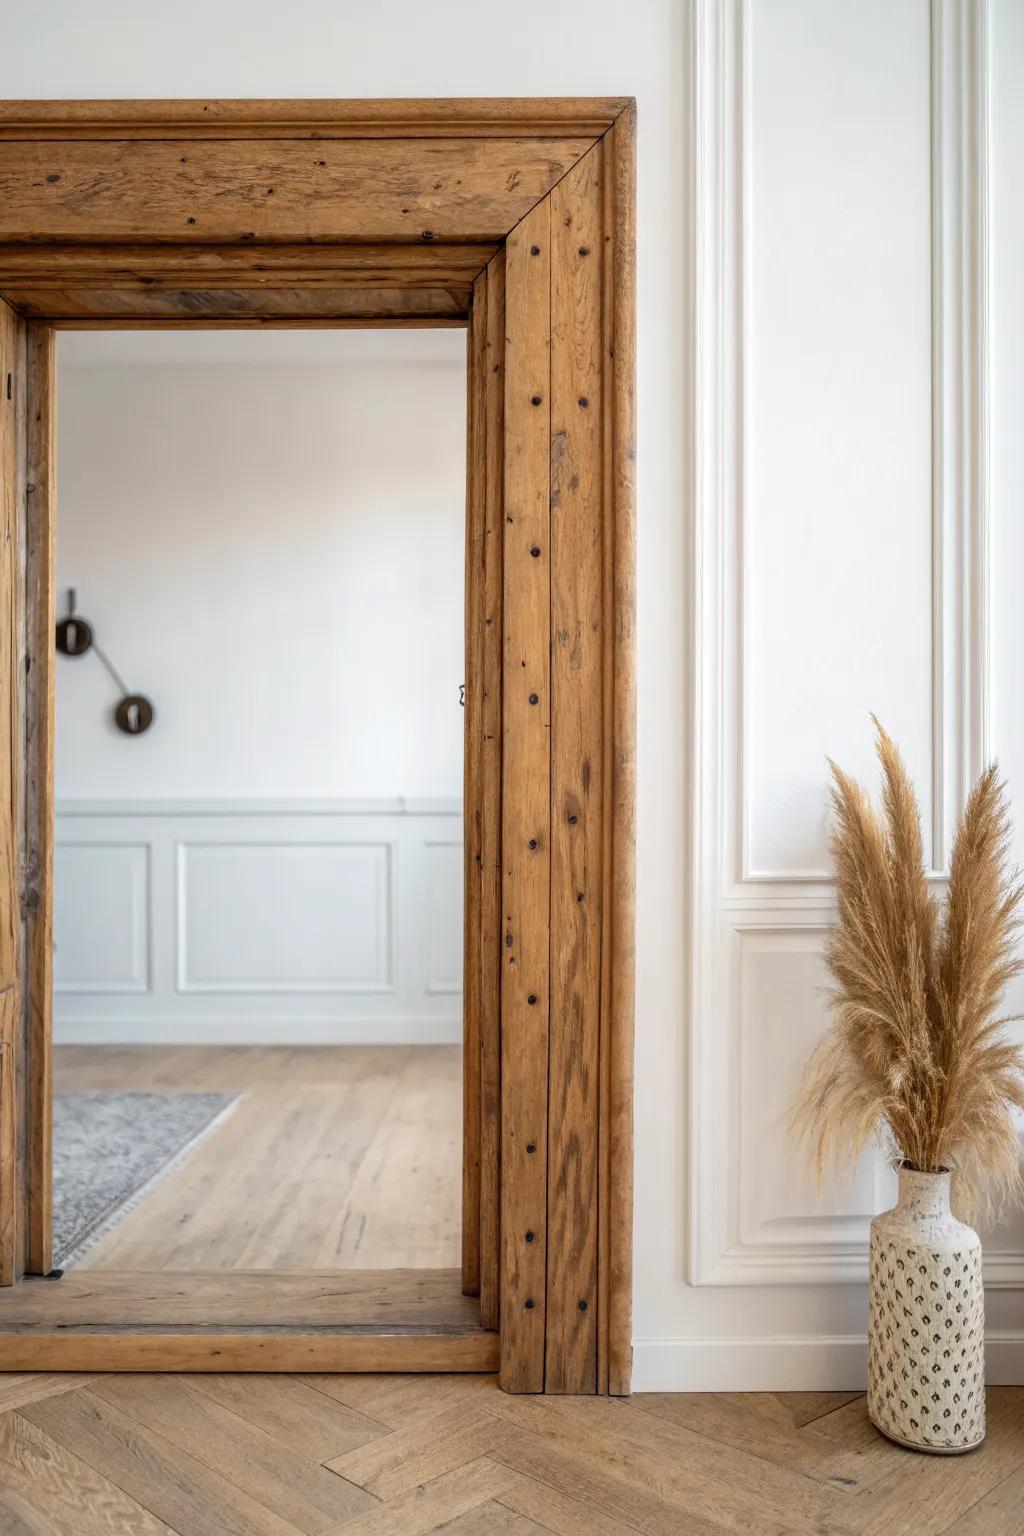
One of my favorite builds was cladding a doorway with reclaimed wood trim—nail holes and saw marks included. I sealed it well, and the rustic doorway moulding became the kind of detail people run their hands over when they walk by.
These products might be useful:
- Reclaimed Wood Planks or Boards: Source authentic weathered lumber or realistic peel-and-stick planks to create that custom rustic moulding instantly.
- Matte Polyurethane Wood Sealer: Protect your rustic trim without hiding its character by applying a durable, low-sheen protective finish.
- Antique-Style Iron Clavos or Nails: Add the perfect finishing touch to your farmhouse trim with these decorative rustic metal nail heads.
Wainscoting That Dies Into the Casing
I love when wainscoting lines up and “connects” into the doorway moulding, especially in dining rooms and hallways. I’ve done this by matching rail heights to the casing layout, and it makes the whole wall feel designed as one piece.
Possibly helpful picks:
- DIY Wainscoting Panel Kit: Create a unified look with pre-cut framing kits that simplify adding classic architectural details to your walls.
- Brad Nailer Kit: Secure your moulding and trim effortlessly; a brad nailer ensures a clean, professional finish without damaging wood.
- Contour Gauge Duplicator: Perfectly match trim profiles where wainscoting meets door casings by easily tracing irregular shapes for precise cuts.
Picture-Frame Cased Opening
For a doorway without an actual door, I’ve built a picture-frame trim all the way around the opening to make it feel like a real architectural feature. This cased opening moulding looks especially sharp when the miters are tight and the paint is smooth.
Maybe worth checking out:
- Primed Casing Moulding: Create a clean, defined frame around your opening with smooth primed moulding ready for your finishing touch.
- Miter Saw Protractor: Ensure those critical trim corners meet perfectly by calculating precise cutting angles for gap-free joints.
- Paintable Wood Filler: Achieve a seamless, professional finish by filling nail holes and corner gaps before applying your final paint.
Shadow-Reveal Modern Doorway Trim
A shadow reveal is a sleek way to define a doorway using negative space instead of bulky casing, and I’m obsessed with how crisp it looks in good light. I’ve tried it in a modern makeover, and that thin reveal line makes the opening feel super intentional.
A few choices to try:
- Aluminum Shadow Reveal Bead: Create that crisp, precise negative space line around your doorframe for a sleek, modern architectural finish.
- Minimalist Black Door Levers: Complement your modern trim with heavy-duty matte black hardware that contrasts beautifully against natural wood tones.
- Laser Level Tool: Ensure your reveal lines and installation are perfectly straight and professional with a self-leveling laser guide.
Beadboard-Lined Doorway Returns
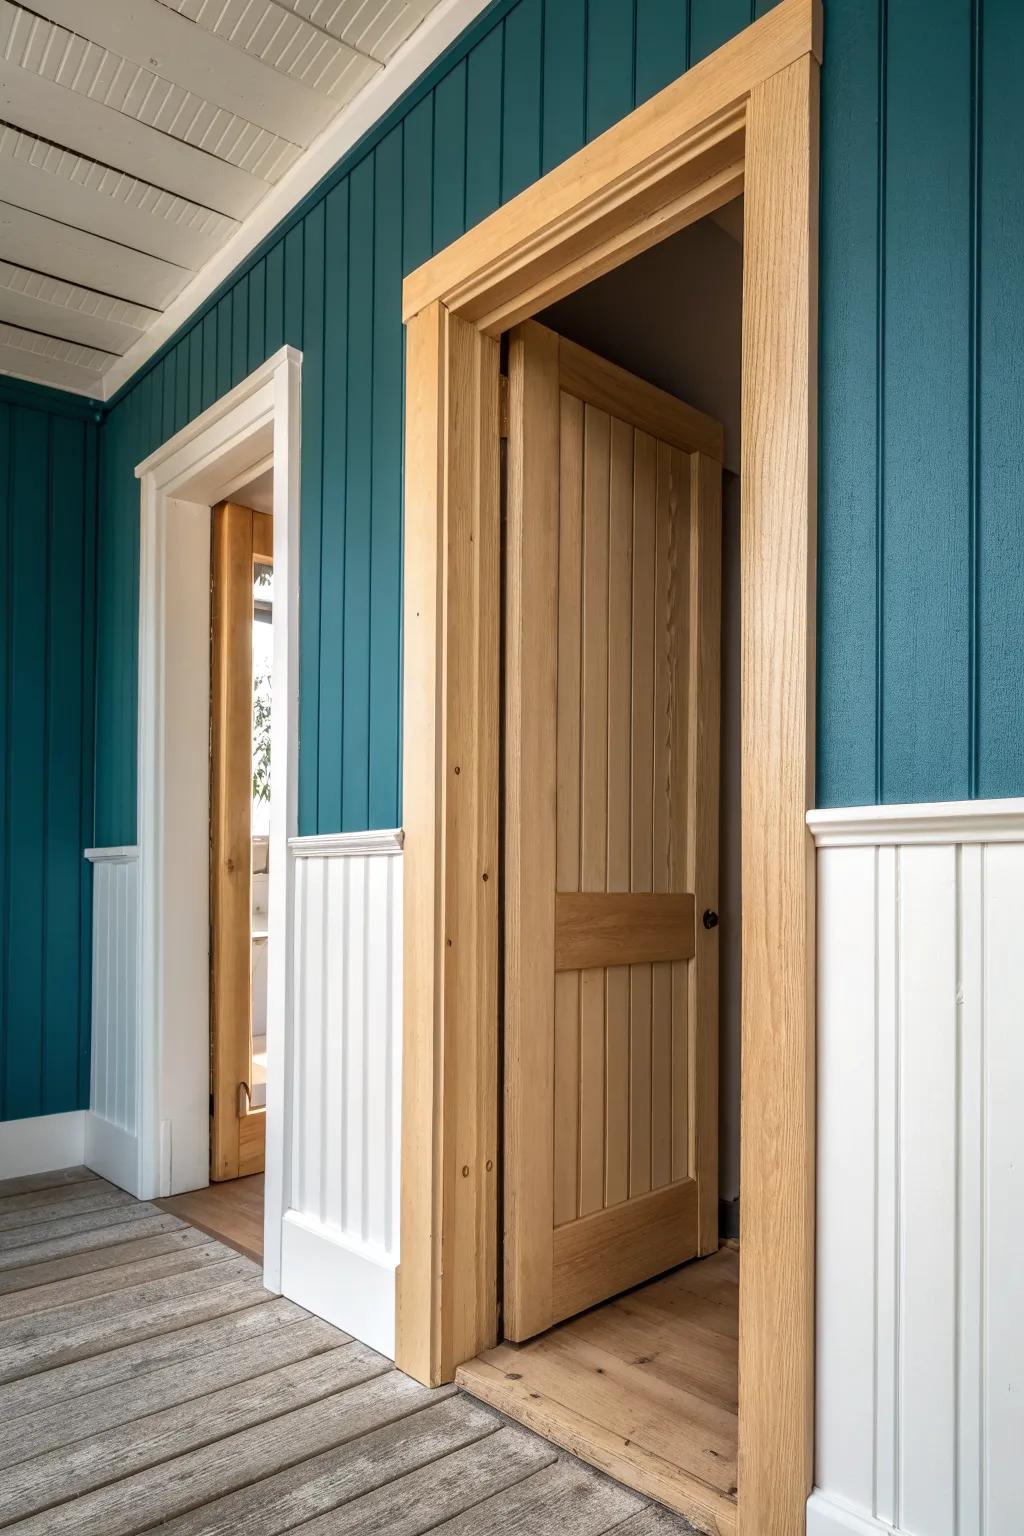
If a doorway has depth, I like lining the inside “returns” with beadboard so the opening feels finished from every angle. I’ve done this on a pantry doorway, and that little doorway moulding detail adds cottage charm without changing the whole room.
A few relevant products:
- Beadboard Wall Paneling Kit: Add instant cottage charm to your doorway returns effortlessly with these easy-to-install, primed beadboard paneling kits.
- Construction Adhesive: Ensure a secure, long-lasting hold for your new beadboard lining without excessive nailing using this heavy-duty adhesive.
- Finishing Trim Nails: Use these small-gauge finish nails to subtly secure your moulding and beadboard for a professional, clean look.
Inlay Stripe in the Header
For a true conversation piece, I’ve routed a shallow channel in the top header and added a resin inlay (or a thin metal strip) right into the doorway moulding. It’s a small detail, but in person it catches light and feels like custom craftsmanship.
Products that could assist:
- Compact Handheld Router: Carve precise grooves into your moulding effortlessly with this essential tool for creating clean, professional recessed channels.
- Clear Casting Epoxy Resin Kit: Fill your routed channels with durable resin to create a smooth, light-catching inlay that elevates your woodwork.
- Straight Router Bit Set: Ensure perfectly straight edges and flat bottoms for your inlay channels using these specialized cutting bits.
Hidden Light on a Header Ledge
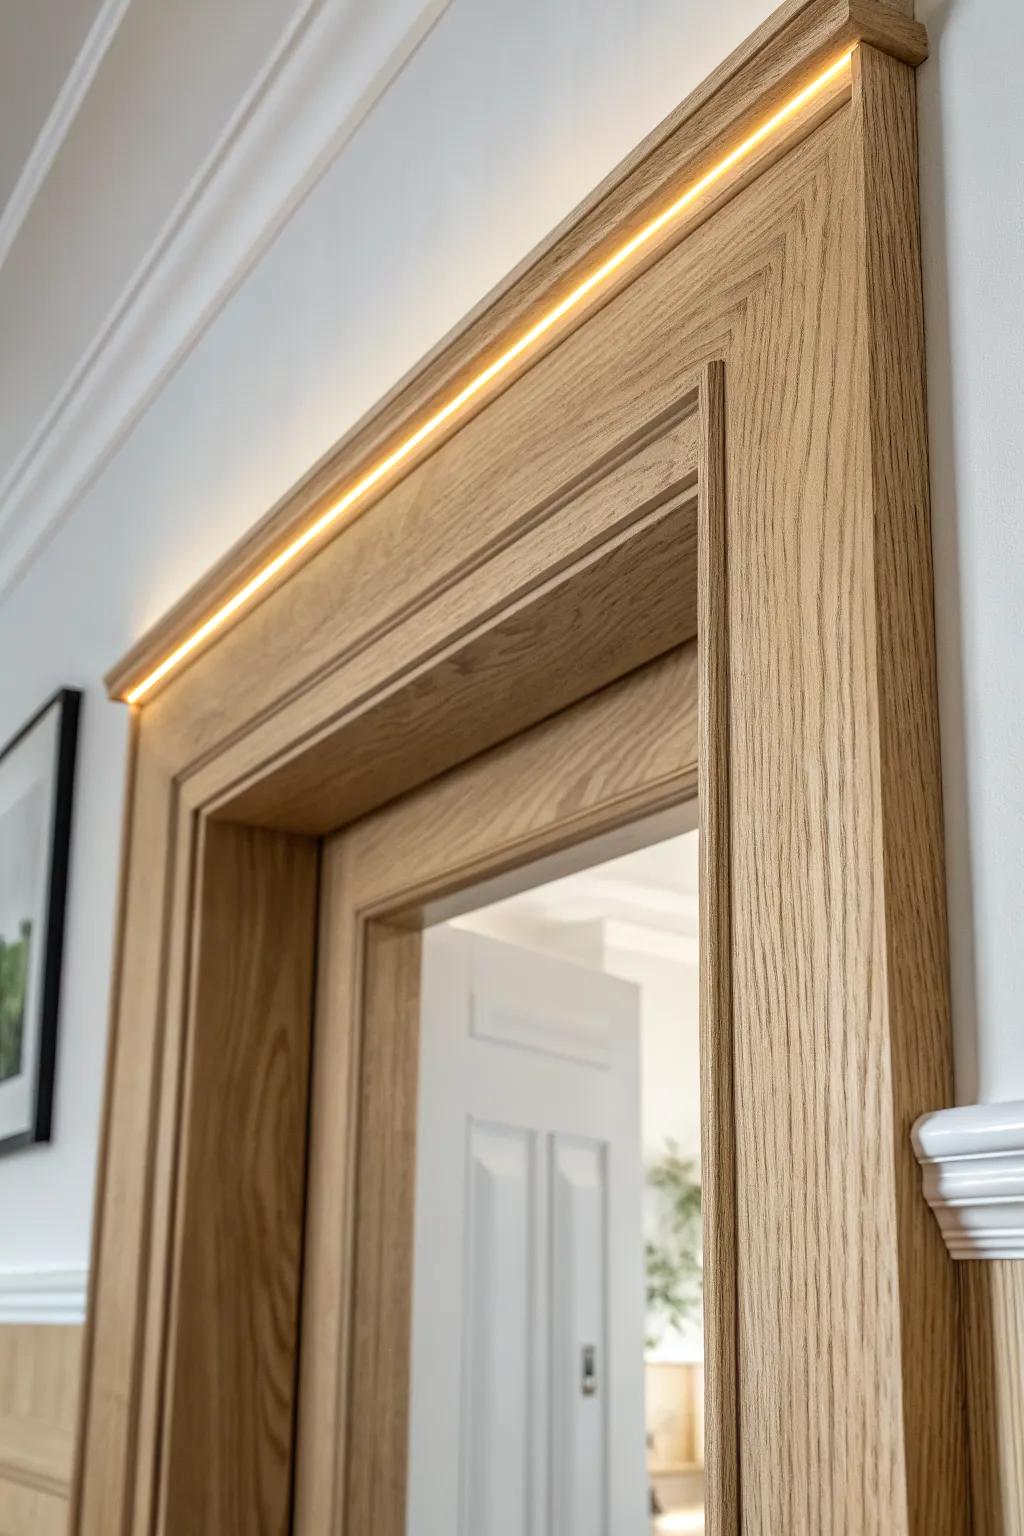
When I build a deeper cap on a boxed doorway header, I’ll sometimes leave room for hidden LED lighting to wash the trim with a soft glow. I’ve used this in a dark hallway, and that lit doorway moulding turns a basic passage into a feature.
A few suggestions:
- COB LED Strip Light Tape: Create a seamless, dot-free glow along your door header with these flexible, cuttable high-density light strips.
- Aluminum LED Channel Diffuser: Protect your lights and soften the output for a professional finish using these flush-mount metal tracks.
- Low Voltage Power Supply Driver: Power your new lighting setup safely and reliably with a compatible, compact transformer hidden from view.


