
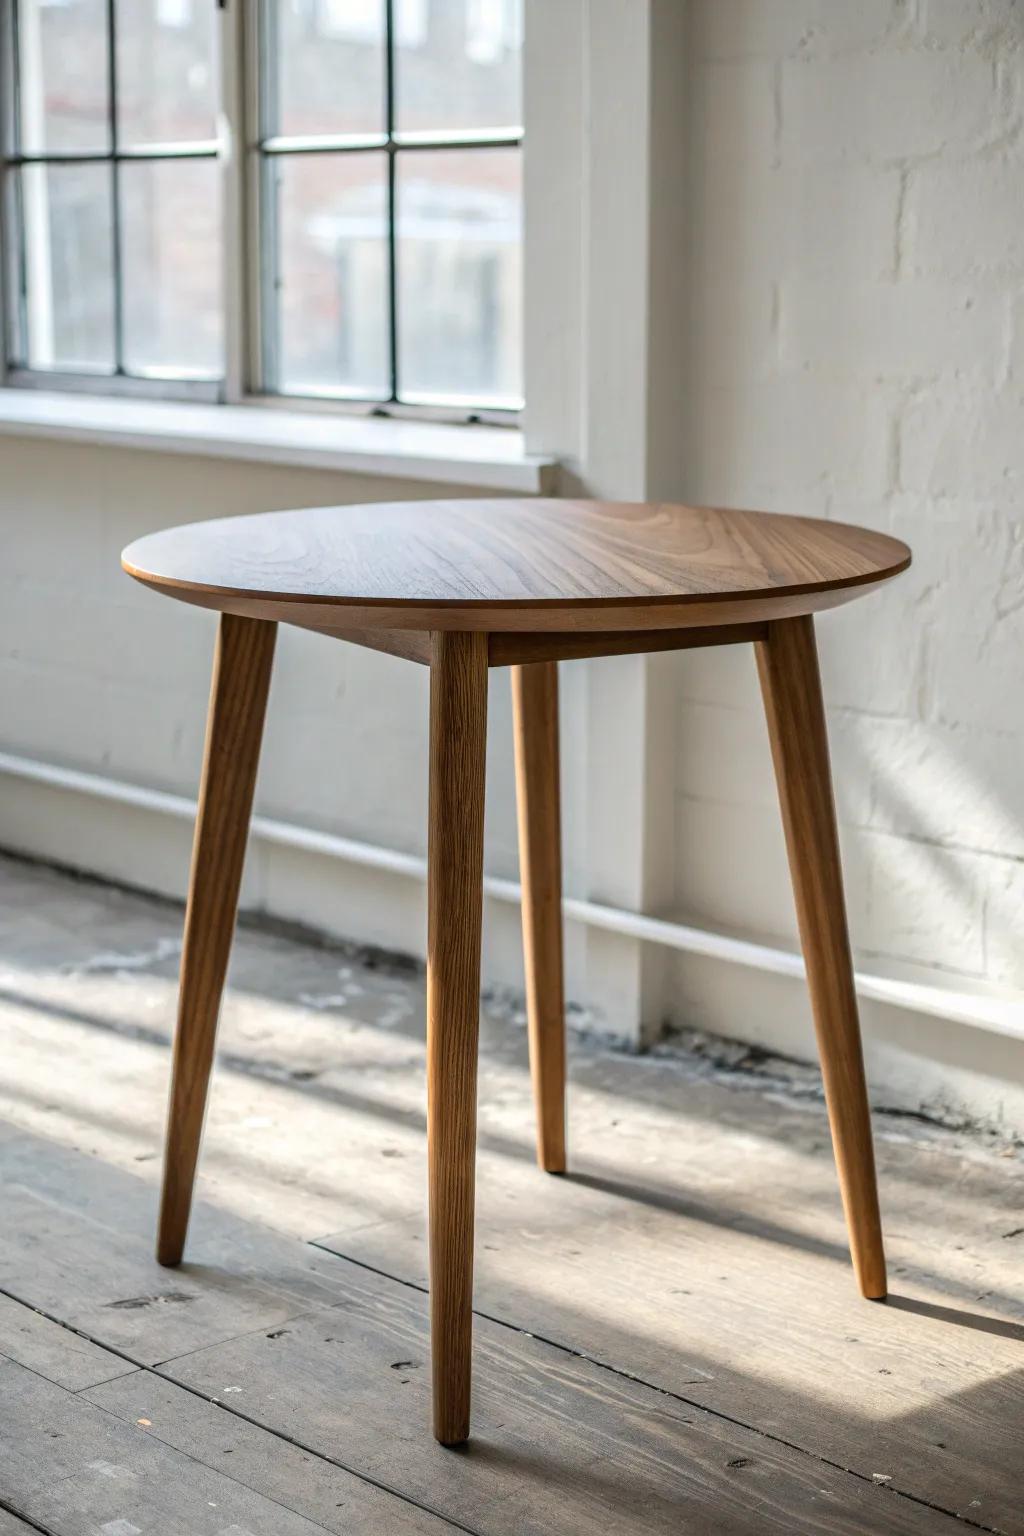
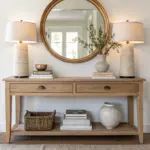
A fresh end table top can change the whole vibe of a room without touching your sofa or walls. Here are my favorite tried-and-true (and a few delightfully weird) ways to make that little surface feel like a big design moment.
Breadboard Ends for a Traditional Look
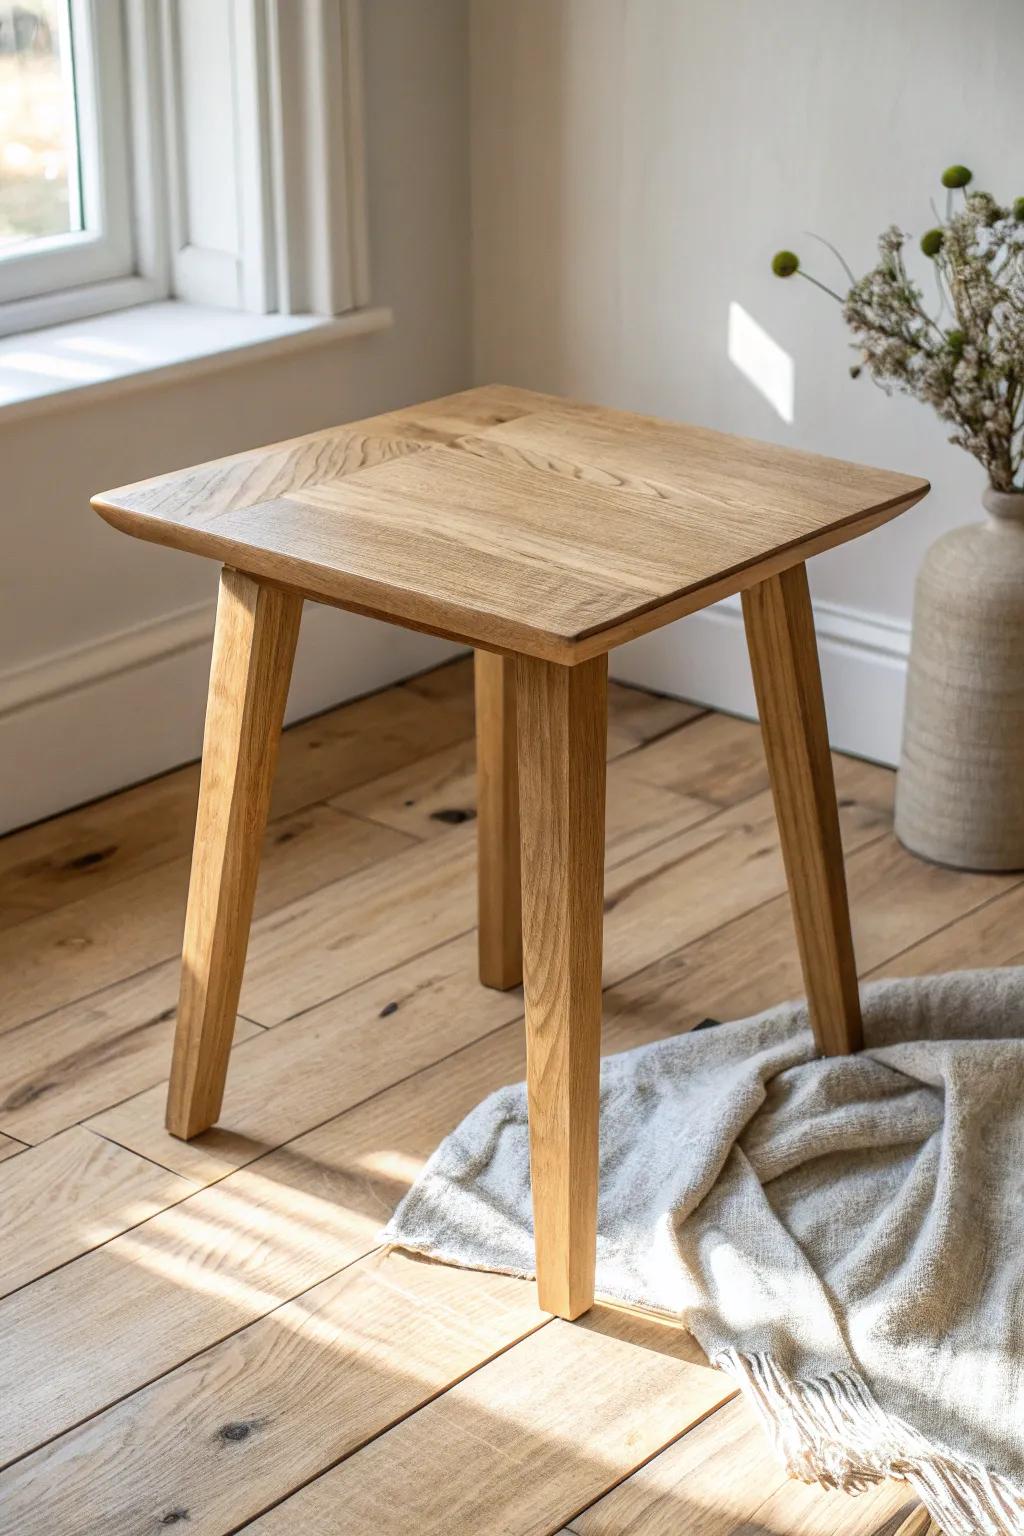
Adding breadboard ends is one of my favorite ways to make a basic end table top look more “furniture-grade.” The first time I tried it, I kept the joinery simple and still got that classic, tailored edge.
These products might help:
- Biscuit Joiner Kit: Create strong, hidden joints easily for seamless breadboard ends and professional-looking table tops.
- Pocket Hole Jig System: Simplify your joinery process with a jig system, perfect for securely attaching breadboard ends quickly.
- Set of Parallel Clamps: Ensure your table top stays perfectly flat and square while glue dries on your new joints.

Classic Sand-and-Stain Refresh
When an end table top looks tired, I strip it back, do a careful sand-and-stain combo, and let the grain do the talking. A few thin coats of wipe-on finish have saved more thrift-store tops in my shop than I can count.
These products might be useful:
- Assorted Grit Sandpaper Pack: Prep your surface effectively for refinishing by smoothing out imperfections and old finishes with these assorted sanding sheets.
- Oil-Based Wood Stain: Enhance the natural grain of your table top and add rich color depth with a penetrating wood stain.
- Wipe-On Polyurethane Finish: Protect your newly stained table top easily with a clear, durable finish that applies smoothly without brush marks.
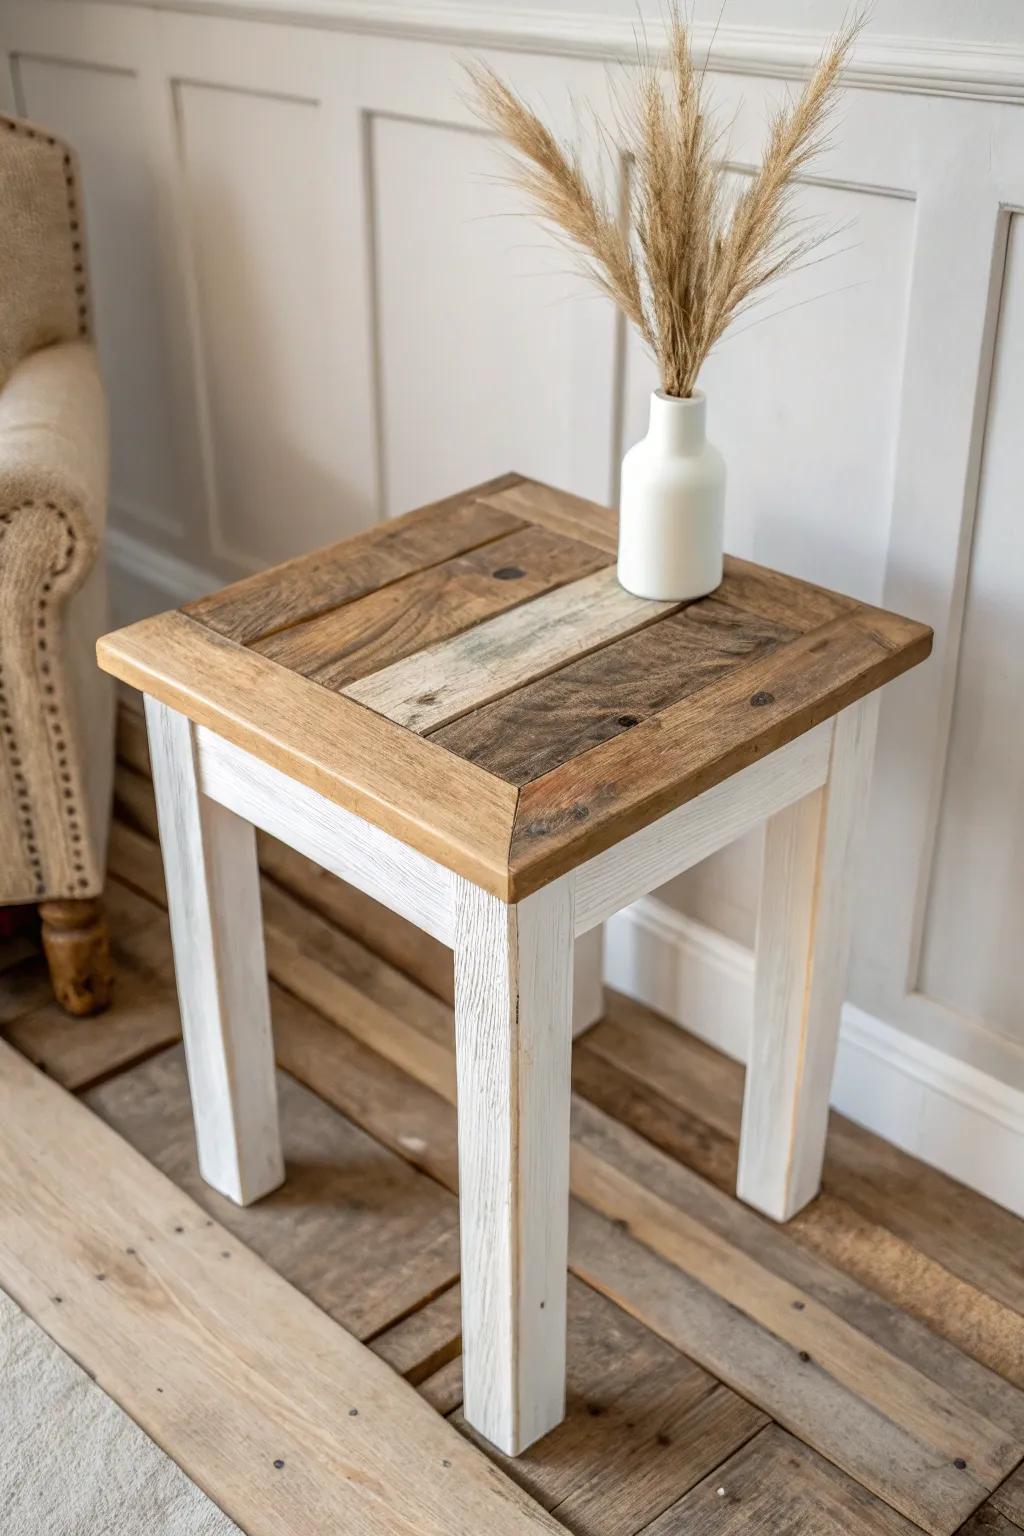
Two-Tone Wood Top and Painted Edge
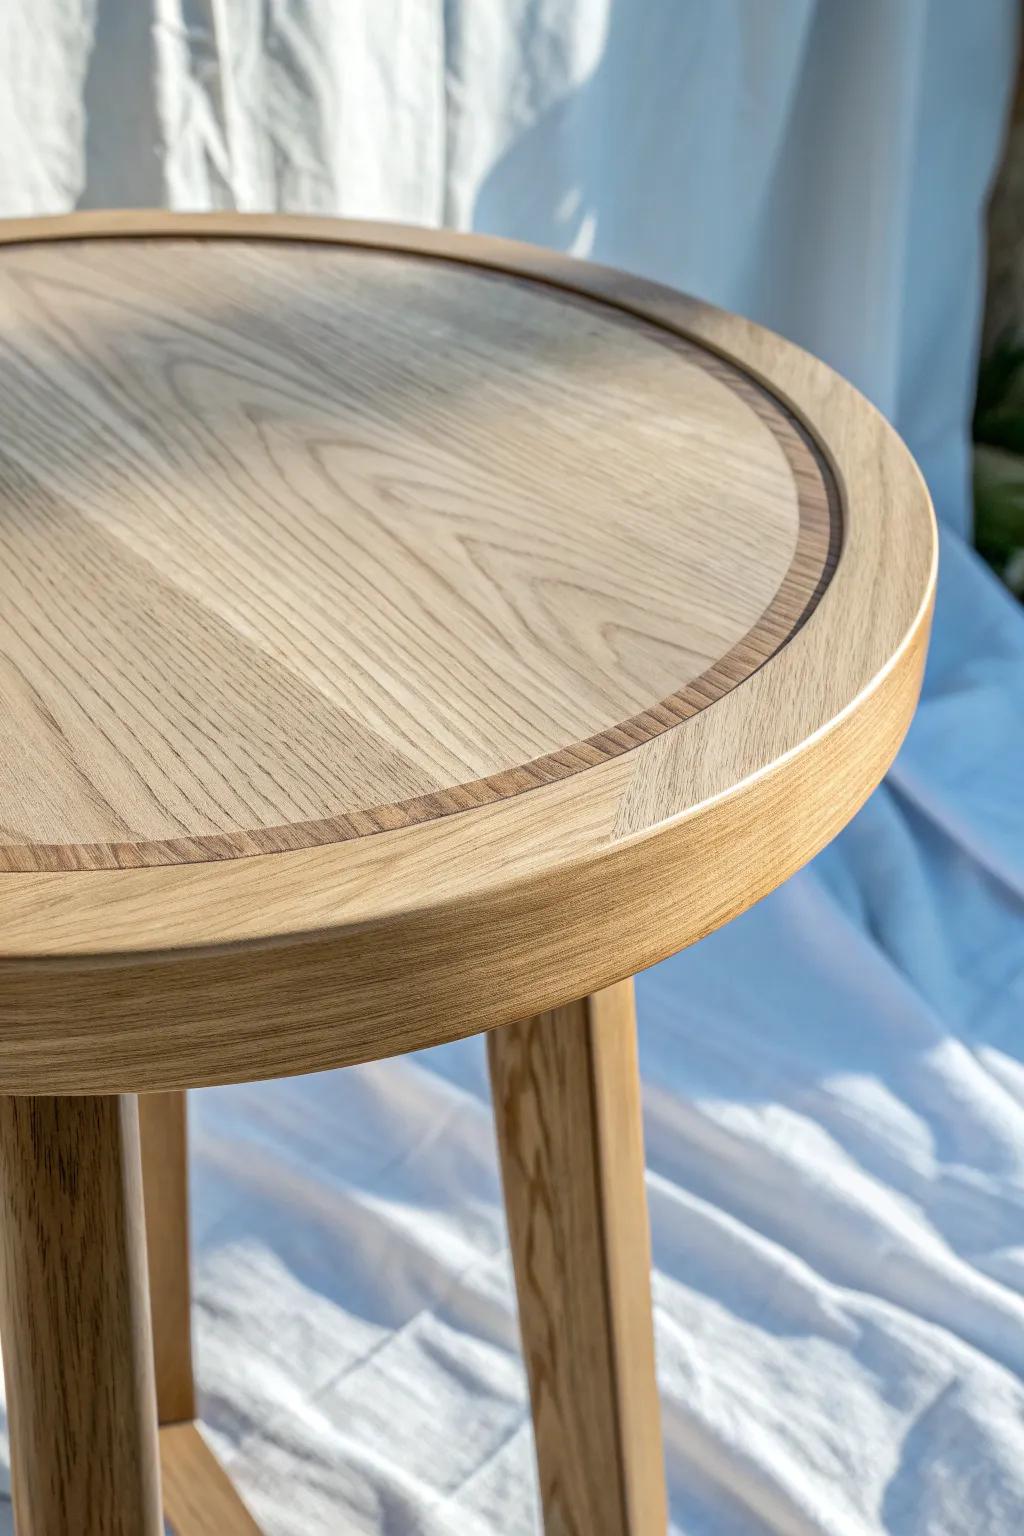
I love keeping the center of the end table top natural wood and painting just the rim for a crisp frame. I’ve done this with a soft neutral edge, and it instantly made the table feel more “finished” next to a sofa.
You might like:
- Painter’s Tape for Delicate Surfaces: Ensure a sharp, professional line between the wood grain and your painted edge with this essential tool.
- Chalk Style Paint (Soft Neutral): Transform the table rim effortlessly using this matte finish paint that requires minimal priming or preparation.
- Small Round Paint Brush Set: Achieve precise control on curved table edges without overlapping onto the natural wood center.
Solid Painted Top in a Soft Neutral
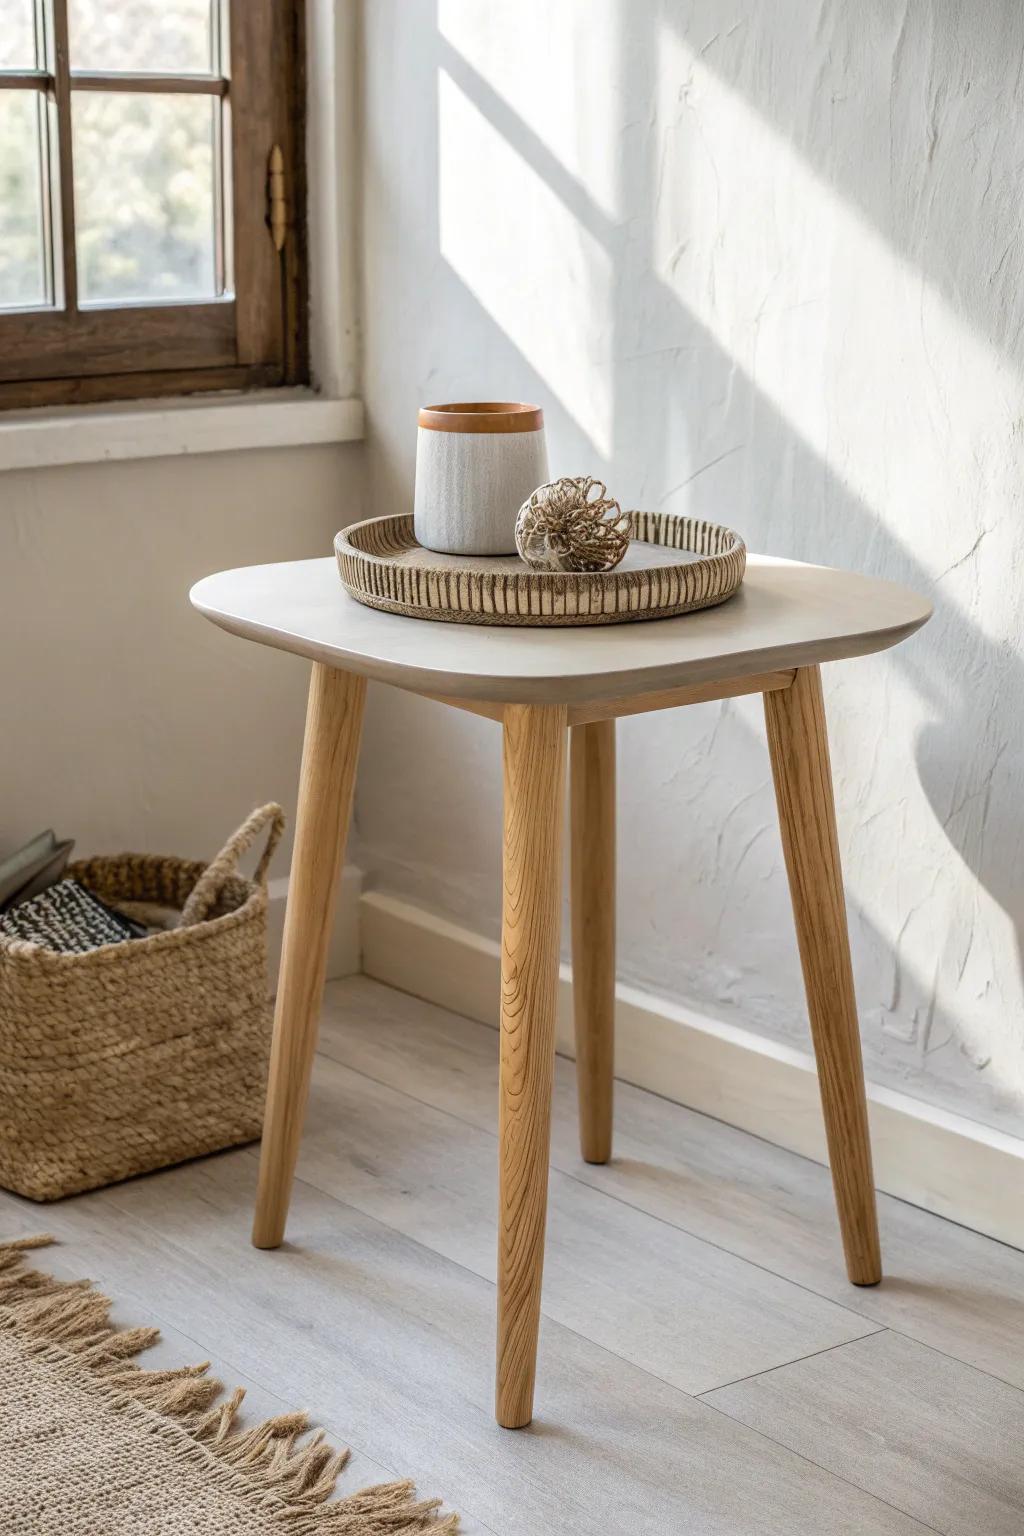
A smooth painted tabletop is my go-to when the surface has stains that won’t budge. I’ve learned the hard way that a light scuff-sand and a durable topcoat are what keep it from looking “crafty” after a week of coffee mugs.
Useful items to consider:
- Chalk Style Paint in Neutral Tones: Transform your dated furniture effortlessly with this matte finish paint that requires minimal surface prep beforehand.
- Assorted Sanding Sponges: Prepare your tabletop for a flawless finish by using these flexible blocks to scuff away old glossy finishes.
- Protective Matte Clear Coat: Seal your painted surface against water rings and daily wear while maintaining that modern, shine-free look.
Weathered Gray Wash Finish
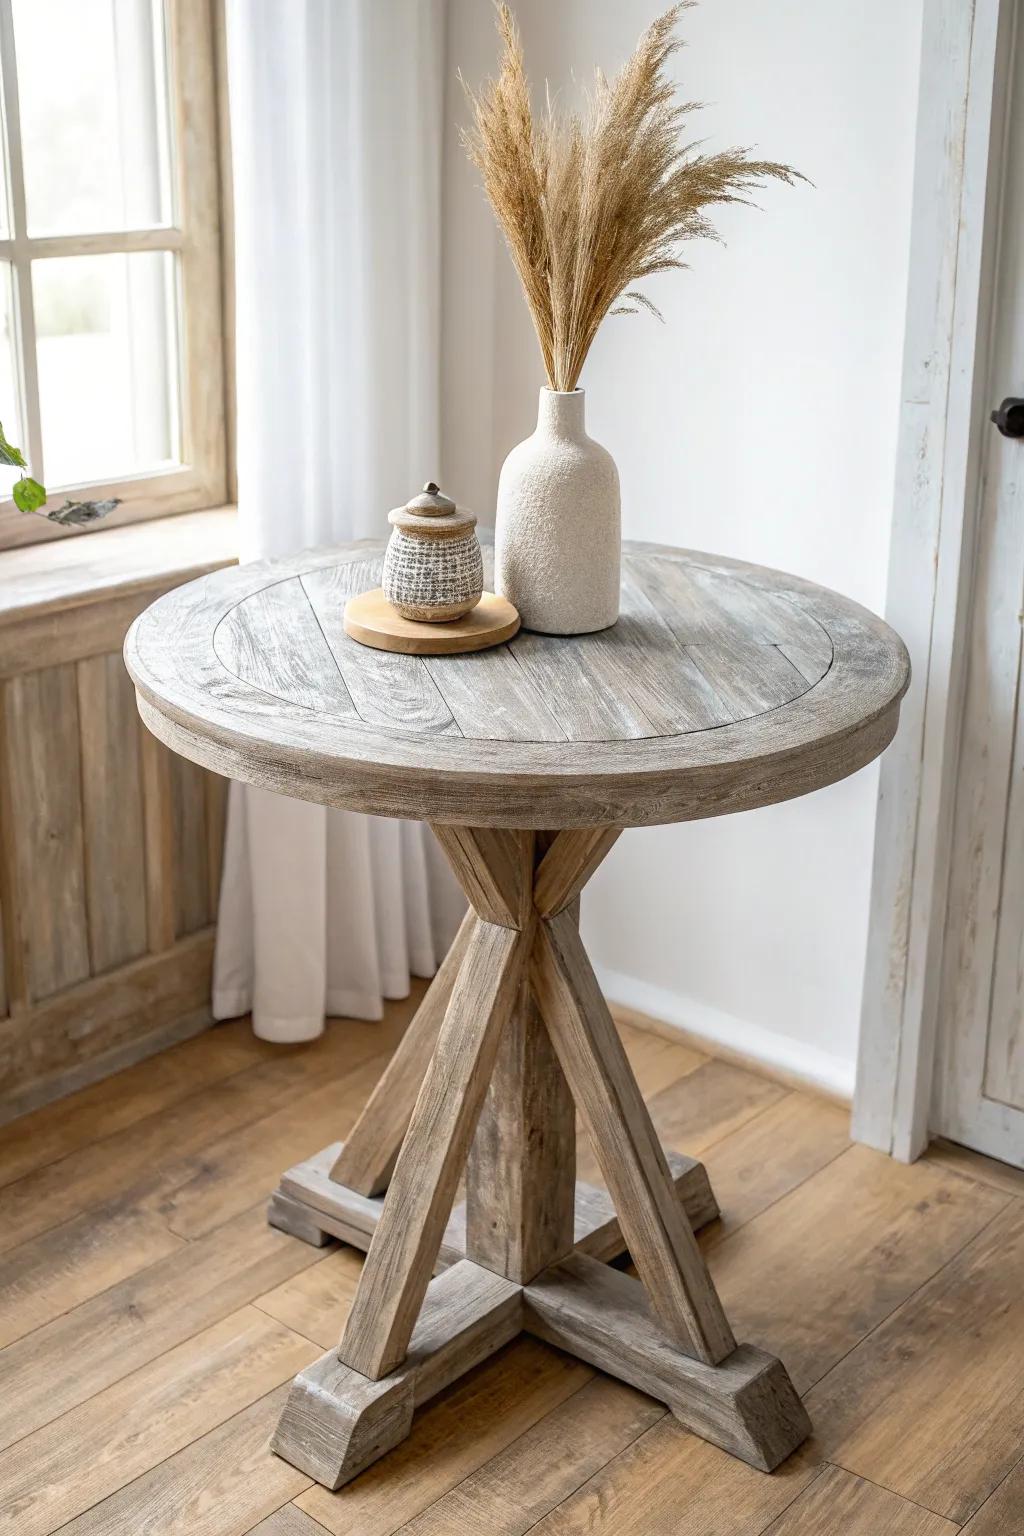
A simple gray wash gives an end table top that breezy driftwood vibe without hiding the grain. I’ve used this on mismatched side tables, and it’s the fastest way I know to make them look like a set.
Some handy options:
- Gray Weathered Wood Stain: Achieve that breezy driftwood look easily by applying this stain to enhance the natural grain of your table.
- Matte Polyurethane Sealer: Protect your newly finished gray table with a durable, non-glossy clear coat that preserves the natural matte vibe.
- Assorted Sanding Sponges: Prepare your table surface properly and distress edges for an authentic aged look with these flexible sanding tools.
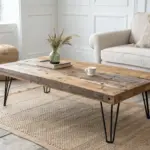
Planked Reclaimed Wood Top
If the original end table top is beyond saving, I’ll skin it with reclaimed wood planks for instant texture. I’ve built a bunch of these, and a tiny chamfer on the edges makes the whole top feel intentional.
Might be a good match:
- Reclaimed Wood Planks or Peel-and-Stick Paneling: Create that authentic, rustic texture instantly by adding real weathered wood planks directly to your existing table surface.
- Construction Adhesive or Wood Glue: Secure your new wooden top permanently with a strong adhesive designed to bond wood surfaces tightly together.
- Matte Polyurethane Finish: Protect the raw wood from spills and wear without compromising the rustic, natural look of the grain.
Herringbone Scrap-Wood Pattern
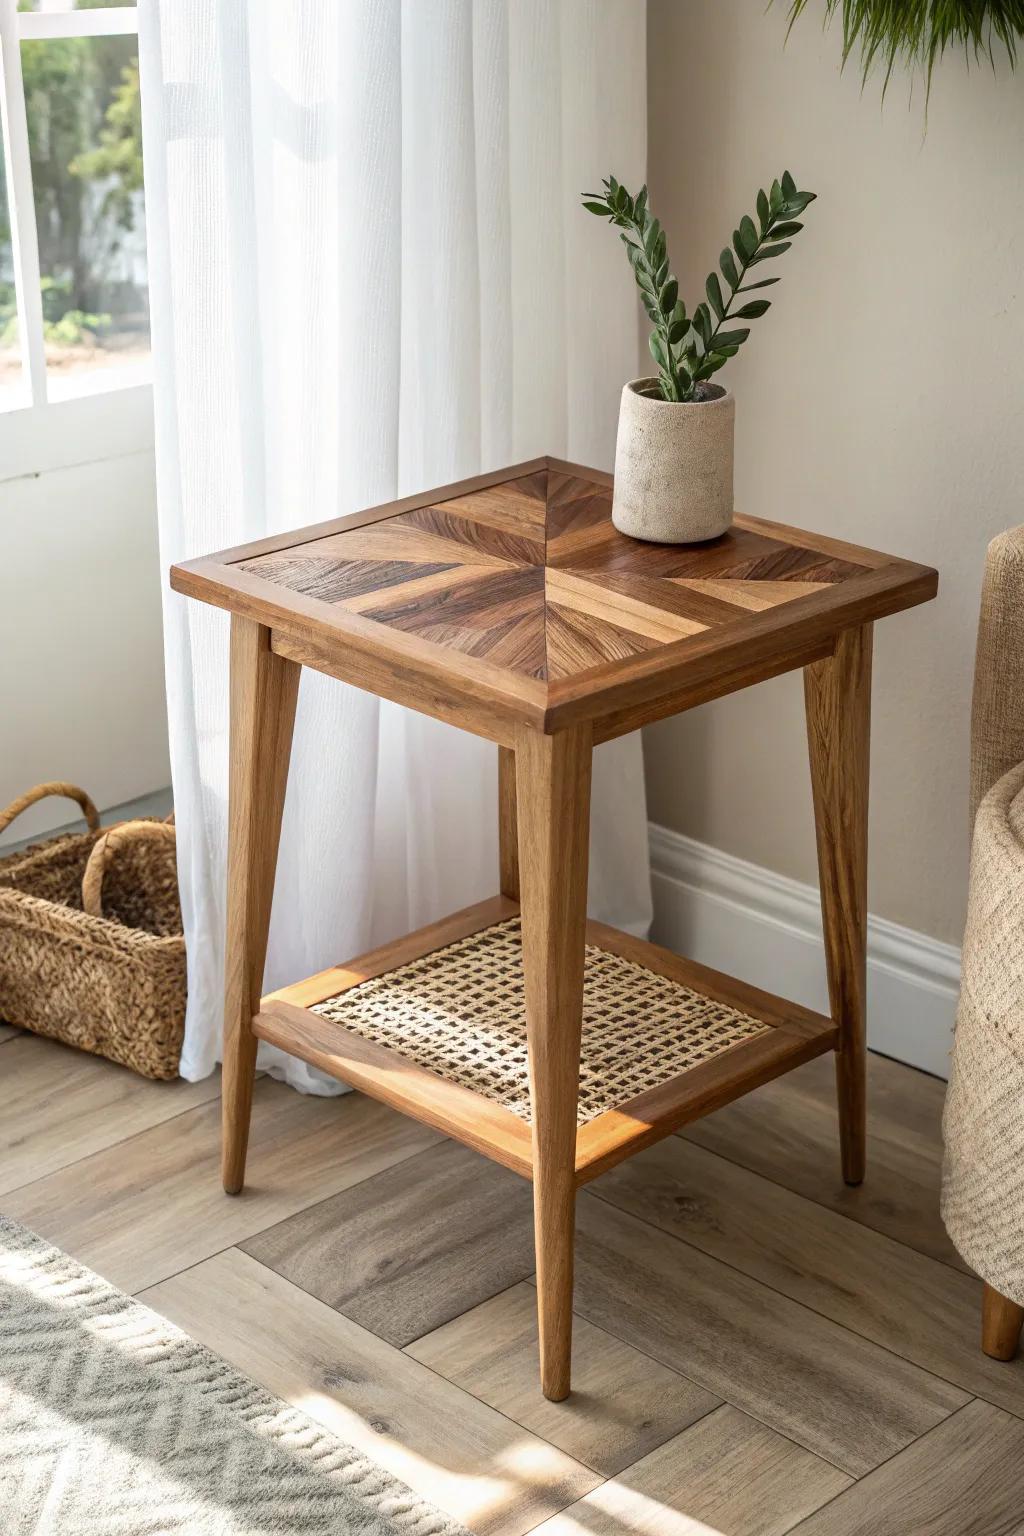
A herringbone tabletop looks fancy, but I’ve made it from leftover offcuts more times than I can admit. The first time I tried it, I marked a centerline and suddenly the whole pattern clicked into place.
Explore these options:
- Wood Glue for Joinery: Secure your intricate wood patterns firmly by applying reliable wood glue for a long-lasting, durable bond.
- Speed Square Layout Tool: Mark your centerline and angles accurately with a speed square to ensure your pattern aligns perfectly.
- Clear Matte Wood Finish: Protect your finished tabletop and enhance the natural wood grain variation with a durable clear coat.
Live Edge Slab Swap

Trading a plain end table top for a live edge slab gives you that “found in nature” look instantly. I’ve done this with a slightly wonky board, and the knots ended up being the best part once it was sealed.
Try these:
- Unfinished Wood Slice Rounds: Find the perfect raw slab to create your own table top, ready for sanding and your preferred finish.
- Mid-Century Wooden Table Legs: Support your new rustic top with tapered legs that easily screw in for a sturdy, stylish foundation.
- Wait-based Wood Conditioner & Oil: Protect your new live edge slab and enhance the natural grain patterns with a quality wood finish.
Tree Slice Round Top
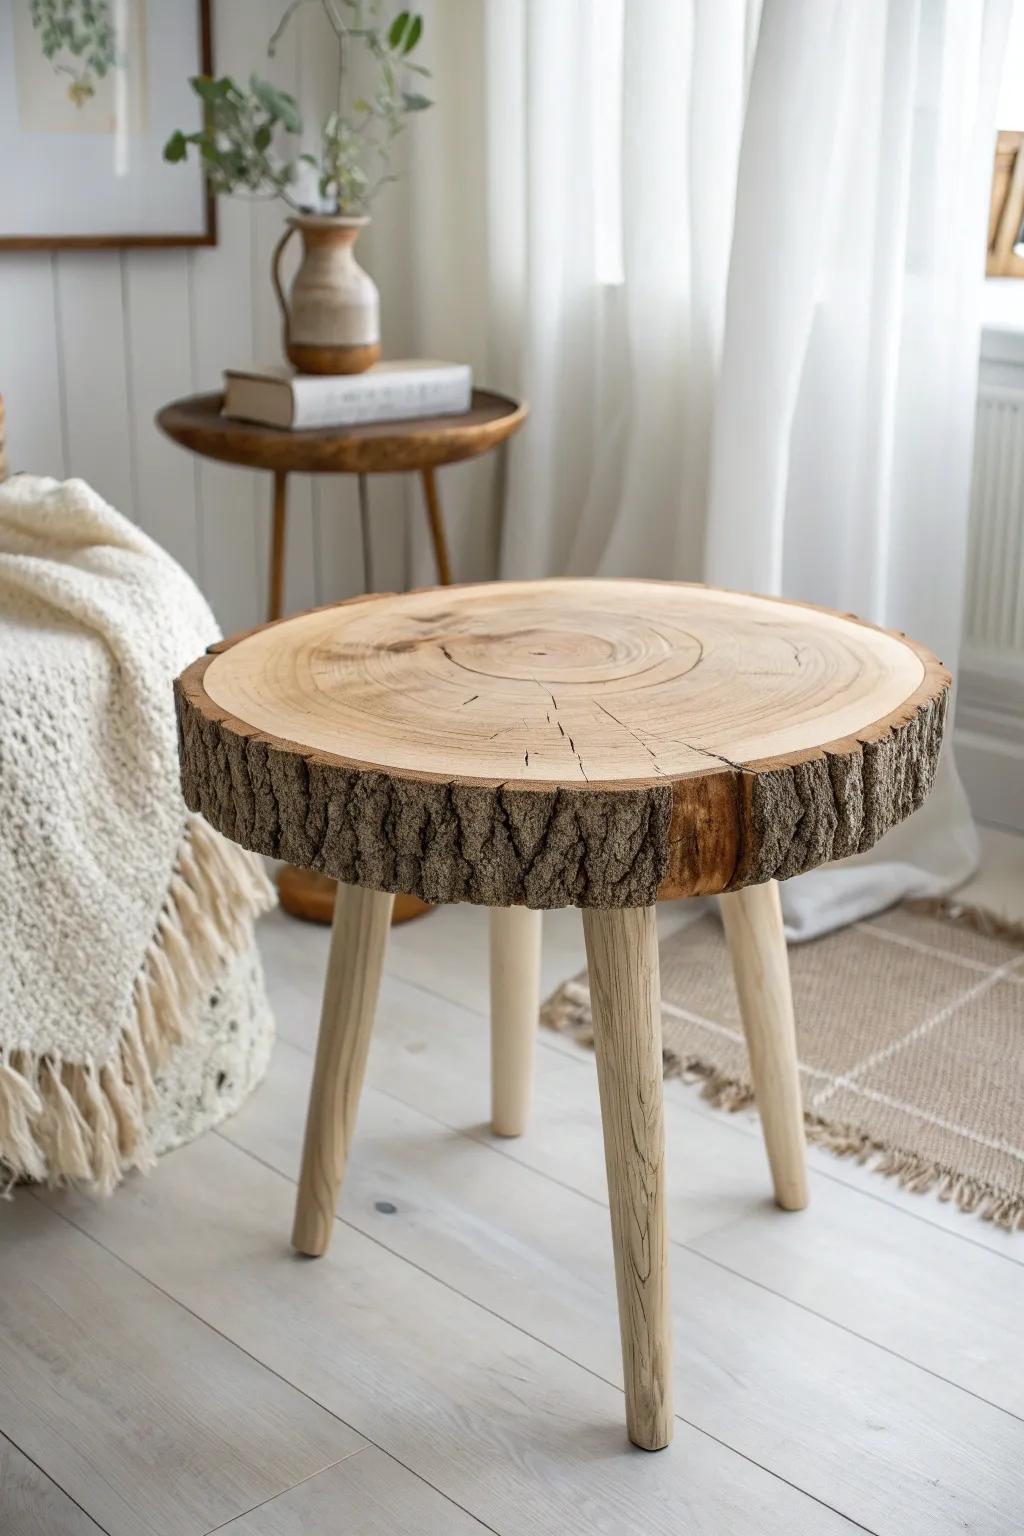
A thick wood round makes an end table top feel rustic in the best way, especially next to soft textiles. I’ve learned to stabilize cracks early and flood the surface with finish so it stays smooth for daily use.
Possibly handy products:
- Unfinished Wood Slice Round: Start your project with a natural wood slab ready for sanding and finishing to match your rustic decor.
- Mid-Century Modern Furniture Legs: Attach these simple, sturdy wooden legs to your tree slice to create a stable and stylish table base.
- Clear Gloss Wood Finish: Protect your table surface and enhance the natural grain pattern with a durable, easy-to-apply clear coat.
Simple Geometric Stencil Pattern
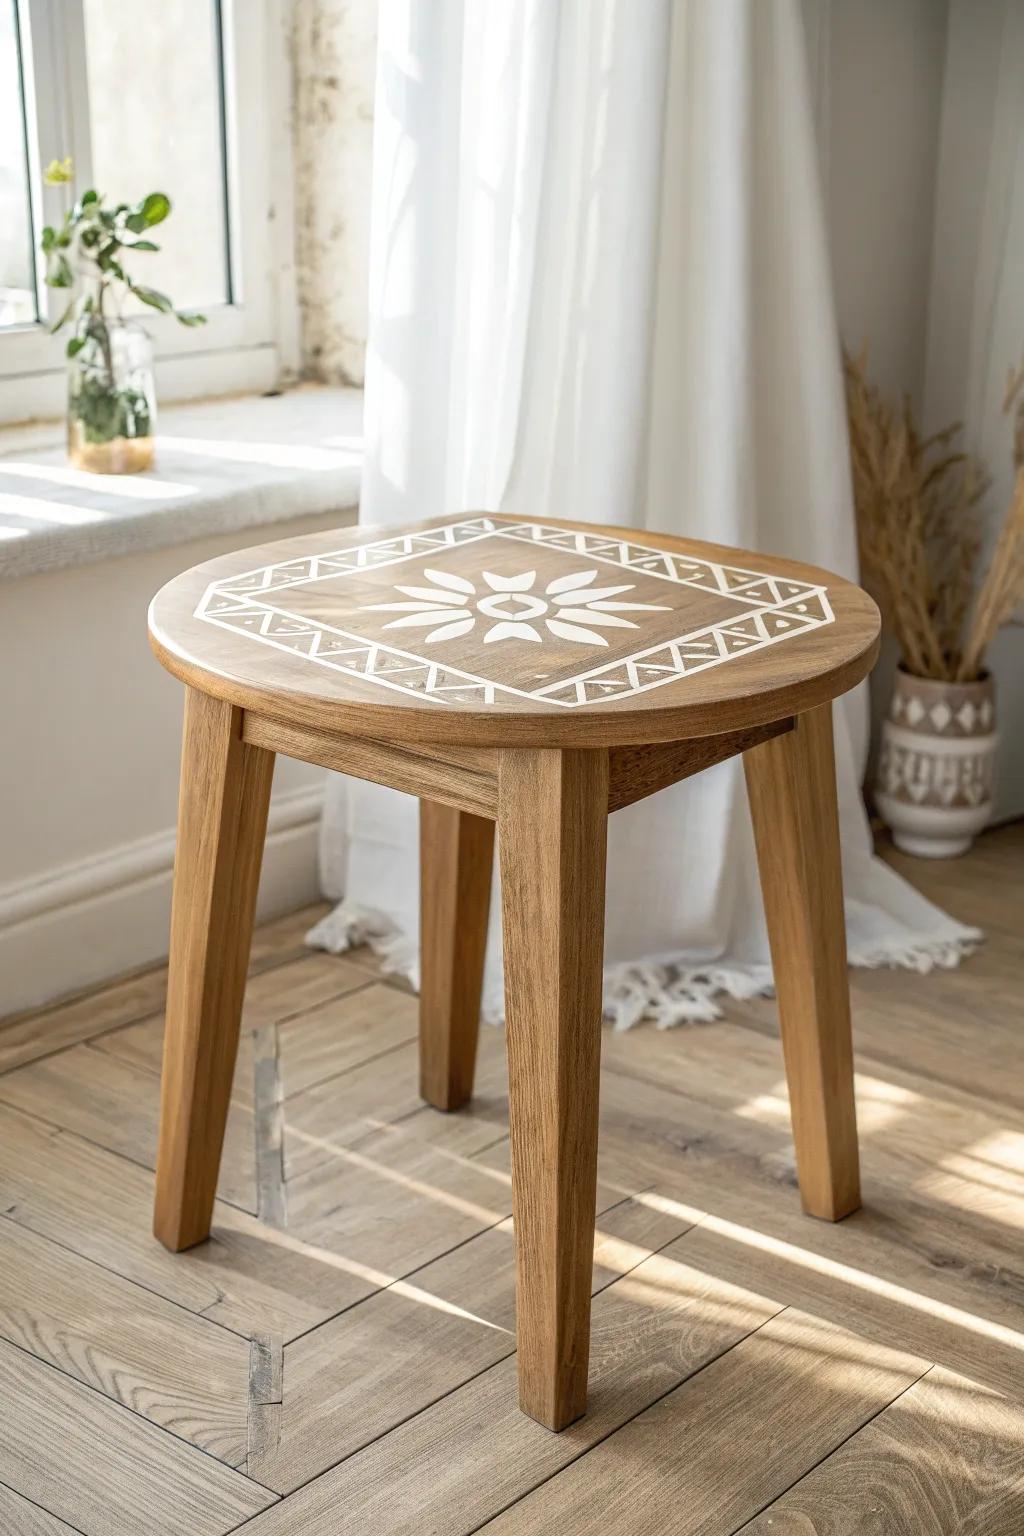
A crisp stencil pattern on an end table top is such an easy win when you want personality without chaos. I’ve had the best results using light pounces of paint and sealing it right away with a water-based topcoat.
Possibly helpful picks:
- Geometric Reusable Stencil Set: Create crisp patterns easily by securing these reusable templates to your tabletop before painting your design.
- Round Foam Stencil Sponges: Apply paint lightly with these foam applicators to prevent bleeding and ensure clean, sharp design edges.
- Water-Based Clear Topcoat: Protect your painted design from scratches and wear by applying a durable, non-yellowing clear finish.
Hand-Painted Checkerboard Top
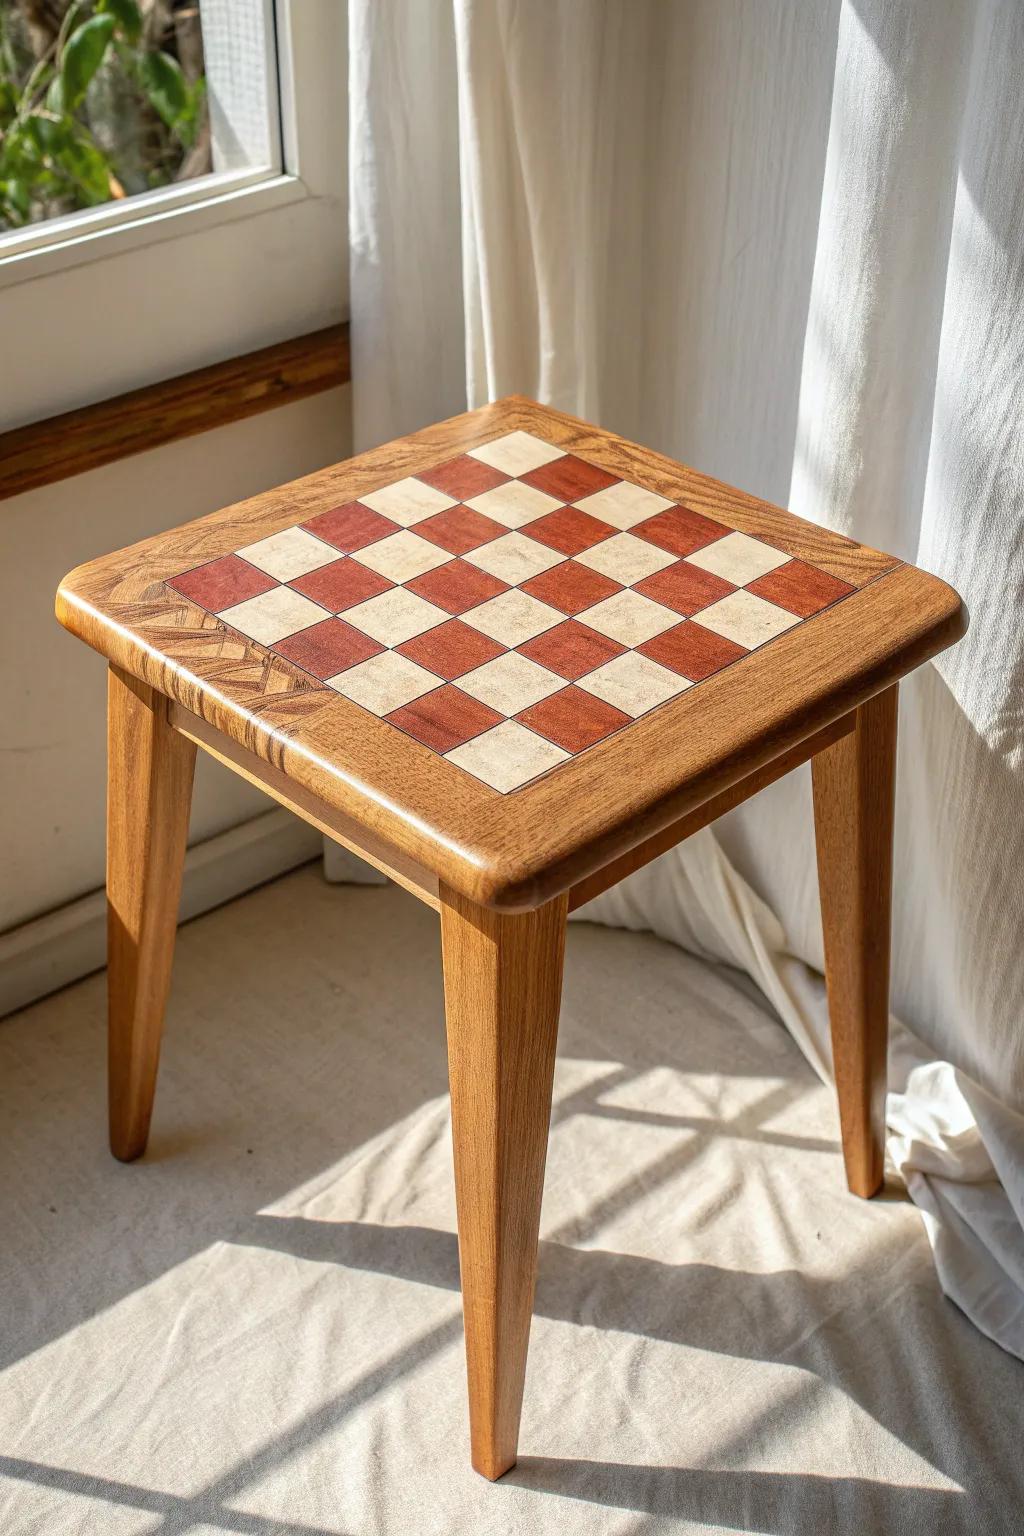
A checkerboard tabletop is playful but still classic, and it’s surprisingly forgiving if your lines aren’t perfect. I’ve painted one for a small reading nook, and it became the little focal point everyone comments on.
You might give these a try:
- Set of Multi-Surface Acrylic Paints: Choose contrasting colors to create your custom design; durable formulas ensure your tabletop handles daily wear well.
- Painter’s Tape for Delicate Surfaces: Achieve crisp, clean lines on your grid without damaging base layers, making the geometric pattern much easier.
- Polyurethane Wood Sealer: Protect your finished checkerboard handiwork from spills and scratches with a clear, durable topcoat for longevity.
Decoupage Paper Collage Under Clear Coat
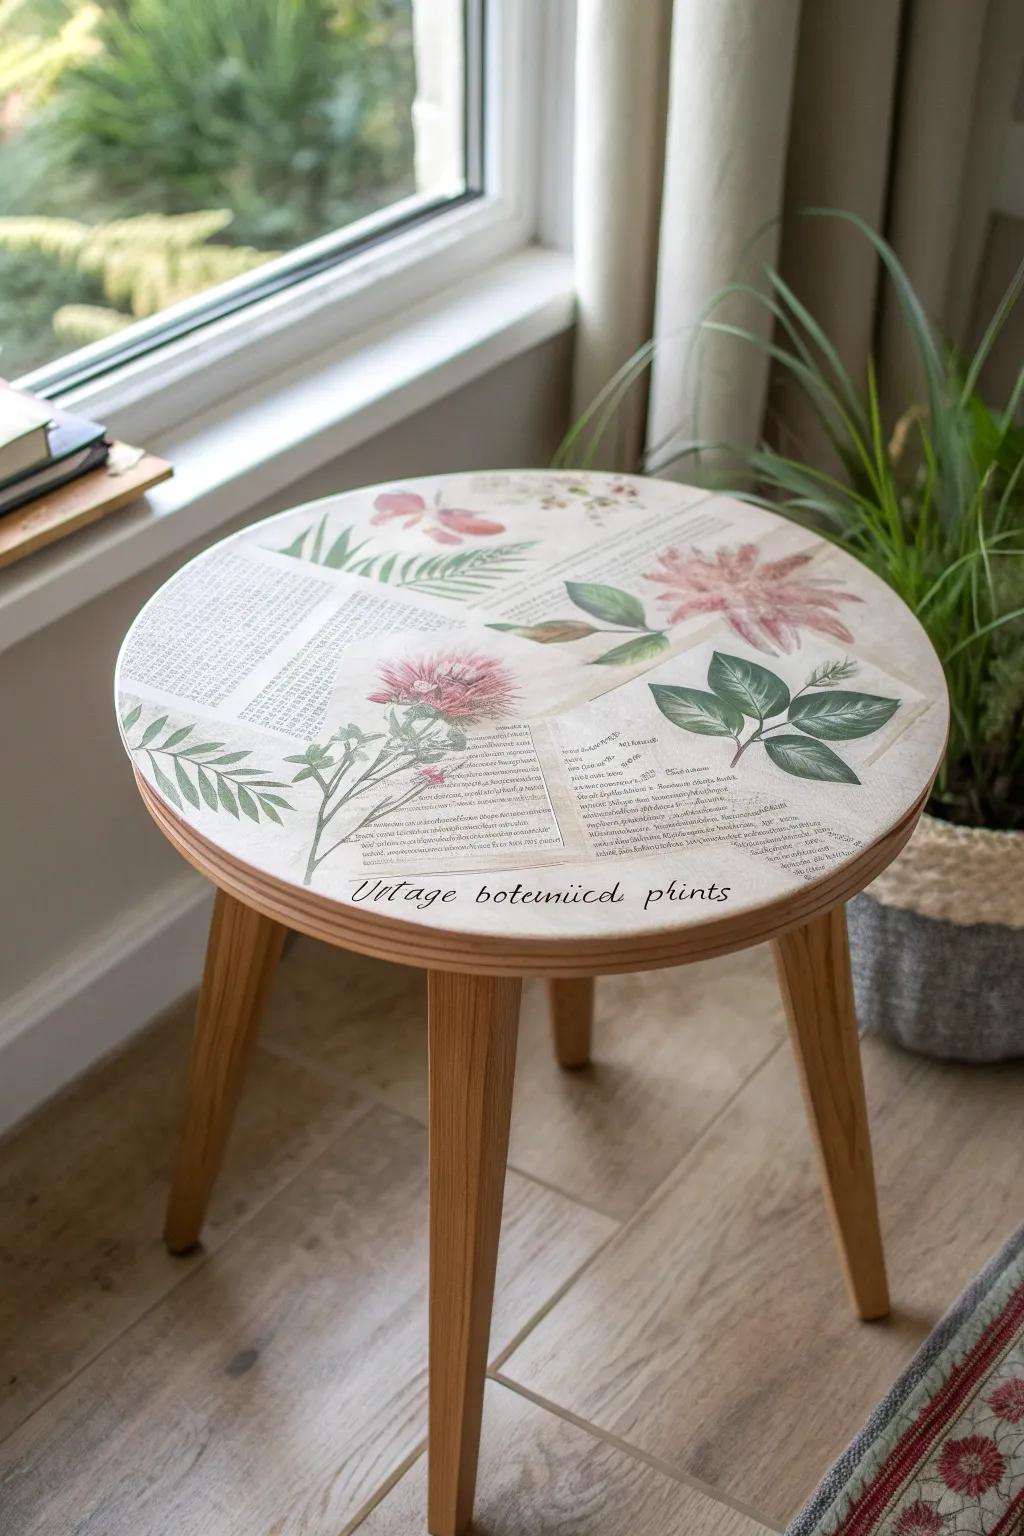
When I want instant pattern, I decoupage the end table top with paper and lock it in under a glassy clear finish. I’ve done this with vintage-looking sheets, and it turned a boring table into a total conversation starter.
Consider these options:
- Vintage Botanical Decoupage Paper: Create a nostalgic look by applying delicate floral and script patterns directly onto your furniture surfaces.
- Matte or Gloss Decoupage Glue: Secure your paper designs firmly in place while sealing them for a durable, long-lasting artistic finish.
- Polyurethane Clear Top Coat: Protect your finished collage under a hard, protective layer that resists scratches and everyday wear.
Tiled Mosaic End Table Top
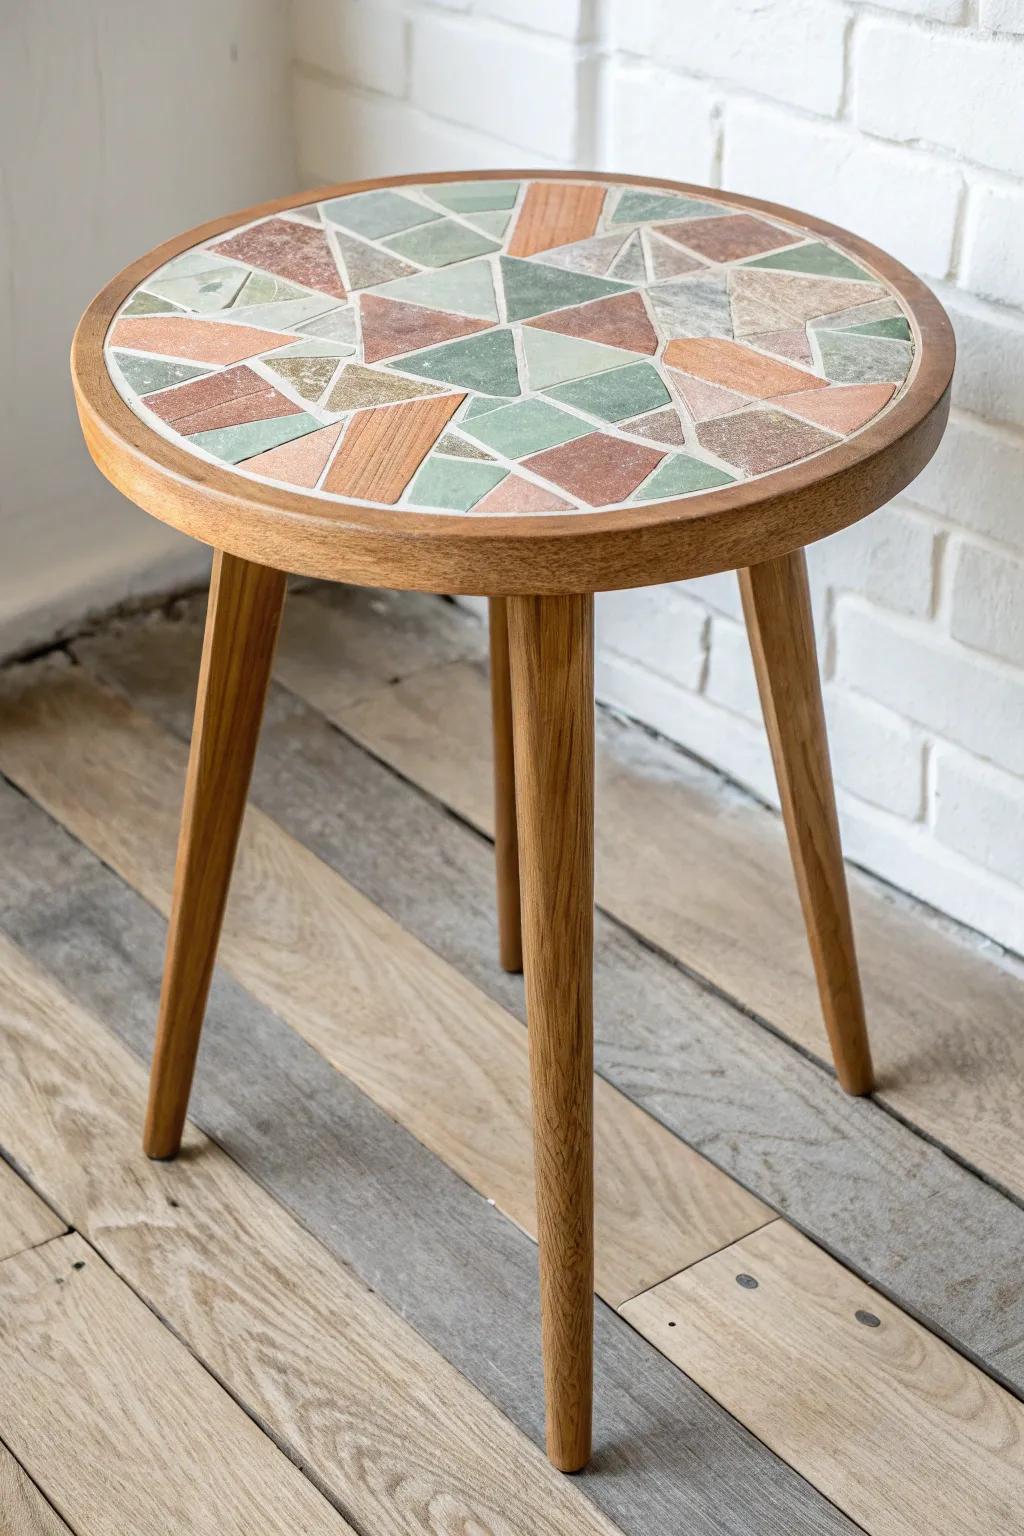
A mosaic tile end table top is perfect if you want color and texture that can handle real life. I’ve used leftover tiles from past projects, and once it’s grouted and sealed, it’s basically bulletproof.
Check these products out:
- Assorted Mosaic Tiles: Create stunning patterns with mixed tiles, perfect for giving your old table a durable and colorful new surface.
- Pre-mixed Tile Grout: Secure your design seamlessly with easy-to-use grout that fills gaps and helps ensure a long-lasting, smooth finish.
- Tile Stone Sealer: Protect your beautiful handiwork from spills and stains by applying a quality sealer for a truly durable tabletop.
Glass Overlay to Protect Artful Layers
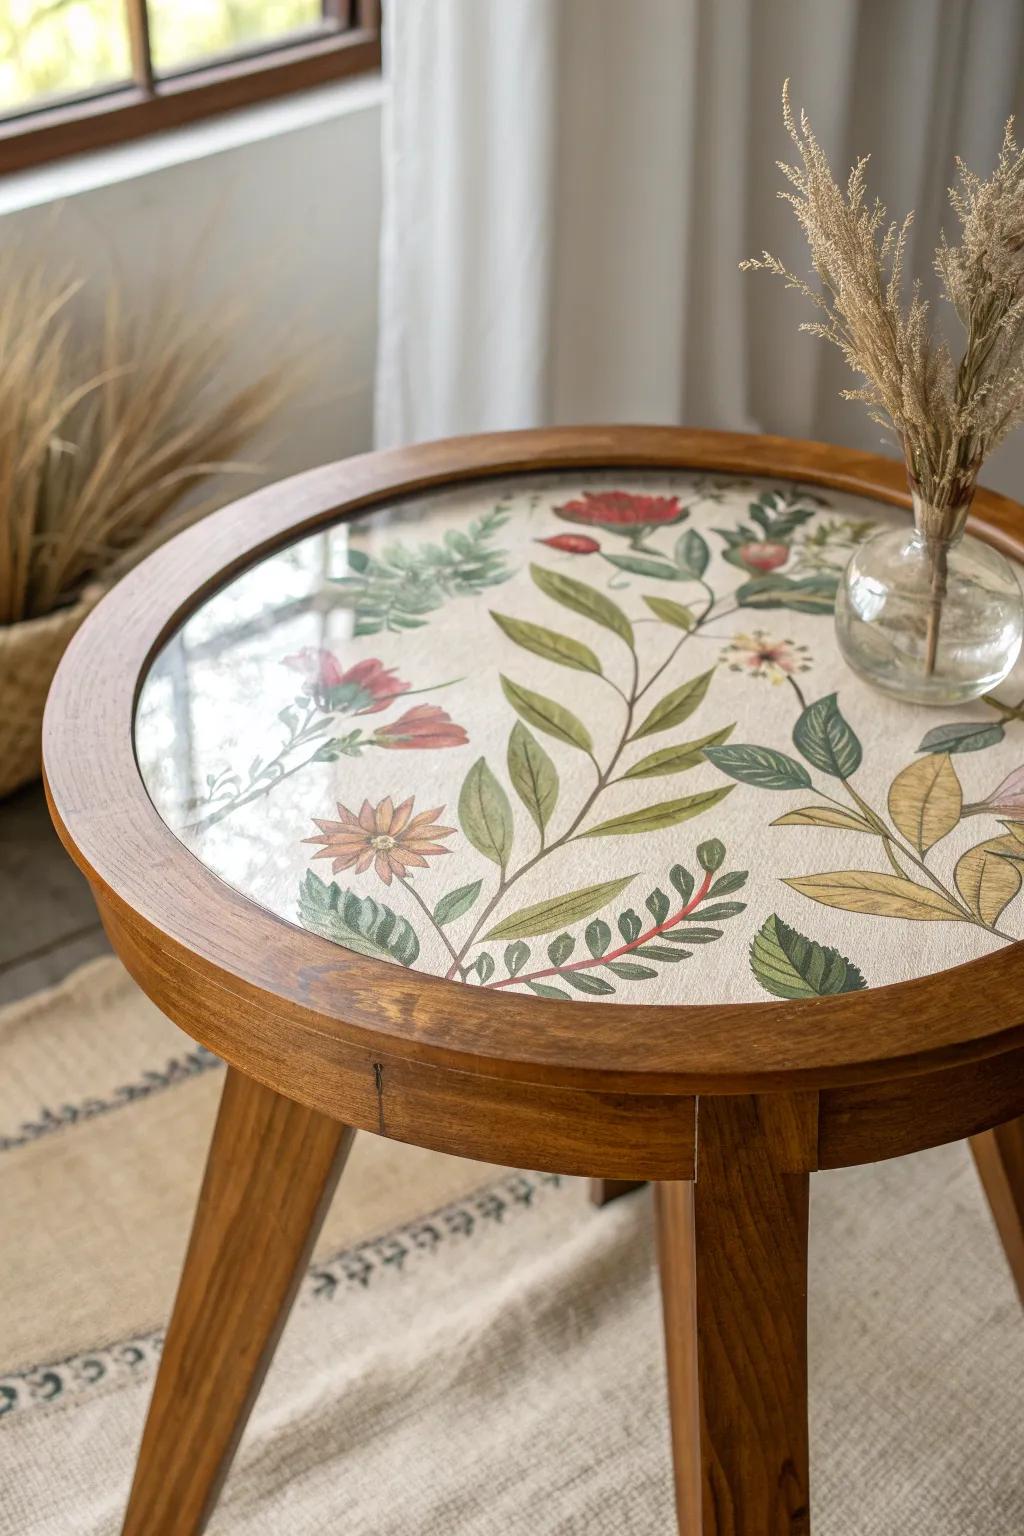
If you’ve created a beautiful end table top (decoupage, paint, or photos), adding a thin glass top keeps it worry-free. I’ve done this for a client who hates coasters, and it saved my sanity.
May just do the trick:
- Round Tempered Glass Table Top: Protect your DIY surface with durable tempered glass that adds a sleek, polished finish to your custom table.
- Non-Slip Glass Table Pads: Keep that new glass secure and prevent sliding with discreet, clear bumpers placed underneath the overlay.
- Botanical Decoupage Paper: Create a stunning nature-inspired look like the example above using detailed floral papers designed for furniture crafts.
Metal Inlay Stripe for a Modern Edge
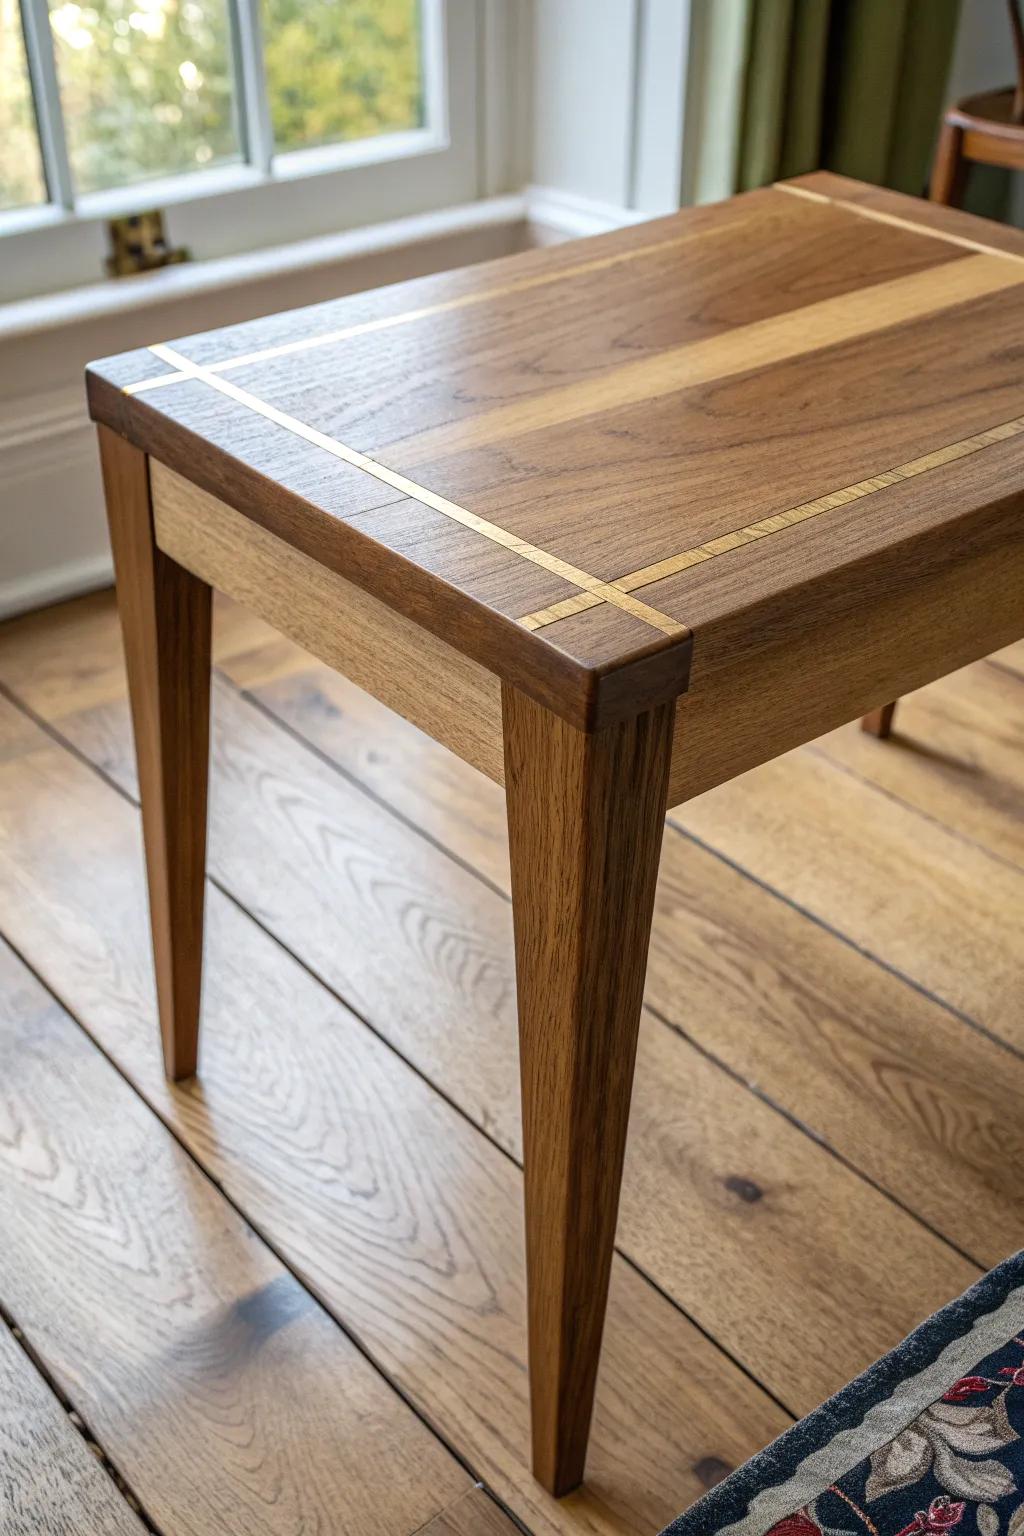
A slim metal inlay line across an end table top adds just enough contrast to feel custom. I’ve used this trick when a top needed “something,” and it instantly made the wood grain look richer.
Give these a look:
- Brass Flat Bar Inlay Strip: Embed these solid brass strips into routered channels to create distinctive, permanent metallic accents in your woodwork.
- Self-Adhesive Gold Metal Trim: Apply this peel-and-stick metallic tape for a quick, low-effort upgrade that mimics the look of real inlay.
- Metallic Epoxy Resin Pigment: Mix this powder with epoxy to fill carved grooves, creating a seamless, customizable liquid metal inlay effect.
Charred Wood Top With Deep Texture
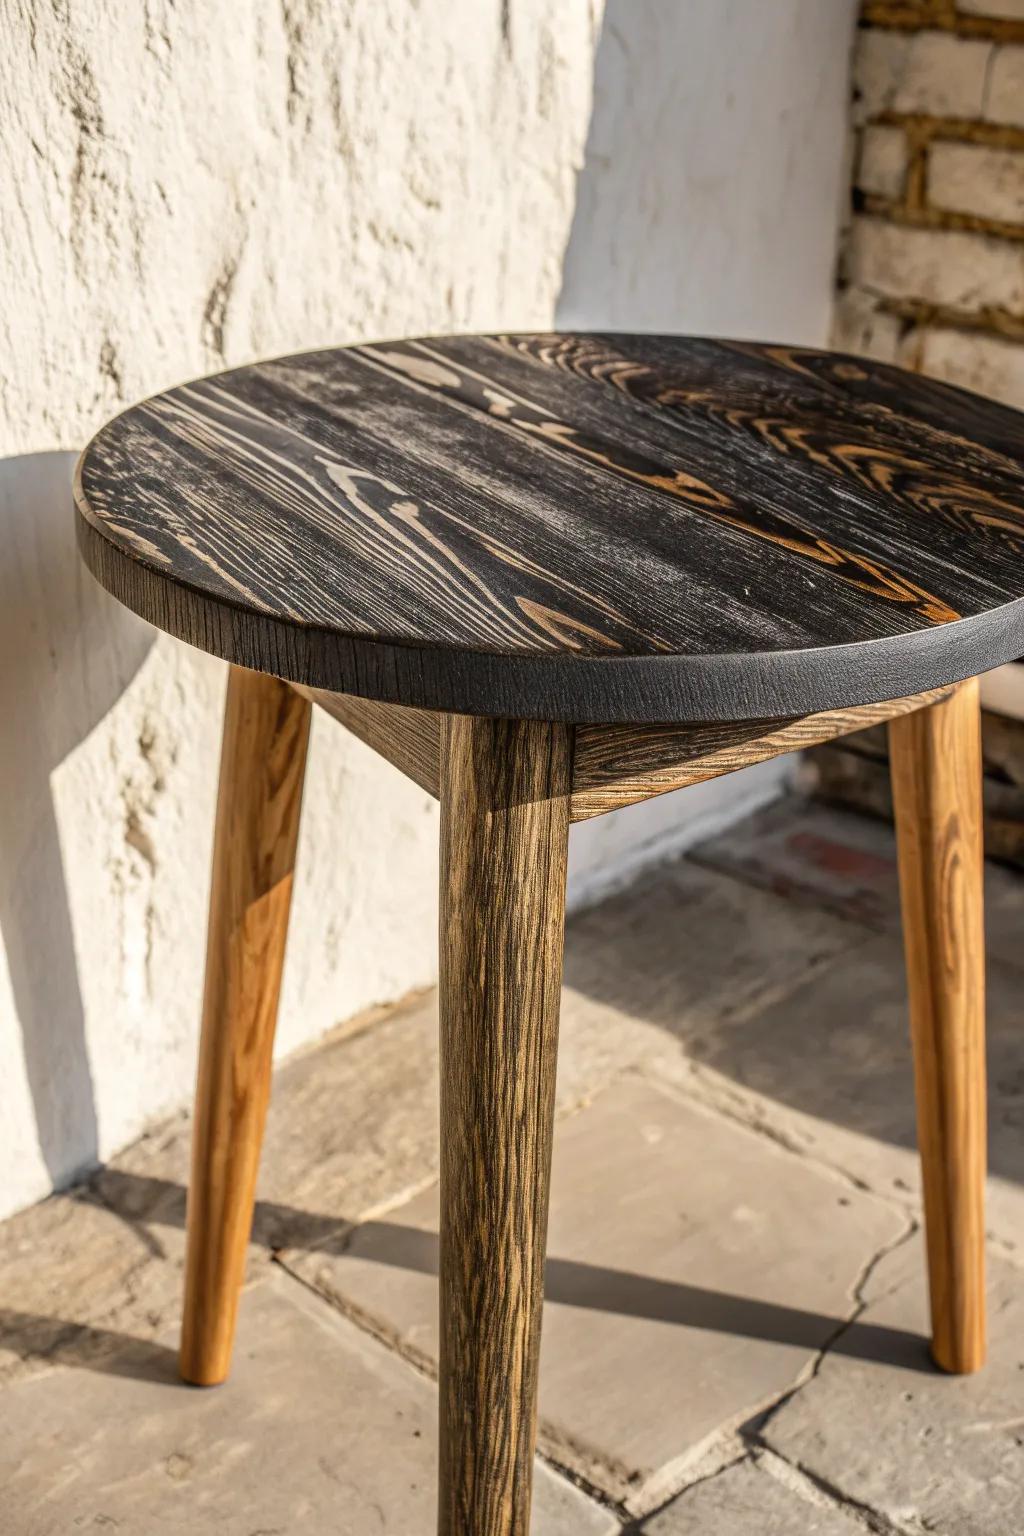
A lightly charred wood end table top has this smoky, dramatic texture that looks amazing in farmhouse spaces. I’ve done it with a gentle brush-back and a sealing oil, and it’s one of those finishes people have to touch.
A few suggestions:
- Round Unfinished Pine Wood Board: Start your tabletop project with a solid wood round suitable for burning and staining techniques.
- Propane Torch Head for Wood Burning: Achieve that dramatic charred Shou Sugi Ban effect safely by using a reliable, high-heat torch head.
- Wire Brush Drill Attachment Set: Remove loose char and reveal the deep grain texture quickly with these durable wire wheel attachments.


