
A great garage door trim is like a picture frame for the biggest “feature wall” on the outside of your house. With a few boards, smart proportions, and the right finish, you can make the whole front elevation feel more polished and intentional.
Go High-Contrast for Instant Pop
A contrasting trim color (dark trim on light siding or vice versa) makes the garage feel crisp and intentional instead of “tacked on.” I’ve used this trick when a house needed curb appeal fast, and tying the trim color to other accents (like shutters or planters) made it look designed, not random.
A few suggestions:
- Exterior Wood Stain & Sealer: Enhance natural wood grain while protecting your trim from UV rays and moisture for lasting beauty.
- Outdoor Wall LED Sconces: Highlight your high-contrast trim work with sleek, modern lighting fixtures placed on either side.
- General Purpose Sanding Block: Prepare your wood surfaces perfectly before staining to ensure a smooth, professional, and consistent finish.

Match Trim to the Garage Door Color
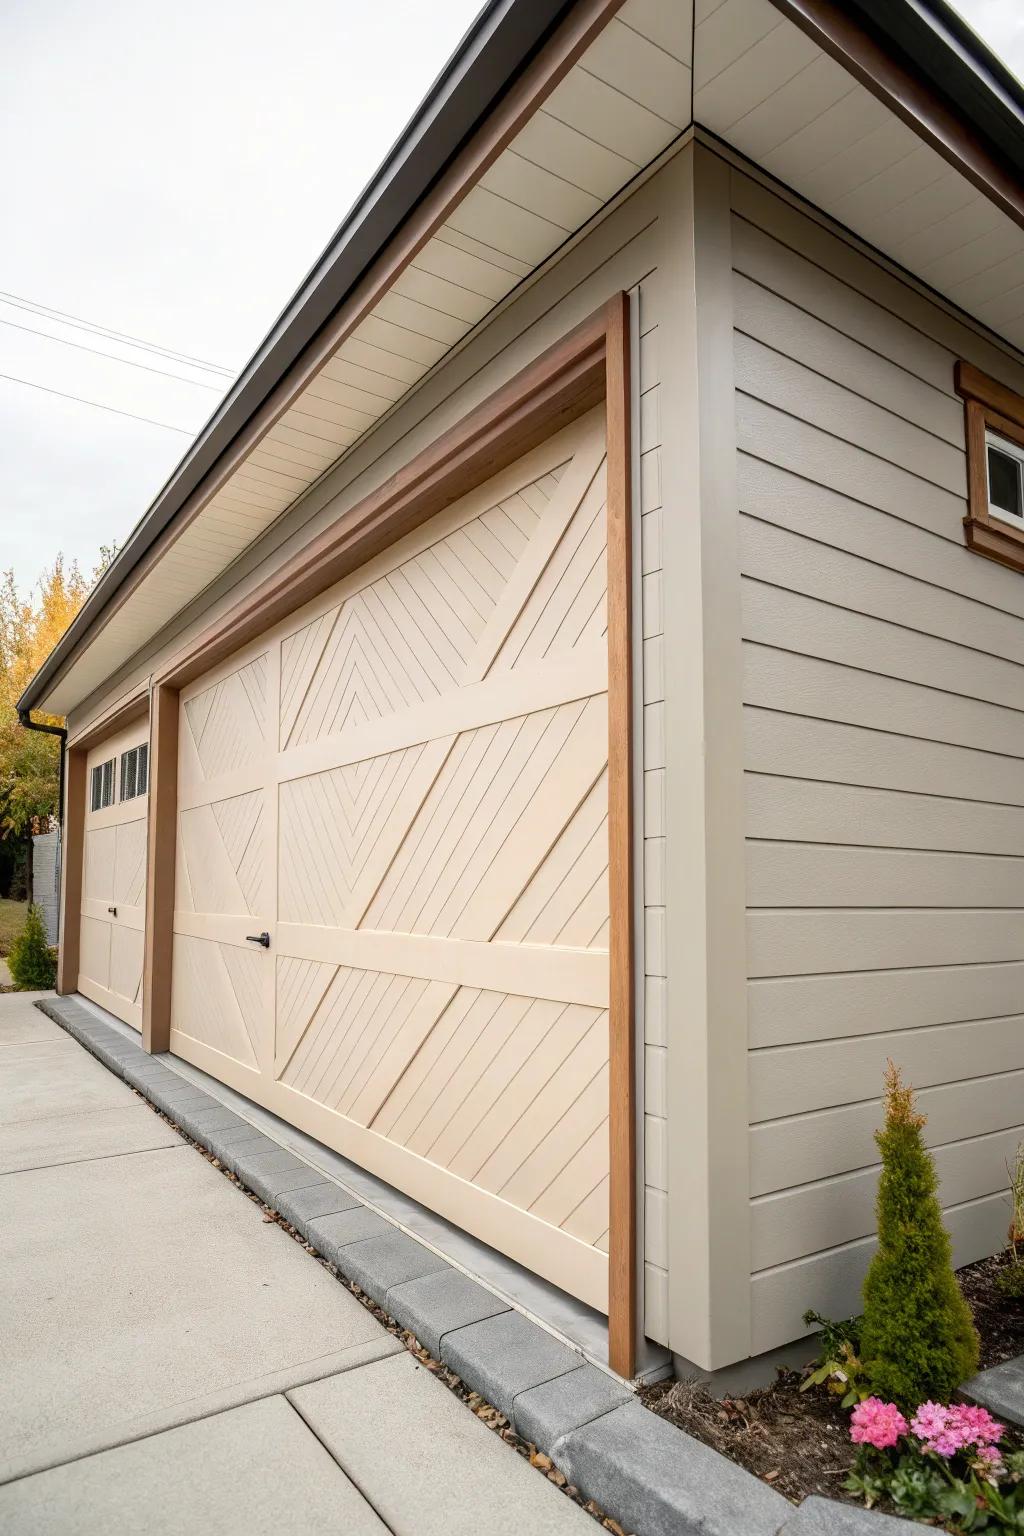
If you want a clean, seamless look, paint or stain your garage door trim to match the door so everything reads as one bold shape. I did this on a tight driveway where I wanted less visual clutter, and it made the opening feel wider instantly.
A few choices to try:
- Exterior Paint Sprayer: Achieve a smooth, professional finish on your trim quickly; use this tool to evenly apply your matched color.
- Premium Exterior Wood Stain: Protect your wood trim while matching your garage door’s tone; choose a high-quality stain for lasting durability.
- Painter’s Tape for Exterior Surfaces: Ensure crisp, clean lines between your trim and siding; apply this heavy-duty tape for a mess-free project.

Match the Home’s Existing Exterior Trim
Repeat whatever your windows, fascia, and corner boards are doing so the garage door casing looks like it belongs. When I copied the same trim width and color from the front windows onto the garage, the whole exterior suddenly felt cohesive.
Products that could assist:
- Paintable PVC Trim Boards: Use rot-resistant PVC boards to create durable, matching casing around your garage door opening.
- Exterior Wood Stain or Paint: Select a high-quality exterior stain or paint to perfectly color-match your new trim to existing elements.
- Weather-Resistant Caulk: Seal gaps between your siding and new trim to prevent moisture damage and ensure a professional finish.


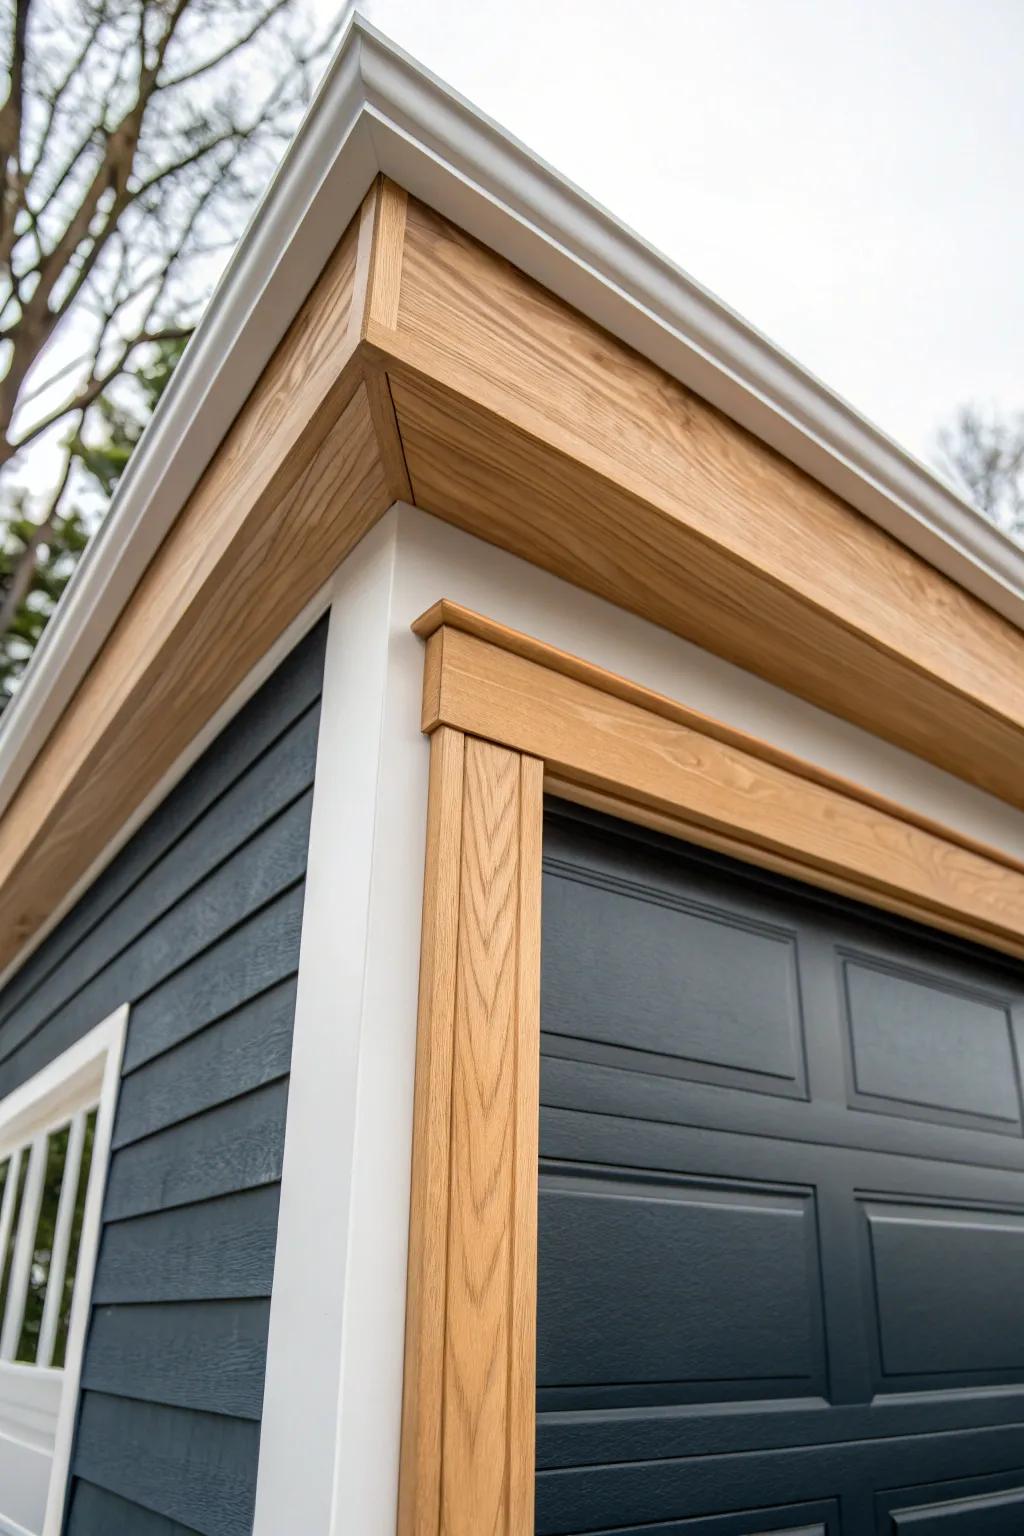
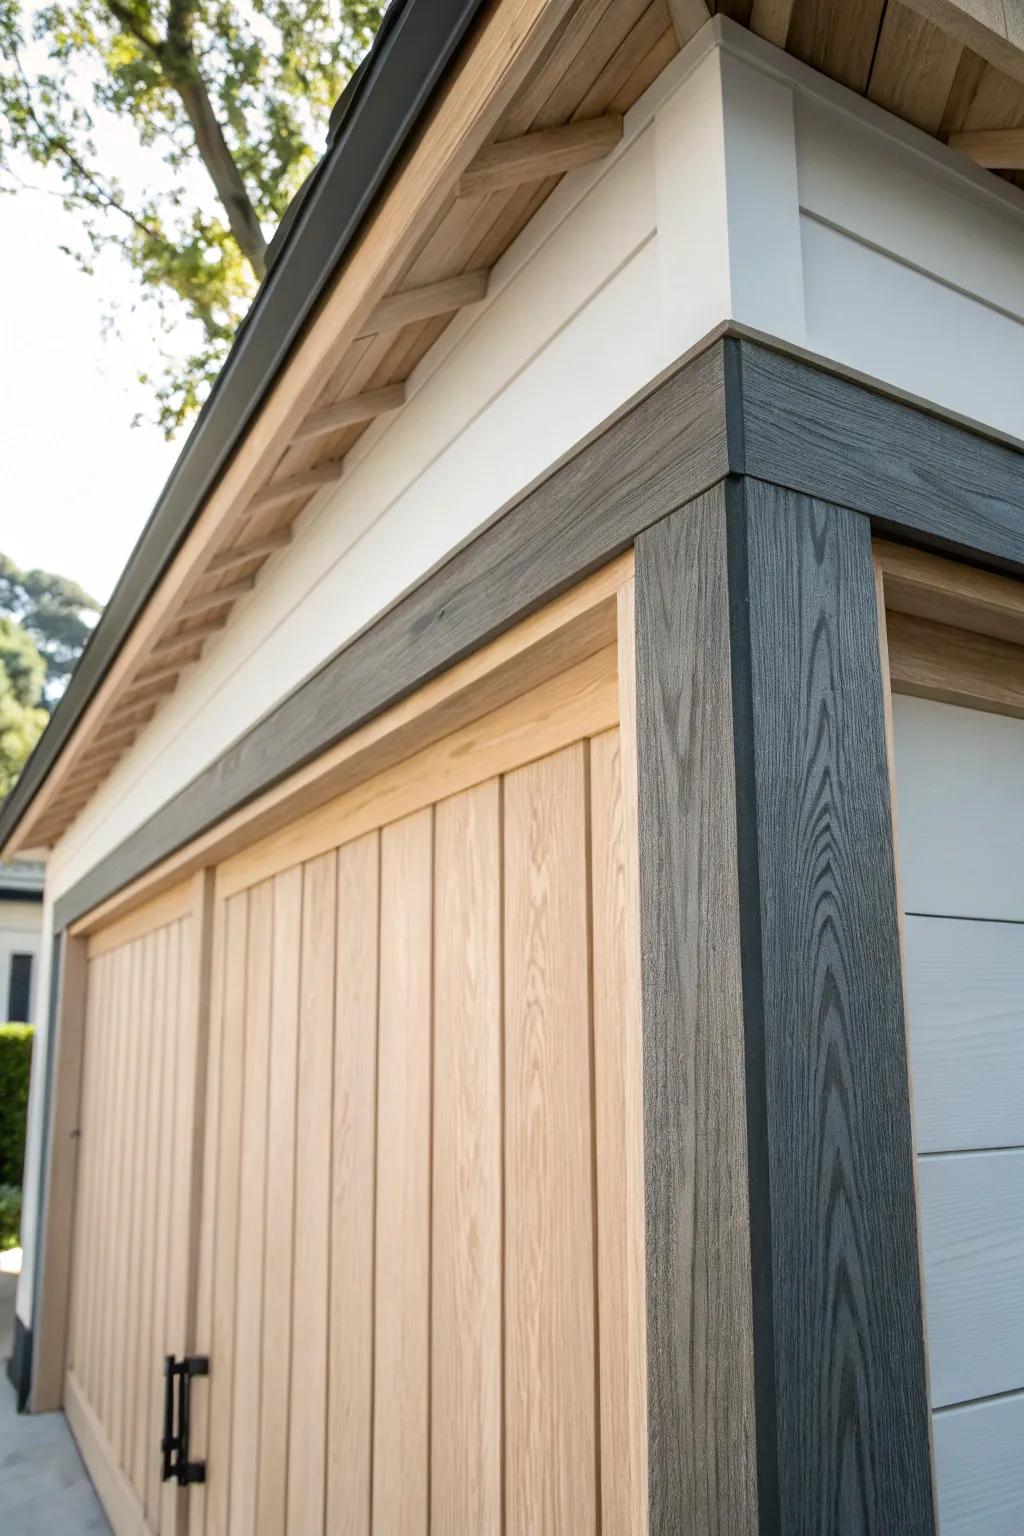
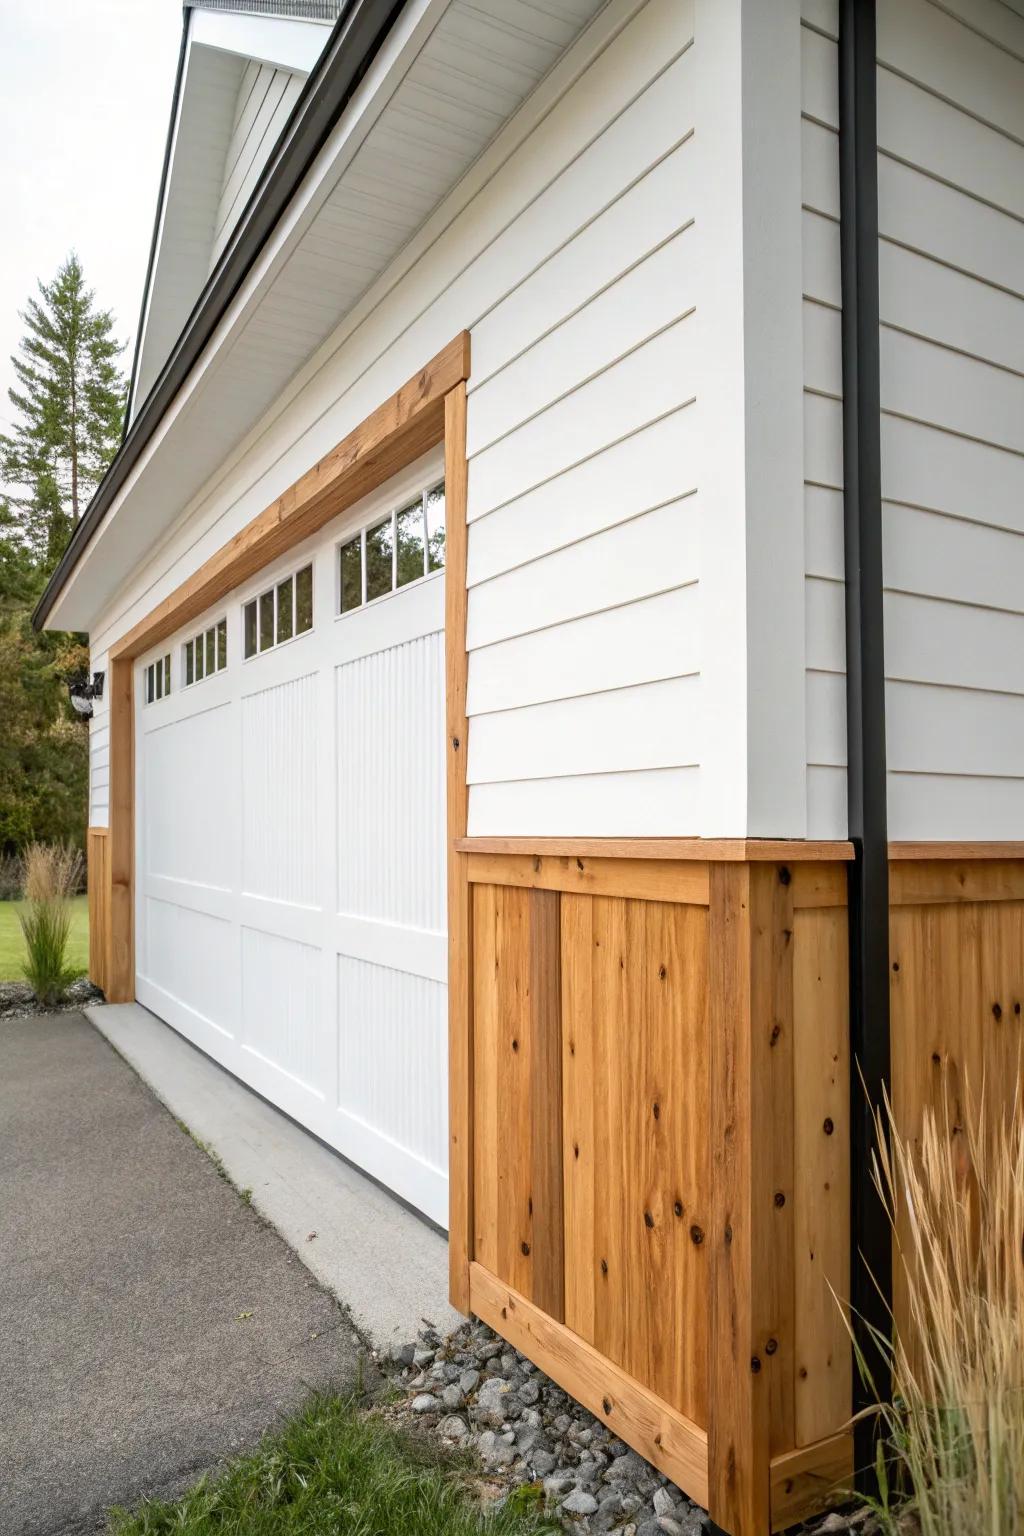
Wide Craftsman-Style Flat Stock
Using wider, flat boards (instead of skinny trim) gives you that sturdy Craftsman-style trim vibe with strong lines. I love this on older homes, and I’ve found that slightly thicker side boards make even basic garage doors look more substantial.
Possibly handy products:
- Composite Exterior Trim Boards: Create durable, substantial borders around your garage door using these weather-resistant boards that mimic natural wood grain.
- Clear Wood Sealer & Stain: Protect your new craftsmanship from the elements while enhancing the natural grain patterns for that warm, custom look.
- Stainless Steel Trim Screws: Secure your wide trim boards firmly with these corrosion-resistant fasteners designed to blend seamlessly into the wood surface.
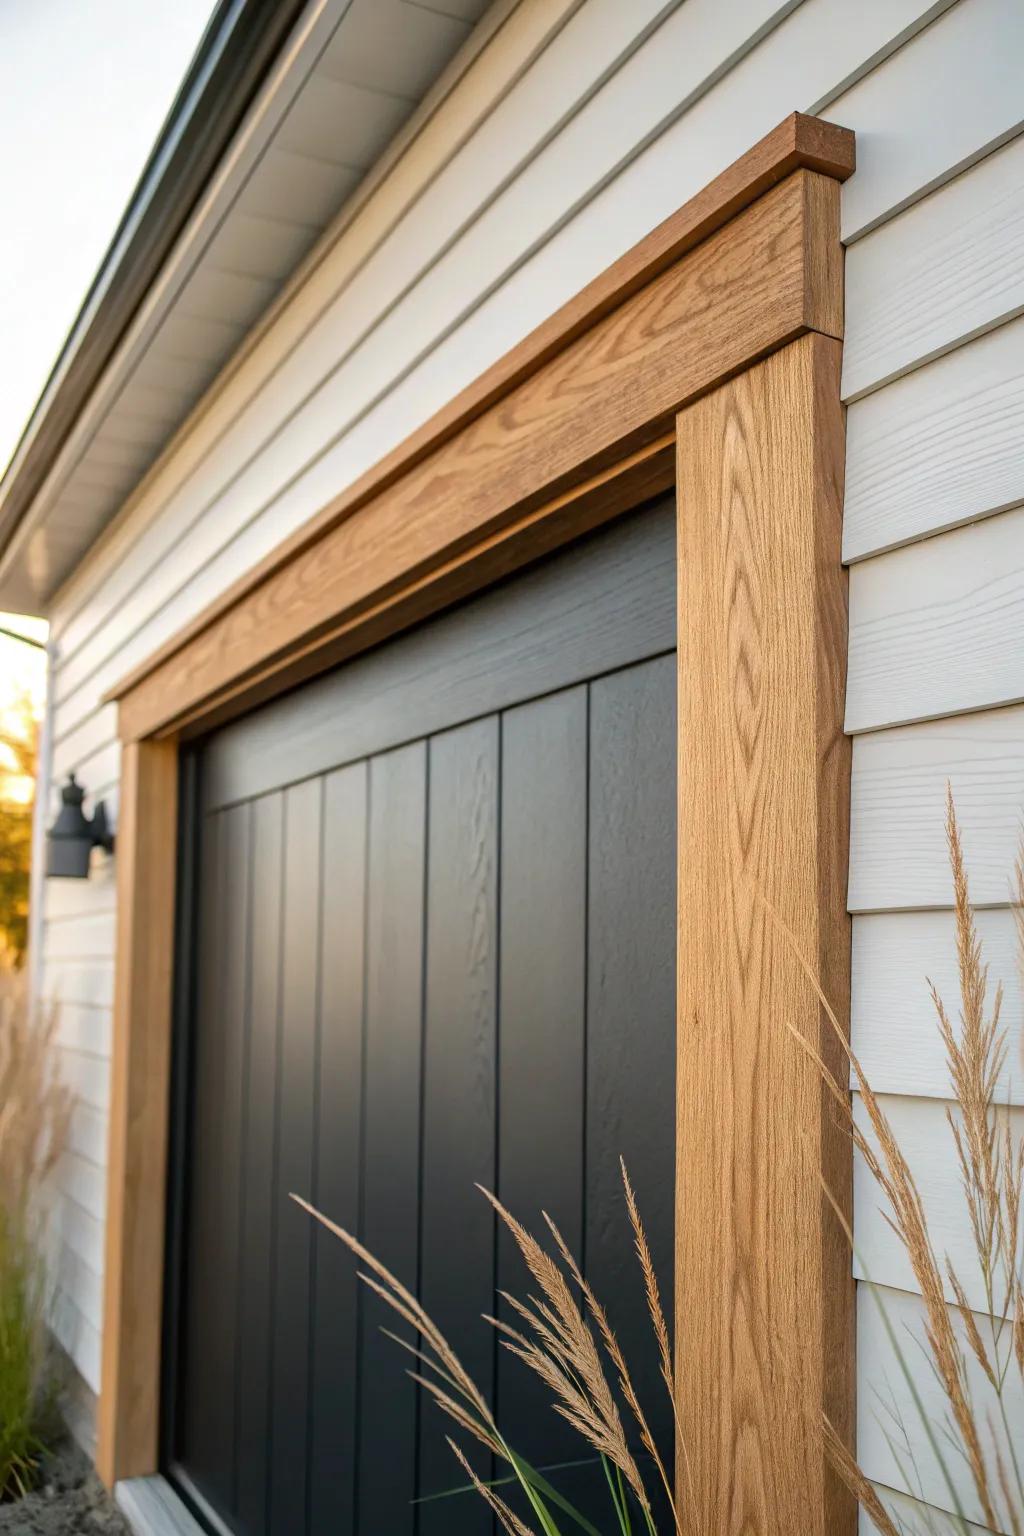
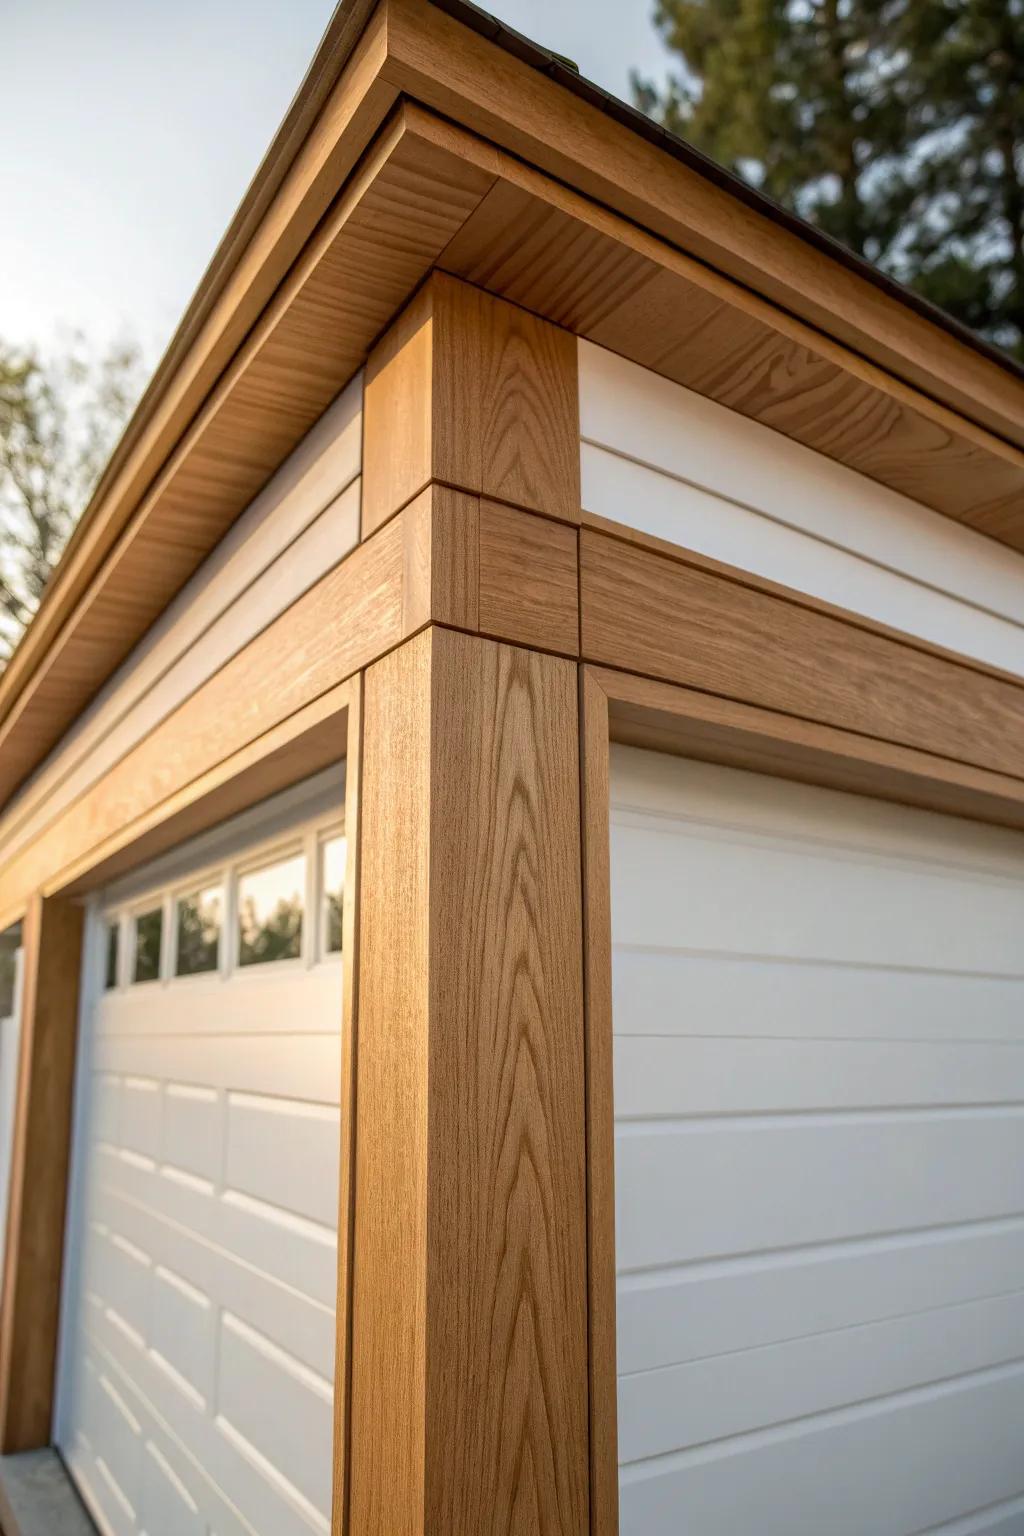
Add a Bold Header Board
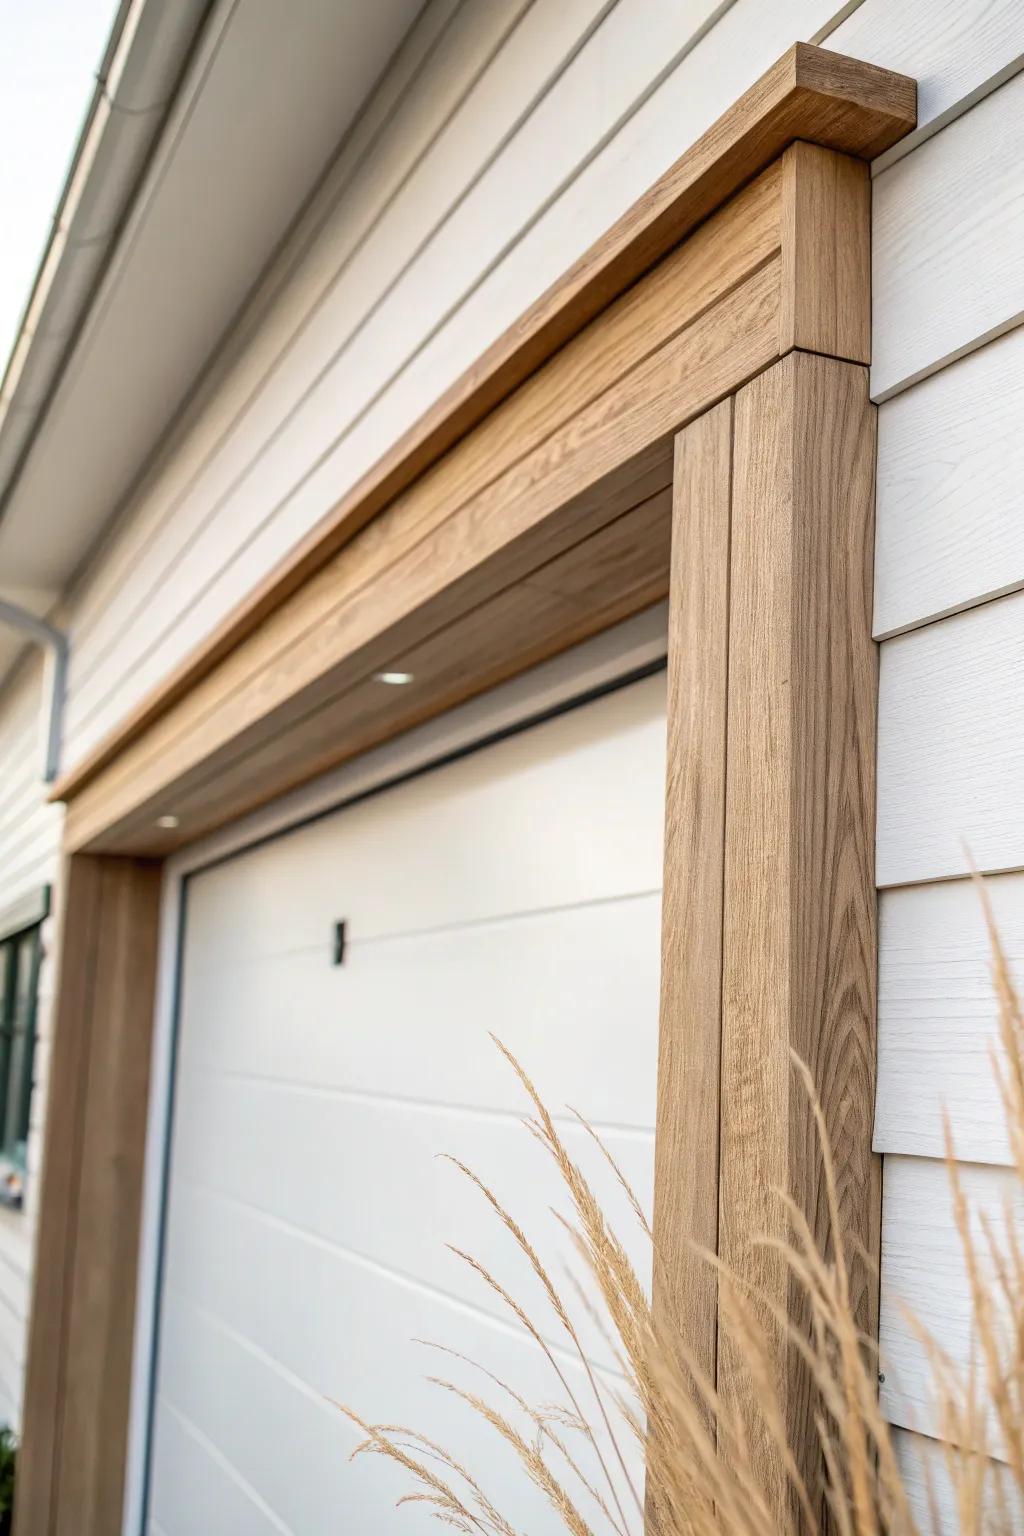
A chunky header board across the top of the opening adds instant architecture, especially if it’s a bit wider than the side trim. I’ve built headers with a subtle overhang, and that one detail made the garage look more “built-in” to the house.
Items that may come in handy:
- Exterior Wood Stain & Sealer: Protect your new cedar or pine header board from the elements while enhancing its natural grain and color.
- Carbon Steel Wood Screws: Secure your heavy header boards firmly in place with durable structural screws designed specifically for exterior framing.
- Recessed Soffit Lighting Kit: Install small, low-profile LED puck lights into the header overhang to create a warm, custom architectural glow.
Use Corbels or a Simple Keystone Accent
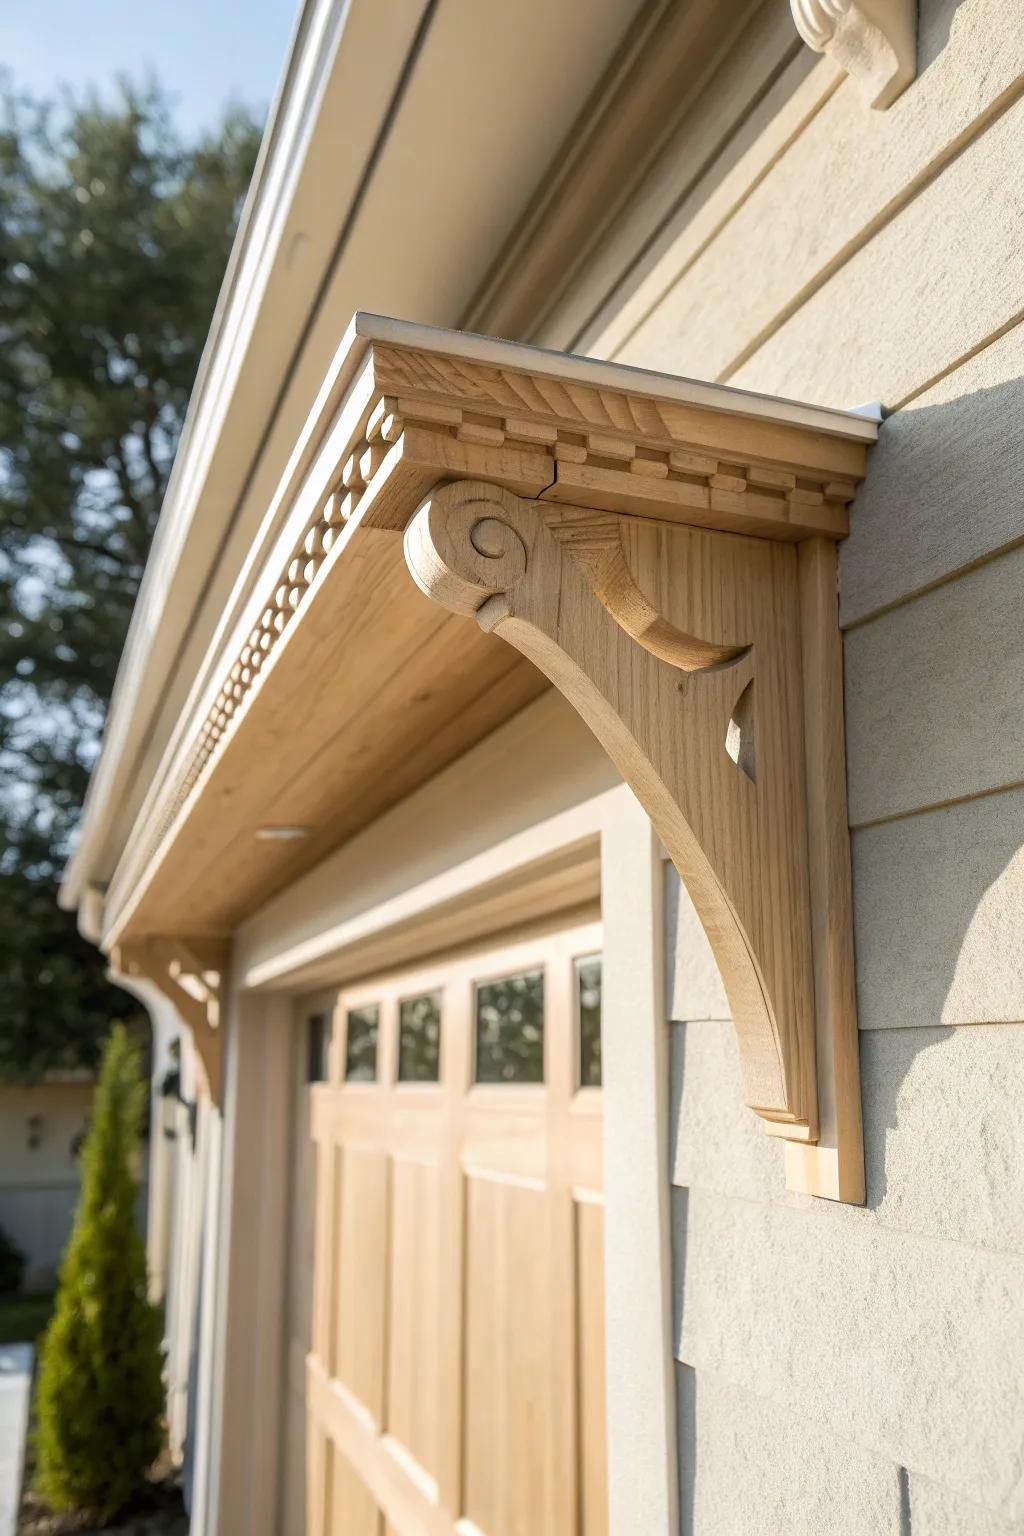
A small pair of corbels under the header (or a centered keystone detail) can make plain trim feel custom without going overboard. I’ve cut corbels from scrap wood in my shop, and once they’re painted to match the trim, they read like true craftsmanship.
Give these a look:
- Wood Corbels for Exterior Trim: Add instant architectural interest to your garage door header by installing these paint-grade decorative wooden brackets.
- Decorative Garage Door Hardware Kit: Enhance your curb appeal quickly with simple faux hardware accents that complement your new trim details.
- Exterior Wood Stain & Sealer: Protect your new custom wood trim and corbels from the elements with a durable, weather-resistant finish.


Install a Drip Cap for a Clean Shadow Line
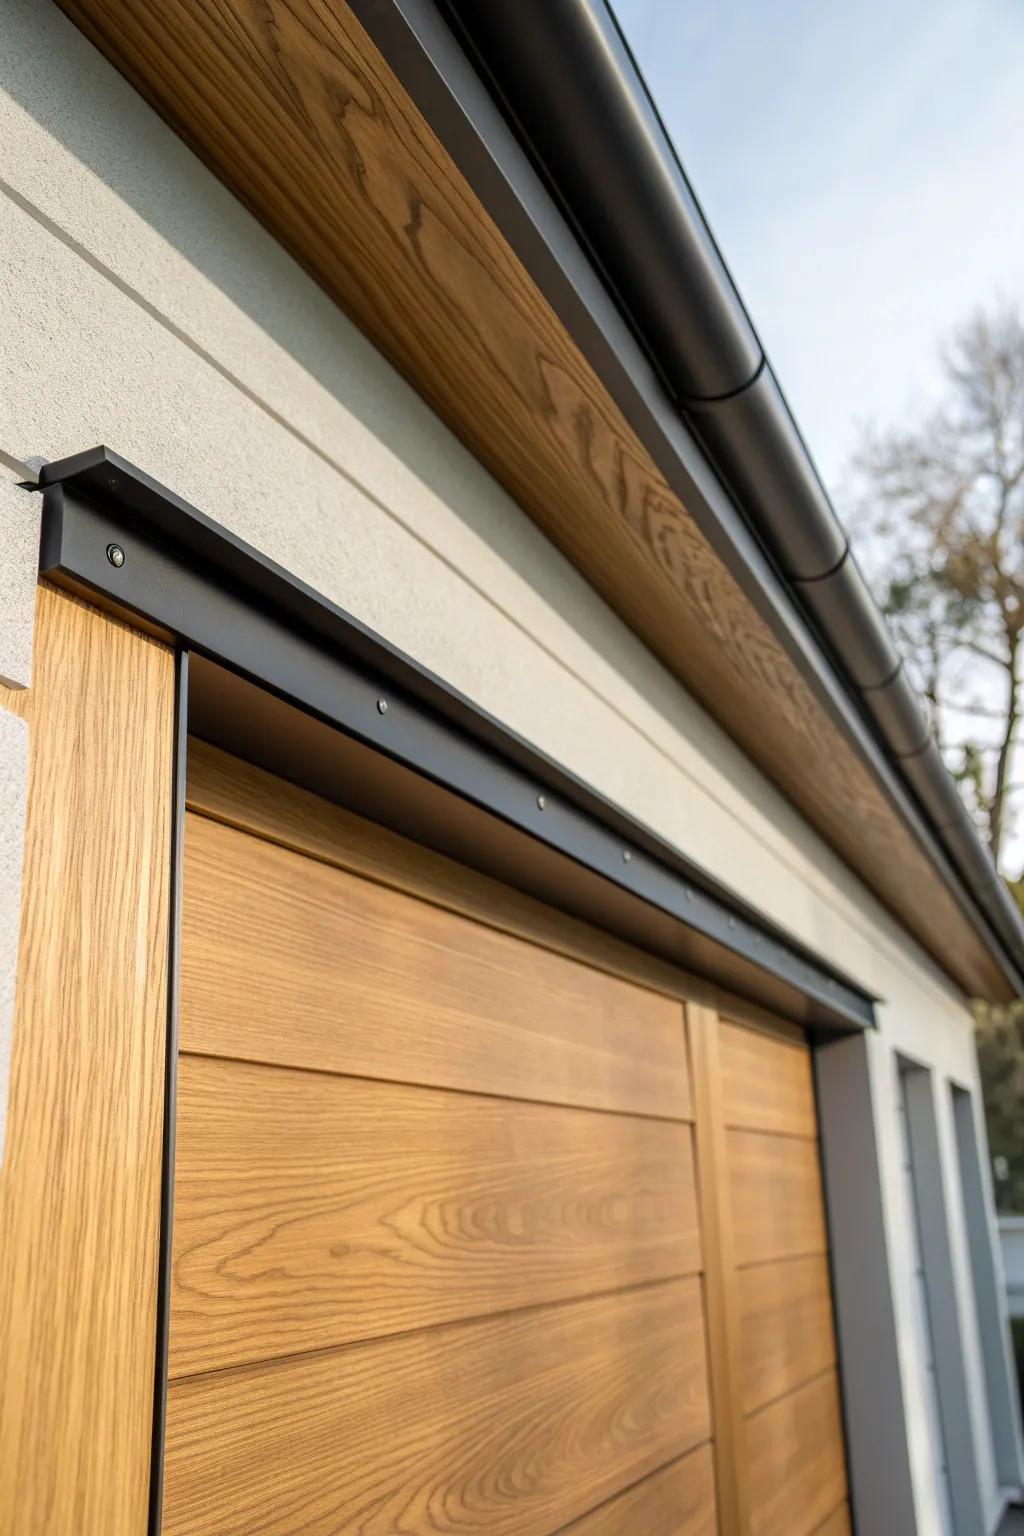
A drip cap (or subtle flashing) above the header protects the trim and adds a sleek little shadow line that looks very “finished.” I started adding drip caps after repairing a few water-worn casings, and it’s one of those upgrades you’ll be grateful for every rainy season.
Some ideas to consider:
- Aluminum Drip Cap Flashing: Protect your garage header from water damage with this essential flashing that directs rain away effectively.
- Self-Piercing Exterior Screws: Secure your new metal flashing firmly with these weather-resistant fasteners designed for clean, lasting exterior installations.
- Exterior Waterproof Caulking: Seal the upper seam against moisture intrusion to ensure your new drip cap performs perfectly year-round.
Add Simple Crown Molding on the Top
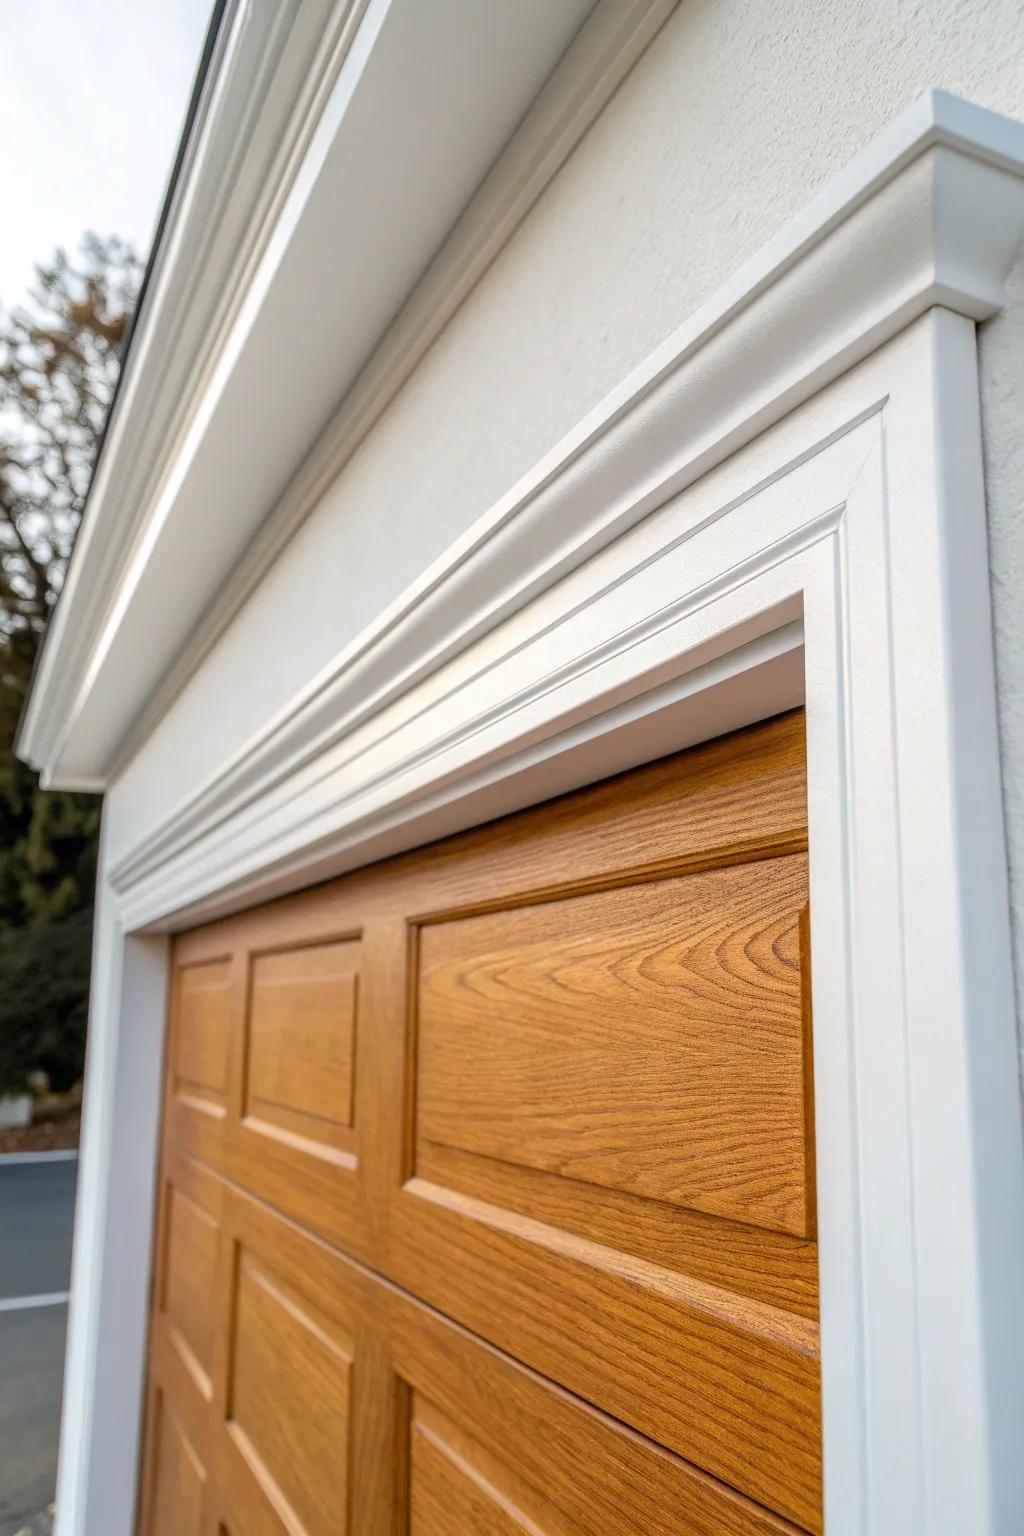
A small run of crown molding above the header can lean traditional or modern depending on how simple the profile is. I’ve used a very clean crown detail on a boxy exterior, and it added just enough character without getting fussy.
Useful items to consider:
- Exterior PVC Crown Molding: Upgrade your garage curb appeal with durable, weather-resistant molding that resists rot and moisture damage over time.
- Brad Nailer Kit: Secure your new trim pieces neatly and efficiently with a reliable nailer designed for finish carpentry projects.
- Exterior Construction Adhesive: Ensure a long-lasting hold for your molding installation with heavy-duty adhesive made for variable outdoor temperatures.
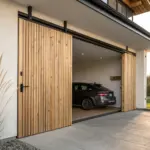
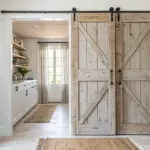
Wrap the Opening in Board-and-Batten
Surround the door with board-and-batten so the trim becomes a whole textured feature, not just a frame. I’ve paired this with simple flat casings, and those vertical lines make the garage feel taller and more farmhouse-cute.
Some handy options:
- Fiber Cement Board Siding: Create the durable board-and-batten base layer around your garage door opening for that classic farmhouse texture.
- Exterior PVC Trim Boards: Use these rot-resistant boards to form the vertical battens and flat casing needed to complete the look.
- Exterior Wood Paint/Stain: Finish your new trim with a high-quality exterior paint or stain to protect against weather and matching your style.
Mix in Stone or Brick Base Piers
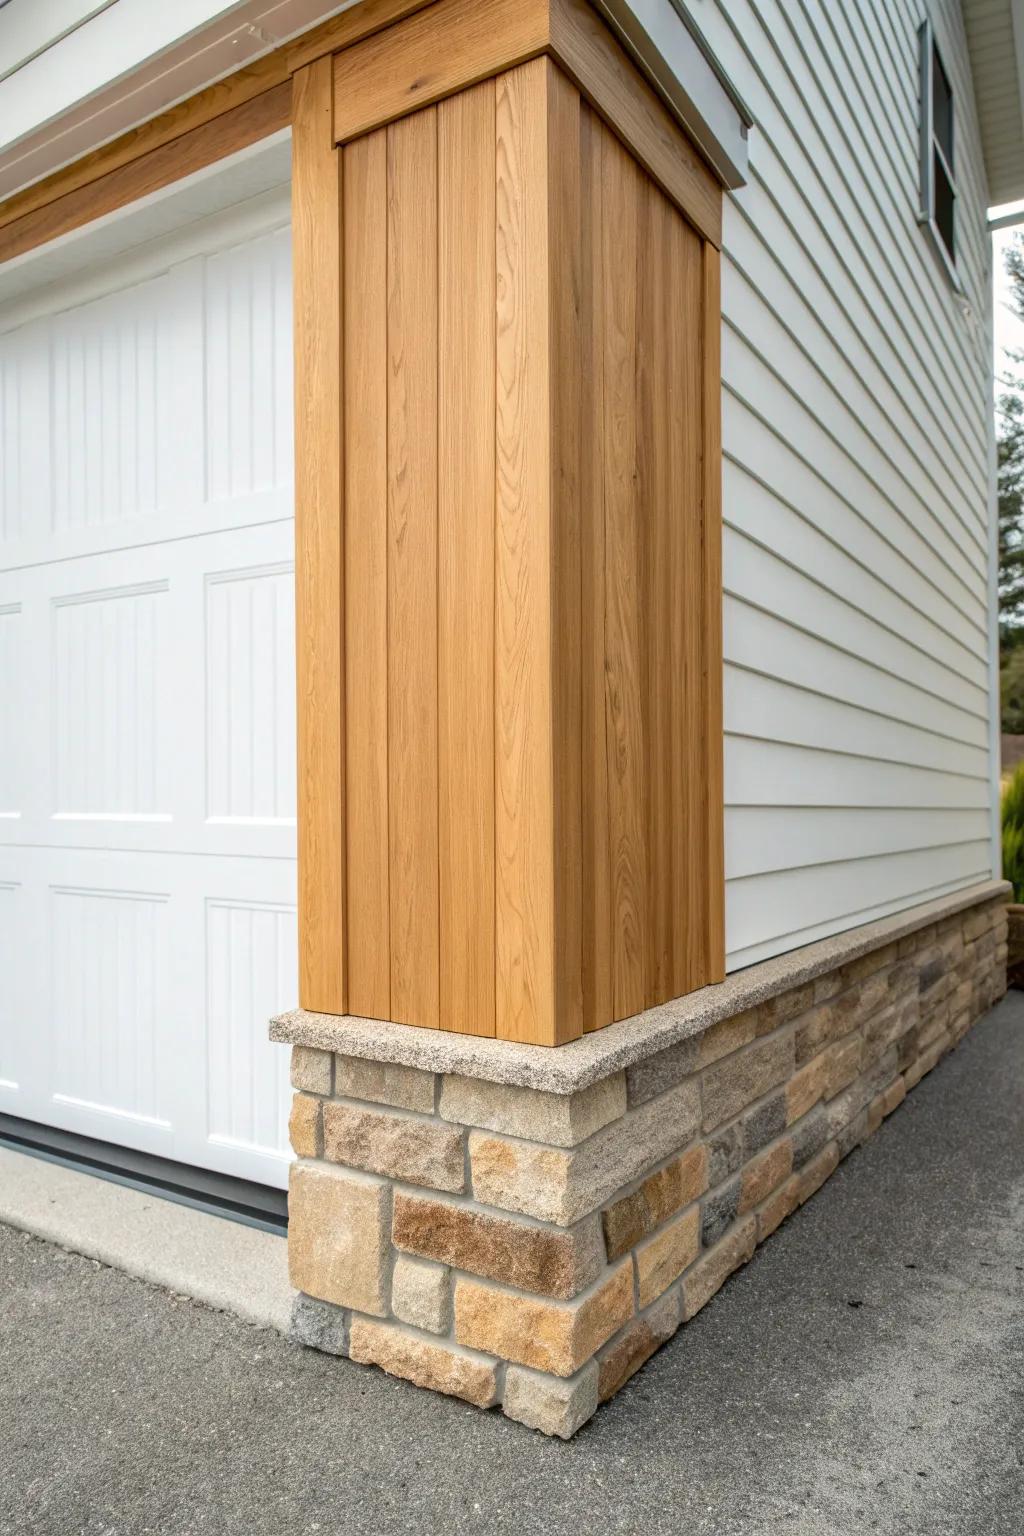
Adding stone veneer or brick at the bottom of the side trim creates that grounded, upscale “column” look. I’ve used this mix when the house already had masonry elsewhere, and it made the garage feel like part of the original architecture.
Might be a good match:
- Faux Stone Veneer Panels: Instantly upgrade your column bases with lightweight, realistic panels that mimic the upscale look of natural stone.
- Masonry Construction Adhesive: Secure your stone or brick veneer firmly to your garage piers with this heavy-duty, weather-resistant bonding agent.
- Natural Stone Wall Cap: Finish the top of your stone pier cleanly and protect the masonry with a durable, flat stone cap.
Keep It Sleek With Minimalist Thin Trim
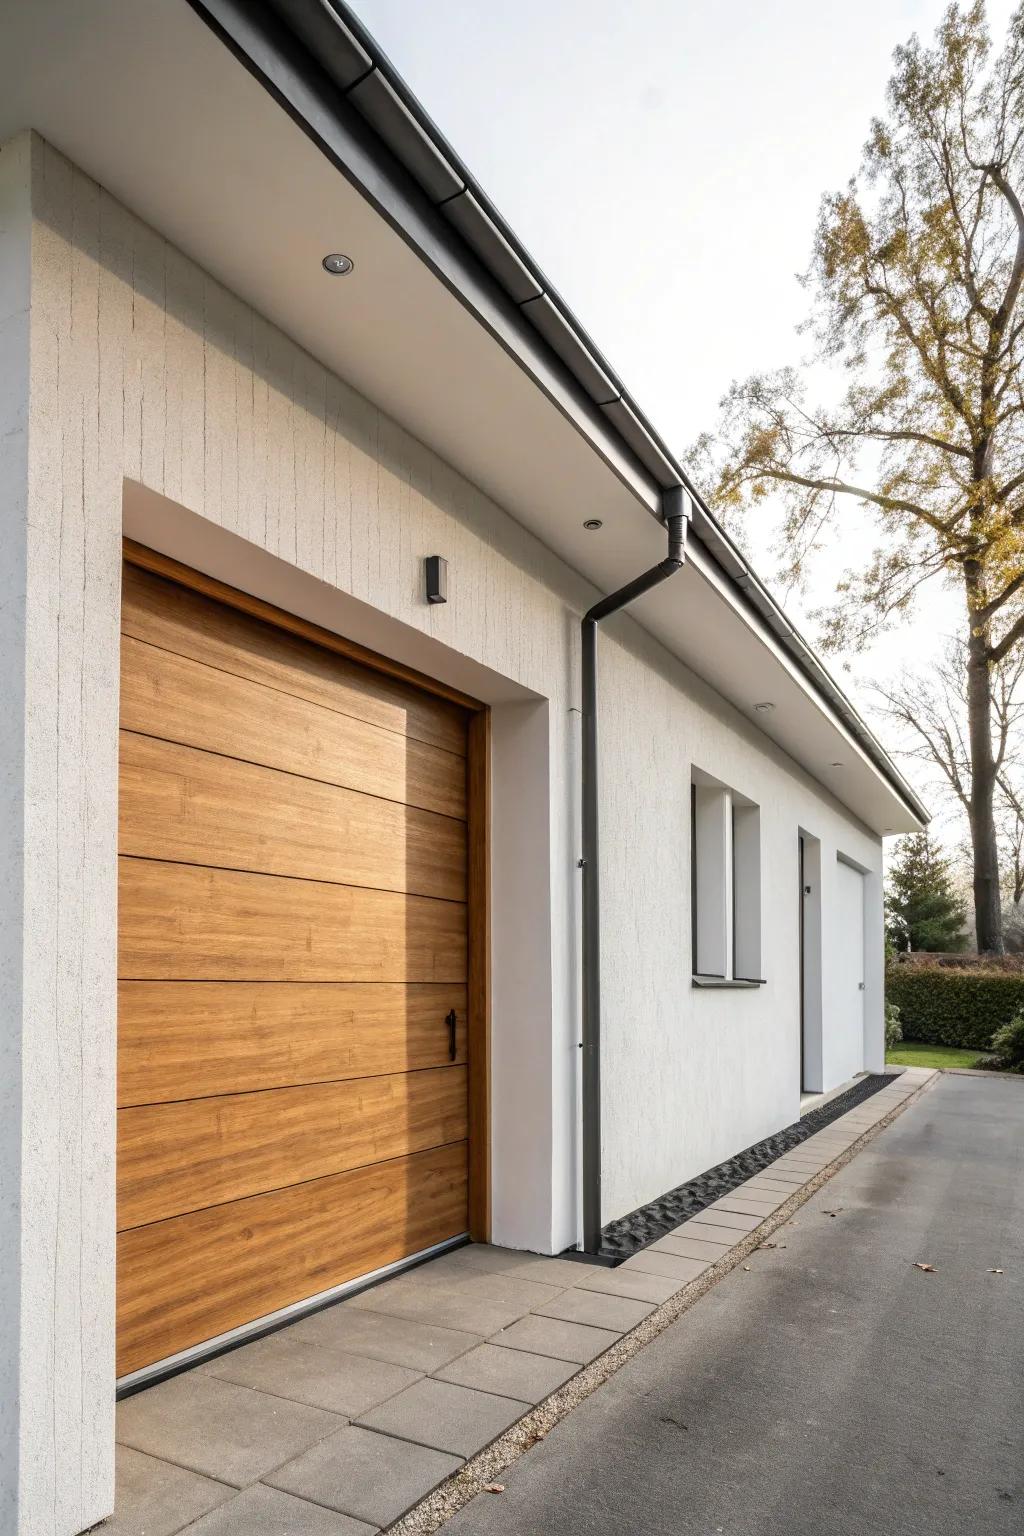
For modern exteriors, a narrow flat trim with crisp edges looks sharp and intentional without overpowering the door. I’ve done a thin-reveal approach on a clean-lined home, and it made the whole facade feel more architectural and calm.
A few helpful options:
- Composite White Flat Trim Board: Achieve crisp architectural lines with these durable, low-maintenance boards that resist rot, perfect for minimalist modern exteriors.
- Paintable Weatherproof Exterior Caulk: Create seamless, professional transitions between your siding and trim to ensure a clean, sharp look that lasts.
- Modern Up-Down Outdoor Wall Sconce: Highlight your sleek trim work with focused architectural lighting that enhances the calm, linear feel of the facade.
Use Half-Height Side Trim With Chunky Bases
A half trim layout (shorter side casings with beefy base blocks) gives the garage a custom look that’s a little unexpected. I tried this when landscaping covered the lower walls anyway, and it still framed the door beautifully without wasting material.
You might like:
- Exterior Wood Stain & Sealer: Protect your new cedar trim from the elements and enhance the wood grain with a durable exterior stain.
- Rough Sawn Cedar Lumber Boards: Create that custom chunky base look by sourcing quality rough-sawn lumber for sturdy, rustic exterior accents.
- Heavy Duty Exterior Construction Adhesive: Ensure your beefy base blocks stay securely in place against the garage wall with high-strength construction adhesive.
Make It a Statement With Reclaimed or Charred Wood
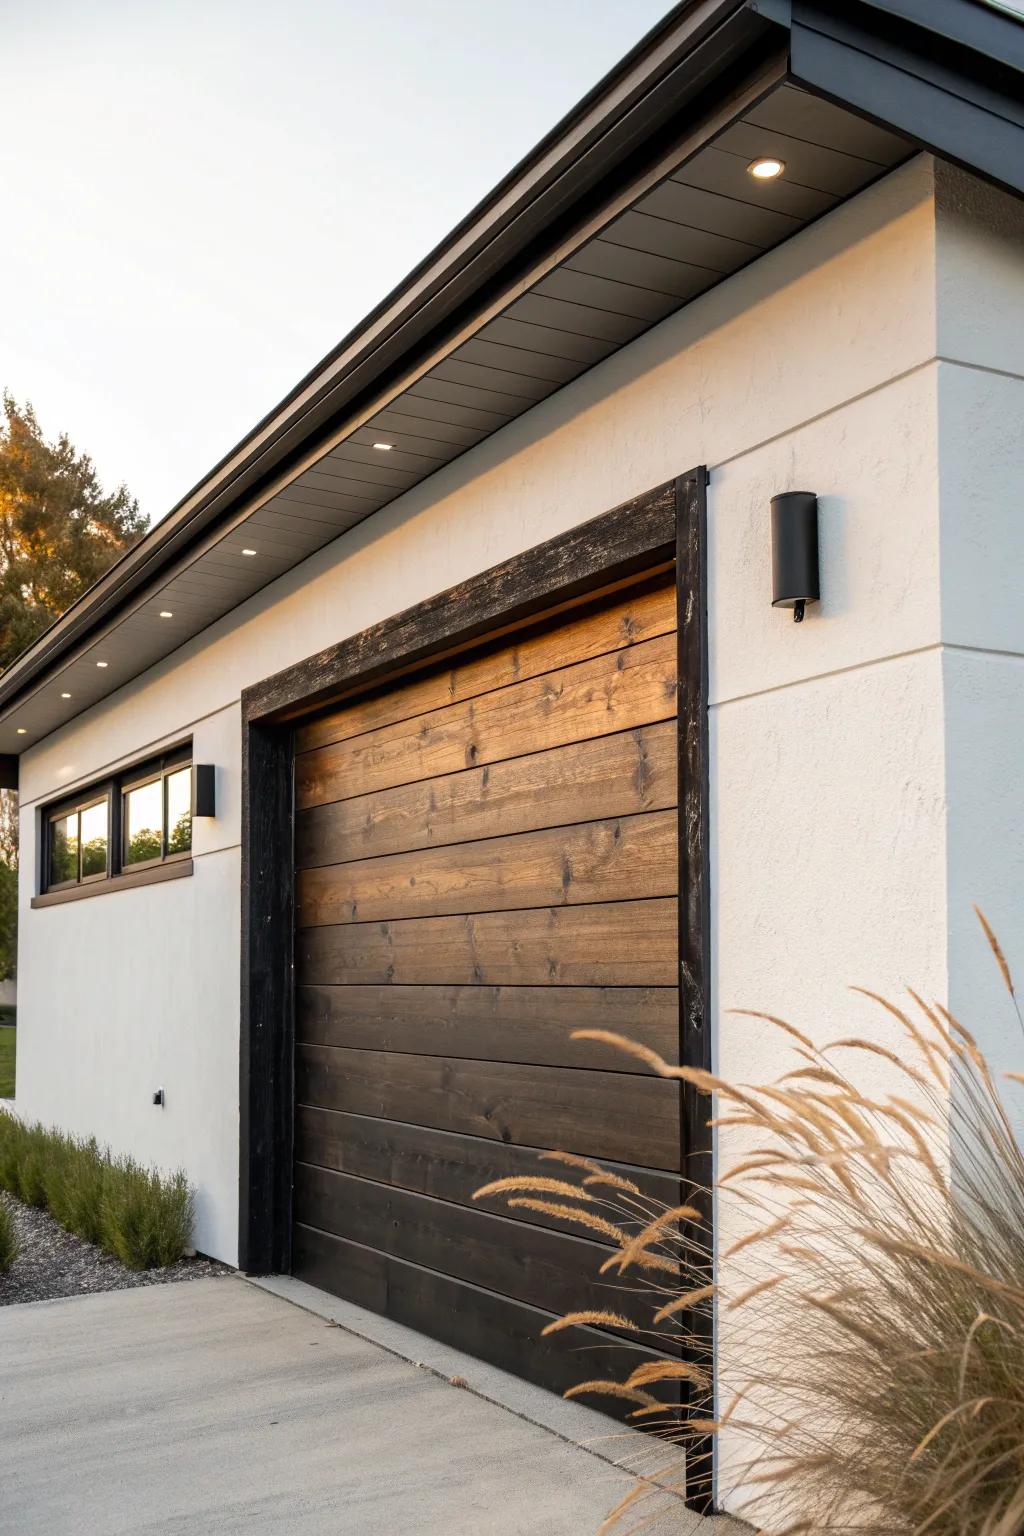
If you want real wow-factor, frame the door in reclaimed wood trim or a sealed charred wood finish so the grain and texture steal the show. I’ve done this with salvaged boards, and once they’re properly sealed for outdoors, the trim looks like a designer feature instead of just “door casing.”
A few things you might like:
- Reclaimed Wood Planks: Add instant rustic charm to your exterior trim using authentic weathered wood panels for a designer look.
- Exterior Wood Sealer: Protect your custom wood trim from harsh weather and UV rays while enhancing natural grain patterns.
- Charred Wood Stain: Achieve that striking charred shou sugi ban aesthetic easily with a specialized dark carbon-colored wood stain.


