
A pine ceiling is one of those upgrades that instantly makes a room feel warmer, cozier, and a little more “finished” without getting fussy.
Wide-Plank Pine for a Modern Farmhouse Feel
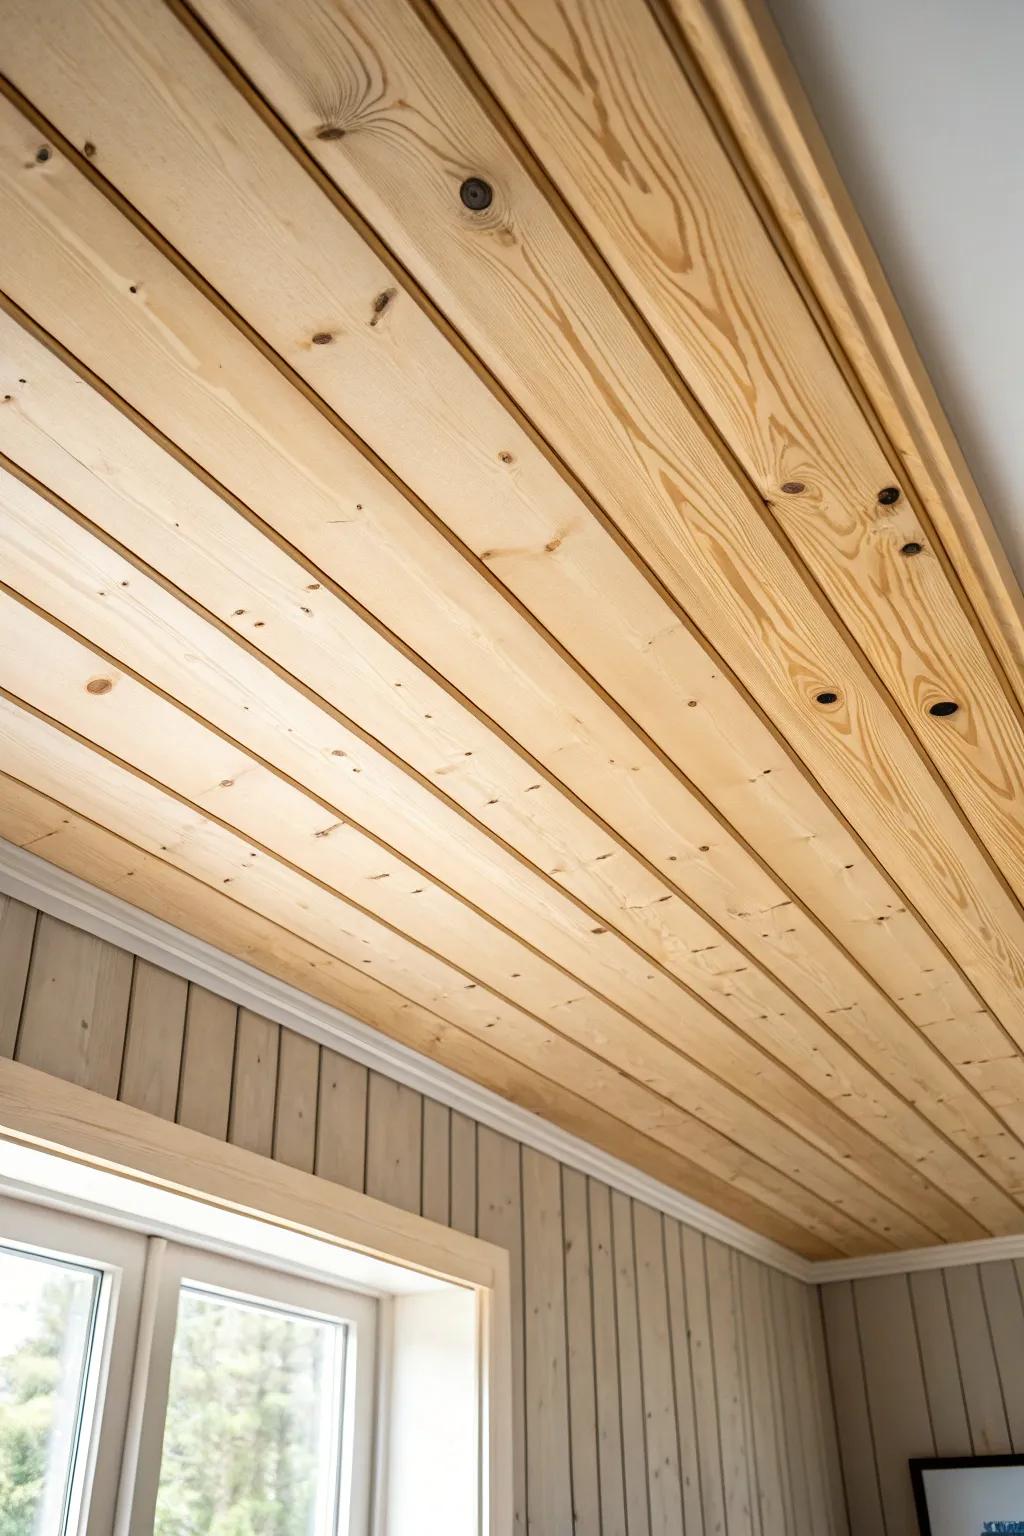
If you love a calmer, less “busy” look, a wide-plank pine ceiling is the move—I’ve installed wider boards in larger rooms and it reads more modern right away. I always sort boards on the floor first so the knots are spread out instead of clumped in one spot.
Some handy options:
- Clear Matte Wood Finish: Protect your pine planks without altering their natural color by using a high-quality, non-yellowing matte finish.
- Brad Nailer Kit: Secure your wide planks efficiently and neatly overhead with a reliable pneumatic nailer designed for finish work.
- Recessed Gimbal Lighting: Illuminate your new ceiling perfectly by installing adjustable recessed lights that blend seamlessly into the wood surface.


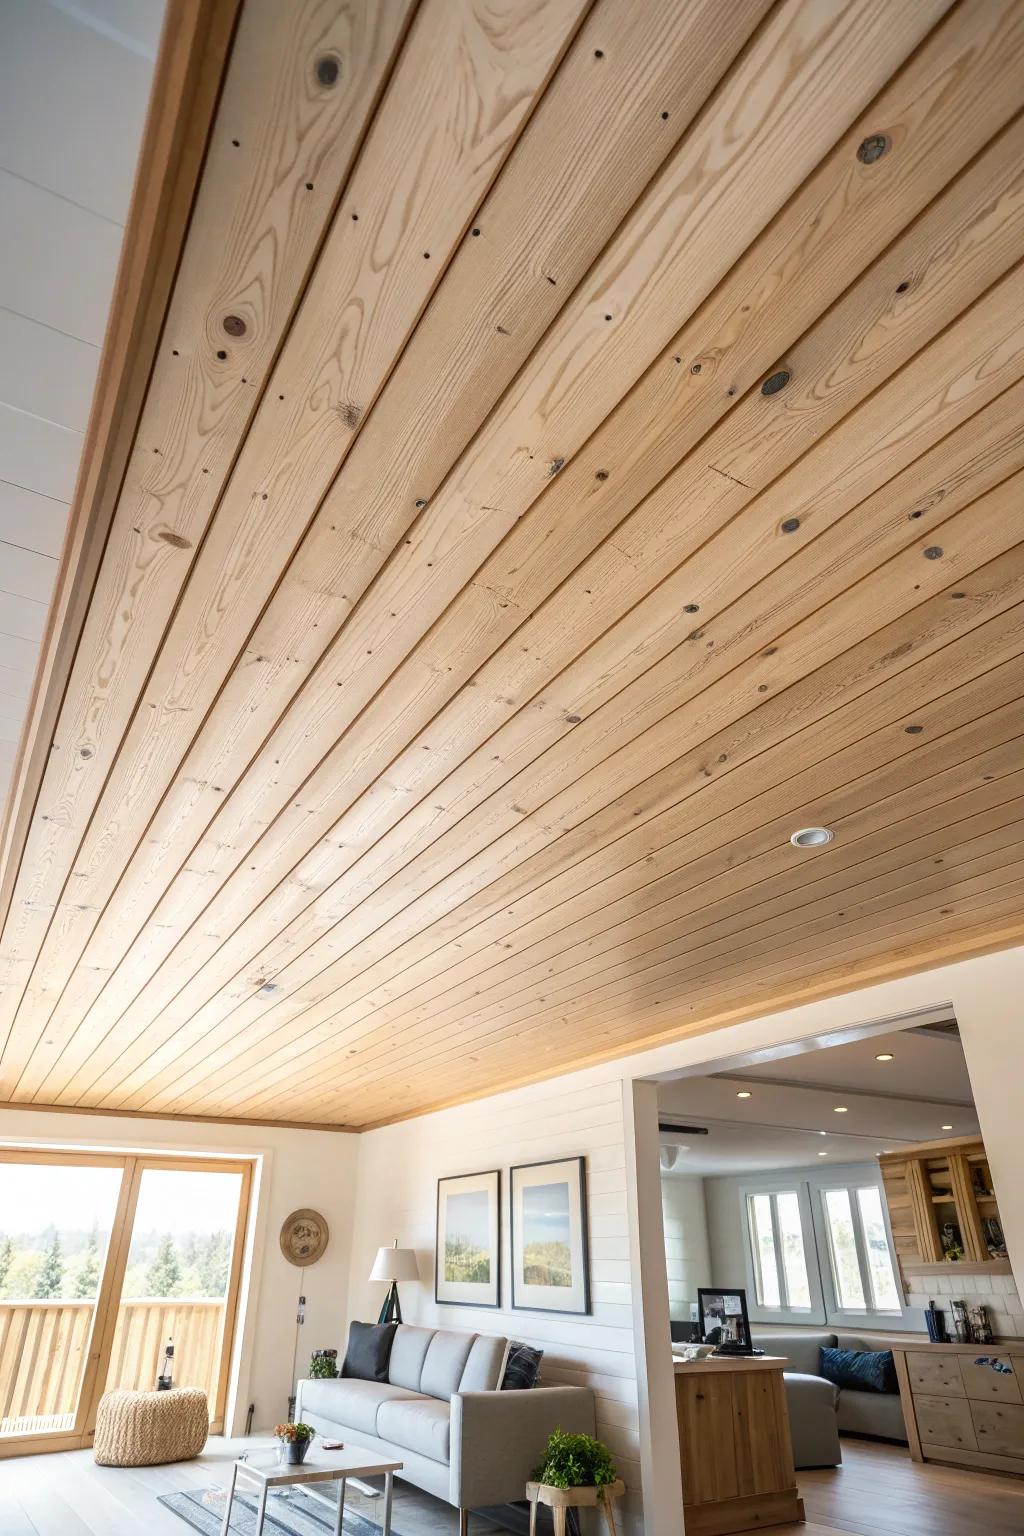
Tongue-and-Groove Planks for a Clean Line Look
A tongue-and-groove pine ceiling gives you that tidy, continuous plank look, and I love how fast it goes up once you get in a rhythm. I’ve learned to stagger the seams like flooring so the ceiling feels intentional, not “patched together.”
A few helpful options:
- Clear Interior Wood Varnish: Protect your pine planks and enhance their natural grain pattern with a durable, clear matte or satin interior finish.
- Pneumatic Brad Nailer Kit: Make overhead installation faster and less tiring by securing each tongue-and-groove plank quickly with this essential power tool.
- Sturdy Aluminum Stepladder: Reach your ceiling safely and comfortably during installation with a stable, lightweight ladder designed for home improvement projects.
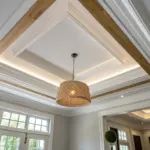
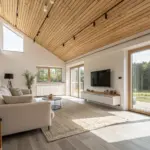
Pine Ceiling with White Beams
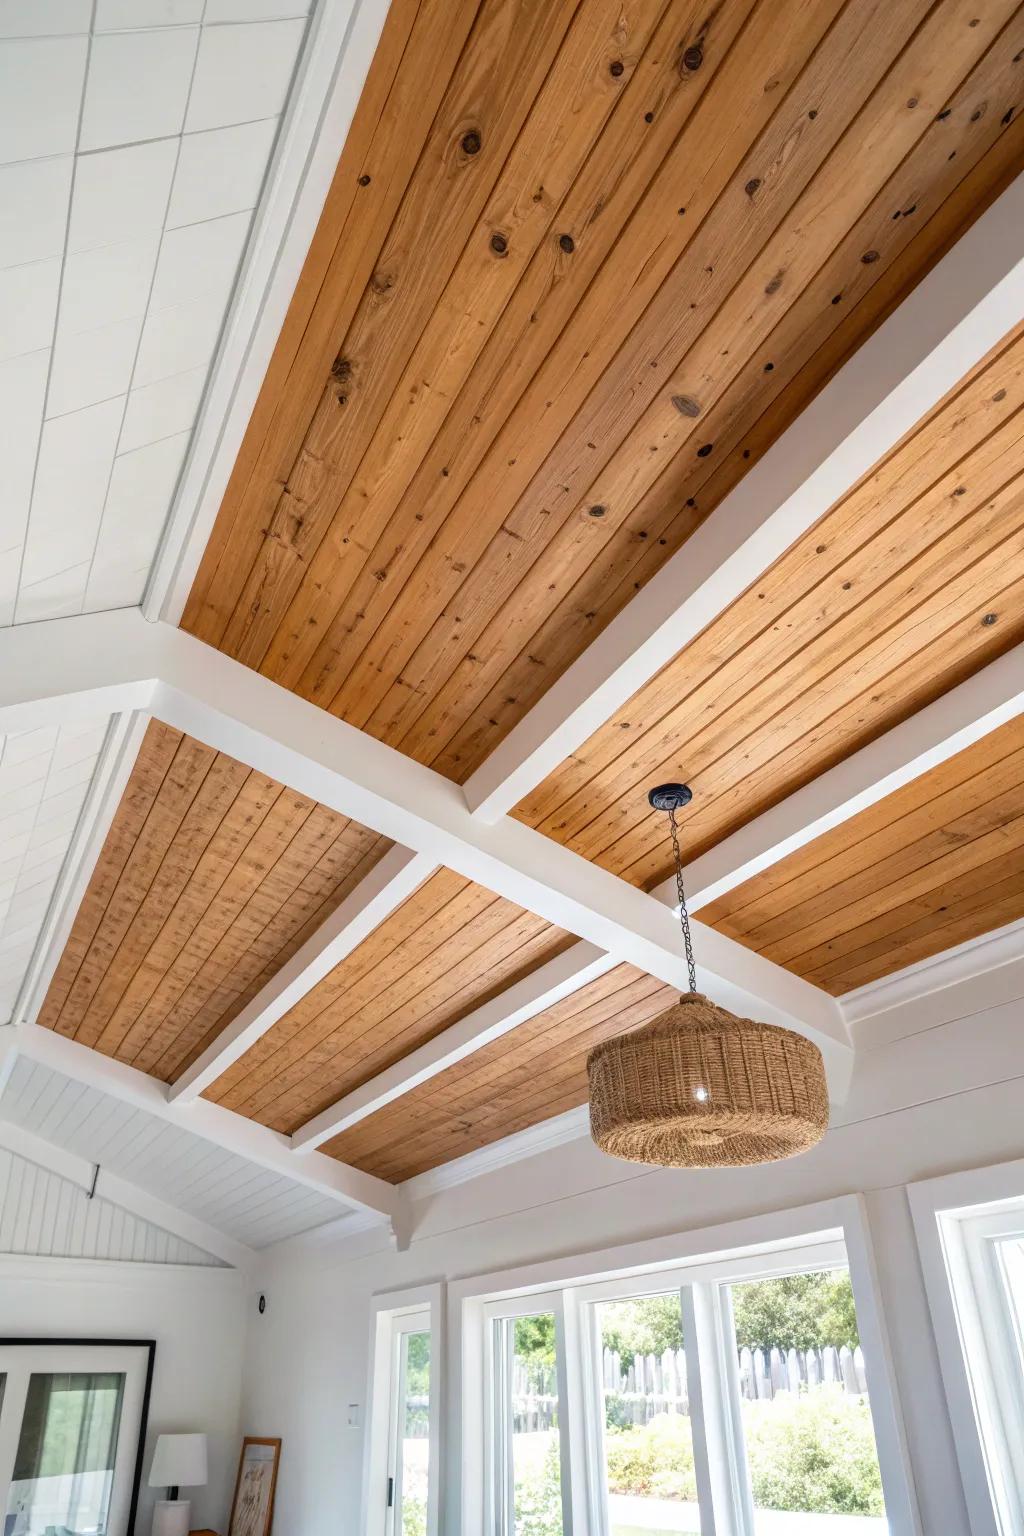
Pairing a pine ceiling with painted white beams is one of my favorite high-impact combos, especially in open living spaces. I’ve done this when a room needed contrast, and the beams visually “break up” the pine so it feels fresh and modern.
These products might be useful:
- Tongue and Groove Pine Ceiling Planking: Create a warm, natural foundation for your ceiling project by installing these classic knotted pine planks.
- White Ceiling Paint & Primer: Achieve crisp, high-contrast beams against the wood with a high-quality, bright white interior paint.
- Woven Pendant Light Fixture: Complete the modern coastal or farmhouse look by hanging a textured rattan pendant from the center beam.


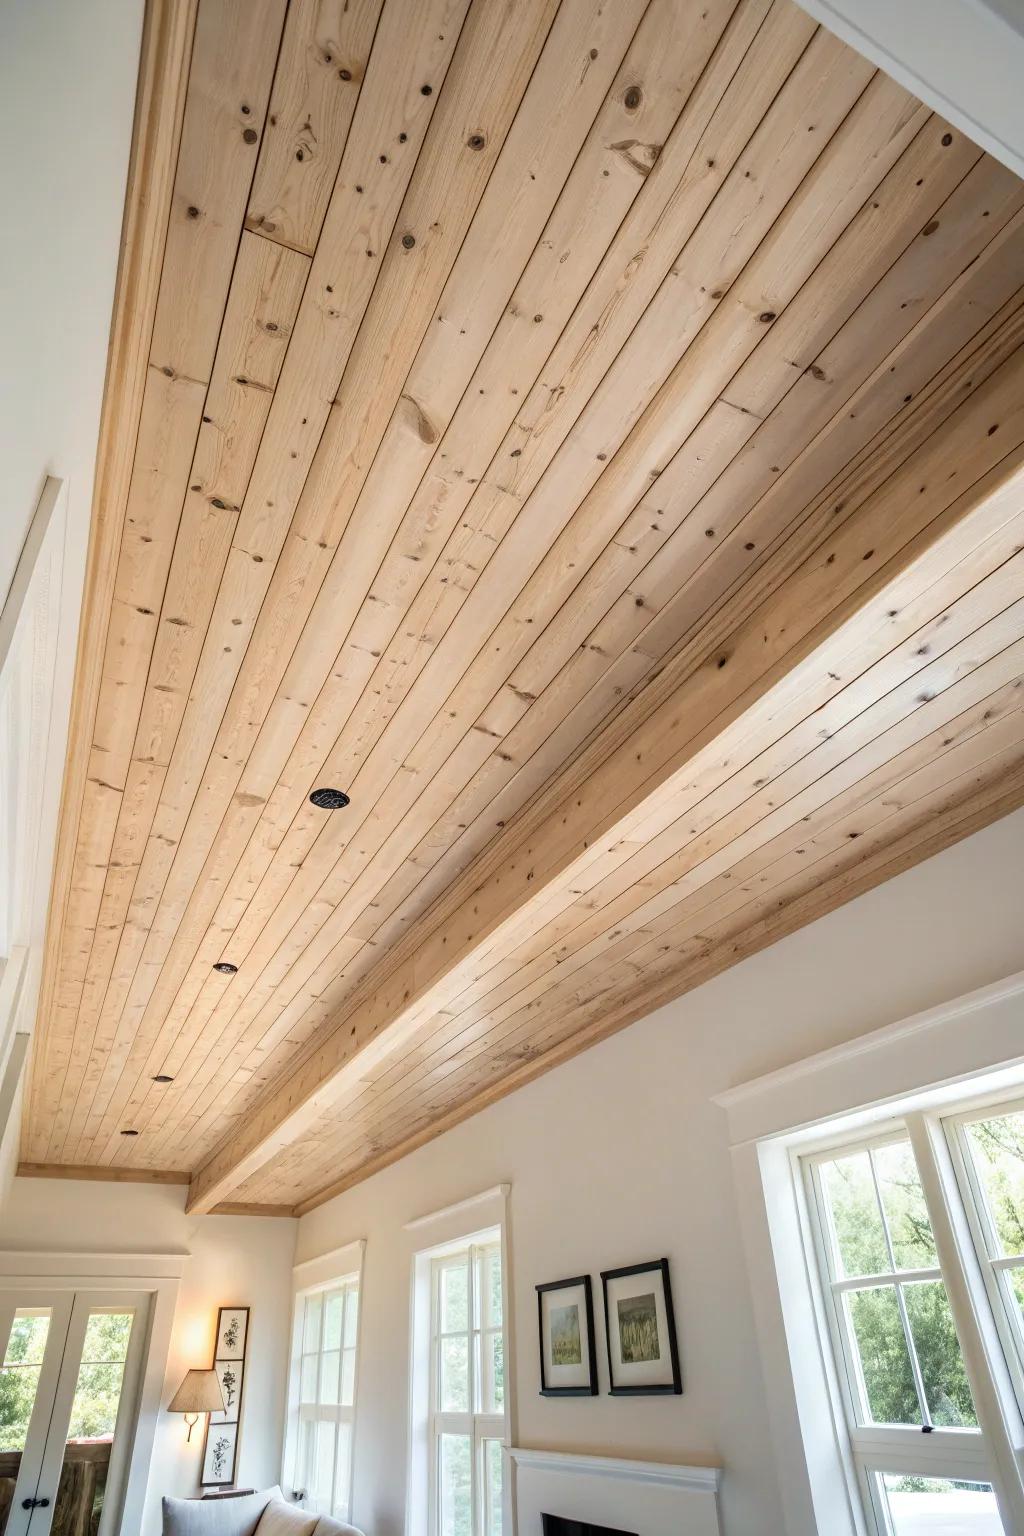
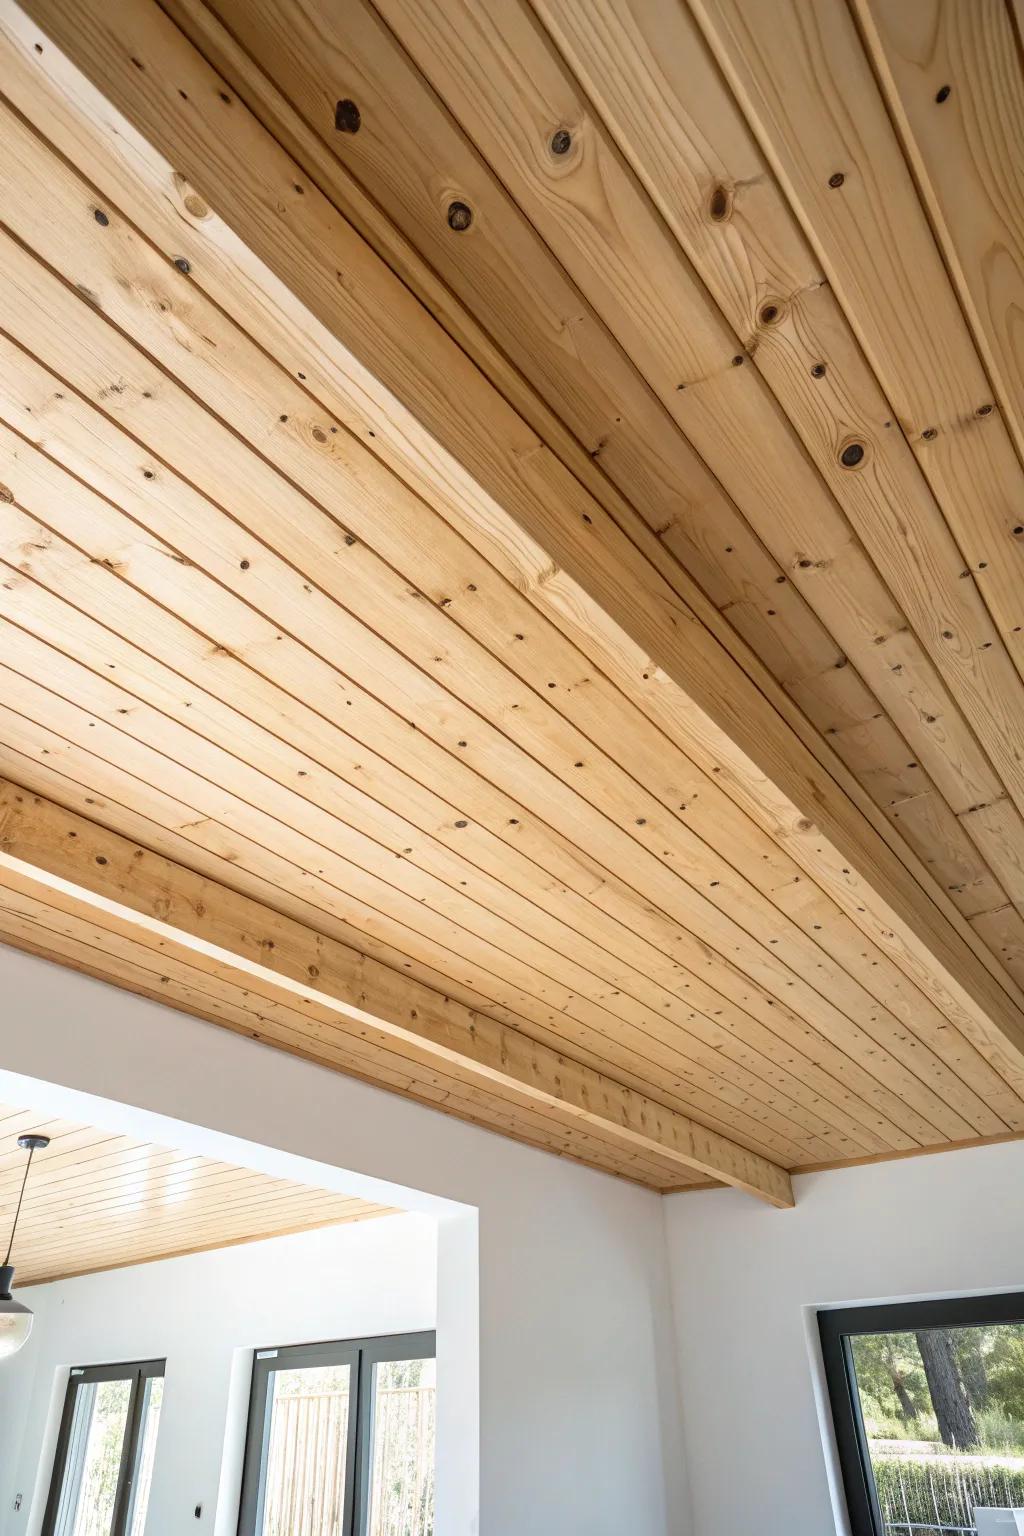
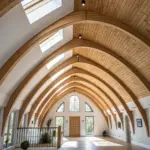
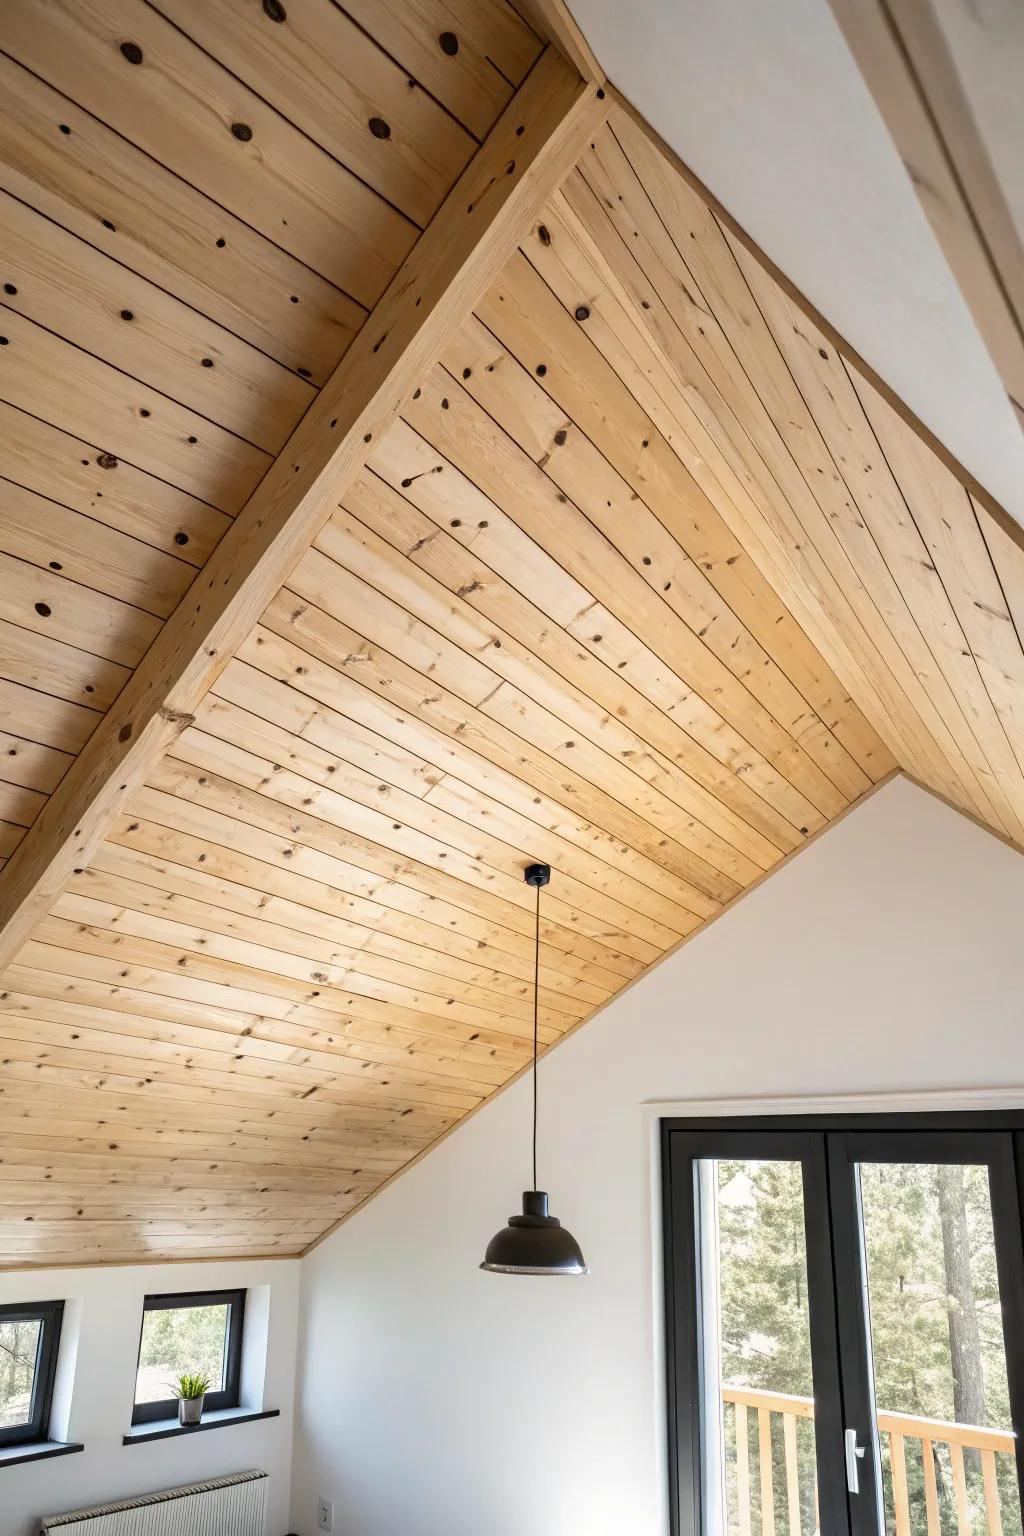
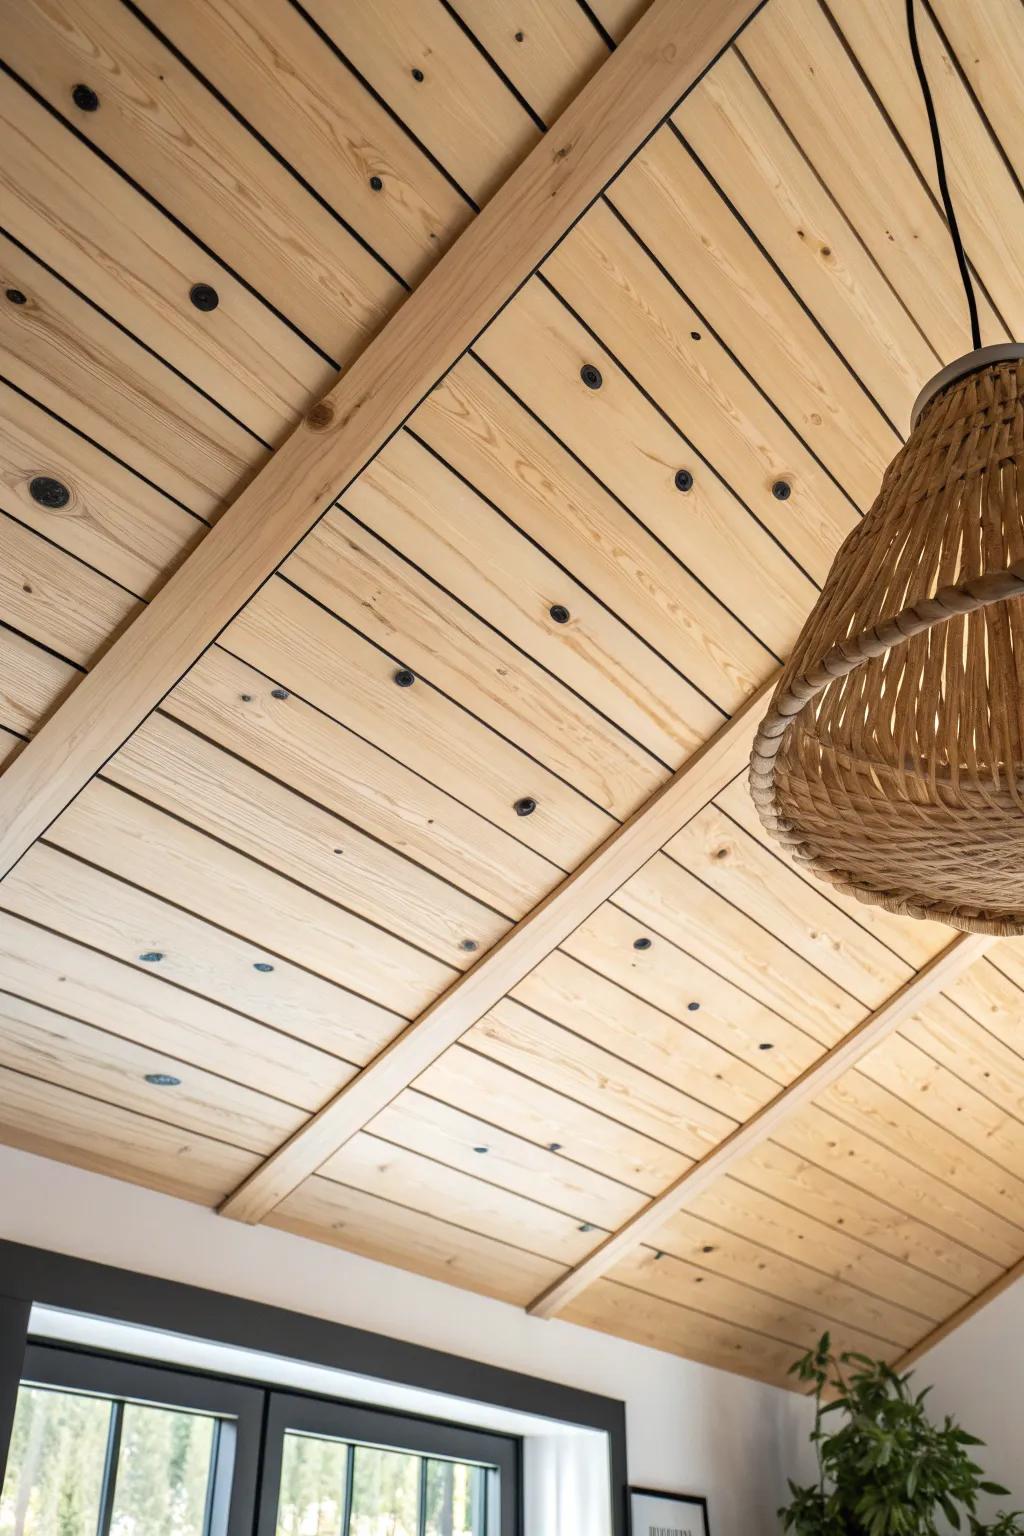
Vaulted Pine Ceiling That Follows the Pitch
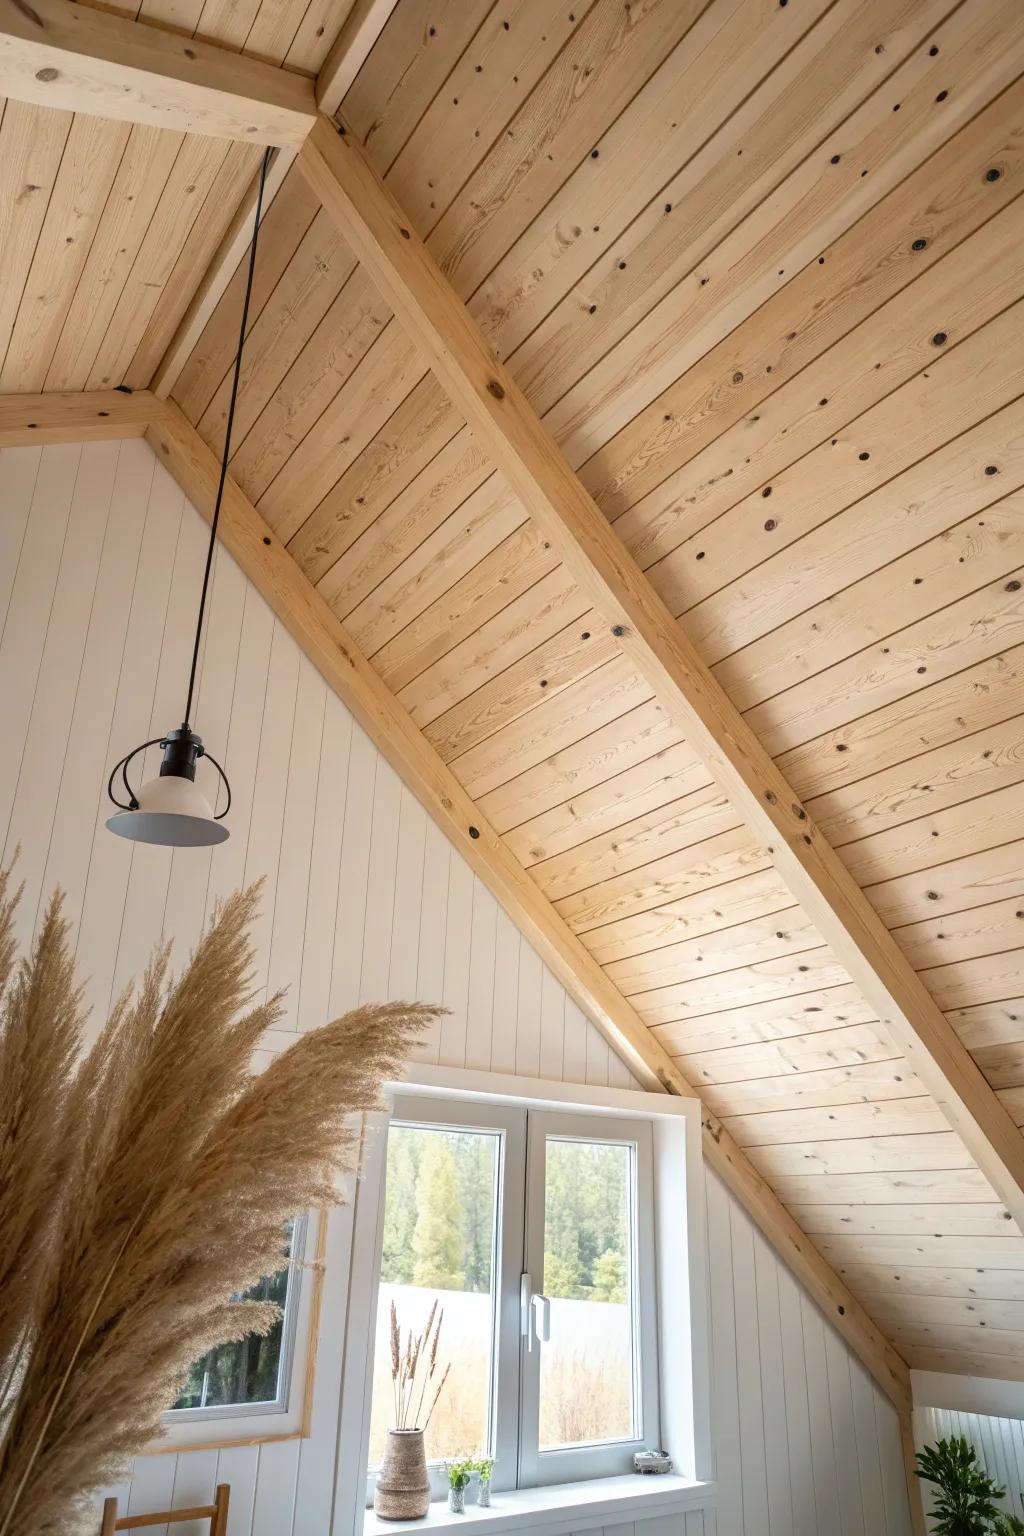
On a vaulted pine ceiling, running boards from the wall plate up to the peak makes the whole space feel taller—every time I do it, the room instantly feels bigger. I like to add a simple ridge trim at the peak to make the meeting line look crisp.
Consider these options:
- Tongue and Groove Pine Ceiling Planks: Create a seamless, warm wooden ceiling that instantly adds character and height to your vaulted room space.
- Matte Black Industrial Pendant Light: Contrast the natural wood tones with a modern industrial pendant fixture to anchor your vaulted ceiling design.
- Large Dried Pampas Grass: Bring soft textures into your room to complement the pine ceiling and enhance the cozy, organic aesthetic.
Shiplap-Style Pine for Subtle Shadow Lines
A shiplap-style pine ceiling gives you those clean little reveals between boards, and I’ve used it when someone wants texture without a super-rustic vibe. I usually keep the finish matte because it makes the shadow lines look softer and more natural.
Items that may come in handy:
- Clear Matte Wood Finish: Protect your pine ceiling while preserving its natural look with a high-quality matte finish sealer.
- Brad Nailer Kit: Secure your shiplap boards efficiently and neatly with a reliable brad nailer for seamless installation.
- Recessed Lighting Kits: Illuminate your new ceiling beautifully by installing discreet recessed lights that complement the clean, modern lines.
Pine Ceiling in a Bright Kitchen
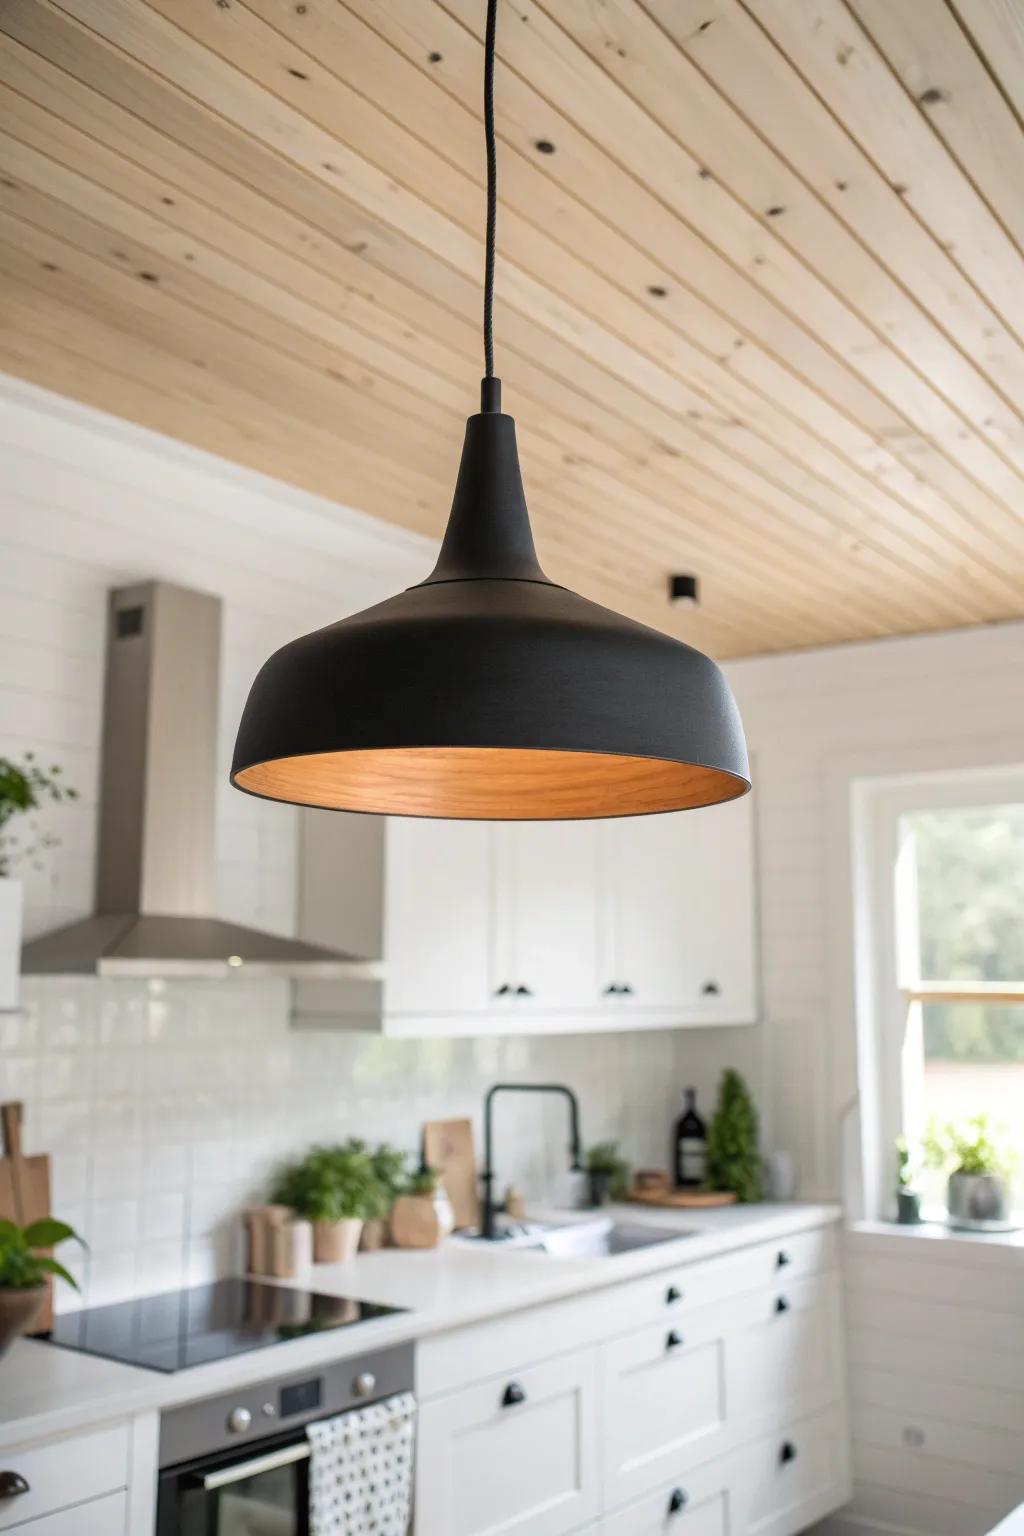
A pine ceiling over a kitchen is such a cozy contrast to crisp cabinets, and I’ve found it makes the whole space feel less sterile. I plan lighting early—once I’ve installed pine up there, I don’t want to be patching holes later.
A few choices to try:
- Matte Black Cone Pendant Light: Replicate this modern farmhouse look by anchoring your pine ceiling with a striking, industrial-style matte black fixture.
- Clear Satin Polyurethane Wood Finish: Protect your new pine planks while keeping that natural, light wood tone visible with a durable clear coat.
- Pine Tongue and Groove Planking: Create the warmth shown here by installing authentic knotty pine paneling to instantly soften your kitchen’s aesthetic.

Porch or Sunroom Pine Ceiling That Feels Outdoorsy
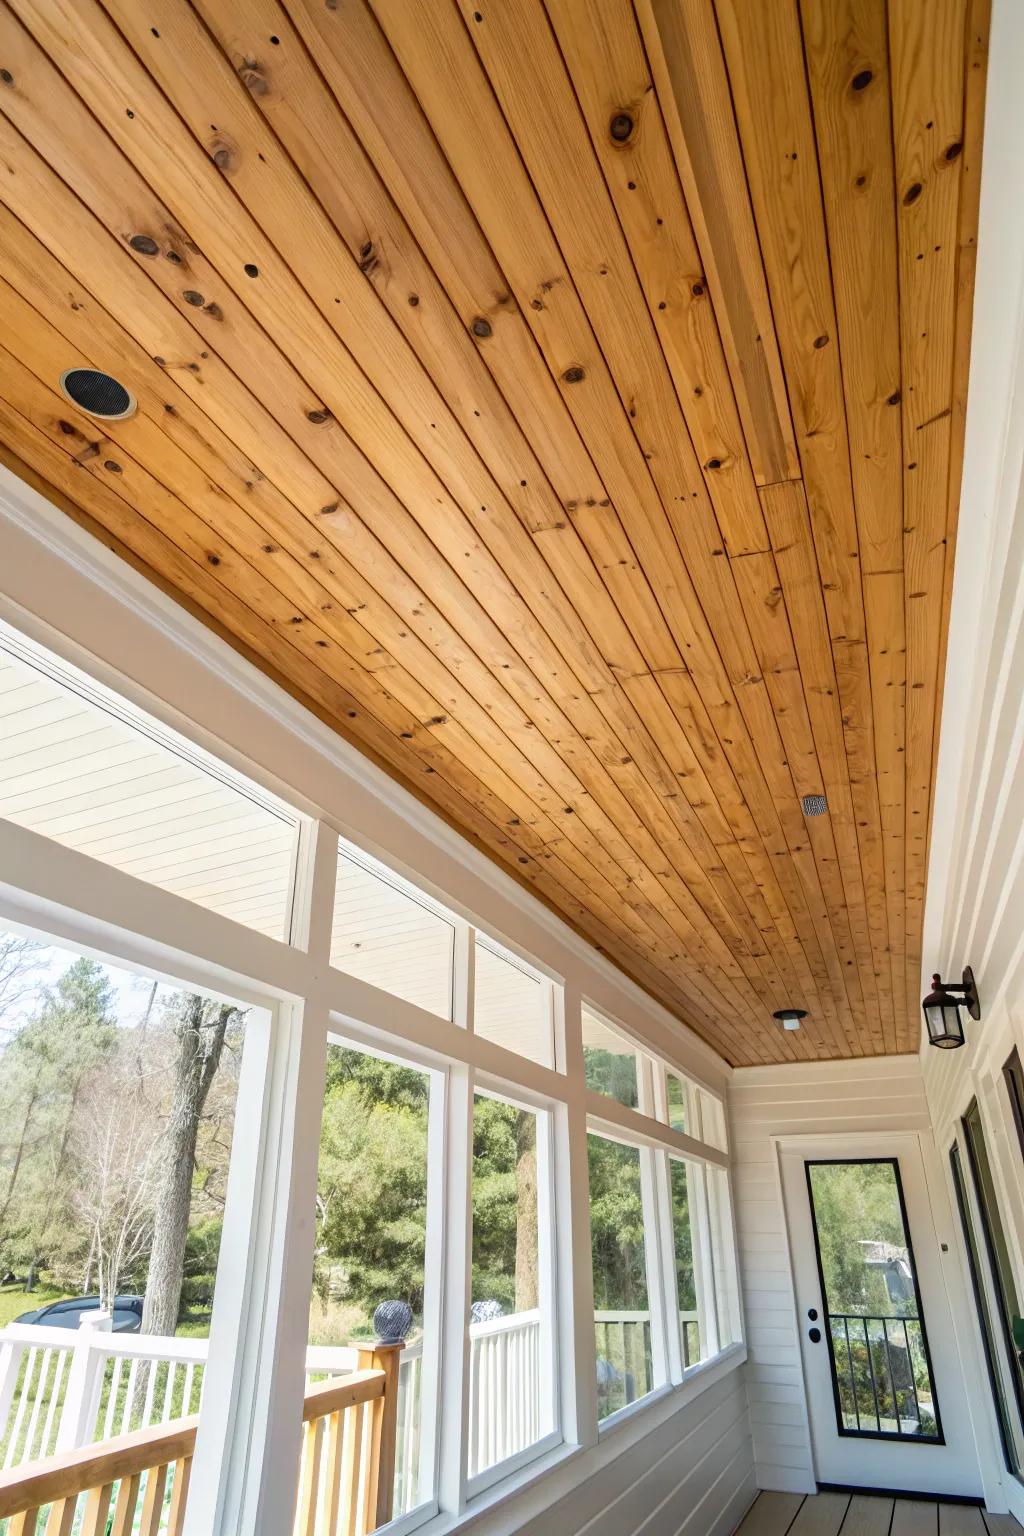
For a porch or sunroom, a pine ceiling adds that cabin-like warmth, and I’ve used it to visually connect indoor/outdoor spaces. I always seal all sides and end grain because I’ve seen humidity turn unsealed pine into a gap-and-cup situation.
Give these a look:
- Automated Brad Nailer Kit: Secure your pine planks efficiently with a pneumatic nailer, ensuring a clean and professional ceiling installation.
- Clear Wood Sealer & Finish: Protect your pine from humidity and prevent warping by applying a durable, moisture-resistant clear coat.
- Recessed Lighting Trim Kit: Integrate lighting smoothly into your wood ceiling for a modern look that highlights the natural grain.
Diagonal Pine Planks for Instant Energy
A diagonal pine ceiling is my favorite way to make a plain room feel designed, and I’ve used it in smaller spaces that needed some movement. It takes a little more measuring, but the payoff is huge when the lines lead your eye across the room.
May just do the trick:
- Knotty Pine Tongue and Groove Planking: Create that authentic, rustic look by installing these classic knotty pine boards tailored for easy interlocking alignment.
- Industrial Black Pendant Light Fixture: Add a modern contrast to your warm wood ceiling with a simple, industrial-style hanging light fixture.
- Natural Wood Matte Varnish: Protect your pine ceiling while keeping its natural, pale appearance with a low-sheen clear matte varnish.
Chevron Pine Ceiling for a Statement Moment
When I want that “stop scrolling” look, I do a chevron pine ceiling, especially on a vaulted surface where the pattern can really shine. I’ve learned to dry-lay a few rows on the floor first so the angles stay consistent all the way up.
These products might help:
- Digital Angle Finder or Protractor: Ensure your chevron cuts meet perfectly at the peak by measuring angles accurately before cutting any wood.
- Pneumatic Brad Nailer Kit: Secure your pine boards overhead quickly and cleanly without visible hammer marks disrupting the finished look.
- Clear Matte Wood Polyurethane: Protect your beautiful pine ceiling while maintaining a natural, low-sheen finish that highlights the wood grain.
Pine Ceiling with Dark Grooves for Depth
This one’s sneaky-good: I’ve painted just the seams (or the backing) dark so the pine ceiling gets bold shadow lines even with light wood. It’s my favorite trick when I want the boards to pop but still keep the room bright.
Try these:
- Dark Interior Paint or Stain: Apply dark paint to the tongue or wall behind your planks to create that bold, depth-enhancing shadow line effect.
- Angled Sash Paint Brush: Use a quality angled brush for precise application in grooves or seams without getting dark paint on the plank faces.
- Professional Painters Tape: Protect your light wood surfaces and ensure clean lines when painting seams to maintain that crisp, professional finish.
Faux Coffered Look Using Pine Beams
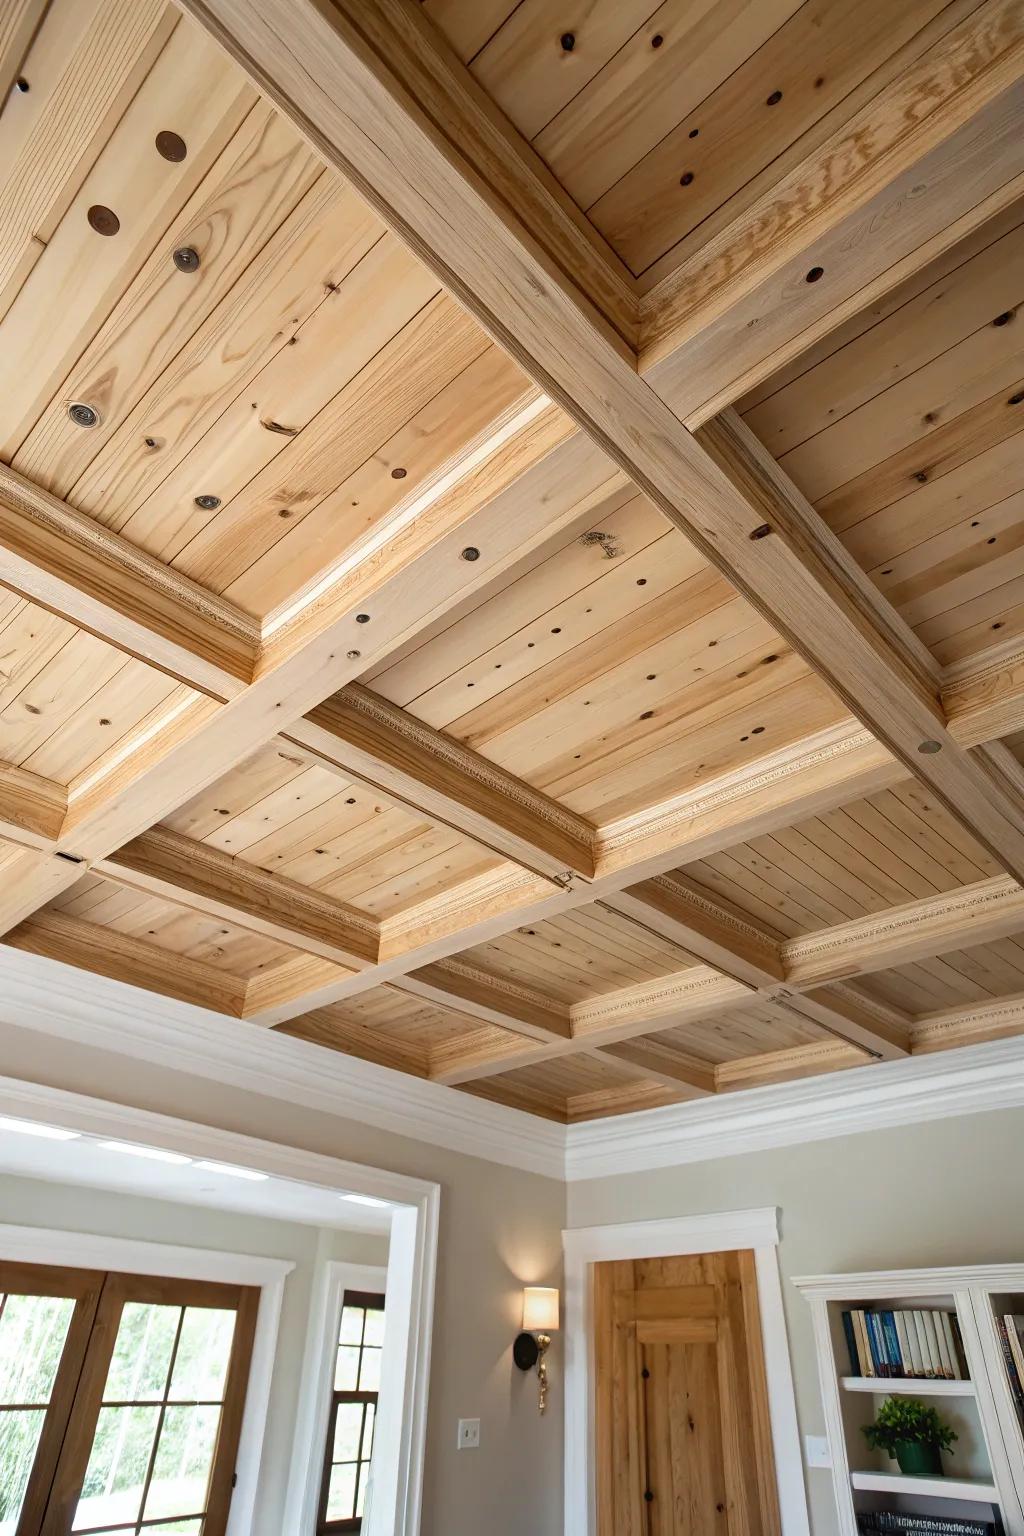
You can fake a coffered pine ceiling by adding pine beam boxes over a simple pine plank field, and I’ve used this to make builder-basic rooms feel high-end. I like to keep the beam faces a hair rougher than the planks so the textures play off each other.
You might give these a try:
- Knotty Pine Tongue and Groove Paneling: Establish your base layer quickly with interlocking boards that provide the classic, warm look of natural wood.
- Solid Wood Ceiling Molding: Add refined detail inside your beam boxes with decorative trim that softens the transition between beams and planks.
- Matte Wood Sealer or Varnish: Protect your new pine ceiling and enhance the natural grain without creating an artificial-looking, high-gloss shine.
Board-and-Batten Pine Ceiling for Cottage Texture
A board-and-batten pine ceiling is such a sweet, cozy look, and I’ve used thin battens to hide seams when I’m working with shorter boards. It’s also forgiving—if a board edge isn’t perfect, the batten makes it look planned.
Might be a good match:
- Unfinished Tongue and Groove Pine Boards: Create a warm, seamless cottage look by installing these interlocking boards directly onto your ceiling joists.
- Clear Satin Water-Based Polyurethane: Protect your wood ceiling and enhance the natural grain without yellowing over time using this finish.
- Pneumatic Brad Nailer Kit: Secure your ceiling planks quickly and neatly with this essential tool, making overhead installation much easier.
Pine Ceiling with Resin or Metal Inlay Strips
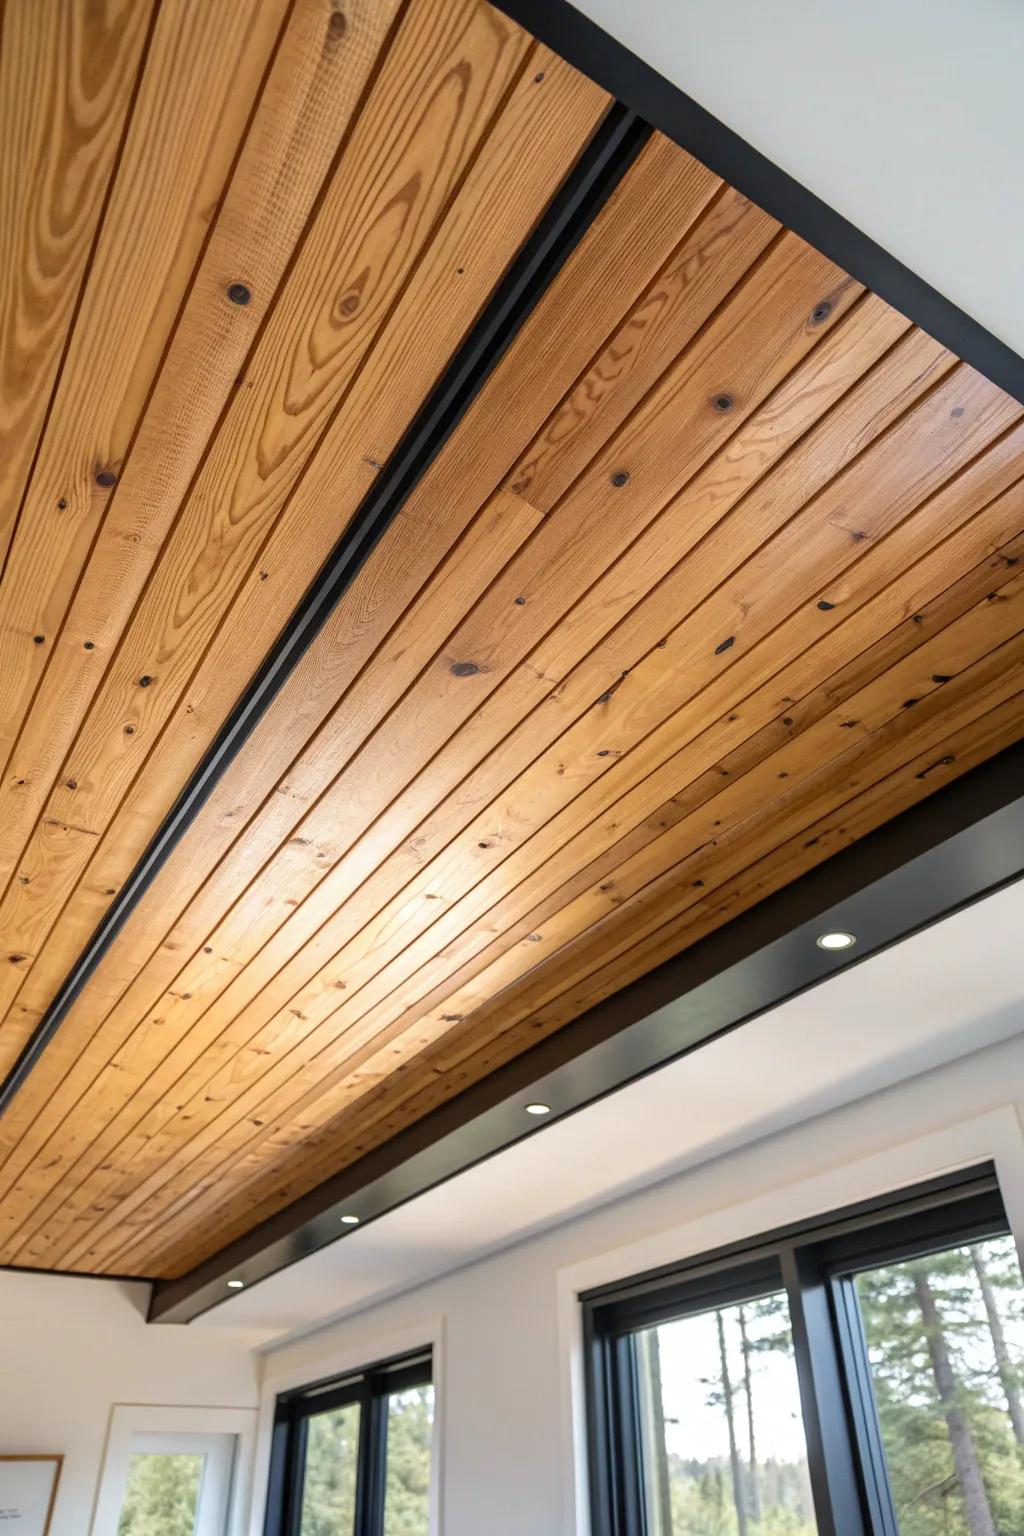
For a true wow-factor, I’ve inlaid thin channels in a pine ceiling with resin inlay or slim metal strips, and it looks like custom architectural detailing. I keep the inlay lines minimal—just a few intentional runs—so the pine grain stays the star.
You might like:
- Aluminum C-Channel or T-Track: Create the sleek metal separation lines seen in the image by embedding these durable metal channels between your wood planks.
- Epoxy Resin Kit for Woodworking: If you prefer a seamless look, mix and pour durable resin into ceiling gaps for a custom, colourful inlay finish.
- LED Strip Light Channels: Replicate the illuminated effect often paired with inlays by installing these diffusors to add modern lighting to your ceiling.


