
Carpet-free stairs can look just as finished and cozy as a runner—sometimes even more so—when the wood and details get a little love. I’ve redone a lot of bare staircases, and the sweet spot is always the same: make them beautiful, durable, and non-slip.
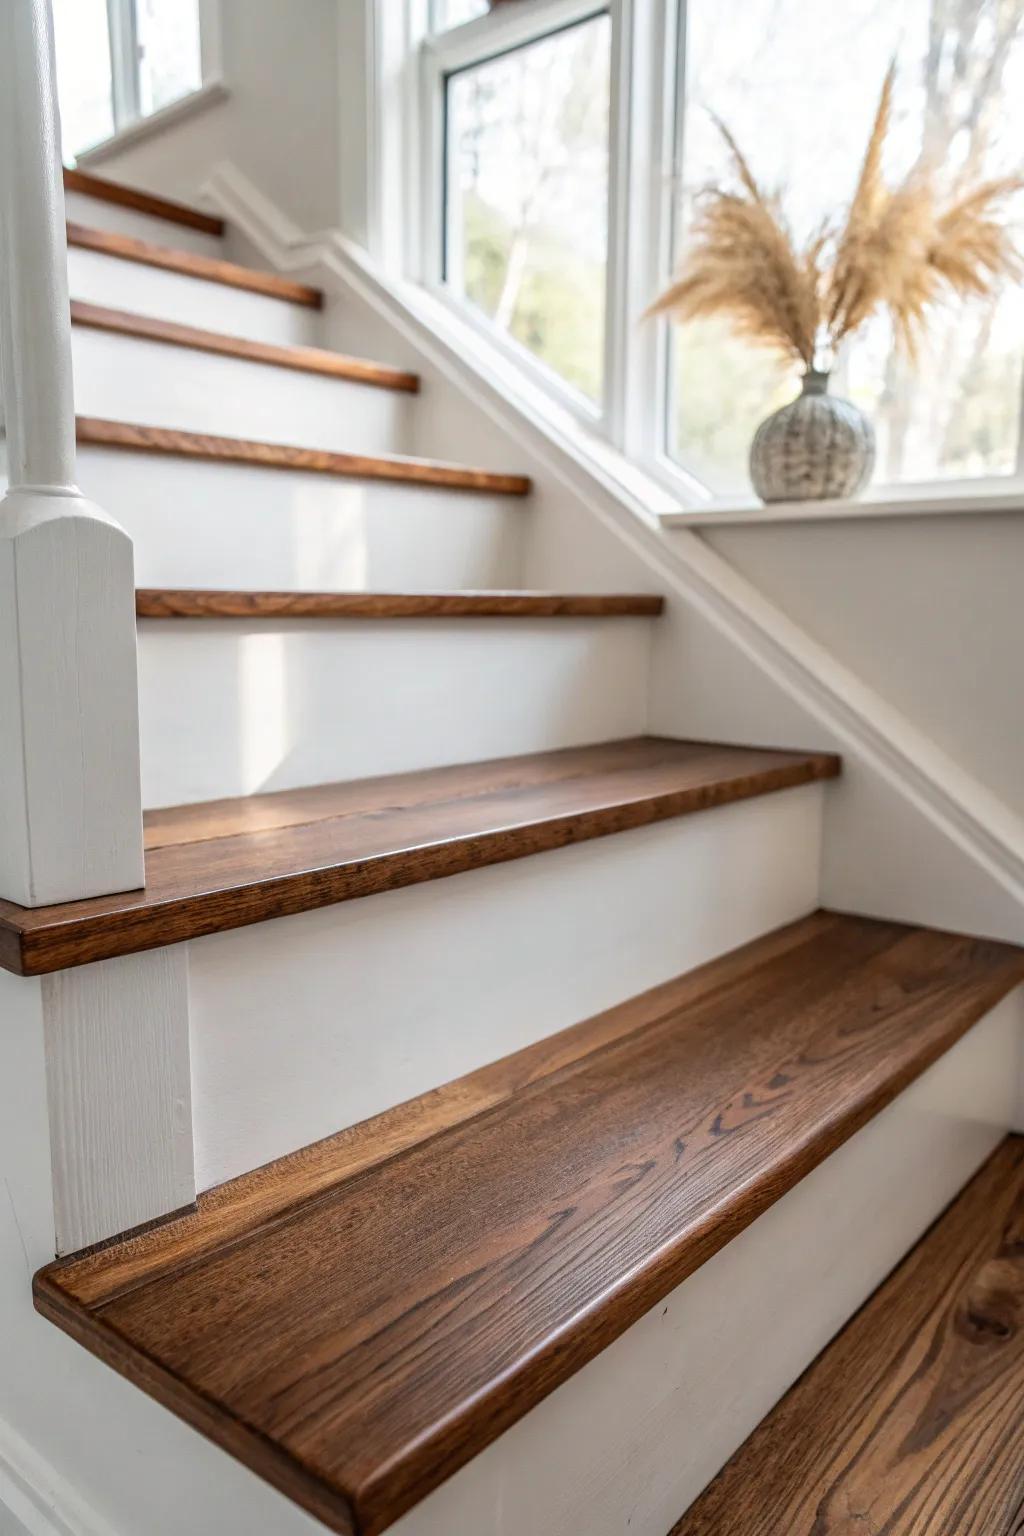
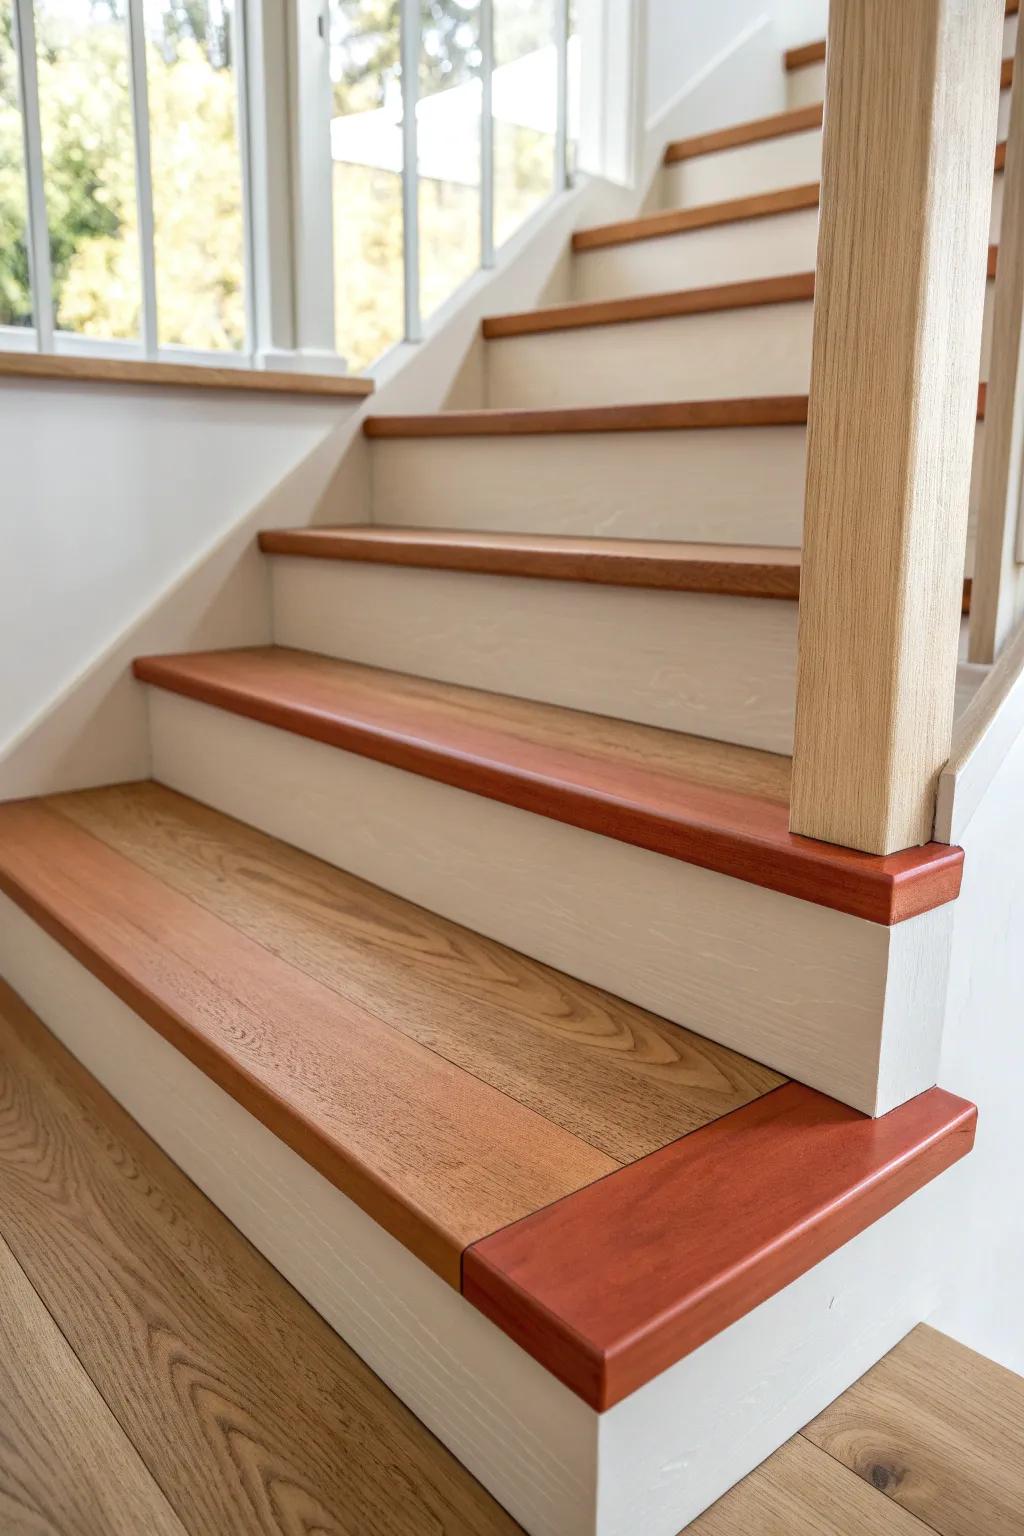
Two-Tone With Dark Treads and Light Trim
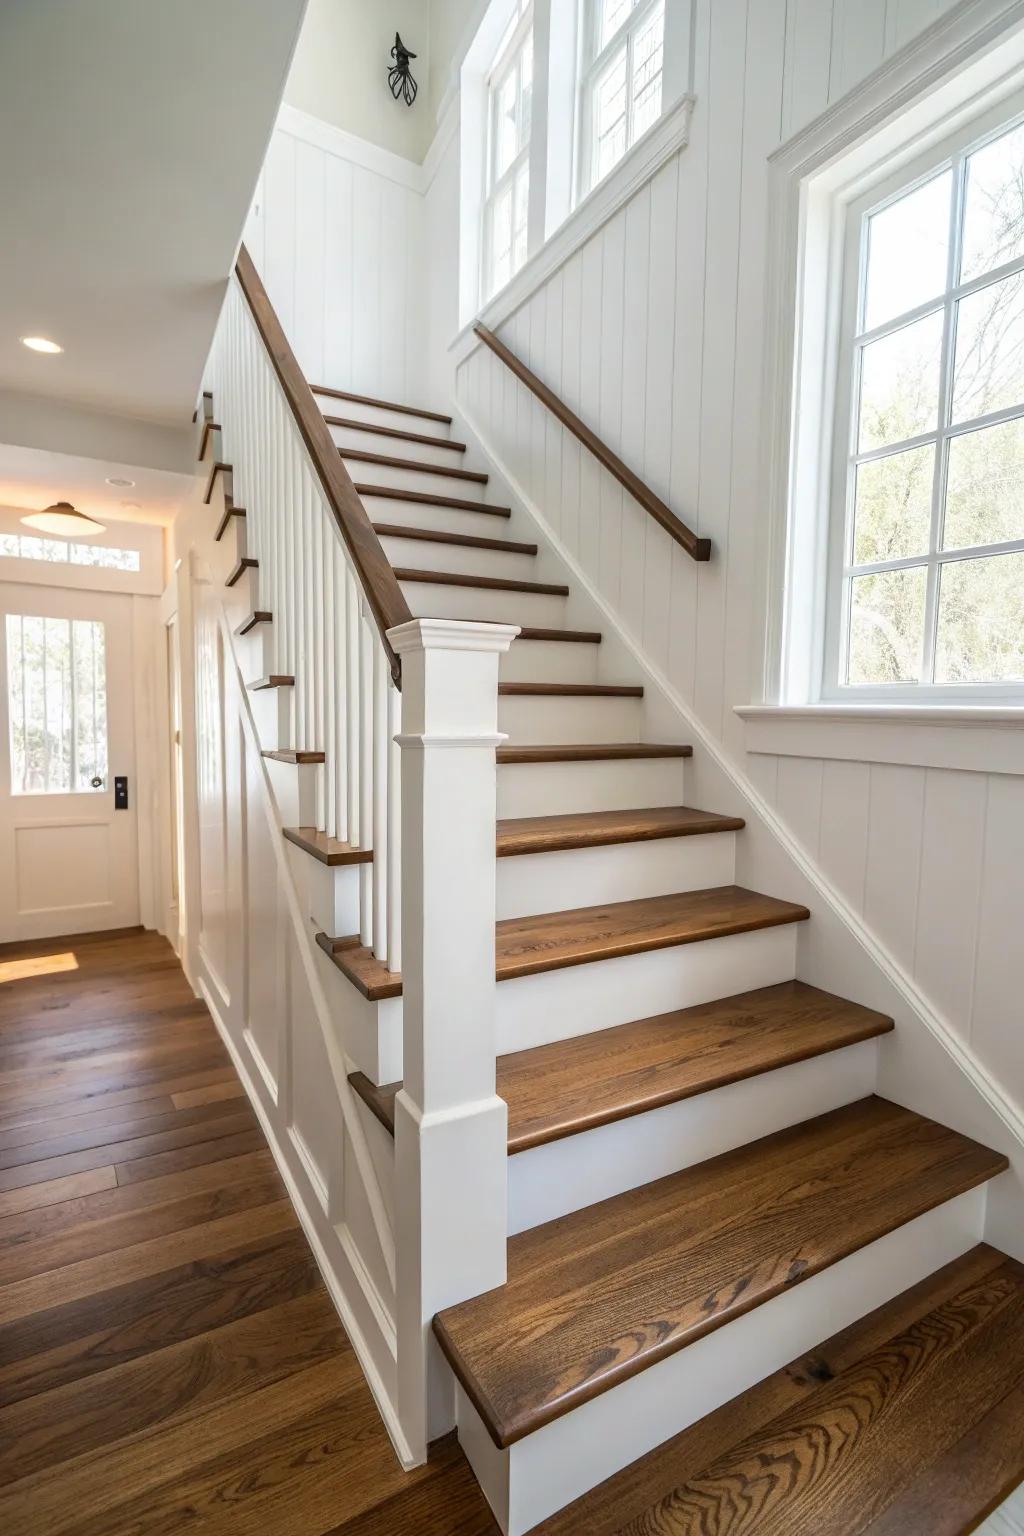
If you want a little more drama, I’ve stained treads deep and kept the stringers and risers light for that bold two-tone stairs look. It hides scuffs way better than all-light finishes, which I learned the hard way on a busy household project.
Some ideas to consider:
- Dark Walnut Wood Stain: Achieve that rich, dramatic contrast by staining your treads deeply, helping hide everyday wear and footprints.
- Matte Polyurethane Finish: Protect your newly stained treads and painted risers with a durable clear coat that resists high-traffic scuffing.
- Bright White Trim Paint: Create a crisp, clean look on your risers and stringers to make the dark treads truly pop.
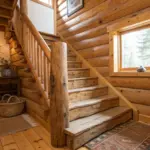

Sand and Stain for a Classic Wood Look
When I pull carpet and find decent wood underneath, I usually go straight to a full sand and a rich wood stain to make the grain the star. A couple coats of a tough clear topcoat is what made my own high-traffic stairs look “done,” not dusty.
Consider these options:
- Electric Detail Sander: Easily remove old varnish and smooth out tight corners on your staircase with this essential tool.
- Oil-Based Wood Stain: Achieve that deep, rich tone you see in the photo by applying a durable, penetrating stain.
- Polyurethane Floor Finish: Protect your hard work from daily foot traffic with a clear, durable topcoat that resists scratches.
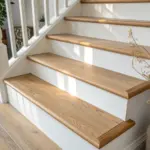
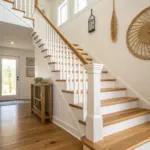

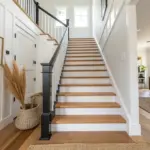
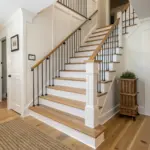
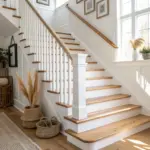
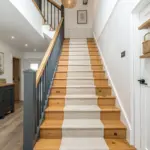
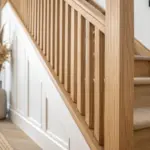
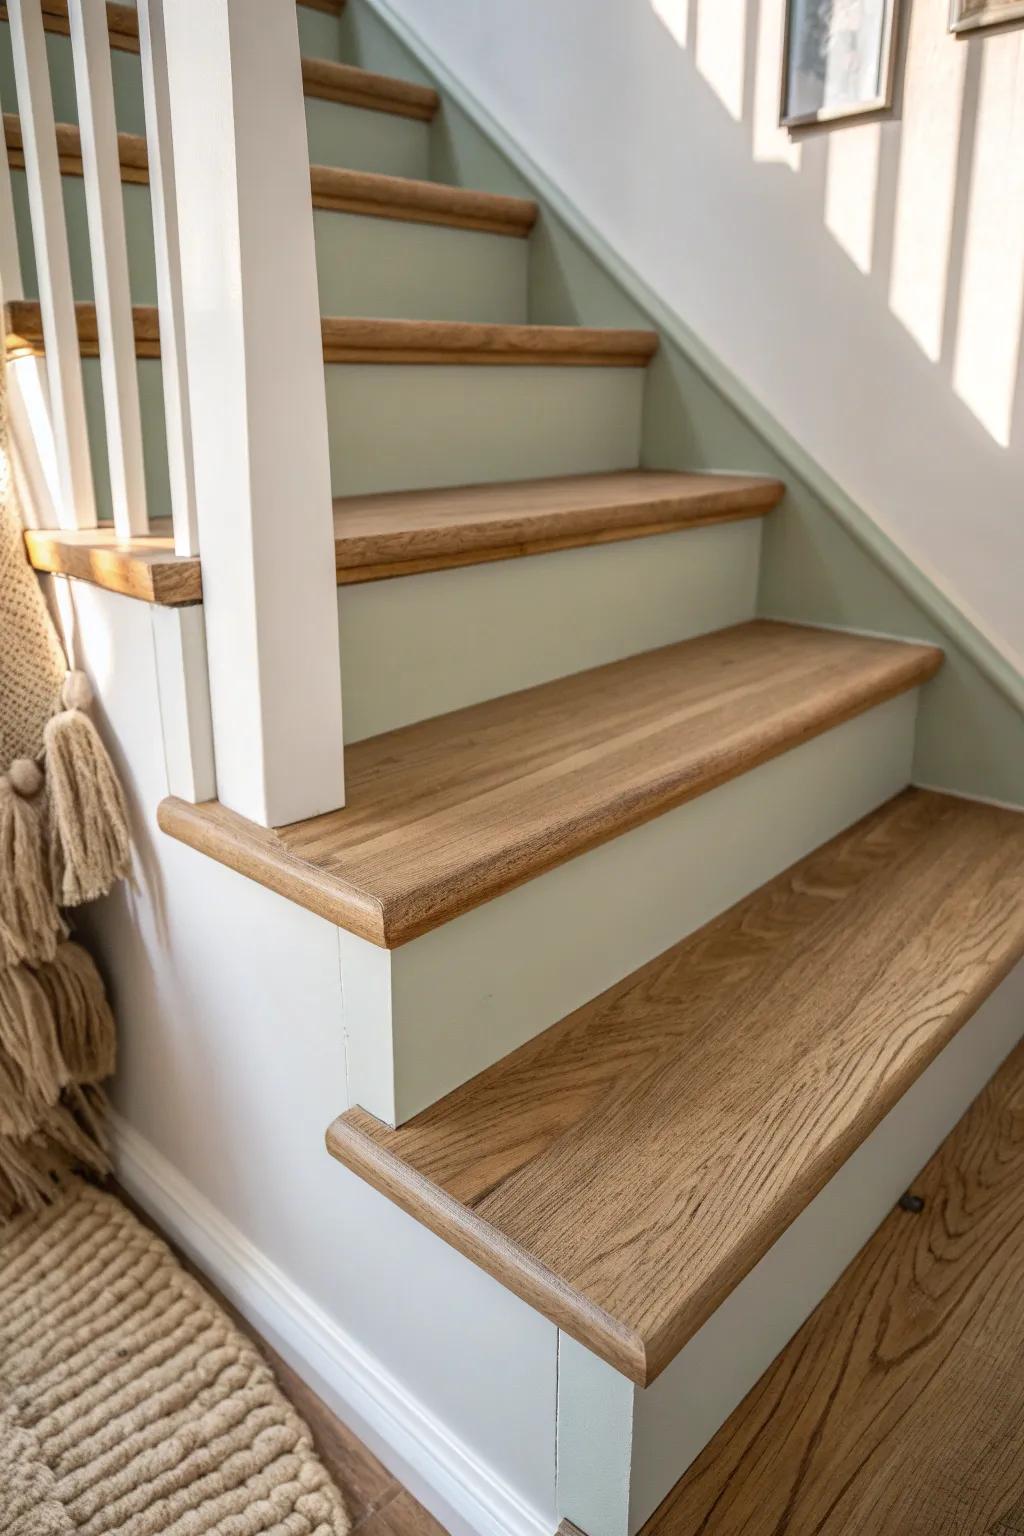
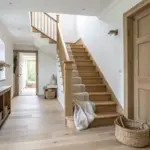
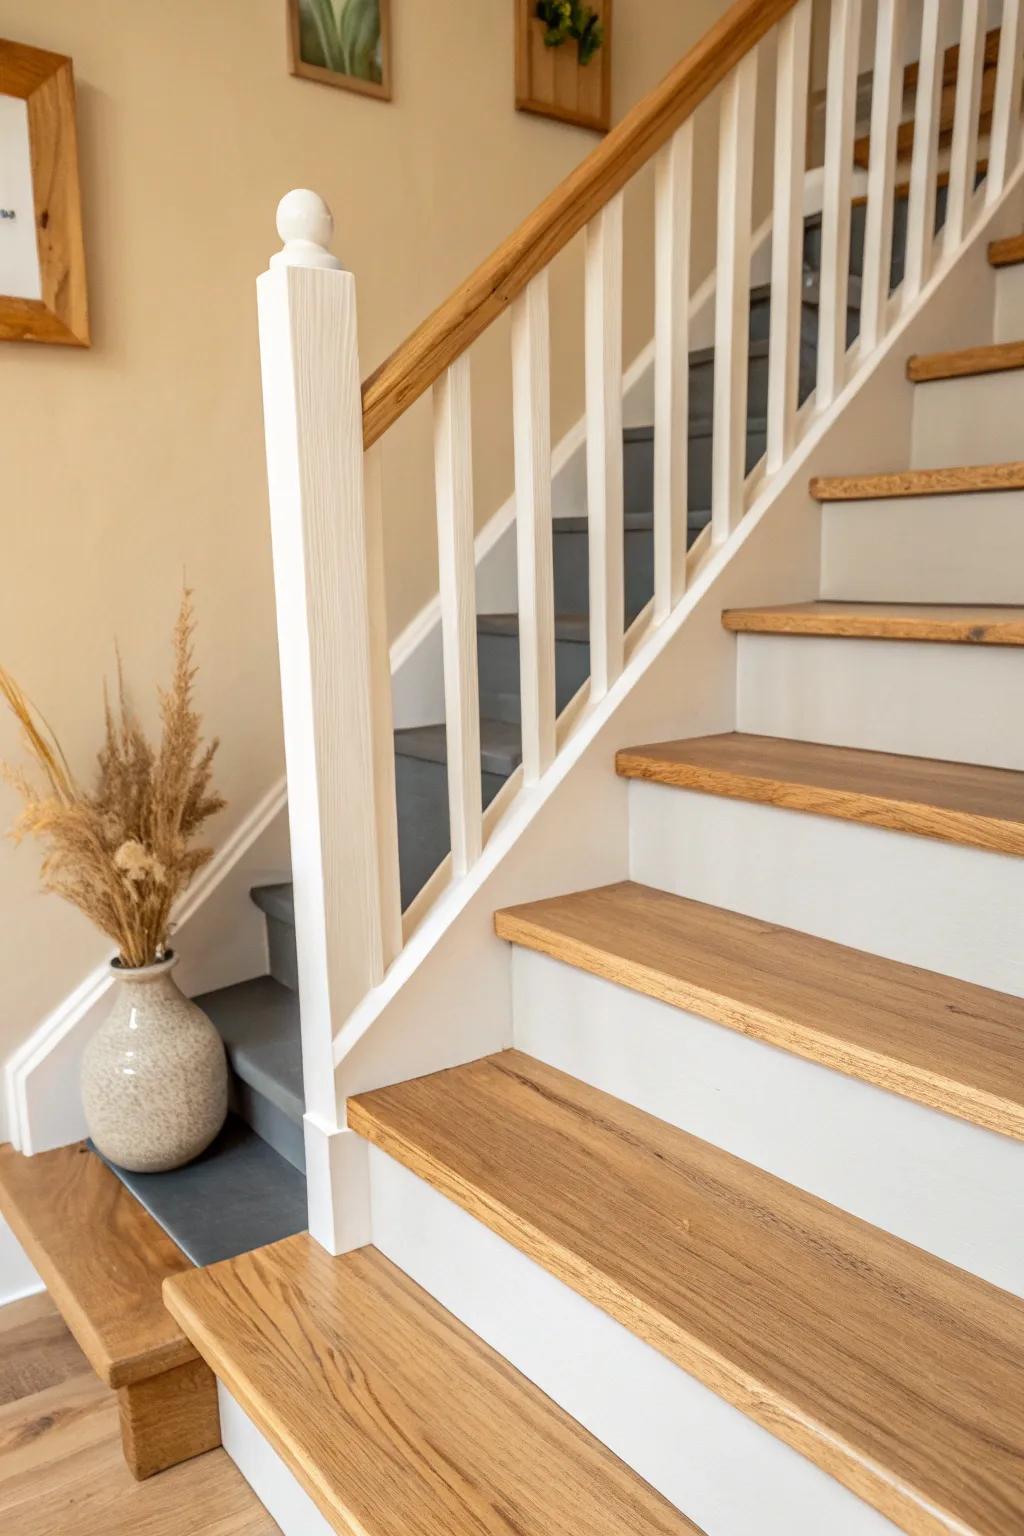
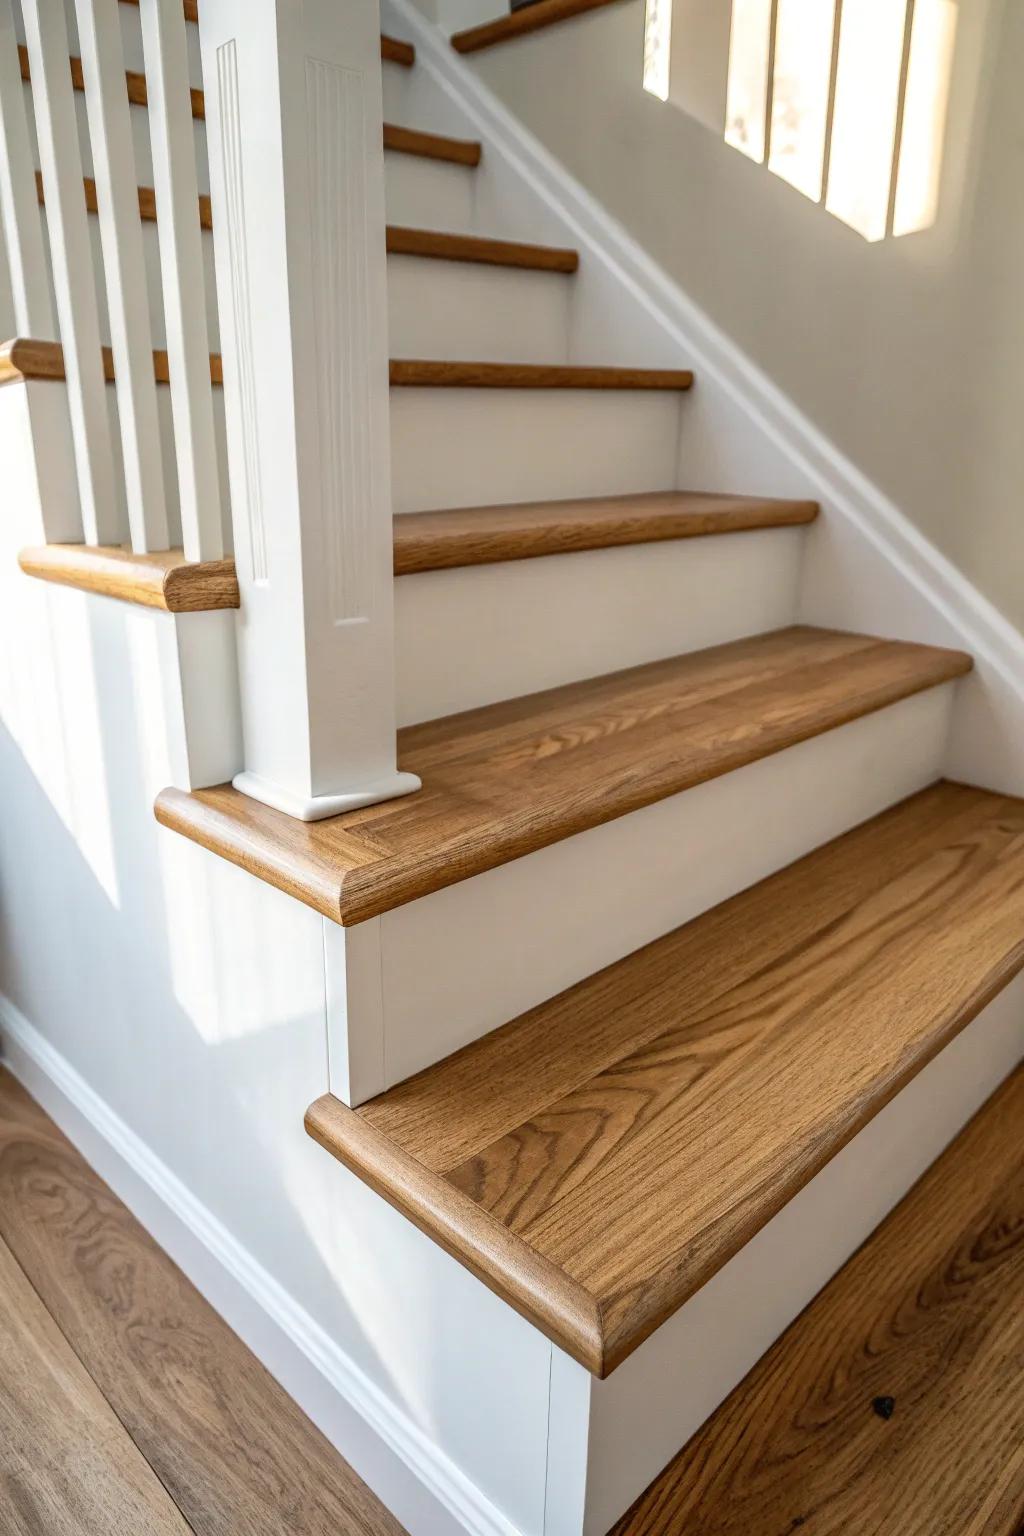
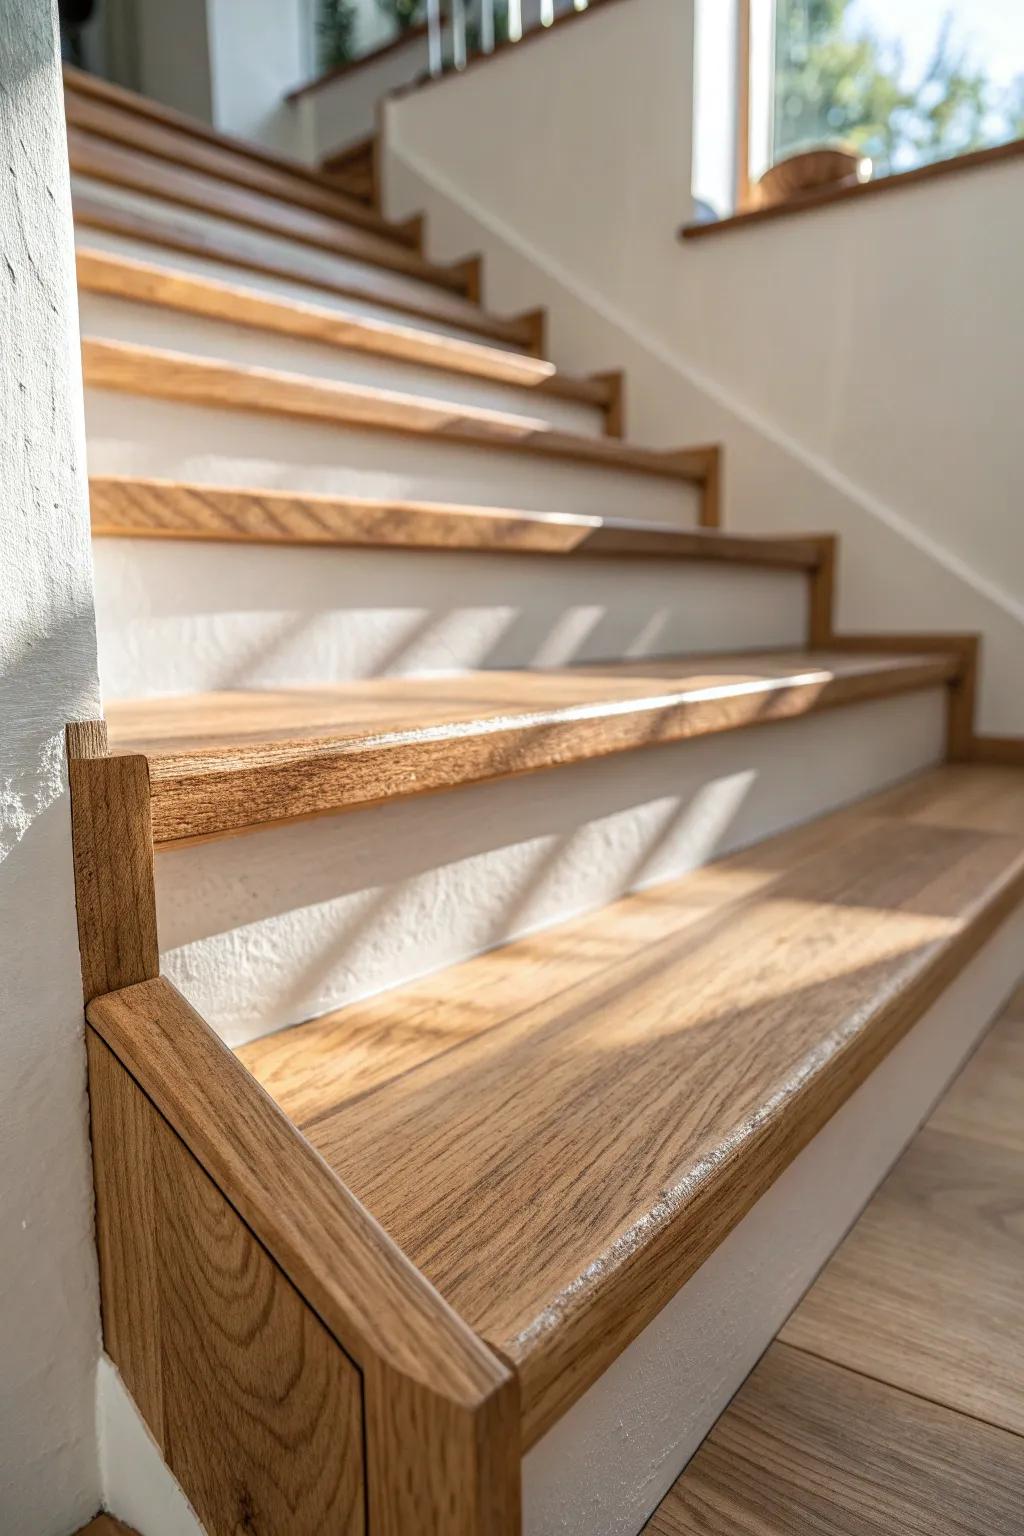
Natural Treads With Bright White Risers
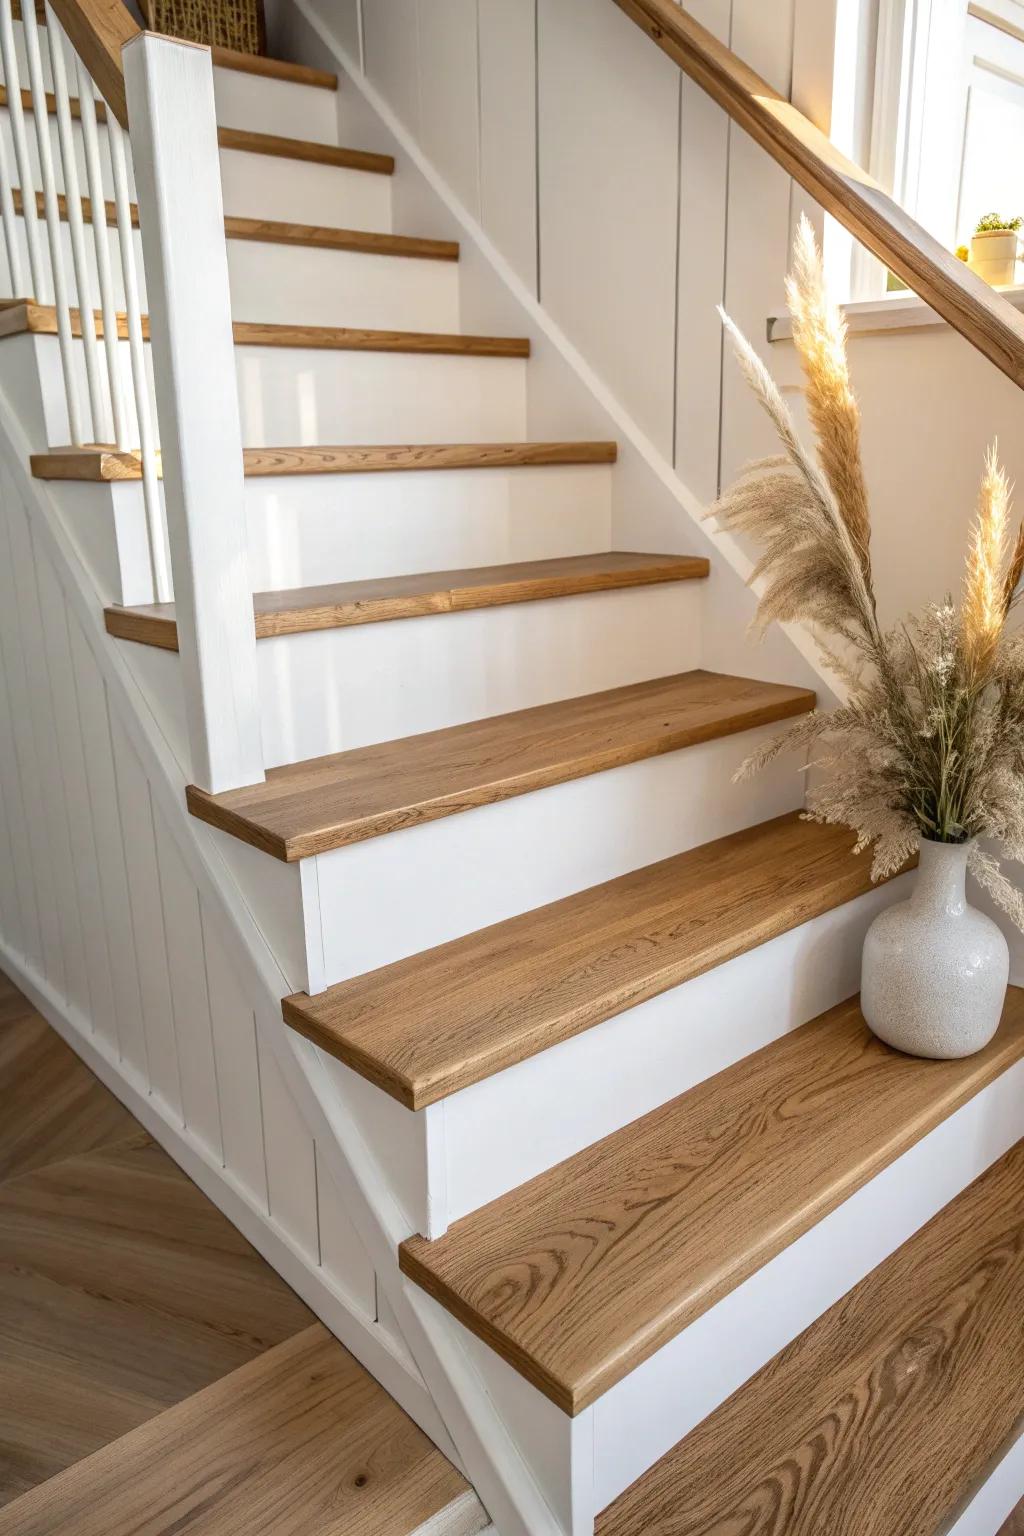
My go-to, never-fails combo is natural wood treads with white risers—it instantly looks crisp and intentional. I’ve done this in older hallways where everything felt dark, and the contrast made the whole stairwell feel lighter.
Check these products out:
- Solid Oak Stair Treads: Upgrade your staircase by installing durable solid wood treads that provide warmth and classic natural contrast.
- Self-Adhesive White Riser Skins: Easily cover existing scuffed risers with peel-and-stick vinyl or primed wood veneers for an instant white finish.
- Indoor Semi-Gloss White Paint: Refresh your current risers with a coat of high-quality, scuff-resistant white paint for a crisp, clean look.
All-Over Matte Paint for Easy Cleanup
I’ve painted entire staircases in a matte floor paint, and it’s honestly one of the easiest ways to make old wood look fresh fast. Just skip anything shiny—my early glossy experiment was a slip hazard until I redid it with a grippier finish.
Give these a look:
- Anti-Slip Floor Paint Additive: Mix this grit into your paint to create a safer, textured surface that helps prevent slipping on stairs.
- Matte Finish Porch & Floor Paint: Choose a specialized floor paint in a non-reflective finish to durably cover scuffs while hiding surface imperfections.
- Angled Sash Paint Brush: Use a quality angled brush to achieve crisp, clean lines where the painted risers meet the wooden treads.
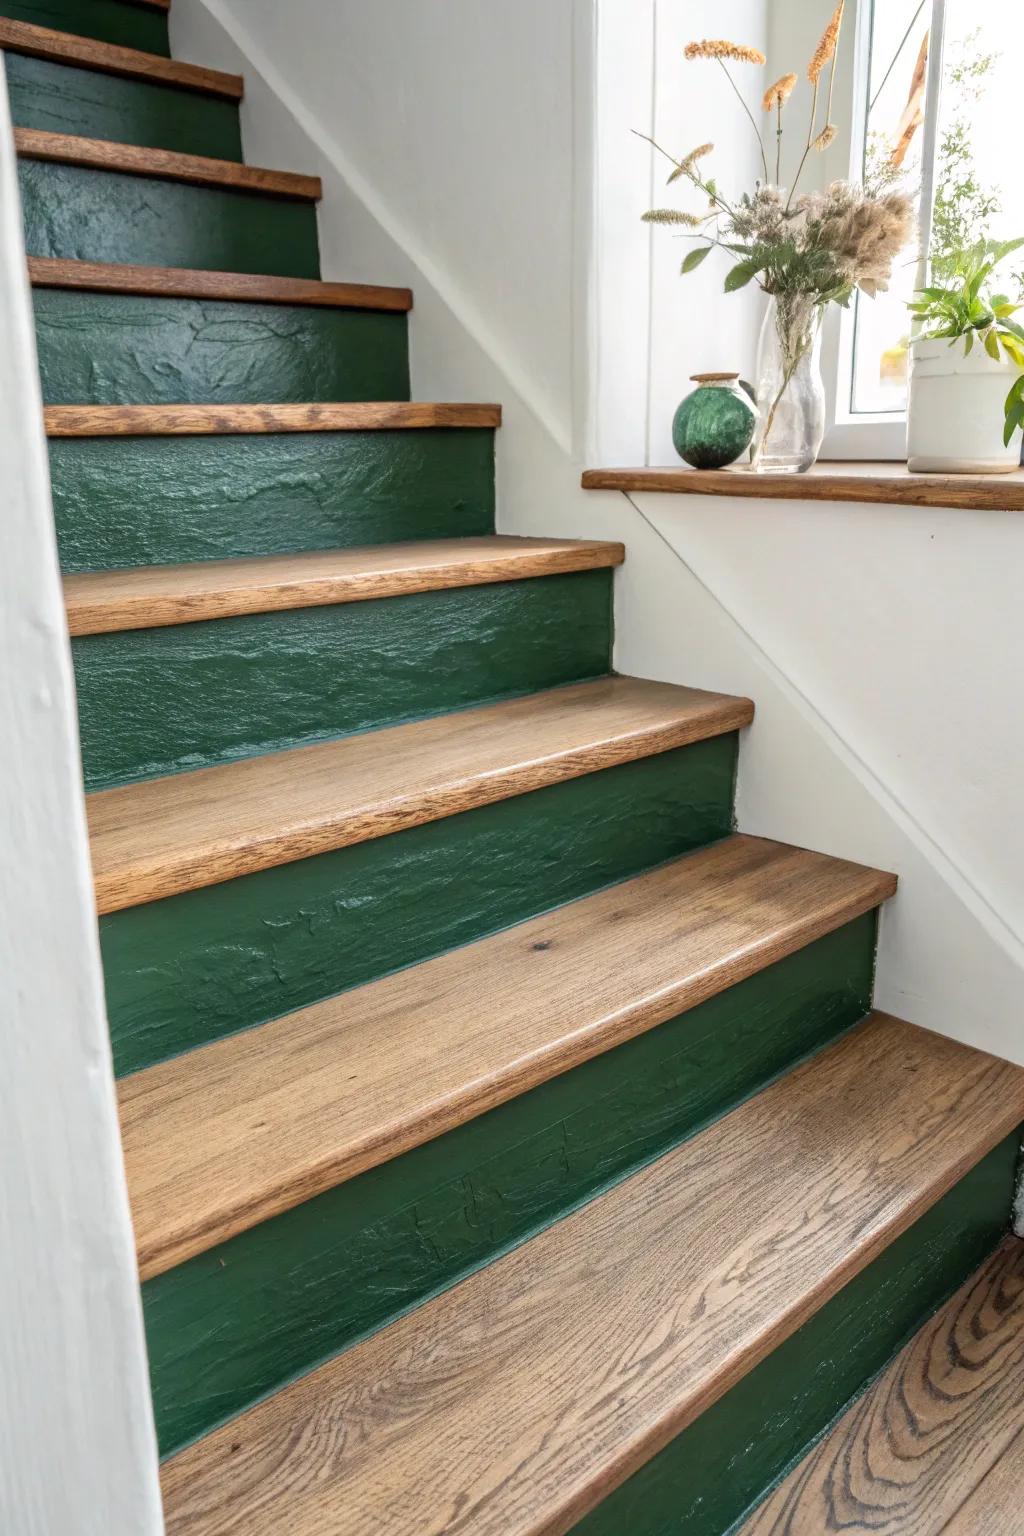
Painted Risers in a Soft Accent Color
Painting just the stair risers is my favorite “big impact, small effort” trick, especially when the treads are staying wood. I’ve used muted greens and warm grays here, and it gives the staircase personality without screaming for attention.
You might like:
- Self-Adhesive Painter’s Tape: Protect your wood treads perfectly while painting risers by edging them off with high-quality, easy-peel tape.
- Muted Sage Green/Grey Interior Paint: Achieve that soft, modern look by choosing a durable, scuff-resistant paint in a calming muted sage or gray tone.
- Angled Sash Paint Brush: Ensure crisp lines and reach tight corners on your staircase risers effortlessly with a professional-grade angled sash brush.
Stencil Patterns on the Risers
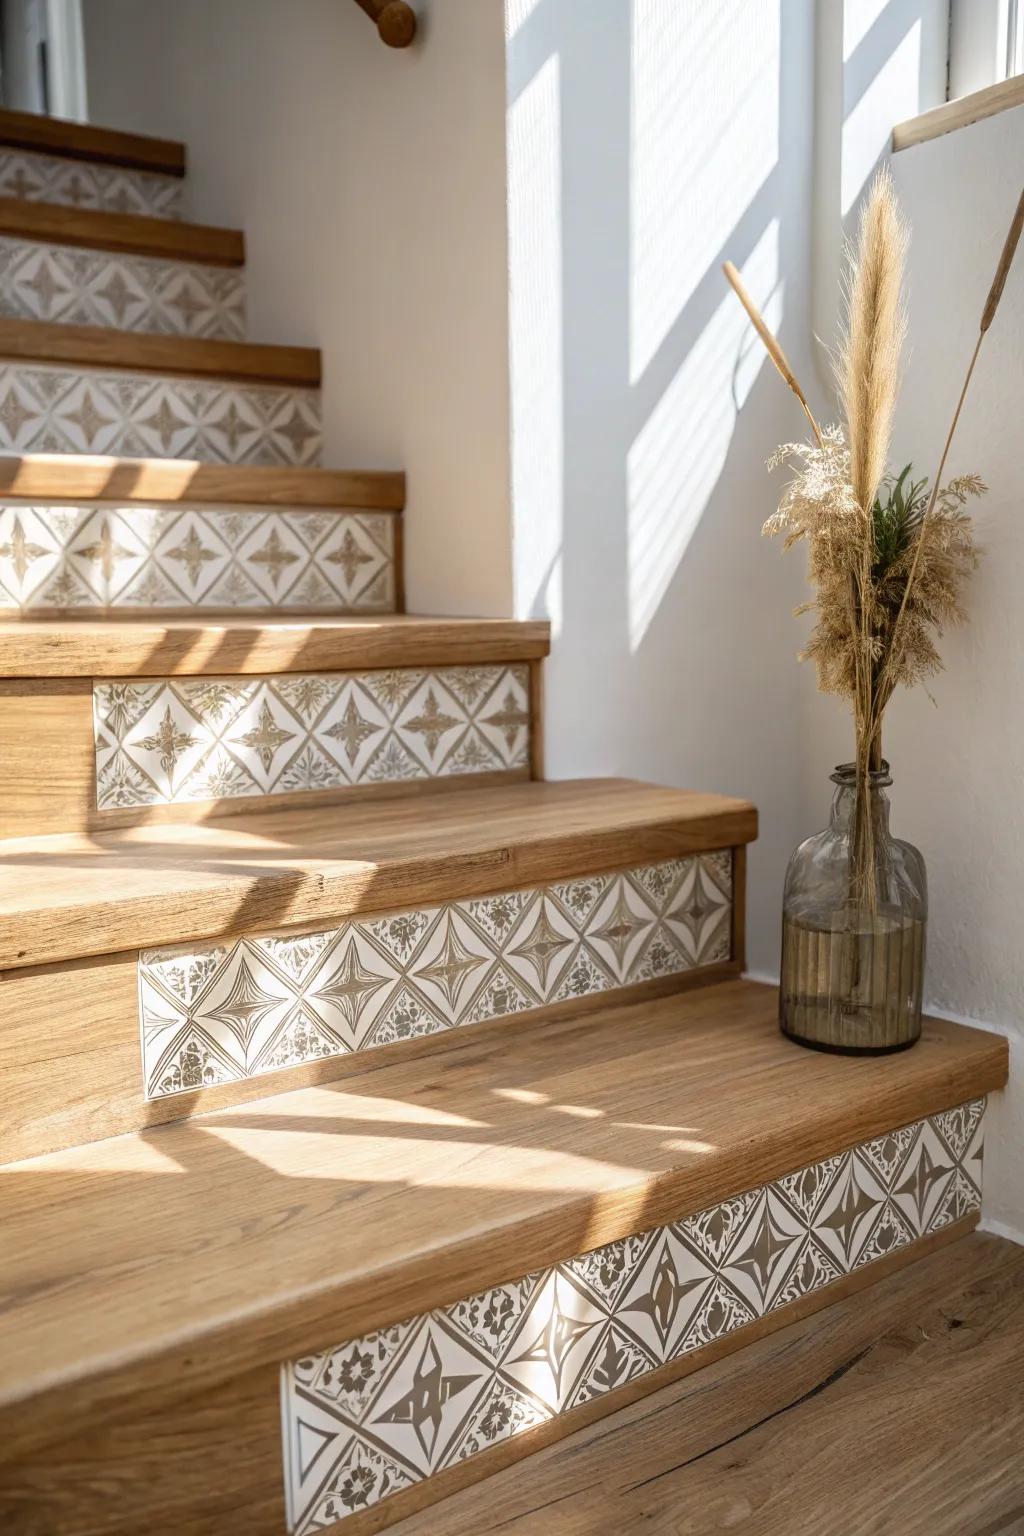
I’ve stenciled geometric risers on bare-wood stairs, and it reads like custom tilework without adding thickness to the steps. The key from my experience is sealing the risers well so the pattern survives vacuum bumps and shoe scuffs.
Some handy options:
- Geometric Stair Riser Stencils: Create a stunning faux-tile look on your risers by applying these detailed geometric patterns directly onto the wood.
- Matte Finish Sealer for Wood: Protect your beautiful stencil work from daily wear and shoe scuffs with a durable, clear matte topcoat.
- Peel and Stick Stair Riser Decals: Achieve the stenciled tile aesthetic quickly without paint by simply applying these adhesive patterned strips to risers.

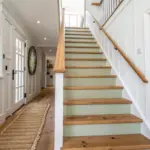
Fake a Runner With Paint
When someone wants the runner look but not the carpet, I mask off a center stripe and paint a painted stair runner right on the wood. I’ve done this in one weekend, and it’s shockingly forgiving because the darker center hides daily dirt.
Check if these fit your needs:
- Painters Tape for Sharp Lines: Create crisp, professional lines for your faux runner by securely masking off the edges of your stairs.
- Floor & Porch Paint: Choose a durable, scuff-resistant paint designed specifically for high-traffic floor areas to ensure long-lasting results.
- Angled Sash Paint Brush: Use a high-quality angled brush to cut in precision edges on risers and treads for a clean finish.
Paint Only the Stair Edges
For a subtle twist, I’ve painted a slim border along the edges of each tread and left the middle as bare wood. It gives a clean, finished outline and also helped me visually “square up” slightly uneven old steps.
Explore these options:
- Painter’s Tape for Crisp Lines: Create sharp, professional-looking paint lines on your stair treads to achieve that clean, bordered effect effortlessly.
- Interior Semi-Gloss Enamel Paint: Choose a durable, high-quality paint to apply smooth color to your stair edges while resisting daily scuffs.
- Detail Paint Brush Set: Use angled and detail brushes to carefully apply paint in corners and along edges for precision work.
Whitewash for Rustic, Lived-In Charm
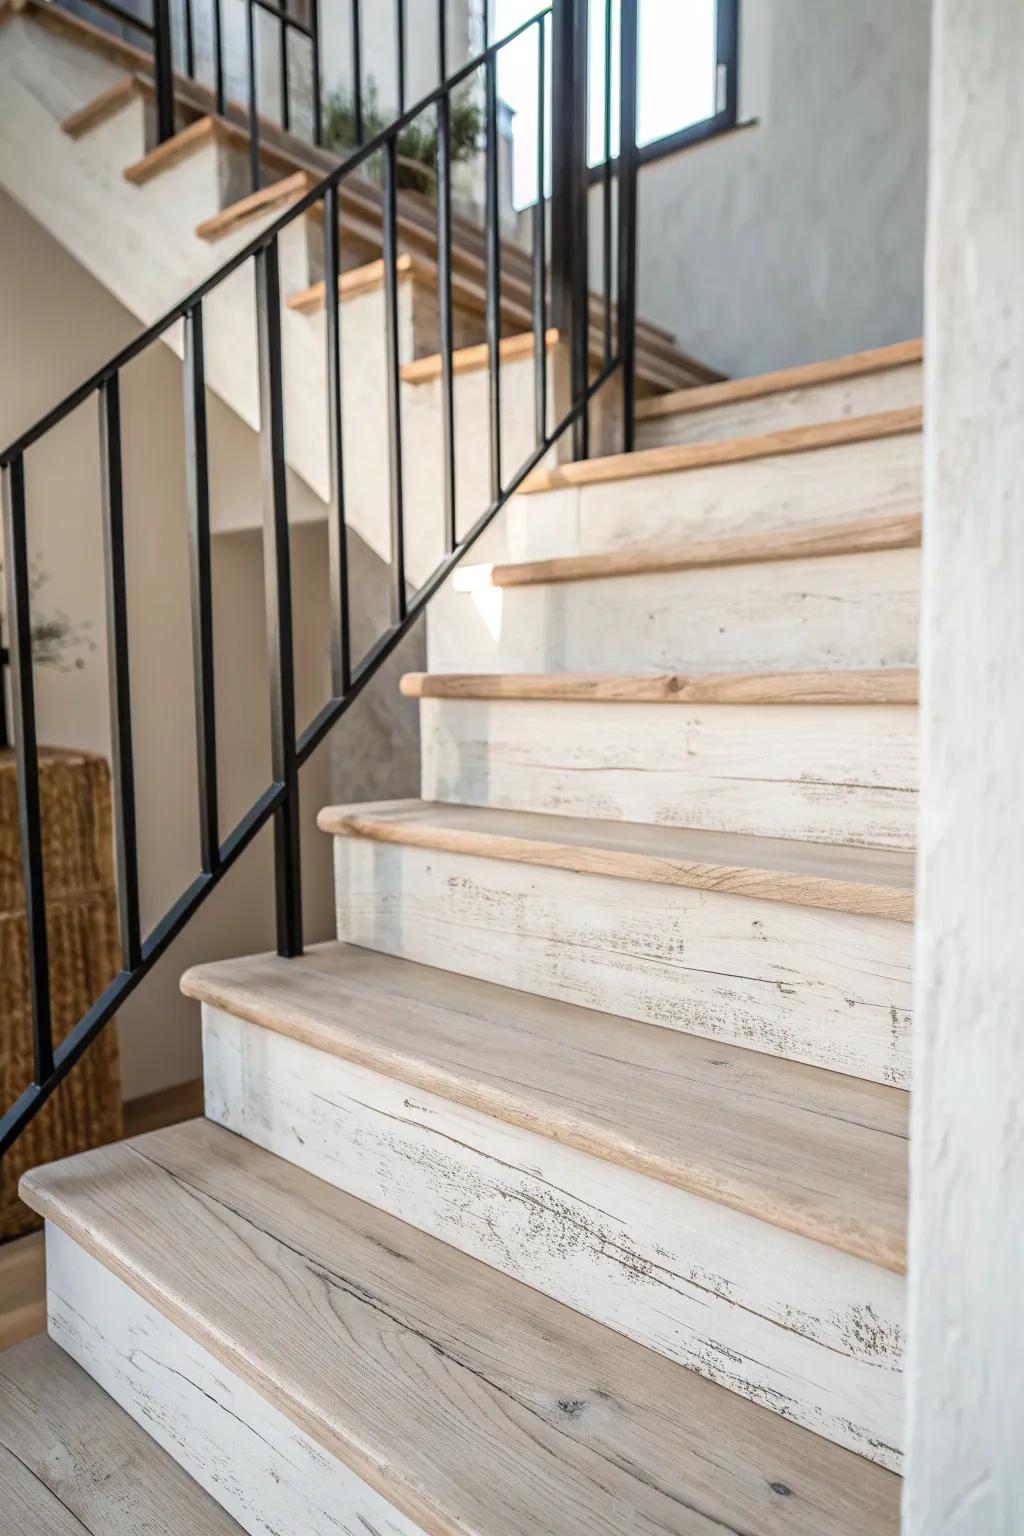
A light whitewash finish is my shortcut to farmhouse character when the wood is mismatched or patchy. I usually sand back the tread centers a touch—just like natural wear—and it looks authentically aged instead of freshly painted.
Useful items to consider:
- Whitewash Wood Satin: Achieve that airy, rustic farmhouse look easily by applying a quality whitewash stain to your bare wooden steps.
- Handheld Electric Detail Sander: Create authentic-looking wear patterns by gently sanding back the stain on the center of each stair tread.
- Matte Water-Based Polyurethane: Protect your newly finished stairs from daily foot traffic without adding unwanted shine using a durable matte topcoat.
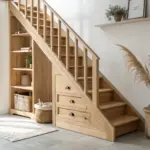
Replace Just the Tread Caps (Retread Style)
When the wood under carpet is hopeless, I’ve covered it with new stair tread caps and painted the risers for a clean, budget-friendly overhaul. Measuring each step individually saved me on one set where every tread was slightly different (older stairs love to do that).
Possibly handy products:
- Stair Tread Installation Jig: Ensure perfect cuts for every unique step angle by using this precise measuring tool for retrofitting treads.
- Oak Stair Retread Caps: Cover worn surfaces instantly with these solid wood overlays designed to give your stairs a fresh, new look.
- Construction Adhesive for Wood: Secure your new tread caps firmly in place with a heavy-duty adhesive formulated for wood bonding applications.
Add Wood Stair Nosing for a Finished Edge
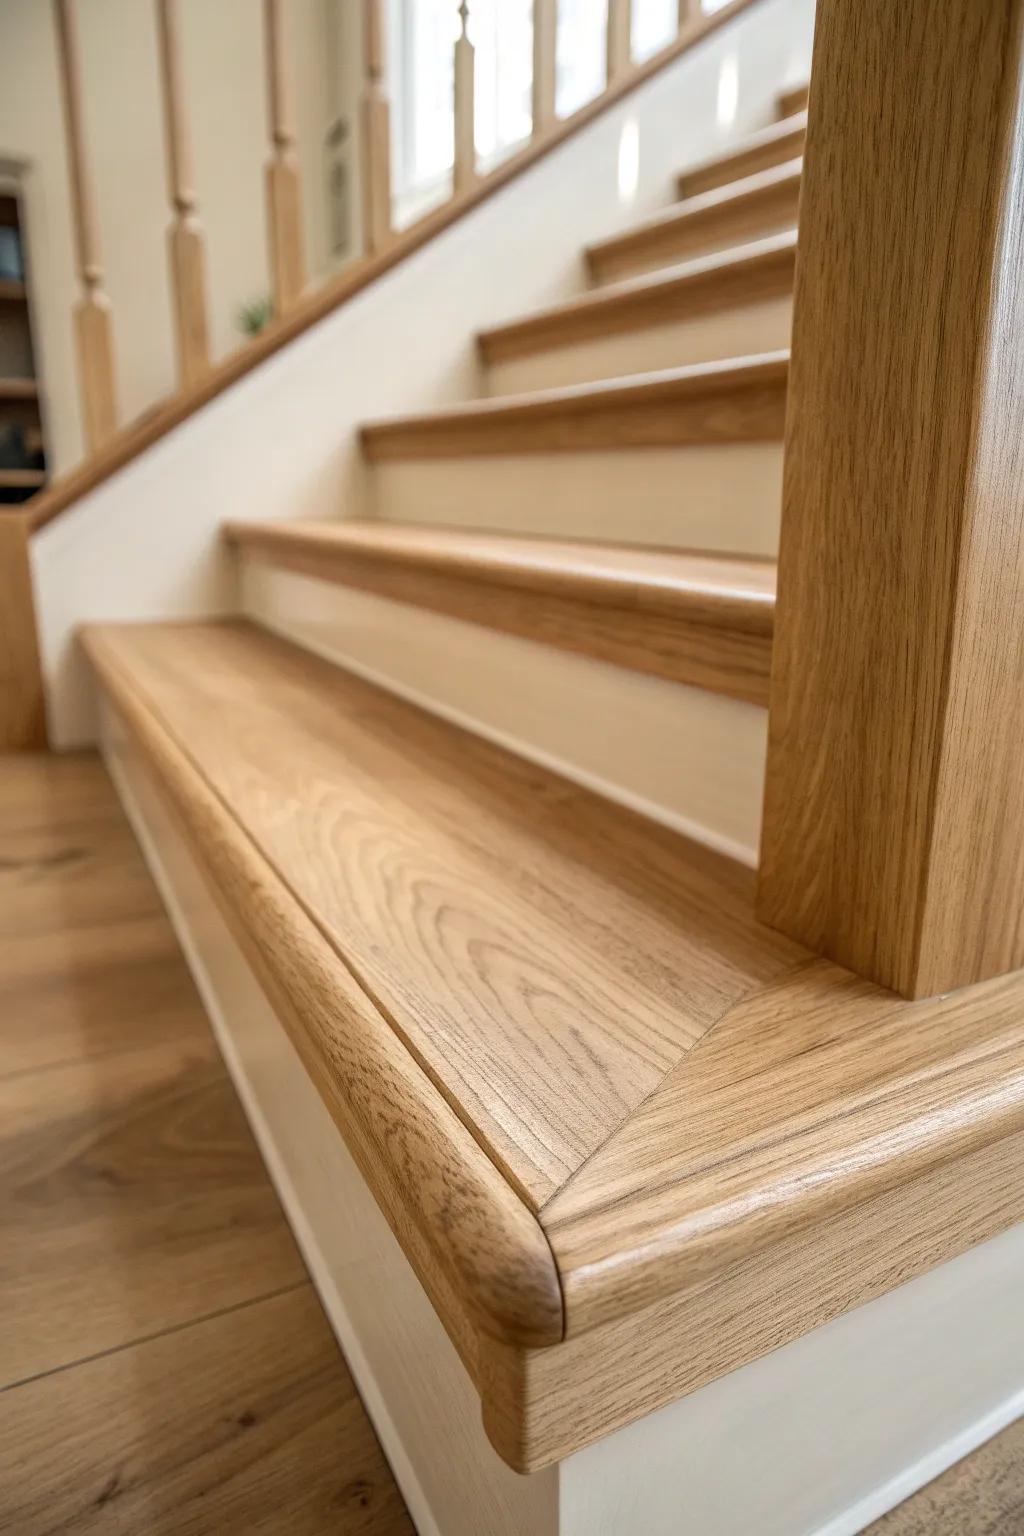
I’ve upgraded plain stairs by adding a sturdier stair nosing (especially when the original edge was chipped). It looks more “built-in” and, from my experience, it also protects the spot that gets kicked the most.
A few suggestions:
- Oak Bullnose Stair Tread: Create a seamless, professional edge on your stairs while protecting high-traffic areas from daily wear and tear.
- Construction Adhesive for Wood: Ensure your new nosing stays securely in place by using a high-strength adhesive designed specially for woodwork.
- Clear Satin Wood Finish: Protect your new oak nosing and match existing treads with a durable, clear finish that resists scuffing.
Seal With a Non-Slip Clear Coat
If you love the natural look, my best safety upgrade is a non-slip finish that keeps the wood visible. I’ve used clear grip additives in the topcoat on slick stairs, and it made a noticeable difference in socks.
A few helpful options:
- Clear Anti-Slip Grip Additive: Mix this fine aggregate into your stain or sealer to add subtle traction without hiding the wood grain.
- Transparent Non-Slip Spray Coating: Apply a quick, clear aerosol layer over existing stairs to enhance grip instantly without a full refinishing project.
- Matte Floor Polyurethane: Seal and protect your treads with a durable topcoat designed to work with grip additives for lasting safety.
Install Subtle Step Lighting Along the Wall
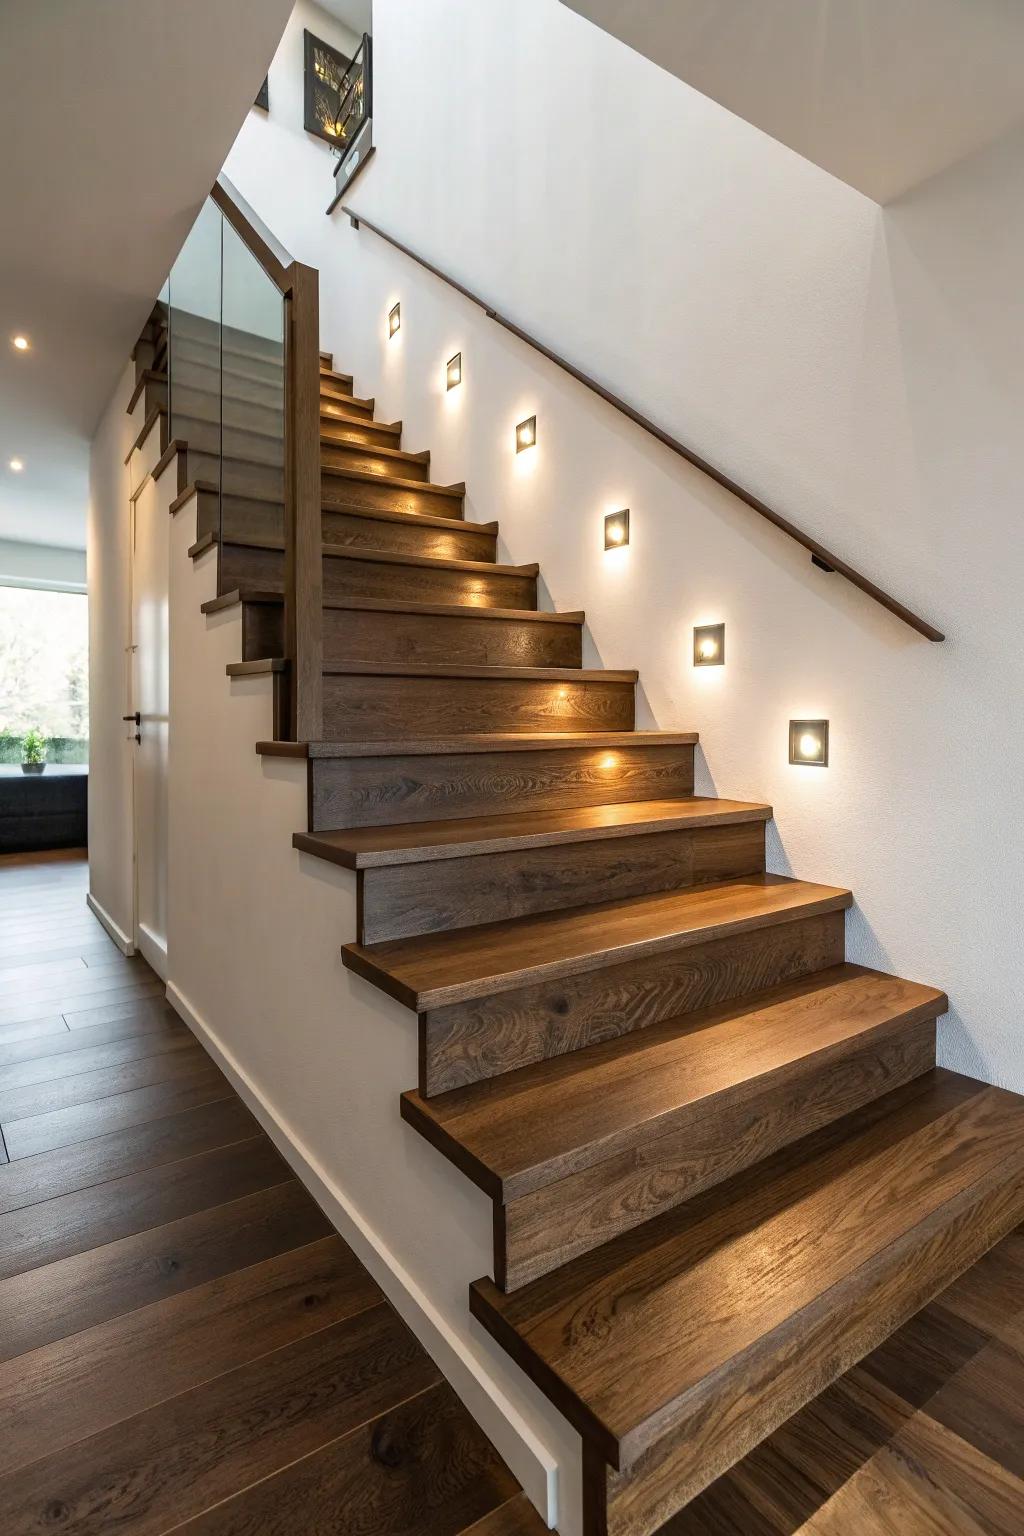
I’ve added low-profile stair lighting on a dark staircase, and it instantly made the space feel higher-end and safer at night. Even a simple, evenly spaced light plan looks intentional—like the stairs were designed that way from the start.
Might be a good match:
- Recessed LED Step Lights: Instantly upgrade your staircase with these sleek, energy-efficient fixtures that provide customized safety and a modern aesthetic.
- Motion Sensor Stair Lights: Add convenience and hands-free safety by installing lights that automatically illuminate the path as you walk.
- Wood Floor Scratch Repair Kit: Keep your beautiful wooden treads looking flawless during installation and daily use with this essential maintenance kit.
Try Cork on the Treads for Quiet Grip
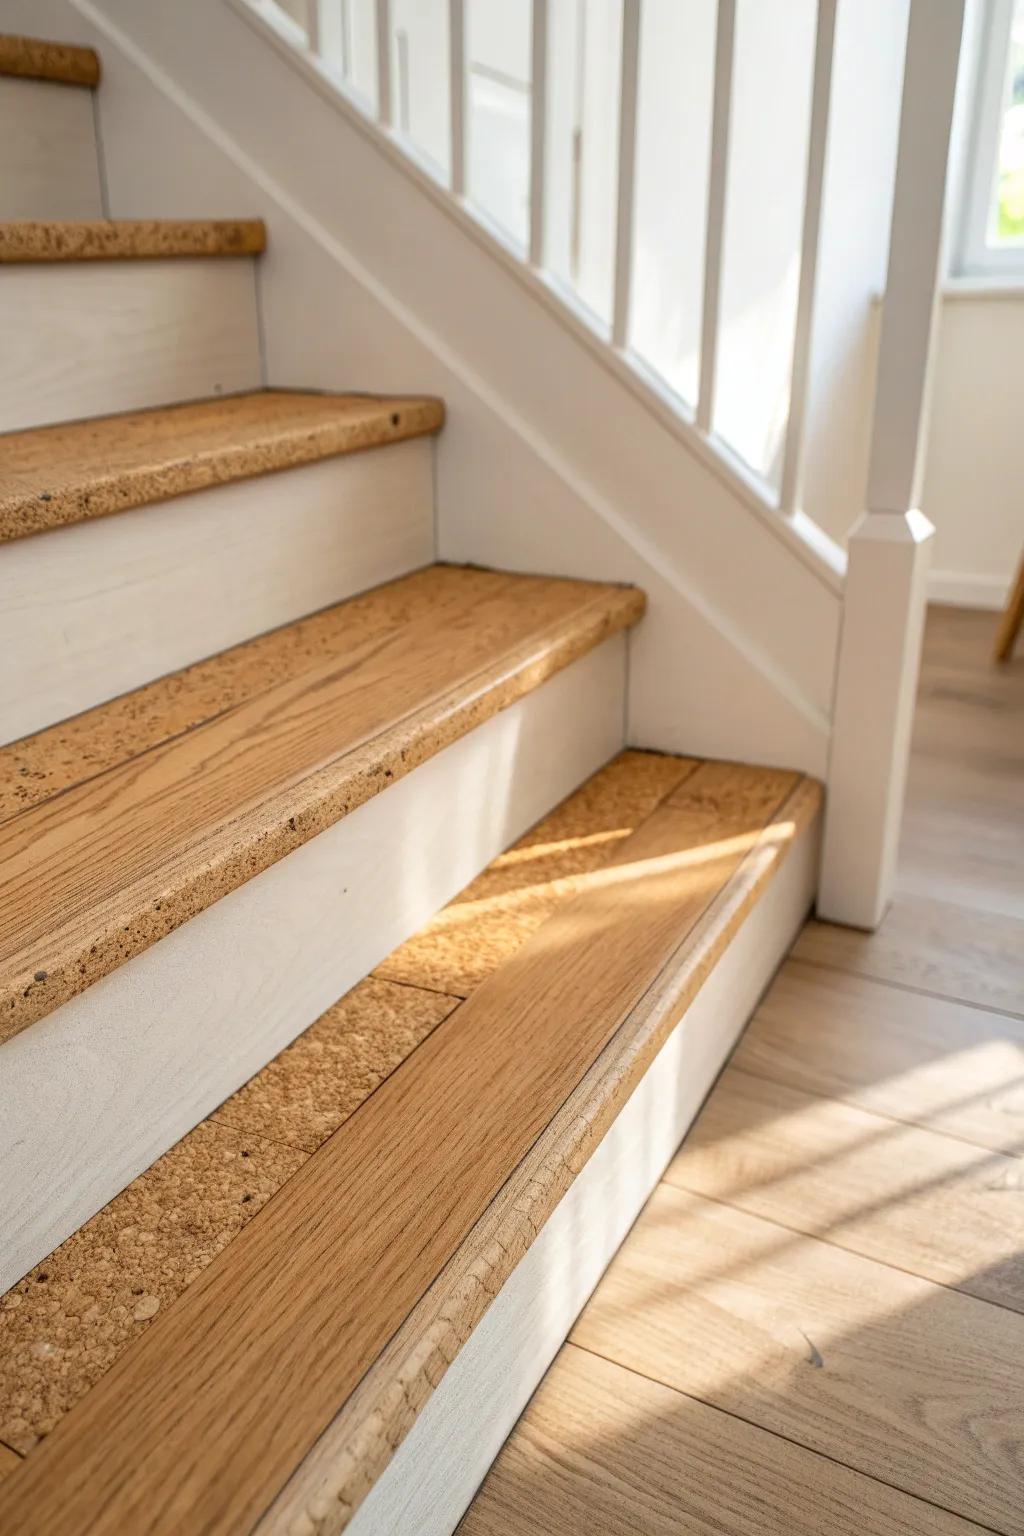
Cork is a surprise favorite of mine for stairs without carpet because it’s warm underfoot and naturally non-slip. I’ve used cork treads in a family home makeover, and the reduction in clacky footstep noise was immediate.
A few things you might like:
- Pre-Cut Cork Stair Treads: Add instant warmth and traction to your steps with these convenient treads; simply peel and stick for an easy upgrade.
- Cork Flooring Tiles or Strips: Customize your look by cutting these versatile cork tiles to fit your specific stair dimensions perfectly.
- General Purpose Stair Nosing: Protect your newly installed cork edges and enhance safety with a durable, easy-to-install stair nose profile.
Add Metal Inlay Strips for a Modern Rustic Mix
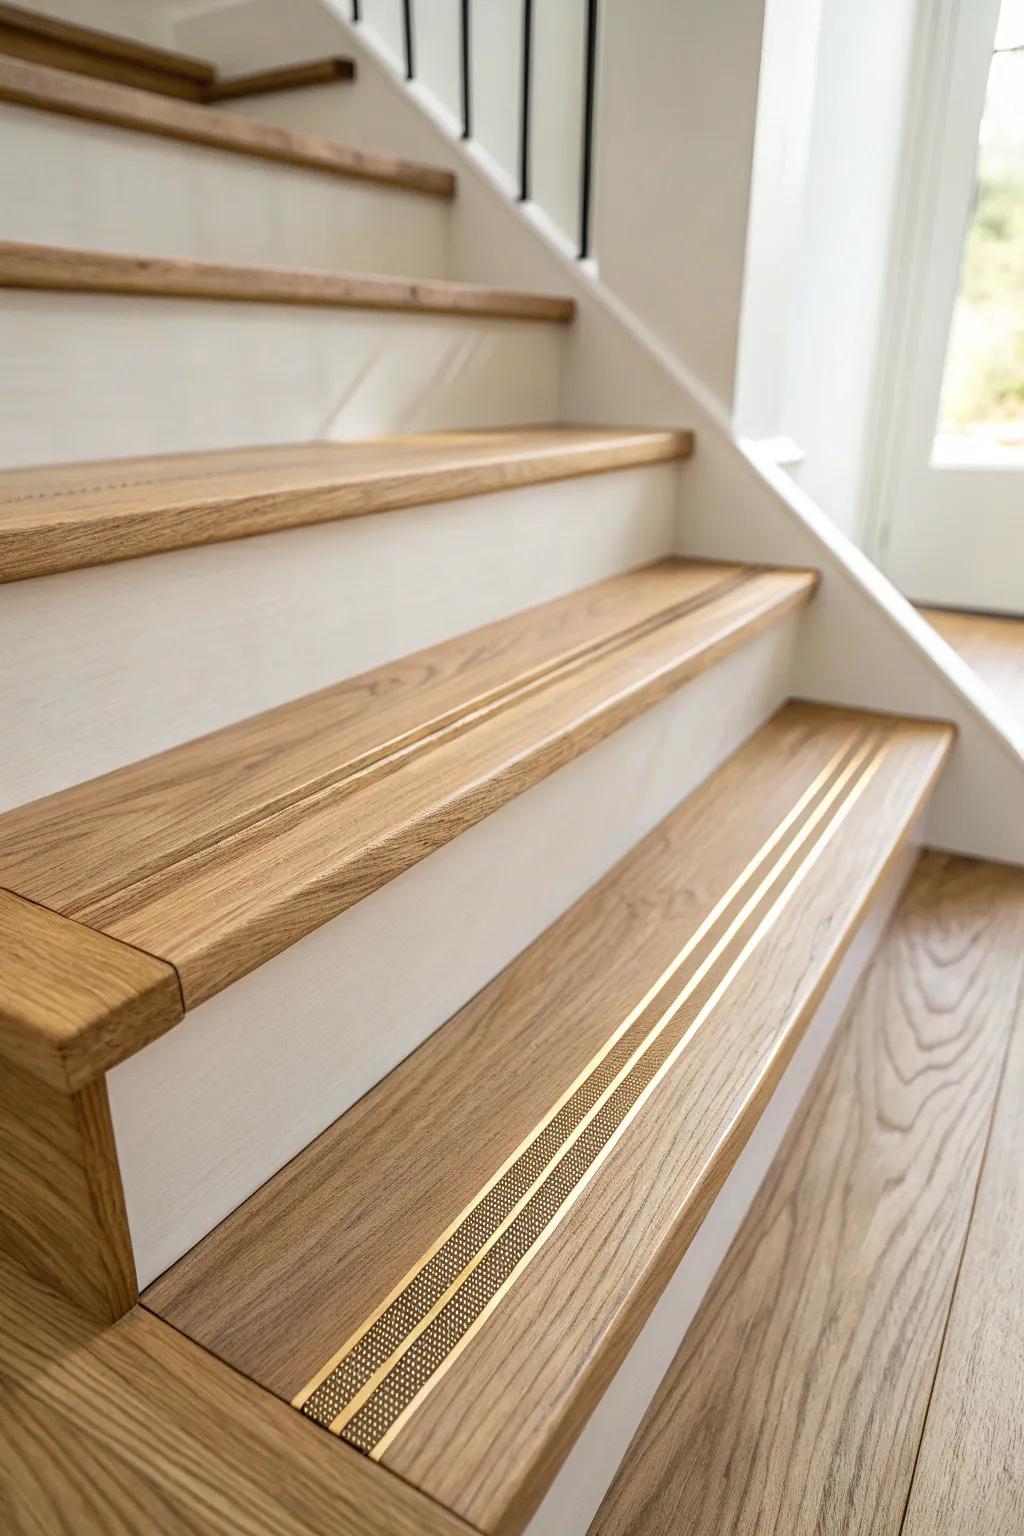
I’ve routed shallow channels into wood treads and set in thin metal inlay strips for a subtle shine that reads custom. It’s a real wow moment in person, and it also helps define the tread edge visually without any carpet.
Maybe worth checking out:
- Brass Flat Bar Strips: Create a high-end custom look by inserting these durable metal strips into routed channels on your stair treads.
- Self-Adhesive Gold Metal Trim: Achieve the inlaid aesthetic easily by applying these peel-and-stick metal strips directly onto clean wooden surfaces.
- Non-Slip Metal Stair Treads: Enhance safety and style simultaneously with these textured metal profiles designed to define step edges clearly.
Charred Wood Treads for Bold, Moody Texture
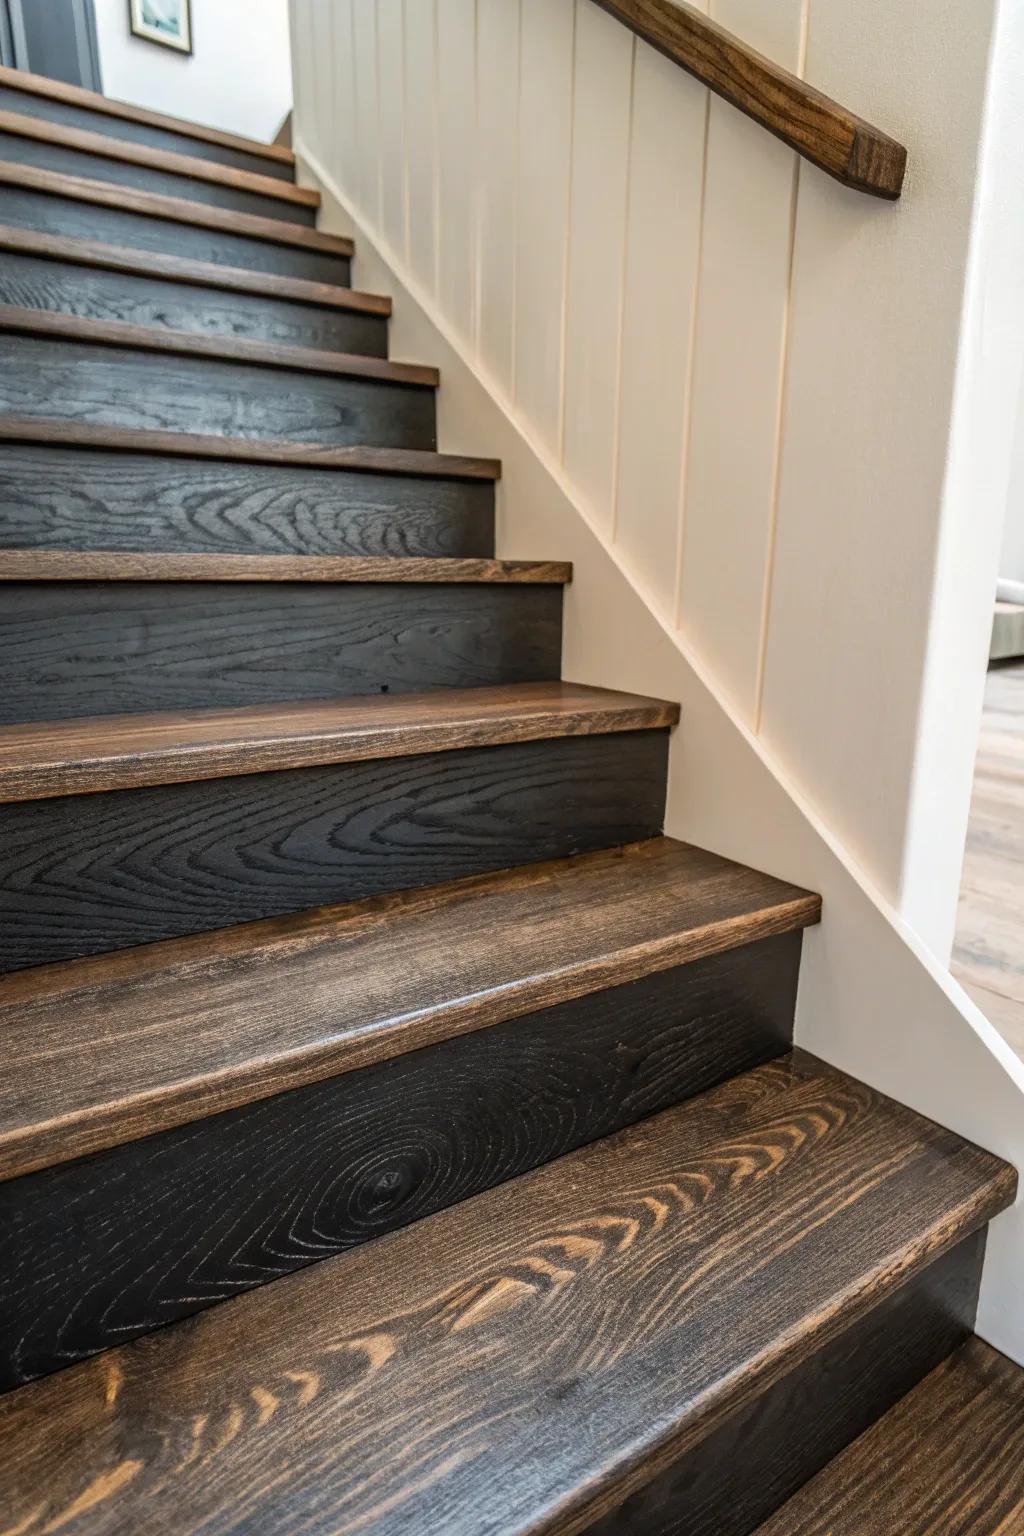
For the bravest makeovers, I’ve done a controlled charred wood finish on stair treads and sealed it smooth, and the depth of color is unreal. It’s dramatic but still grounded, and the texture (once sealed) hides wear better than my lighter stair projects ever did.
You might give these a try:
- Shou Sugi Ban Propane Torch: Achieve the dramatic charred effect safely and evenly by using a high-output torch designed for larger wood surface projects.
- Heavy-Duty Wire Brush: Remove loose ash after burning to reveal the stunning wood grain texture before applying your final sealant finish.
- Clear Polyurethane Floor Sealer: Lock in the charred color and protect the treads from daily foot traffic with a durable, non-yellowing clear finish.


