
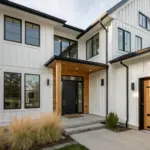
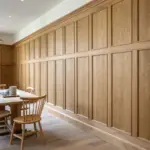
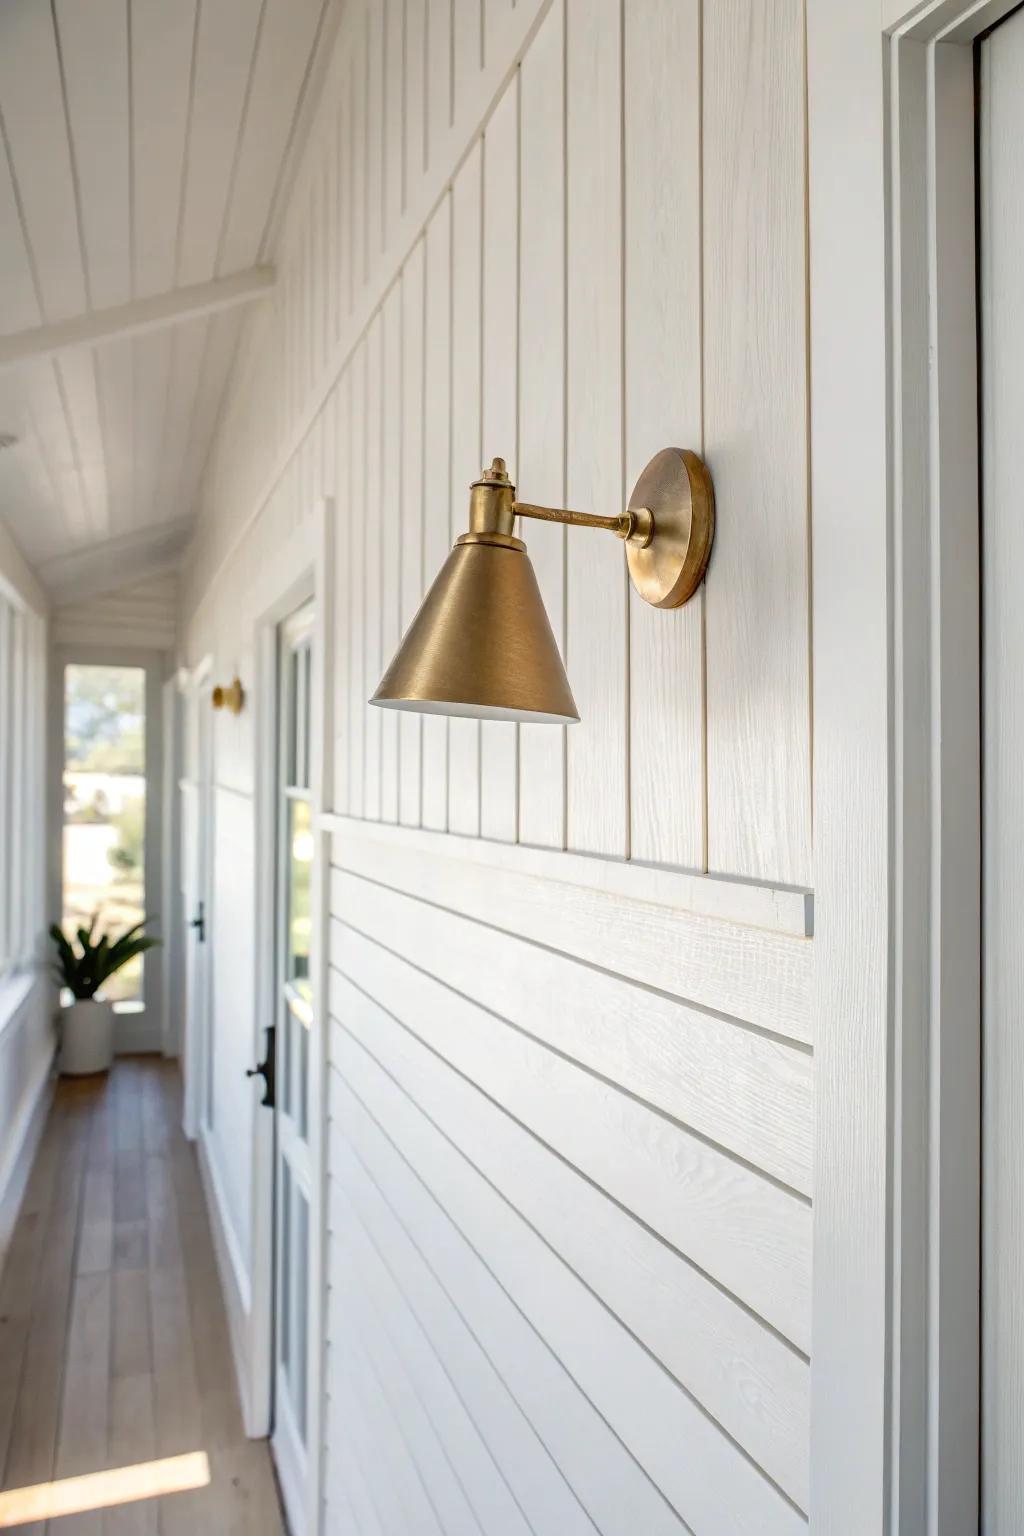
A tongue and groove accent wall is my favorite way to make a room feel finished fast, because the boards lock together and look crisp even when you DIY it. I’ve built a lot of these in my shop, and the right layout and finish can swing the vibe from cozy farmhouse to bold and modern in a weekend.
Two-Tone Top and Bottom Split

Try a two-tone tongue and groove accent wall—darker on the bottom, lighter on top—to ground the room without feeling heavy. I’ve done this in a dining space, and the color break made the whole wall feel architectural.
Items that may come in handy:
- Primed MDF Tongue and Groove Paneling Kit: Create your wainscoting quickly with pre-primed panels that are ready for your choice of dark paint.
- Charcoal or Black Interior Paint: Select a rich, matte charcoal or black finish to ground the lower half of your wall stylishly.
- Chair Rail Molding Trim: Finish the transition between the two tones neatly with a classic trim piece for a polished look.

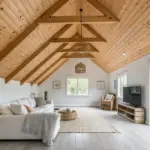
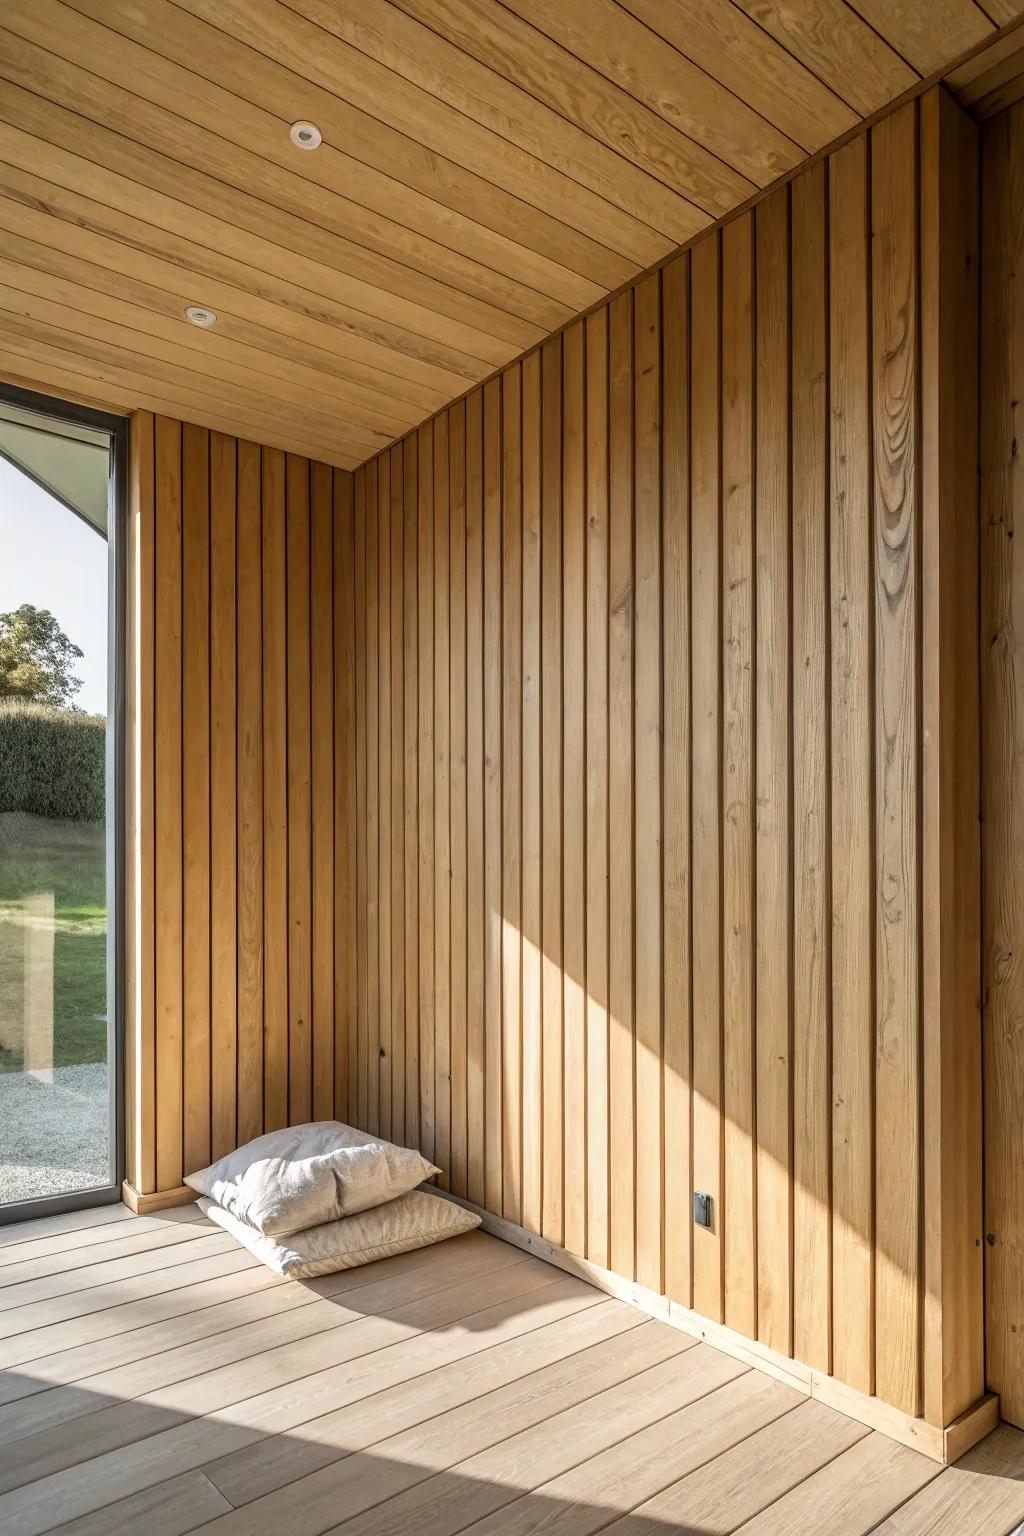
Classic Horizontal Natural Wood
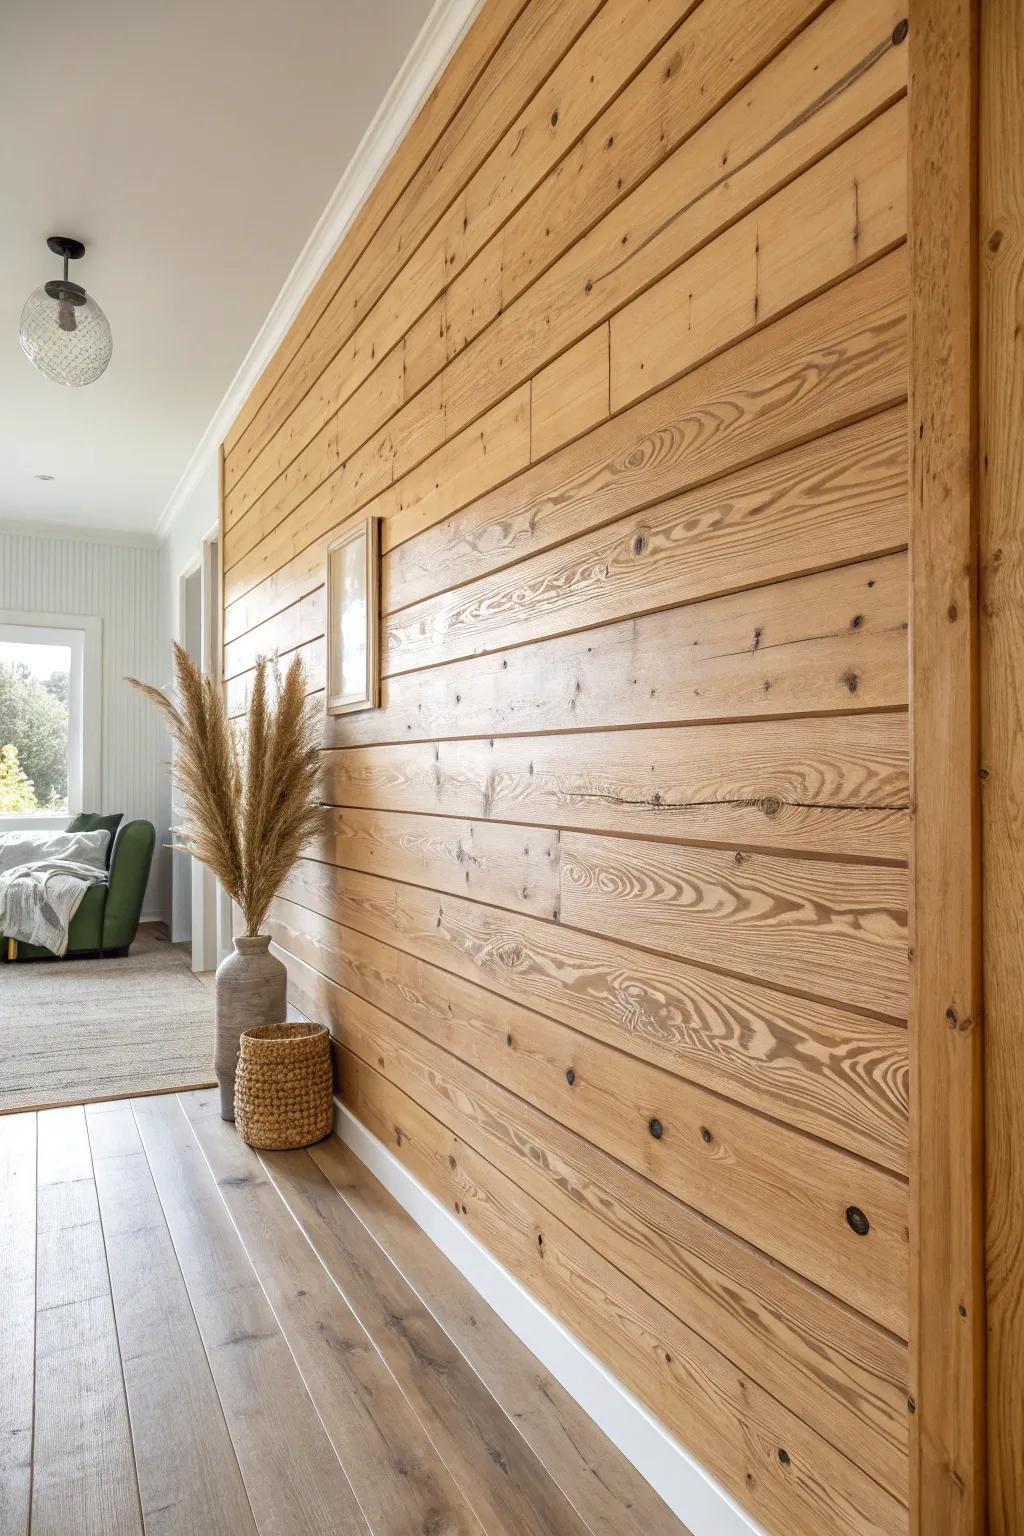
When I want that timeless cabin-cozy feel, I install tongue and groove boards horizontally and finish with a clear coat so the grain does the talking. The first one I ever built like this instantly made my living room feel warmer and more “collected.”
May just do the trick:
- Clear Satin Water-Based Polyurethane: Protect your wood while enhancing the natural grain without yellowing over time using this clear finish.
- Brad Nailer 18 Gauge Kit: Secure your tongue and groove planks efficiently with this essential tool for a professional-looking installation.
- Tall Decorative Floor Vase: Add a touch of organic texture to your finished wall with a rustic vessel for dried botanicals.
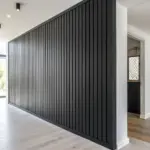
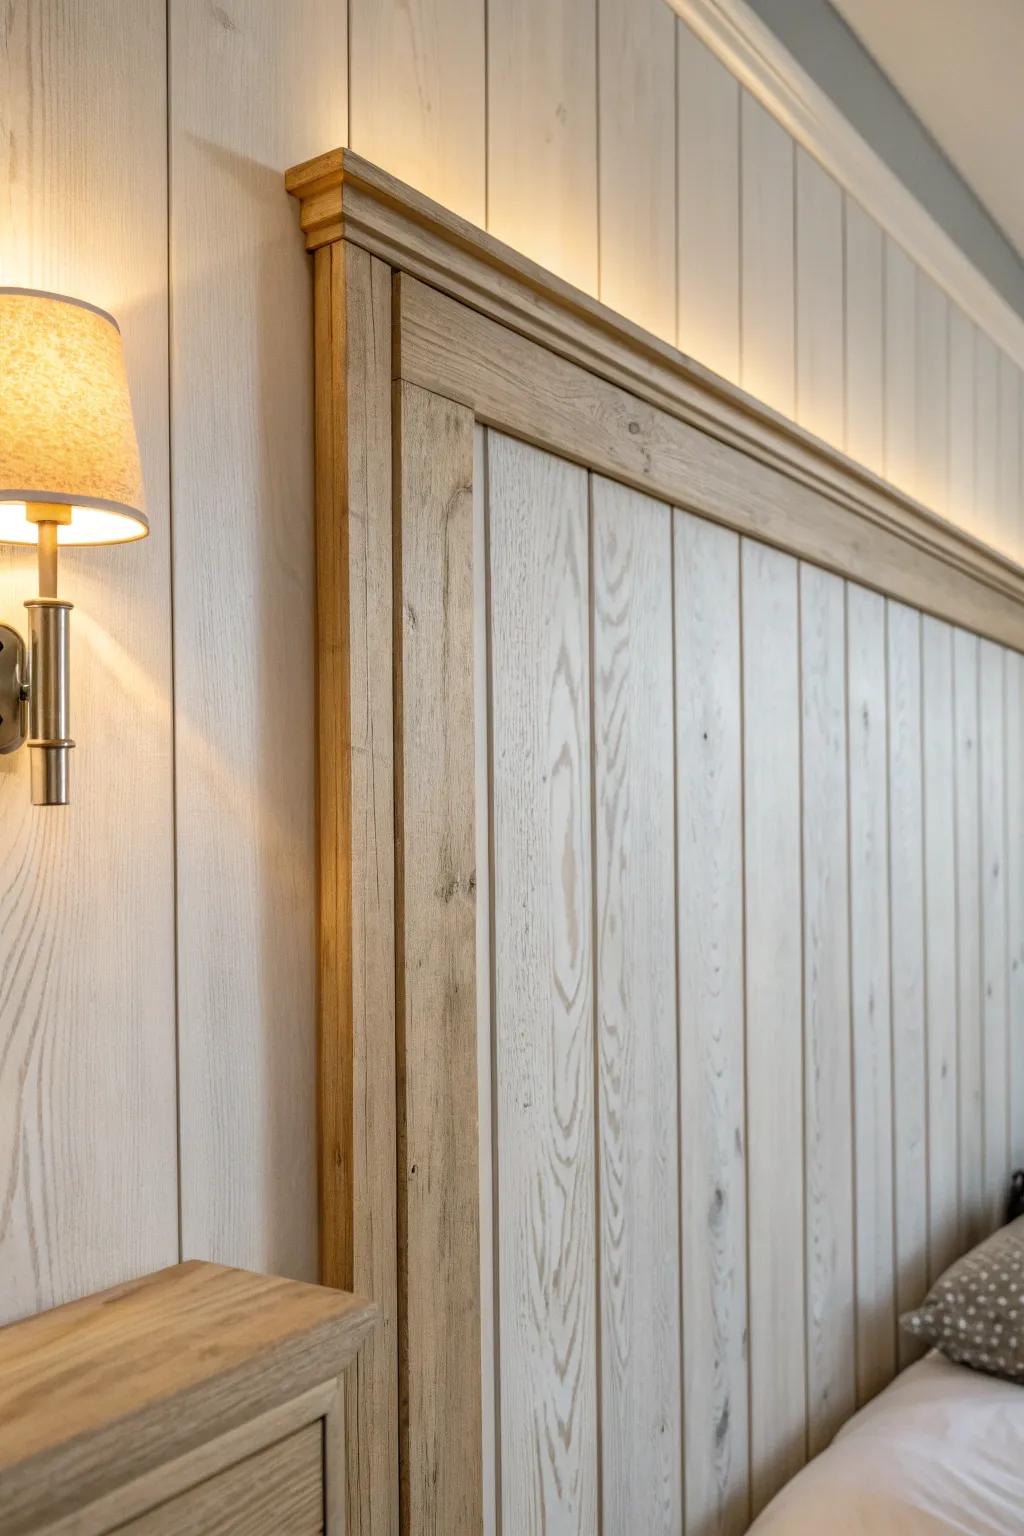
Vertical Painted Faux Headboard
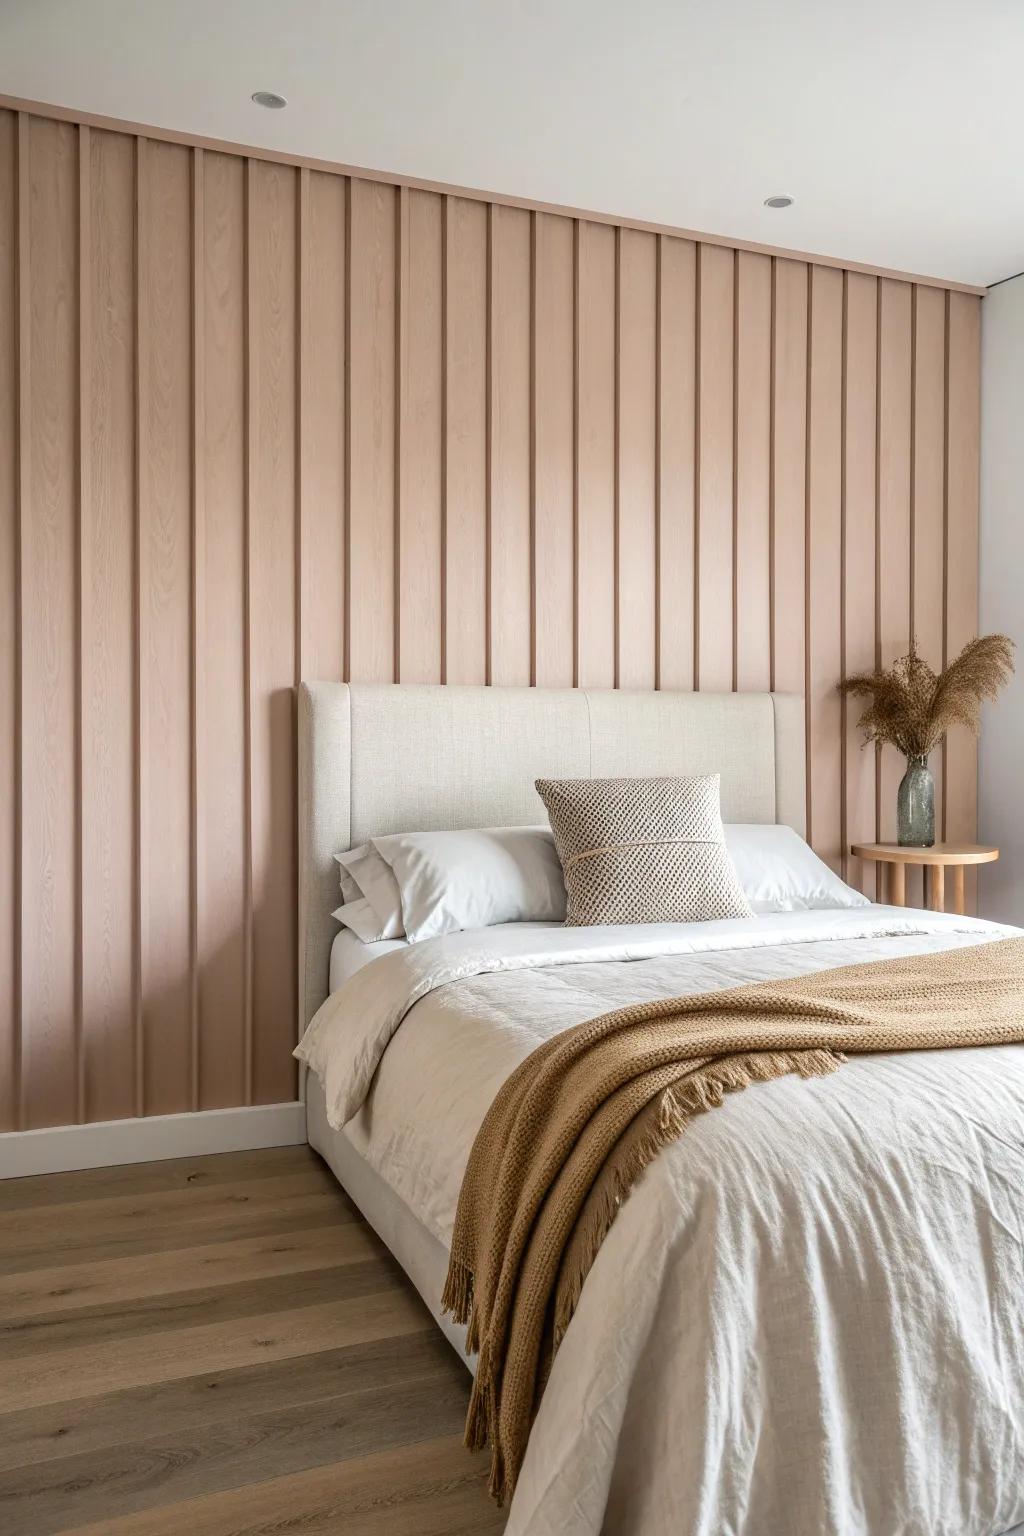
A vertical tongue and groove accent wall behind the bed reads like a built-in headboard, especially in a soft painted finish. I did this in a guest room and it made the whole space feel taller and way more intentional.
Products that could assist:
- DIY Wood Wall Paneling Kit: Create your vertical accent wall easily with pre-cut slat panels that add instant texture and height to your bedroom.
- Matte Finish Interior Wall Paint: Achieve that soft, custom look by selecting a calming, high-quality matte paint to finish your new headboard feature.
- Construction Adhesive & Caulk Gun: Ensure your panels stay perfectly in place for years with professional-grade construction adhesive designed for wood installation.
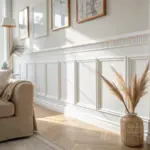


Half-Wall With a Cap Ledge

A tongue and groove accent wall doesn’t have to go floor-to-ceiling—half height with a chunky cap ledge is perfect for styling frames and plants. I built one in a hallway and loved how it protected the wall from scuffs while still looking pretty.
Check if these fit your needs:
- Beadboard Wainscoting Panels: Transform your plain walls instantly by installing these classic panels for durable, stylish lower-wall protection and charm.
- Chair Rail Molding: Finish off your half-wall project cleanly with this molding to create the perfect divide and photo ledge.
- Terracotta Interior Paint: Create a warm contrast above your ledge with this rich, earthy hue inspired by the featured hallway.
Entryway Mudroom Drop Zone
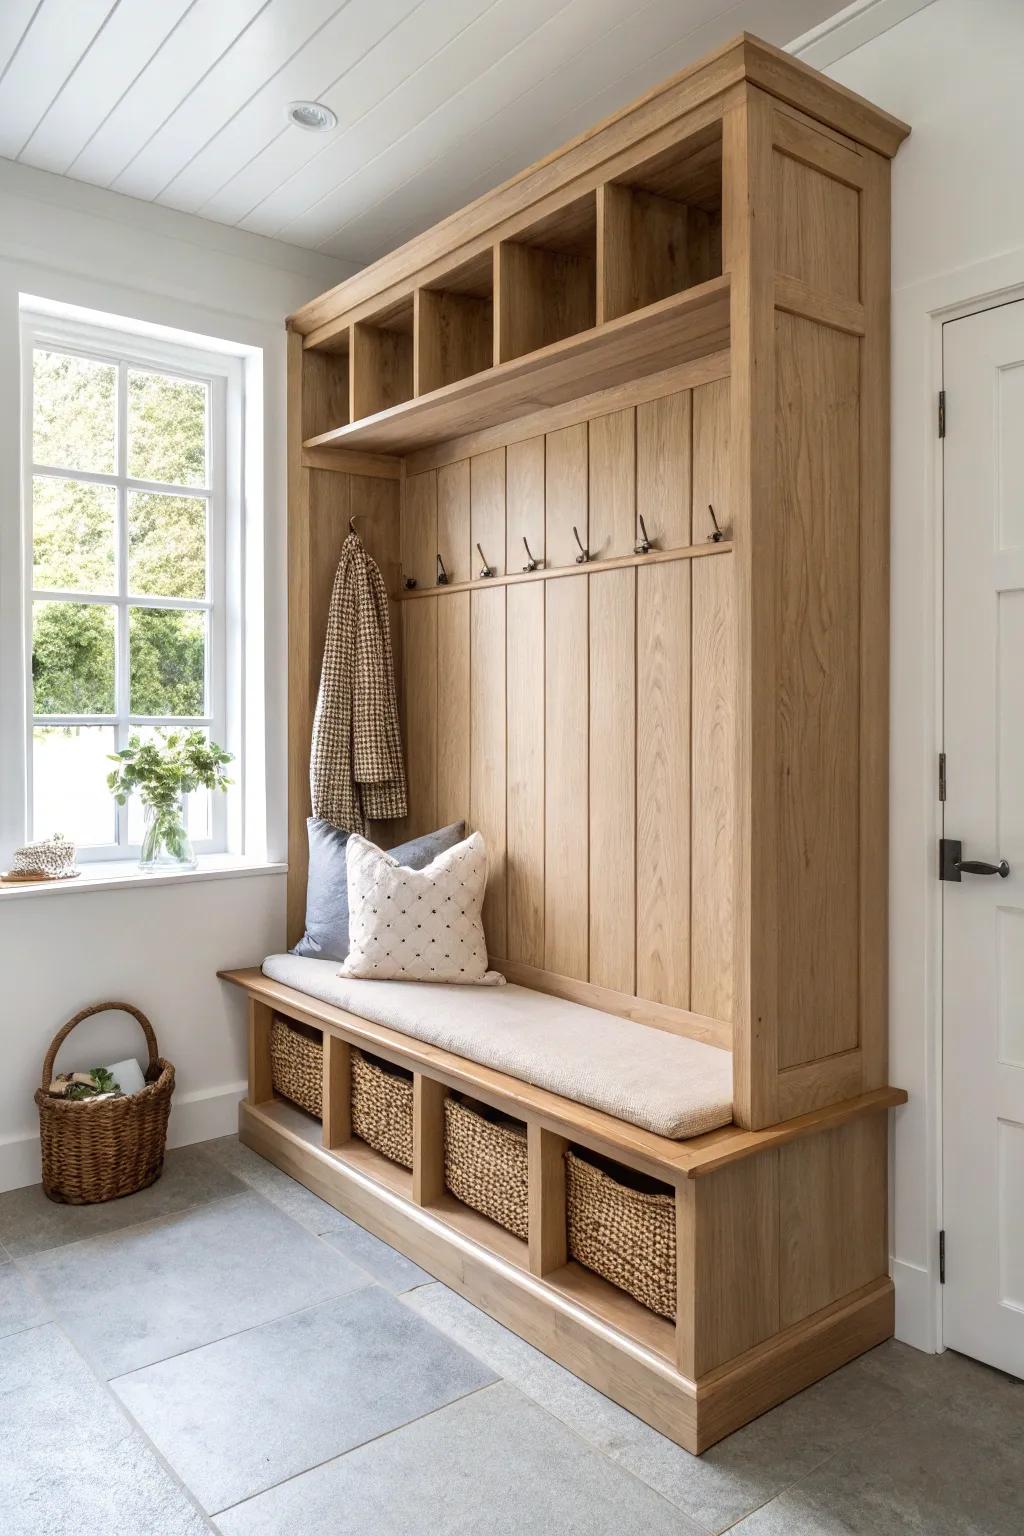
Turn your entry into a workhorse by running a tongue and groove accent wall behind hooks, a bench, or cubbies. I’ve done this for clients and for myself, and that extra wood texture makes everyday “mess” feel way more charming.
You might give these a try:
- Wooden Tongue and Groove Plank Kits: Instantly add warmth and texture to your walls with easy-to-install wood planking for a custom mudroom look.
- Modern Minimalist Coat Hooks: Install sturdy, stylish hooks directly onto your new accent wall to keep jackets and bags beautifully organized.
- Woven Storage Baskets: Utilize natural woven baskets beneath your bench to hide clutter while complementing the rustic wood tones perfectly.
Fireplace Wall With Clean Lines
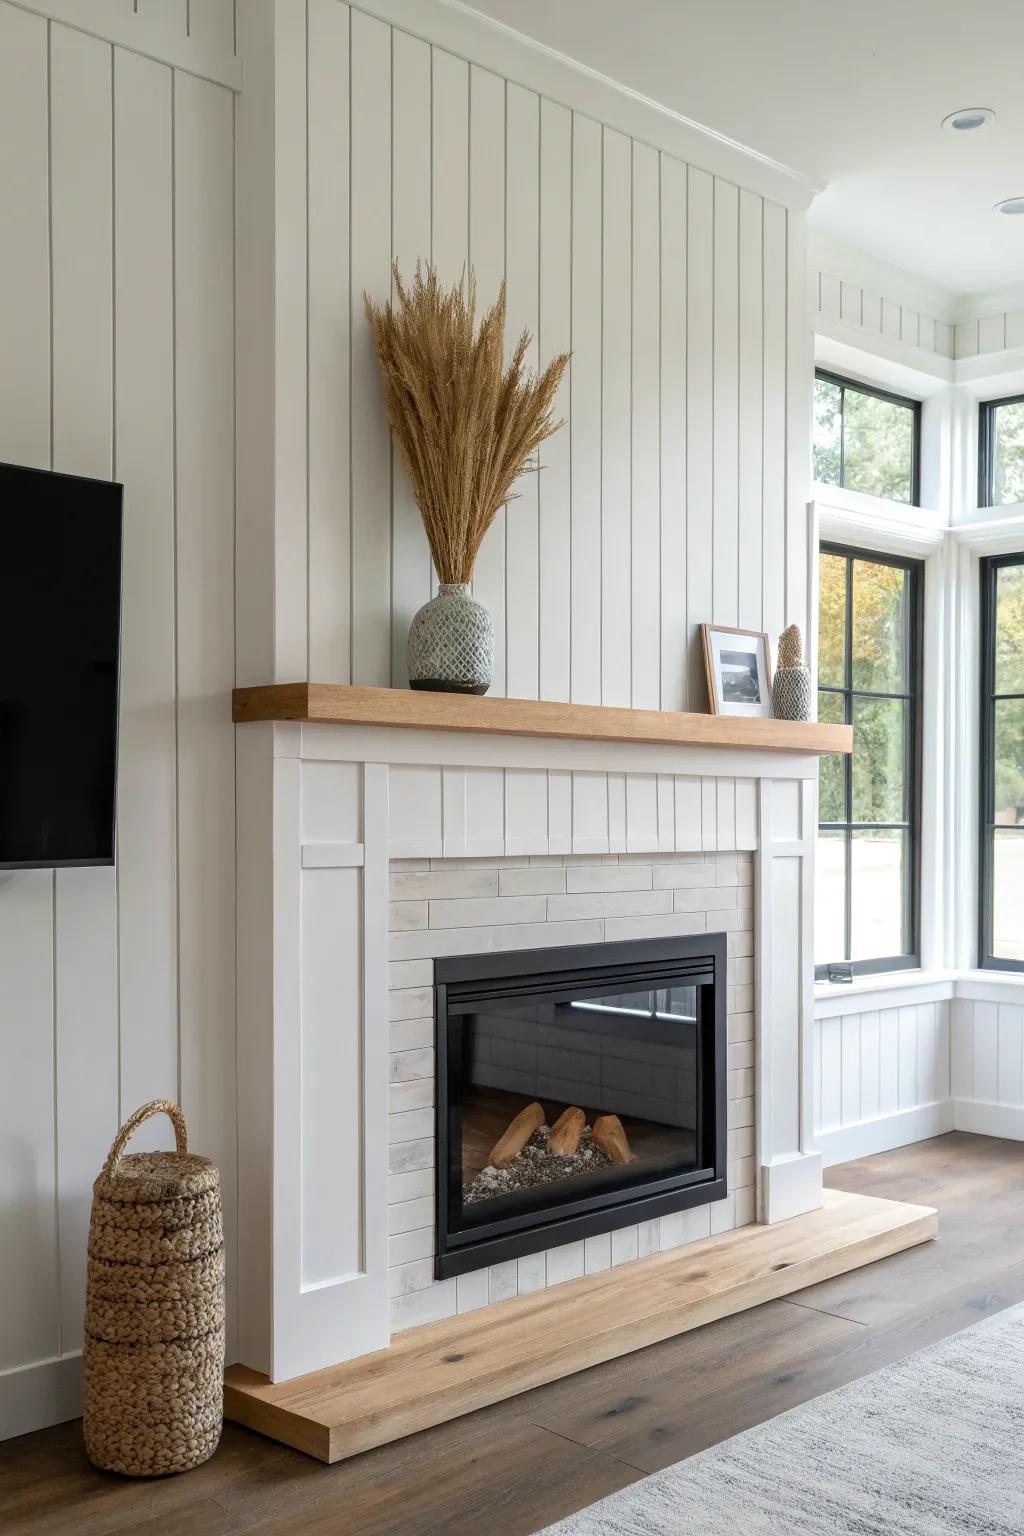
A tongue and groove accent wall around a fireplace adds texture without competing with the mantle decor. I like to nail through the tongue so fasteners disappear, because that detail always makes it feel custom.
Maybe worth checking out:
- Brad Nailer Kit: Secure your planks precisely through the tongue without splitting wood, ensuring a seamless and professional-looking finish.
- Primed tongue and groove boards: Transform your fireplace surround instantly using these ready-to-paint planks designed for easy vertical or horizontal installation.
- Floating Wood Mantel: Add warmth and contrast to your white accent wall with a sturdy, rustic beam shelf.

Stairway Height Booster
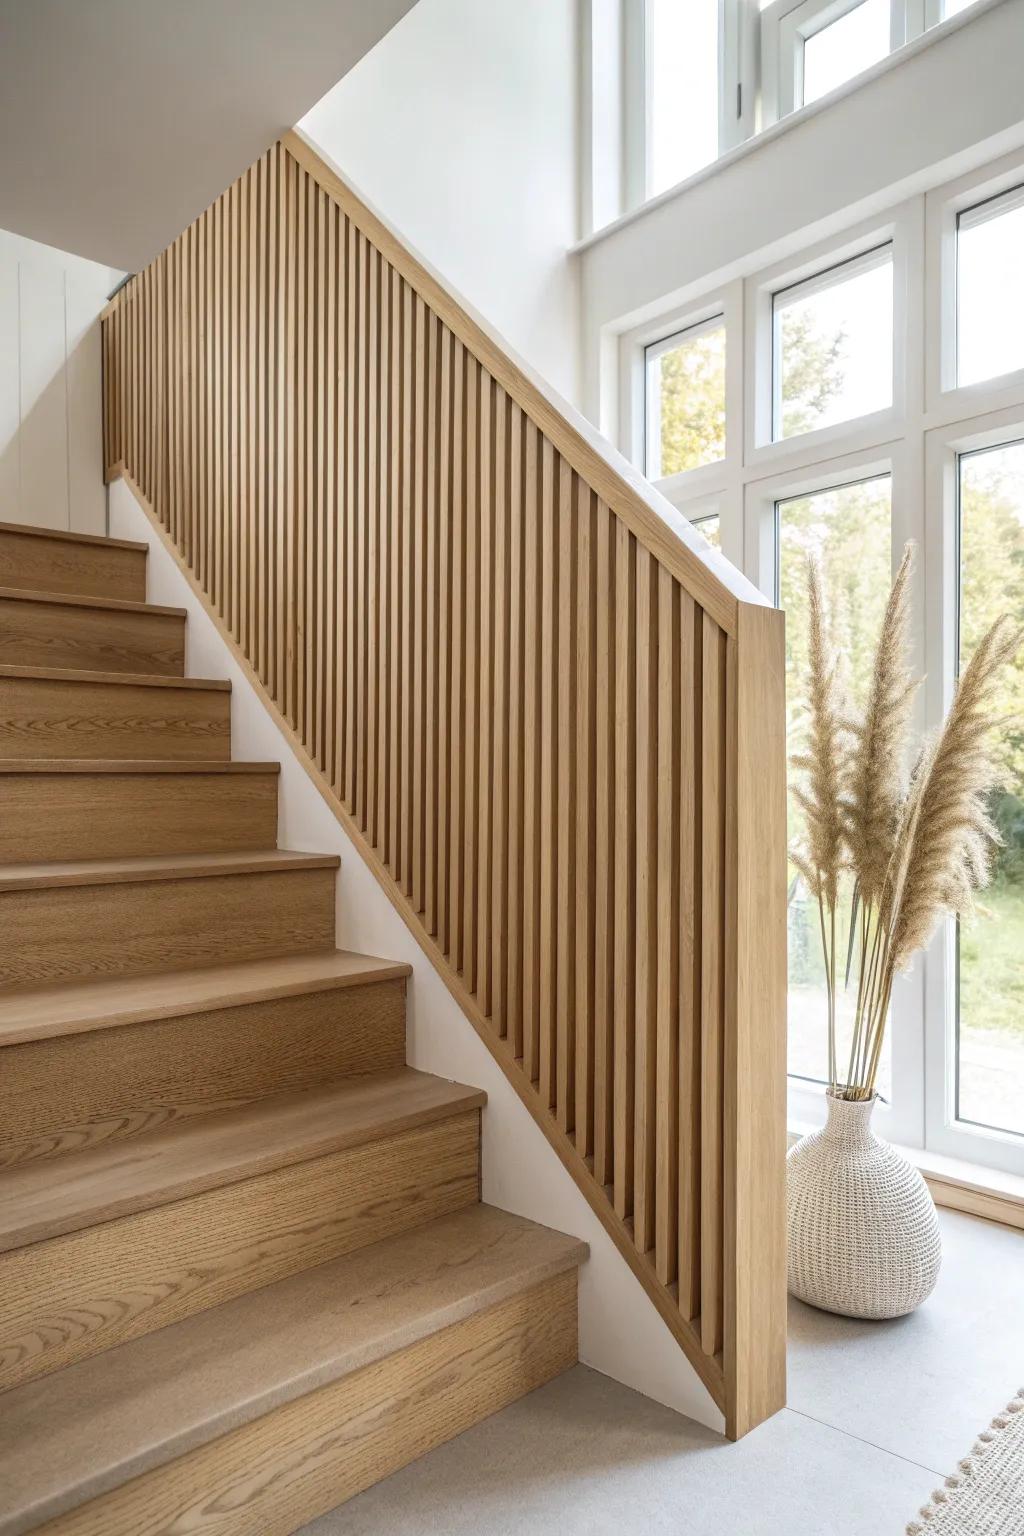
On stair landings, I lean into vertical tongue and groove to pull the eye up and make the area feel bigger. I’ve installed it in tight transition spaces, and it’s the quickest way I know to make “awkward walls” feel designed.
A few relevant products:
- Wood Slat Wall Paneling Kit: Instantly create sleek vertical lines to visually heighten your stairway with these easy-to-install decorative wood panels.
- Large Ceramic Floor Vase: Style that awkward corner landing with a textured, neutral vase that perfectly complements warm wood tones.
- Dried Pampas Grass Decor: Add organic softness and texture to your stairway landing without needing water or maintenance.
Seamless Wrap Around a Corner
Wrapping a tongue and groove accent wall around an outside corner looks super polished, like the house came that way. I’ve done corner wraps by planning board layout first, and it always feels like an instant upgrade.
Try these:
- Wood Corner Trim Moulding: Use corner moulding to conceal transitions and protect edges, creating a clean finish for your wrapped wall installation.
- Pneumatic Brad Nailer Kit: Secure your tongue and groove planks precisely without damaging the wood using this essential tool for professional-looking results.
- High-Quality Wood Stain or Sealant: Enhance the natural grain and protect your timber cladding from diverse environmental factors with a penetrating wood finish.
Whitewashed Modern Farmhouse
A light whitewashed tongue and groove finish keeps things airy while still giving you that woodgrain texture. I use this trick when a room needs brightness, and it plays so nicely with warm metals and natural linens.
Some ideas to consider:
- Whitewash Wood Satin Stain: Brighten your space while revealing natural wood grain by applying this light, airy finish to your existing panels.
- Brass Wall Sconce Lighting: Add warmth and elegance to your walls with gold-toned fixtures that perfectly complement crisp white paneling.
- Tongue and Groove Wall Planks: Create instant farmhouse charm and texture by installing these ready-to-paint panels vertically or horizontally in your home.
Mixed Tones for Reclaimed Character

Mix a few stain tones across your tongue and groove wall to get that reclaimed, collected look without needing perfectly matched boards. I’ve blended “leftover” stains from my shop shelves, and those natural variations always get compliments.
Give these a look:
- Peel and Stick Reclaimed Wood Planks: Achieve that rustic, multi-colored look instantly with easy-to-install planks featuring varied authentic wood tones.
- Assorted Wood Stain Sampler Pack: Experiment with different finishes on your boards to create depth and custom variety for your accent wall.
- Brad Nailer Kit: Secure your tongue and groove boards efficiently and neatly for a professional-looking, long-lasting installation.
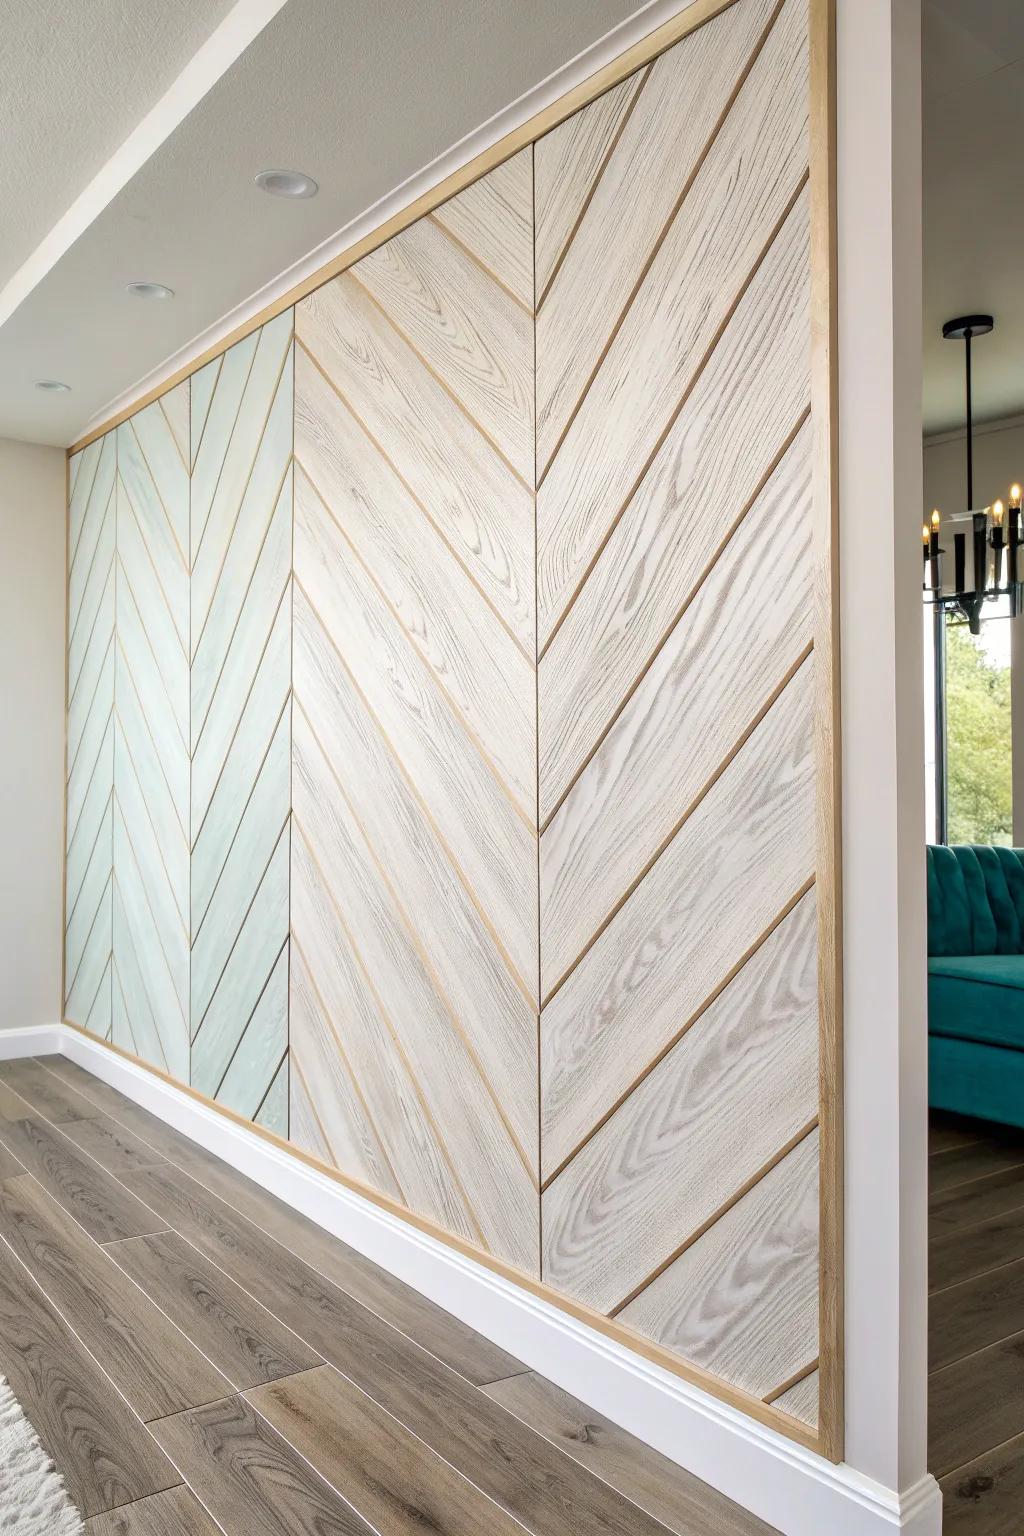
Diagonal Run for Instant Motion
A diagonal tongue and groove accent wall adds movement and makes plain rooms feel dynamic. I tried this once in a small office, and it turned a basic rectangle wall into the main event.
Might be a good match:
- Wooden Wall Paneling Planks: Transform your space easily using these versatile wood planks to create striking diagonal or chevron patterns.
- Miter Saw for Angled Cuts: Achieve precise angles for your chevron design with a reliable saw essential for any diagonal layout.
- Construction Adhesive and Nail Gun Kit: Secure your diagonal boards firmly to the wall with the right adhesive and finish nailer setup.
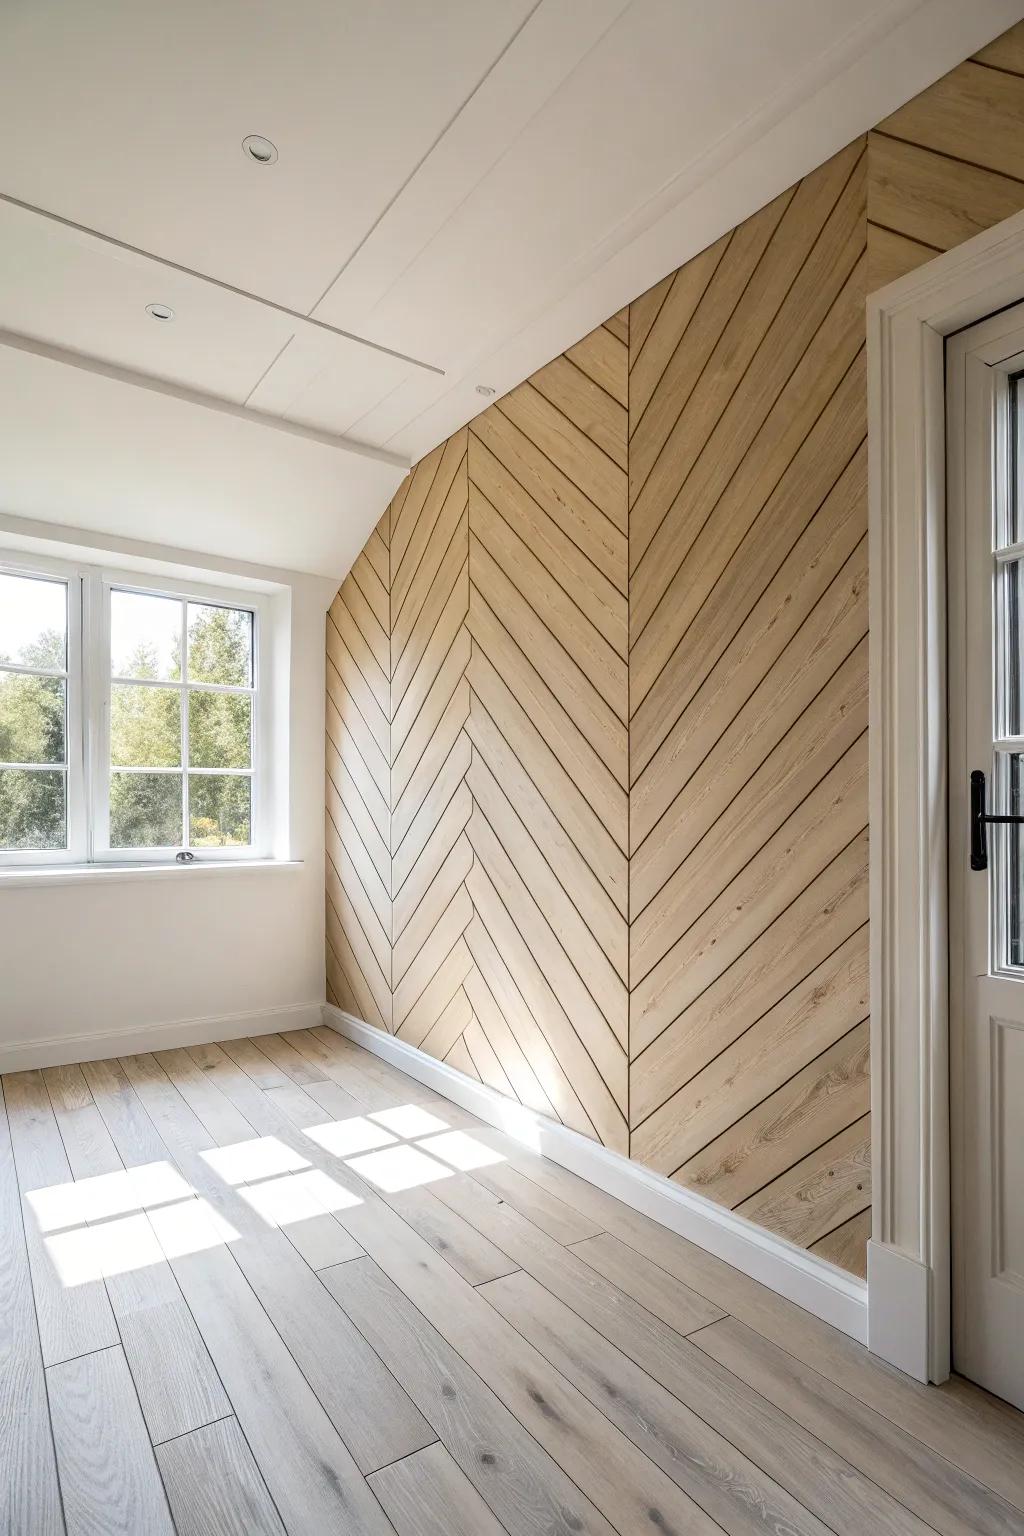
Chevron Pattern With Mitered Boards
For a big wow that’s still classic, cut and flip your tongue and groove boards into a chevron layout. I won’t lie—it takes patience at the saw, but the first time I did it, the finished wall looked like high-end millwork.
Possibly handy products:
- Sliding Compound Miter Saw: Achieve precise 45-degree angle cuts for your chevron pattern and ensure seamless joints by upgrading your workshop saw.
- Finish Nailer Kit: Secure your carefully cut boards invisibly and quickly, speeding up the installation process without damaging the wood surface.
- Clear Matte Wood Varnish: Protect your new accent wall while highlighting the natural grain and maintaining that crisp, modern organic aesthetic.
Picture-Frame Trim Over Tongue and Groove
Add thin “frames” of trim on top of a tongue and groove accent wall to fake custom paneling without losing the plank texture. I’ve used this combo in a bedroom, and it gave the wall that fancy built-in vibe with simple materials.
A few choices to try:
- Unfinished Wood Molding Trim: Create elegant frames by attaching this simple, paintable molding directly over your existing wall planks.
- LED Strip Lights (Warm White): Install these dimmable lights behind the headboard trim to achieve that cozy, backlit hotel-style ambiance.
- Brad Nailer Kit: Secure your new trim pieces neatly and securely without splitting the delicate wood or leaving large holes.
Floating Shelves That Hit Studs Cleanly
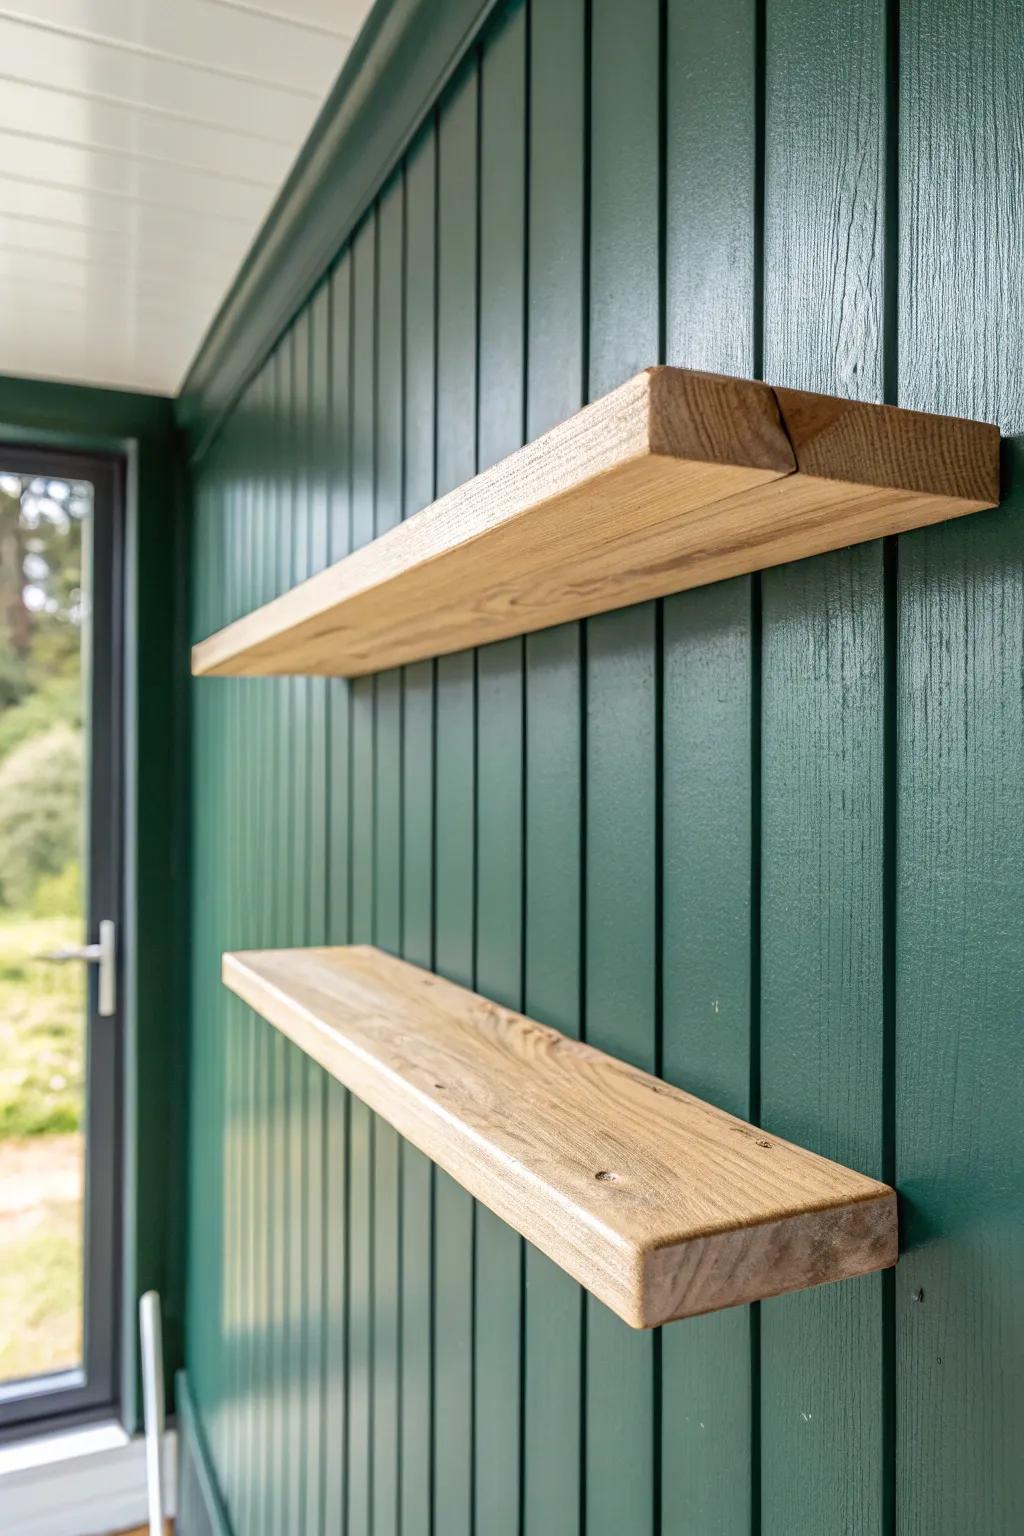
A tongue and groove accent wall is a perfect backdrop for chunky floating shelves, especially when you plan shelf placement to land on studs. I’ve learned to mark studs before I start installing boards, and it saves so much frustration later.
Some handy options:
- Chunky Solid Wood Floating Shelves: Add warmth and functional storage to your accent wall with sturdy, natural wood shelves ready for heavy display items.
- Heavy-Duty Blind Shelf Brackets: Achieve that seamless floating look by using invisible steel supports designed to drill directly into your wall studs.
- Reliable Stud Finder Tool: Ensure your installation is secure by accurately locating studs behind paneling before drilling for your heavy shelf brackets.
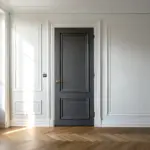
Hidden Door Disguised as the Wall
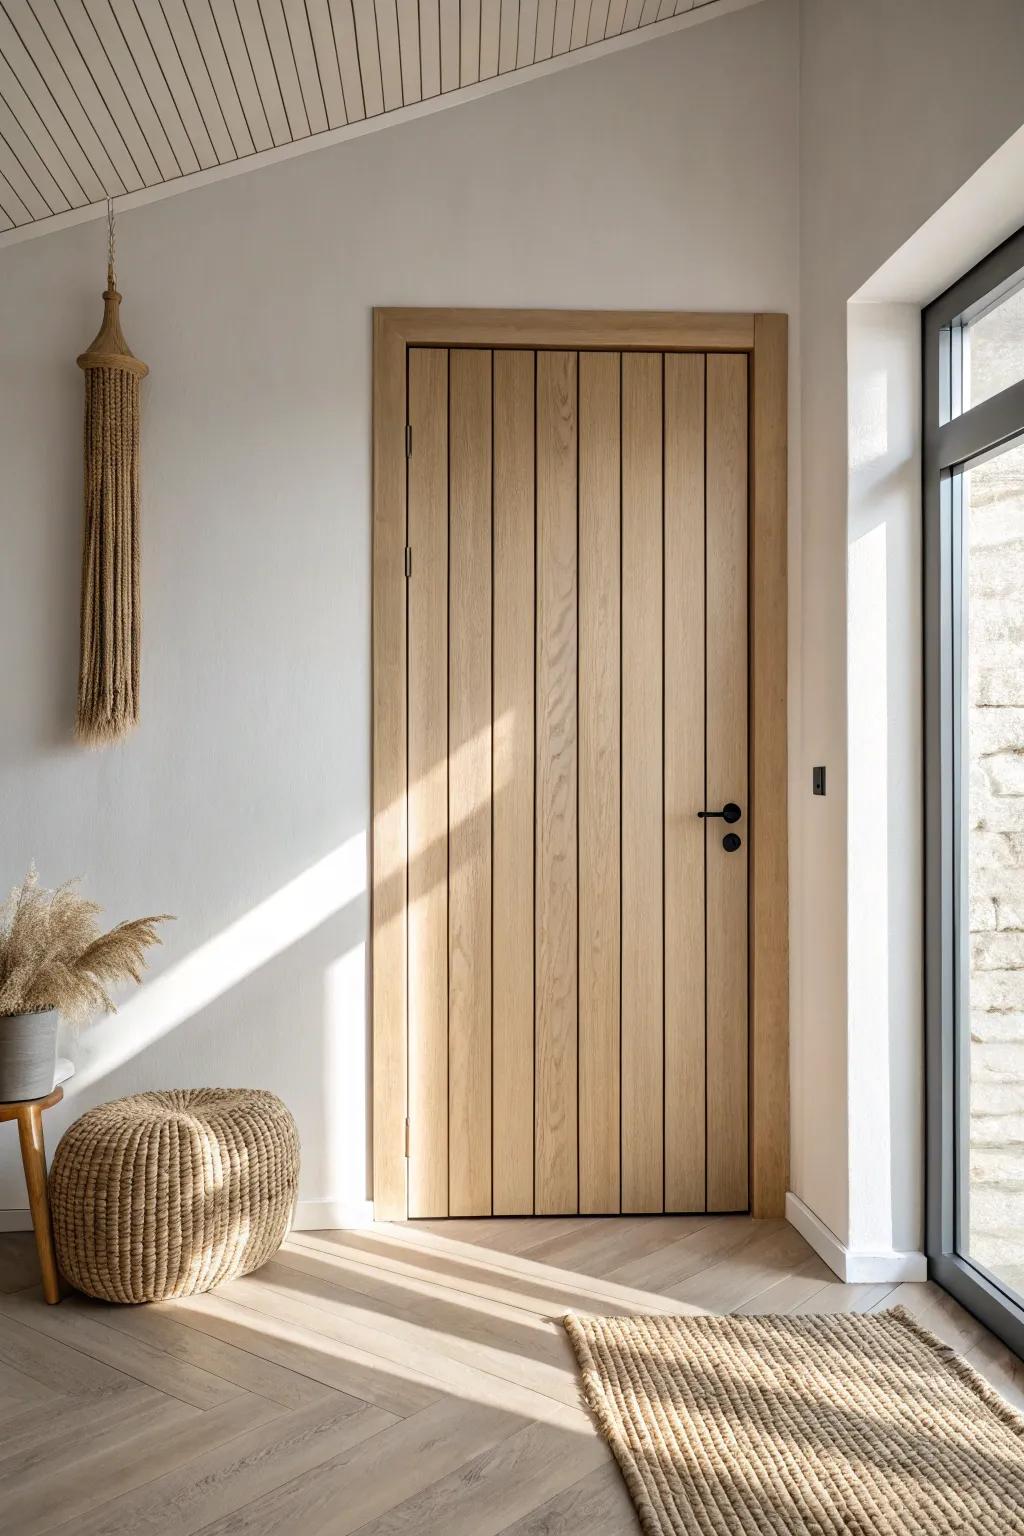
This one is sneaky in the best way: run tongue and groove right across a flush door so the whole accent wall looks uninterrupted. I helped a friend hide a storage closet like this, and guests literally couldn’t find the handle.
Check these products out:
- Concealed Door Hinges: Achieve a flush, seamless look effortlessly by installing invisible hidden hinges that disappear completely when closed.
- Solid Oak Wood Paneling: Transform your door into an accent piece with high-quality, durable wood paneling ready for installation.
- Matte Black Minimalist Door Lever: Maintain the sleek aesthetic with a low-profile handle that complements modern wood finishes perfectly.
Backlit Glow Between Boards
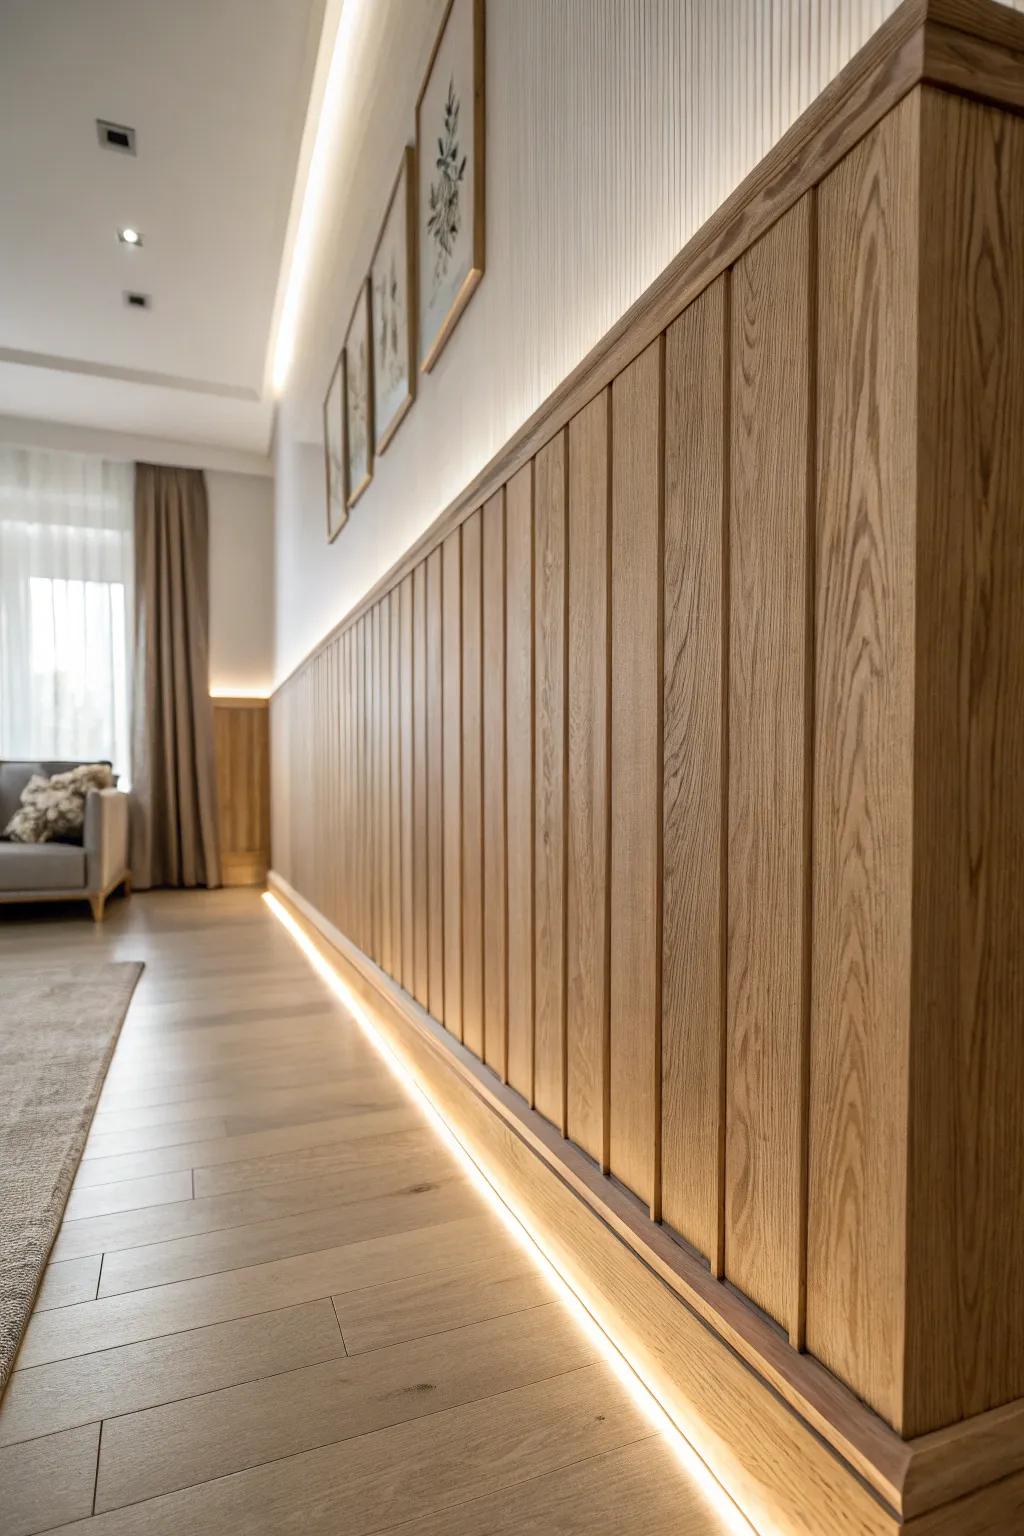
Add a soft backlight by planning a shallow channel behind the tongue and groove accent wall so a warm glow peeks out at the edges. I tested it in my workshop first, and the lighting made the wood texture feel almost sculptural.
Useful items to consider:
- Warm White COB LED Strip Lights: Install these seamless strip lights base molding or channels to create that continuous, warm architectural glow.
- Aluminum LED Channel Diffusers: Use these channels to house your light strips, protect them, and soften the light for a professional finish.
- Paintable Wood Baseboard Molding: Choose a clean, flat profile baseboard to conceal the lighting channel while anchoring your accent wall’s design.
Resin-Filled V-Grooves for Shine
If you want a truly unexpected finish, fill the V-groove lines on a tongue and groove accent wall with a tinted resin and sand it flush. I tried a small test panel in my shop, and the glossy veins against matte wood were seriously jaw-dropping.
A few suggestions:
- Clear Epoxy Resin: Create a durable, glossy finish by mixing this resin base to fill wood grooves and secure your design.
- Metallic Resin Powder Pigments: Add a stunning shimmer to your resin mix to create eye-catching, contrasting veins within the wood grooves.
- Orbital Sander and Sanding Discs: Achieve a smooth, professional surface by sanding the dried resin flush against the wooden wall panels.
Curved Accent Wall With Kerf Cuts
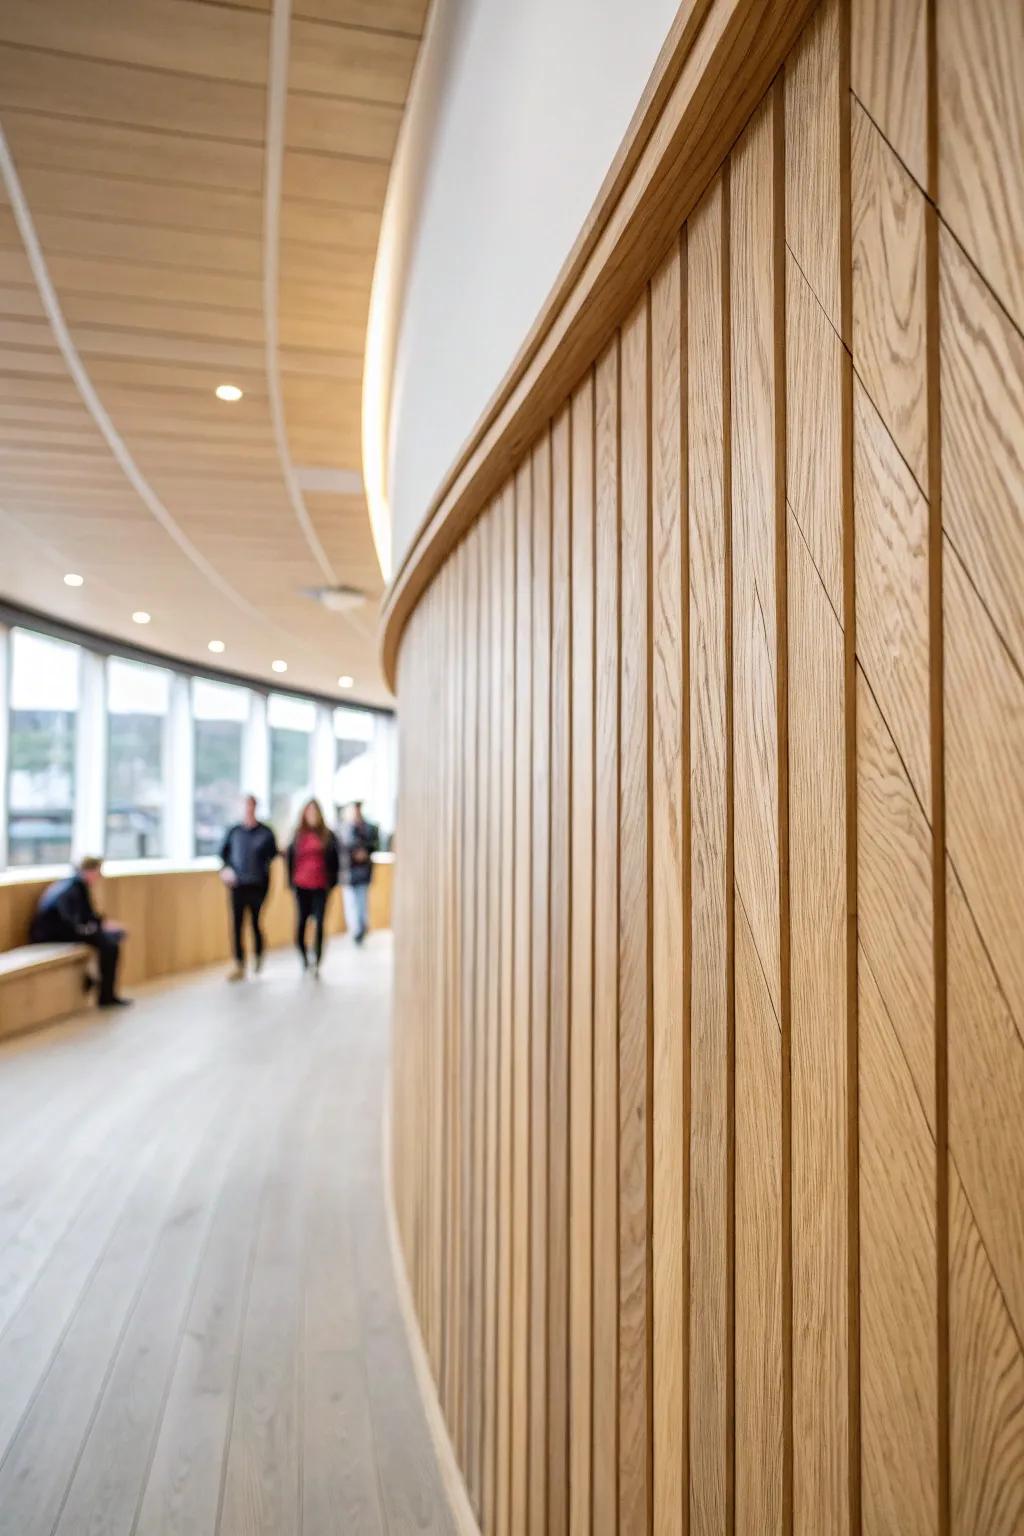
Yes, you can bend a tongue and groove accent wall around a gentle curve by kerf-cutting the back of boards so they flex. I did this on a rounded nook, and it turned a weird corner into the kind of detail people stop and touch.
Consider these options:
- Circular Saw with Laser Guide: Establish the precise kerf cuts needed to bend your wood by using a reliable and adjustable circular saw.
- Flexible Tambour Wood Panel: Skip the tedious cutting process entirely by choosing pre-grooved flexible wood panels ready to wrap curves immediately.
- Construction Adhesive for Wood: Ensure your curved boards stay permanently in place on the radius by applying a high-strength construction adhesive.


