
A good video game console shelf keeps your setup looking calm while still showing off the fun stuff. I love building shelves that balance airflow, cable control, and that cozy wood-grain vibe so your consoles feel like decor, not clutter.
Adjustable Shelf Pins for Mixed Sizes
Consoles change shapes constantly, so I often use adjustable shelving with pin holes to reconfigure heights anytime. I’ve found it saves you from rebuilding when you add a taller console or a chunky charging dock.
Products that could assist:
- Metal Shelf Support Pegs: Upgrade your existing furniture instantly by swapping in sturdy metal pegs to support heavier console arrangements securely.
- Adjustable Shelf Bracket Rails: Install these vertical rails inside cabinets or on walls to freely move shelf heights whenever you upgrade hardware.
- Self-Adhesive Shelf Supports: Add new shelving layers to units without pre-drilled holes using these strong, clear, stick-on bracket supports.

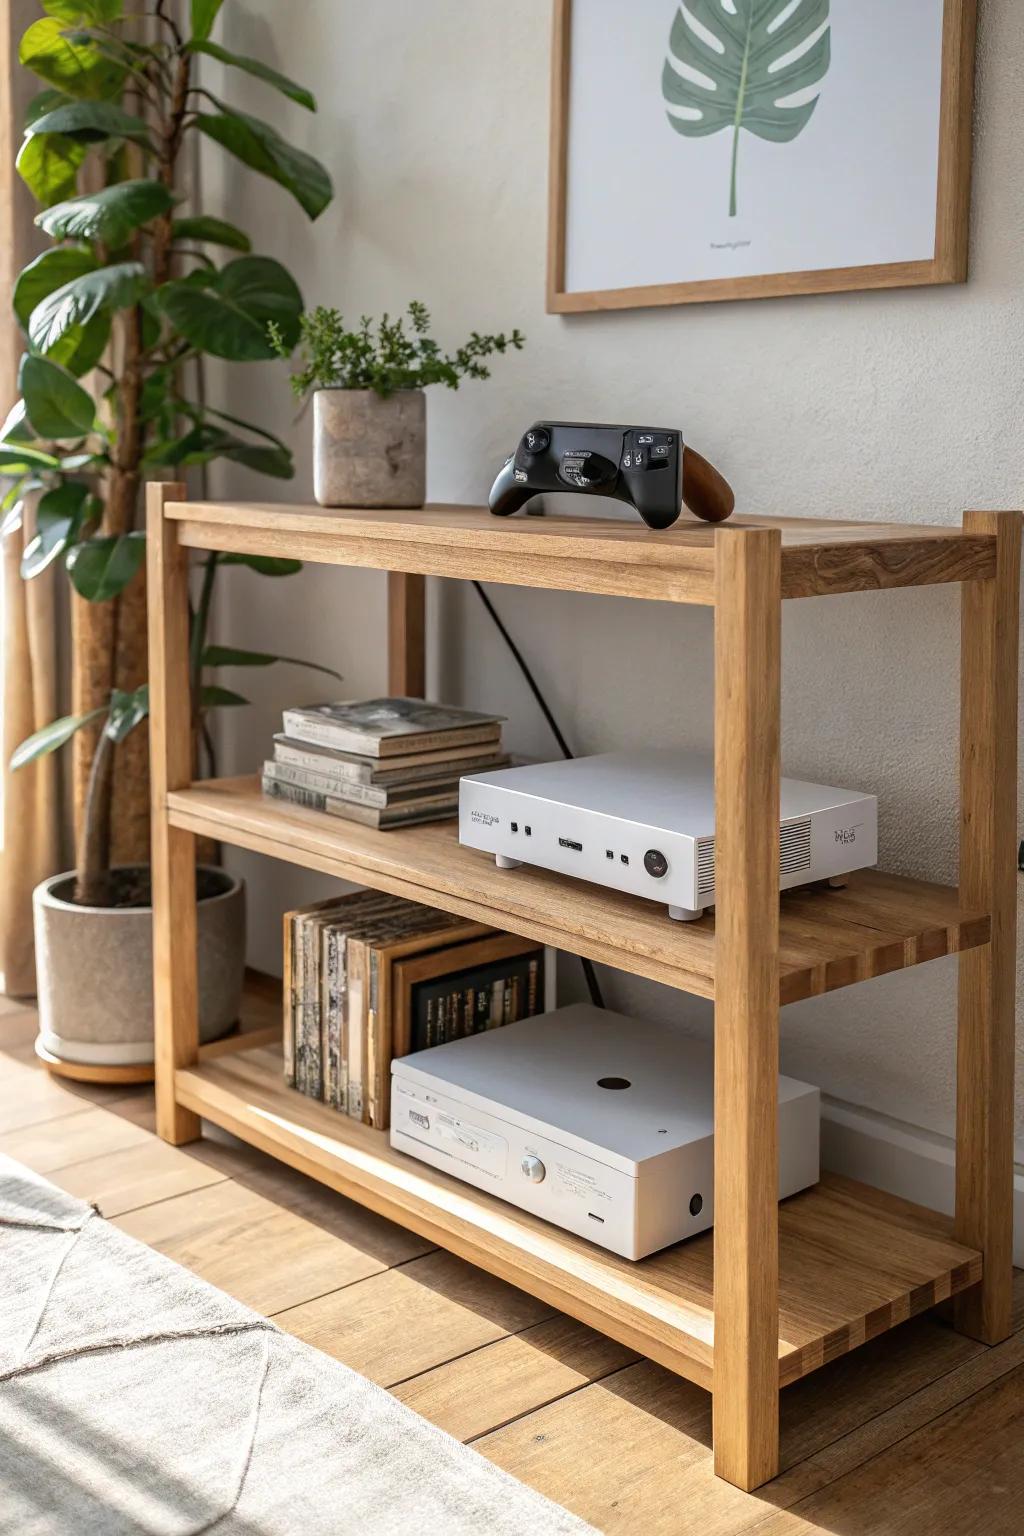
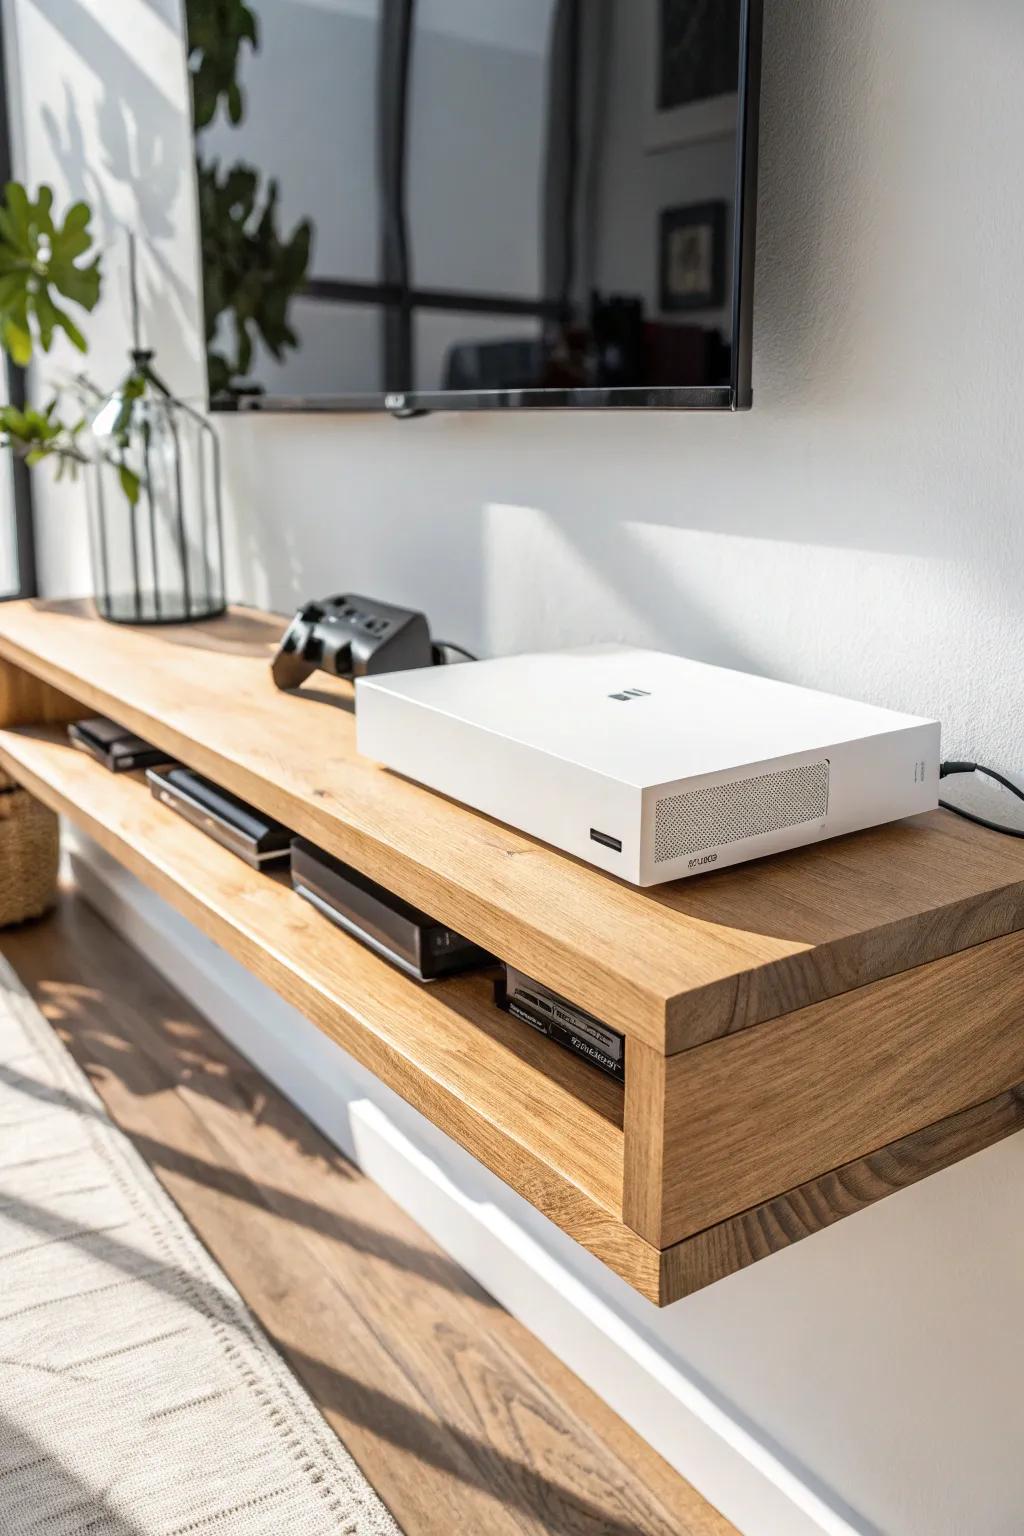
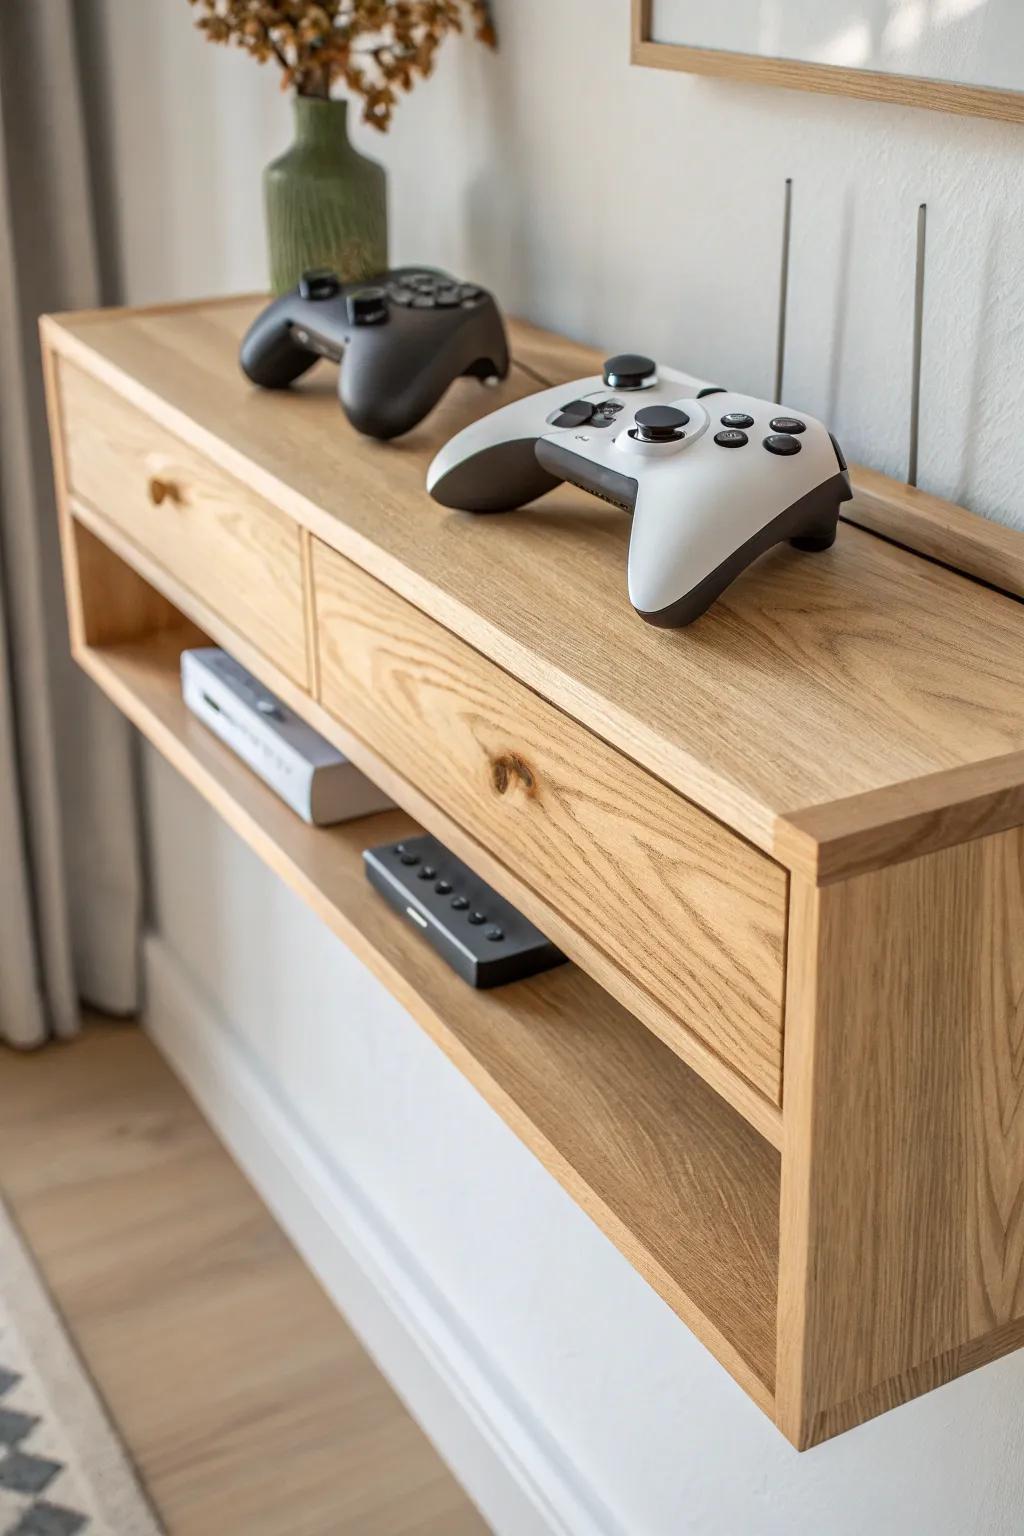
Classic Low Console Shelf Under the TV
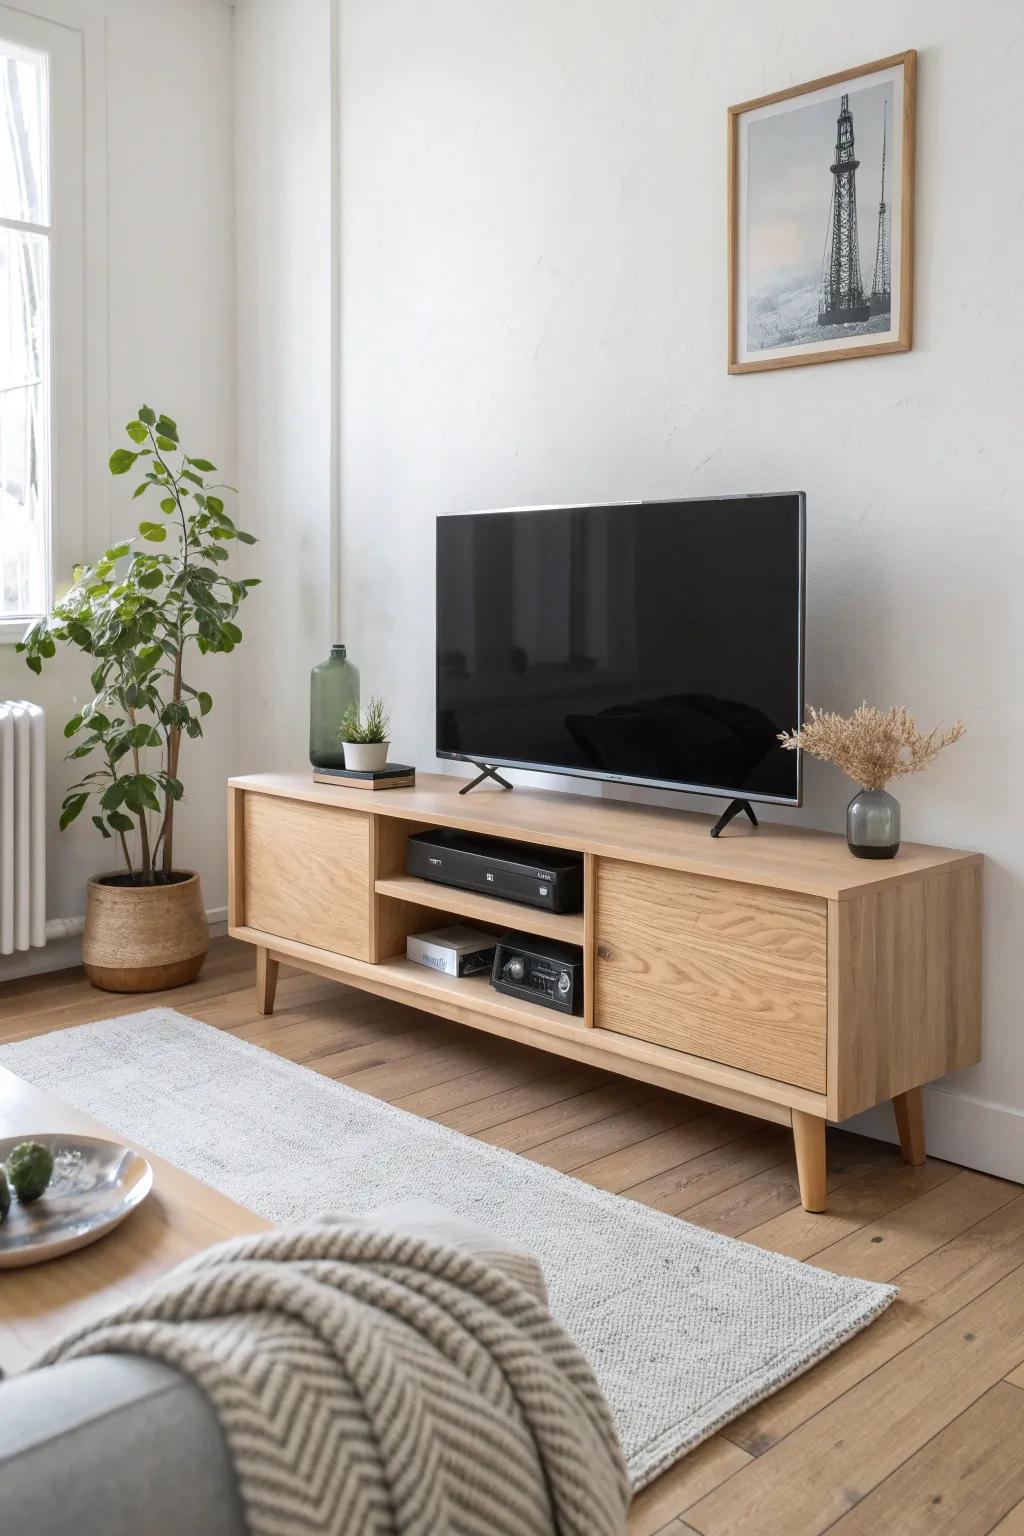
When I build a low media shelf from plywood and a solid wood face frame, it instantly makes multiple consoles look intentional instead of stacked and stressed. I always add a recessed back strip so power cords and HDMI cables disappear without pinching.
May just do the trick:
- Birch Plywood Sheets: Build the sturdy core structure of your custom console with durable, high-quality plywood sheets for lasting support.
- Oak Lumber Boards: Create a premium face frame that gives your DIY shelf that professional, solid-wood finish you desire.
- Cable Management Kit: Keep those HDMI cords and power cables neatly organized and hidden behind your new custom media unit.

Modular Cubby Grid for One-Console-Per-Slot
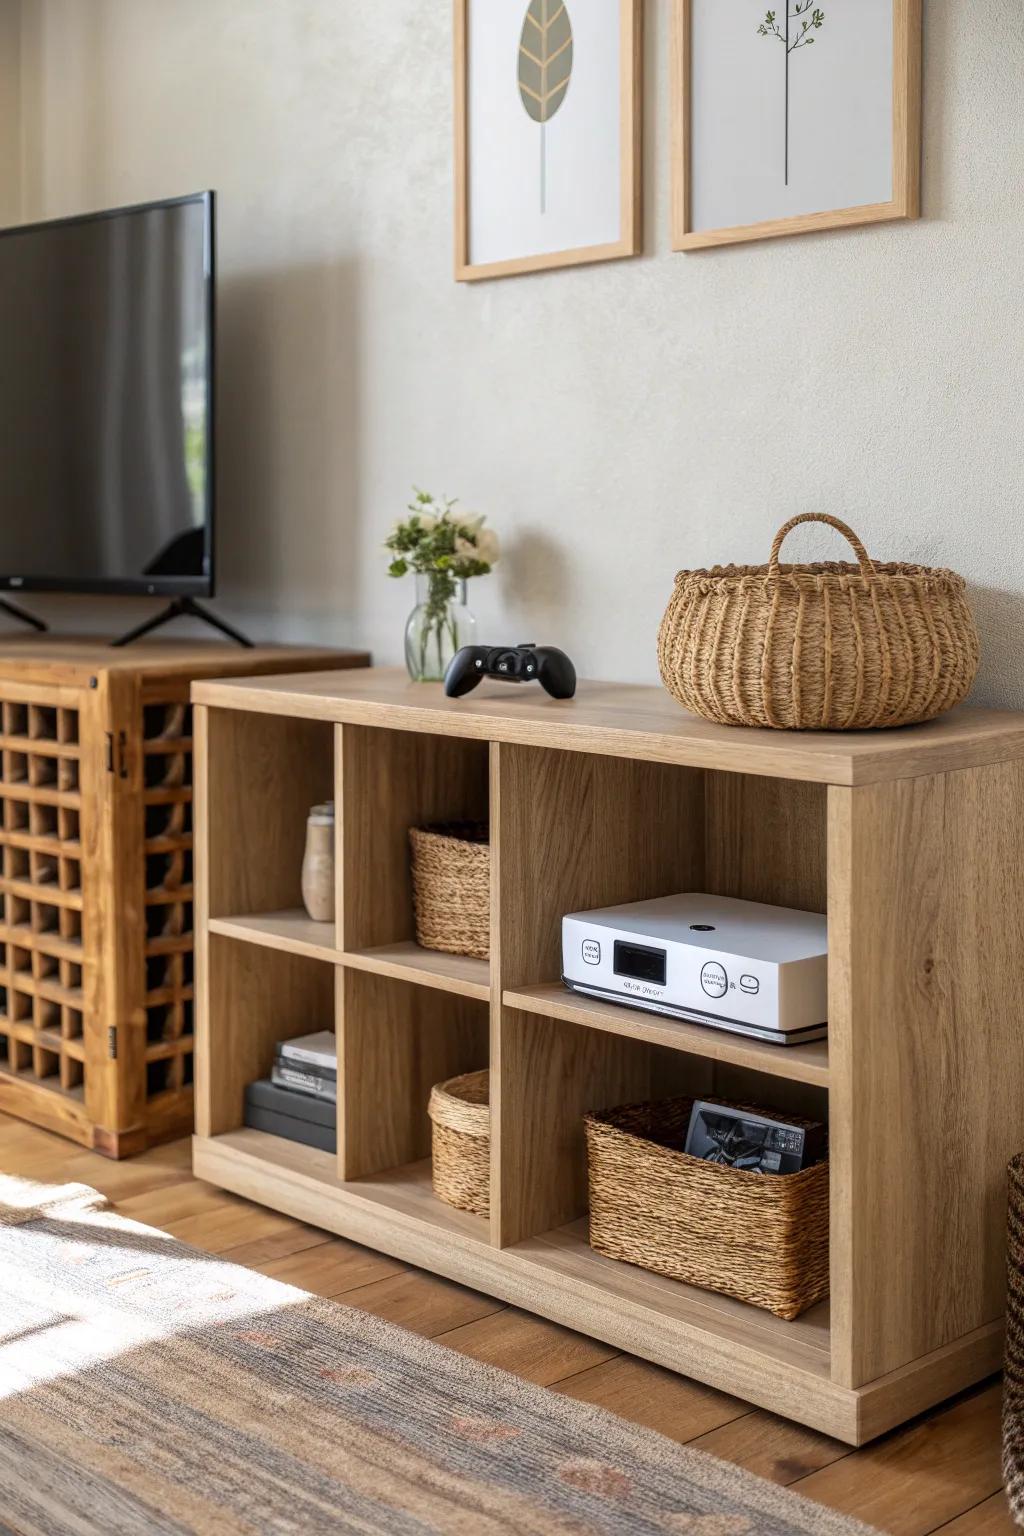
I’m a huge fan of a cubby shelf grid because each console gets its own “parking spot,” and it’s the easiest way I’ve found to organize mixed generations. In my shop, I size cubbies with a little extra headroom so airflow stays solid even when you add doors or bins later.
Check these products out:
- Cube Storage Organizer Shelf: Organize your consoles effortlessly with this versatile shelf that offers dedicated spots for each gaming system.
- Woven Storage Baskets for Shelves: Keep controllers and cables tidy inside cubbies using these woven baskets that add texture and style.
- Small Glass Flower Vase: Add a touch of greenery next to your gaming setup to soften the look of electronics.

Floating Shelves for a Clean Wall Display
A set of floating shelves makes consoles look like art, and I’ve used thick hardwood fronts to keep them from feeling flimsy. I drill a clean pass-through behind each shelf so the cables route straight down the wall and vanish.
Possibly helpful picks:
- Wall-Mounted Floating Media Console: Replicate the clean, airy look of this setup by installing a sturdy floating shelf for your media devices.
- Cable Management Wall Kit: Hide unsightly cords efficiently by routing cables behind the drywall for that seamless, wireless appearance.
- Decorative Glass Vase: Add a touch of greenery to your console setup with a sleek, modern vase for light decor.
Built-In Wall Nook Console Shelves
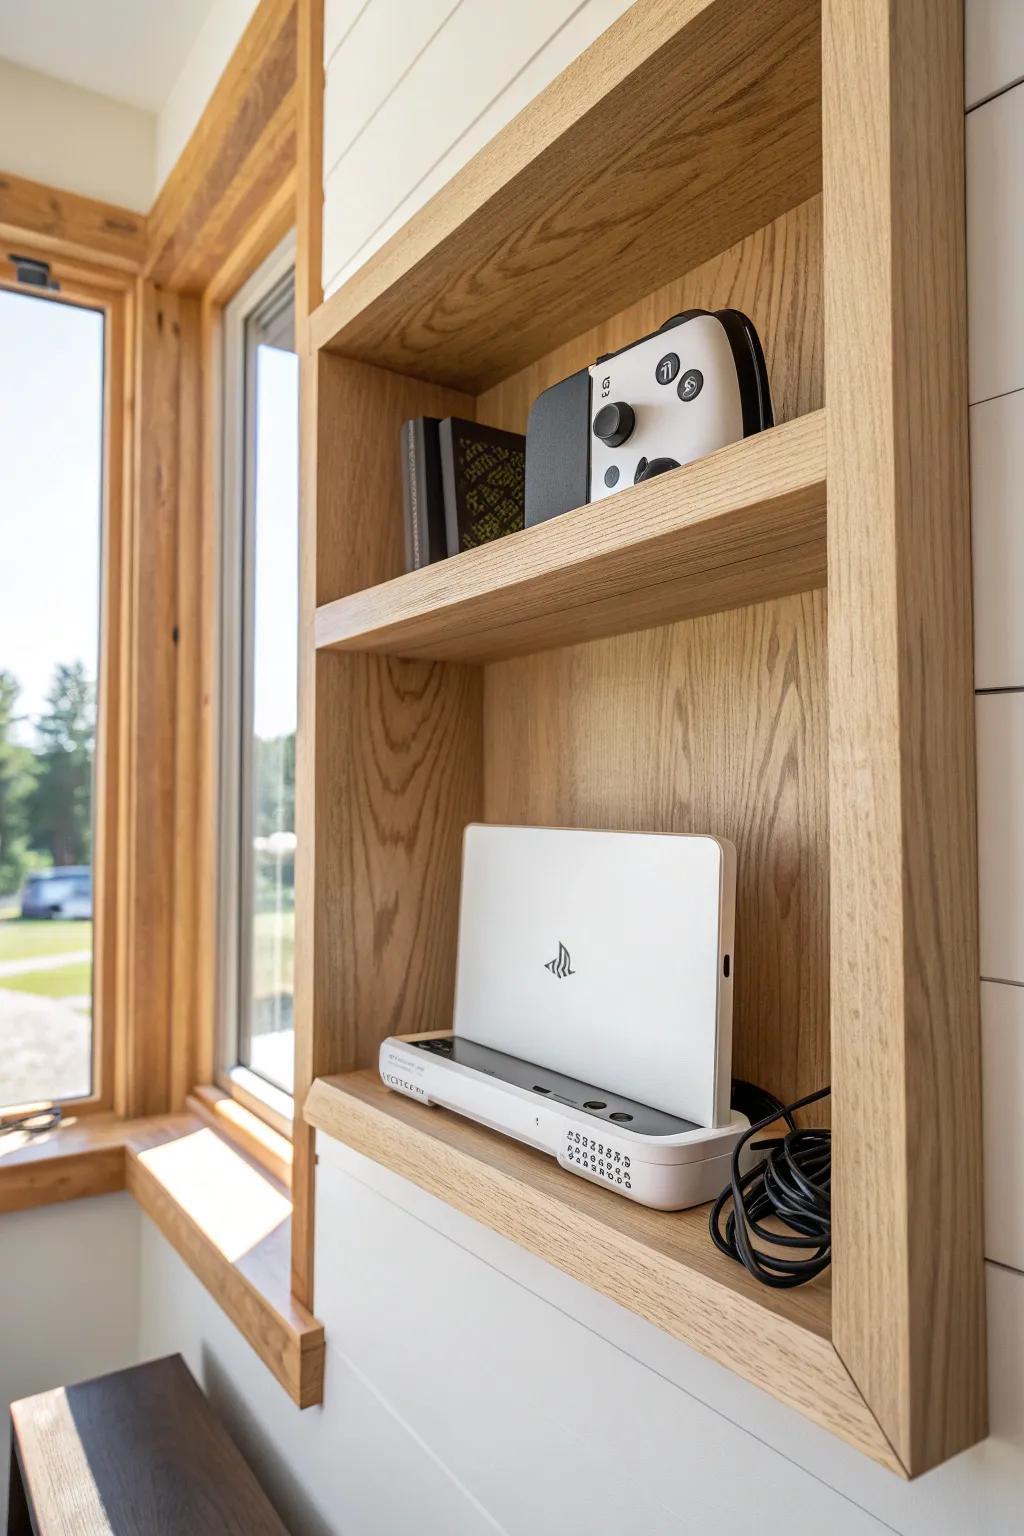
If you’ve got a recessed spot, turning it into built-in console shelving gives you that custom-home look without taking over the room. I’ve trimmed nooks with simple farmhouse casing and left the back open enough for venting and wiring.
A few suggestions:
- Vertical Console Cooling Stand: Keep your system stable and cool within tight built-ins with a stand featuring integrated fans and charging docks.
- Cable Management Sleeve Kit: Control messy wiring behind your recessed shelving and maintain a clean, custom look with organized cable sleeves.
- Floating Shelf Brackets or Trim: Create your own custom nook shelving with sturdy brackets or finish existing recesses with natural wood casing.
Corner Tower Shelf to Save Floor Space
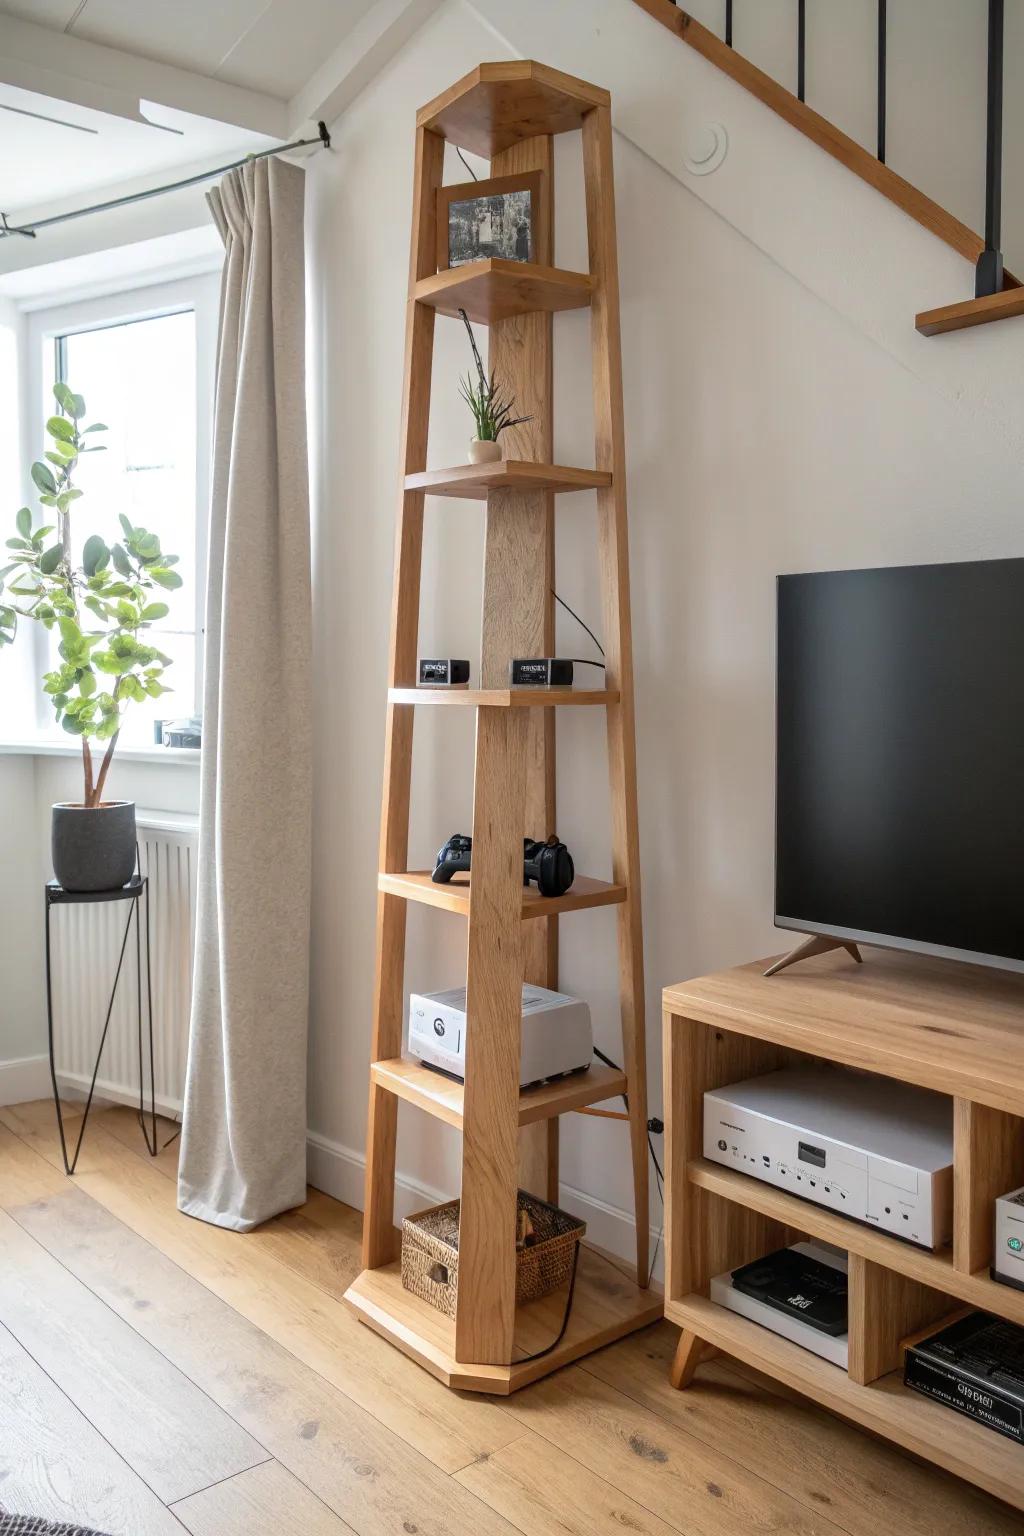
I’ve built a tall corner console shelf with staggered shelves that fits a surprising number of systems without feeling bulky. The trick I use is a wider base and a back rail so controllers don’t tumble off during cable swaps.
These products might help:
- Narrow 5-Tier Corner Bookshelf: Maximize your vertical storage with a tall shelving unit perfect for displaying consoles in tight corners.
- Adhesive Cable Management Clips: Keep power cords and HDMI cables neatly organized behind the stand for a cleaner gaming setup.
- Woven Storage Basket for Controllers: Store extra controllers and accessories at the base of your tower to reduce visual clutter instantly.

Sliding Pull-Out Shelves for Easy Access

For tight cabinets, I love adding pull-out console trays so you can reach ports and power buttons without crawling on the floor. I’ve learned to choose sturdy slides and leave extra slack for cord movement so nothing gets yanked.
Some ideas to consider:
- Heavy-Duty Drawer Slides: Install these robust runners to create a smooth, stable pull-out shelf that supports heavy gaming consoles effortlessly.
- Finger Edge Pull Handles: Attach these minimalist handles to your new shelf for a sleek grip that makes sliding equipment easy.
- Velcro Cable Management Straps: Use these adjustable ties to bundle extra slack, preventing tangled cords from getting jammed behind the sliding tray.
Open Slat Shelves for Maximum Airflow
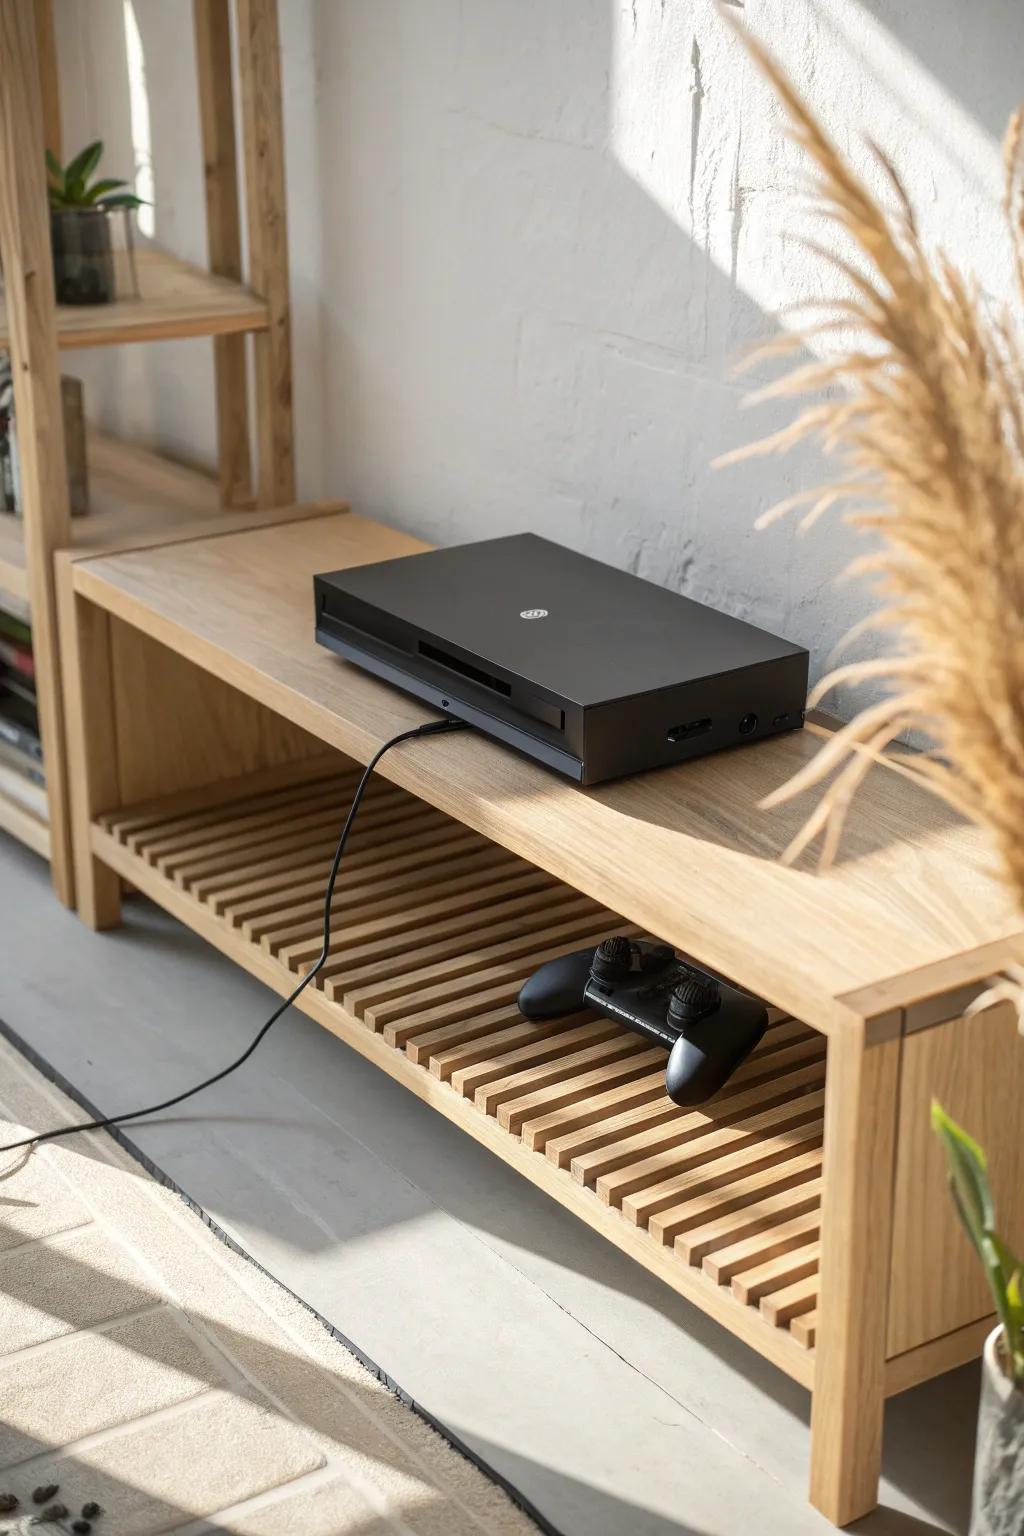
Whenever heat is a worry, I build slatted wood shelves that let consoles breathe from below and behind. In my own setup, that one change made everything feel safer, especially for stacked consoles in a single zone.
You might like:
- Slat Wood TV Stand: Improve airflow with an open-design wooden media console that naturally helps ventilate your gaming electronics.
- Wooden Bench with Shelf: Utilize a sturdy entryway bench with a slatted lower shelf for a minimalist, breathable console setup.
- Bamboo Tiered Rack: Choose open tiered shelving to organize multiple consoles, ensuring heat dissipates easily from every side.
Glass-Front Console Shelf Cabinet
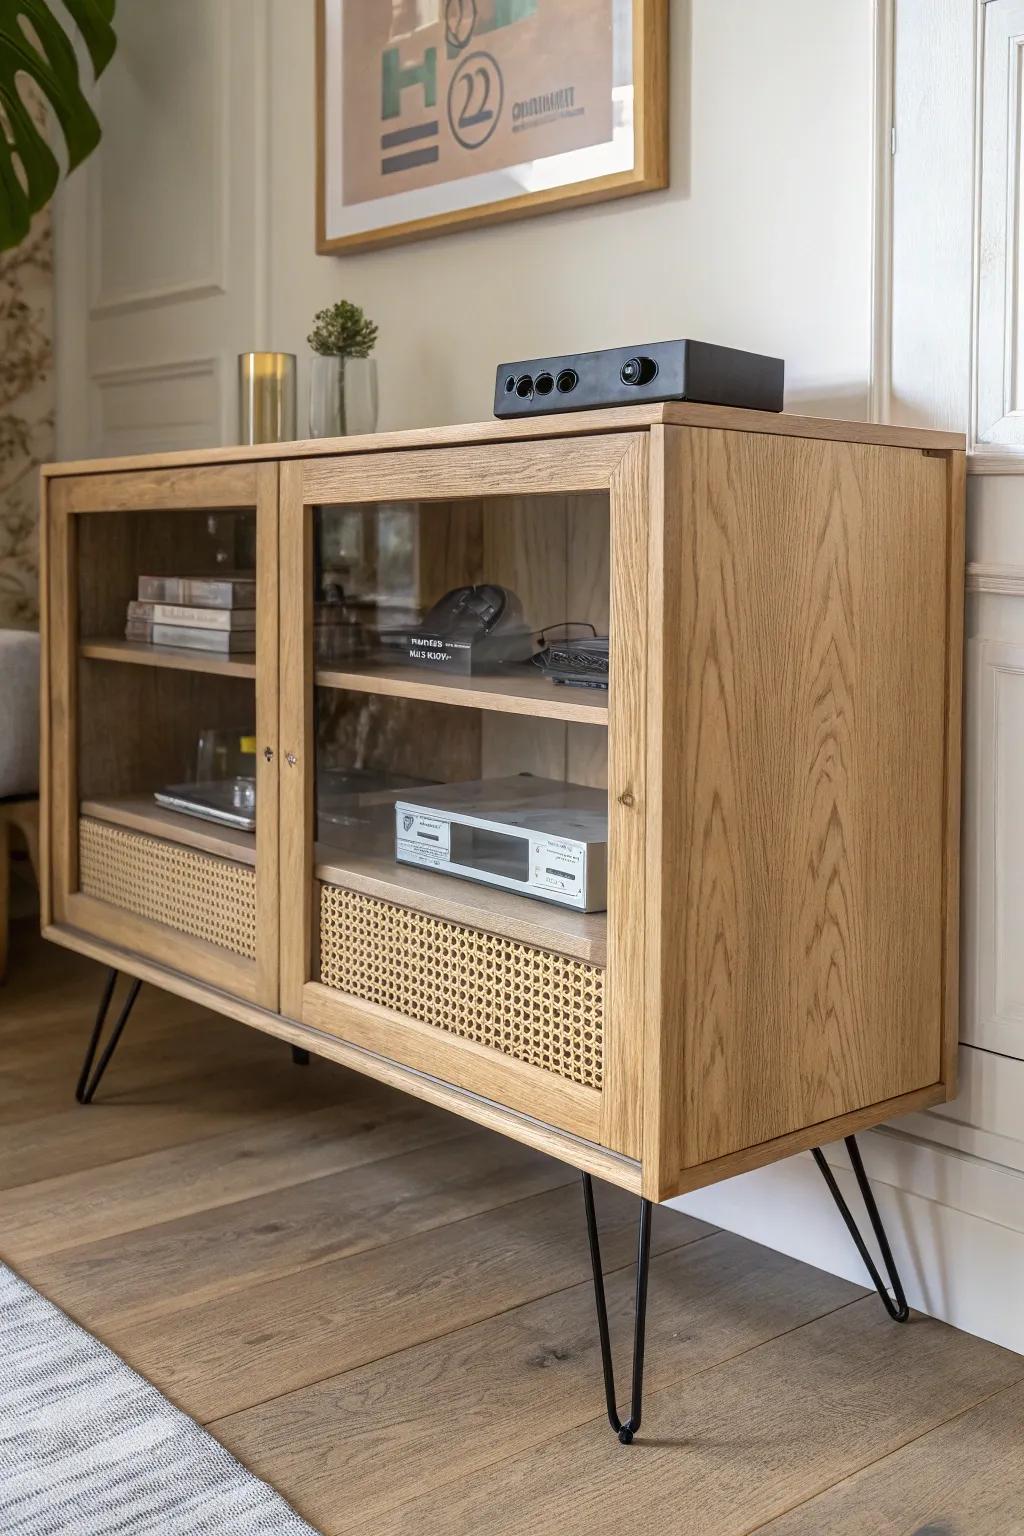
If you want a tidy look, a glass-front cabinet shelf keeps dust off while still letting you see your consoles. I like using a breathable back panel style so remote signals and heat don’t become an issue.
Useful items to consider:
- Glass Display Cabinet: Protect your consoles from dust while keeping them visible with a stylish glass-front cabinet for your setup.
- Rattan Media Console: Add a touch of natural texture to your gaming room with a console featuring woven rattan accents.
- Black Hairpin Legs: Upgrade your existing furniture easily by installing sturdy hairpin legs for a modern, elevated industrial look.
Barn Door Console Shelf for Rustic Style
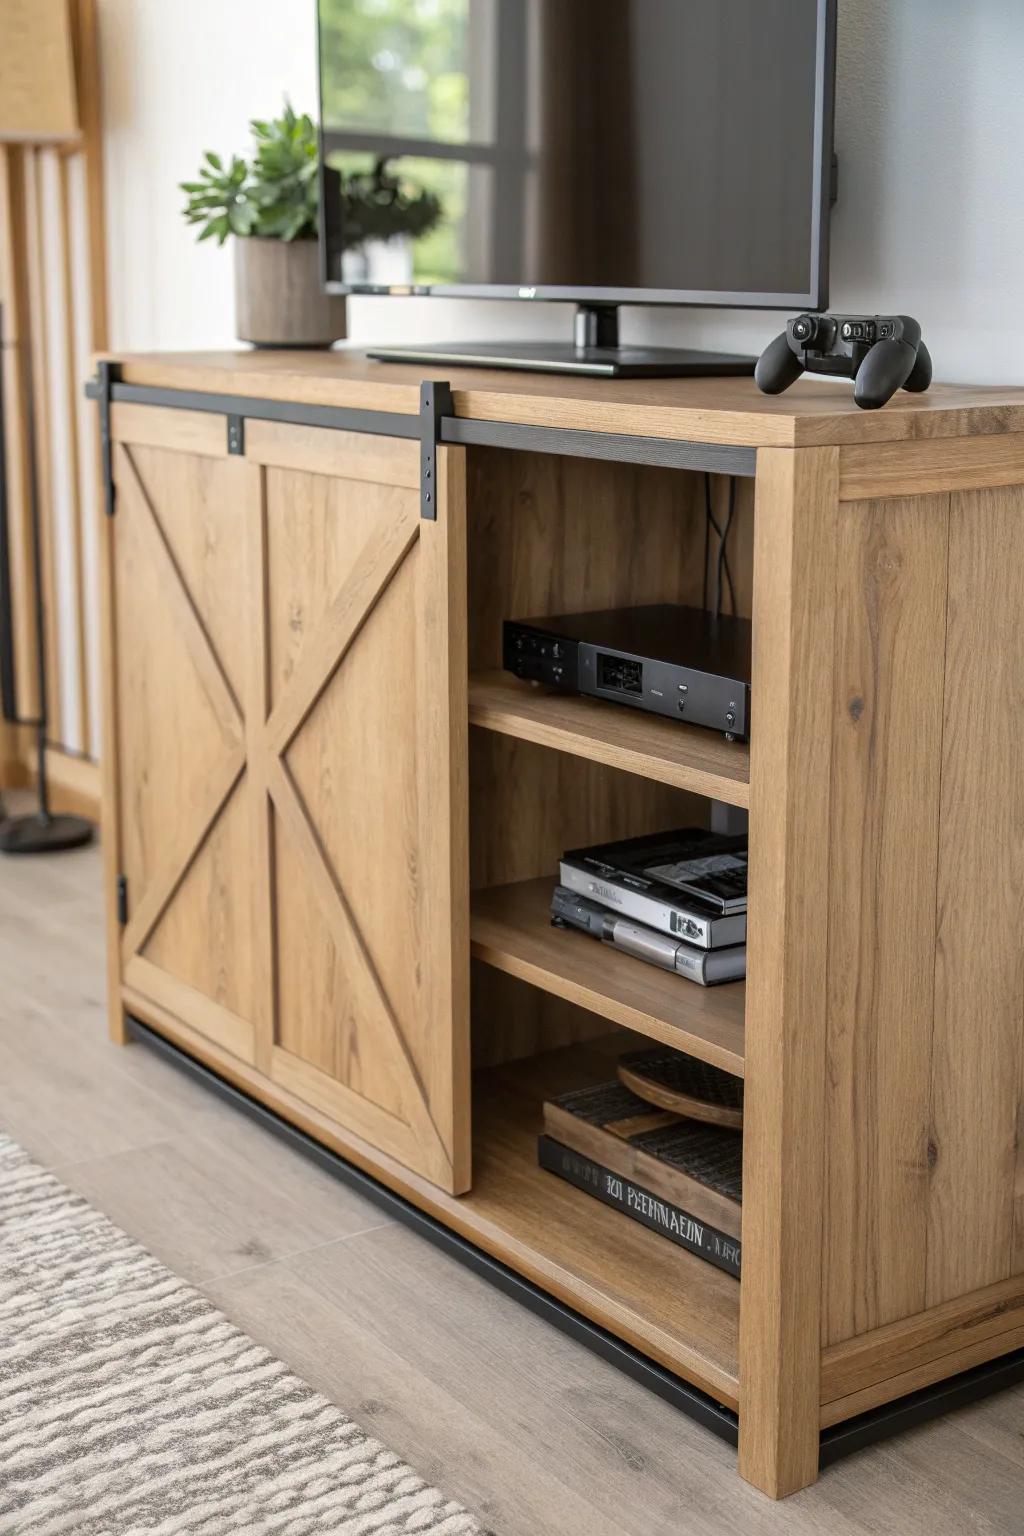
A slim barn door console cabinet is my go-to when you want rustic charm but still need practical storage underneath. I build mine so the doors slide to reveal the active console area, while the other side hides extra controllers and cables.
Consider these options:
- Barn Door TV Stand Media Console: Find a rustic media console with sliding barn doors to hide clutter and show off your gaming setup easily.
- Universal Game Controller Stand: Organize your gaming area by placing a sleek controller stand on top of or inside your new cabinet.
- Cable Management Box Organizer: Keep cords tidy behind your console shelf with a discreet cable management box that blends into the background.
Crate-Style Stackable Console Shelves
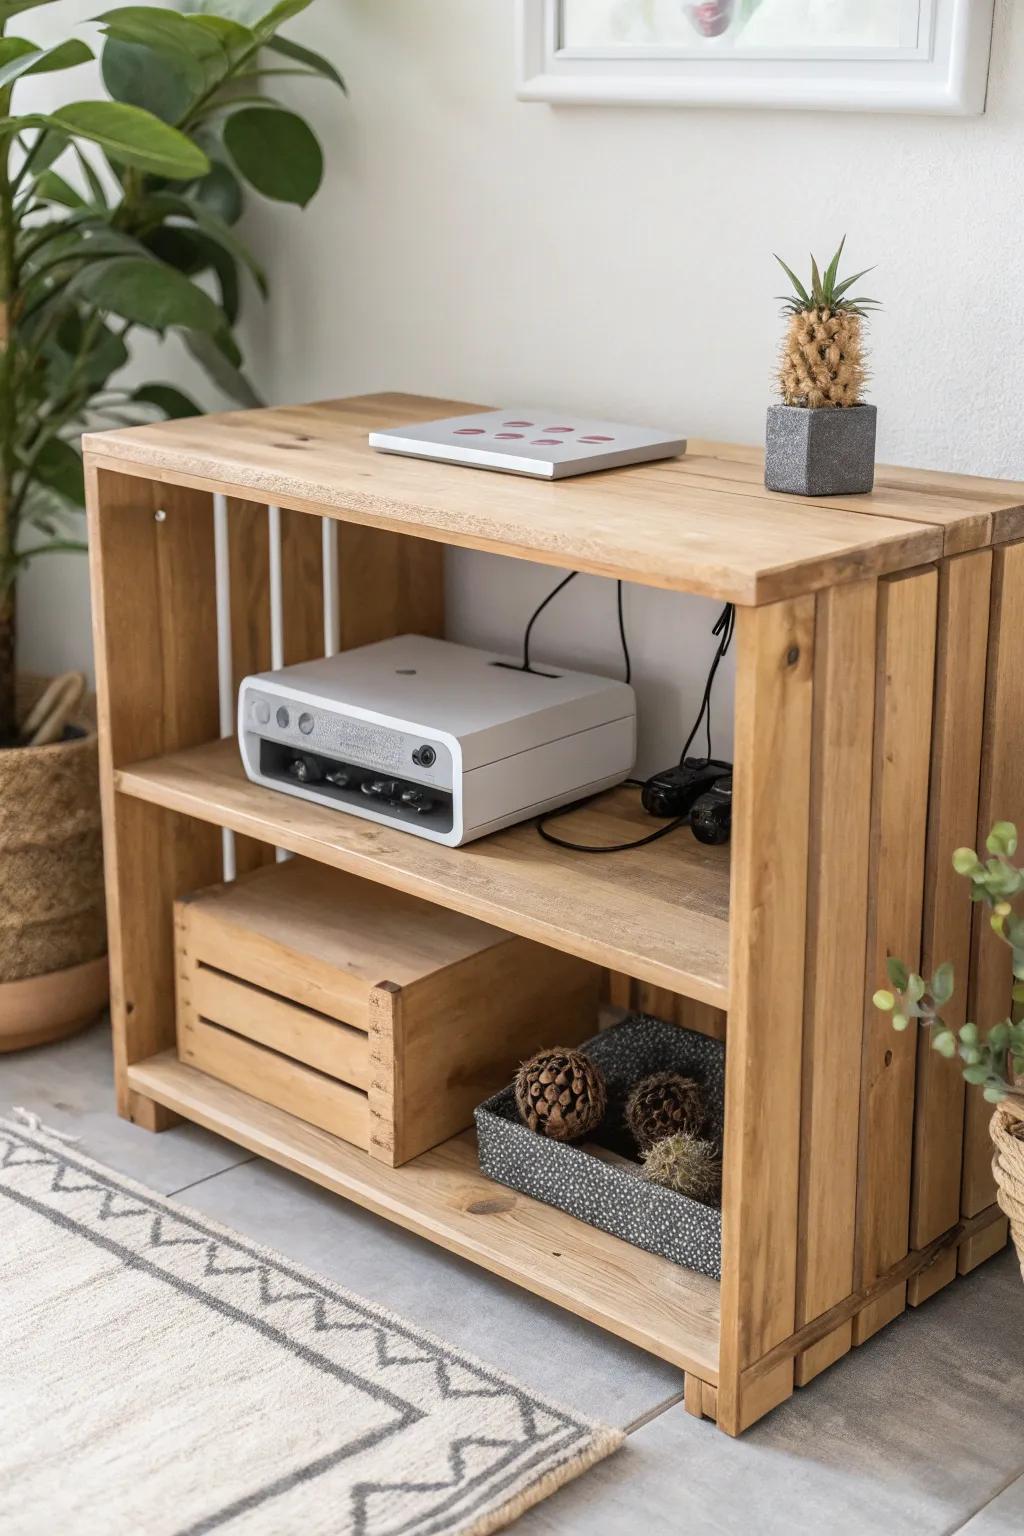
I’ve made wood crate shelves that stack like building blocks, and they’re perfect for collections that keep growing. I always sand them silky and add a back stop so consoles don’t scoot backward and strain cord connections.
Maybe worth checking out:
- Stackable Wooden Crates: Build your own modular setup instantly by stacking these crates to fit your growing console collection perfectly.
- Cable Management Clips: Keep power cords and HDMI cables tidy and prevent strain on ports behind your open-back crate shelves.
- Wood Sanding Sponges: Ensure your DIY crates are silky smooth and splinter-free to protect your hands and gaming gear.
Repurposed Dresser Turned Console Shelf Unit
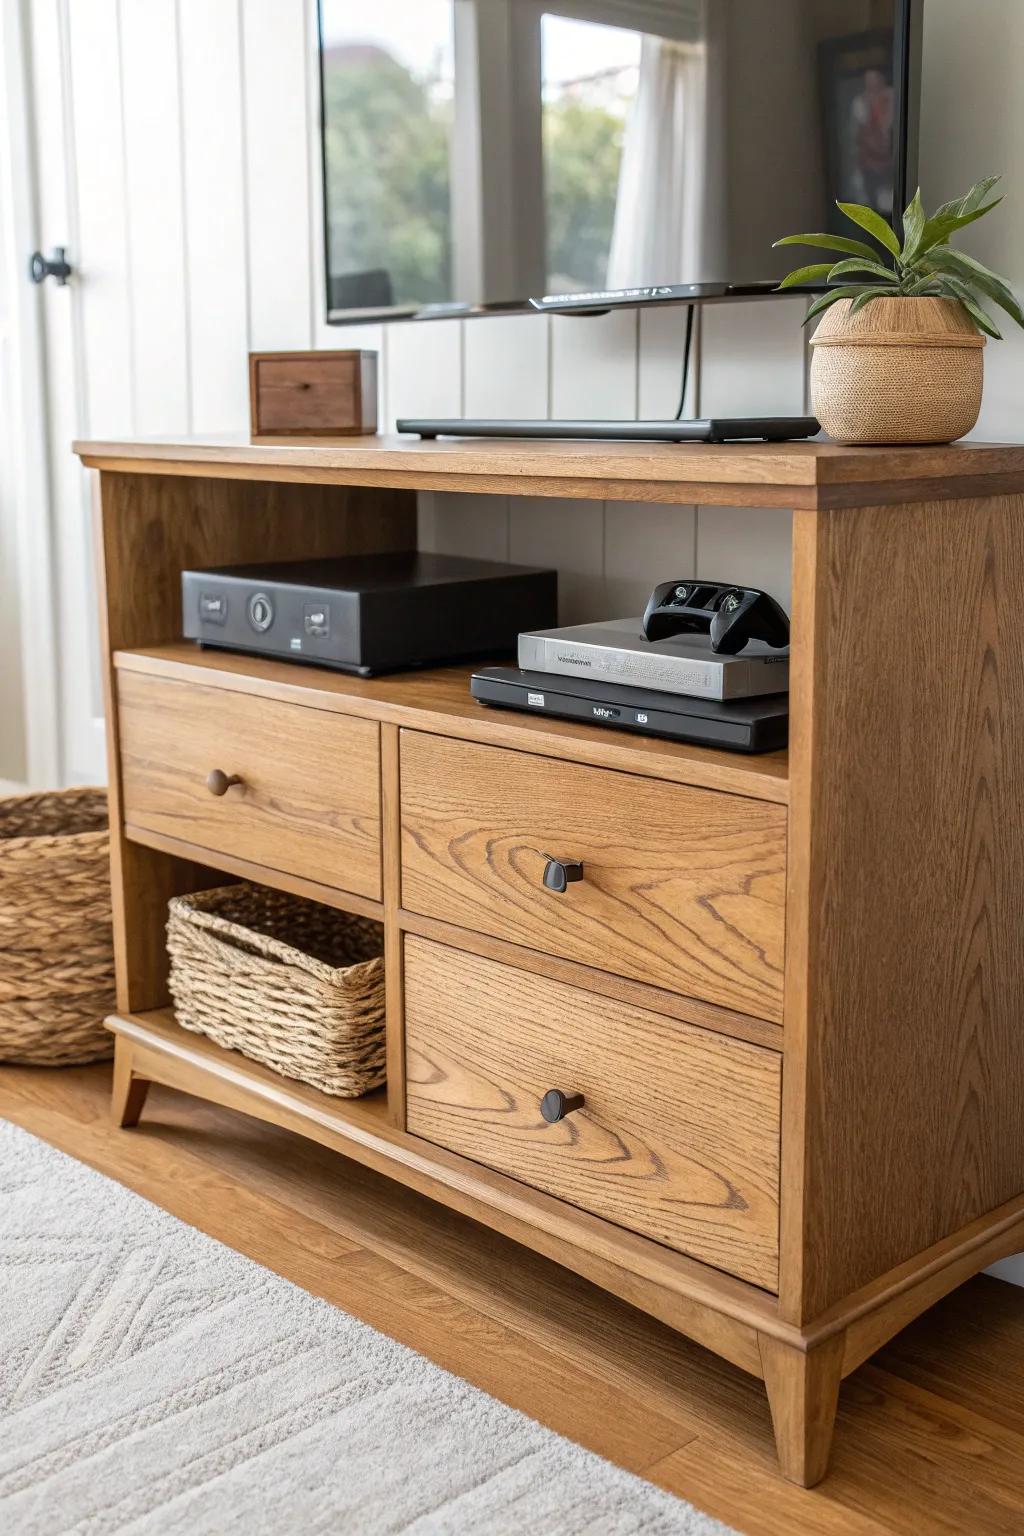
One of my favorite makeovers is turning a thrifted dresser into a video game console shelf by removing a couple drawer fronts for open bays. I’ve routed vent slots into the back and used the remaining drawers for games and accessories.
You might give these a try:
- Woven Storage Baskets: Keep cords and accessories organized inside open shelving spaces with these textured, natural-looking storage bins.
- Cabinet Hardware Knobs: Update the look of remaining drawers easily by swapping old hardware for modern, matte black knobs.
- Cabinet Exhaust Fan: Prevent your gaming consoles from overheating in semi-enclosed spaces by installing a quiet, USB-powered cooling fan.
Console Shelf With Built-In Cable Raceway
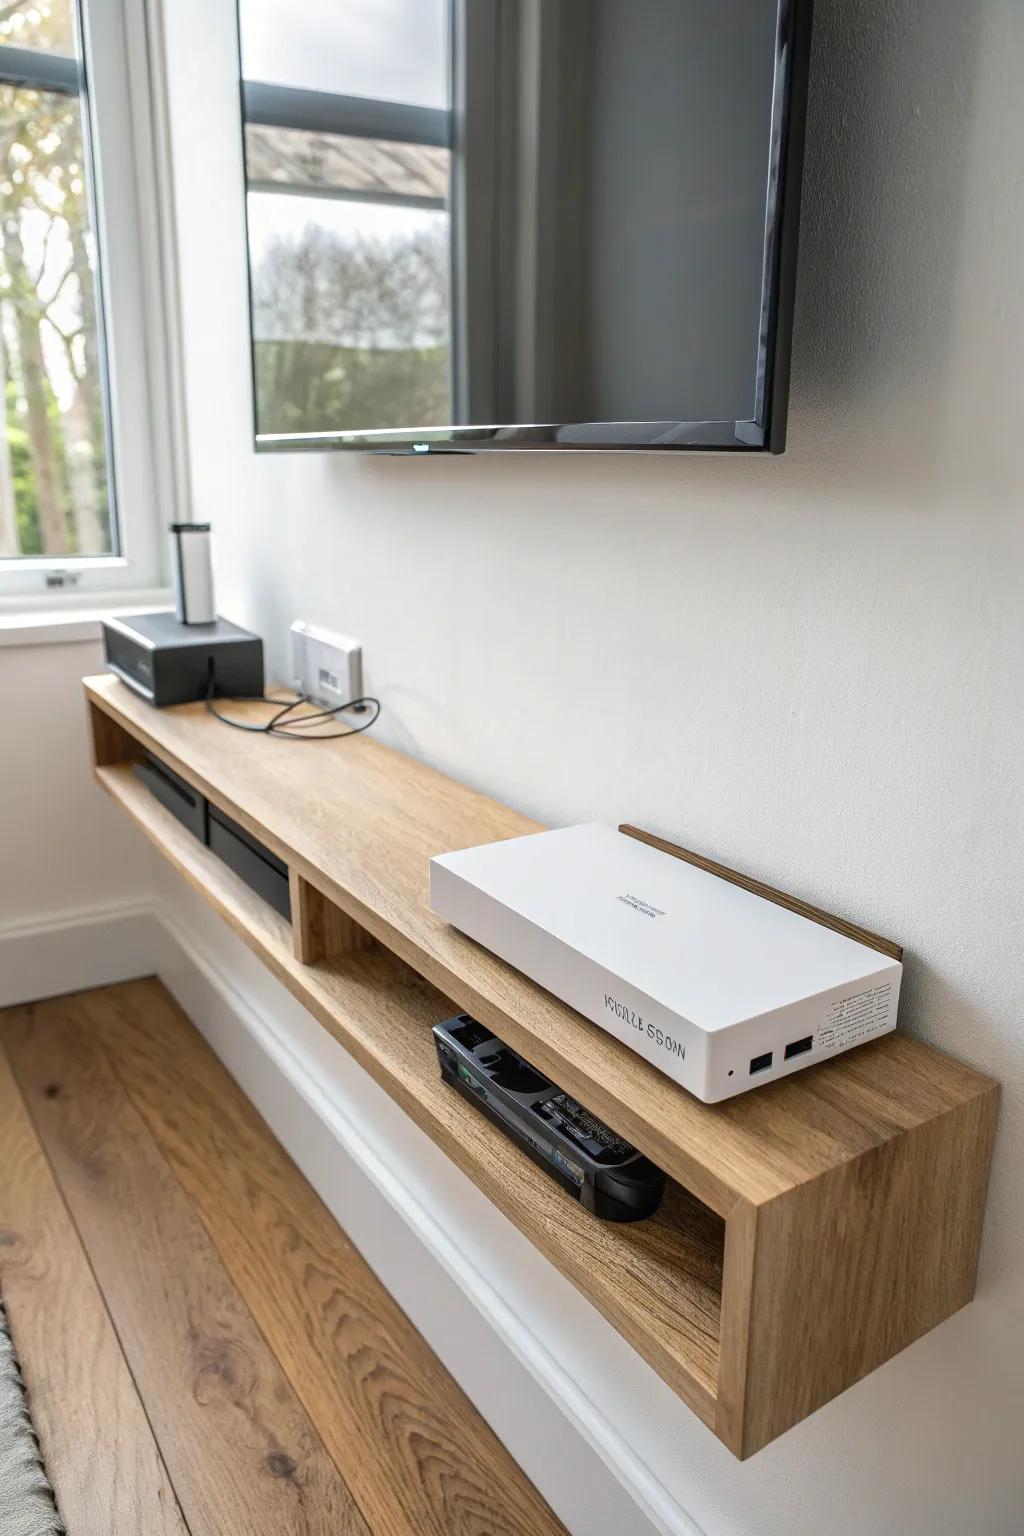
When I want that “how is it so clean?” look, I add a rear cable management channel with a removable cover strip. It’s a small detail, but it makes swapping consoles way less annoying because the cords stay organized.
Give these a look:
- Solid Wood Floating Console Shelf: Upgrade your gaming setup with a wall-mounted console shelf that keeps your gear elevated and looking modern.
- On-Wall Cable Raceway Kit: Hide unsightly cords easily using paintable raceways to maintain that wire-free, minimalist aesthetic below your screen.
- Under-Desk/Shelf Cable Clips: Secure power and HDMI cables neatly behind or underneath your new shelf to prevent messy, tangible clutter.
Controller + Console Shelf Combo Wall Rail
I’ve mounted a wall shelf with controller hooks underneath so the whole setup stays in one tidy zone. It feels surprisingly luxe when every controller has a home and the console shelf above stays clutter-free.
These products might be useful:
- Floating Wood TV Shelf with Drawers: Organize your gaming setup elegantly with a floating shelf that hides cables and keeps consoles accessible.
- Under-Desk Game Controller Mount: Keep your controllers secure and ready to grab by installing discreet mounts under your new shelf.
- Slim Wall-Mounted Cable Raceway: Hide unsightly wires effortlessly to maintain the clean, floating look of your gaming station upgrade.


