Ceiling transitions are the sneaky little design trick that can make an open layout feel intentional instead of mushy.
Board-and-Batten Ceiling Band
A short board-and-batten band across the transition works like a belt that cinches two ceiling styles together. I’ve run this band perpendicular to traffic flow, and it gently signals “you’re entering a new zone” without shouting.
You might like:
- Primed MDF Boards: Create the flat base of your transition band easily with smooth, paint-ready boards for a clean finish.
- PVC Batten Strips: Add the defining ‘batten’ detail to your ceiling band using lightweight strips that are easy to install overhead.
- Crown Molding: Finish the edges of your ceiling band where it meets the wood planks for a polished, professional look.


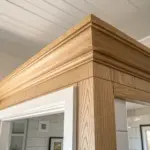
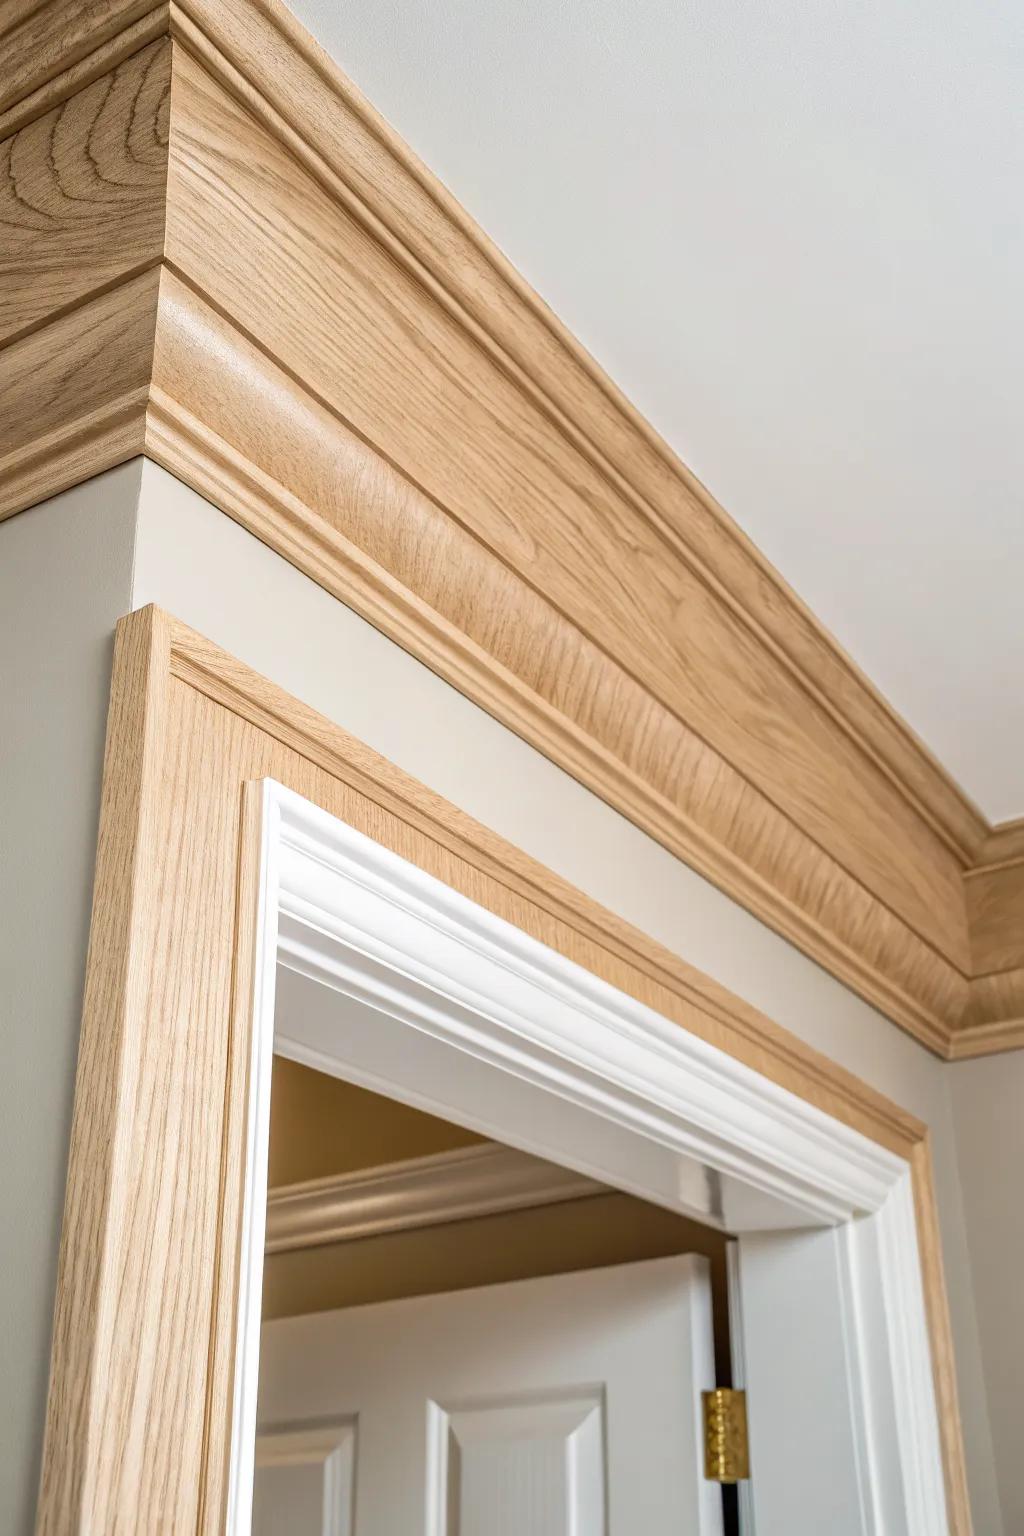
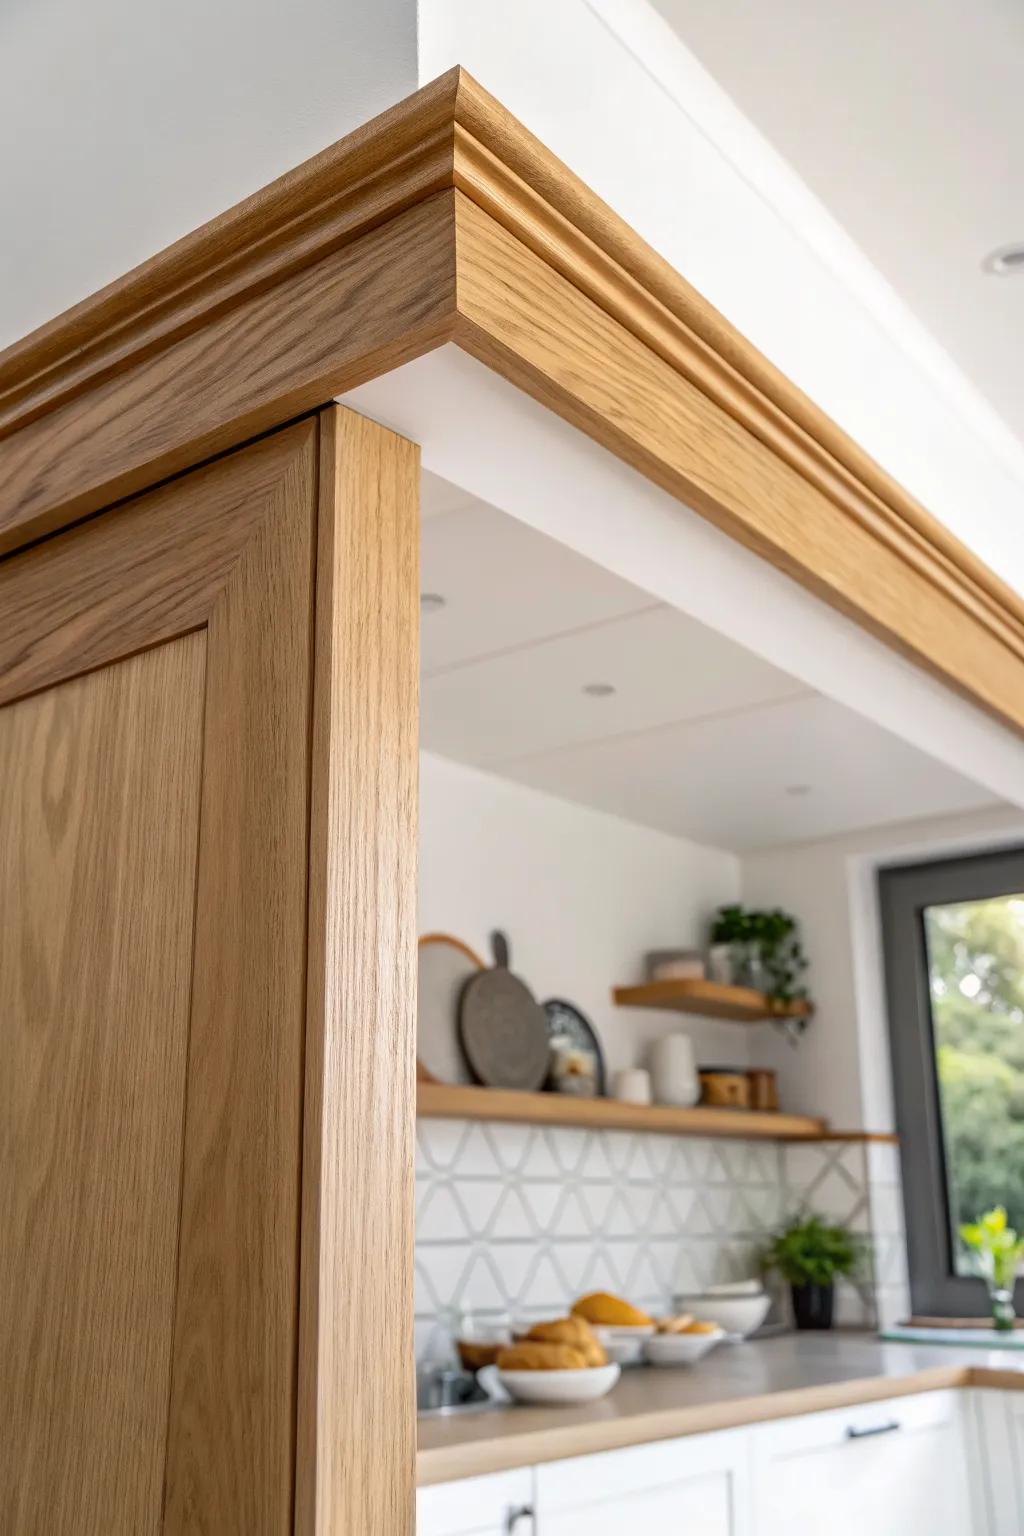
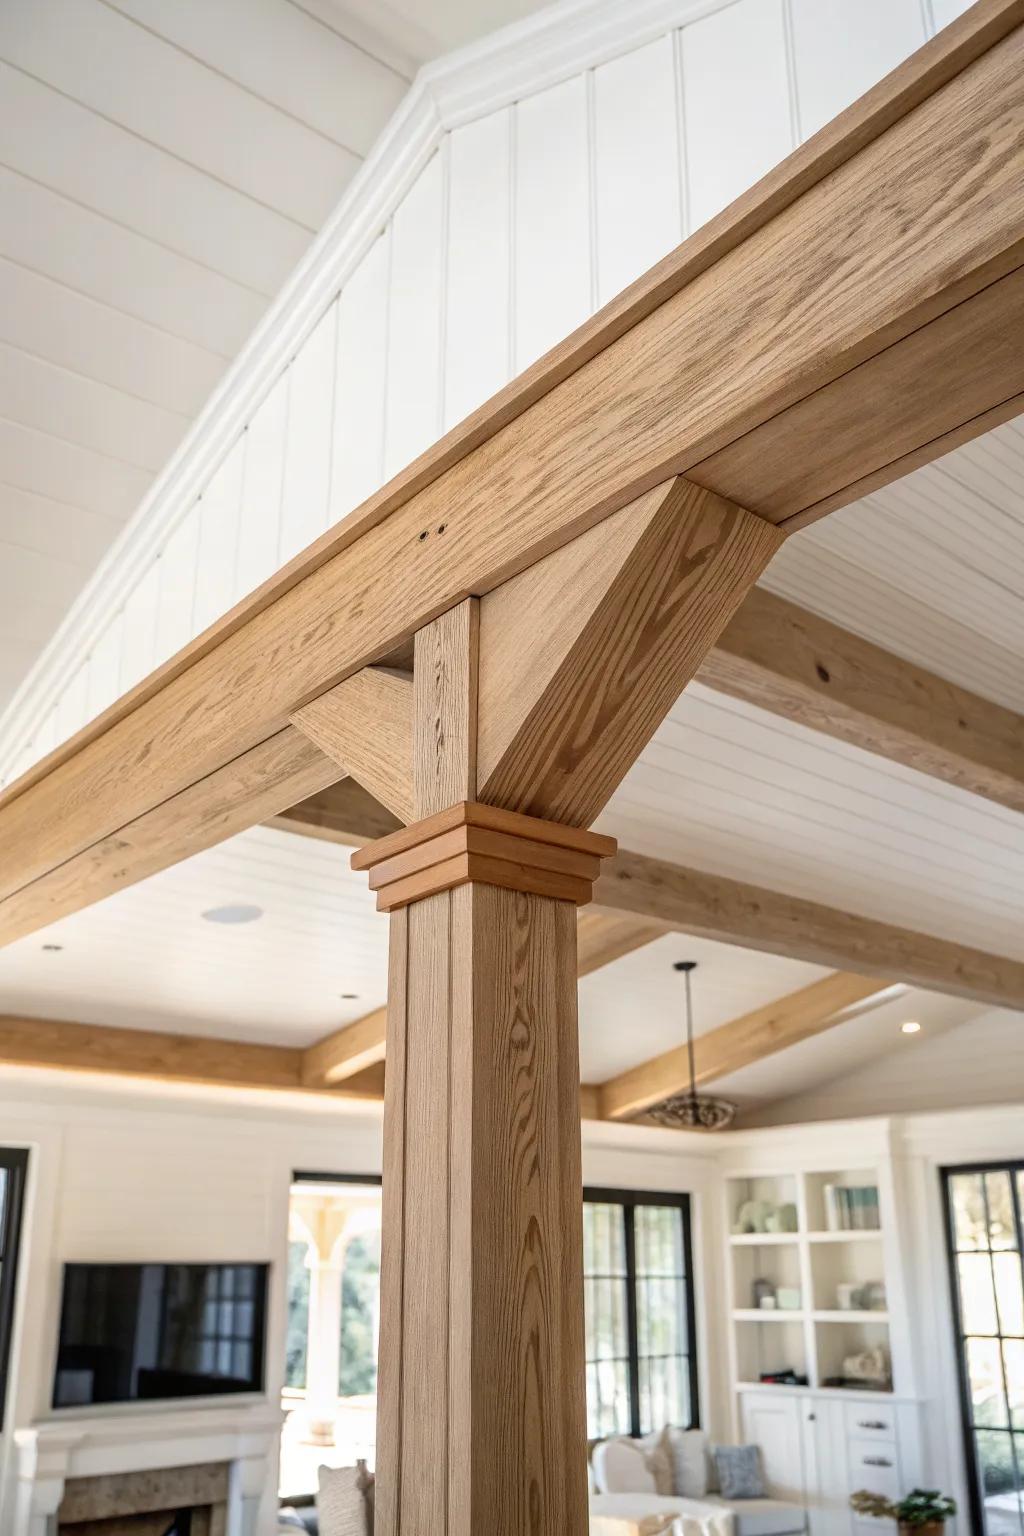
Thick Cased Opening With a Wood Header
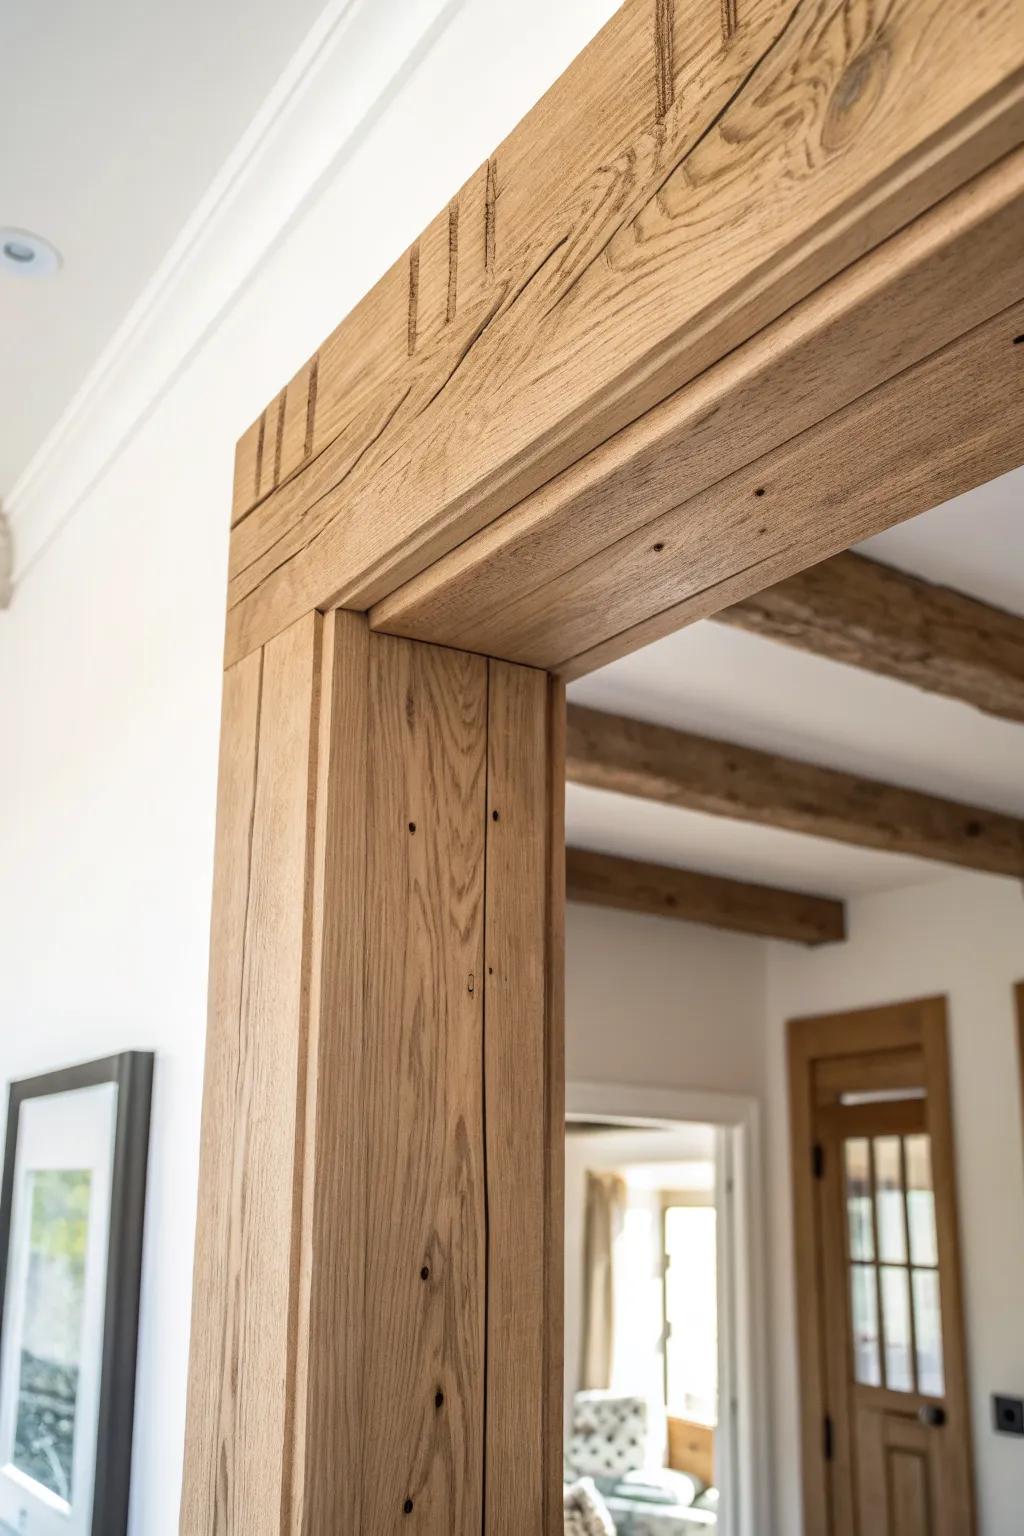
When I need a classic, “built-in” ceiling transition between rooms, I frame the opening with chunky trim and a wood header beam so the threshold feels solid and grounded. I’ve done this between a hallway and a great room, and it instantly made the ceiling change feel planned instead of accidental.
Check if these fit your needs:
- Faux Wood Beams: Instantly create that solid timber look without the heavy lifting by installing realistic, lightweight faux wood beams.
- Wood Stain and Sealer: Enhance the natural grain of your header and trim with a quality stain that protects and beautifies.
- Pneumatic Brad Nailer Kit: Secure your chunky casing and trim efficiently and cleanly with a reliable brad nailer for professional results.


Crown Molding Stop-and-Return
If one space gets crown molding and the next doesn’t, I like to end it cleanly with a crisp “return” right at the transition line. I’ve used this trick in open-concept dining-to-living areas, and it gives your eye a clear place to pause.
Some ideas to consider:
- Miter Saw with Laser Guide: Achieve precise angle cuts for flawless returns by using a reliable miter saw for your molding projects.
- Unfinished Oak Crown Molding: Match the warm, natural look of your room transitions with stainable, real wood crown molding profiles.
- Wood Glue and Clamp Set: Ensure your return pieces stay perfectly tight and seamless with high-quality wood glue and precision clamps.
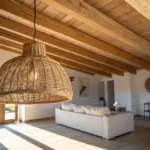

Boxed Beam Portal
A simple boxed beam running across the boundary works like a doorway for your ceiling, even when there’s no wall below it. I’ve built lightweight hollow versions for kitchen-to-living transitions, and they define zones without closing anything in.
A few helpful options:
- Faux Wood Ceiling Beam: Create a rustic transition overhead by installing lightweight, realistic faux wood beams without structural reinforcements.
- Recessed Lighting Kit: Enhance your ceiling portal by embedding recessed lights directly into or near the boxed beam structure.
- Wood Stain and Finish: Match your new cross-beam to existing woodwork or floors using high-quality stains for a cohesive look.
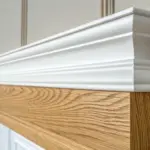
Soffit Drop Over the Work Zone
For a super common ceiling transition, I’ll add a shallow soffit over the kitchen run or island to visually “lower” that area while the living room stays open. I’ve routed the soffit edges clean and then trimmed them in wood so it looks intentional, not like a weird bump-out.
A few relevant products:
- Oak Crown Molding: Finish your soffit edges professionally by adding elegant wood molding that creates a defined, high-quality transition.
- Wood Veneer Sheets: Cover plain drywall soffits with real wood veneer to match existing cabinetry for a seamless, built-in look.
- Recessed LED Lighting Kit: Illuminate your new work zone by installing sleek recessed lights into the dropped soffit for targeted brightness.
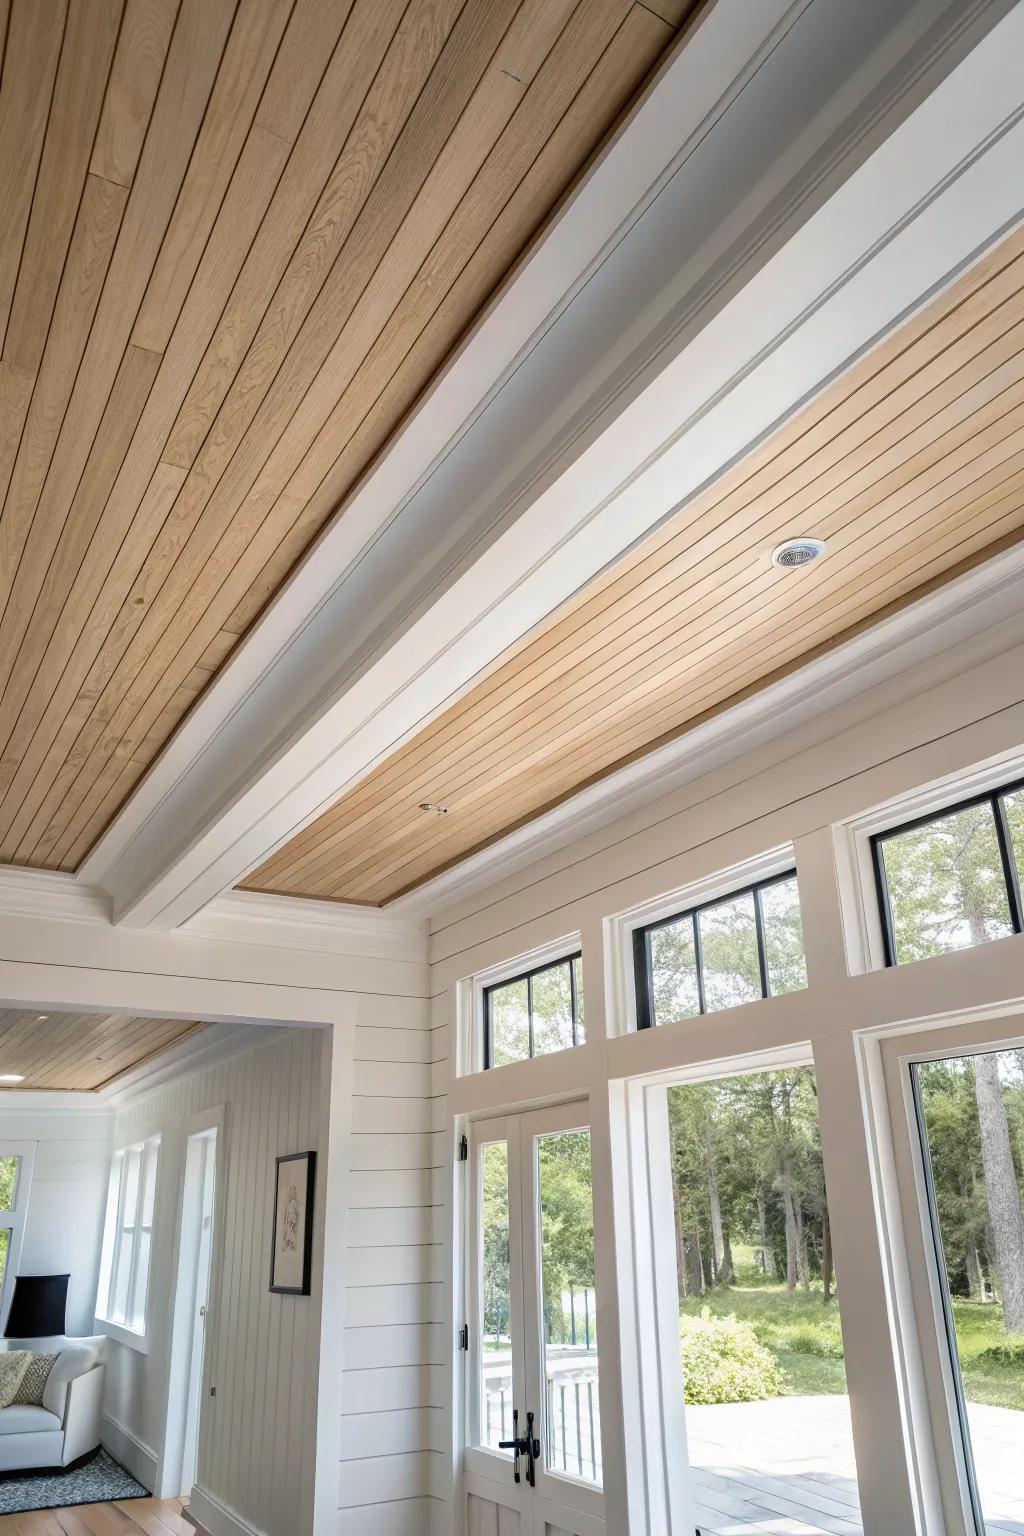
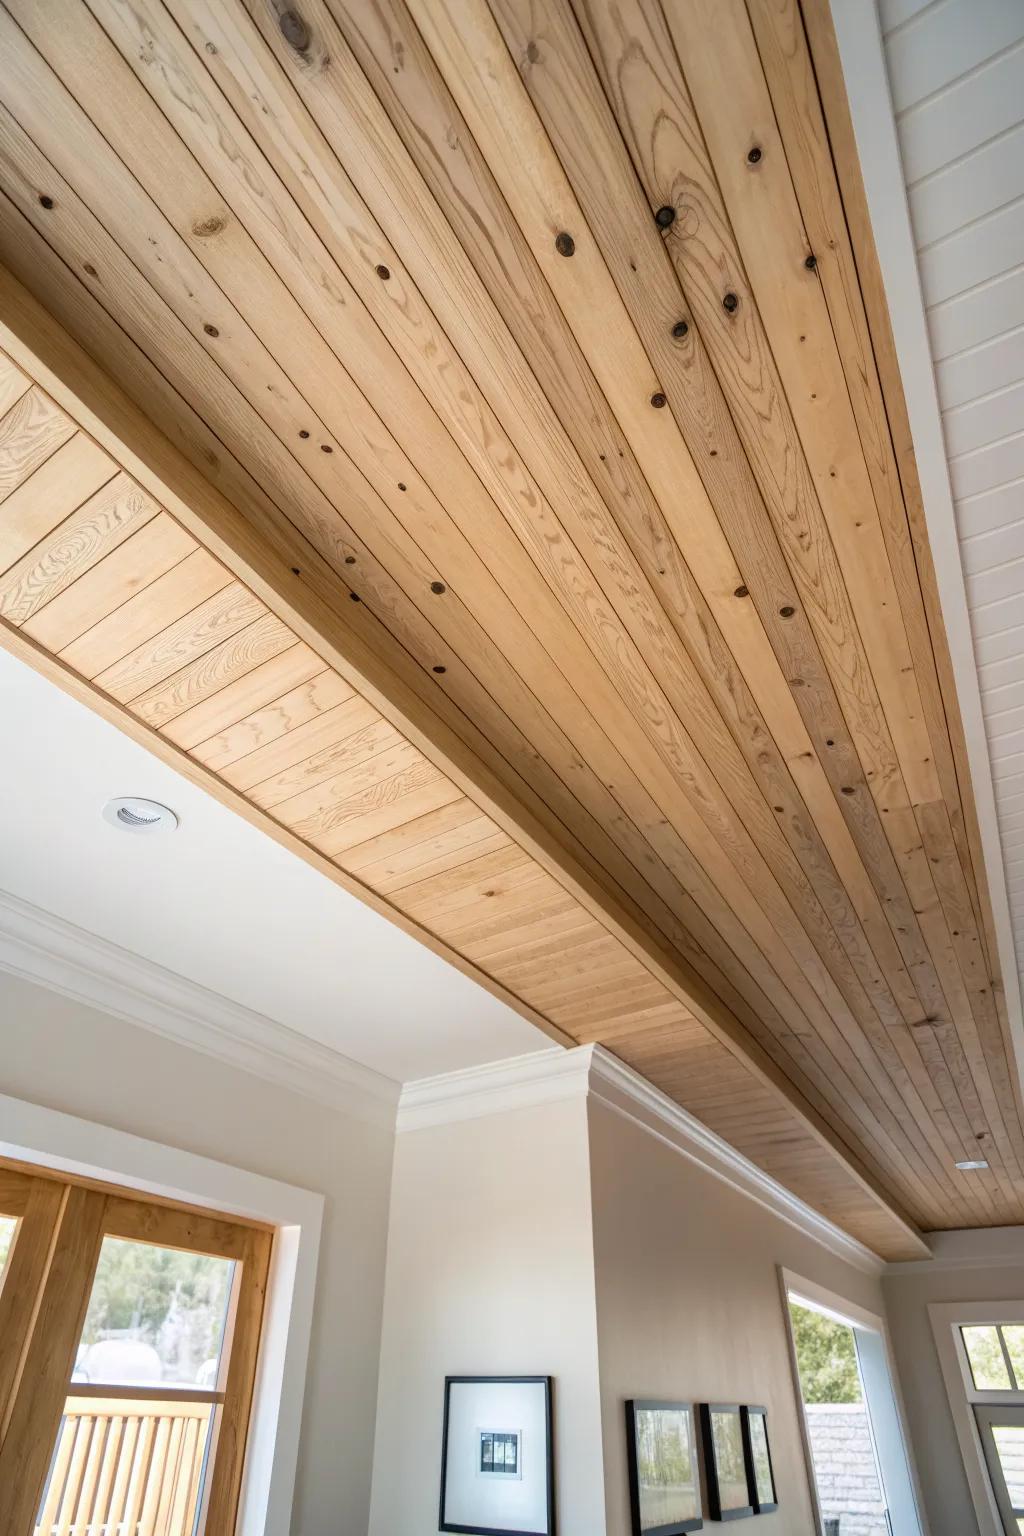
Shiplap-to-Drywall With a Trim Break
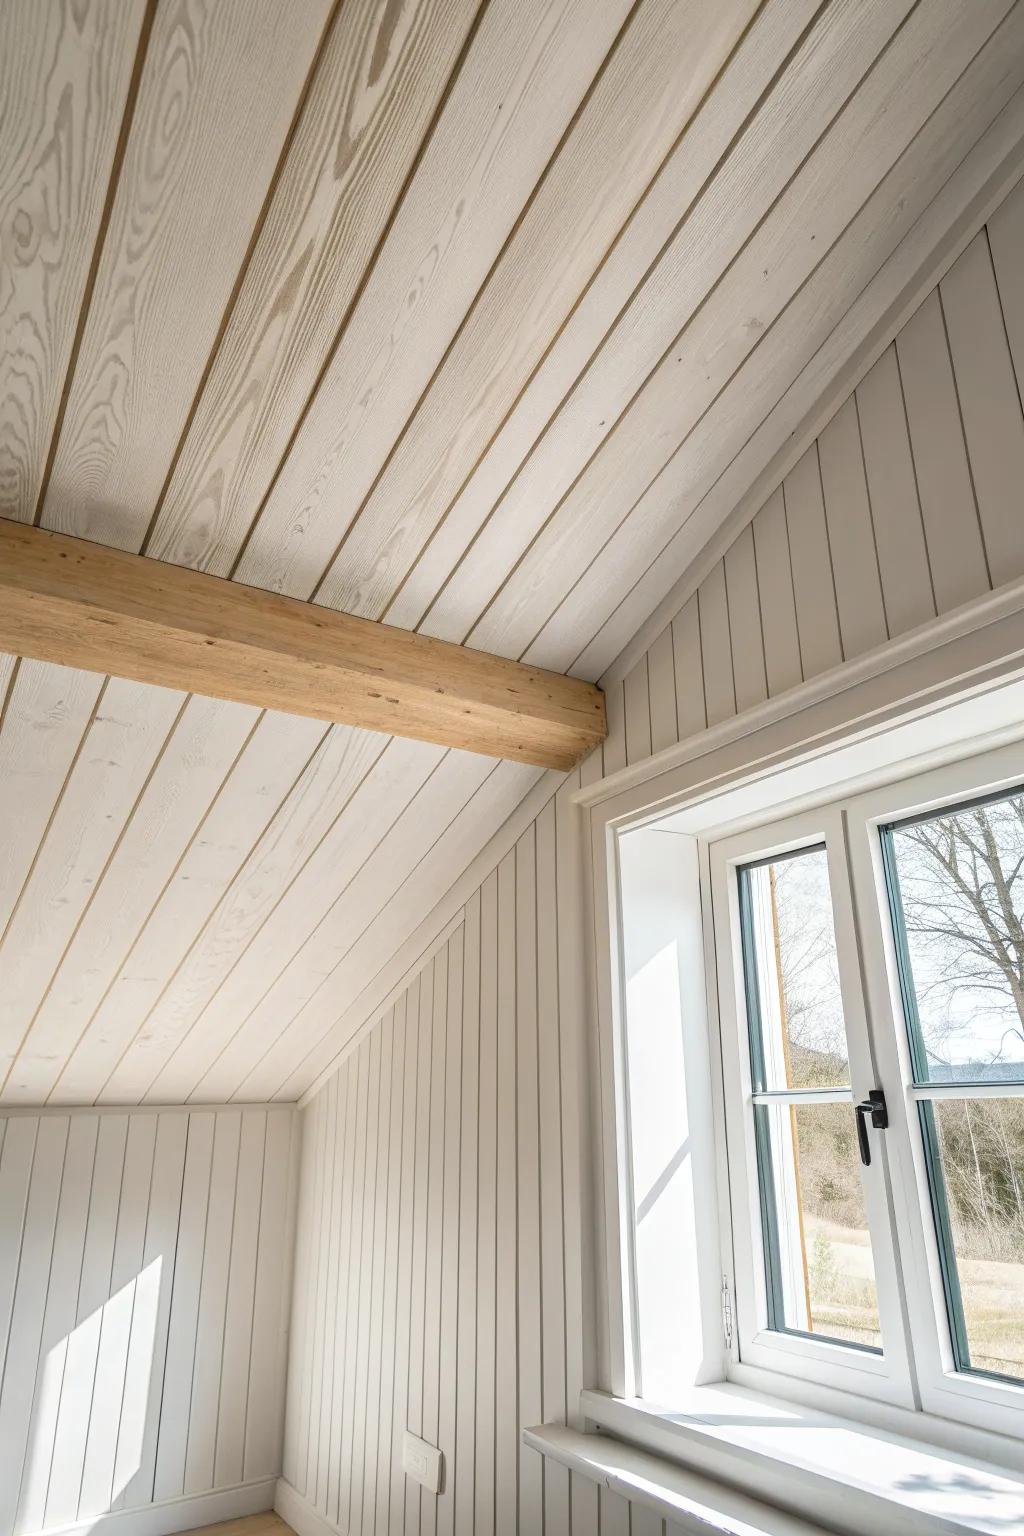
One of my go-to ceiling transition ideas is switching from shiplap ceiling planks in one zone to smooth drywall in the next, separated by a simple wood batten. I’ve done this over a dining table, and that little trim line makes the material change feel neat and finished.
Check these products out:
- Primed MDF Shiplap Planks: Transform your ceilings easily with these interlocking planks; paint them to match your desired aesthetic flawlessly.
- Faux Wood Ceiling Beam: Create a stunning visual transition between materials without the heavy weight of solid timber installation.
- Flat Ceiling Batten Trim: Use simple, clean flat molding to create a crisp dividing line between your shiplap and drywall zones.

Tongue-and-Groove Direction Shift
If both areas are wood, I still create a ceiling transition by changing plank direction—like tongue-and-groove running one way in the kitchen and rotating 90 degrees in the living room. I’ve used a narrow divider strip at the seam, and it reads like a subtle border from below.
These products might help:
- Tongue and Groove Ceiling Planks: Instantly add warmth and texture to your ceiling by installing these interlocking wood planks to define separate zones.
- Decorative Wood Trim Molding: Create a clean, professional transition line between distinct ceiling areas with this versatile, stainable wood trim molding.
- Recessed Lighting Kit with Gimbal: Highlight your new architectural wood details and textures effectively by installing adjustable recessed lighting along the transition.
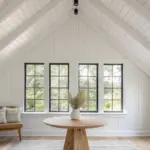
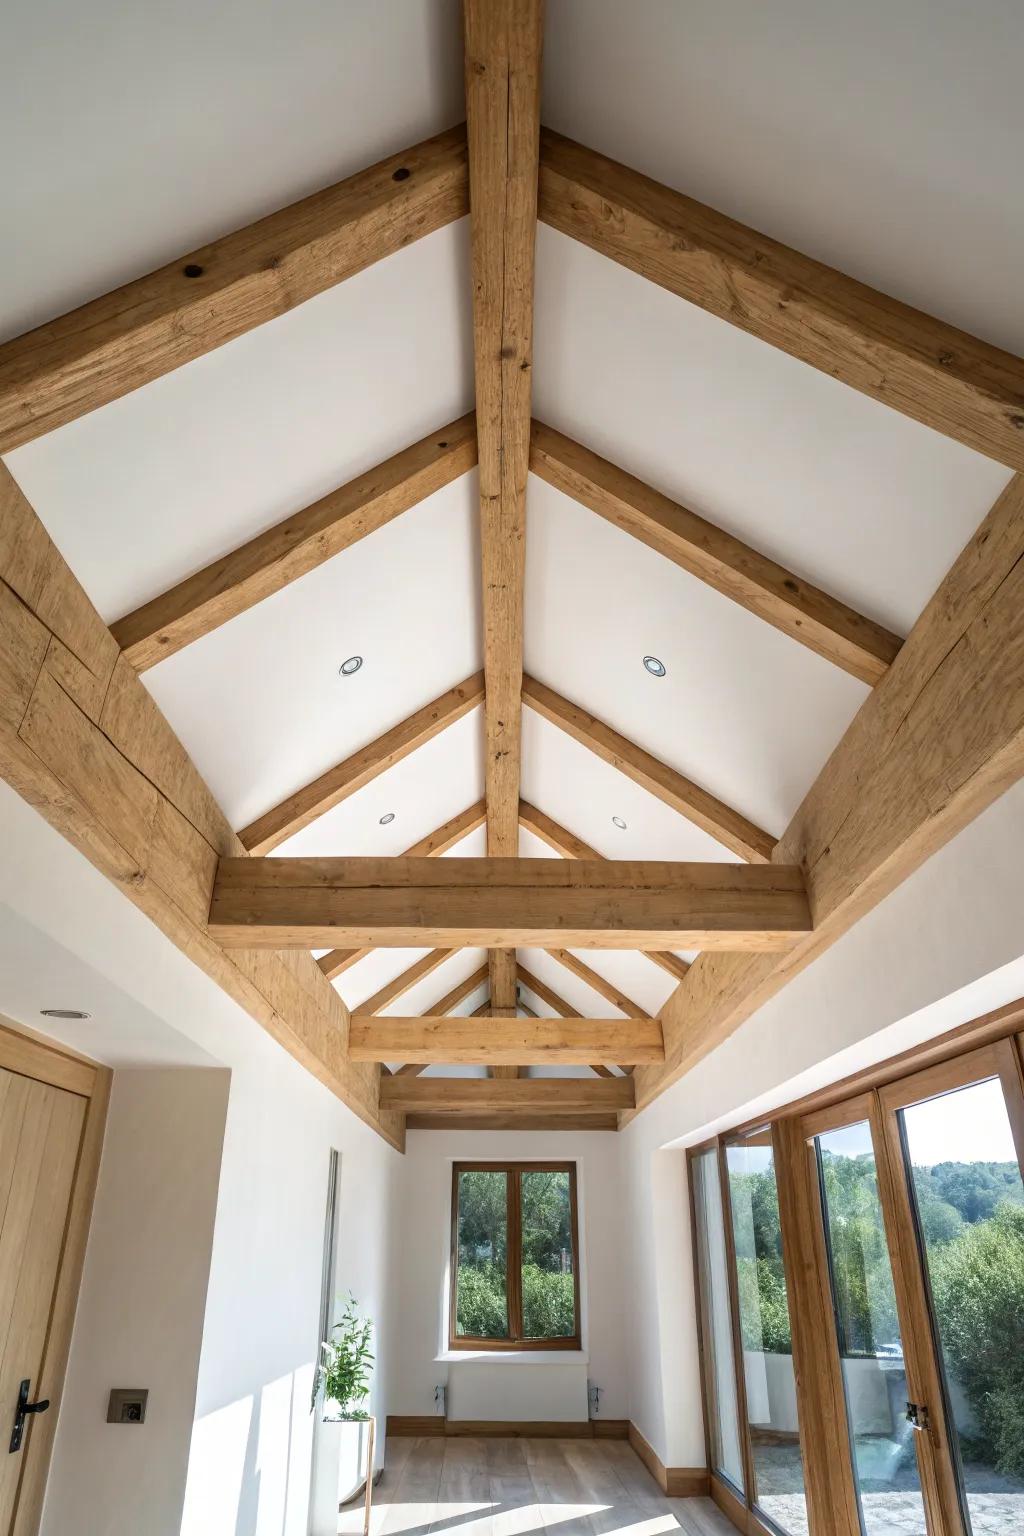
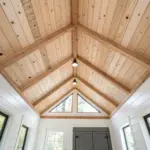
Vault-to-Flat Beam That Follows the Pitch
That tricky vaulted-to-flat ceiling transition gets so much easier when I install a beam that rides the vault pitch and then lands cleanly at the flat ceiling edge. I’ve scribed one to an angled ceiling before, and it made the whole change look like it was always meant to be there.
May just do the trick:
- Contour Gauge Duplicator Tool: Use this tool to perfectly duplicate the angle of your ceiling pitch for precise scribing and fitting.
- Faux Wood Beam Strap or Bracket: Add these decorative iron-style straps to cover seams and enhance the rustic look of your timber transition.
- High-Strength Construction Adhesive: Ensure your beams stay securely in place with professional-grade adhesive designed for heavy vertical and overhead loads.
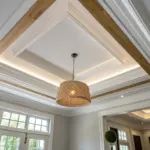
Coffered Section Over One Area
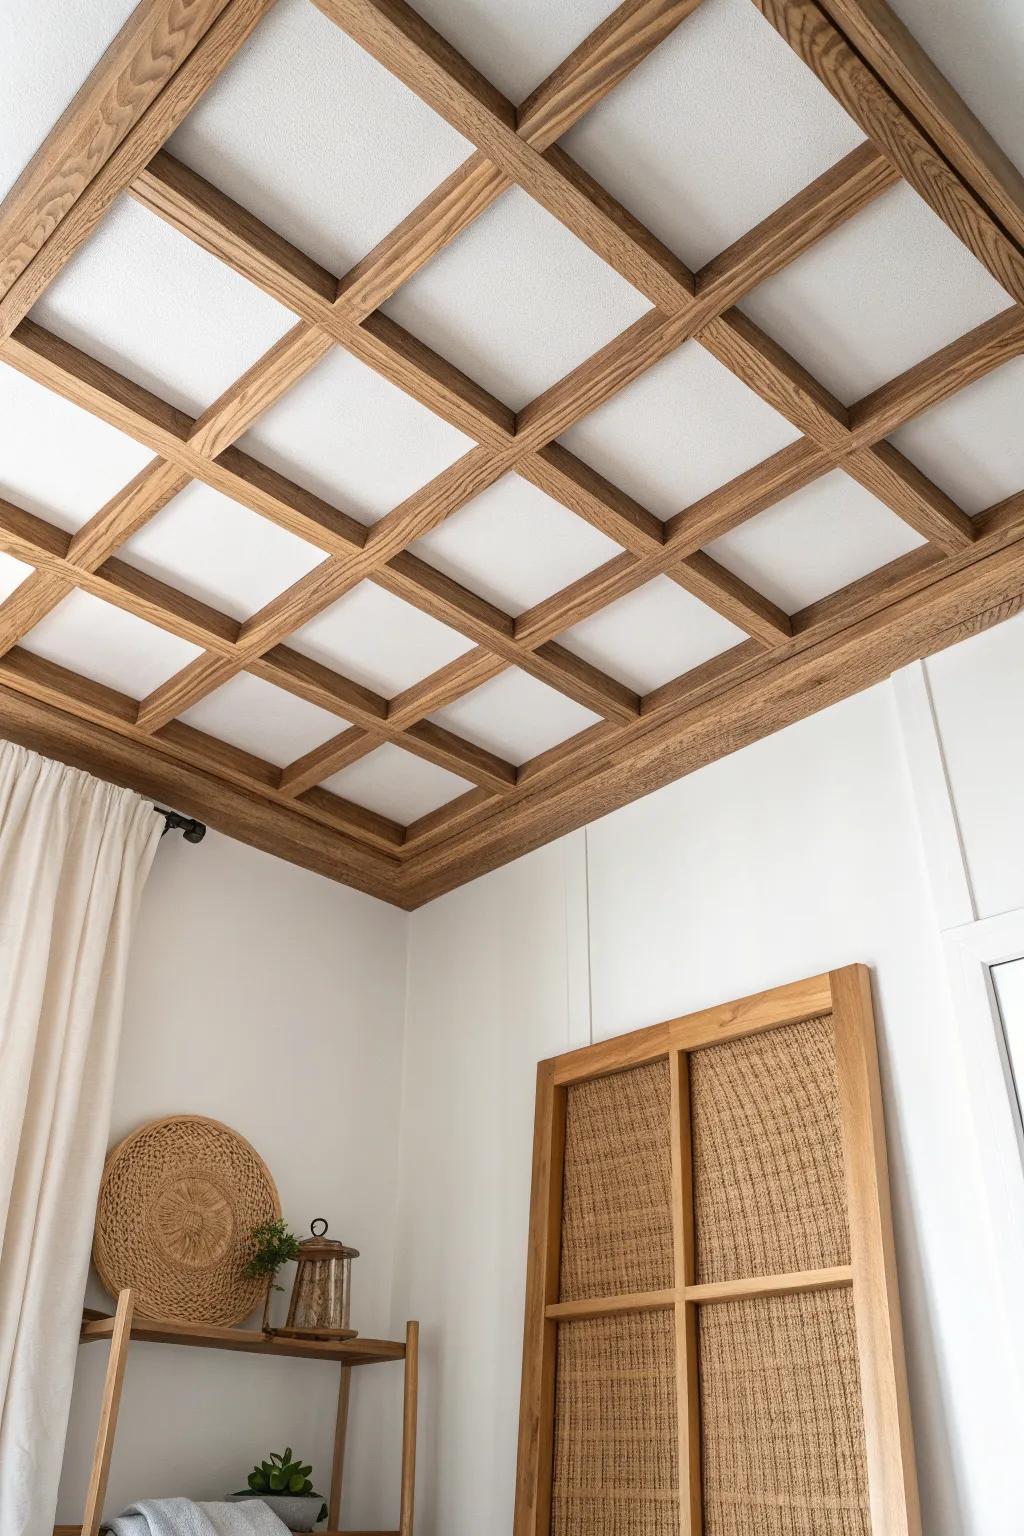
A coffered ceiling pattern over just the living zone creates a strong ceiling transition line where the grid stops. I’ve built shallow coffers with thin wood lattice, and it’s amazing how “room-like” an open space feels afterward.
Try these:
- Unfinished Wood Lattice Moulding: Create your own custom grid pattern easily with lightweight wood strips ready for staining or painting.
- Wood Stain in Natural Oak: Enhance the natural beauty of your wood lattice with a stain that adds warmth and depth.
- Construction Adhesive for Wood: Secure your ceiling molding firmly in place without relying solely on nails for a cleaner installation.
Corbel Details at Beam Ends
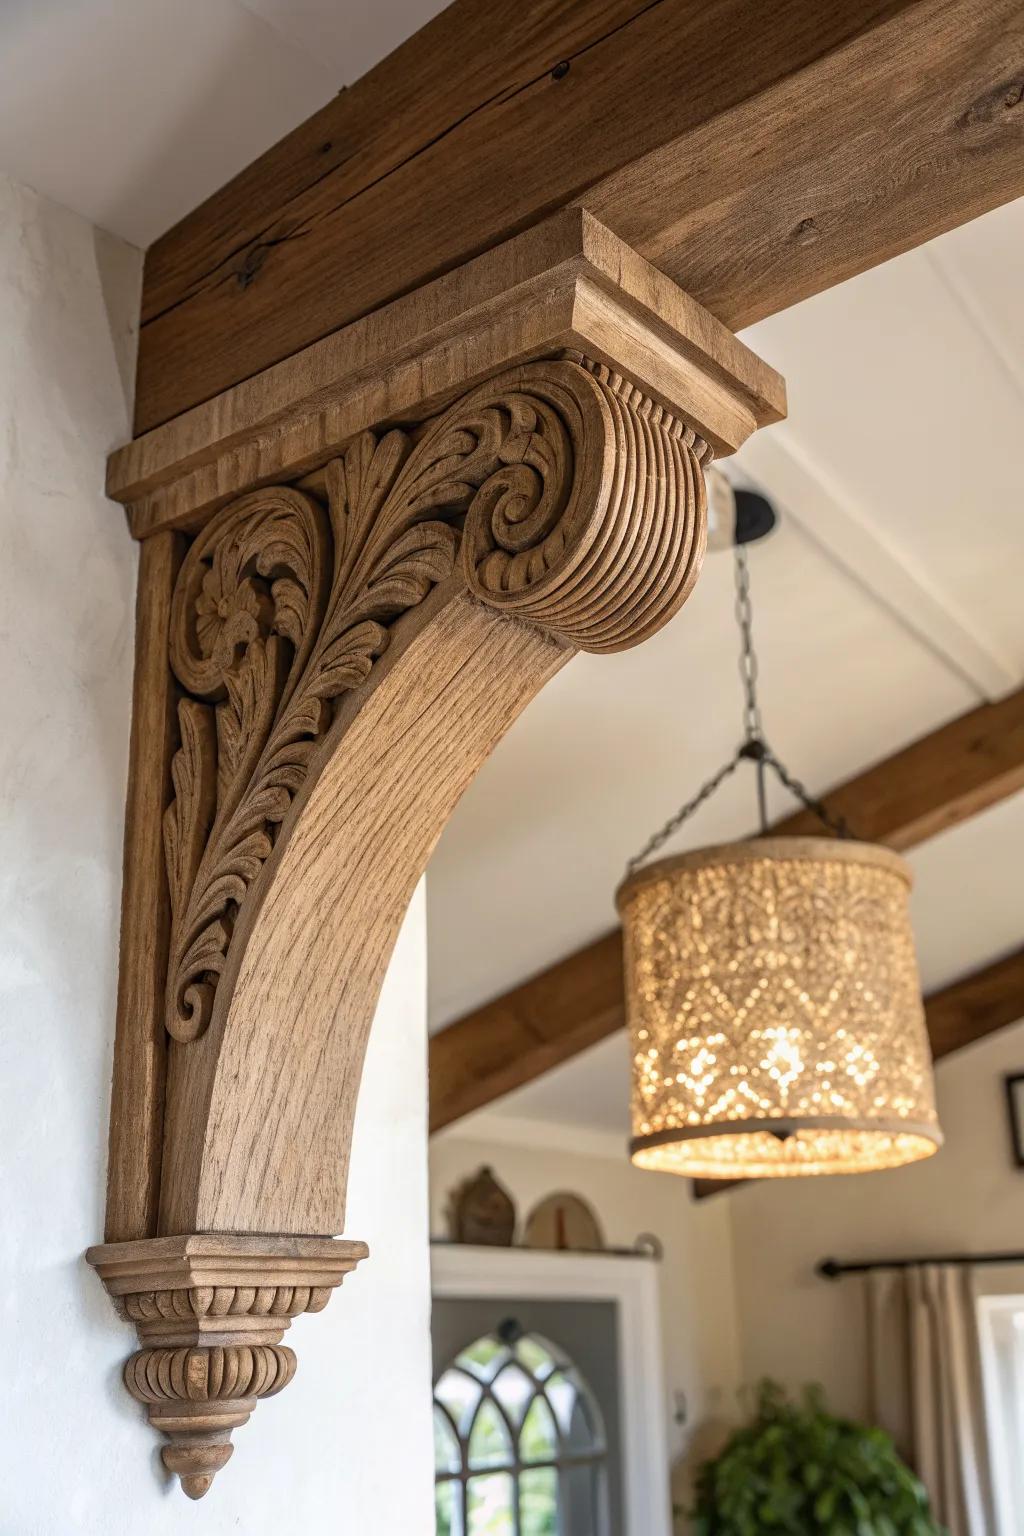
If a beam marks your ceiling transition, I love adding small wood corbels where it meets the wall so it looks “supported.” I’ve carved simple corbels from scrap, and they add that farmhouse character while visually anchoring the transition line.
A few choices to try:
- Decorative Wood Corbel: Instantly add architectural charm and visual support to ceiling beams with these intricate, ready-to-install carved wooden brackets.
- Wood Stain or finishing Wax: Match your new corbels perfectly to existing beams with a high-quality stain or antiquing wax for cohesion.
- Heavy Duty Construction Adhesive: Ensure a secure, long-lasting installation for your decorative beam supports without relying solely on complex invisible nailing.
Slatted Wood Screen That Wraps Up
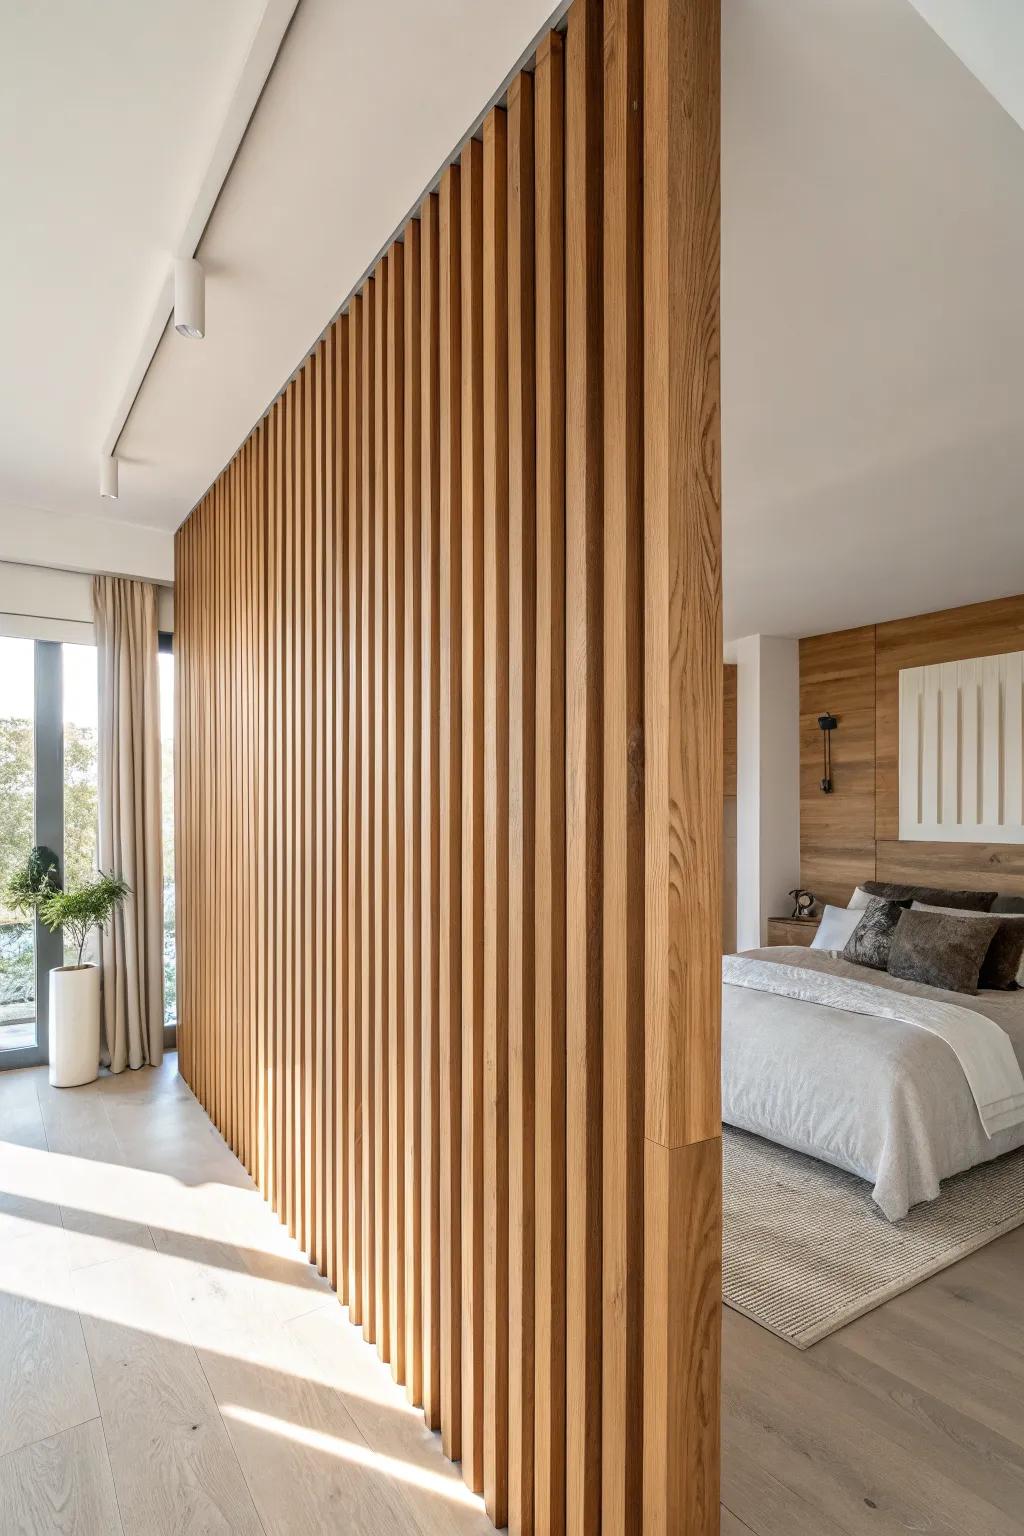
For a modern-rustic ceiling transition, I’ve built a wood slat feature that climbs the wall and continues onto the ceiling for a few feet into the next zone. It’s a fun way to bridge spaces because your eye follows the slats right across the boundary.
A few suggestions:
- Wood Slat Wall Panels: Instantly create a modern aesthetic with these acoustic panels designed to cover walls and wrap across ceilings seamlessly.
- Solid Oak Lumber Boards: Build your custom divider screen using sturdy lumber pieces for a truly bespoke, high-quality architectural feature.
- Matte Wood Varnish: Protect your wood slats while maintaining a natural, raw look with a premium matte finish topcoat.
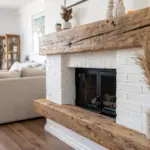
Rope-Wrapped Beam Accent
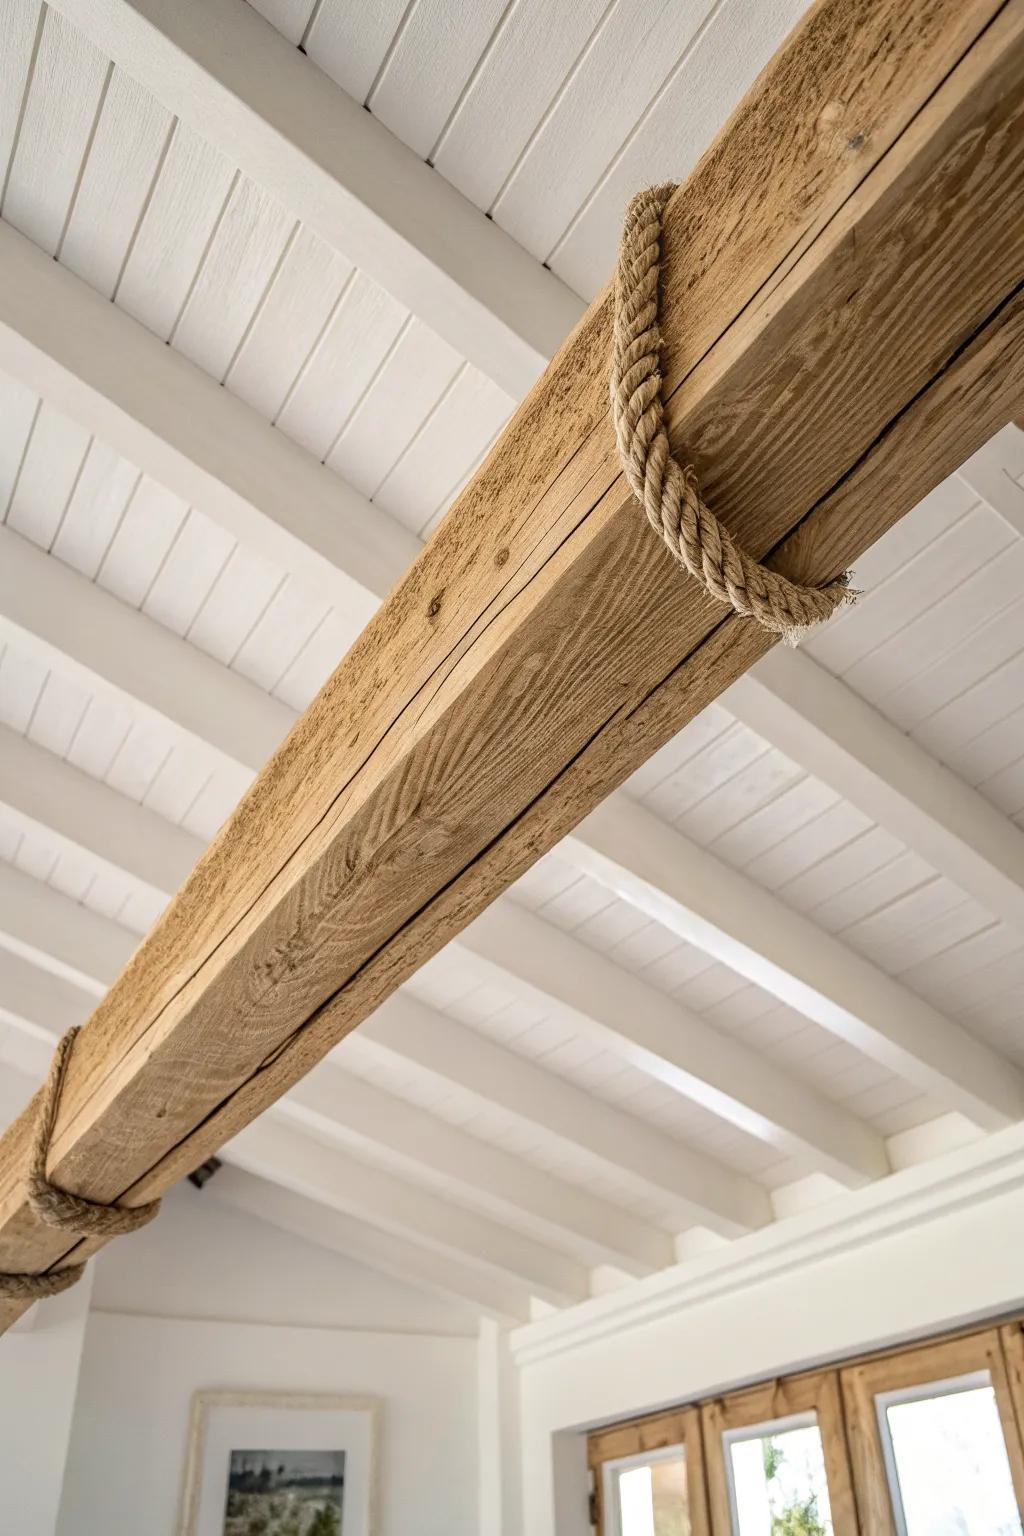
This one’s a little quirky: I’ve wrapped the center section of a transition beam with natural rope to create a tactile beam detail right where rooms shift. It sounds odd, but in a casual coastal-or-cabin vibe, it makes the ceiling transition feel like a handcrafted feature.
Possibly helpful picks:
- Heavy Duty Manila Rope: Choose a thick, durable natural fiber rope to wrap around your beams for that authentic, nautical look.
- Faux Wood Beam Strap: Secure your rope or add decorative visual contrast with these rustic, iron-look straps for custom ceiling beams.
- Construction Adhesive & Caulk Gun: Ensure your wrapped accents stay perfectly in place without sagging by using strong, reliable construction adhesive.
Metal Strap Plates at the Transition
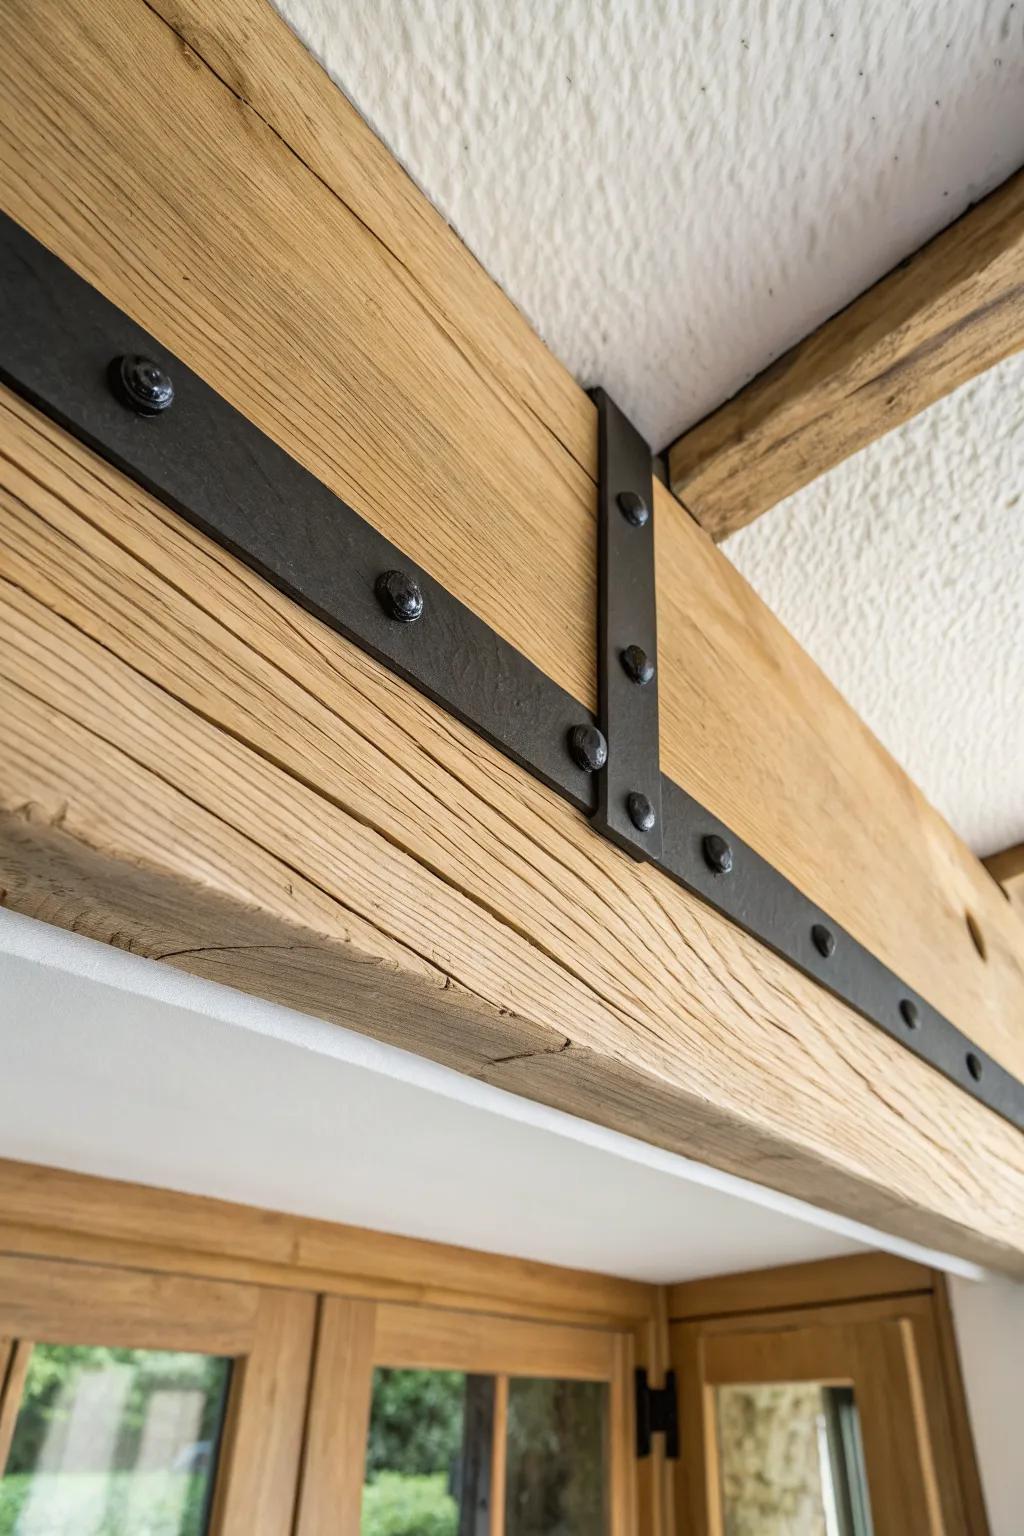
Adding metal strap accents to a wood beam right at the ceiling transition gives it that subtle industrial-meets-farmhouse edge. I’ve used simple flat plates with dark screws, and it makes the boundary look deliberately engineered.
Explore these options:
- Decorative Black Iron Flat Straps: Secure flat metal brackets to your beam to create that authentic, engineered industrial look quickly and easily.
- Faux Iron Beam Straps: Add the look of heavy forged iron without the weight or complex installation using these flexible faux straps.
- Black Lag Screws or Decorative Clavos: Complete your custom strap project by using these dark, heavy-duty fasteners for that rugged, finished rustic appearance.
Resin “River” Inlay Transition Strip
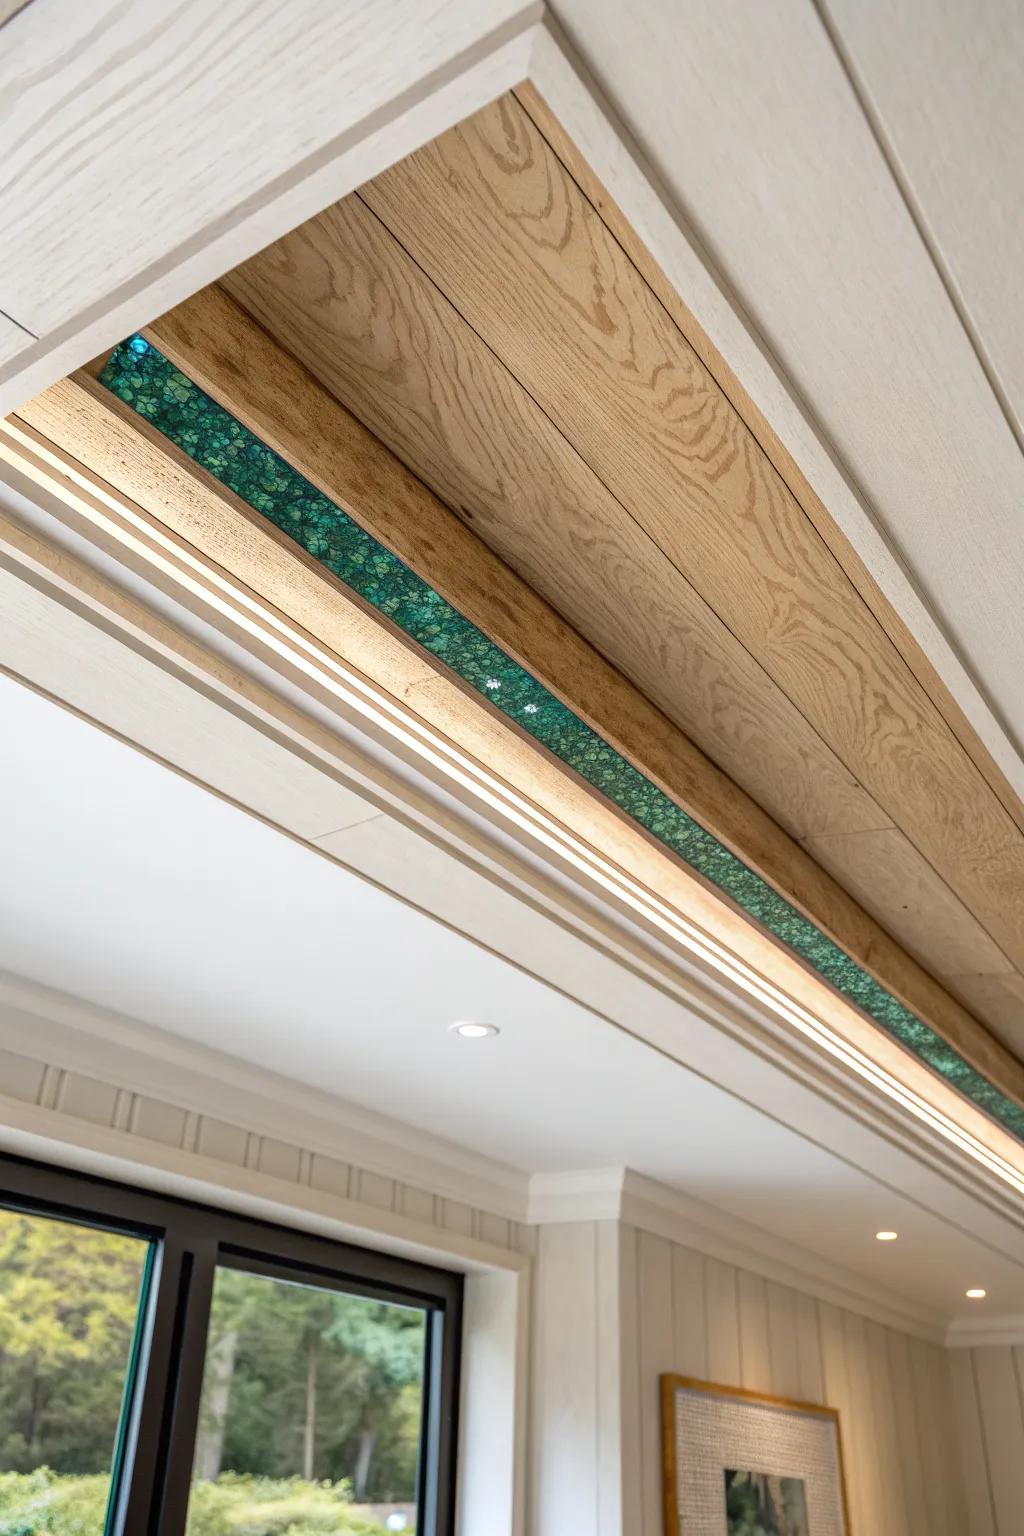
For a real wow-factor ceiling transition, I’ve inlaid a narrow wood strip with a resin inlay line across the boundary—like a tiny river running between zones. When light hits it, that shimmer turns the ceiling change into an art moment instead of a problem to hide.
Useful items to consider:
- Crushed Glass or Stone Chips: Create that shimmering river effect by choosing vibrant crushed glass or stone material for your inlay.
- Clear Epoxy Resin Kit: Seal your crushed stone and bind the inlay securely with a high-quality, clear epoxy casting resin.
- LED Strip Light Channel: Illuminate your custom transition from behind using slim LED channels for a professional, diffused glow.
Salvaged Transom Frame as a Ceiling Threshold
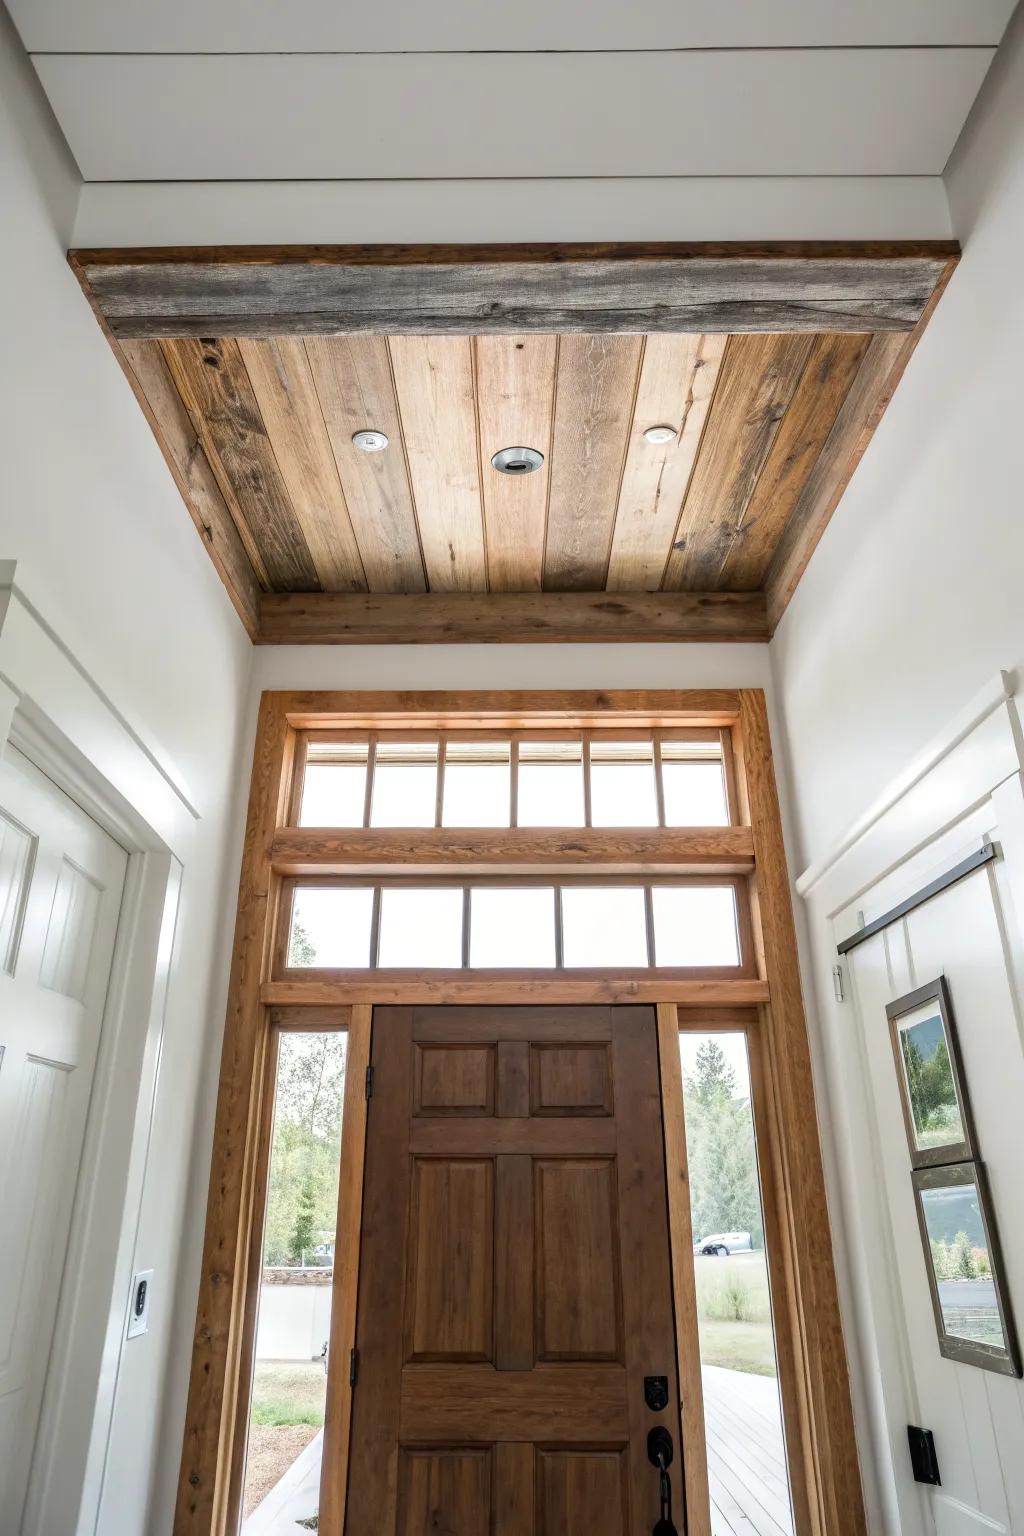
I’ve repurposed an old window transom frame overhead as a reclaimed wood frame to mark a ceiling transition between an entry and a main room. It’s such a cool way to get architectural character fast, and it reads like an antique “portal” from below.
Consider these options:
- Reclaimed Wood Planks: Use authentic weathered barn wood planks to easily create the rustic, paneled look inside your ceiling frame.
- Recessed Lighting Kits: Install these flush-mount lights within the wood paneling to highlight the texture and illuminate the entryway.
- Wood Stain and Sealer: Apply a quality matte finish to protect your reclaimed wood while enhancing its natural grain and character.
Suspended Light Rail Along the Boundary
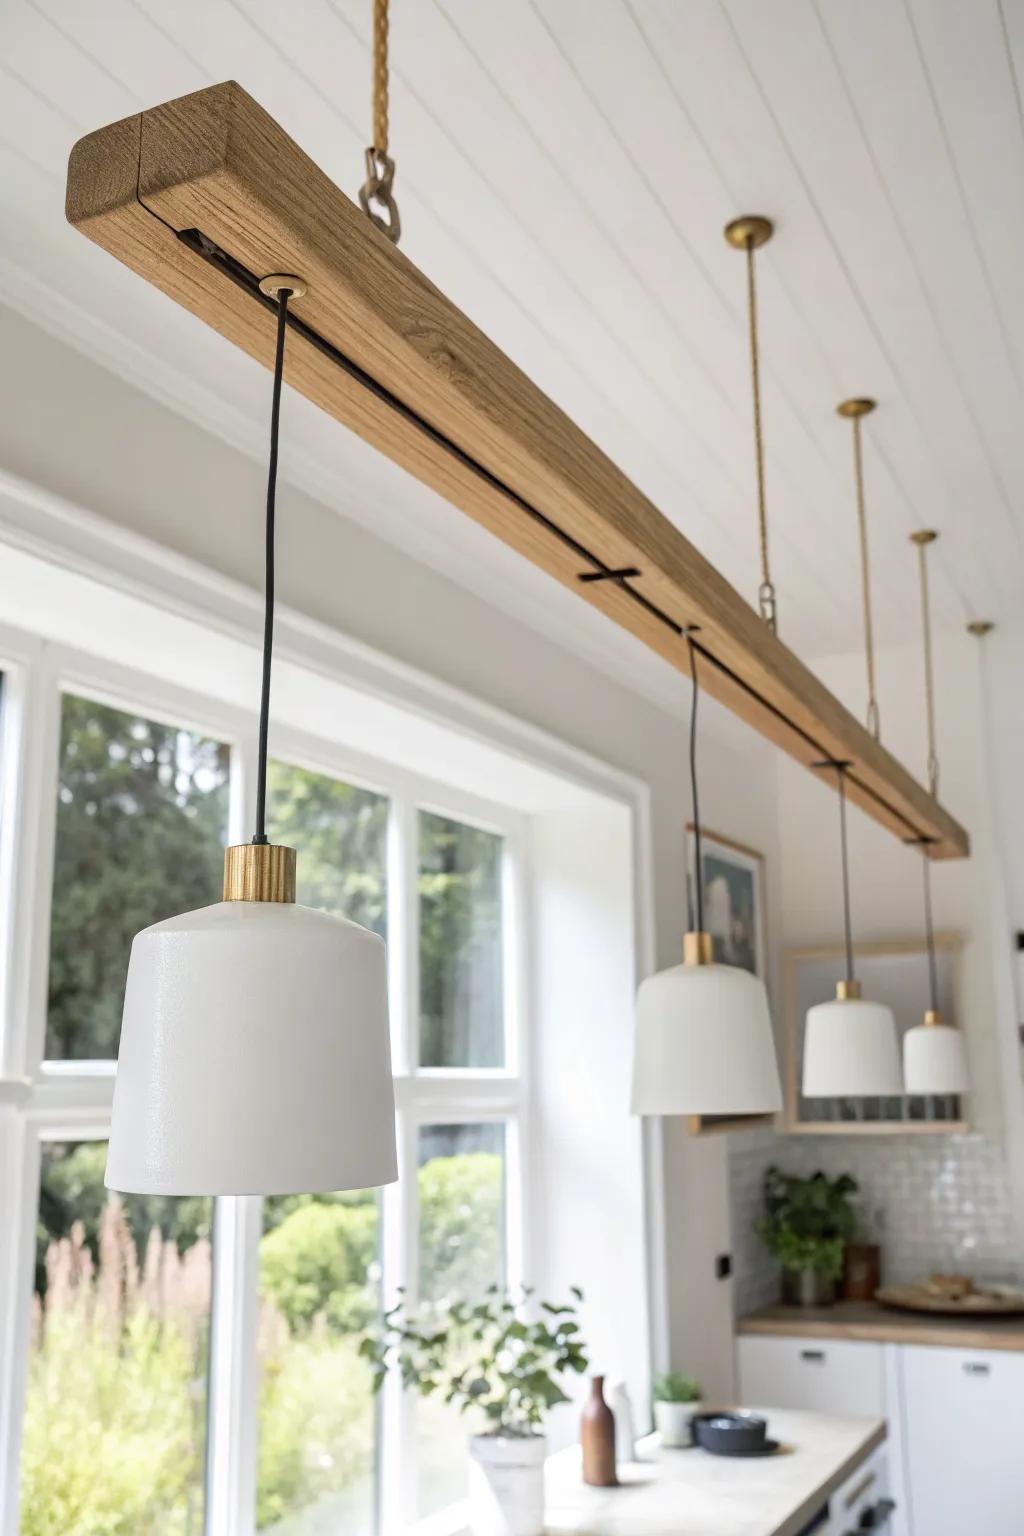
Hanging a simple wood light rail right on the transition line lets you drop pendants on one side and keep the other side calmer. I’ve done this over an island-to-living-room change, and it pulls double duty as both lighting and a visual ceiling divider.
You might give these a try:
- Wooden Beam Chandelier: Transform your transition zone with a suspended linear wood fixture that adds instant warmth and divides overhead space.
- White Cone Pendant Shades: Update existing fixtures with clean, minimal white shades to replicate the crisp contrast seen in this design.
- Modern Track Lighting System: Install a flexible track lighting kit to mimic the linear layout and directional utility of a custom rail.
Acoustic Felt With Wood Battens at the Shift
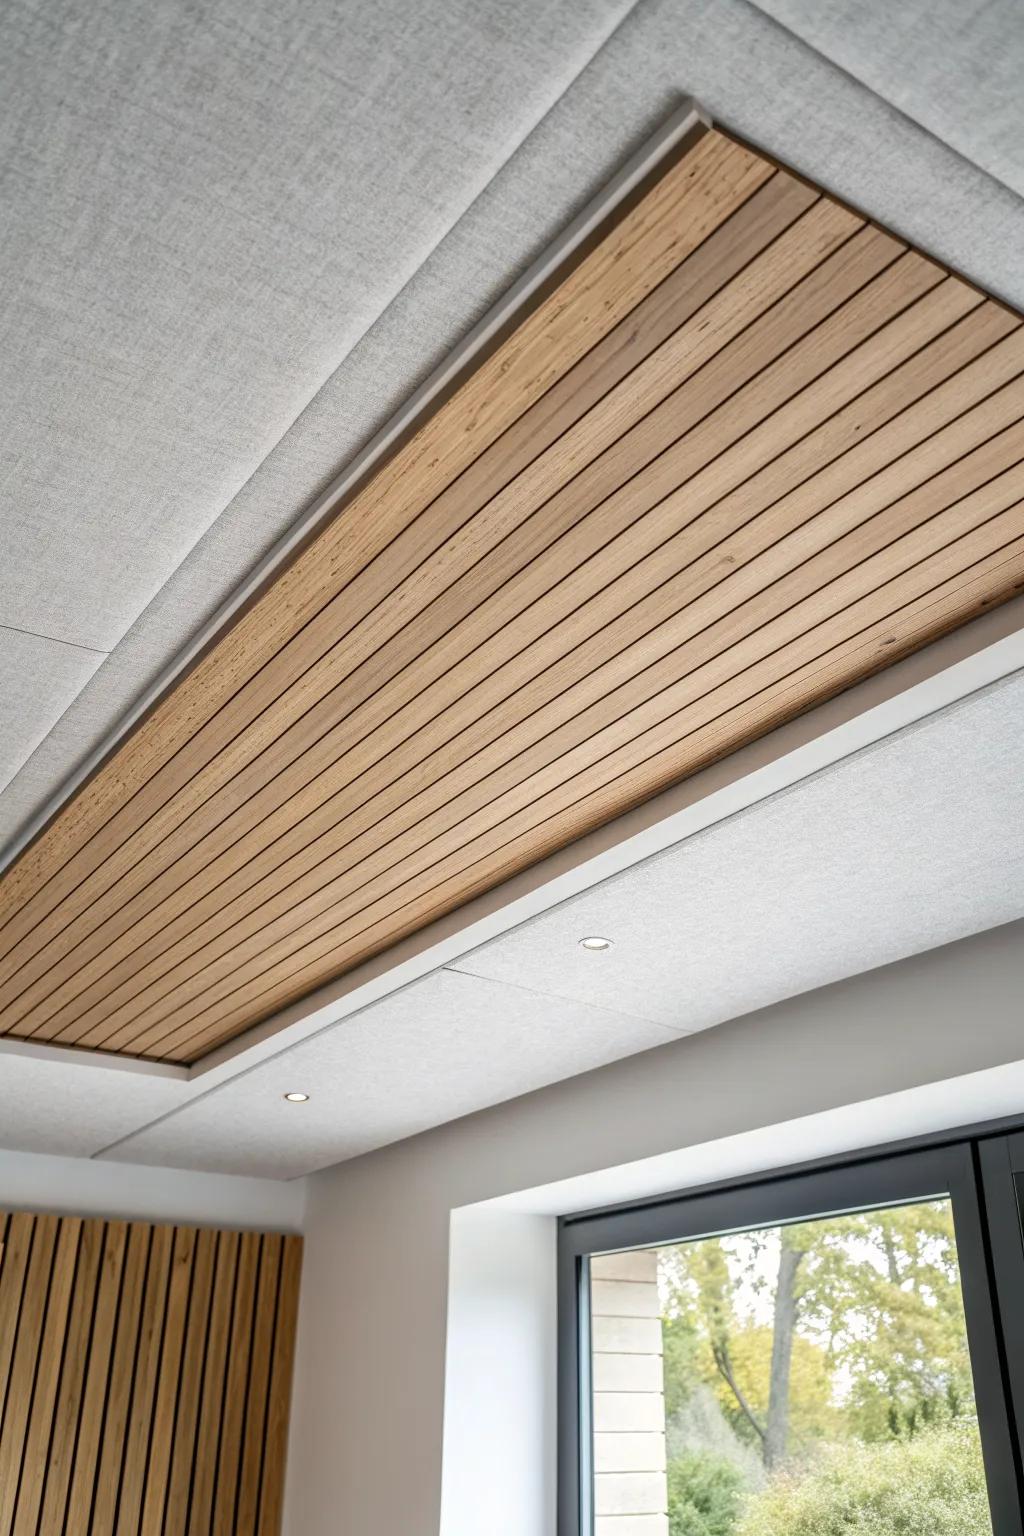
If your open concept is echoey, I’ve had great results using a narrow band of acoustic felt topped with slim wood battens exactly where the ceiling transitions. It’s unexpectedly pretty, and it makes the boundary feel designed while also taming sound.
Products that could assist:
- Acoustic Wood Slat Wall Panels: Instantly add warmth and sound dampening to your ceiling transition with these easy-to-install, pre-made slat panels.
- Sound Absorbing Felt Panels: Create a modern, noise-reducing base layer for your ceiling accents using these versatile high-density polyester sheets.
- Recessed LED Spotlights: Highlight your new architectural details and add dimension to the ceiling drop with these adjustable integrated fixtures.


